Quick Start Guide
Find everything you need to kickstart your form-building. We walk you through the basics of getting started with Fluent Forms, so you can create beautiful, functional forms in no time.
INSTALLATION
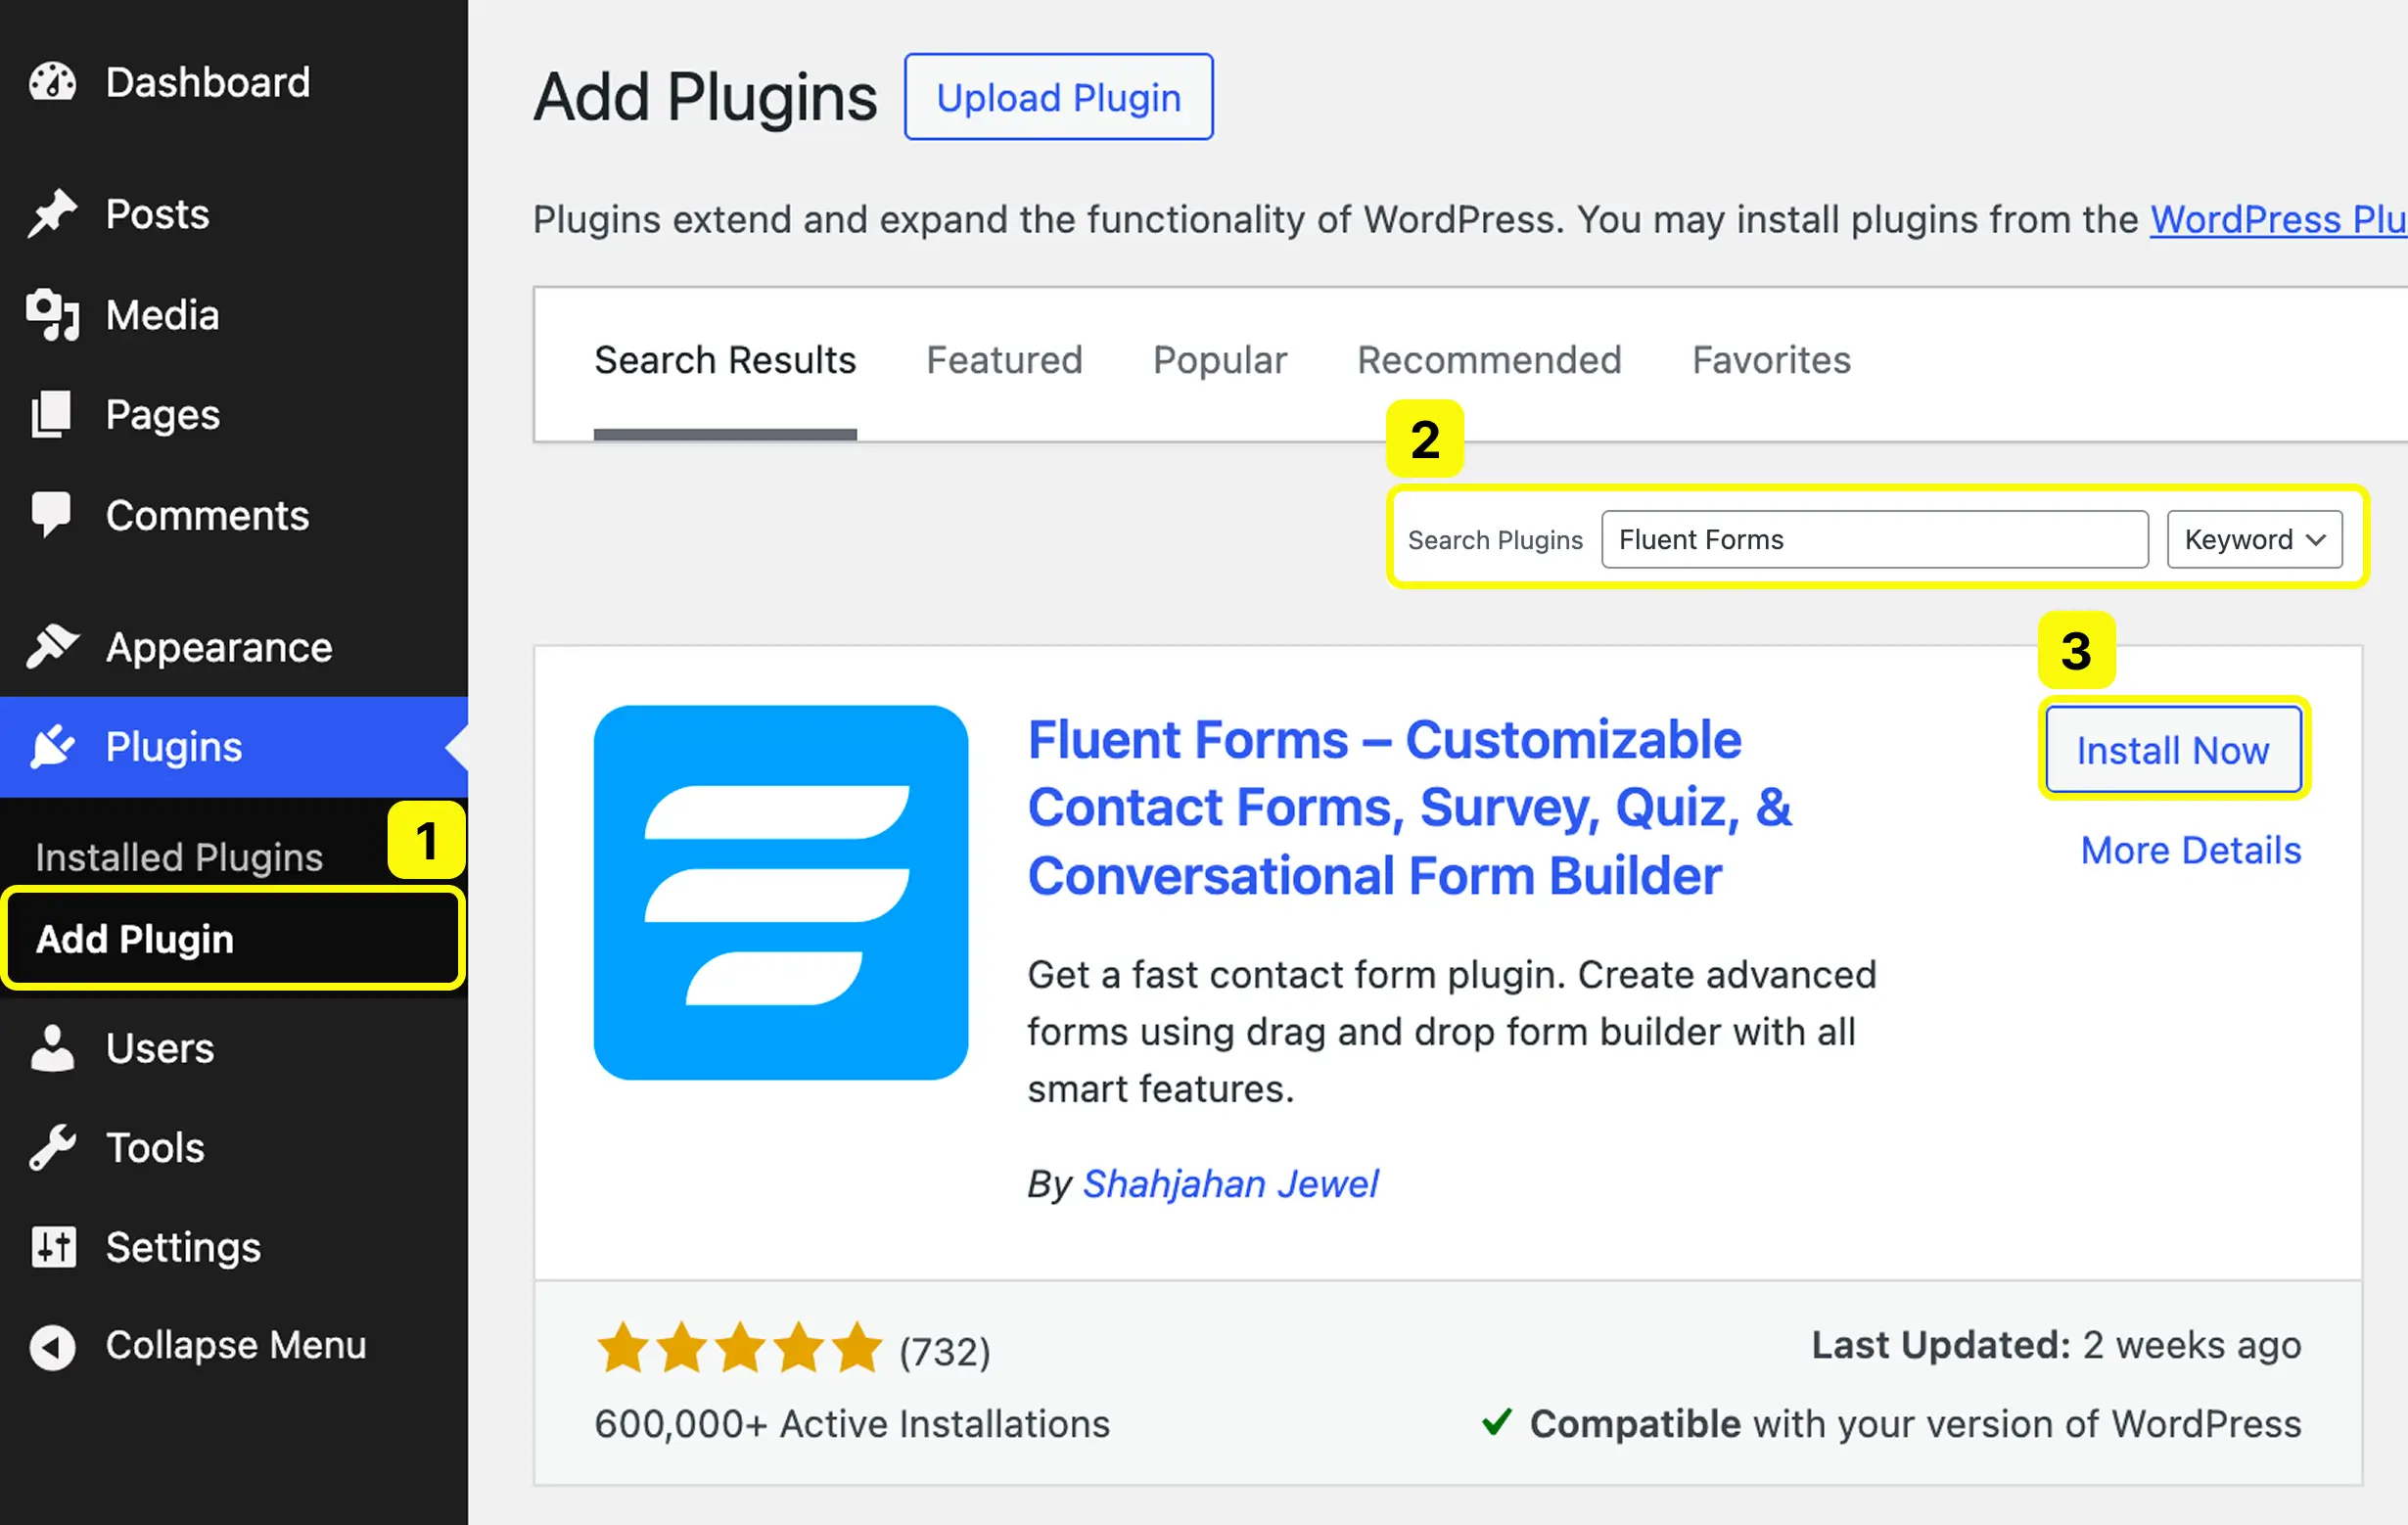
Using Plugin Repository
- Go to WordPress Dashboard → Plugins → Add New Plugin.
- Search for Fluent Forms.
- Click on Install Now. Wait for the plugin to be installed and then click Activate to activate the plugin.
ALTERNATIVE INSTALLATION
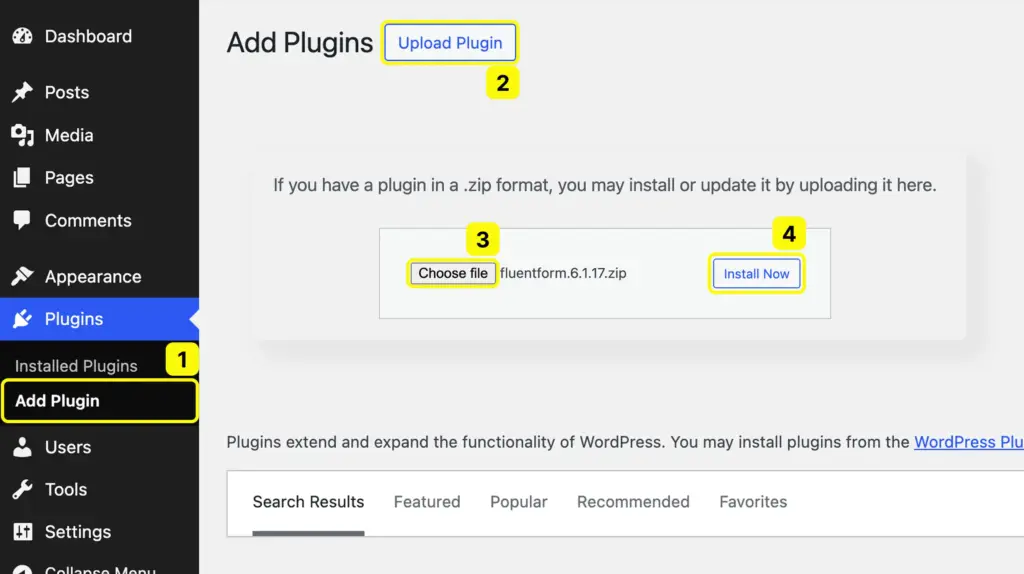
Uploading ZIP File
- Go to WordPress Dashboard → Plugins → Add New Plugin.
- Click on Upload Plugin.
- Choose the ZIP file you downloaded from WordPress repository.
- Click on Install Now. Then click Activate to activate the plugin.
USER INTERFACE
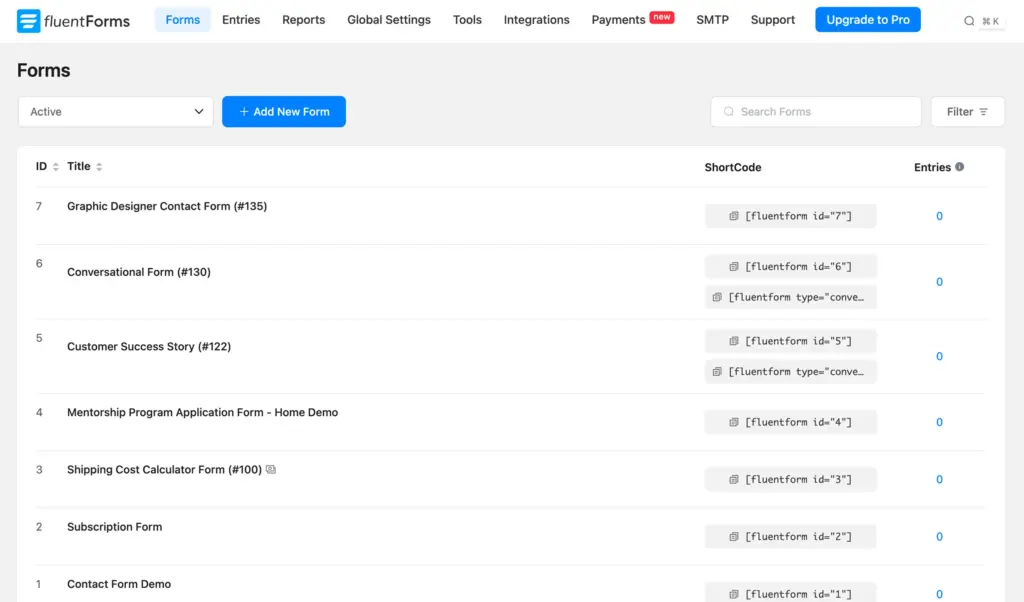
All Forms
Here you can see a list of all the forms you create with Fluent Forms. The list includes the number of entries, views and conversion of each form. You can also search any form or filter by date range or form type.
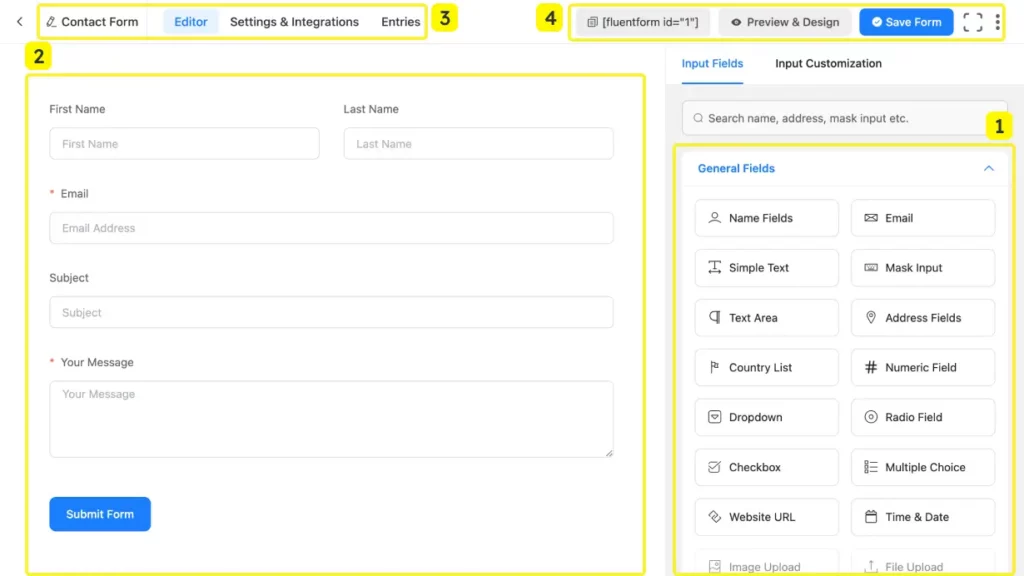
USER INTERFACE
Form Editor
- On the right side, you get the input fields.
- All the added input fields appear here. You get an idea of how your form fields might look.
- You can access different form settings and submitted entries. Renaming a form can also be done here by clicking on the form name.
- The form shortcode is available here which is required to display the form on your website. You can preview and design the form by clicking on the designated button. The three dots on the corner can be used to convert a traditional form to a conversational form →.

USER INTERFACE
Setting & Integrations
- Here you can tweak different form-specific settings to adopt more advanced functionalities.
- Presents navigation to access different form settings.
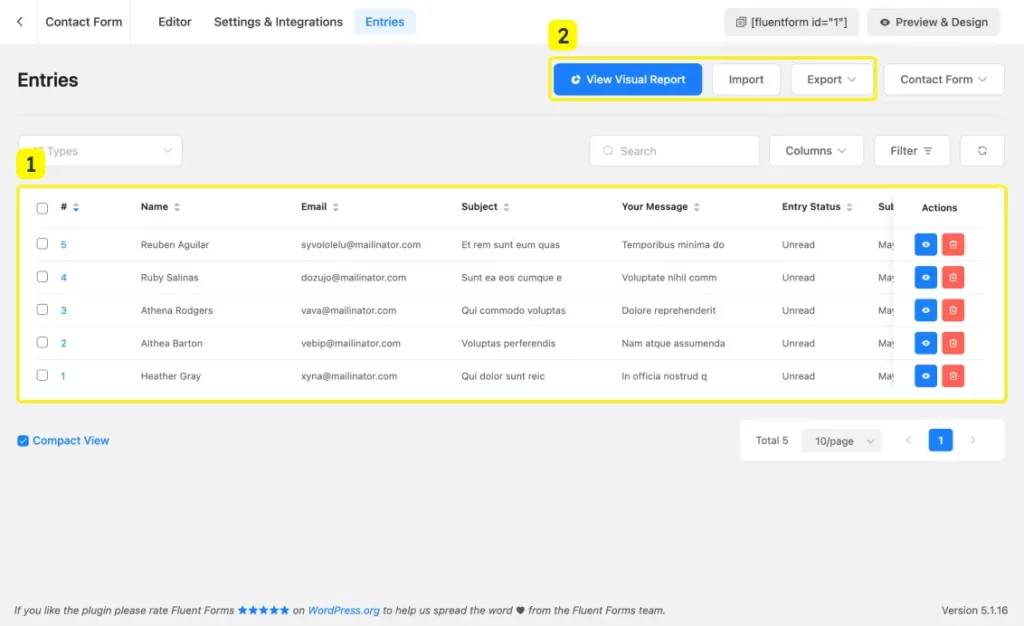
USER INTERFACE
Entries
- Shows a tabular view of the submitted entries.
- Provides different data analysis options, including option to import form entries.
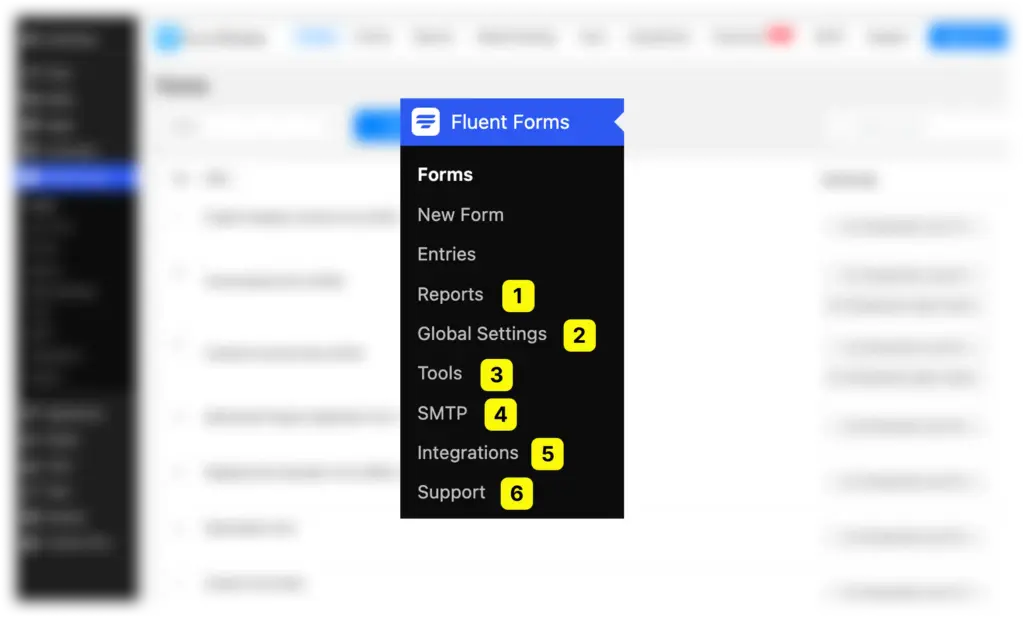
USER INTERFACE
Plugin Navigation
- Global Settings allow you to configure different settings to adopt more advanced functionalities that will be applied to all forms.
- Export forms, import forms and entries, migrate your forms by accessing this Tools panel.
- Set up FluentSMTP here to make sure your emails are delivered smoothly.
- Enable or disable various integrations.
- Seek expert support from our dedicated team or access clear documentation.
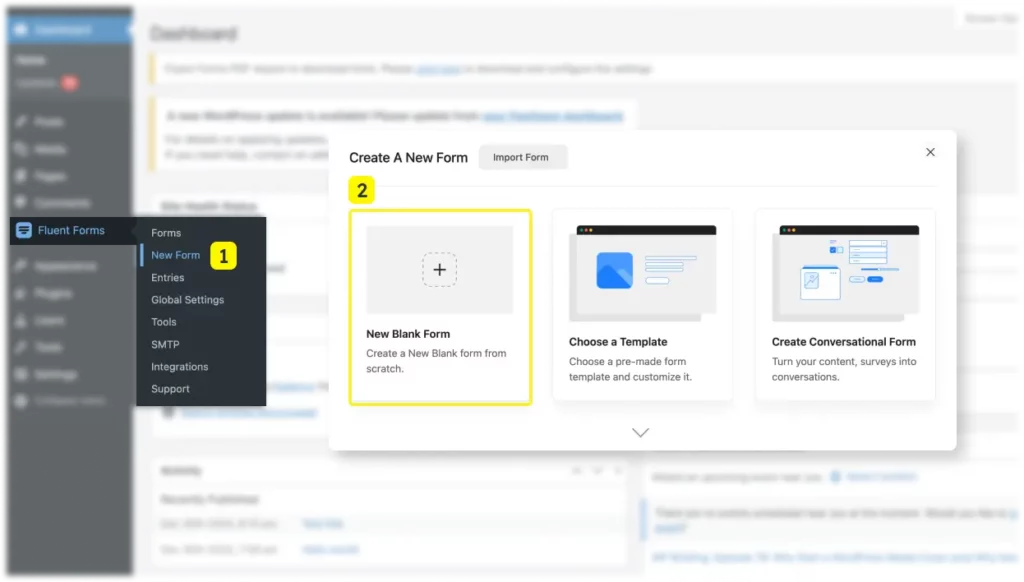
Form Building
Create a blank form
- Hover over Fluent Forms. Click on New Form.
- Click on the New Blank Form to create a blank form.
Form Building
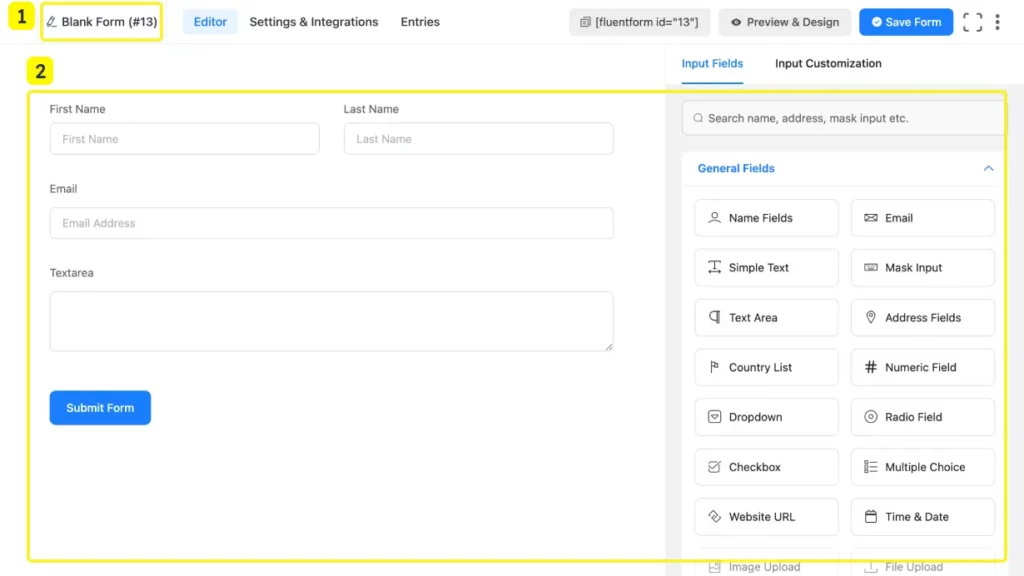
Add input fields
- Rename the form by click on Blank Form (#Form_ID).
- Drag and drop necessary input fields from the list of available input fields to the left side of the window.
Form Building
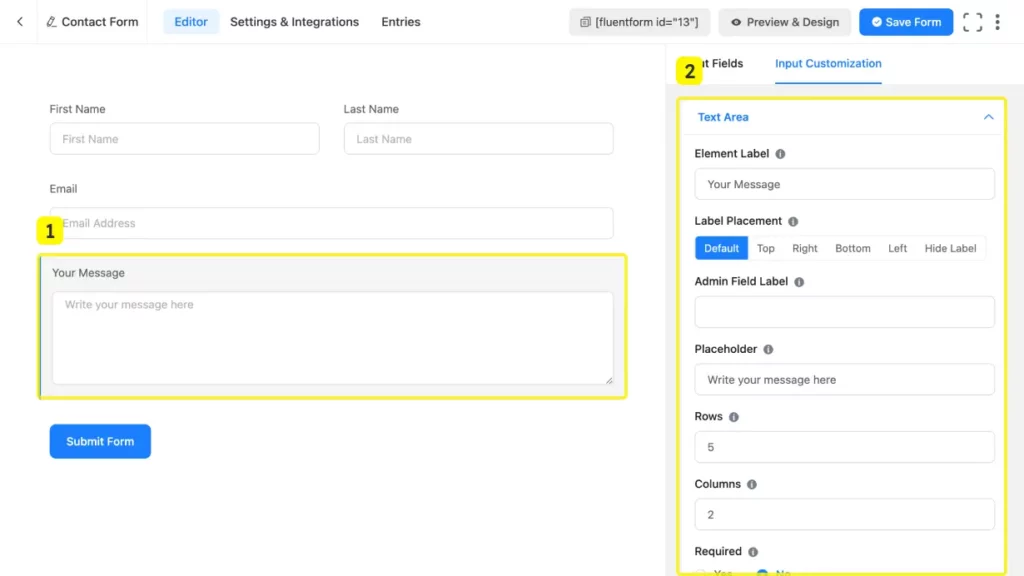
Customize input fields
- Click on any added input field you want to customize.
- You will see a range of customization options specific to the selected input field. Make changes as required.
Form Building
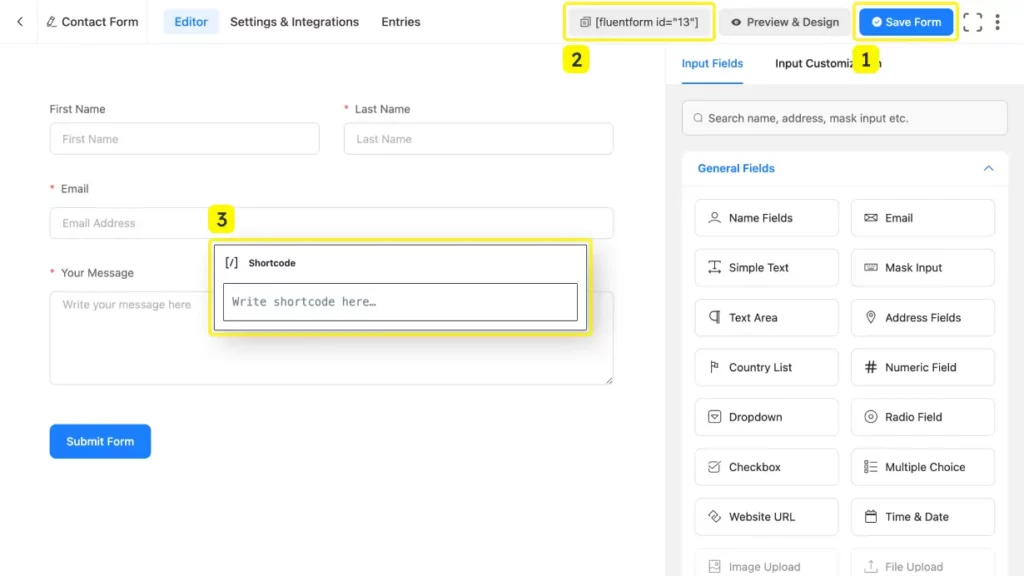
Save and Publish
- Click the Save Form button.
- Copy the shortcode.
- Paste the shortcode that you copied using a Shortcode block in any page/post on your website.
Or, If You Prefer a Head Start: Explore Our Templates