How to Manage Product Inventory Using WordPress Forms

Keeping track of your product inventory is crucial for every business, whether it’s a tiny online store or a growing enterprise. Fluent Forms, the versatile WordPress form plugin, offers a powerful way to simplify inventory management—and you don’t need advanced tools or external systems to get started.
In this blog, we’ll explore a real-world use case of managing product inventory using Fluent Forms and walk you through the steps to implement it seamlessly.
Why manage inventory with Fluent Forms
Many businesses rely on spreadsheets or complex inventory systems to track stock levels, sales, and restocks. They might be effective, but these tools can be overwhelming for small to medium-sized businesses. Fluent Forms provides a lightweight, customizable, and easy-to-use solution for tracking inventory directly on your WordPress website.
Key Benefits of Using Fluent Forms:
Customizable fields: Tailor forms to match your specific inventory needs.
Real-time updates: Log changes in inventory directly from your website.
Global inventory system: Manage the global inventory without needing external tools.
Managing product inventory for a small business
Suppose you’re a small business owner selling eco-friendly craft products and need an efficient way to track their inventory. With multiple products and frequent restocks, they’re looking for a solution to log stock changes, monitor current levels, and set alerts for low-stock items—all without investing in costly inventory management software.
The main challenges are to:
Avoid overselling products.
Keep track of inventory updates in real-time.
The solution:
Use Fluent Forms to create a simple, effective inventory management system directly on their WordPress site.
Setting up Fluent Forms for inventory management
Setting up Fluent Forms to manage your inventory is easy. Follow these simple steps, and you’re all set.
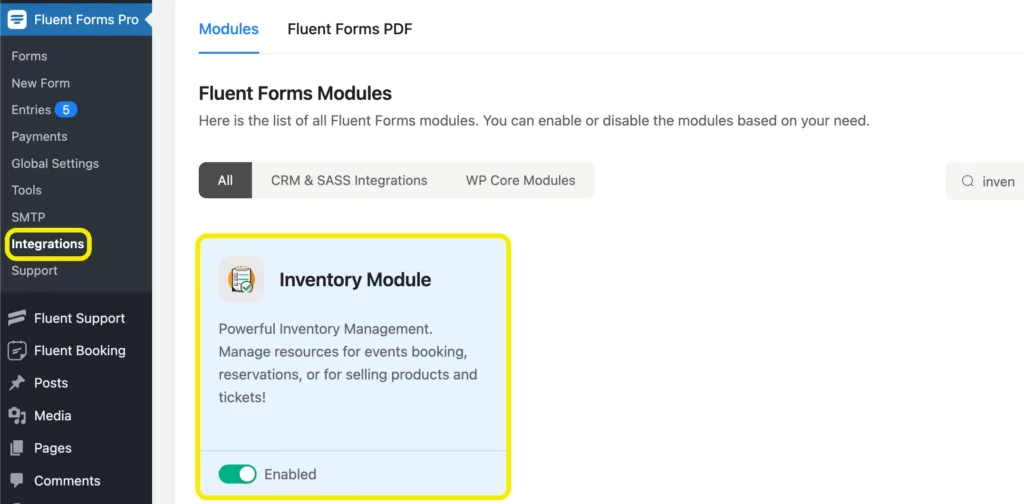
1. Turn on the Inventory Module
First, you need to turn on the Inventory Module.
Go to the Integrations tab and use the search bar or scroll to the Inventory Module to enable it.
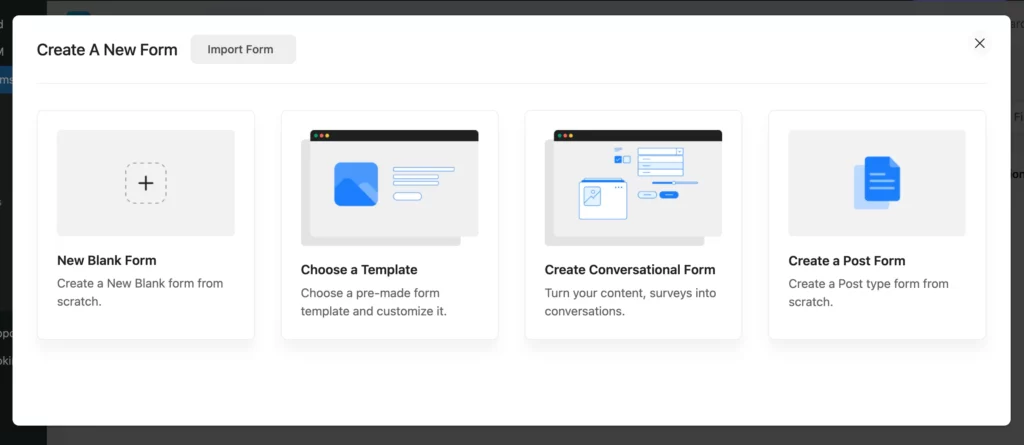
2. Create a form
Create an order or inventory form. You can either start from scratch or choose one from 70+ prebuilt form templates.
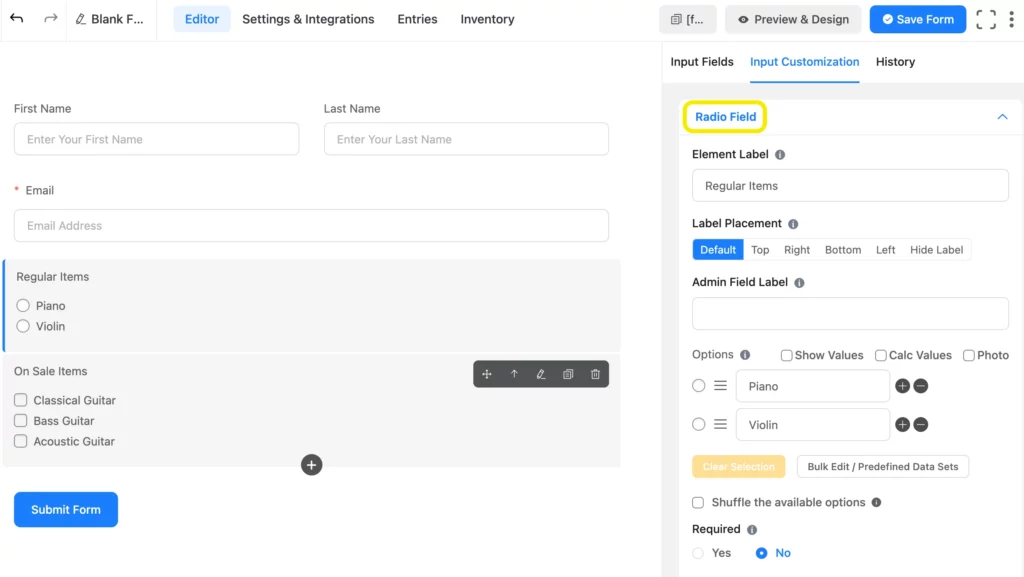
3. Choose necessary fields
Now your forms need relevant input fields. Using Name and Email fields is a common practice. We’ve also used the Radio Field and Payment Item field, as they have the inventory management functionalities.
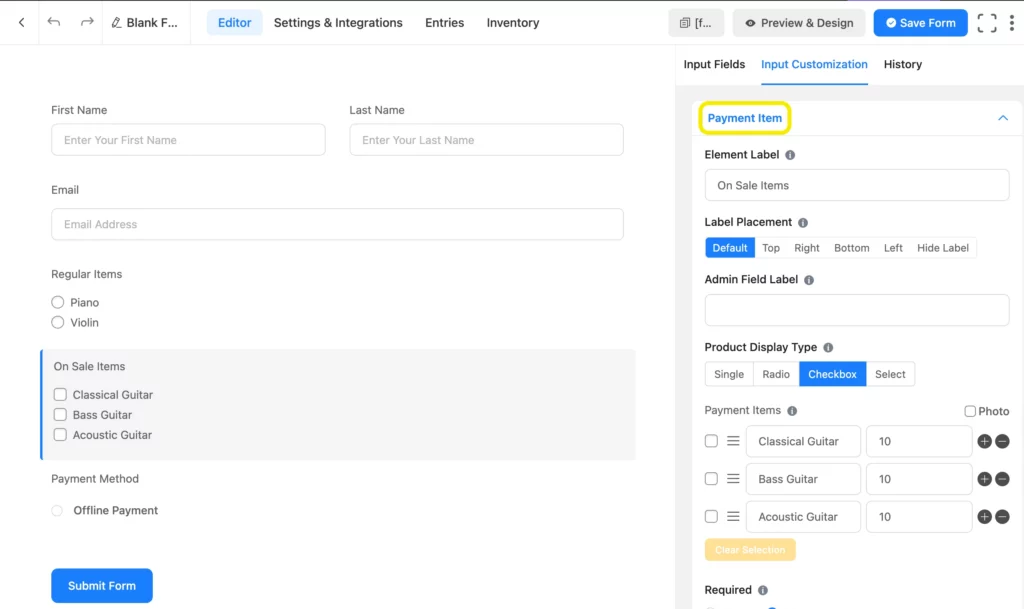
Payment item:
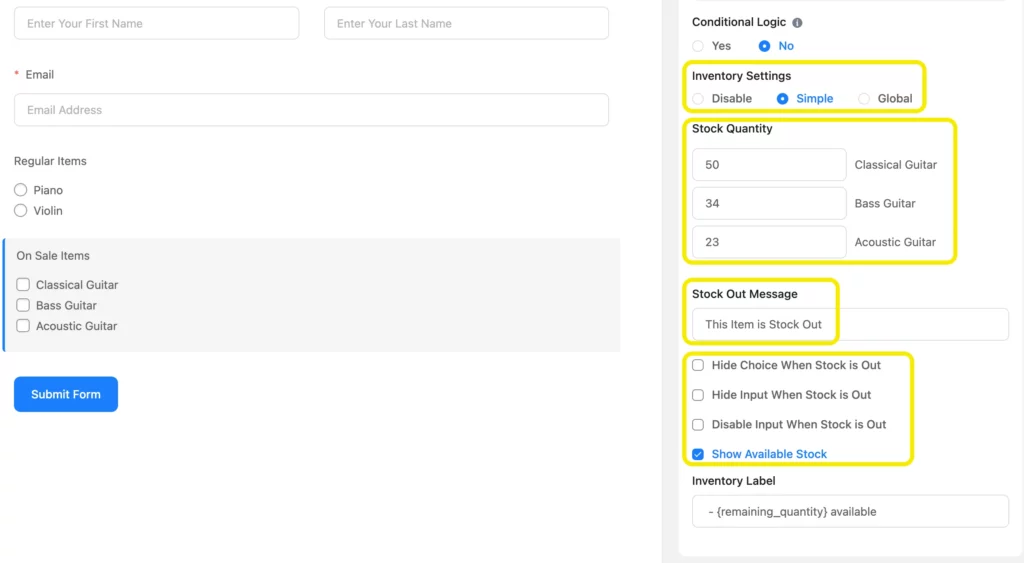
4. Set up inventory
To set up inventory, you need to do a few things.
- Enable the Inventory Settings
- Put the Stock Quantity for your inventory
- Customize Stock Out Message
- Choose actions when Stock is Out
5. Save and preview form
Save the form when you’re done with the inventory settings. Now your form is all set up to give you full control over your inventory.
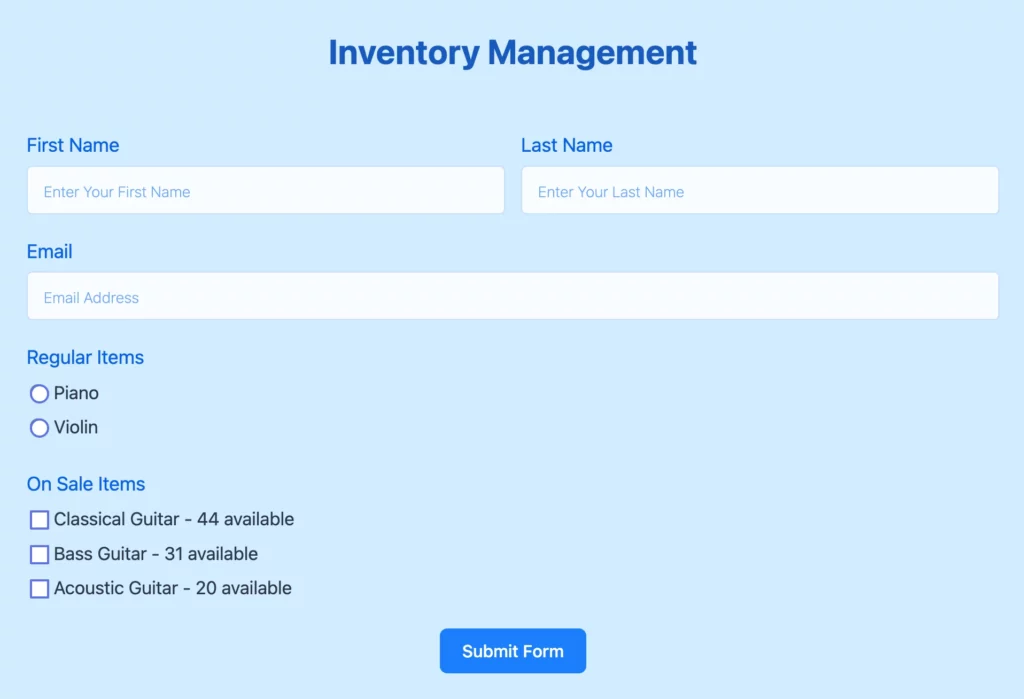
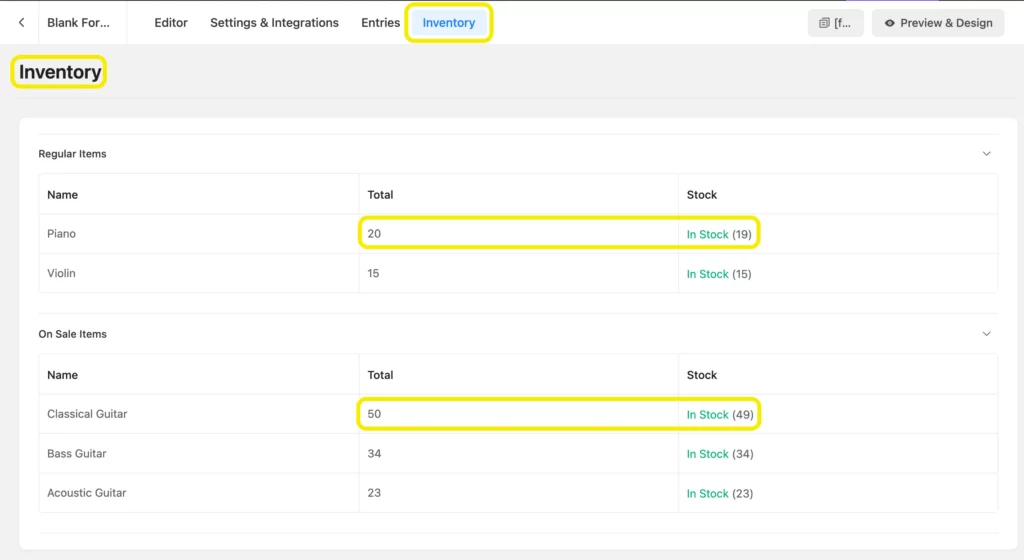
6. Inventory preview
From the form editor, you can access the Inventory. The stock will be automatically updated after every submission.
How Fluent Forms simplifies inventory management
By setting up an inventory management system with Fluent Forms, businesses can achieve the following:
Centralized tracking: All inventory updates are logged and stored in one place.
Customizable and scalable: As the business grows, the form can be modified to include additional fields or integrate with advanced tools.
Checkout this video to see inventory module in action –
Wrap up
Fluent Forms provides a simple yet powerful way to manage your product inventory directly from your WordPress site. By creating a custom inventory form, configuring notifications, and leveraging integrations, you can stay on top of your stock levels and ensure smooth operations.
If you’re ready to simplify inventory management, try Fluent Forms. And don’t forget to share your experience or ask questions in the comments below—we’d love to hear from you!

This is Sumit. He’s a physics major who’s trying to understand both the physical as well as the WordPress worlds. Whenever he’s not busy, plays fifa or spends time with his family.


Leave a Reply