How to Create a Smart Form Using Conditional Logic
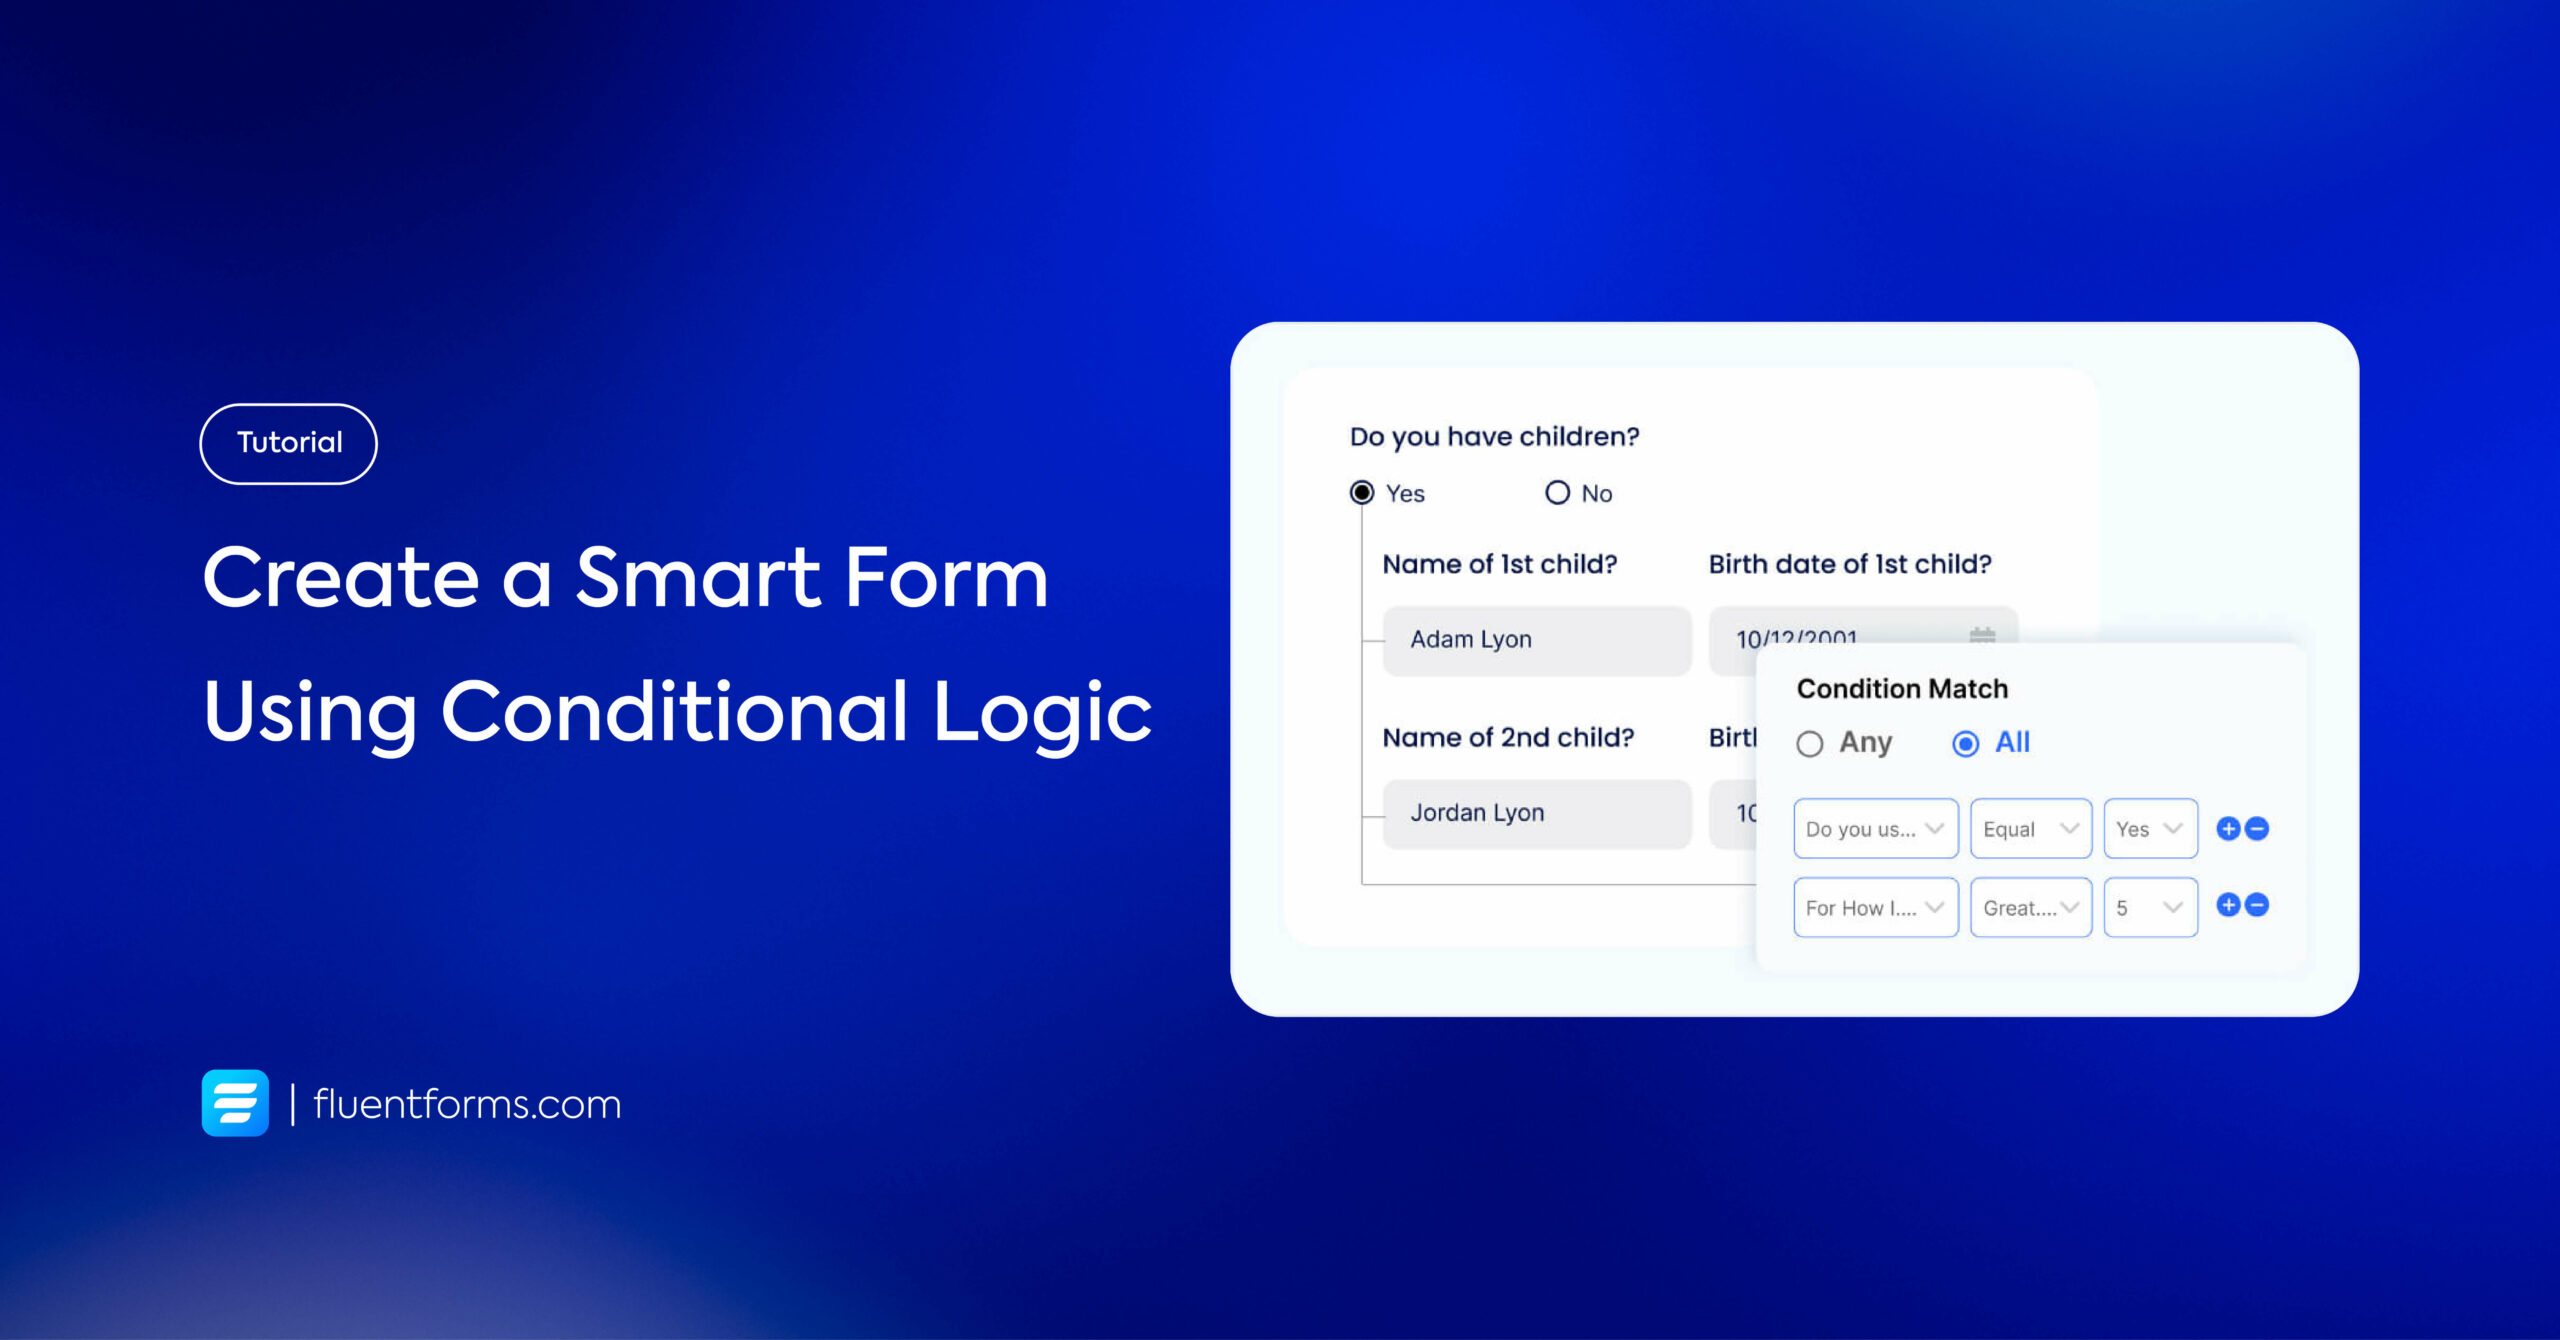
Conditional logic makes form filling a straightforward and delightful experience for users. It keeps any unnecessary fields hidden and only shows the fields relevant to each user. Thus they don’t have to come across an unwanted clutter of form fields, which makes the navigation easy throughout the form.
Use cases
- It makes your form look clean
- Only shows the relevant fields based on user input
How to use conditional logic in your forms
In this tutorial, we’ll show you how to create a perfect form using conditional logic with Fluent Forms, a lightweight and smart contact form plugin.
To use conditional logic, you have to learn the basics first. For example, you would like to accept any of the two contact information, email or phone number.
Now, you have to add two separate input fields for email and phone number.
But you only want to show the email input field to whoever chooses email as their preferred contact method, and the phone number input field to those whose preferred method of contact is phone number.
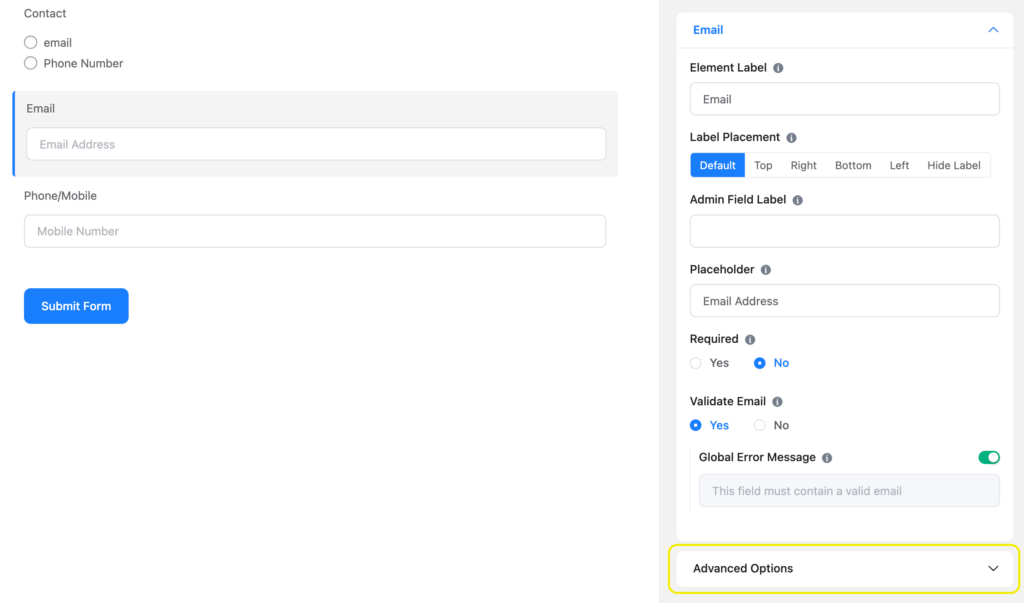
To do so, add a radio field, where your client can choose between email and phone number. Then apply conditional logic to the email and phone number field based on the input provided in the radio field. Here’s how you apply conditional logic. Click on the email field. Go to Advanced Options at the bottom. Click the down arrow.
Go to Conditional Logic from Advanced Options. Select Yes to enable conditional logic. There will be three boxes in the condition match section. The first box contains the input field based on which you have to set the condition(s). The box in the middle contains a few conditions that you can apply. The box on the right contains the value to be matched with the condition.
In our case, we have selected the radio input field named Contact in the first box, the condition ‘equal’ in the middle box, and email as the value in the last box.
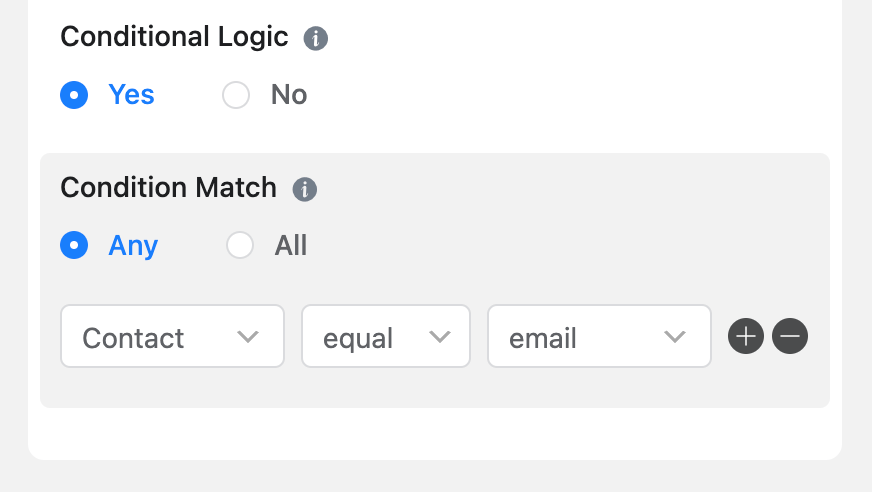
It works like this: Show the email field if contact equals email.
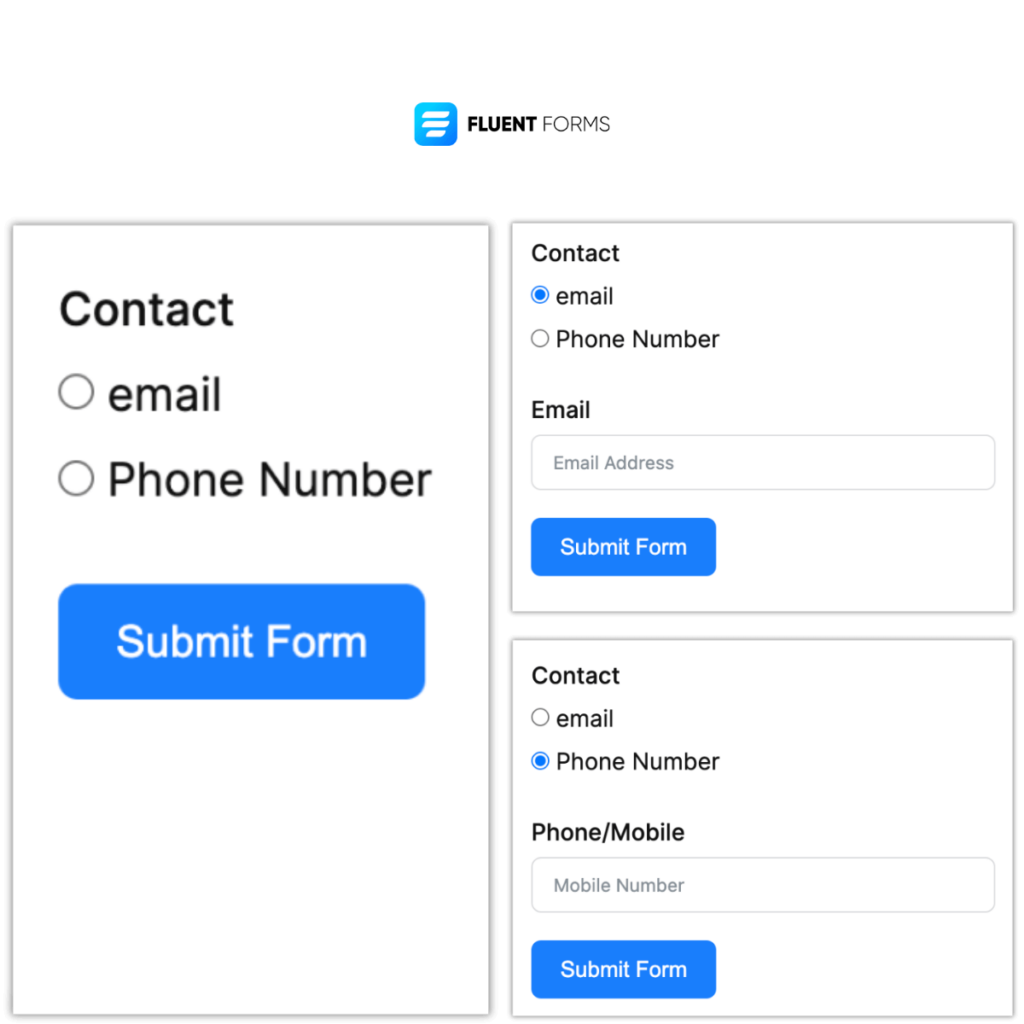
Do the same thing with the phone number field. All the steps are the same, except select the phone number in the last box of condition match.
The result will look like this:
To add more conditions, click on the Plus icon.
In case of multiple conditions, select All if you want the field in question to appear when all the conditions are met. Select Any if you want it to appear when any of the conditions are met.
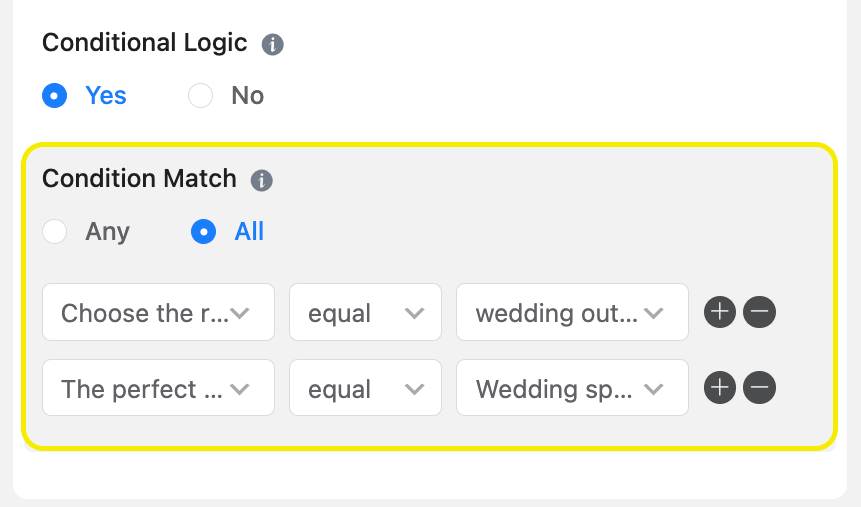
Besides equal, the other conditions you can apply are not equal, greater than, less than, greater than or equal to, less than or equal to, includes, doesn’t include, starts with, ends with, regex match, etc. Regex (regular expression) match works to identify patterns, for example, a positive integer or the zip code of a country, etc.
Related features
Conditional confirmation
Enables you to show different confirmation messages to different users. You can show the confirmation messages on the same page as the form submission, in their email, or direct them to another webpage to show confirmation as well.
Conditional logic in email notification
You can receive and send conditional email notifications for particular forms. For example, if there’s only one job application form for different departments, you can send notifications for each application of a certain department to a dedicated email address. You can also get the attachments with those forms in the email.




Leave a Reply