How to Enable Double Opt-in Feature on Your Forms
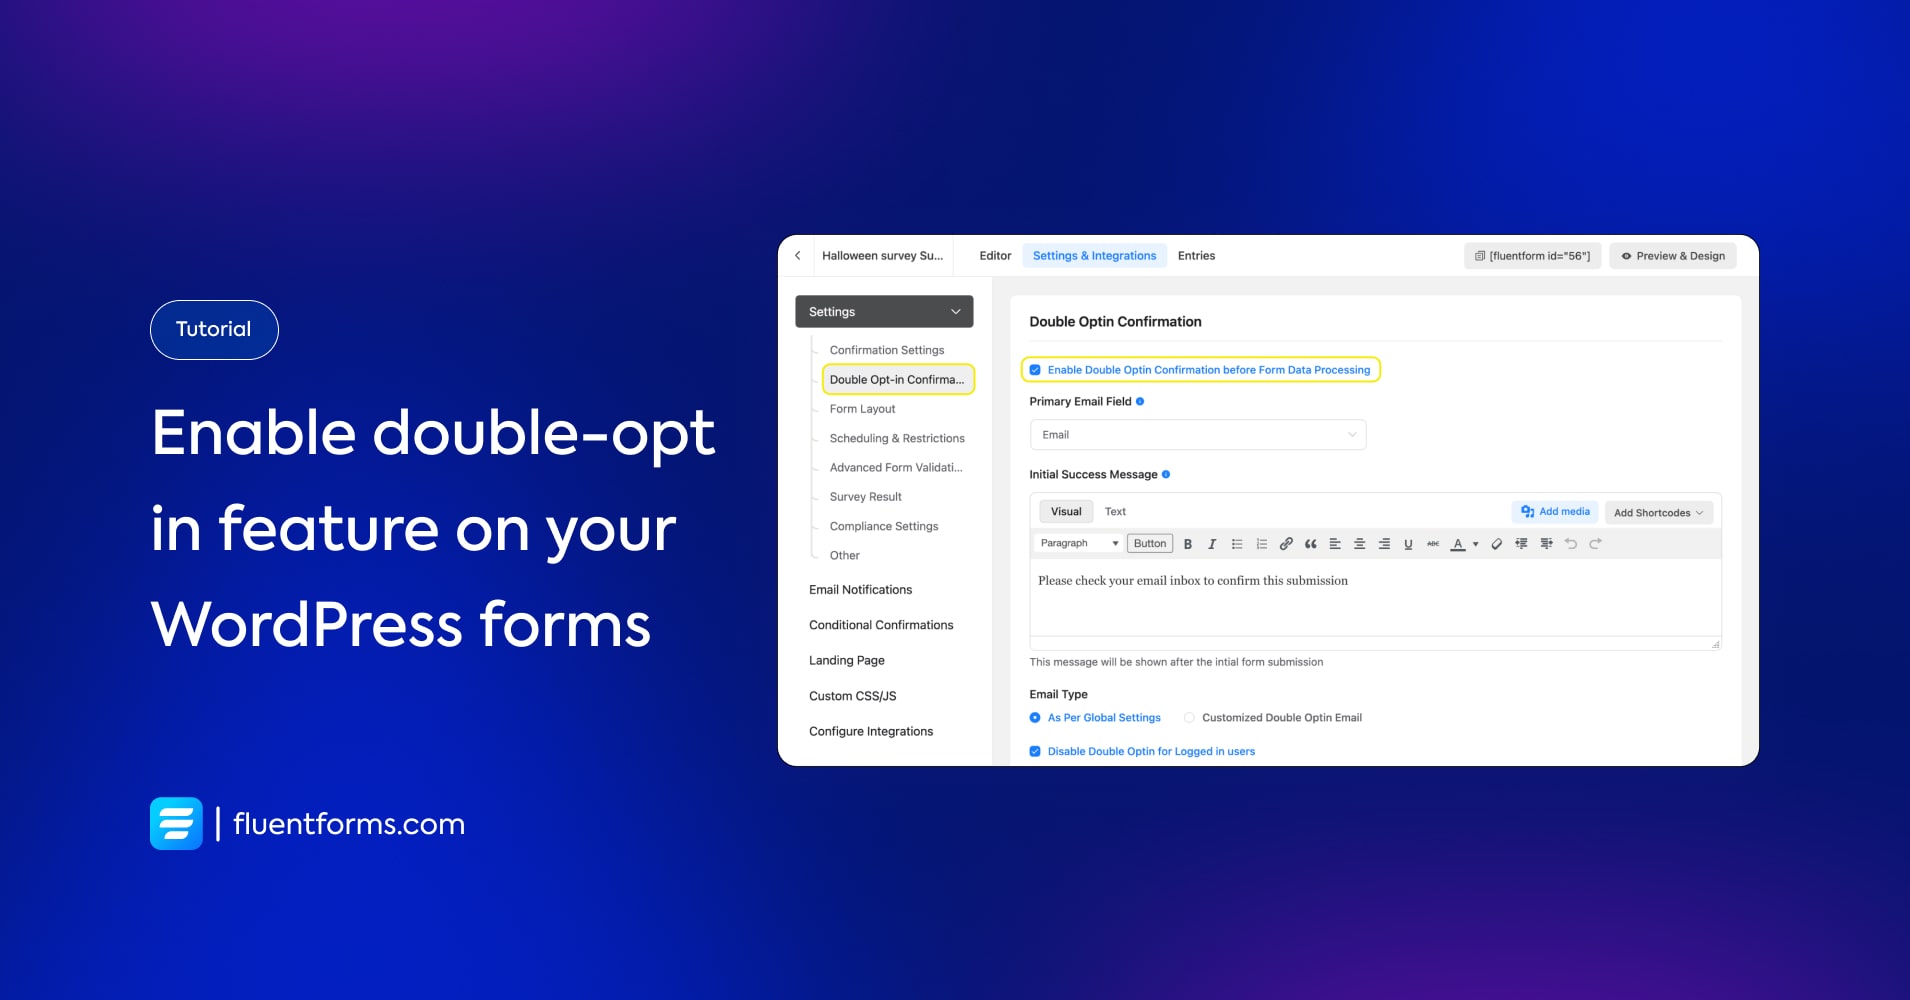
You’re obviously familiar with the phrase “better safe than sorry.” And what makes you safe is confirmed form submissions. You receive only valid data this way. This helps you get more accurate insight and also saves you from getting a lot of spam entries.
Use cases
- By confirming form submission you can prevent bot submission.
- You can confirm your newsletter subscribers this way.
How to enable double opt-in feature on your forms
We’ll use Fluent Forms, the fastest WordPress form plugin for this tutorial.
You have to follow two steps to enable the double opt-in feature for your forms. First, you have to turn on global double opt-in settings. Then you have to turn it on for the individual forms that you want the users to confirm submissions.
Step 1:
From the left-hand menu of your WordPress dashboard, go to Fluent Forms → Global Settings → Double Opt-in.
Check the box for Enable Double Optin Module. You will be presented with a bunch of customization options for the global double opt-in email. Write the email subject and body. There’s a Confirm Submission button in the body of the email. If users click that button, their form submission is confirmed.
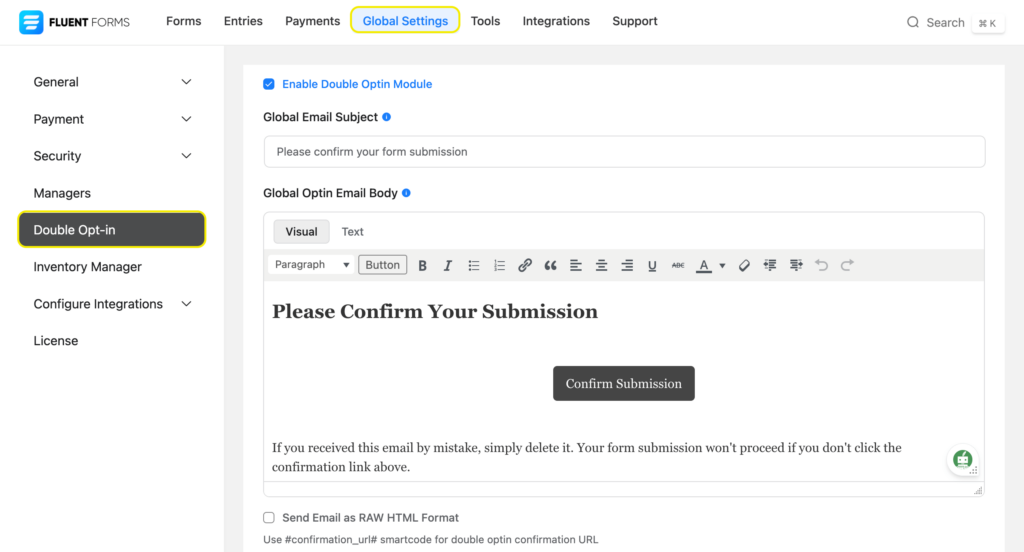
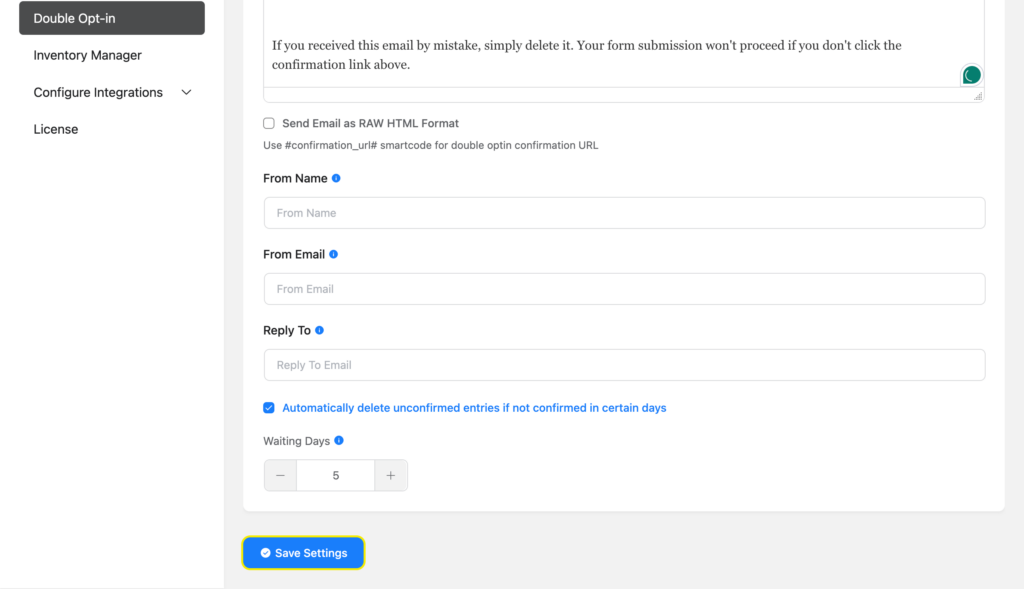
Fill out the remaining fields, i.e. sender’s name, sender’s email, and the email address they should reply to in case they have any queries.
Set the number of days within which you want users to confirm their form submission through email. If they don’t confirm by that time, their entries get deleted automatically. However, this feature is optional, and if you don’t check the automatically delete box, the entries won’t get deleted.
Click on the Save Settings button and the global double opt-in settings are saved.
Step 2:
Now you have to turn on double opt-in for individual forms on which you want this feature.
Go to the Settings & Integrations of the individual forms. Select Double Optin Confirmation. Select the email field where you want to send the confirmation email. The default initial success message asks users to confirm their submission from their email. You can customize it from the Initial Success Message.
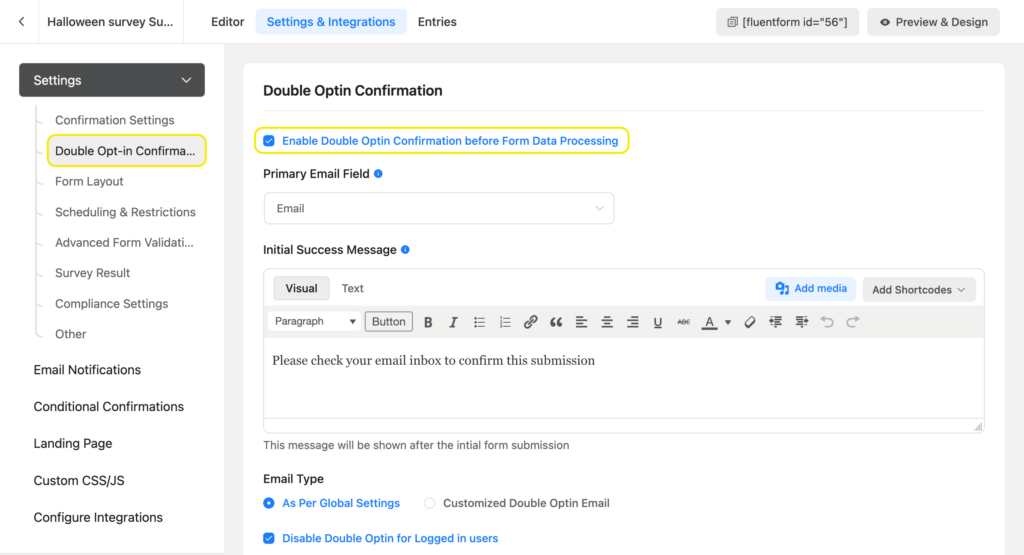
Next, there’s a section for the confirmation email. Select an email type. If you select As Per Global Settings the email subject and body will be the same as the one from global double opt-in settings.
If you select Customized Double Optin Email, you have to write a new email subject and body that will only appear as the double opt-in email of that particular form.
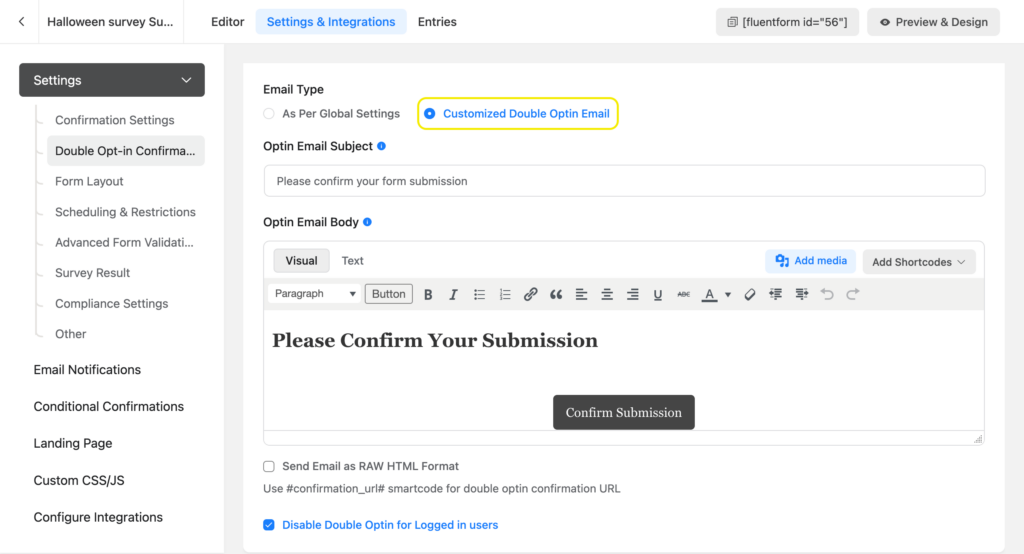
Lastly, scroll down to the bottom and click on Save Settings.
Related feature
Advanced form validation
Advanced form validation prevents spam or bot submissions. You can apply multiple conditions to this feature. The conditions will dictate whether there’s an error in the entries, or the entries are true. And depending on whether the conditions are met or not, the submission either proceeds or fails.


Leave a Reply
You must be logged in to post a comment.