How to Setup Conditional Confirmation Messages in WordPress Contact Forms
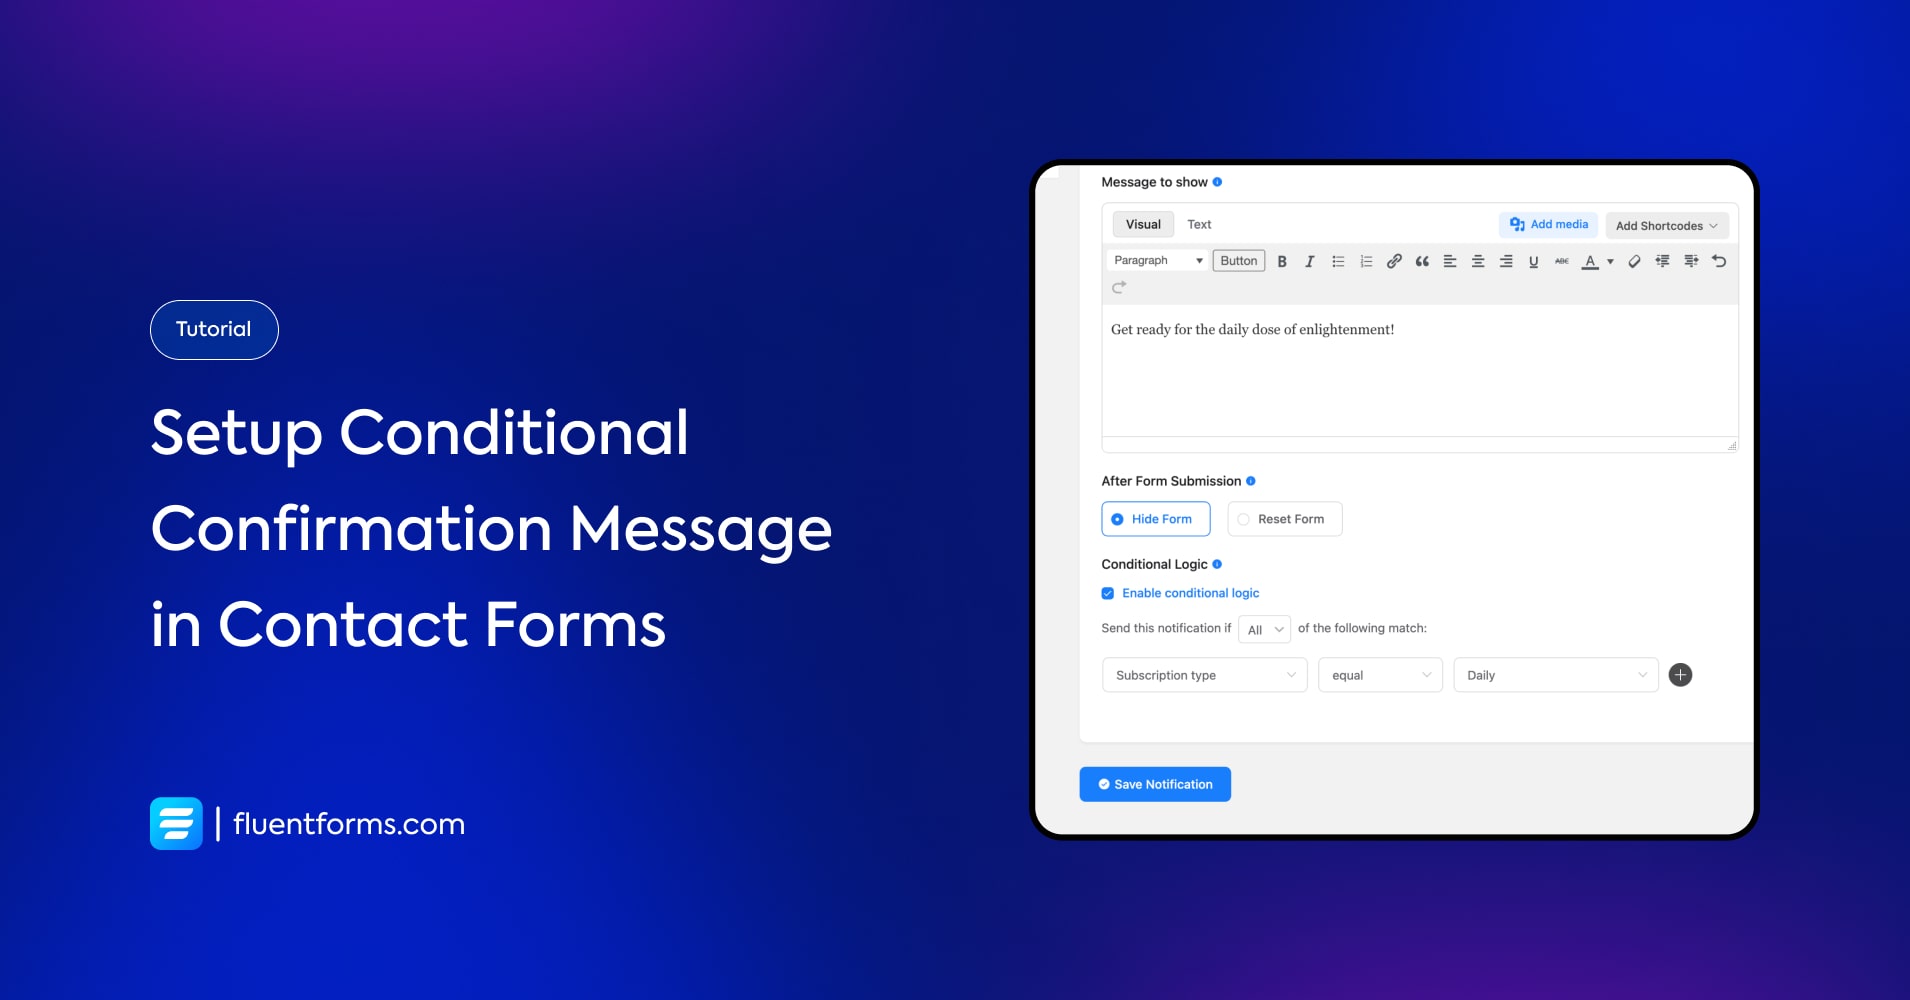
In many cases, you might want to send different confirmation messages to different users after they submit a WordPress form. It helps regarding user segmentation as well as relationships.
Fluent Forms is a WordPress forms plugin that enables you to customize your confirmation messages with conditional logic.
Let’s see how to do it.
How to setup conditional confirmation messages
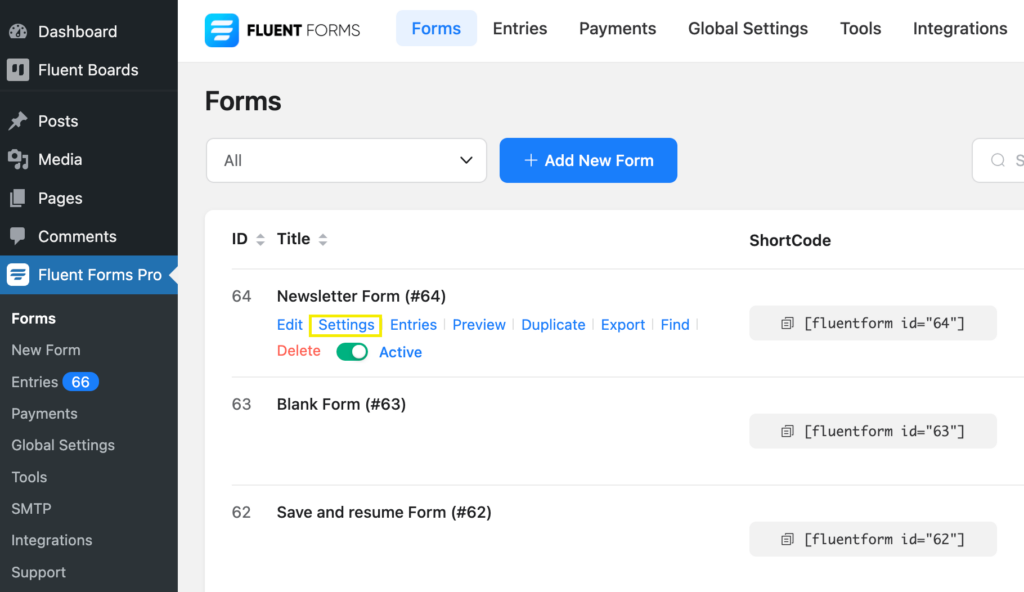
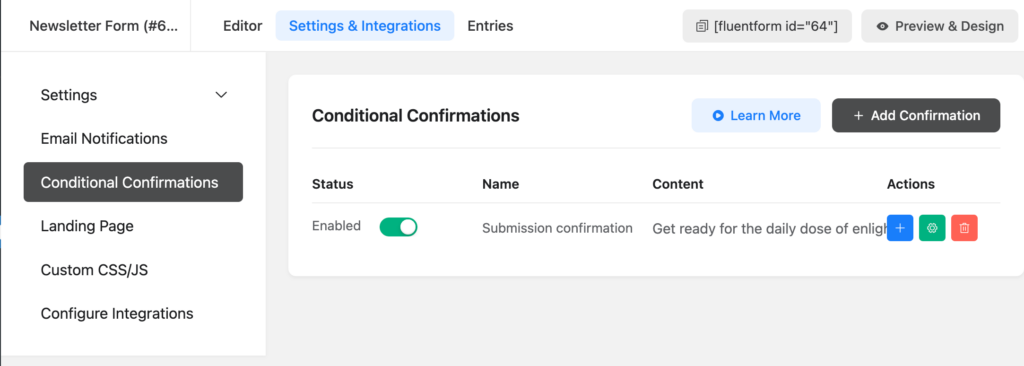
Start with the Settings option of the form you want to enable conditional confirmation messages.
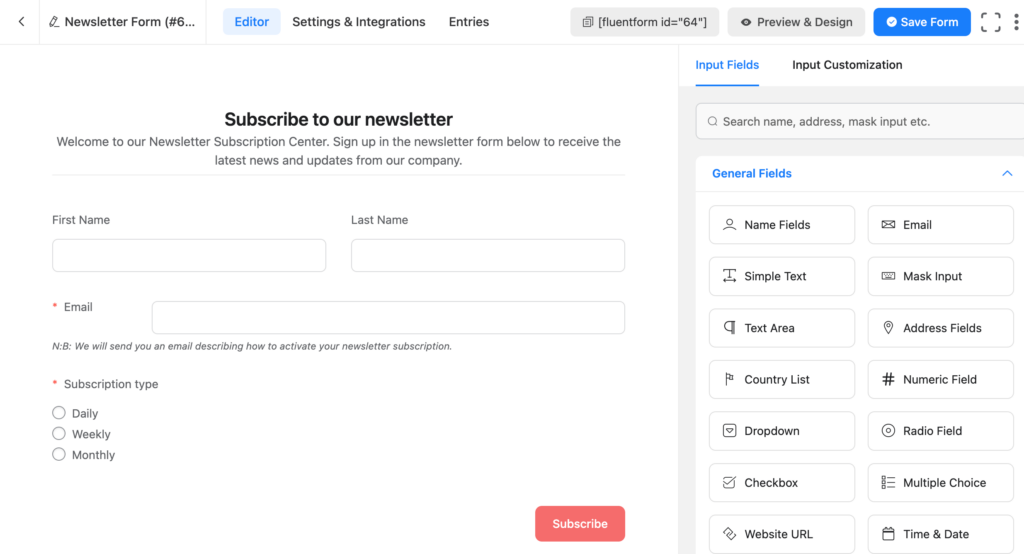
Or you can open the form and access Settings and Integrations from the inside.
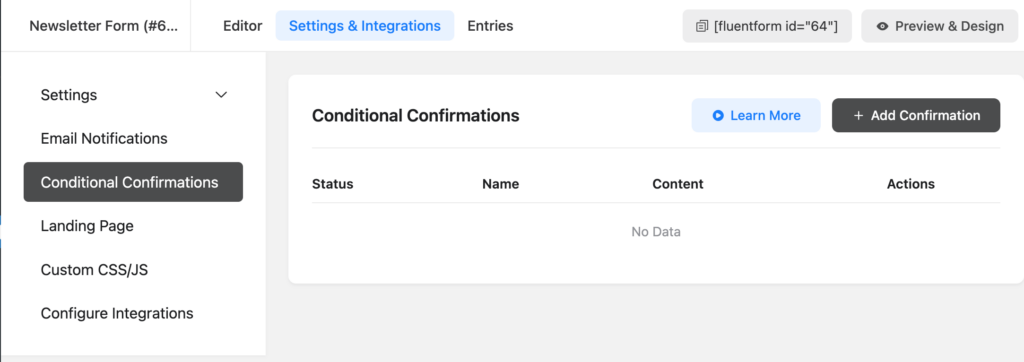
Select Conditional Confirmations from the menu. Click on Add Confirmation to create your confirmation message.
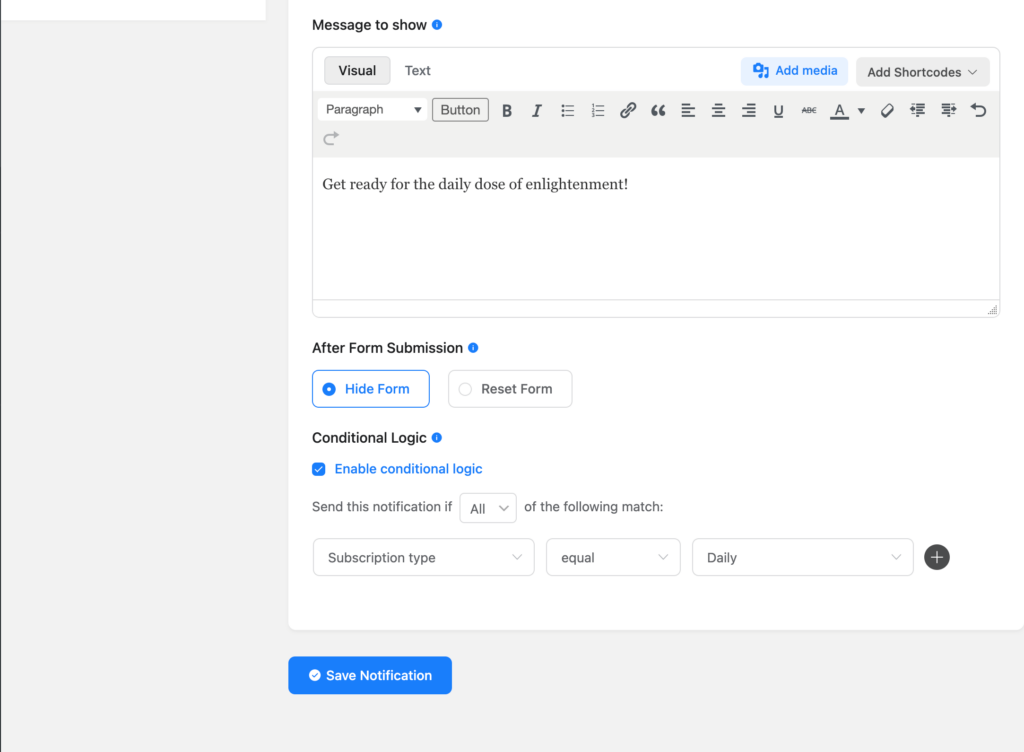
You’ll get to see an interface like below. Set your Confirmation Name, Type, and the message.
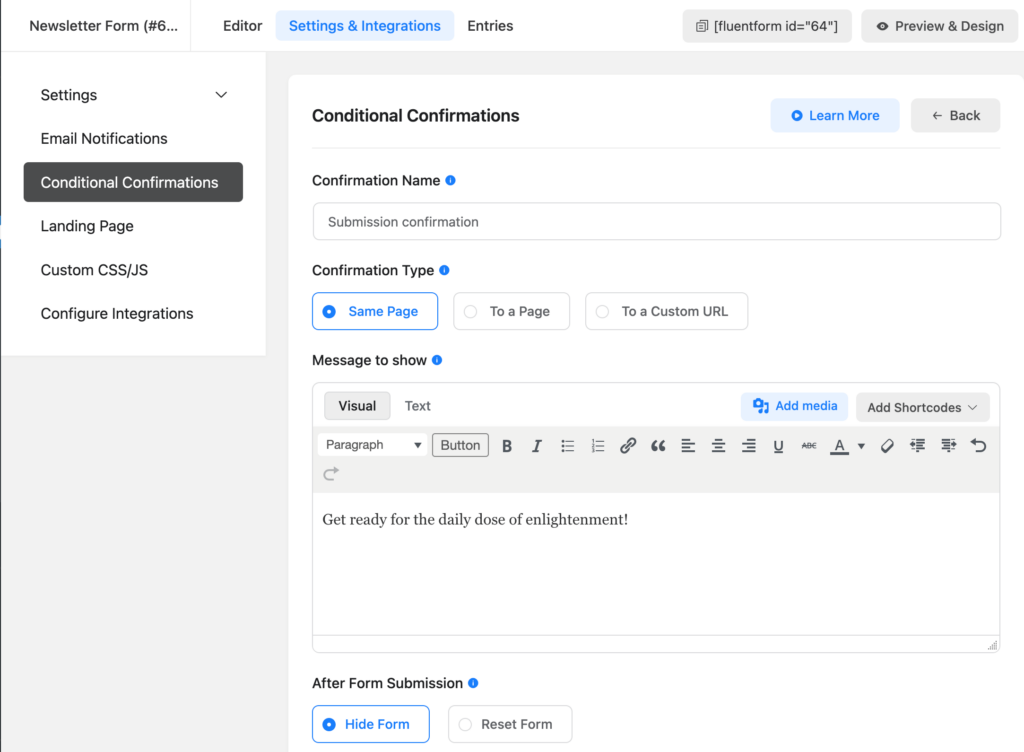
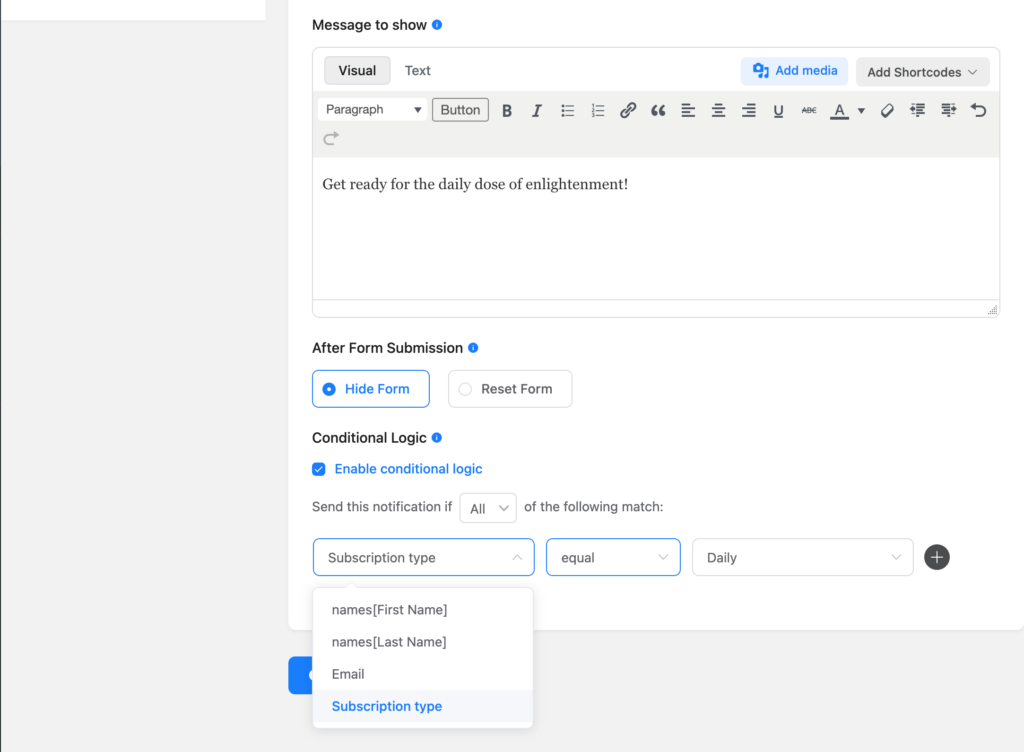
Now let’s get to the Conditional Logic part. Enable it first. Then choose the field you want to specify. In our case, we wanted to send this message to the daily subscriber.
Select the field.
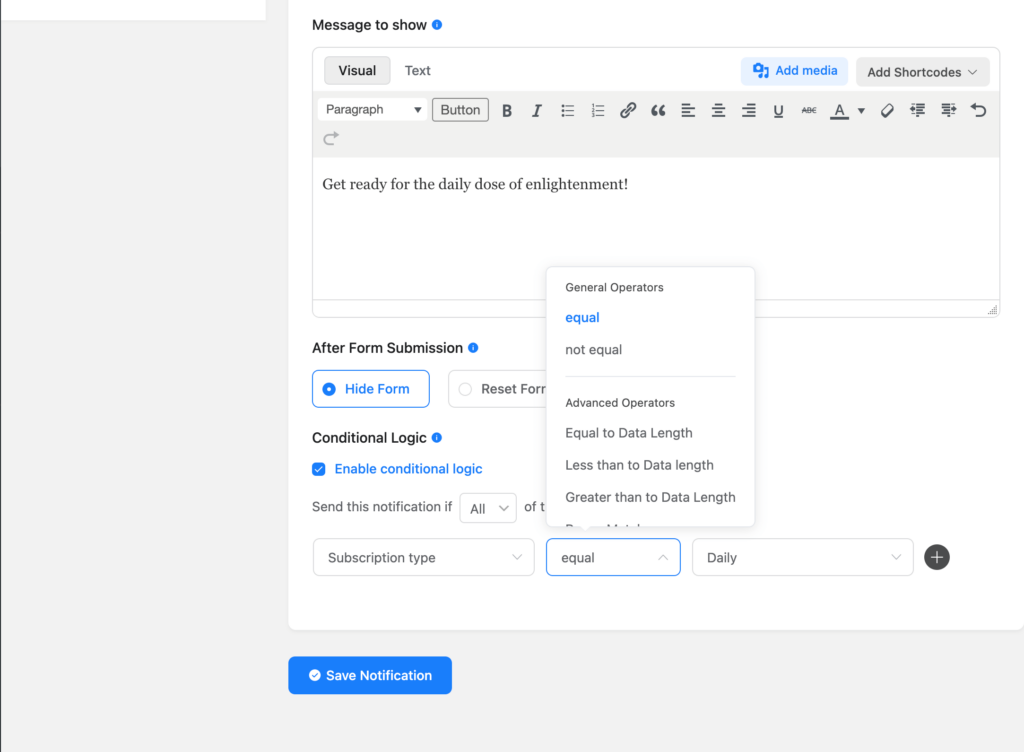
Select either to be equal or not equal to the input value.
Select the input value you want to get notified for. For us it’s Daily.
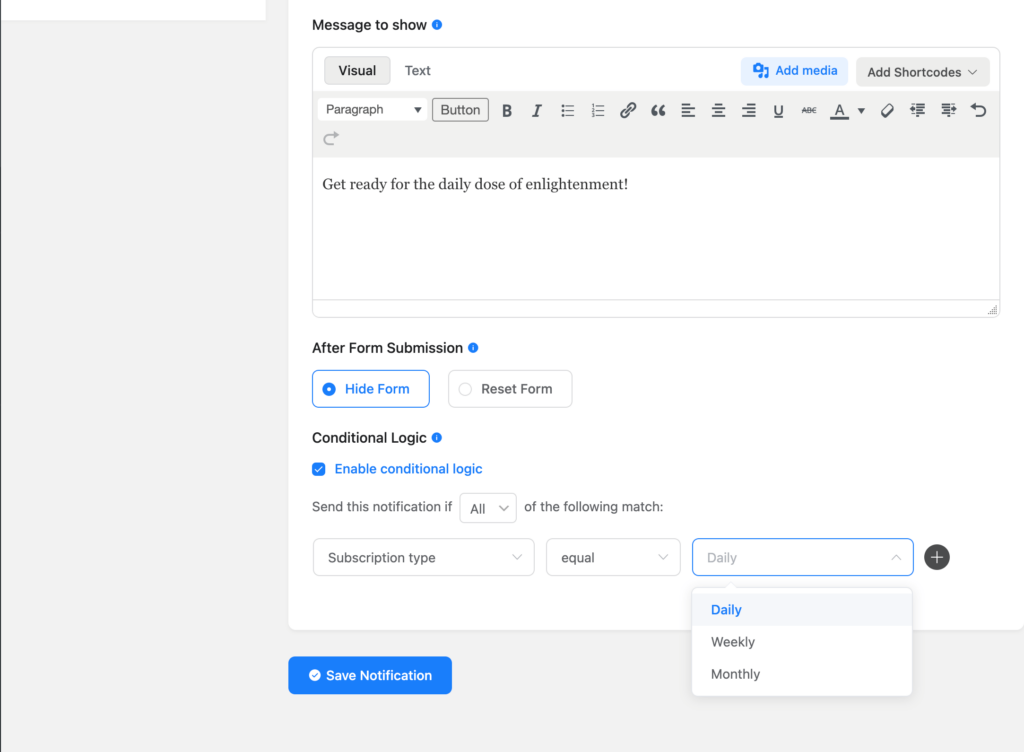
Click on Save Notification and you’re good to go.
You can also use different conditional conformational messages as you like to channel them to your targeted users.
Use case
Mostly conditional confirmation messages are used to provide users with tailored confirmation that makes them feel connected. This little personalization is a powerful gesture.
You can also send specific messages to specific users based on conditional confirmation to convert them more into the desired funnel.




Leave a Reply