
Get More Subscribers With SendFox Integration on Your WordPress Website

Want to capture more traffic and sales? There is no easier way than trying email marketing to gain leads for your business. But from all the options available in the market, choosing a robust and cutting-edge platform is a bit tough.
Saying so, if you want to continue with a simple way to create sign up forms and collect leads, go for SendFox. It is an easy and affordable tool to use; no matter who is operating it. You will love the mechanism of SendFox because of its clean UI.
SendFox integration with Fluent Forms, the fastest form builder plugin, allows you to collect form submissions directly into your SendFox lists, simplifying audience growth and email list management.
Let’s find out how you can use this combo to level up your email marketing!
Connect SendFox with Fluent Forms
Fluent Forms is an excellent form builder plugin for WordPress. It is a lightweight and comfortable tool. Anyone can create any kind of form with its smooth interface. Its drag-and-drop feature makes it easier for users to make any form within a few minutes. Furthermore, Fluent Forms comes with 60+ input fields and 70+ pre-built templates to make the form-making process sleeker. You can also get 60+ third-party integrations with the plugin.
Moreover, advanced post creation, Stripe and PayPal integration, PDF entry generation, file upload, conditional logic, etc., and more WordPress form-building features are also available in Fluent Forms. You don’t need to worry about the security with this tool, as it is secured with reCAPTCHA, Honeypot, and Akismet.
Connecting SendFox with Fluent Forms is just as easy as making your morning cup of coffee. In short, the steps are:
- Login/Create a SendFox Account.
- Get the SendFox API Key.
- Activate the SendFox Module.
- Use the SendFox API Key.
- Create/Use a form with Fluent Forms.
- Set up the integration feed and map the input fields.
Let’s elaborate these steps for you a bit more for a clear picture.
Login/Create a SendFox Account
Login or create a SendFox account to get started. Creating a SendFox account is easy. Go to sendfox.com and register with your google account or email.

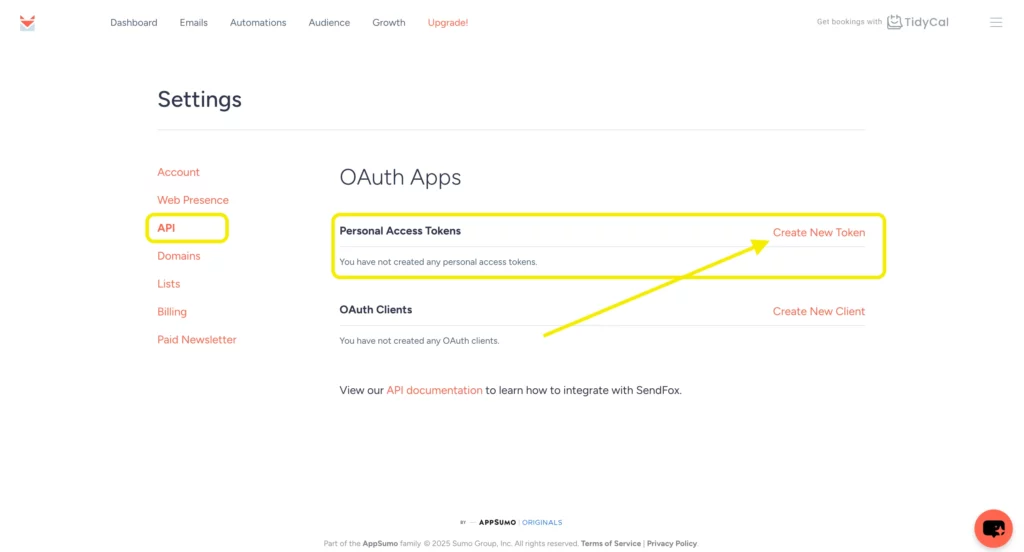
Get the SendFox API Key
You’ll need an API Key for connecting SendFox with other plugins. To get that go to your SendFox dashboard and click on the menu bar on the top right corner. There you’ll find Settings.

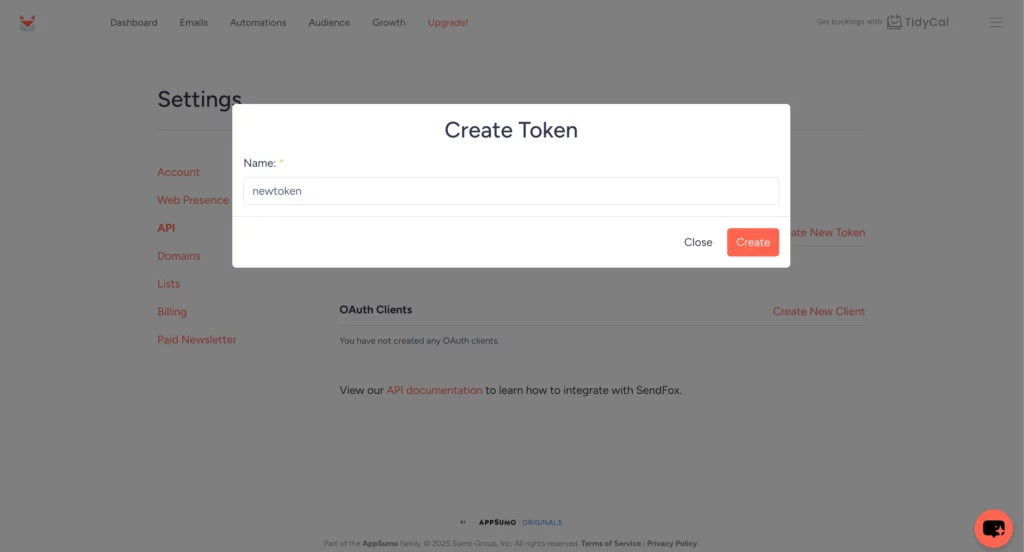
Select the API tab to get your API. Then, click on Create New Token to generate an API key.
Name your token.
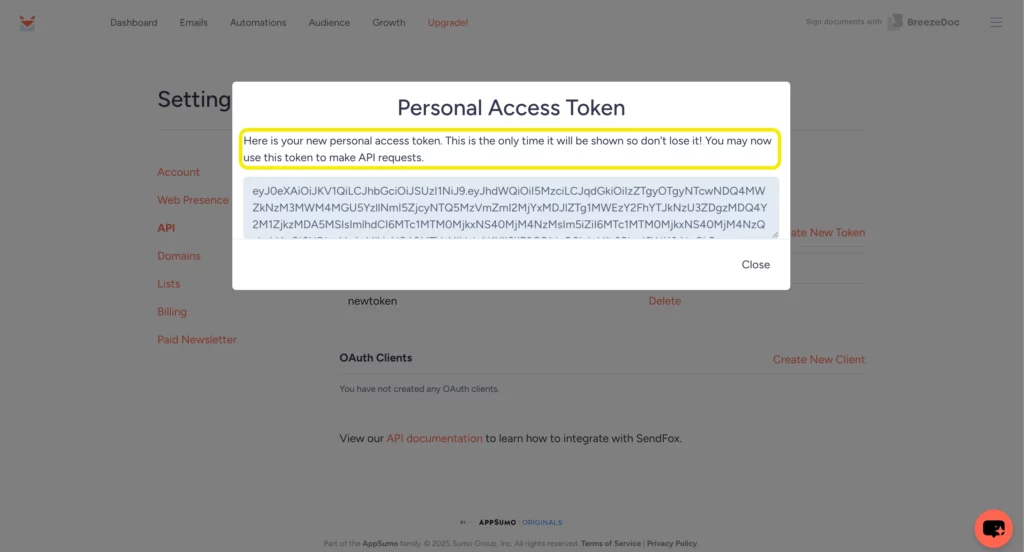
Copy and store your Access Token somewhere safe, because you’ll only be shown this key once.
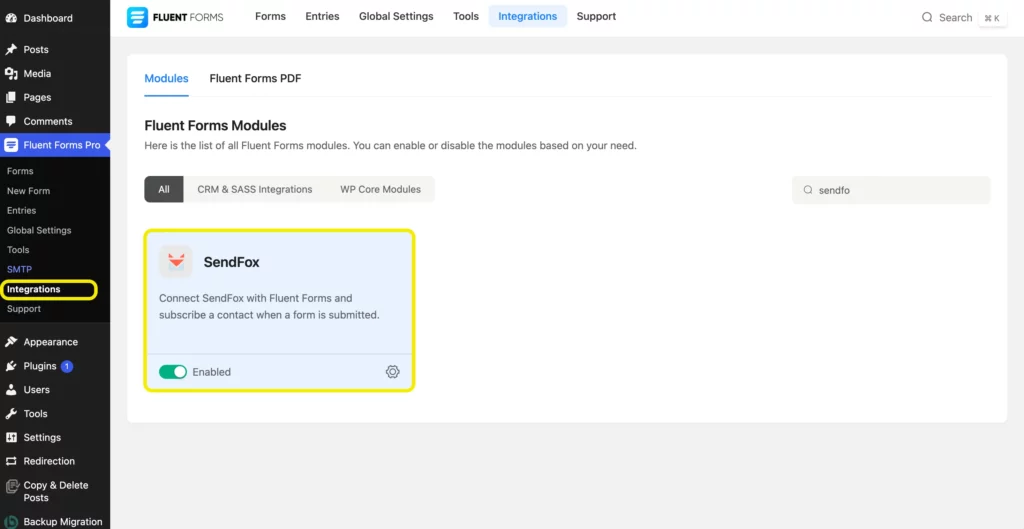
Activate the SendFox Module
When you’re all done with collecting your API, you can move to your WordPress dashboard to connect SendFox with Fluent Forms. Go to the Fluent Forms>Integrations. Search for SendFox from here, and enable the integration module.
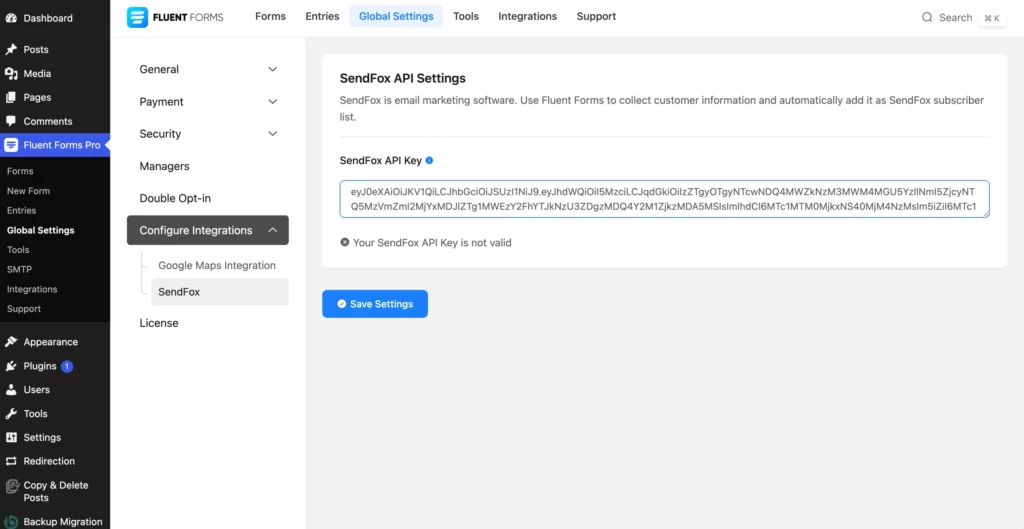
Use the SendFox API Key
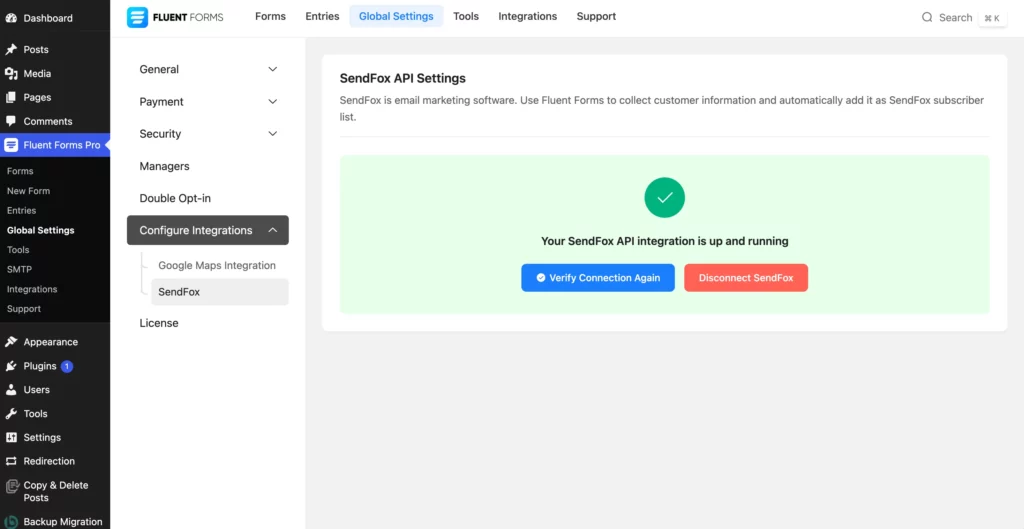
After enabling the SendFox integration module, now you’ll need to connect using the API. Go to Global Setting>Configure Integrations, and select SendFox. Paste your API key there and Save Settings.
Your connection between Fluent Forms and SendFox will be up and running.
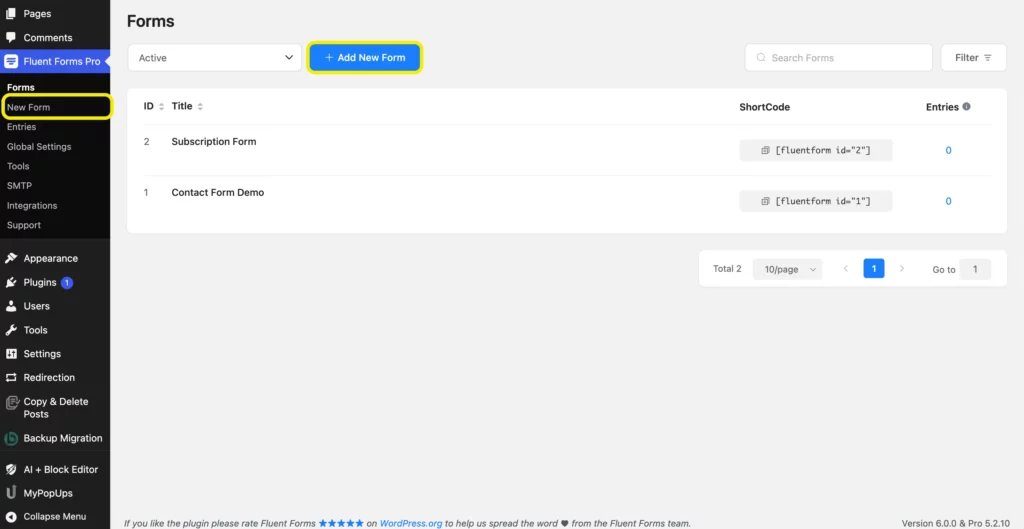
Create/Use a form with Fluent Forms
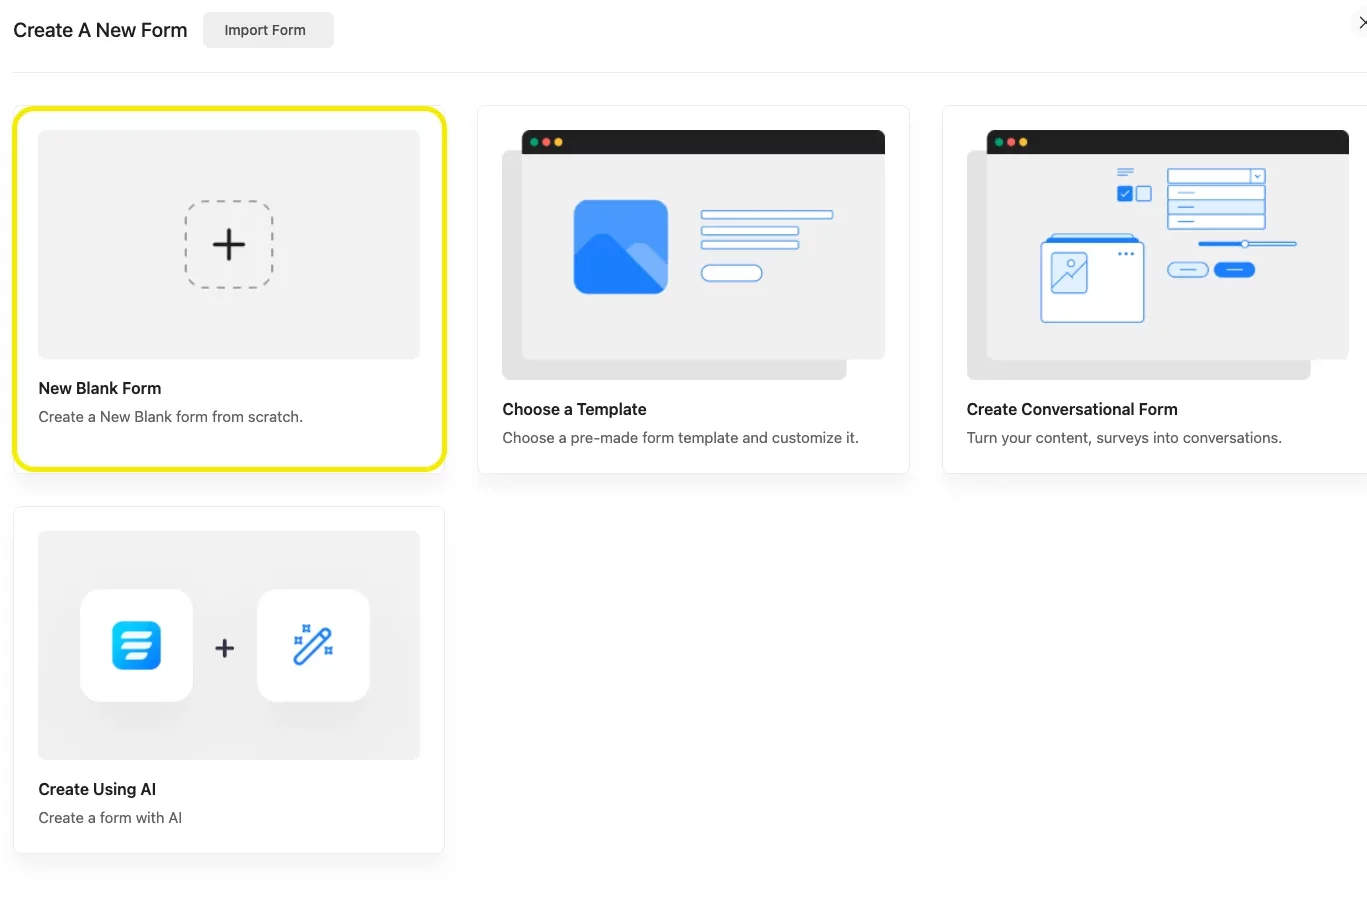
Now, time to grow subscribers. You’ll need to create or use an existing form in Fluent Forms. To create a new form, go to Fluent Forms>New Form from your WordPress dashboard.
You can select from our 70+ pre-built form templates or create a New Blank Form. You can also create a form just by using Ai form-builder.
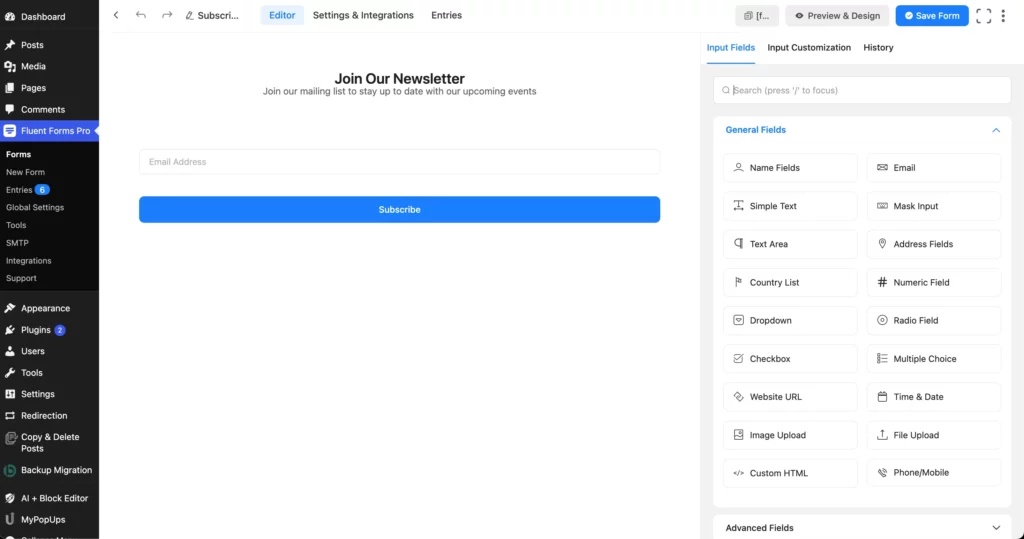
For example, we’ve used a simple Newsletter Subscription Form.
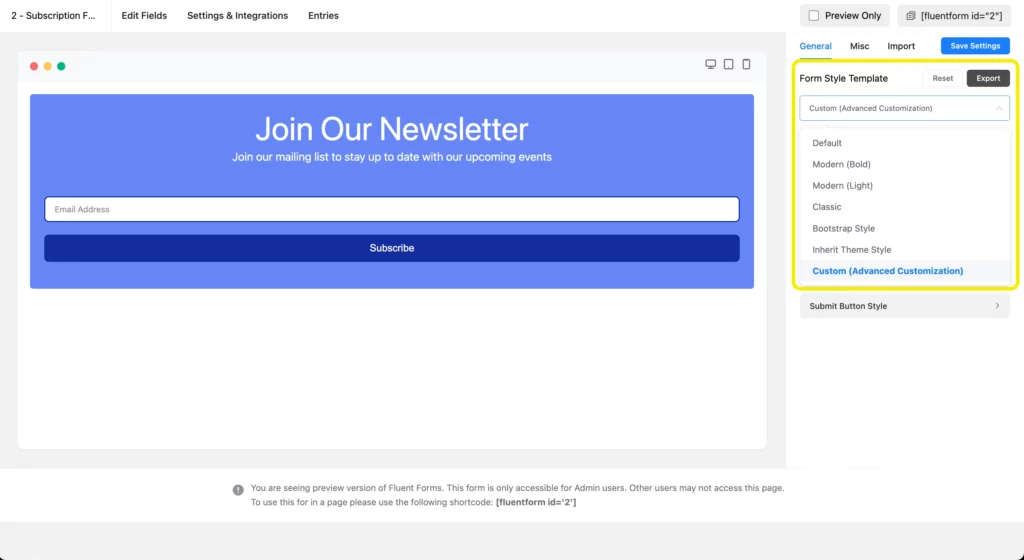
To design your forms, you can choose from the given form styles.
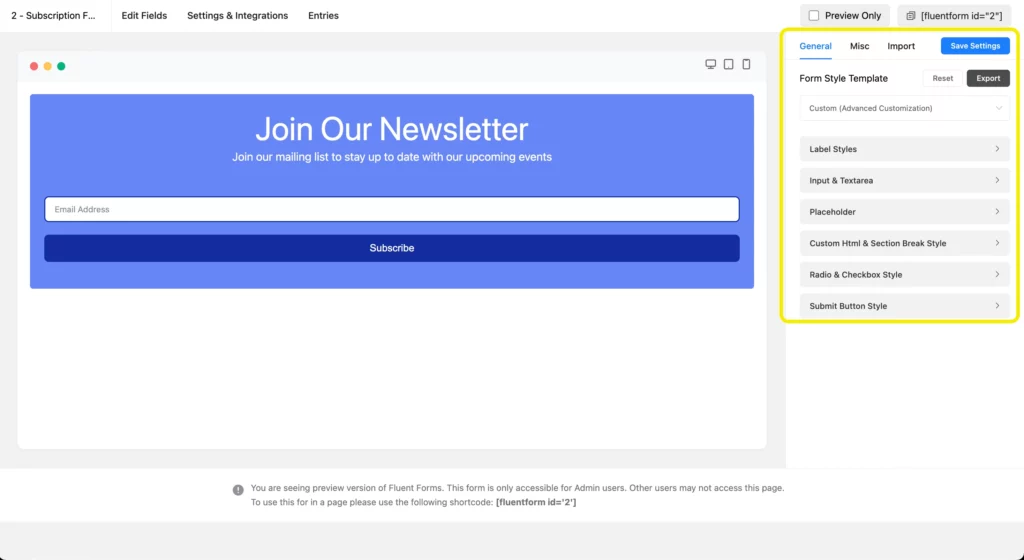
You can also use the Advanced Form Styler to design the form as you wish.
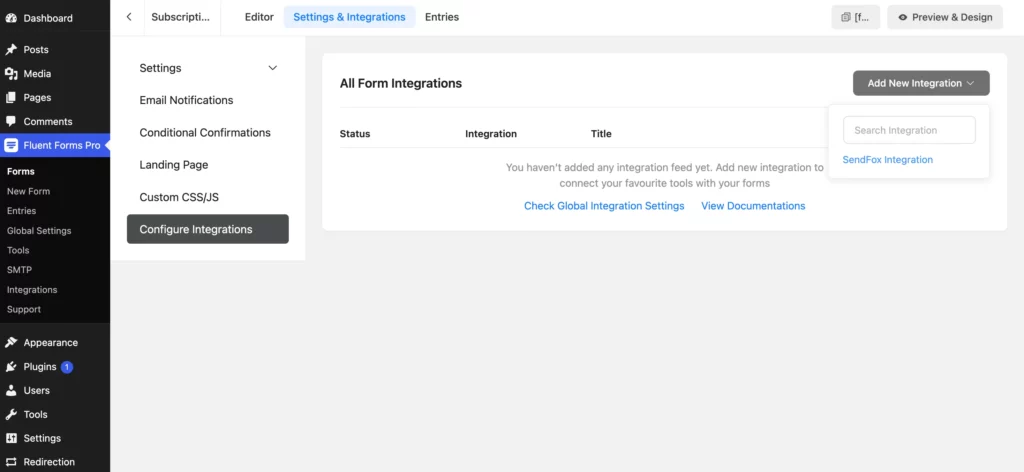
Set up the integration feed and map the input fields
You will now need to map the input fields to set up the integration feed. Go to Settings & Integrations>Configure Integrations. Click on Add New Integration dropdown and select SendFox Integration.
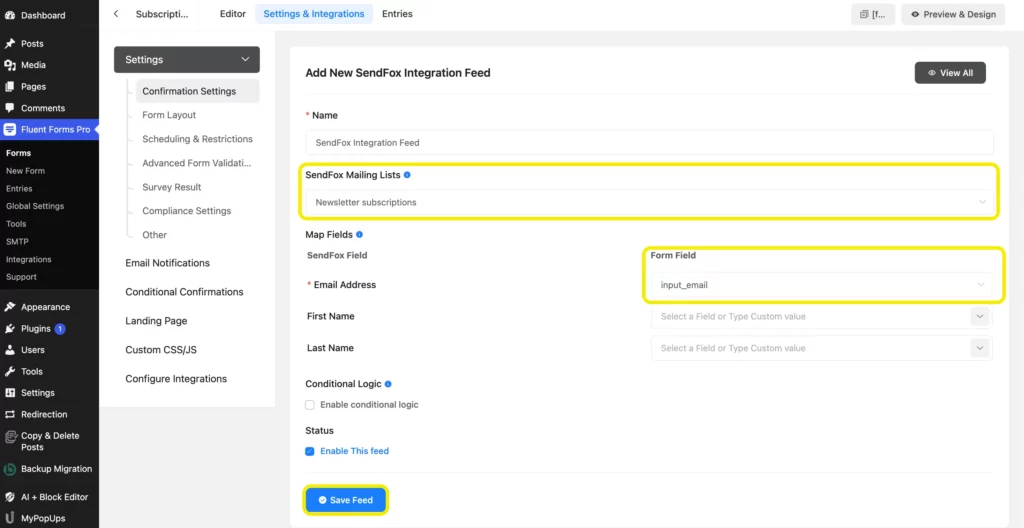
Name your integration feed and select the mailing list.

Select the form field you want to collect information for. We’ve chosen the Email Field as we aimed to create an email list. Don’t forget to Save Feed.
Now, publish the form in a page where you want to collect emails from.

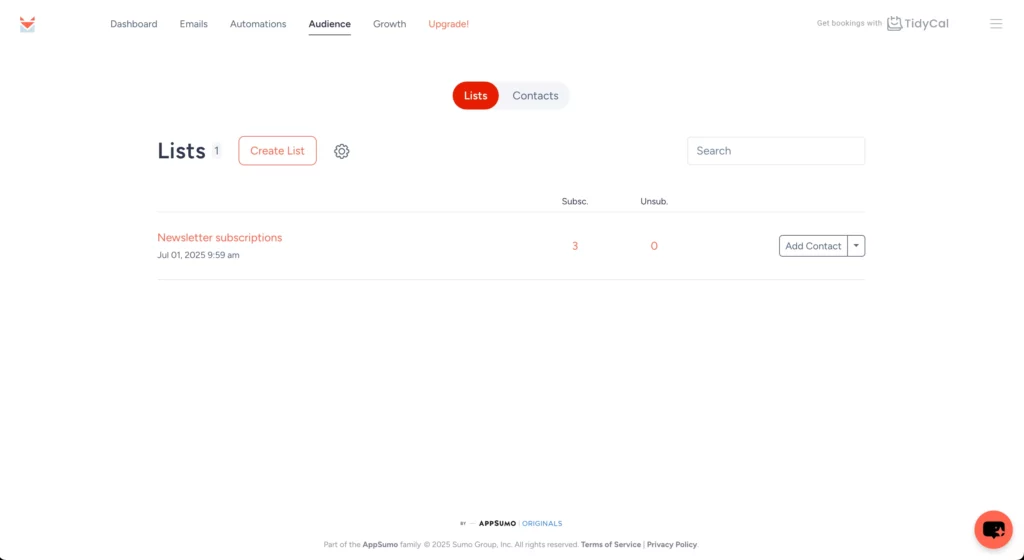
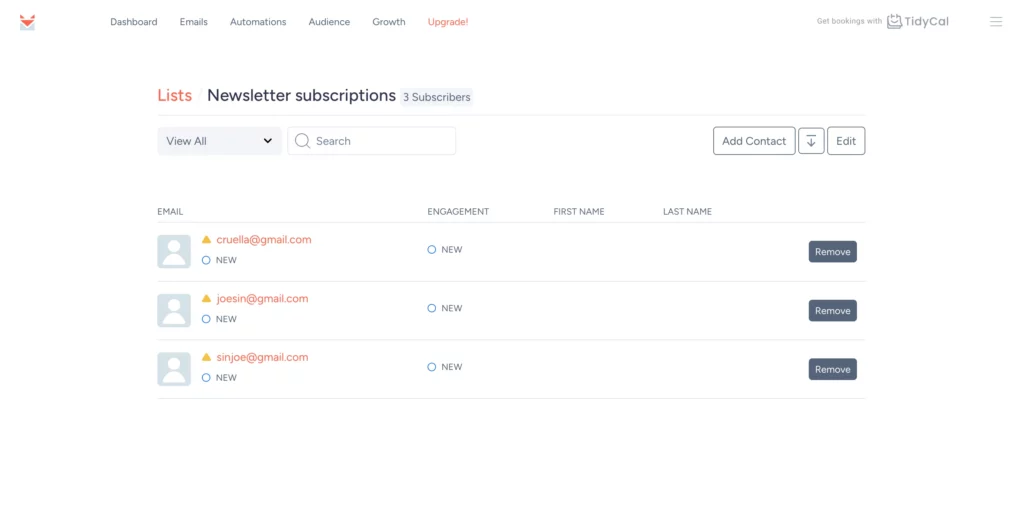
Collect some demo inputs to see if the SendFox integration with Fluent Forms works for real. Then go to your SendFox dashboard>Audience. Click on the list to see if the demo contacts got added just after the form submissions.
And here you go!
Wrap up
If you want to use email marketing as a lever to grow your business, SendFox and Fluent Forms offer a seamlessly integrated, user-friendly option. With this simple guide, you can not only create robust sign up forms, but also efficiently manage your email lists.
You can create automated email campaigns with SendFox to engage your subscribers and timely follow-ups. Use analytics to track progress and tweak if needed.
Remember, capturing leads and growing your audience has never been easier. So, go ahead, give it a try and take your WordPress website to the next level!
What’s your go to email marketing campaign tool? Let us know in the comments below!

This is Sumit. He’s a physics major who’s trying to understand both the physical as well as the WordPress worlds. Whenever he’s not busy, plays fifa or spends time with his family.


Leave a Reply