
Create Form Success Message You Can be Proud of

The form success message may seem like a small detail to you, but it has great potential for customer engagement in your business. Instead of displaying a generic text like “Your message has been submitted,” you can do a lot more with it. From redirecting to a custom URL to showing select content, this feature can intrigue customers to dwell more time on your website. Finally, it can effectively work as a call to action for your business and hold visitors’ attention.
Today in this article, we will show you how to design your contact form with an actionable success message that you may want to use on your website.
Types of form success messages
Below are some common types of successful registration messages that you can use on your online forms or questionnaires.
Text-based thank you messages
This is the most straightforward way of customizing success messages that many form builders follow. In this way, a very simple confirmation message is shown after submitting a form on the same space of the screen where the form has appeared. For example, “Thank you”, “Thank you for contacting us”, or “Thank you for your query”, and so on.
Redirect-based confirmation messages
In this type of form, it redirects users to another page after completing the form. This type of form success message page is quite beneficial as they gain conversion. So if you choose this option, take advantage of it, and design a page full of engaging and compelling content that your clients will love.
Text-based and redirect combined form messages
This option has blended the first and second types of form confirmation messages. Firstly, you need to write a simple text message, and then redirect clients to another page with the message. Here you’re letting your users choose what to do next.
Rich media-based form success messages
With this type, you can create a personalized, neatly designed, and content-rich thank you page. You can add images, videos, and other elements to it to drive more conversions. The aim is to put a mark on your buyer’s perception of your business.
As the types vary, there are also some tips to follow when crafting a form success message. Let’s learn about those, too.
Tips and tricks for a form success message
A “Thank you” message is not always enough. The reason is, they don’t provide any specific answers. So, you should consider providing additional information that’ll inspire them to take further action. Let’s take a look at each step of the process.
Customize the message according to form requirements
Any step taken for your website is an effort to increase conversion. So, even if your form is a short one, make sure to make it attractive for your visitors, and don’t forget to thank them at the end of the form. At such times, only giving a big “Thank” is not enough. So, you need to understand the purpose of your form and provide the information on the “Thank you” page according to your form requirements.
For example, in contact forms, you can write, “Thank you for contacting us, we will be in touch with you shortly”. For survey forms, write down, “Thank you, you have just helped us be better”.
Tell your visitors how long you will take to respond
Always tell your clients or visitors how long you will take to get in touch with them directly. By doing this, your customers can trust your business and get serious about filling your contact forms. For instance, “Thank you for getting in touch. We will respond to you within 24 hours. Meanwhile, you can take a look at our website. We hope you will get something for you here”. Always give them a clear and concise idea about the feedback.
Inform your visitors about the next step
Once a visitor fills up a form and submits it, the person will leave your site if he doesn’t get any further engaging content or subject. So, try to lead your visitors to the next step. In that way, they won’t get lost and will get a clear idea about the process and result of filling the form.
For example, you may add a link to an FAQ page or a resource page to the form success message to keep the visitors on your website.
Approach clients in a way that they belong to your business
Any client is a part of your business. They are as important as the team members of the organization. Among several online businesses, they decided to go for you. So, always appreciate your users for choosing you. Show them how grateful you are for selecting you, and make them feel special.
For example, on the form success message, you can write like this, “Thank you for being with us. Here is a little more information about us and our business, and a few links to our success stories and cases. We hope you will find our service as per your desire. Someone from our team will get back to you within a few hours.”
Ensure a good customer experience
Sometimes, a simple thank you message is enough, but to have a happy and engaged customer, you need to create some engaging content or moments with them. Providing a good customer experience is very important, such as anticipating your client’s needs in case of an emergency. So, you can add a contact number to your form’s success message.
Understand customer psychology
Getting in touch with a lot of customers is not an easy process. People’s mentality varies a lot. A large number of customers order their products and leave them like that. In most cases, clients click the submit button to see how the product will be delivered. Whether people submit your contact form through the website or social media, they mess up when they have questions.
So, it is crucial to understand customer psychology. Always keep records of all users, like what type of products they are purchasing, what quantities they prefer every time, and who your regular customers are. Using these, you can recognize your loyal customers. Design your form success message based on your user’s psychology.
Place a call to action
Take the opportunity to display your call to action, even if your customers are engaged already. You might be thinking about building an email list, driving traffic to a particular blog post, or gathering feedback on website usability. At the last stage of your form, you can consider using some elements on it, such as:
- An embedded URL in a button or text
- Additional comment field
- Scale for star rating evaluation
- Radio buttons
- Section for capturing emails
Offer them something special
With all the options mentioned above, you also need to make sure that your business is increasing its income. No one can deny that making an excellent offer to customers can do that for your business.
For example, on the form success message, you can write, “Welcome to our community. We are happy to have you! To show our appreciation, we offer you a special welcome gift. In this message, you will find a coupon link to use on our website. Thank you.”
Now we know how to design a form success message. To make the process easier for you, we will see how you can make a confirmation message after the form submission with Fluent Forms.
Customize your form success message with Fluent Forms
Fluent Forms is an excellent form builder plugin for WordPress. It is a lightweight and comfortable tool. Anyone can create any kind of form with its smooth interface. Its drag-and-drop feature makes it easier for users to make any form within a few minutes. Furthermore, Fluent Forms comes with 60+ input fields and 70+ pre-built templates to make the form-making process sleeker. You can also get 60+ third-party integrations with the plugin.
Moreover, advanced post creation, Stripe and PayPal integration, PDF entry generation, file upload, conditional logic, etc., functions are also available in Fluent Forms. You don’t need to worry about the security with this tool, as it is secured with reCAPTCHA, Honeypot, and Akismet.
So, without any doubt, Fluent Forms is full of unique features. The developers of the tool add more functionalities every two or three months. Moreover, the plugin is super cost-effective.
Now, let’s see how to customize the form success message with Fluent Forms.
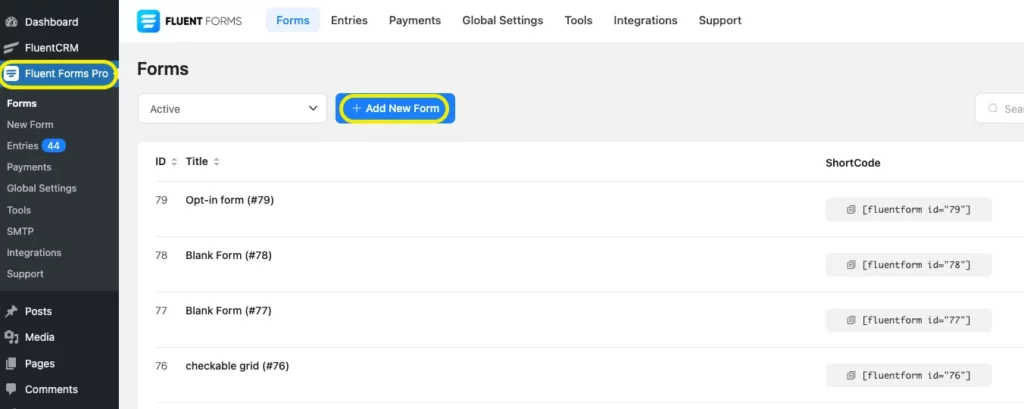
Go to your WordPress dashboard. Select Fluent Forms and choose “Forms”. Here, you will see all the forms that are created on your dashboard. Now, click on “ Add new form”.
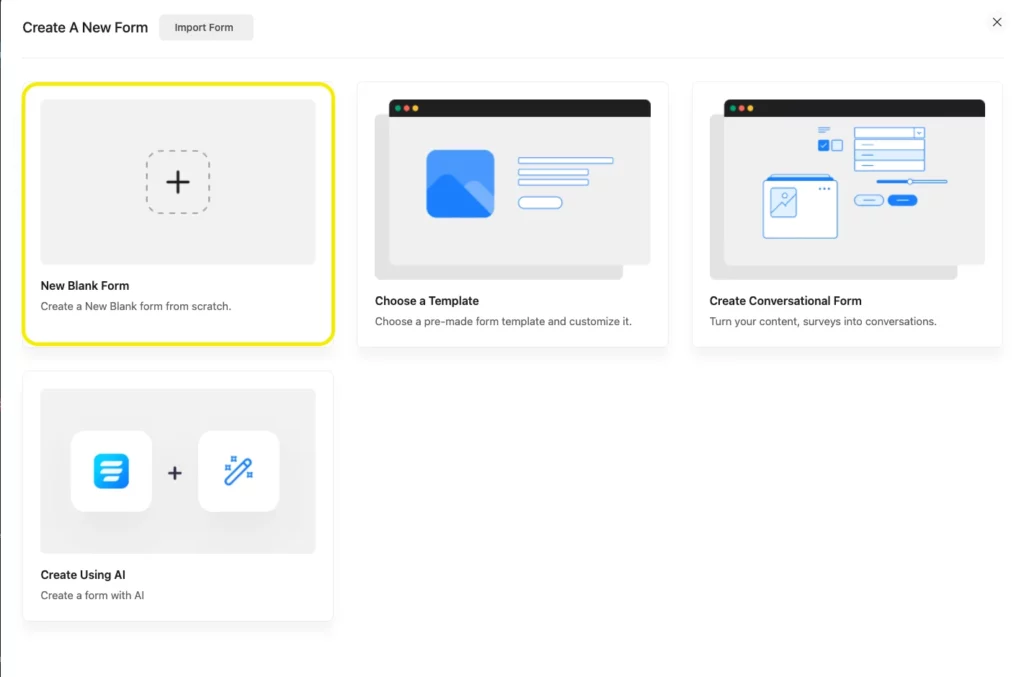
A new pop-up section will appear with the pre-built templates of forms. For now, we are choosing a blank form option.
Now, we are designing the form with the required form fields. Suppose we are designing a registration form. So for this type of form, we need the name, number, email, and, if needed, address fields. After adding all the form fields, click on the “Settings and integrations” from the top bar.
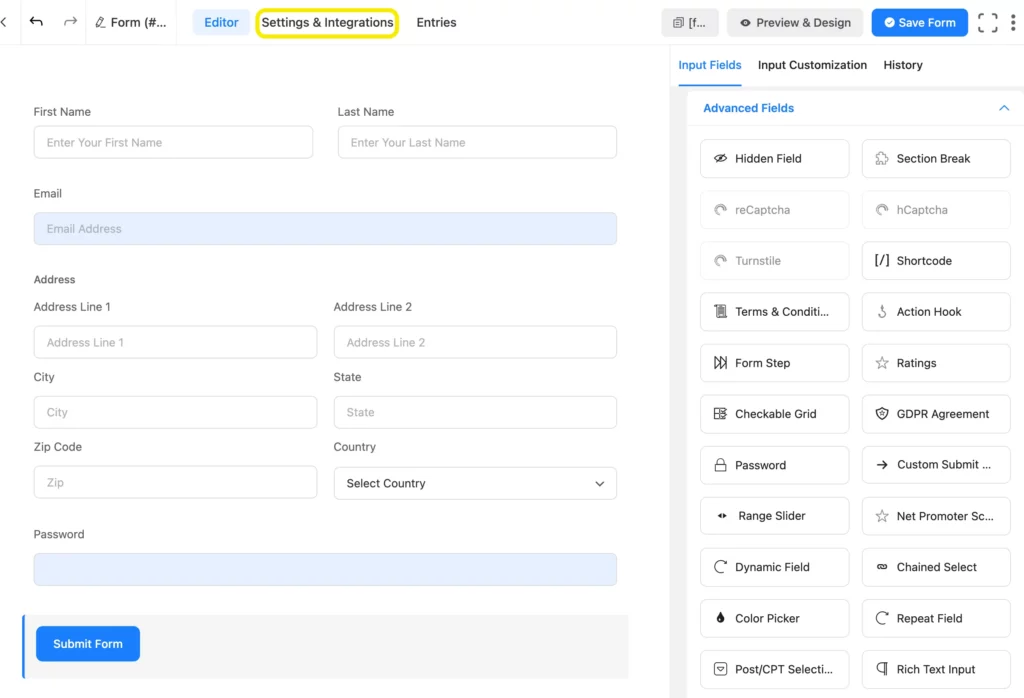
Here, click on the “Form settings” from the left sidebar. Now a new section will open on the right side. You can set all the required options for your form success messages on this page, such as confirmation settings, form layout, scheduling, and restrictions, advanced form validation, survey result, compliance settings, etc.
Confirmation settings
In this section, you can choose the confirmation type and redirection message of your form success message. For example, for the confirmation type, we are selecting the option, “To a custom URL”. Now a new field will open for the URL link. On the redirection message, we have written something for our customers. If you want, you can also add photos to this section. Have a look at the screenshot below for a better understanding.

Form Layout
In this part, you can set the alignment of the confirmation message label, help message position, error message position, and the asterisk position on the fields.
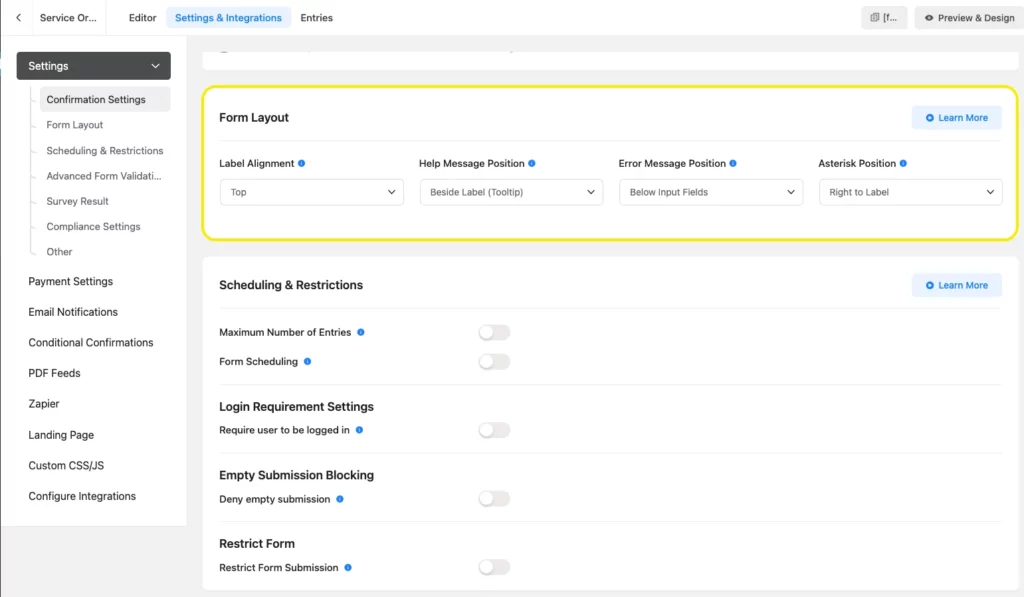
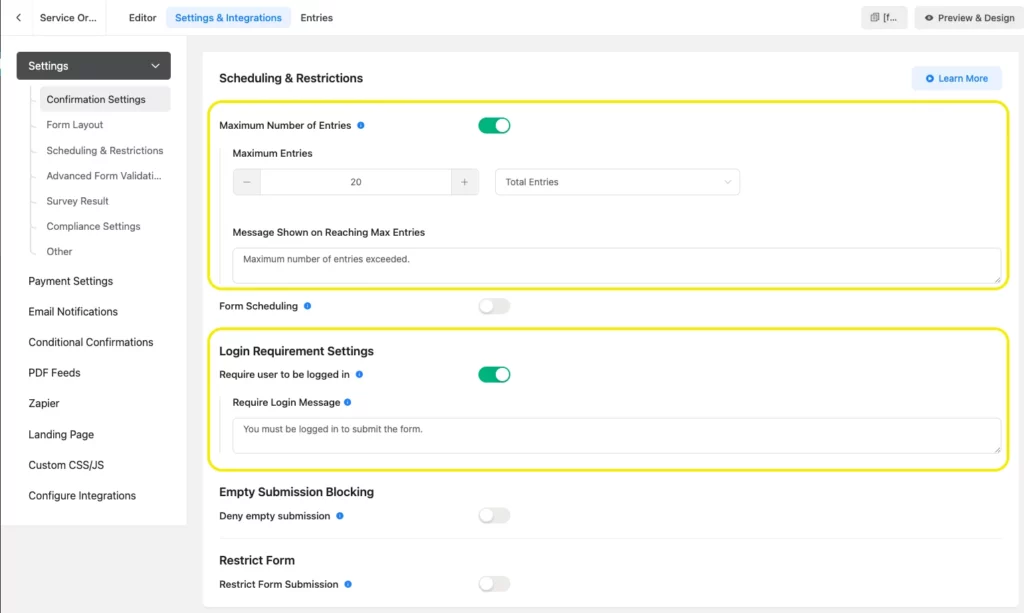
Scheduling and restrictions
Here, customize all the schedules and restrictions for your form, such as the maximum number of entries, form scheduling, login requirements, empty submission blocking, etc. For example, we set the maximum number of entries to be 20 for our form.
Advanced form validation
Personalize the validation type of your form in this section. It means you can set how you want to validate the submissions by clients.

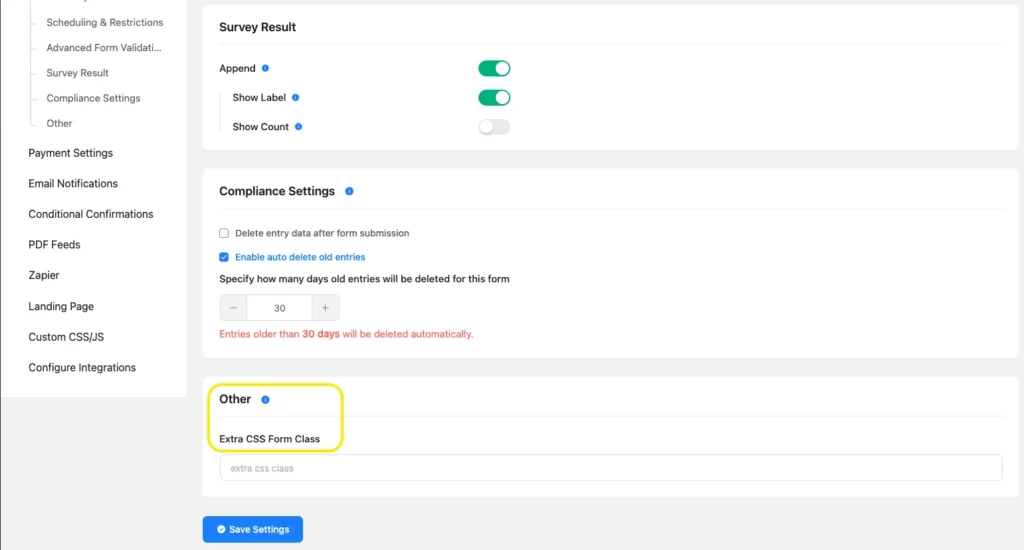
Survey result
This is for adding the survey result, showing labels, and counts of the submissions of forms.
Compliance settings
Once you enable this, it will delete the entry data after the form submission.
Other
Add the extra CSS form class with this field. Once all the settings are done, click on the “save settings” button.
Really easy! Isn’t it?
So, make your form and an attractive form success message with Fluent Forms now.
Enjoying this article?
We regularly publish actionable content on our blog. Subscribe to get them delivered straight to your inbox.
We won’t spam you. You can unsubscribe whenever you want.
Final thoughts
We hope this article has helped you to get some insights into creating a form success message that will guide you to build a better relationship with your site visitors or customers. You can also read the article on creating a CSS form with Fluent Forms for making your forms more attractive.
If you have any questions regarding this post, you can ask in the comments section below.

Hello, This is Prema. I work as a marketing strategist for Fluent Forms at WPManageNinja. When I am not playing with words, I go to explore nature.


Leave a Reply