
Supercharge Your Email Marketing with Campaign Monitor Subscribe Form

You can take email marketing with Campaign Monitor to the next level. This post will walk you through the right process if you want to know how to create a subscribe form in WordPress.
Displaying your subscription form through the whole website can earn you some loyal subscribers to fuel your business for the long run.
In this article, I’m going to explain to you the step by step process of creating a subscription form in WordPress.
Step 1: Create a subscription form in WordPress
Email marketing starts with collecting emails. To do that, you need to display a form where people give their email addresses and let you send newsletters with exciting deals.
We’ll use WP Fluent Forms Pro here. So, install the plugin and activate it from your WordPress dashboard.
After the plugin becomes active, you need to create a form using Fluent Forms, the best WordPress plugin in the market.
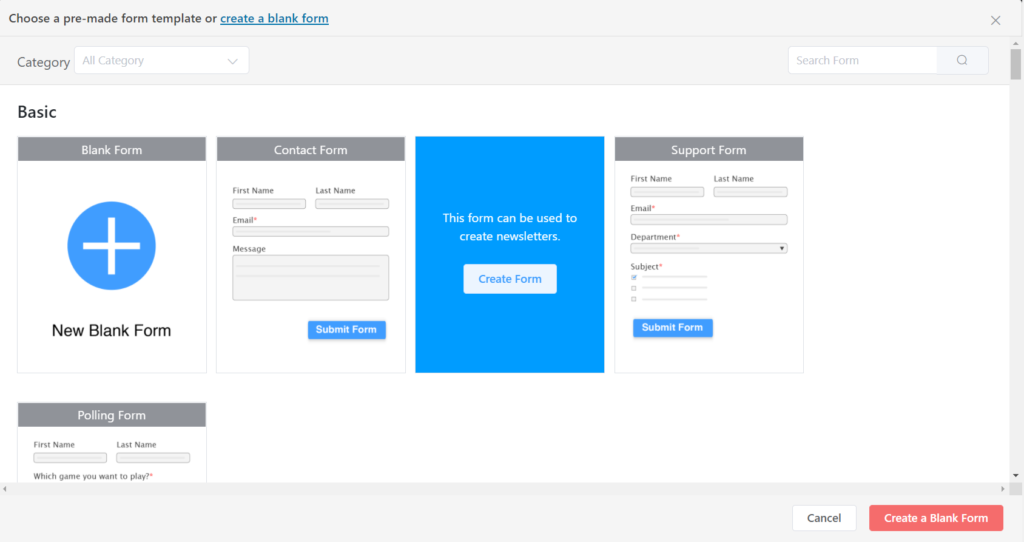
Go to New Form under Fluent Forms Pro on the left sidebar of your WordPress dashboard.
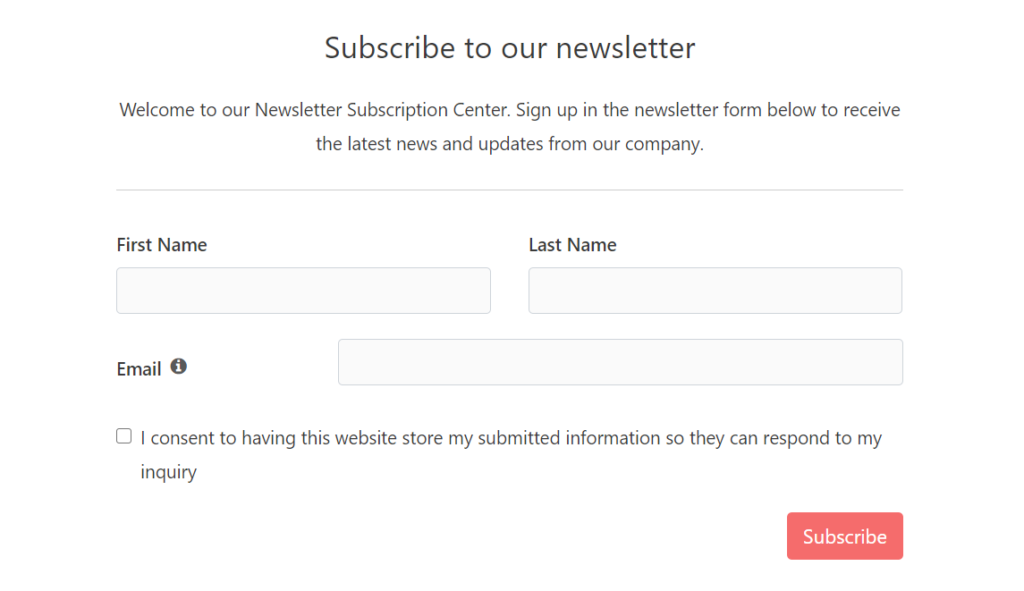
You can see three prepared templates, including a blank form. Hover over Newsletter Form, and click Create Form.
It will bring you to this place.
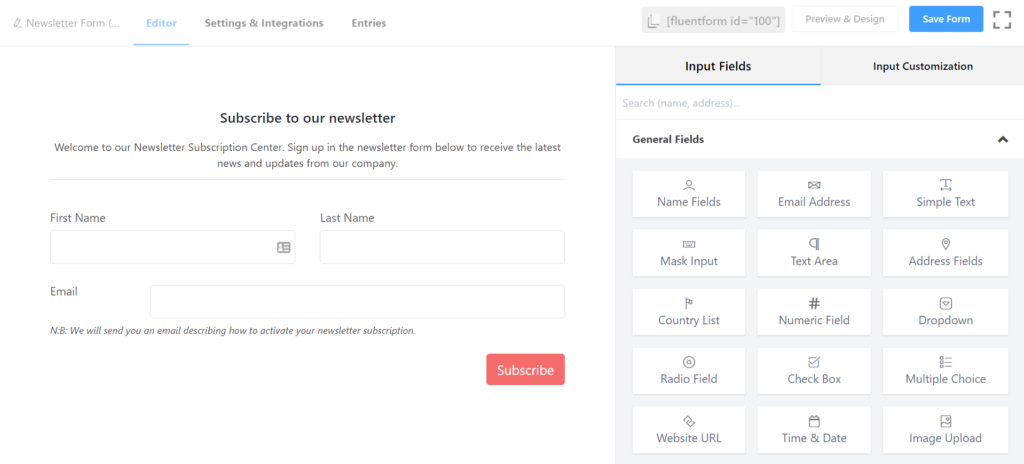
Now, if you want to incorporate any additional fields, click on that from the right-side panel.
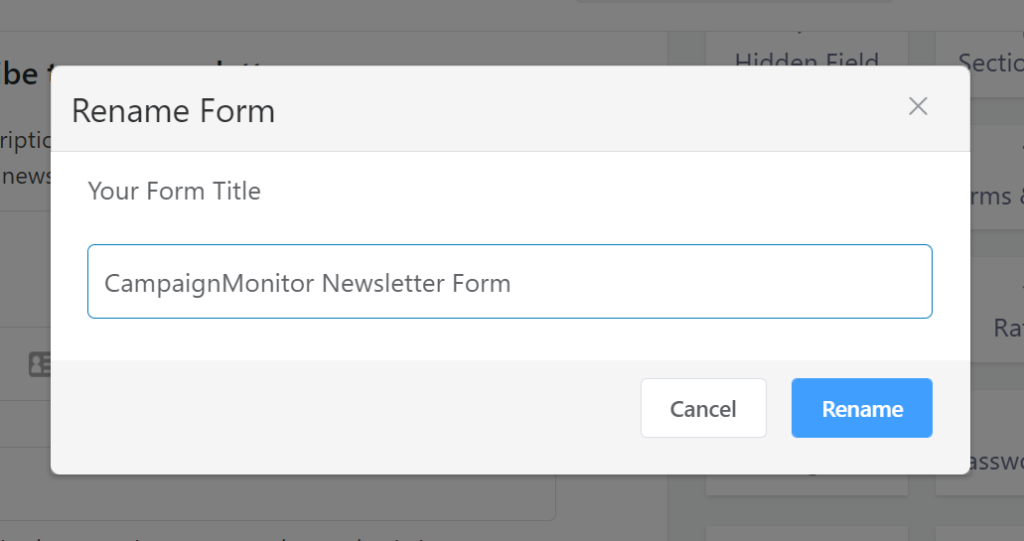
I’m going to rename the form title from the top-left corner for future reference.
Here one thing I wish you don’t miss is including the GDPR field. It allows users to set rules regarding their data privacy.
When you’re done with the customization, click Save Form on the top-right corner.
Step 2: Connect your WordPress form with CampaignMonitor
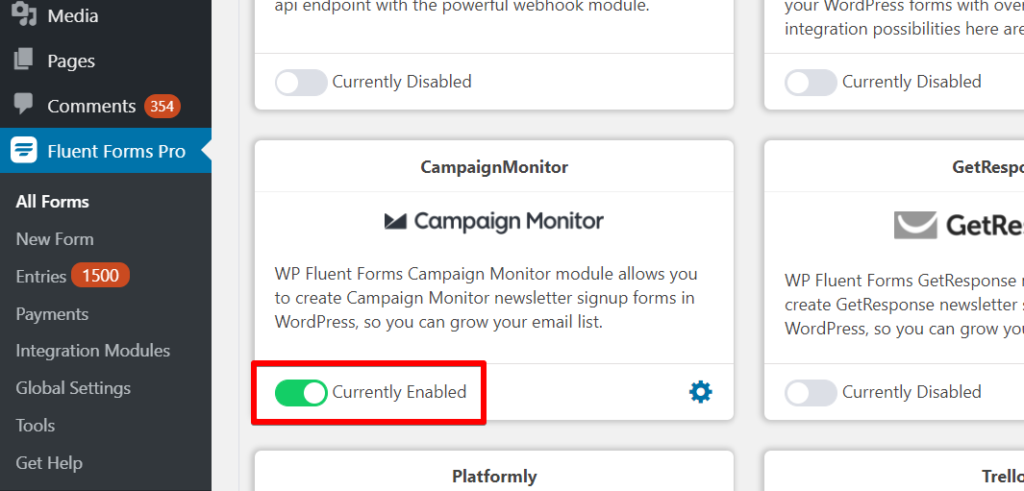
Head over to Campaign Monitor from Modules under WPFluentForms, and activate it.
Let’s click on the gear icon to go to the Global Settings.
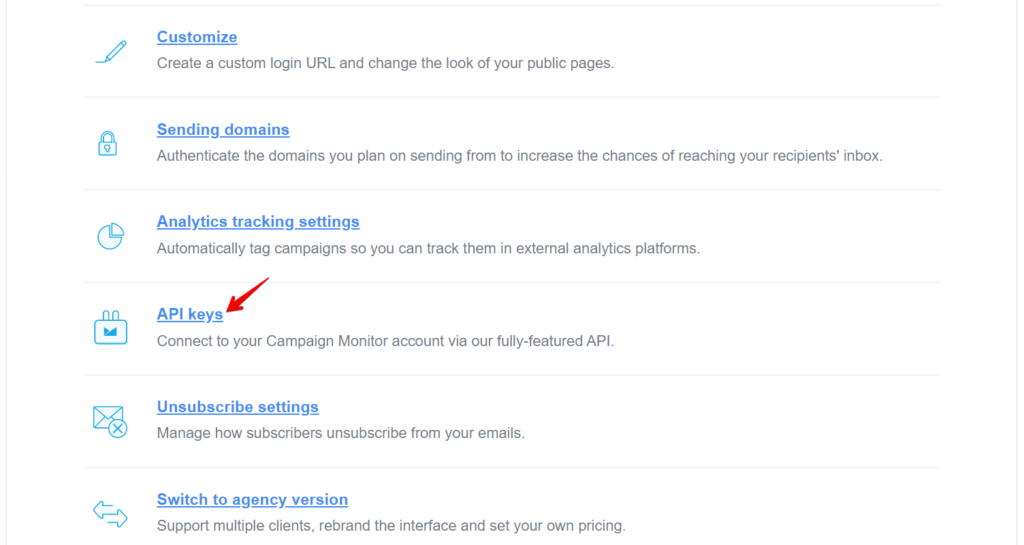
You need your API Key and Client ID from Campaign Monitor. Login to your account and go to Account Settings.
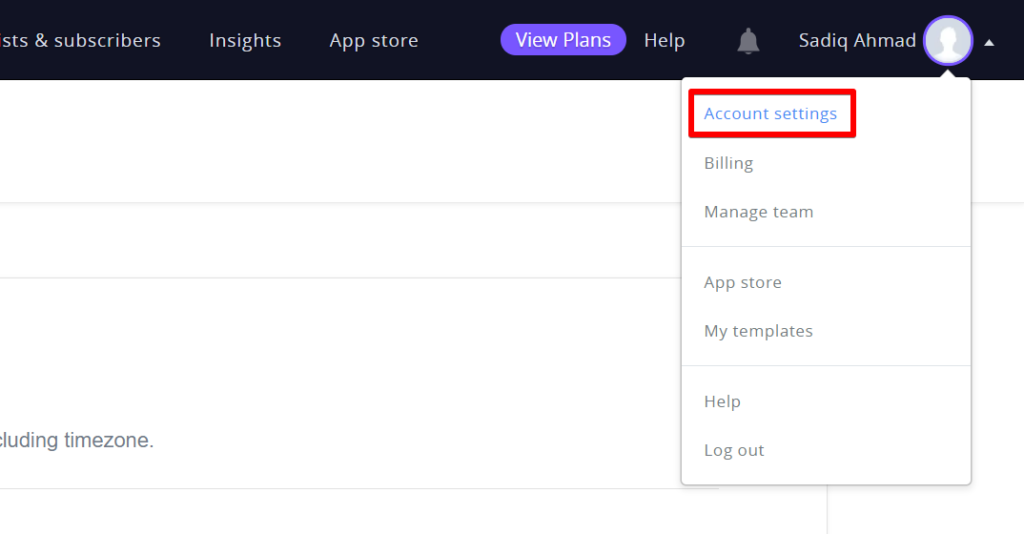
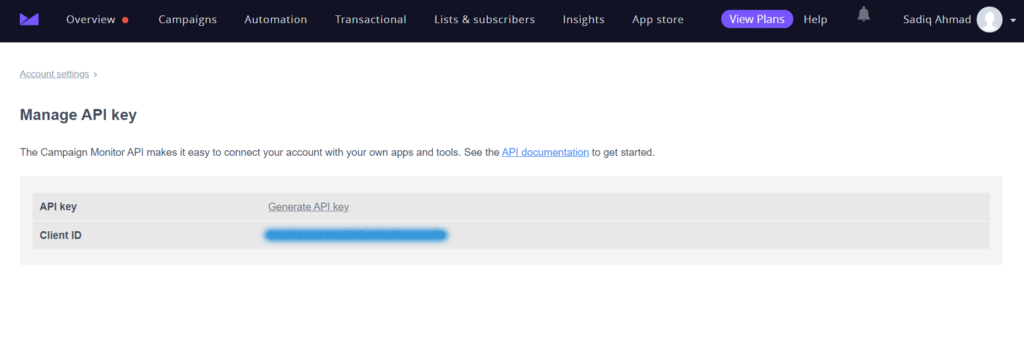
Now, click API keys, and it will open a take you to a new page that reads Manage API key.
Click Generate API key. Copy the key from there.
And, come back to the Fluent Forms dashboard. Paste the key to the respective field. You also have to copy and paste the Client ID to the field after the API key.
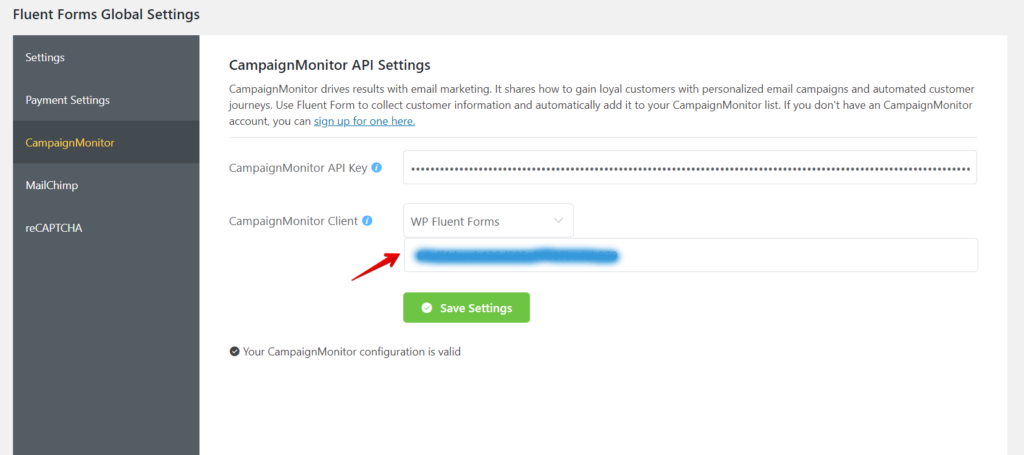
Now, press Save Settings.
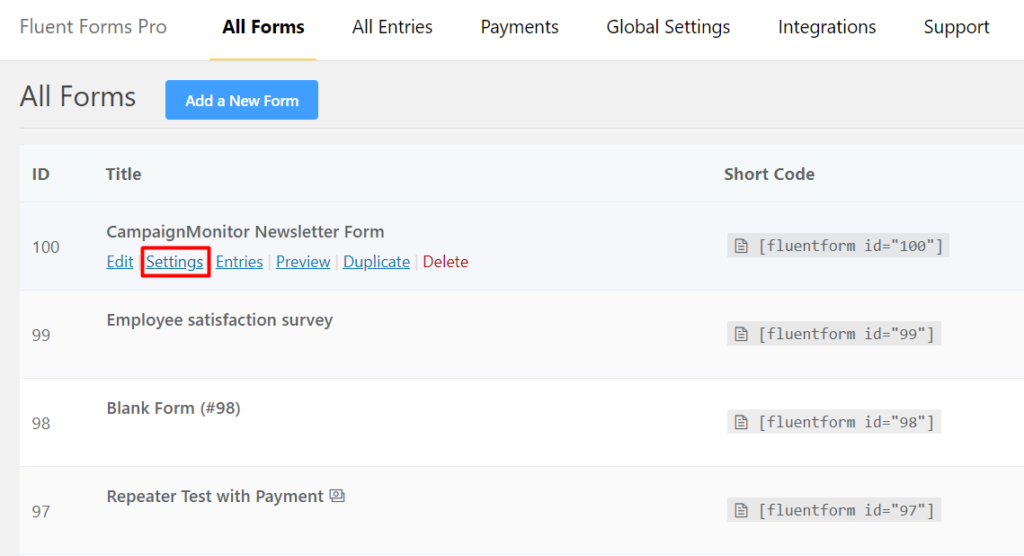
Now, click settings right below your form, under All Forms. Alternatively, you can do that from the Settings and Integrations located on the top of the form editor.
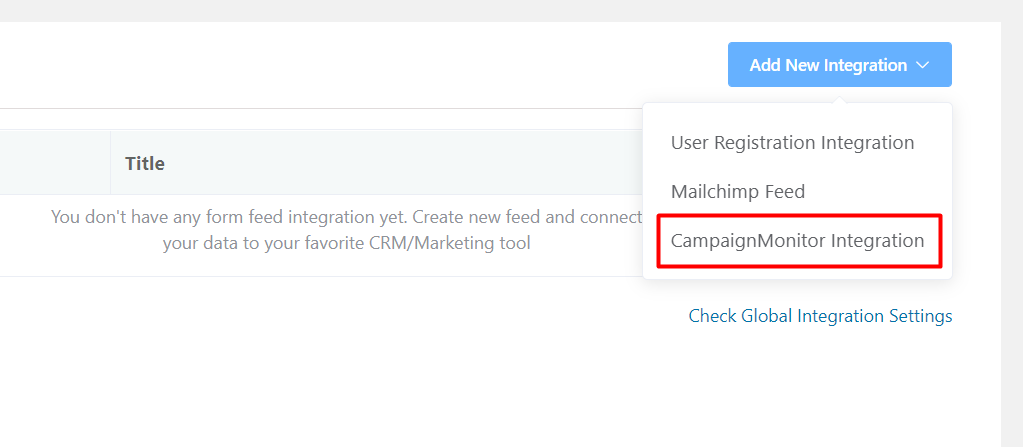
Go to Marketing and CRM Integrations from the left panel. Now hover the blue button that says Add from the top-right, select CampaignMonitor Integration.
Hover on the blue button that reads Add New Integration. From the dropdown, choose Campaign Monitor Integration.
Click the button you see with Create Feed written over it.
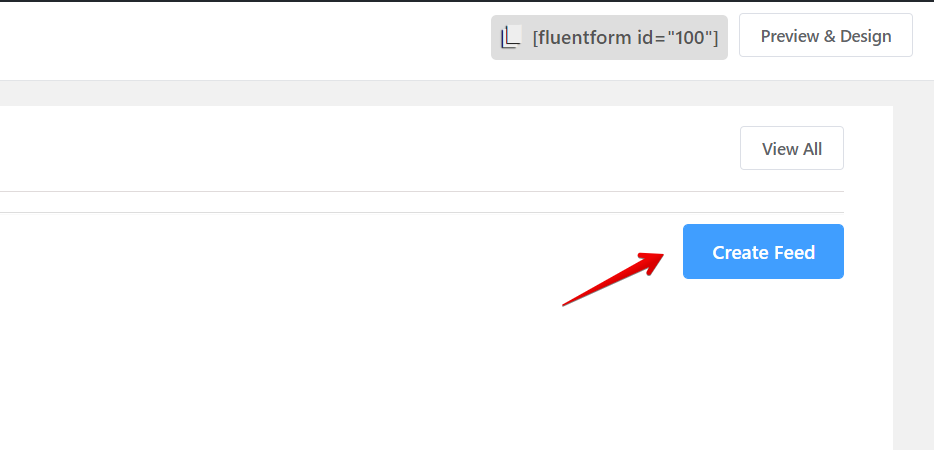
It will take you to the CampaignMonitor Integration Feed. You can rename it if you want. Now, select your CampaignMonitor list. If you don’t have an existing list, click My First List.

For email, choose the Email field, and choose First Name and Last Name or a single one from the second box.
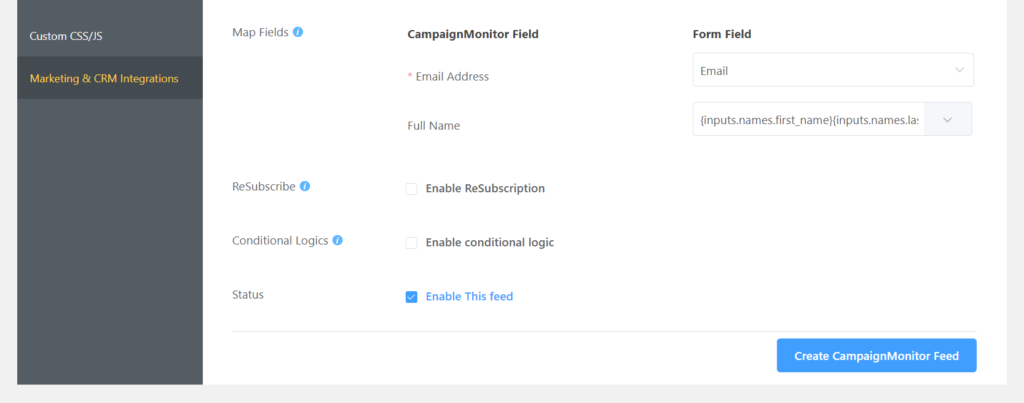
Finally, press the blue Create CampaignMonitor Feed button.
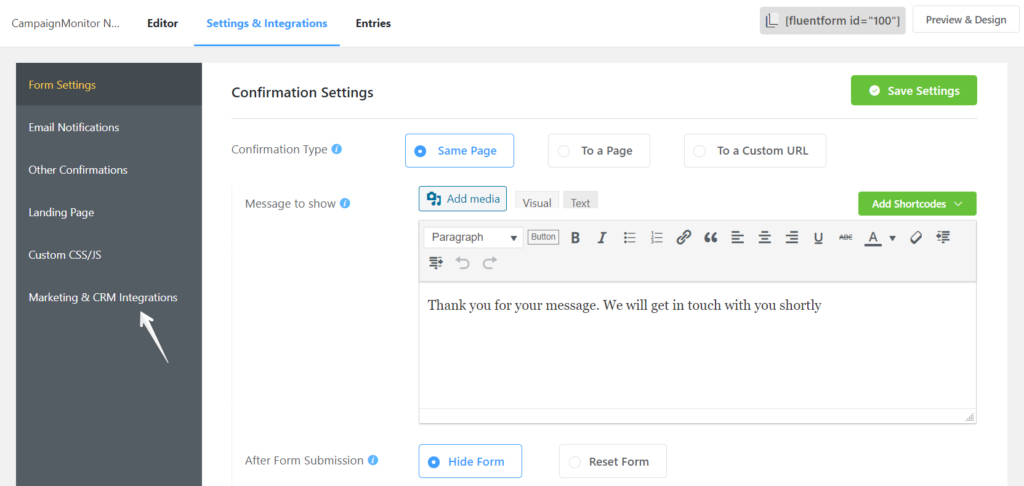
Step 3: Configure form settings and confirmation
Let me walk you through all the options you can see on the Forms Settings, on the top-left side of your form’s Settings & Integrations.
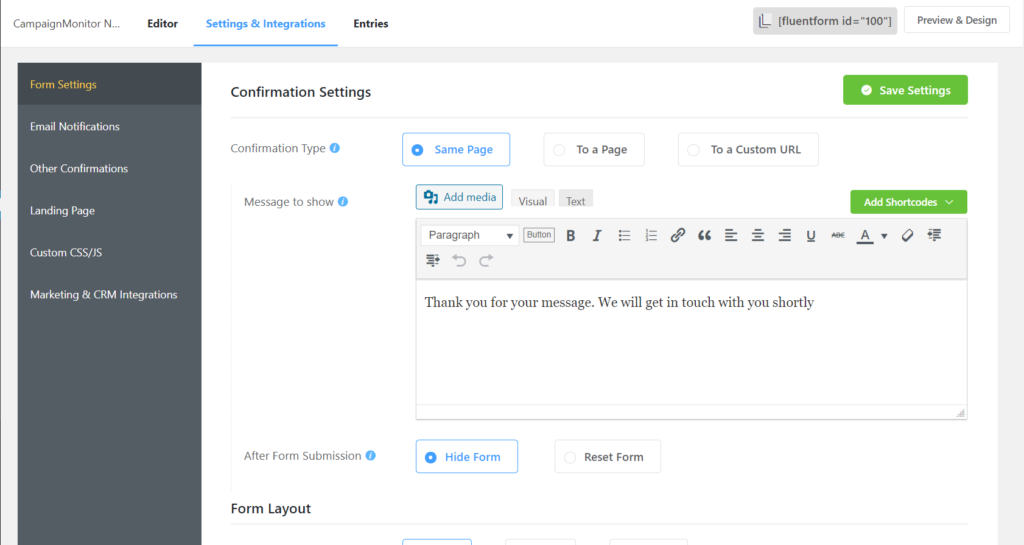
Confirmation Type: You can show the confirmation message on the same page, to another page, or a custom URL.
Message to show: Customize the message with your preferred text. You can even include links and images if you want.
After Form Submission: You can choose between hide or reset the form.
Form Layout: Here, you’ll find several things to do. You can set the Label Alignment, set position for Help Message, Error Message, and Asterisk.
Scheduling & Restrictions: A lot of important things can be done here. First, you can restrict the maximum number of entries, and schedule your form to open at a particular time. You can also require users to be logged in before submitting a form. By enabling Deny empty submission, you can protect your form from spam attack.
Advanced Form Validation: You can set conditions to your form if you want to.
Survey Result: If you switch this, then the survey results will append, and you can further open two options for showing labels and counts.
Compliance Settings: This is crucial for HIPPA and GDPR. If you check the option, all data will be deleted right after submission.
Other: Use this box if you want to input any extra CSS form class.
Once you’re done, click Save Settings.
Step 4: Customize Email Notifications
I also encourage you to enable Email Notification from the left panel of your form’s dashboard. It will send you emails when someone submits a form.
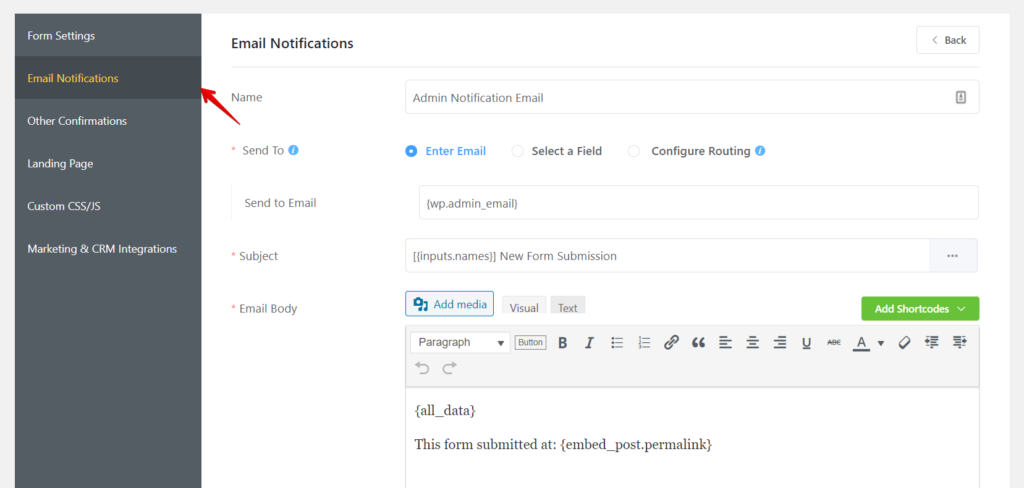
You can select your preference from a lot of options here. Either select a field or an email where the email with submitted information will be delivered.
From the Email Body, choose the shortcodes to filter what particular data you want to be informed with.
When you want to get the email as plain text, check the box from the bottom.
The final part is called Advanced, where you will get more options for admin email notification.
Besides customizing the sender’s name and email, you can also select who you want to reply to, along with BCC and CC.
When you’re done with the configuration, click Save Notification.
Step 5: Include the Campaign Monitor subscription form to your WordPress site
You’ve created and customized your CampaignMonitor subscription form. It’s time to add it posts, pages, and sidebar widgets of your website.
Fluent Forms will let you include the subscribe form to various locations on your WordPress site.
In this section, I’ll show you how you can embed the form into a WordPress post. FYI, you can follow the same step to include it on any page.
To begin, click Posts » Add New from your WordPress dashboard.
Click the ‘+‘ icon from the WordPress block. Search for Fluent Forms, and you can see the logo there. Select it a modal box will be attached to your editor.
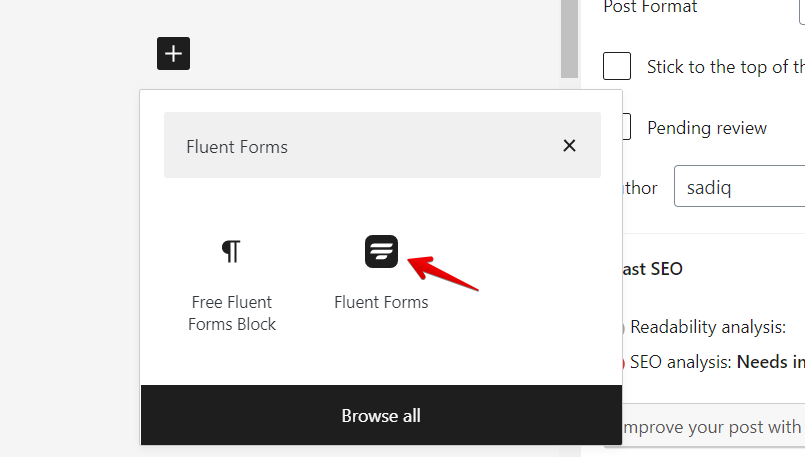
For the next step, click Select a form, and a list will come out with all the forms you have created with Fluent Forms.
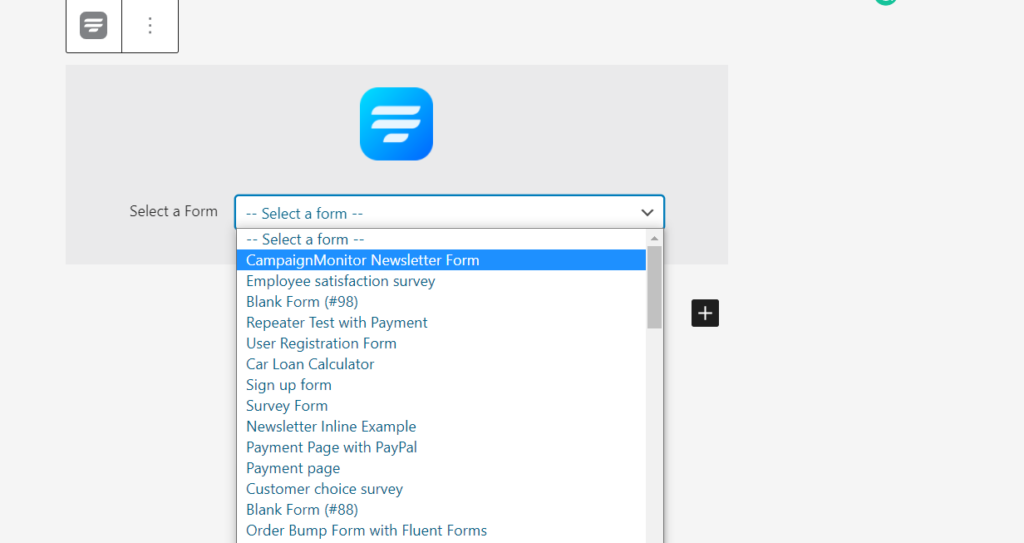
Choose the one you have built for CampaignMonitor. That’s where renaming a form comes real handy!
Congratulations! Now you know you how to create a CampaignMonitor subscription form in WordPress. So, the barrier to start building your email list is unleashed now.
While you’re onboarding new subscribers to your email list, beware of the email unscribes from the beginning. It will help you to run your campaign in the right direction.
After adding subscribers to your list, it’s necessary to know what they want from you. To this, create a survey form with Fluent Forms, and learn from your users without playing a guessing game.
Now you have got everything to tweak your business one step further. Get started with the best WordPress form plugins, and enjoy more ROI with less effort.

I am a fan of ‘WordPress’ and ‘Haevn.’ After spending one-third of my life with WordPress, I can advocate, this CMS lets you create anything you could imagine. Build. Expand. Grow. Hi, my name is Sadiq. I write about WordPress while listening to Haevn.


Leave a Reply