How to Connect Mailchimp to WordPress Forms and Grow Email List
Growing a strong email list is vital for any B2B business, but dealing with slow signup forms and complicated Mailchimp integrations can be frustrating. Poor user experience and messy data syncing waste your time and hurt your conversions.
Luckily, connecting Mailchimp to your WordPress forms can be simple and hassle-free. In this blog, we’ll show you how to easily integrate Mailchimp using Fluent Forms — a smooth, free solution to help you build a healthy, engaged email list.
Let’s dive in!
TL;DR
- Mailchimp helps you build and manage email lists directly from WordPress.
- You can integrate it using plugins like MC4WP, MailMunch, or form builders.
- Fluent Forms offers built-in Mailchimp integration for WordPress sites.
- Connect your Mailchimp account with an API key inside Fluent Forms.
- Create signup forms, map fields to your Mailchimp audience, and embed them anywhere.
- Subscribers sync automatically, letting you automate campaigns and segment lists.
Why use Mailchimp in WordPress for email marketing
Now, the first question that comes to mind: where should I start from, right? You start by choosing a tool for email marketing that can give you a kickstart. And Mailchimp is one of the best solutions for you.
If you’re a WordPress user, then I’m pretty sure you’ve already heard about this amazing tool or using it. You can Google it, but here is a kicker you should know: you can sign up to get your first 500 email subscribers and up to 1000 emails per month for free. It gets crazier as it’s very simple and fun to use. No coding, no hassle, just drag-and-drop, meaning you can add images, caption, text, anything with a few clicks.
How to integrate Mailchimp with WordPress Forms
Mailchimp is one of the most popular email marketing platforms out there, giving you:
- Easy list management and segmentation
- Email automation and drip campaigns
- Pre-designed templates for newsletters
- Detailed analytics to measure performance
But here’s the challenge: Mailchimp form builder is basic and not always smooth. You can create a decent amount of signup forms but the forms can feel clunky, and the customization options are limited – which means you don’t get the best user experience on your WordPress site.
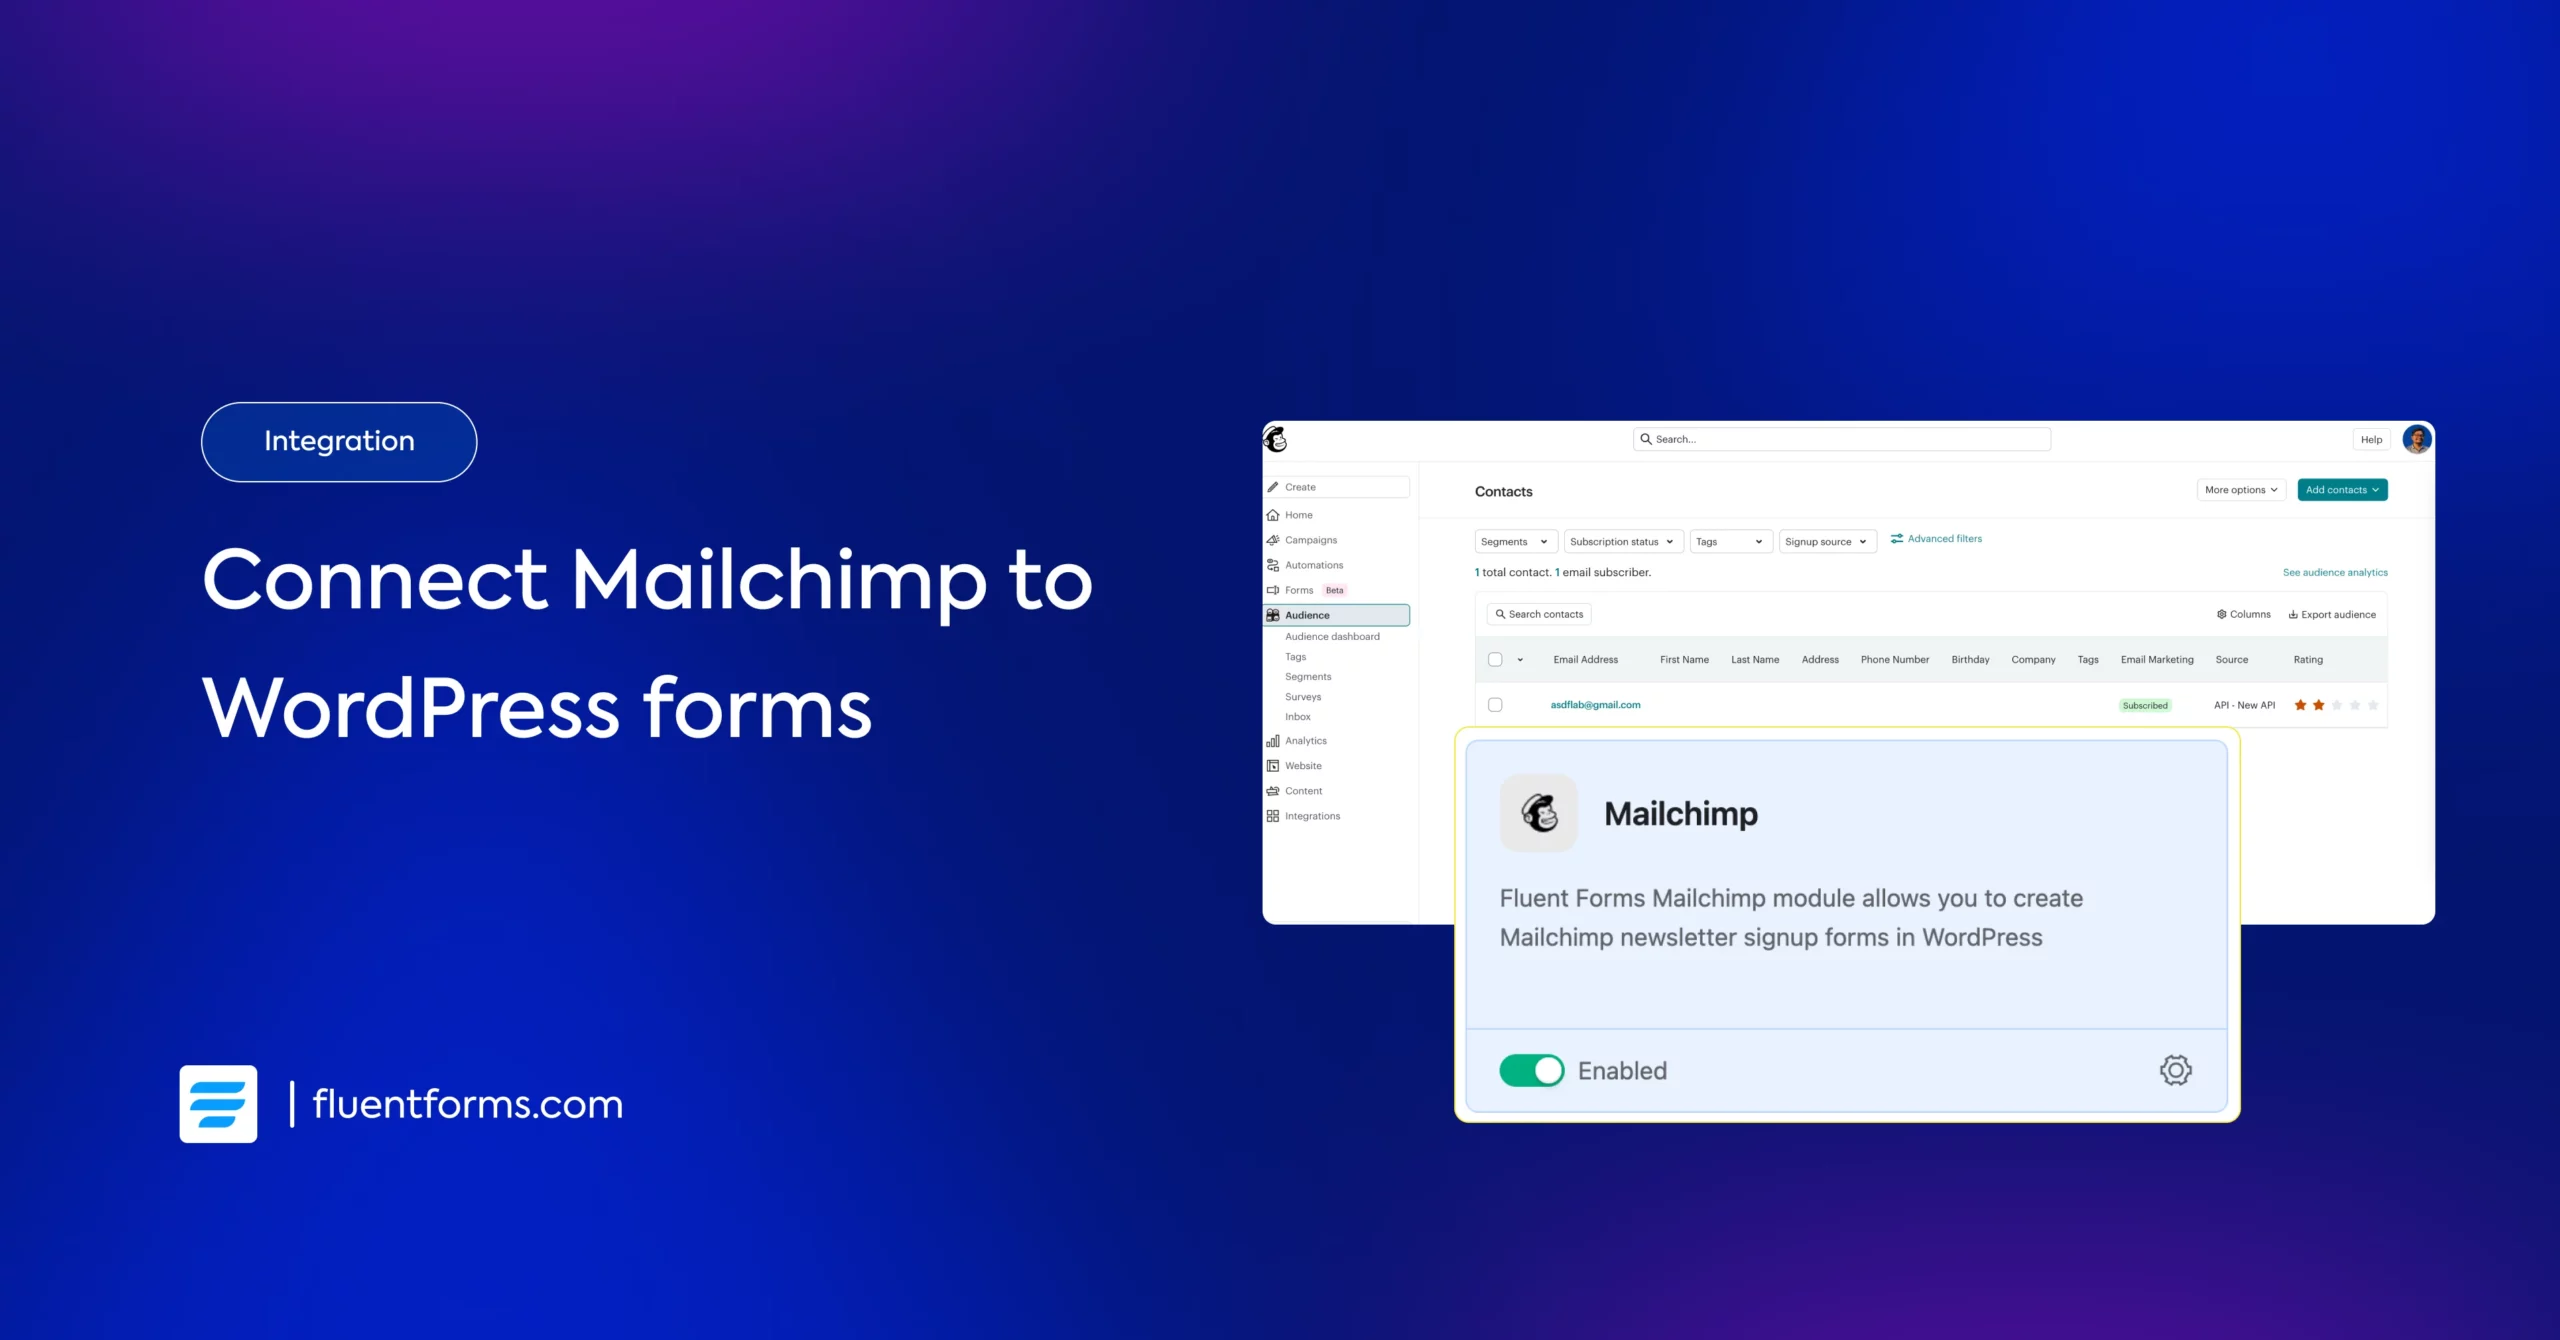
That’s where Fluent Forms makes all the difference. It’s fast, lightweight, and built specifically for WordPress. With the built-in Mailchimp integration, you can:
- Connect your forms directly to Mailchimp with an API key
- Map fields to your Mailchimp audience in seconds
- Segment and sync subscribers automatically
- Create flexible forms that match your site’s design
And the best part? Mailchimp integration comes free with Fluent Forms, so you can start collecting subscribers without extra costs or complications.
Let’s walk through the setup step-by-step.
Activate the Mailchimp Module
Go to your WordPress dashboard and navigate to Fluent Forms from the left-hand menu. Once you’re there, click on the Integrations tab. In the list of available integrations, search for Mailchimp. Once you find the Mailchimp integration module, simply enable it to get started.

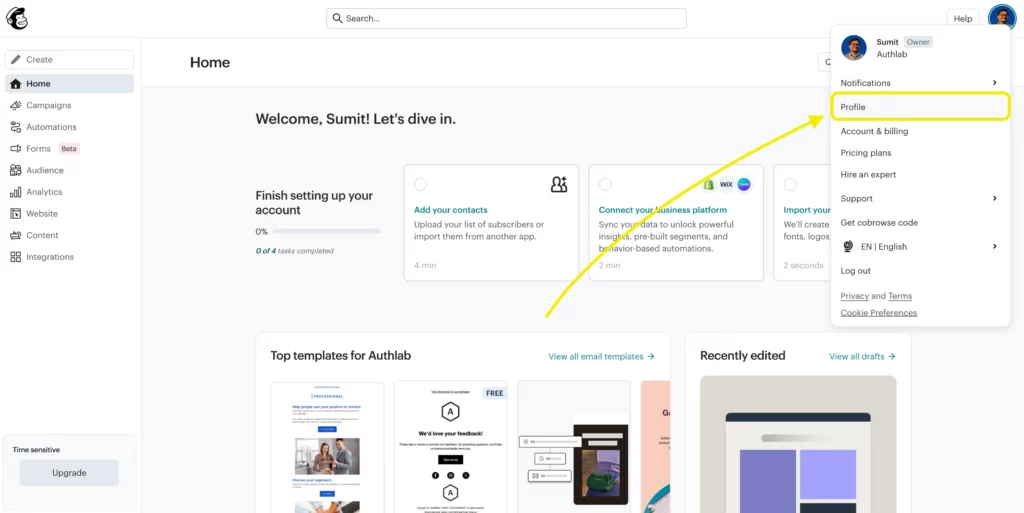
Get your Mailchimp API Key
Now, you’ll need an API key to connect your form with Mailchimp. To generate it, log in or sign up for your Mailchimp account and go to your profile by clicking on your account name in the top-right corner.
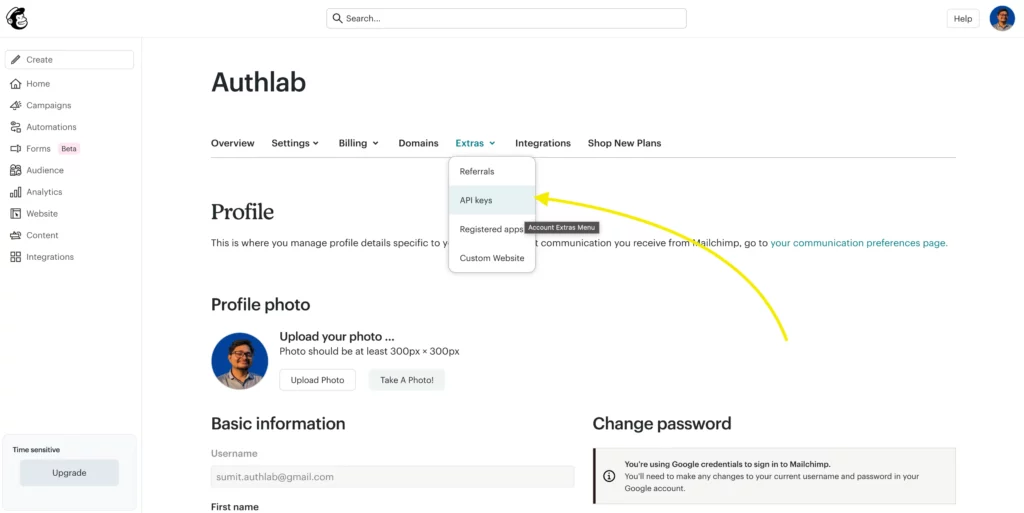
From there, navigate to Account Settings, and under the Extras dropdown menu, select API Keys.
Once you’re on the API Keys page, scroll down a little and you’ll see the option to Create A Key. Click on it to generate a new API key.
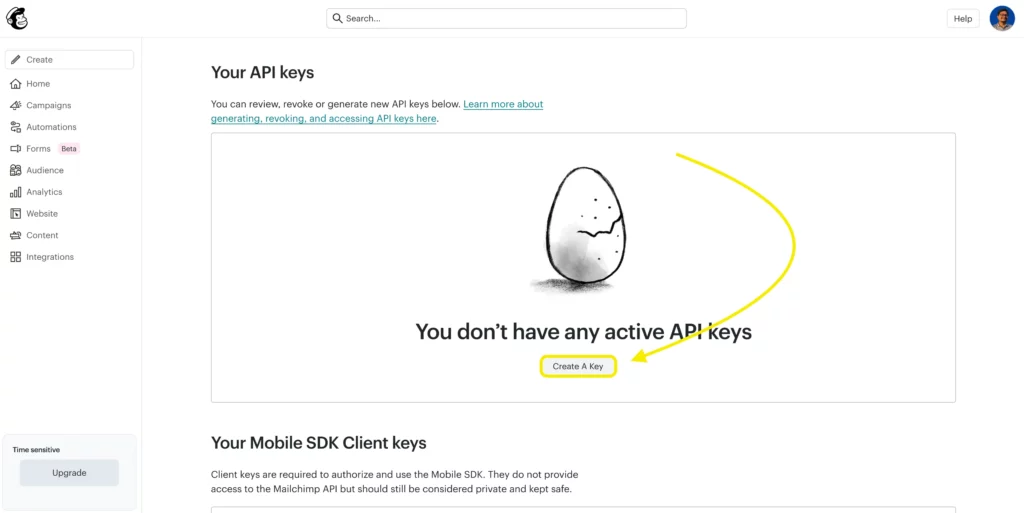
You can give the key a name to help you identify it later, then click Generate Key.
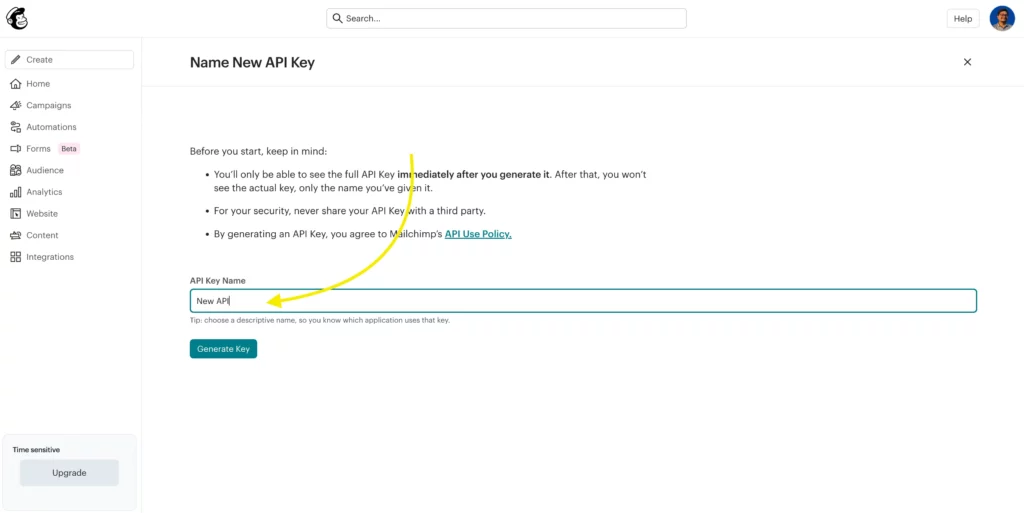
Mailchimp will now create a unique API key for you. Make sure to copy and save it somewhere secure- this is the only time you’ll be able to see the key in full. You’ll need it shortly to complete the integration inside Fluent Forms.
Use the API Key with the Mailchimp module
To use the API Key, head to your WordPress dashboard> Fluent Forms, and click on Global Settings. Here, you’ll find Mailchimp on the Configure Integrations dropdown menu. Click on it and paste the API Key. Don’t forget to save the settings.
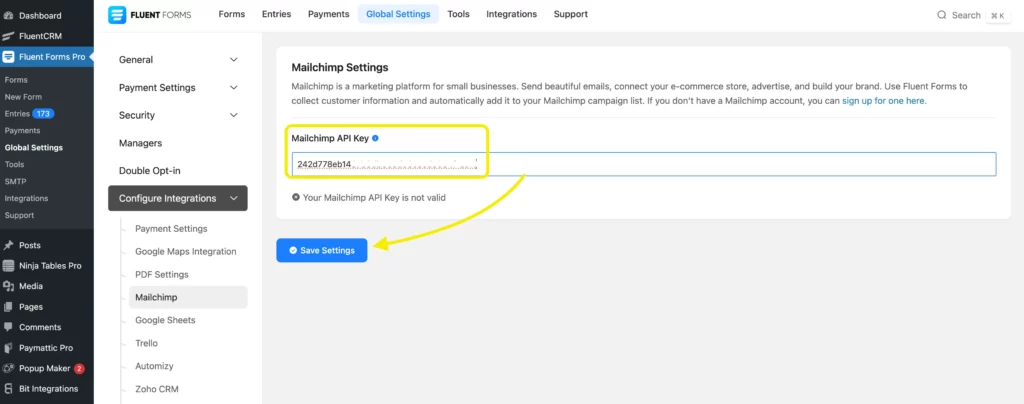
Here’s how a successful connection will look like.

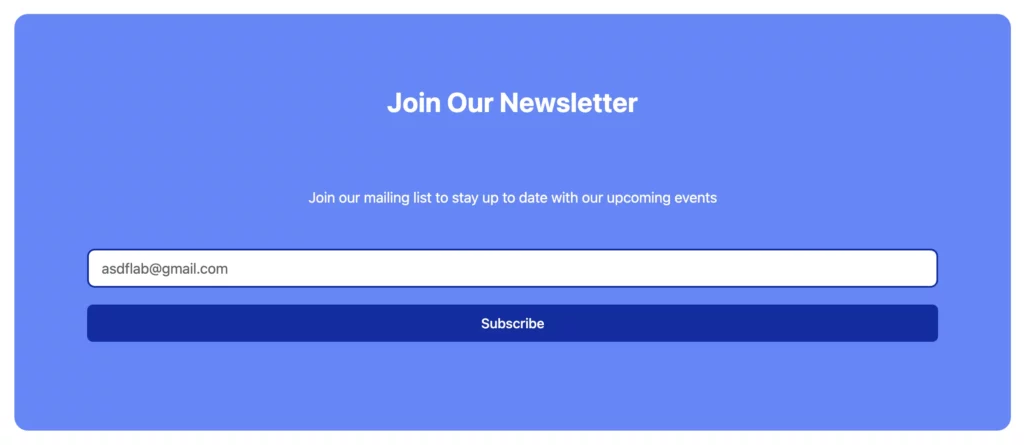
Create/Use a form with Fluent Forms
After successfully connecting Mailchimp to Fluent Forms, let’s test out the connection. Create a form using Fluent Forms. You can create a form from scratch or choose one from pre-built form templates.
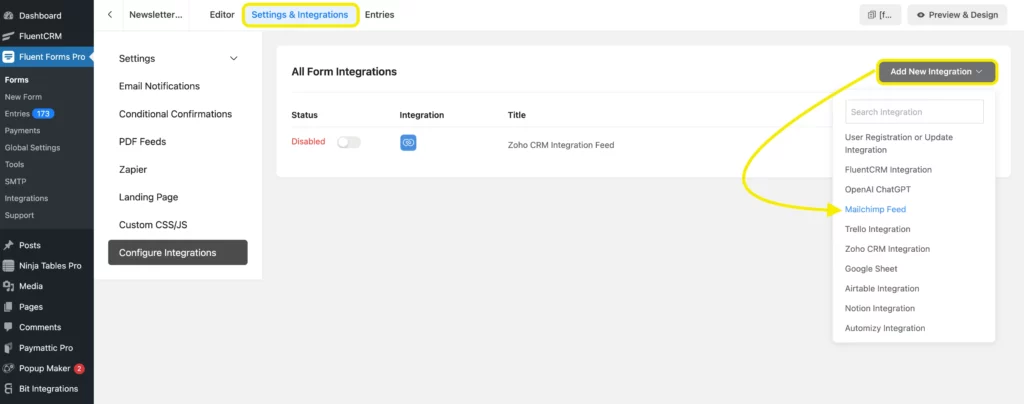
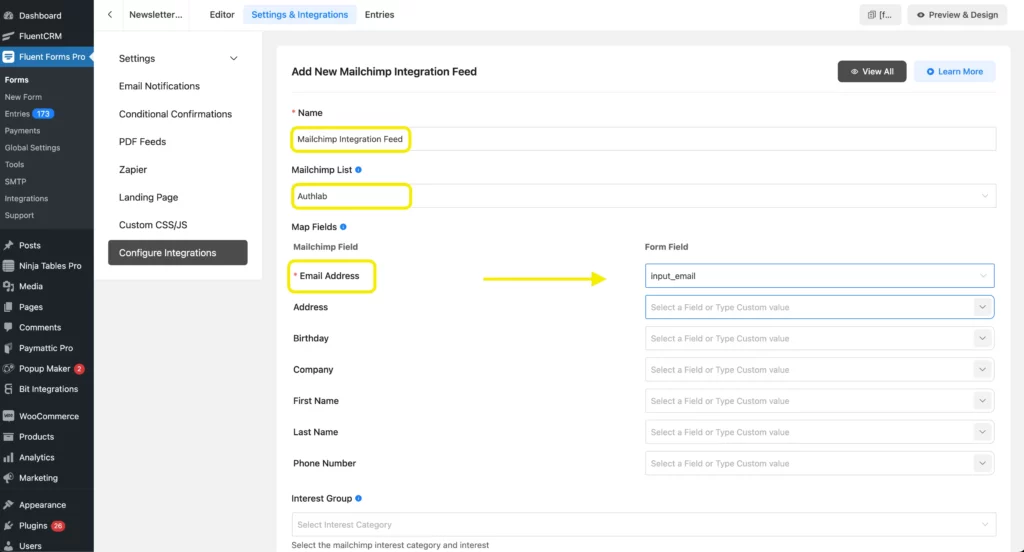
Set up the integration feed and map the input fields
After creating the form, you have to set up the integration feed, and map the corresponding input fields. Go to the Settings & Integration tab of the form you want to set up for Mailchimp.
After selecting Configure Integrations, you’ll be taken to a page like below. From there, open the Add New Integration dropdown menu and choose Mailchimp Feed.
Now, map the input fields as you want, and select the field information that you want to collect. In our case, it was the email field.
Test out the form
Once you’ve finished setting up the integration feed and mapping the necessary fields, it’s time to test the form. Submit a few demo entries to make sure everything is working as expected.
Then, log in to your Mailchimp account and navigate to the Audience tab from the left-hand menu. There, you’ll be able to see all the submissions that were successfully collected through your form.

And it’s done!
Mailchimp integration complete – Time to grow
Connecting your WordPress forms to Mailchimp isn’t just a technical task – it’s the first real step toward building a stronger, more engaged email list. Now that everything is set up, you’re ready to start turning form submissions into loyal subscribers.
Try Mailchimp integration with Fluent Forms, download free!
Build Smarter Forms for Free

Still figuring things out or wondering how this could work for your specific use case? Drop your questions in the comments. We’re here to help!

This is Sumit. He’s a physics major who’s trying to understand both the physical as well as the WordPress worlds. Whenever he’s not busy, plays fifa or spends time with his family.


Leave a Reply