How to Create a Sponsorship Form in WordPress
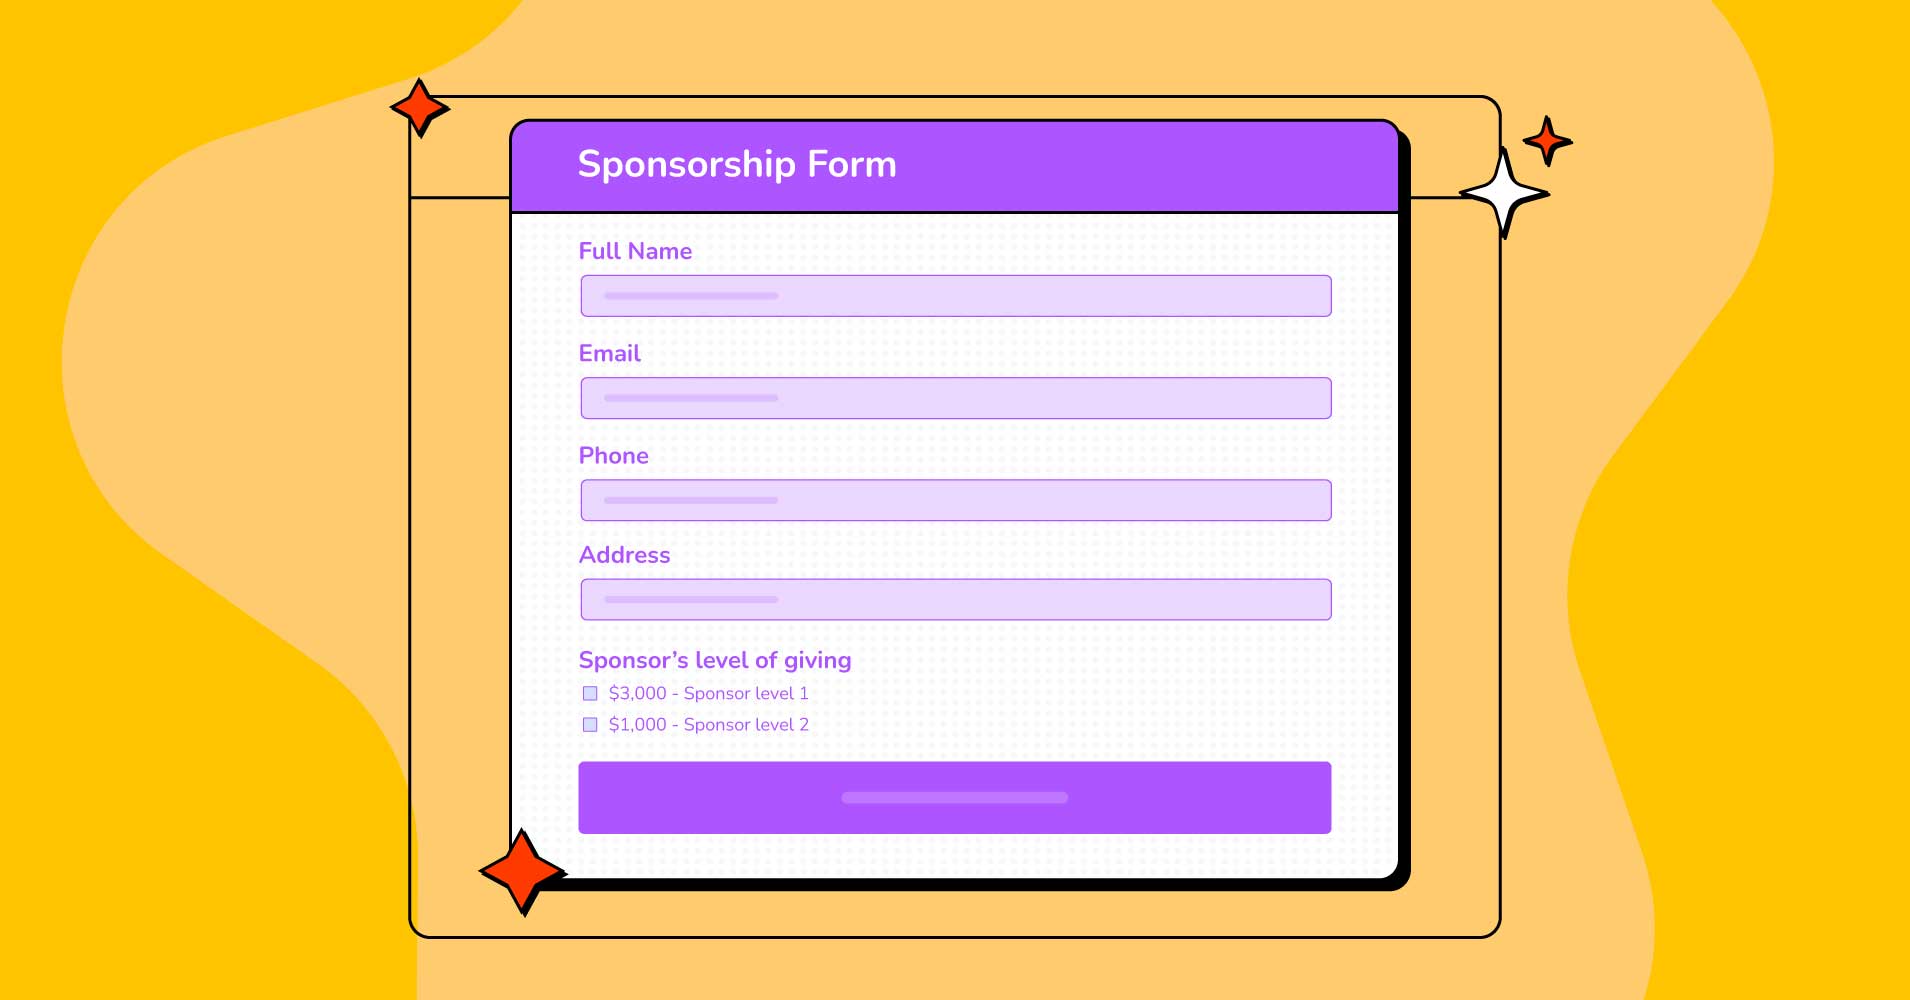
Looking to get more sponsors for your business or an event? Whether you’re a host, an athlete, or run a non-profit organization, you just need a straightforward and aesthetically appealing sponsorship form to collect detailed information about your sponsors.
Sponsors are important in connecting companies and people to fund events and create long-term monetary support pipelines. To grow as a company or individual, attaining sponsorship and generating continuous cash flow is beyond description in this competitive era. That’s why you must create beautiful sponsorship forms to grab their attention and get the deal you want.
Fluent Forms is the most beginner-friendly form builder. Download now and start crafting beautiful forms FREE!!!
There are hundreds and thousands of sponsorship form templates out there. Some of them are free, but you can’t find everything you want in those free template forms. Why limit yourself when you can build your own free sponsorship form, customize, repurpose, and use it whenever you want?
What’s a sponsorship form
Sponsorship forms are used to forge valuable partnerships between communities, individuals, or companies. A sponsorship form outlines the agreement reached between two parties and details what the sponsor will get in return for their investment.
This is a signed agreement between the sponsor (who agrees to donate money or facilitate something that helps to organize the event) and the sponsee who receives that money or aid. This agreement or contract can happen between two individuals or one organization and an individual or two organizations. A sponsorship form is nothing but an act of collaboration and commitment between the sponsee and the sponsor.
Why use a sponsorship form template
When you need to maximize your reach, using a digital sponsorship form is the most convincing way to nurture your potential customers. To do this, you need to create a form from scratch or choose a sponsor request form template online. However, sometimes choosing the right template can be daunting as you can’t find the right fields or have to customize the form for yourself. If you use a secure online form builder, it can be so much easier for you to collect all the necessary information.
How to create a sponsorship form
Follow these simple steps to create an authentic sponsorship form template all by yourself. Without wasting another breath, let’s jump right into the process.
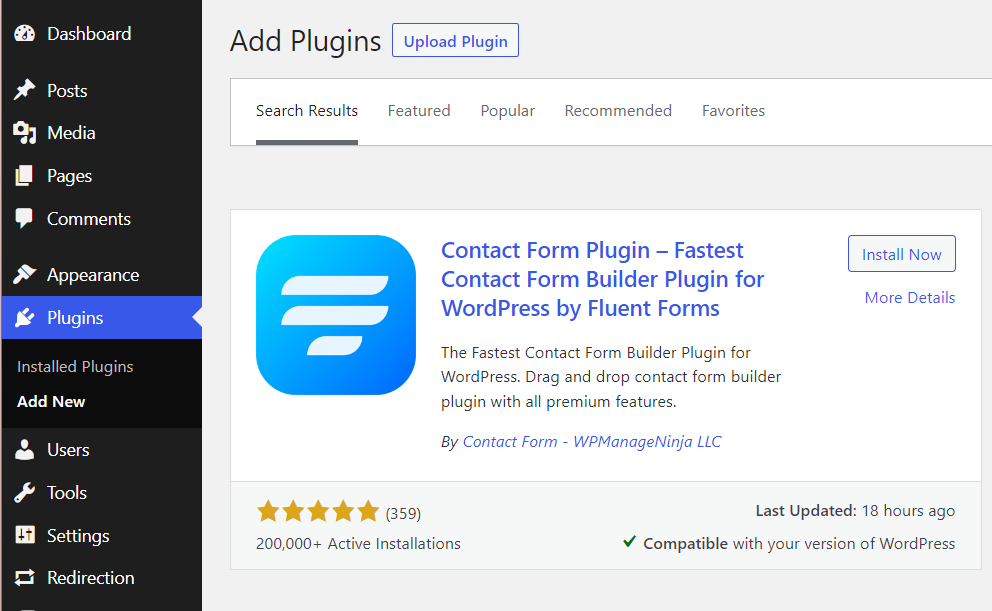
Step 1: Install and activate Fluent Forms
Using Fluent Forms is the easiest and most straightforward way to create an online sponsorship request form in WordPress.
It has a whopping 50+ input fields with a ton of features and integrations. 200K+ businesses trust Fluent Forms, and it has a variety of templates for different niches. From quiz to survey poll, payment form to simple subscription, multi-step form to interactive conversational one, rsvp to order form, you name it – Fluent Forms can do everything and more.
You must install and activate Fluent Forms first to create your desired sponsorship form template for an event or a simple collaboration.
Nothing special; it’s just like installing any other plugin on your WordPress site. For more details, see our step-by-step guide on how to install Fluent Forms in WordPress.
Step 2: Create a sponsorship form template
If you don’t know the must-have fields of a sponsorship form. You can take inspiration from other forms before making one for yourself.
The basic fields must have in a sponsorship form are
- Name
- Phone
- Address
- Checkbox (preferred contact method)
- Textarea (for additional information)
- Dropbox (for sponsorship level)
- eSignature – pro addon (if needed)
You can always find these fileds in the freemium version of Fluent Forms. No need to spend a dime; you can create a sponsorship form for free anytime you want.
However, sometimes you need to create a form with payment and e-signature fields. Fluent Forms got you all covered.
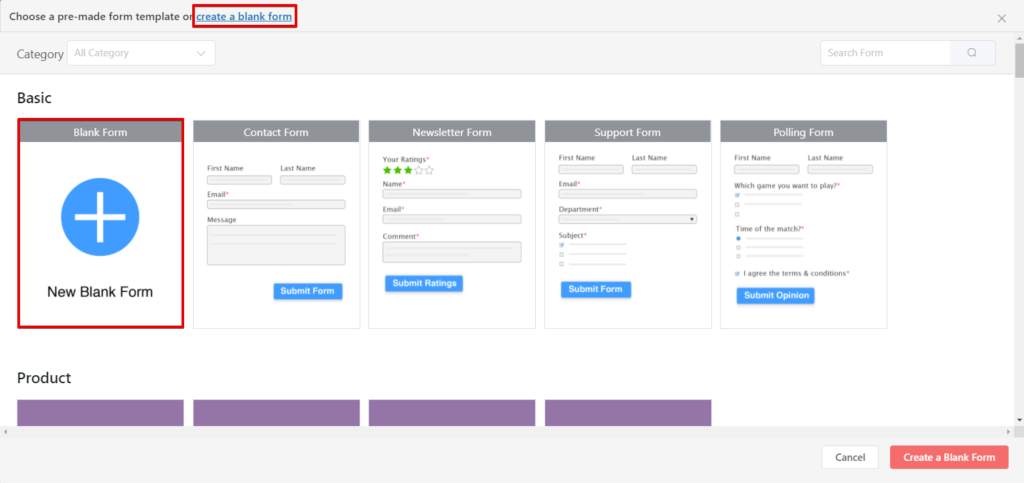
Go to All Forms from your Fluent Forms dashboard and click on the Add a New Form button. A popup with premade form templates will appear on your screen. As we’re creating from scratch, click on the New Blank Form with a huge plus sign tab.
Now add your required fields to your form. To add fields, just click on the field name from the right side or drag and drop the field you want to be in your form.
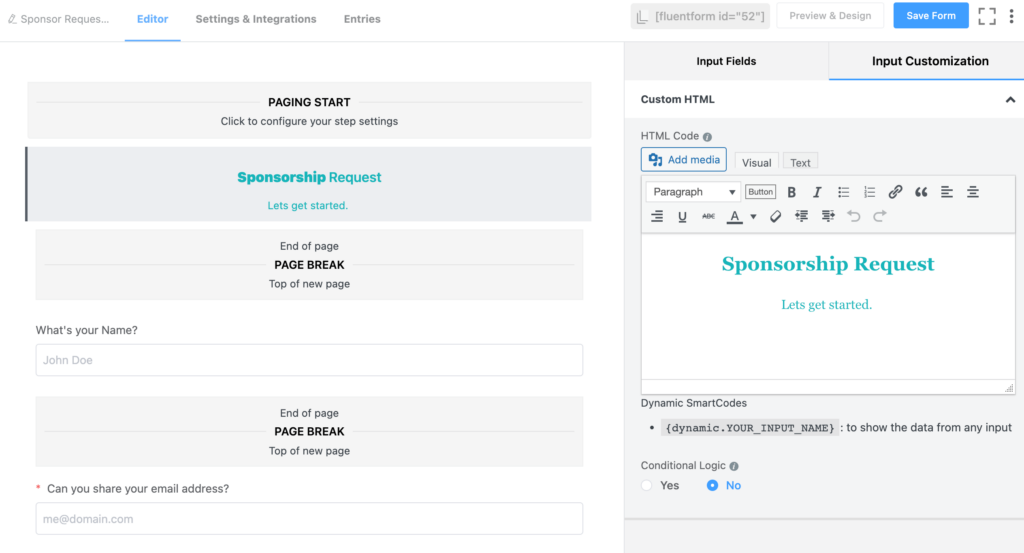
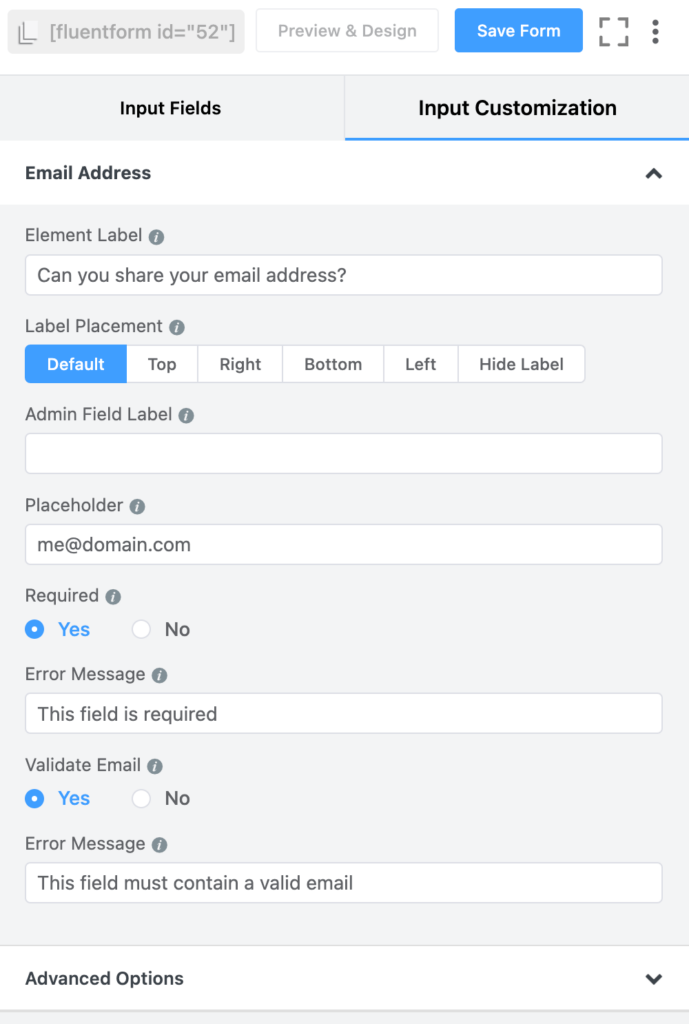
We’ve added a name, email, phone, and address field first. You can easily change the Element Label name, change the Label Placement, give a Placeholder, or make the field a must-fill in one as per your need. You just need to click on the field, and an edit section will appear on the right side.
If you add multiple choice, checkbox, and/or radio button field(s) to your form, you can change, add, and shuffle the options according to your need. Multimedia is supported too, if you have any ideas to add them.
When your sponsorship form looks the way you want it to, don’t forget to hit the save button from the top corner.
If you want to sneak peek at your form and customize the design, the Preview & Design button is right beside the Save Form button.
Step 3: Customizing your Sponsorship form
To customize your form, you can do whatever you want with Fluent Forms. Field customization is as easy as pie. Just click on the field you want to customize, and you can see an edit section on the right side of the screen.
If you want to make a field mandatory to fill in, you can select the required option from “Yes.”
For the name field, we selected only the First and Last names. You can add the Middle name input if you want. And the label placement we kept default.
For the email field, we made a mandatory field as you’ll like to know the email address of who is going to provide a sponsor for your event. Moreover, you need to keep in contact with them, and email communication is still the best and most convenient way in this matter.
For the address field, we just kept one Address line along with the City, State, Zip, and Country option. You can add Google Maps if you want in your Sponsorship form. But we’d like to keep it simple and nifty.
Now you can also add Conditional Logic to any field and show them if they meet the conditions.
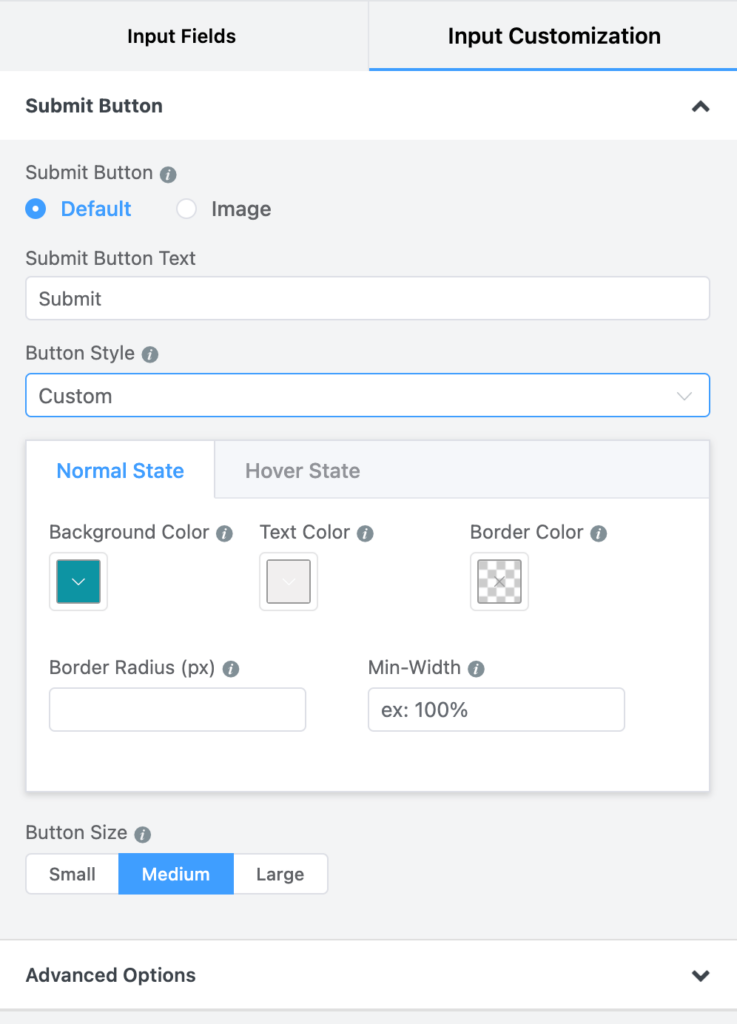
What if you want to modify the Submit button of your Sponsorship form? Just click on the button, and you can add images, color, and change the style, size, alignment, and button text as you like. Submit button plays an important role in form submission. Take some to design your submit button to make your form more lucrative.
As the design aspect came up, you should learn how to design your form to make it stand in the crowd.
Step 4: Design your sponsorship form
If you’re done with your form customization, hit the save button. Time to show your designing skill (not necessary). Click on the Preview & Design button, and you’ll be redirected to another page.
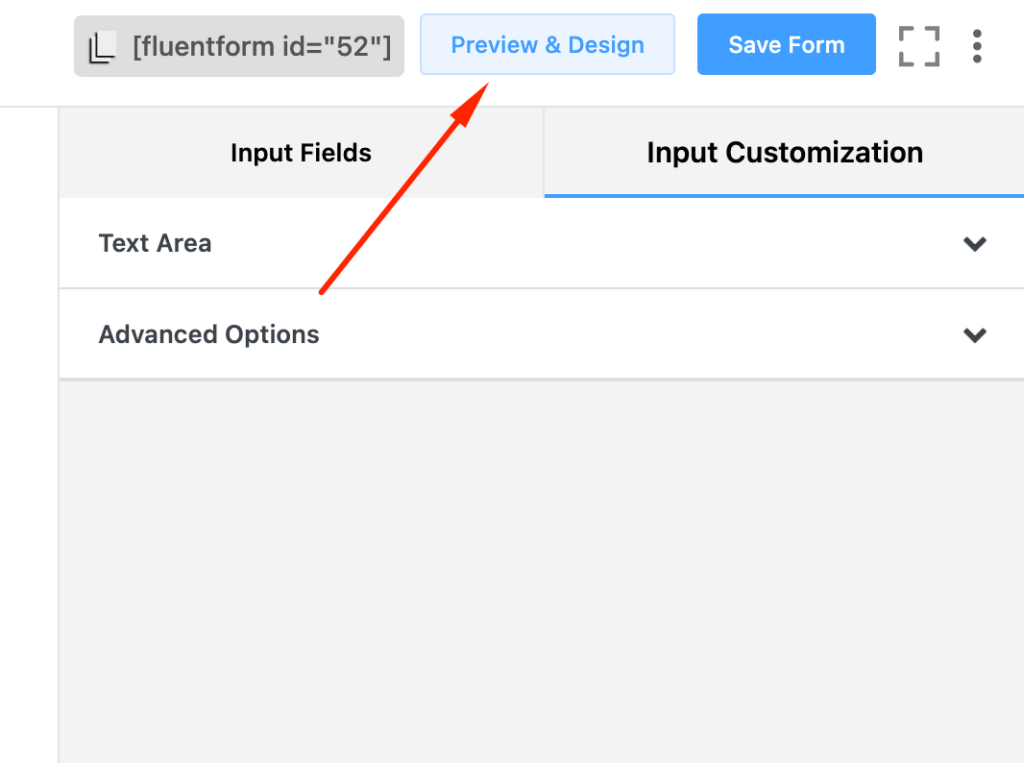
Here, you can change the form’s style, container’s background color, margin & padding, and even change the Asterik style and After Submit Message style as you like.
You can create a conversational form to make it an interactive one and boost your submission rate.
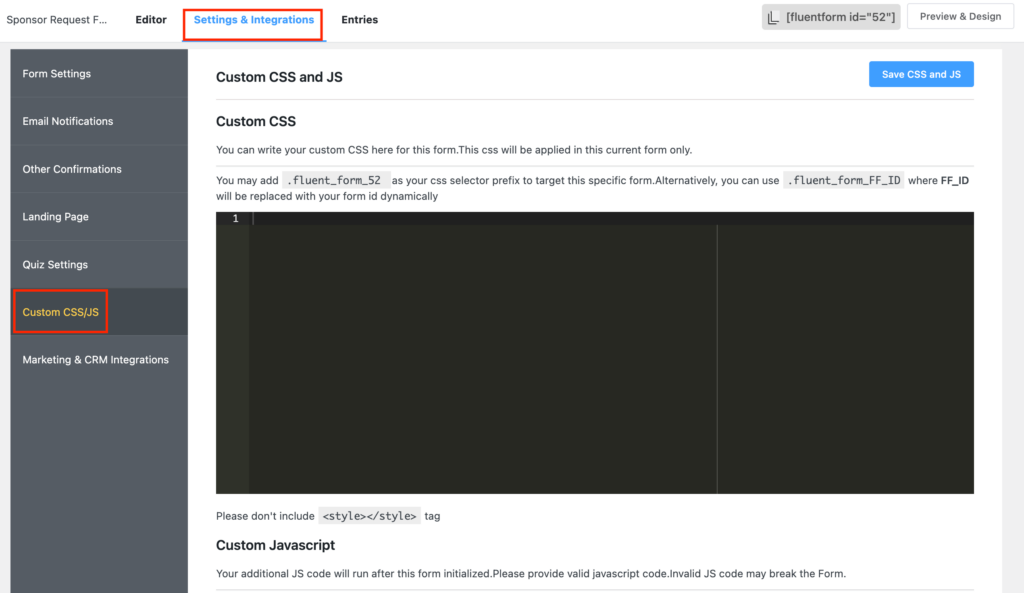
You can add additional CSS and JS to your form. To do so, go to that form’s Settings & Integrations page and click on Custom CSS/JS. There you go, innovate and implement.
Step 5: Configure your sponsorship form’s confirmation
Form confirmation is very important to ensure people that the form is successfully submitted and let them know what the next steps are.
An organized and visually appealing confirmation message can help get the desired sponsor for your event.
Fluent Forms offers 3 types of confirmation with a bunch of options to play with. Add your confirmation text, design them, or add a button to the message as well.
You also have full authority set hide or reset the form after submission, enable double optin confirmation, and so on.
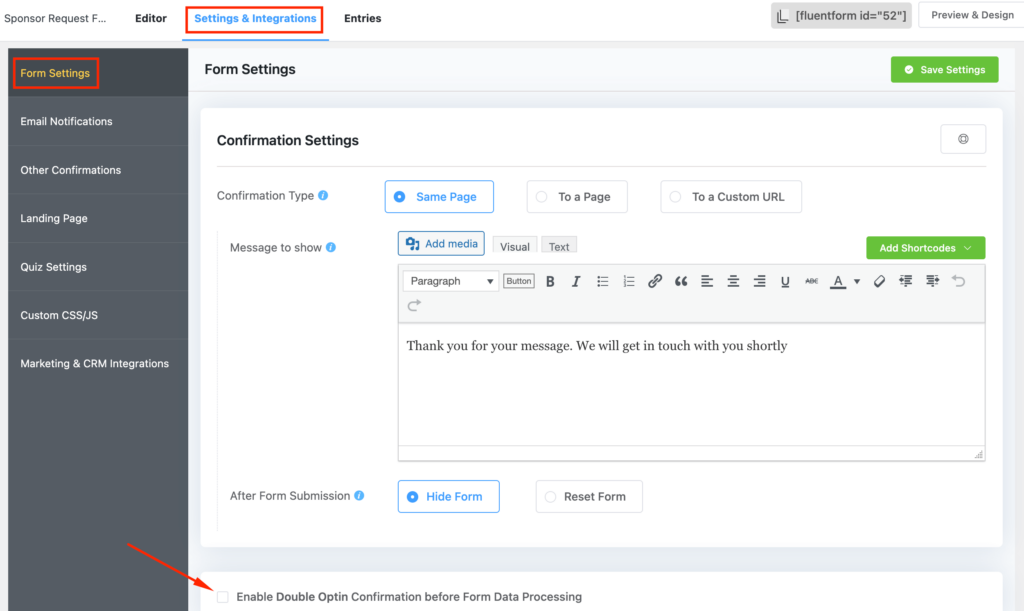
You can set a different confirmation message from Other Confirmation if you want to show a customized confirmation message for a certain group.
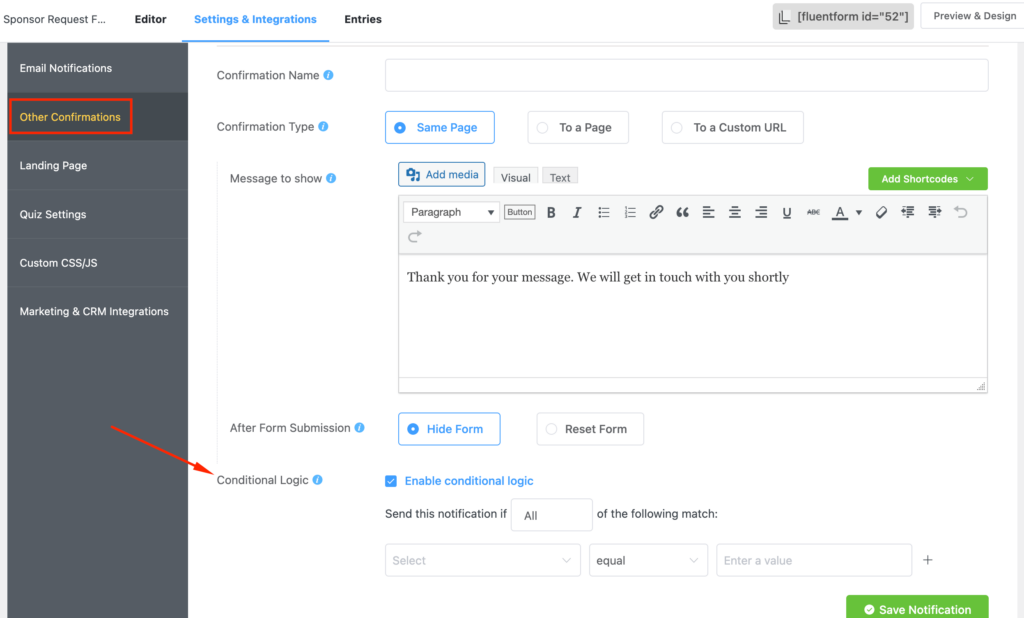
Set up Conditional Logic to show different confirmation messages for different people.
Step 6: Connecting your form with 3rd party apps
Sometimes, you may want to add an e-Signature to your sponsorship form or connect Google Calendar to set reminders. Fluent Forms offers pro-add-ons like digital signature and PDF modules and 50+ native integrations.
Easily add a CRM, Notification, Social Review, Automation, and File Sharing tool to your form to make it more dynamic and useful than ever.
Moreover, Fluent Forms allows you to connect to your favorite apps via Zapier easily. A whopping 4000+ apps can be connected with your WordPress forms to get your job done.
Step 7: Publishing your sponsorship form to your website
You don’t need to know rocket science to publish a sponsorship form to your WordPress website. Simply copy the shortcode and paste it into a page or post.
Or maybe create a landing page to stand out in the crowd. Moreover, you can share it outside of WordPress if you want to.
To publish your form on a page, first, you need to go to pages from your WordPress dashboard. If you want to create a new page, click on Add New, or publish it on the existing page.
Set your page title accordingly, add a new block, and paste your form’s shortcode. That’s it; now you have a page with your sponsorship form on it.
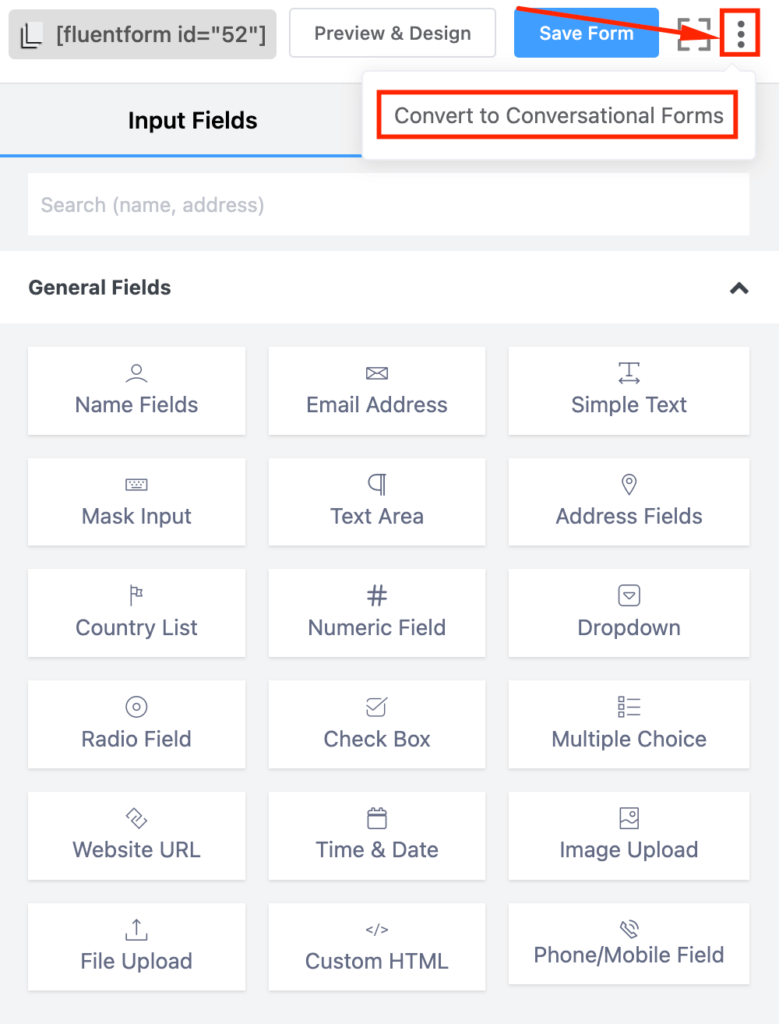
Do you want your form to be an interactive Conversational Form? It’s a no-brainer. You don’t need to make a whole other form to make it conversational. Converting your normal form to an interactive form is just a click away. But remember, once you’ve turned your form to conversational, you can’t return to the normal one. To do so, head over to your Editor page and see a three-dot menu button on the top of your screen. Click on the button and see the Convert to Conversational Forms option.
Final Words
The best sponsorship forms allow interested people to connect seamlessly with your organization. While filling in a sponsorship request form, your users should feel at home. Moreover, from making different forms to taking payments and whatnot, Fluent Forms is a must-have form-building solution for every tech stack. Happy form building!
Create your form as you like, and make sure it meets your needs. Comment below if you want to add something. Follow our social media channels to learn tips and tricks of WordPress.






Leave a Reply
You must be logged in to post a comment.