
How to Create an Order Form in Only 2 Minutes
You have an online business, which you’re ready to host on a WordPress website. It’s great for creating brand awareness, and it will help you streamline sales, meaning extra time to focus on other important matters. However, you don’t think your business is large enough to fit an e-commerce site yet.
Worry not. Because you don’t really need an e-commerce site. All you need is a comprehensive form plugin that lets you create order forms to streamline your sales. And in this tutorial, we’ll learn how easy it is to create an order form for your products.
How to create an order form in 2 minutes
We’ll use Fluent Forms to create an order form in this tutorial, so download the contact plugin if you haven’t already. You can create any order forms with the plugin’s free version. Once you install the plugin, you have to enable the payment module and configure payment methods to automate sales from your order form.
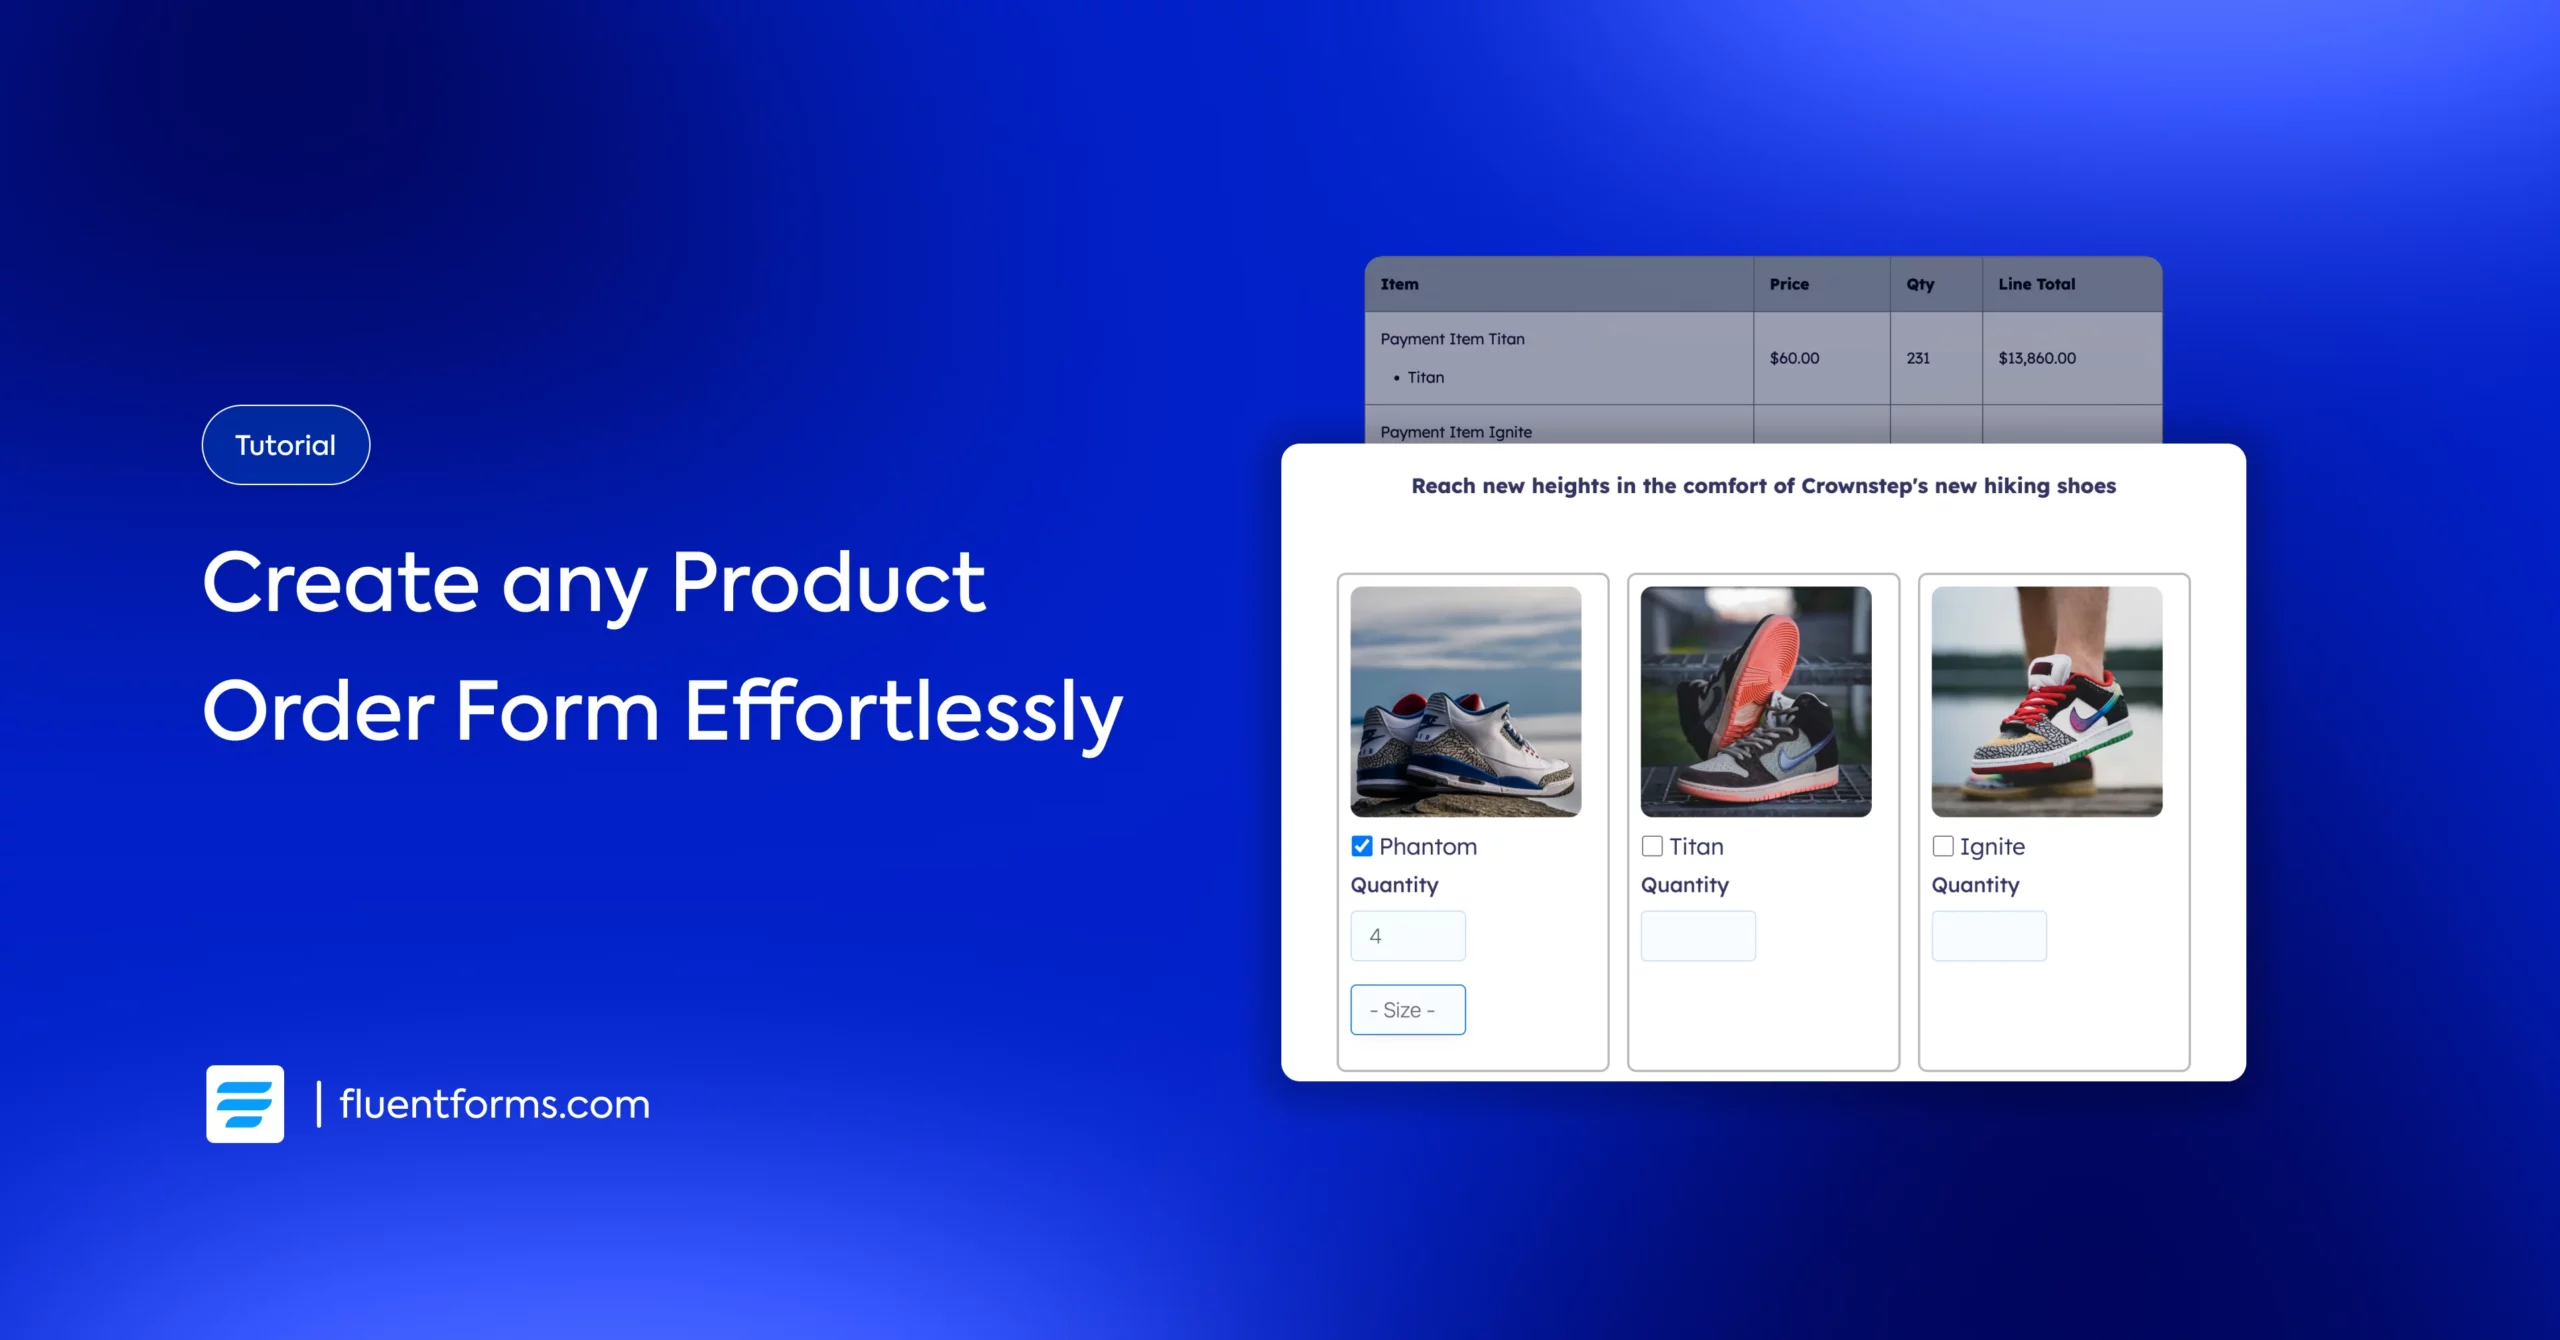
First, let’s picture an overview of our order form. Say we need to display the products and allow selection of products, including their sizes and quantities. After users select their products, we need to guide them to checkout, where we collect their contact and delivery information and accept payment.
Let’s move on to creating our order form.
1. Display products, sizes, and quantities
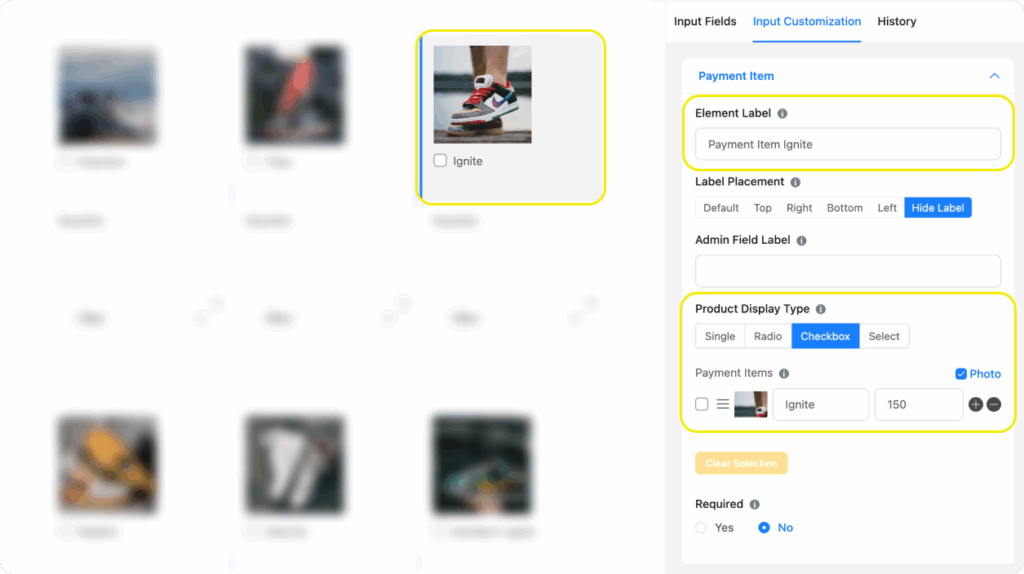
We want to create a grid view to display our products, so we’ll take a 3-column container from the input fields. Next, take a “Payment Item” input field inside each column to list products. You can browse the input fields or use the search bar at the top of the input fields.
Click on the field to customize it. Edit the Element Label and select the product display type “Checkbox,” and add the product image, name & price. We also hid the element label because we want to keep the texts to a minimum.
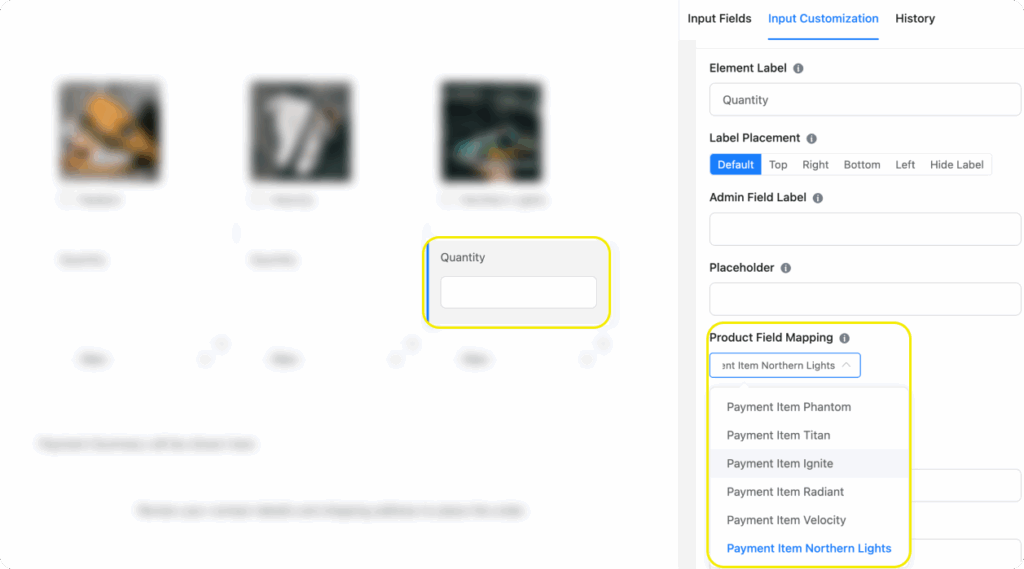
Next, take an “Item Quantity” input field beneath each Payment Item field. Click the Item Quantity field to map it correctly (ensure the quantity field works for the product it’s assigned to). Click on Product Field Mapping and select the right Element Label from the dropdown.
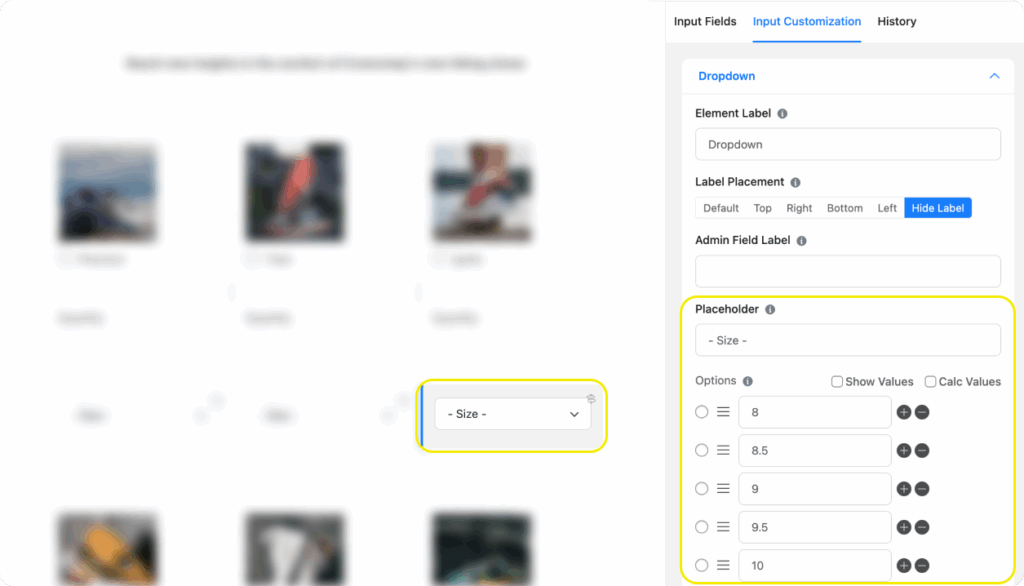
Finally, we’ll take a Dropdown field beneath each “Item Quantity” field to display size. Hide the element label and edit the placeholder. Add the sizes as options. You can also edit the element label to the product’s name before hiding it.
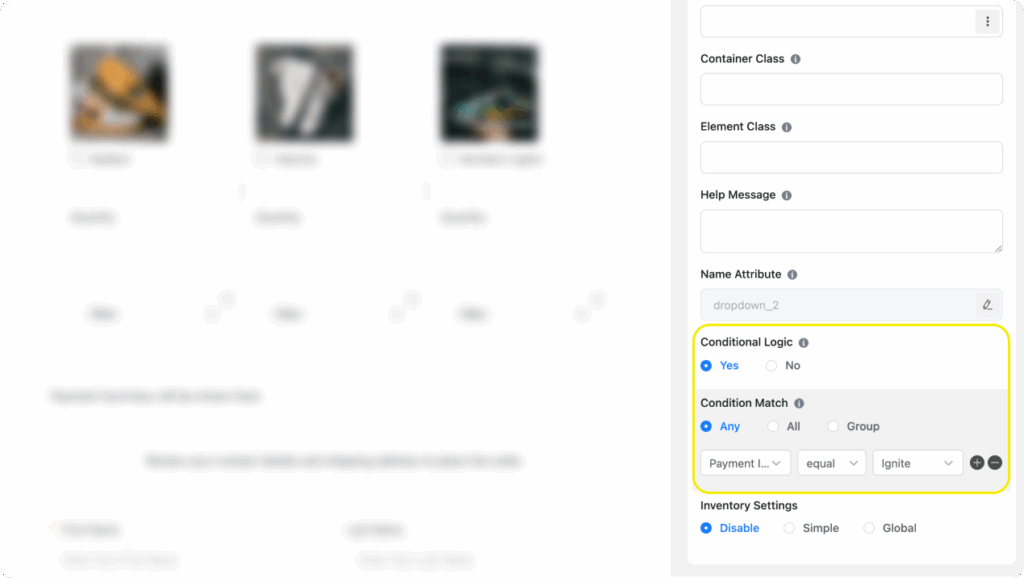
However, if you want the size field to only appear once someone orders a shoe, you have to apply conditional logic. To do so, navigate to the Advanced section from Input customization and scroll down.
Check Yes under Conditional Logic. You’ll find 3 boxes under Condition Match. Select the payment item’s element label from the first box’s dropdown. Select equal in the second box. Finally, select the product name in the last box.
Lastly, duplicate and edit this 3-column container to accommodate all your products in the order form.
2. Show order summary
In this step, insert the Payment Summary input field in your order form. Whenever a user selects items, they can view their order with quantity and price in a table. After reviewing their order summary, they can proceed to checkout.
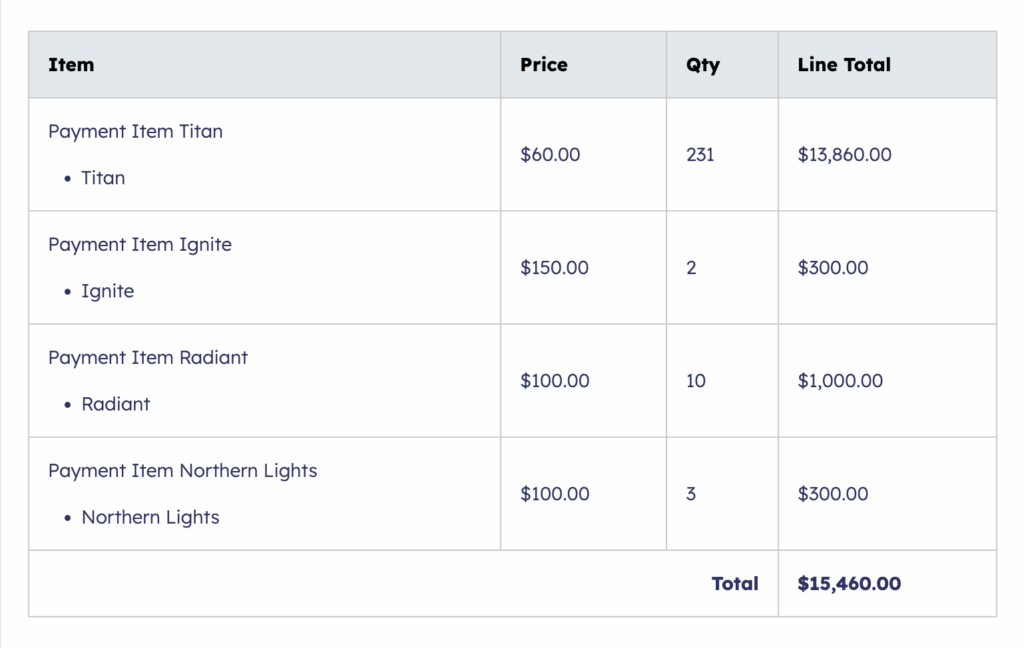
The payment summary field only works on the frontend once users select products.
3. Proceed to the checkout section
This is the final step of our order form. In this step, we’ll collect necessary customer information like names, emails/phone numbers, shipping addresses, etc., and add payment methods to collect payment.
Note that the free version of Fluent Forms only allows an integration with Stripe (keeps a 1.9% charge per transaction), while the pro version allows integration with multiple payment gateways (including Stripe, PayPal, Mollie, RazorPay, Paystack, Square, and Paddle) free of charge.
Let’s take a look at the product order form we just created. We’ve also applied custom CSS to the order form to make it look more intuitive. You can download the form from our templates, import it, and customize it further.
If you need further calculation in the form, like adding tax or shipping charges, you can easily do it from the Custom Payment Amount field.
Build Smarter Forms for Free

Streamline all orders from one order form
Fluent Forms’ extensive features help you create all types of order forms, from easy to complex ones. It allows you to display product images, sizes, and quantities so your users can easily order their desired products. Moreover, you can accept shipping charges, VATs, etc., from the same order form.
Once users select products/items, it shows them the summary of their order with the total payment amount. They can review the payment summary and proceed to checkout and pay you via the order form.
After you create an order form, the work is done on your part, and you only keep accepting payments each time an order takes place. Feels like a dream, right? Once you start using them, let us know how our order forms are serving you and ask us if you have any concerns.

Sarika writes for Fluent Forms and loves to offer insights into small businesses. She’s curious and enjoys discussing ideas, interests, and perspectives. In her free time, she’s either marvelling at architectural beauties or trying different cuisines.


Leave a Reply