
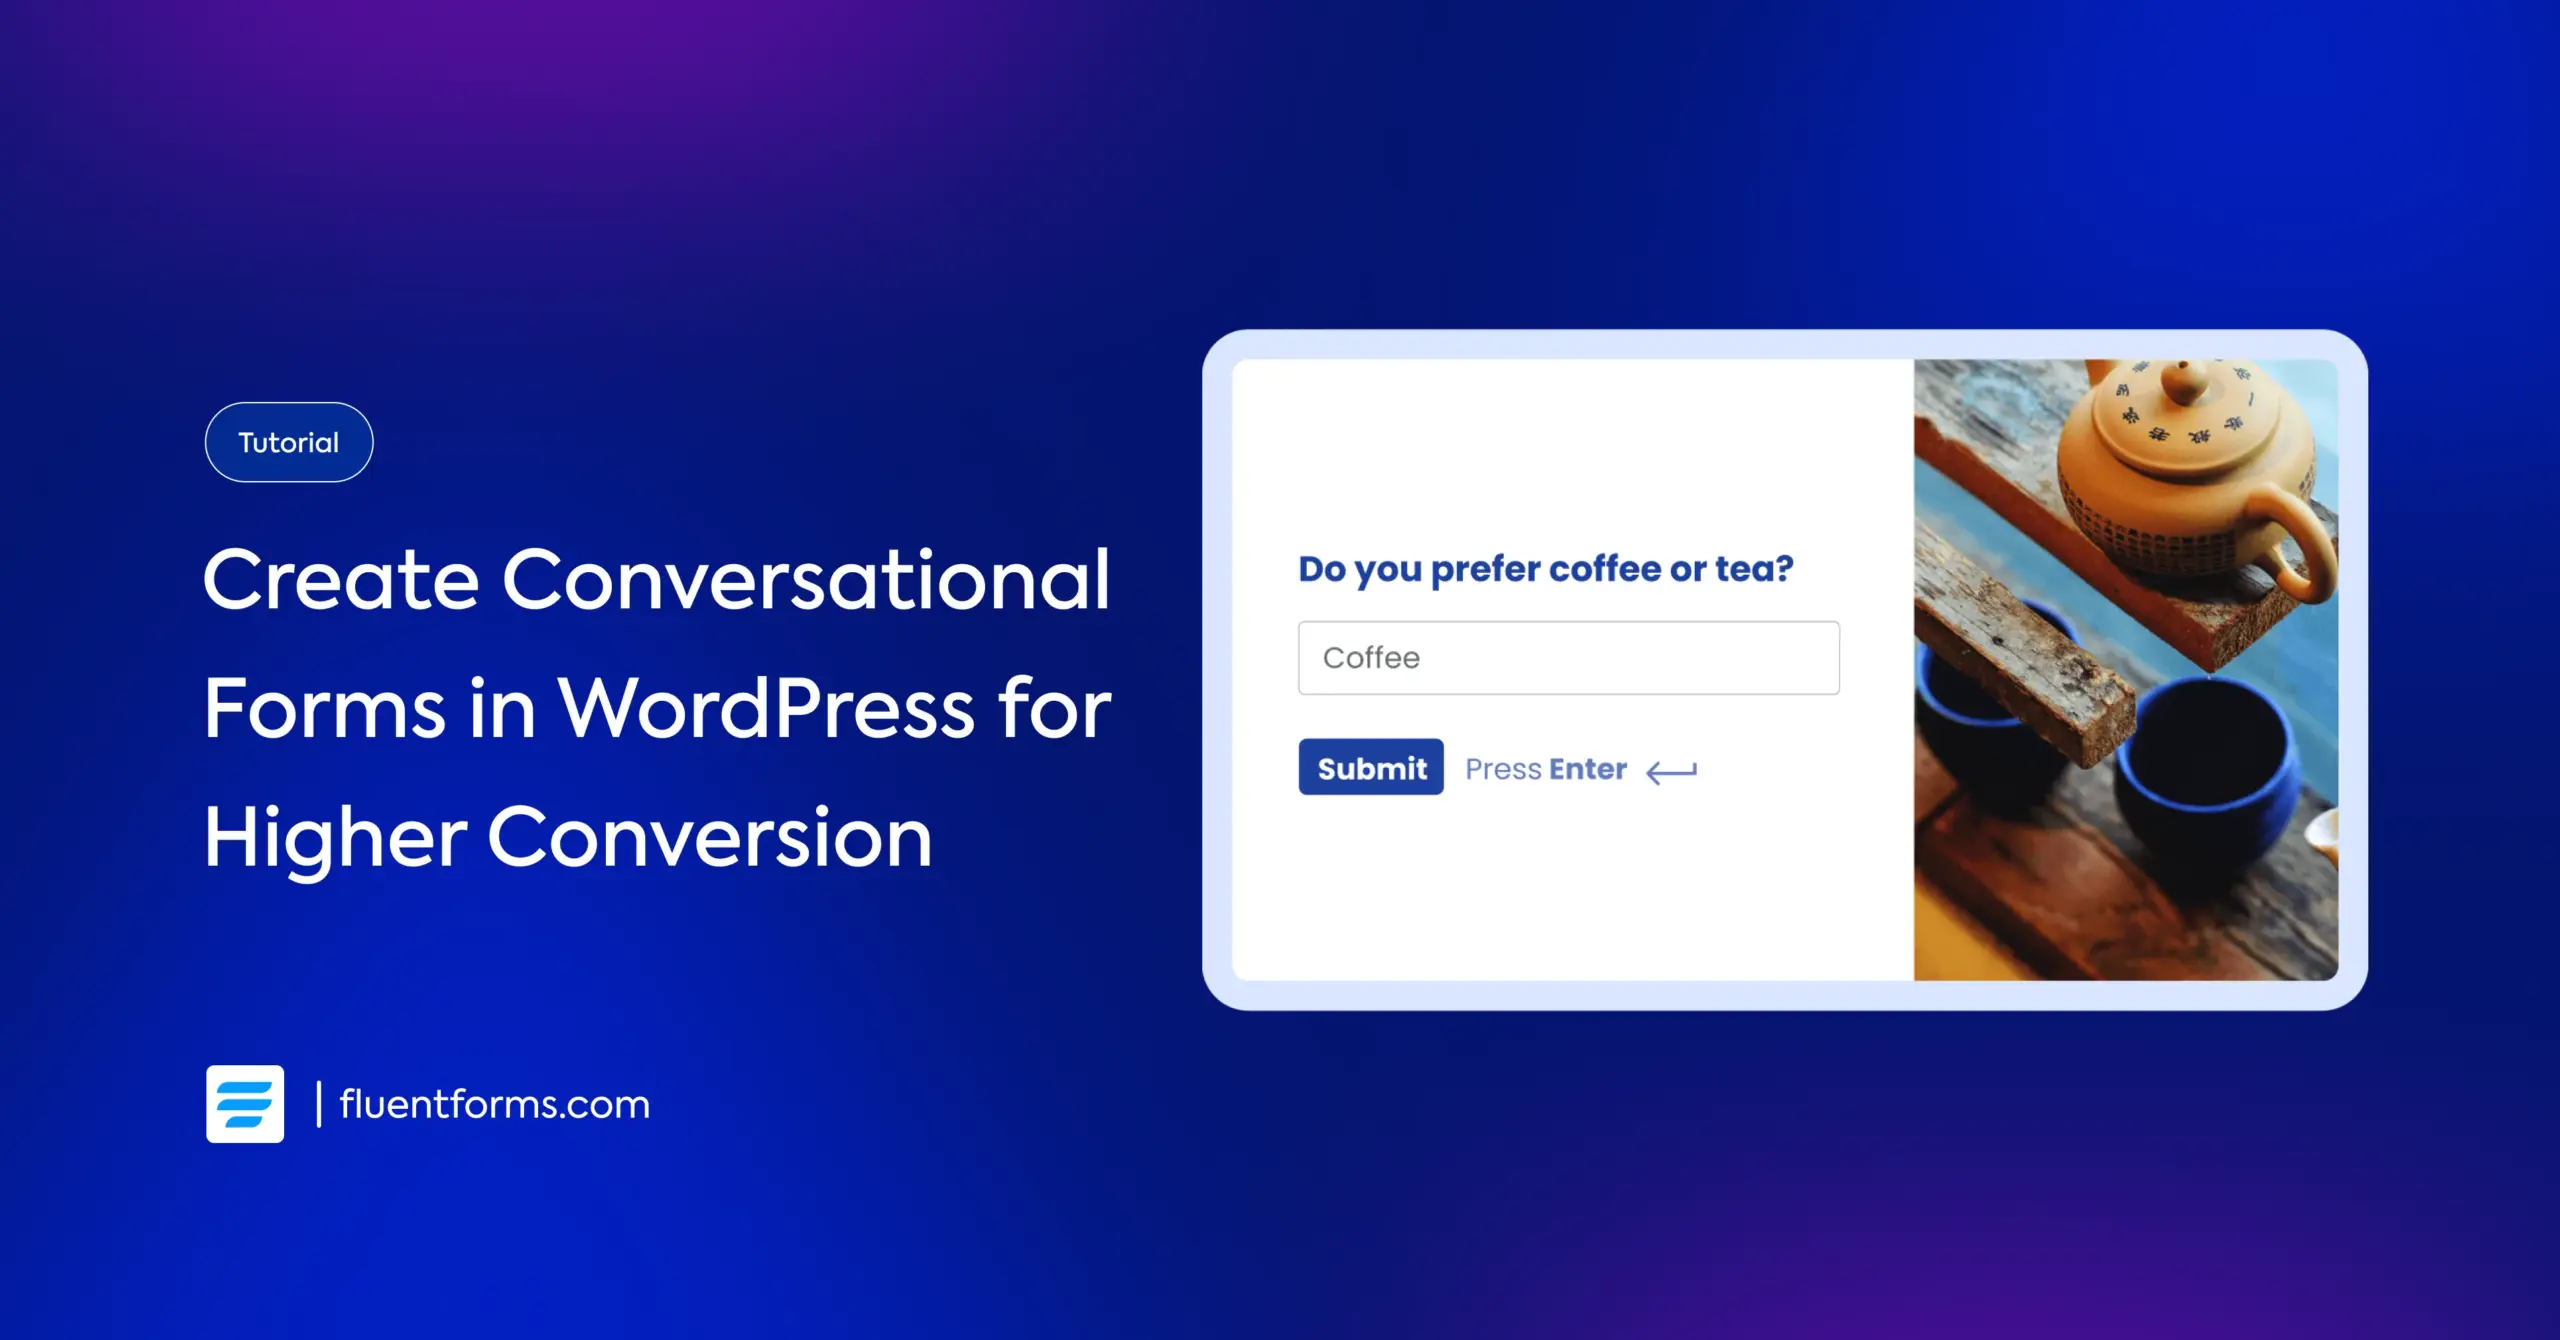
How to Create a Conversational Form in WordPress
When was the last time you actually enjoyed filling out a form?
For most people, the answer is never. But you can change that answer for your users.
You heard me right. Instead of a long, intimidating form, you can guide your users with friendly, one-on-one chat style questions. And the solution is simple: create a conversational form. They make your forms engaging and reduce distractions for a smooth conversion process.
In this guide, I’m going to walk you through the steps to create a conversational form easily in WordPress, when you should use them, and how to make the most out of them. Let’s jump in.
TL;DR
- What it is: A conversational form asks one question at a time, like a chat, to feel more engaging and less intimidating than a traditional form.
- Why use it: This style increases user engagement and completion rates, improves the user experience (especially on mobile), and can lead to higher-quality data.
- How to create it: Use Fluent Forms’ conversational form option, add your questions, and customize the design and settings.
- Where it works best: They are most effective for surveys, lead generation, job applications, client onboarding, and getting customer feedback.
- Best practices: For best results, use a friendly tone, show a progress bar to manage expectations, and use conditional logic to ask only relevant follow-up questions.
What’s a conversational form & why would you use it
A conversational form asks for information one at a time, instead of showing them a long, intimidating page of questions. Simply put, it talks to your users like a real-life chat. They are often presented on a single, distraction-free page.
This guided, friendly approach makes the process feel easy and engaging, which means more people actually complete the form. Here’s how conversational forms are more beneficial to you and users.
|
Higher engagement & completion rates |
|
|
Improved user experience |
|
|
Better Data Quality |
|
|
Increased Personalization |
|
Apart from these, you can use relevant visuals with each question to make the process even more intuitive and engaging. Moreover, you can easily intrigue visitors with a well-crafted welcome screen. So let’s create our form with no further delay.
How to create a conversational form in WordPress (using Fluent Forms)
Creating a conversational form in WordPress is super easy when you use a powerful form builder like Fluent Forms. Here, I’ll show you how in a few simple steps.
- Install Fluent Forms (if you haven’t already!)
- Create a conversational form with the necessary fields
- Add a welcome screen (optional)
- Adjust the fields’ layout and add visuals
- Style your conversational form
- Customize your form’s settings and messages
- Share the form via direct URL or embed using shortcode or iframe.
Install Fluent Forms
First, you need to install Fluent Forms in your WordPress dashboard. Here are the easiest installation steps.
- Go to your WordPress dashboard.
- Find the “Plugins” option on the left menu bar.
- Select “Add New.”
- Search for the “Fluent Forms” plugin.
- Click “Install.”
- Activate the plugin when installation is complete.
Now, let’s create our conversational form.
Create your conversational form
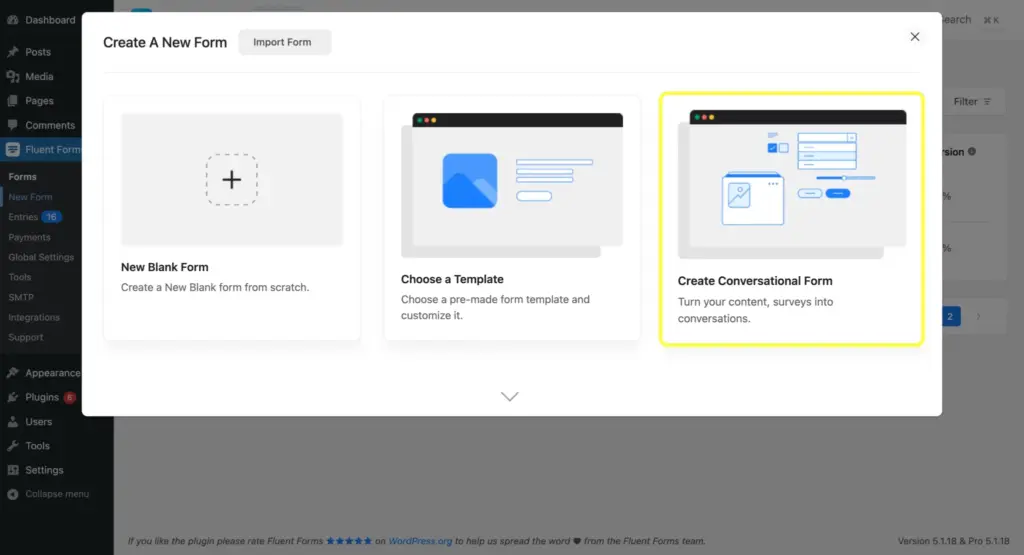
Go to Fluent Forms from your dashboard. From the expanded menu, select “New Form.” You’ll see a pop-up with options like new blank form, create with AI, etc. Select “Create Conversational Form.”
Then you’ll be led to the form editor tab. Rename your form by clicking the pencil icon in the top left corner. You’ll find some fields are already placed in the form. Delete those fields if your form doesn’t require them.
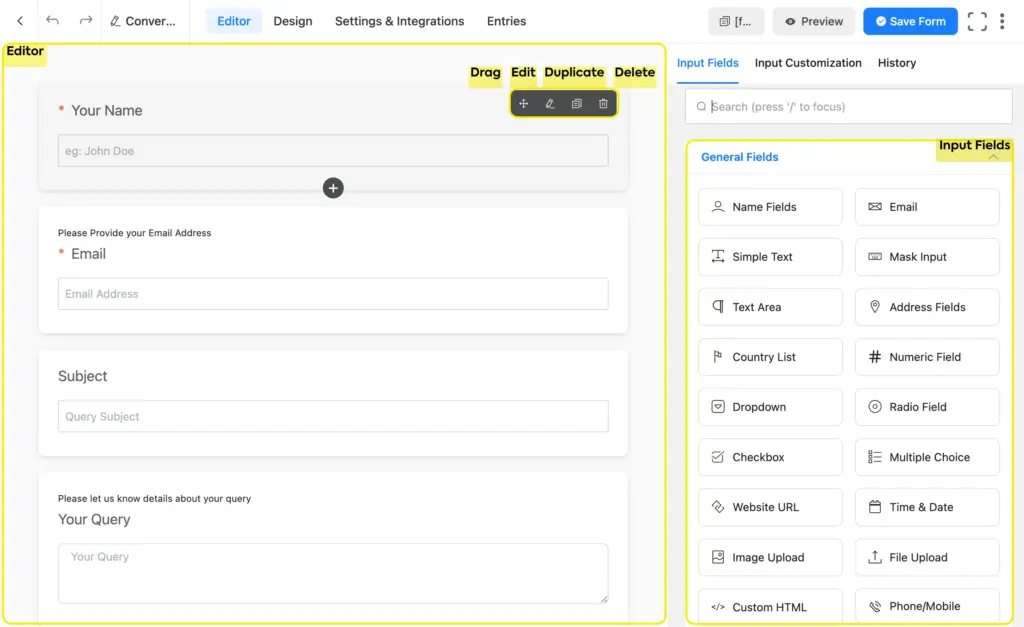
Next, drag the necessary input fields from the right. Click on a field to configure it (customize label & placeholder text, adjust options, add conditional logic, and more).
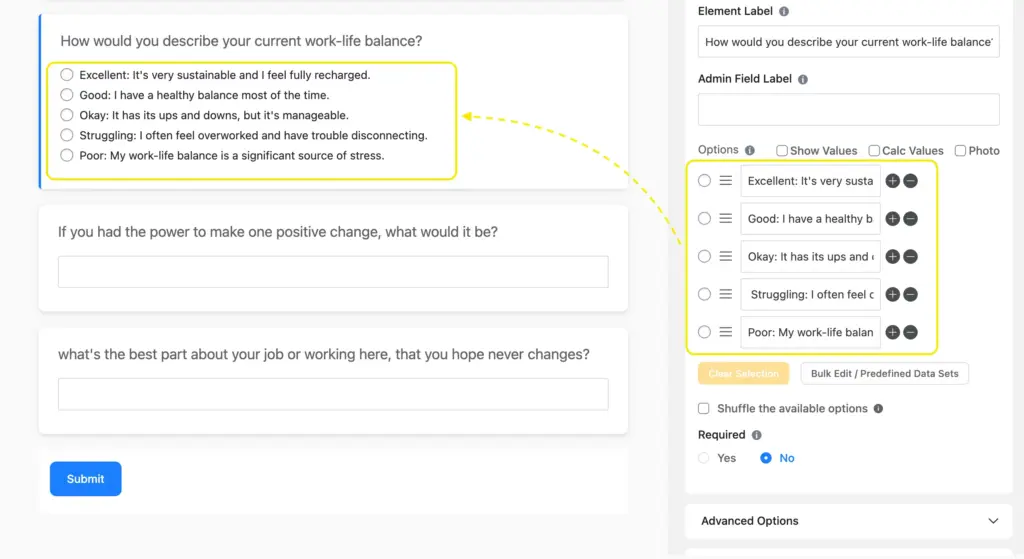
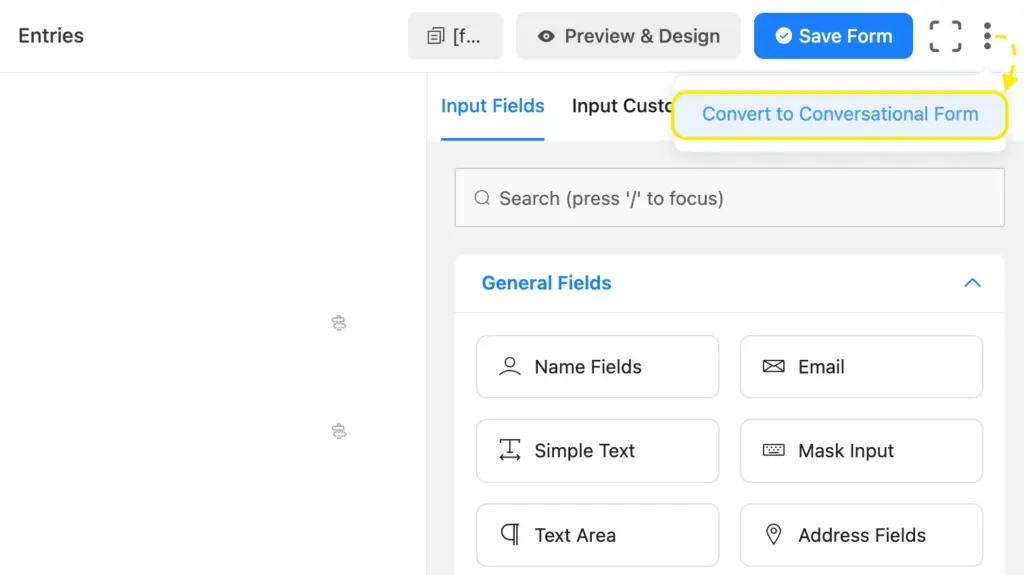
Besides creating a conversational form from scratch, you can also convert any existing regular form into a conversational form.
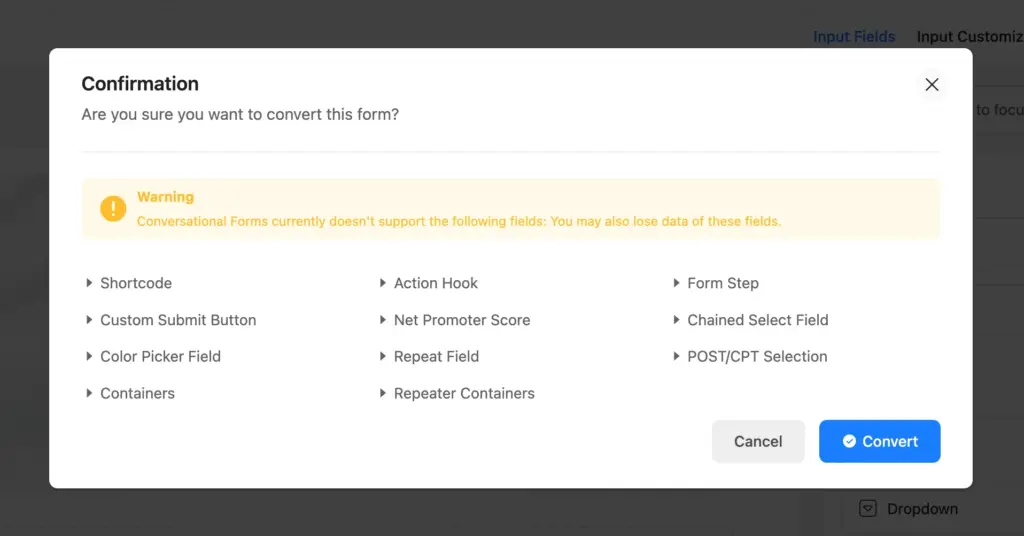
You can also add payment fields and accept payment through a conversational form. However, conversational forms don’t support some of Fluent Forms’ input fields, because they might interfere with the conversation-style layout.
Once we’ve created the basic structure of our form, let’s move on to the fun parts to make our conversational form even more engaging.
Add a welcome screen
You can also insert a welcome screen at the top of your form. You’ll find it among the advanced input fields.

Simply click on the welcome screen field to find its customization options. You can visually edit the description and add images. Adjust the content alignment and button text to your preference.
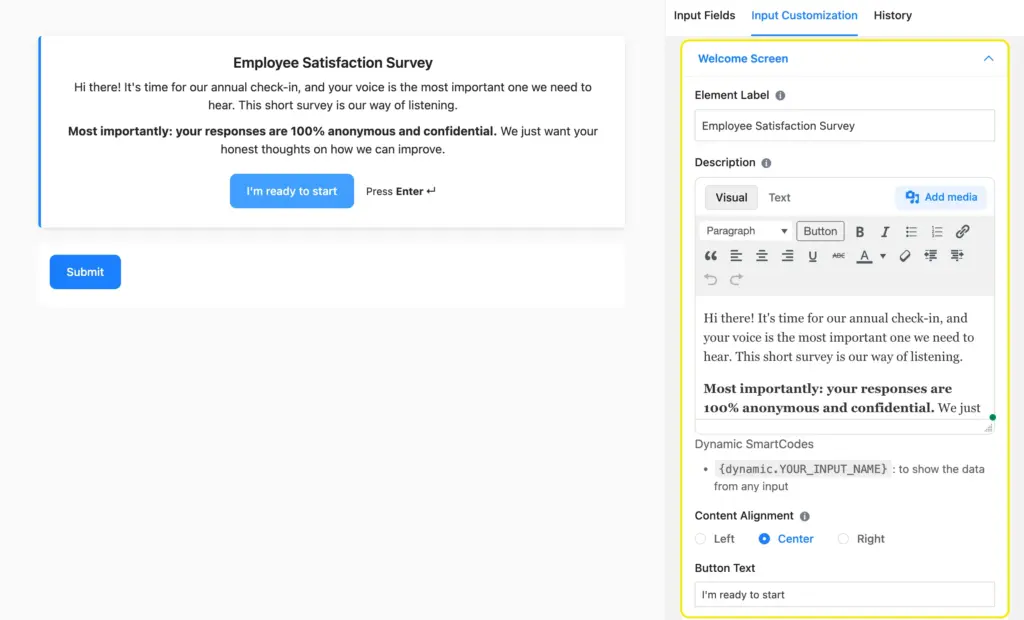
However, this is completely optional. Use it to ease your users into the process. You can skip it if your form is already long enough without it.
Adjust your conversational form’s layout
You can easily change the layout of each field separately. You’ll find the layout option inside the input customization tab, right below the advanced options section.
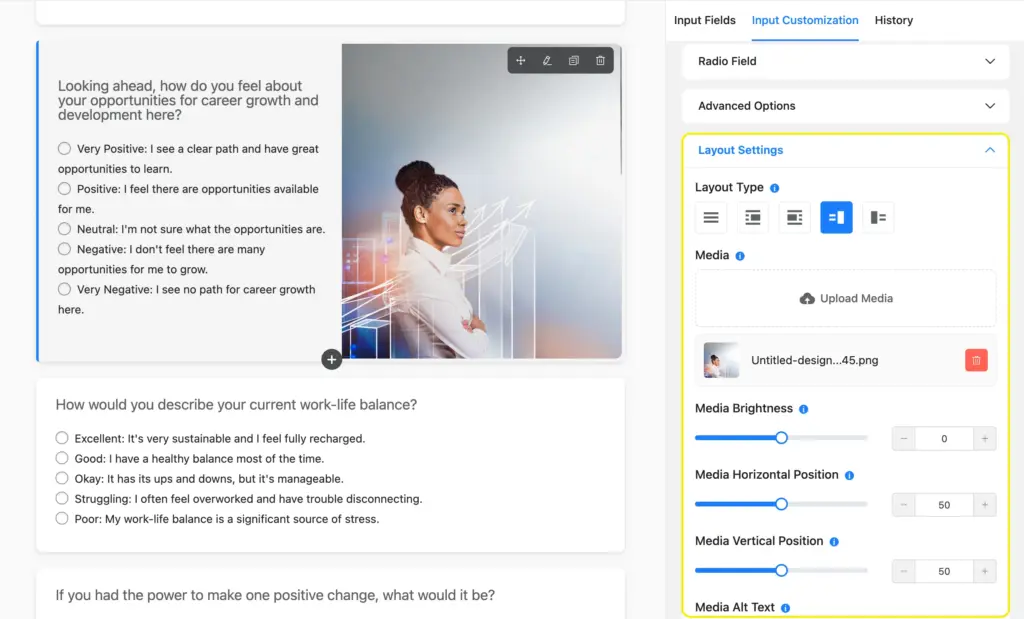
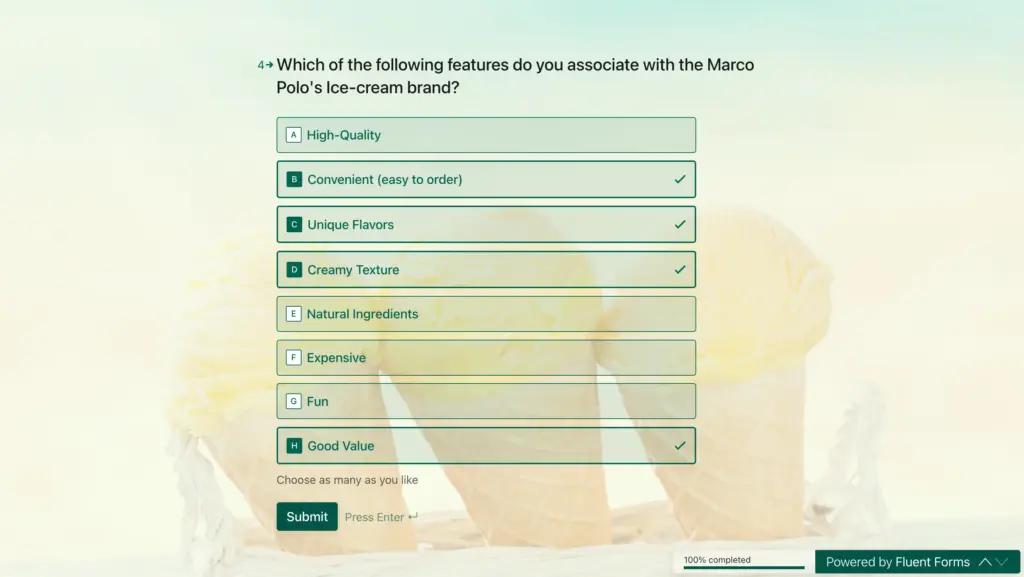
You’ll find five layout types for each field. The first one is classic and keeps the field’s content at the center of the screen. The other four options allow you to add images to the left/right of the field’s content.
You can choose whether the image spans the entire height of the screen or there’s a margin (empty space) around the image. You can also adjust the media position & opacity and add alt text.
Once you’re done, save your form from the upper-right corner before moving on to styling it.
Customize your form’s design
To customize your form’s design, you need to upgrade to Fluent Forms Pro (or you can style it using custom CSS from the form’s settings). This visual styler allows you to customize the text color of the form’s questions, answers, and buttons. You can choose a background color for your form and buttons as well.
Moreover, you can add a background image instead of a plain color and adjust its opacity to maintain readability. However, note that if you’ve already used images in the layout, the layout image will appear on top of the background image, blocking it partially.

This is what a page of our form looks like after styling.
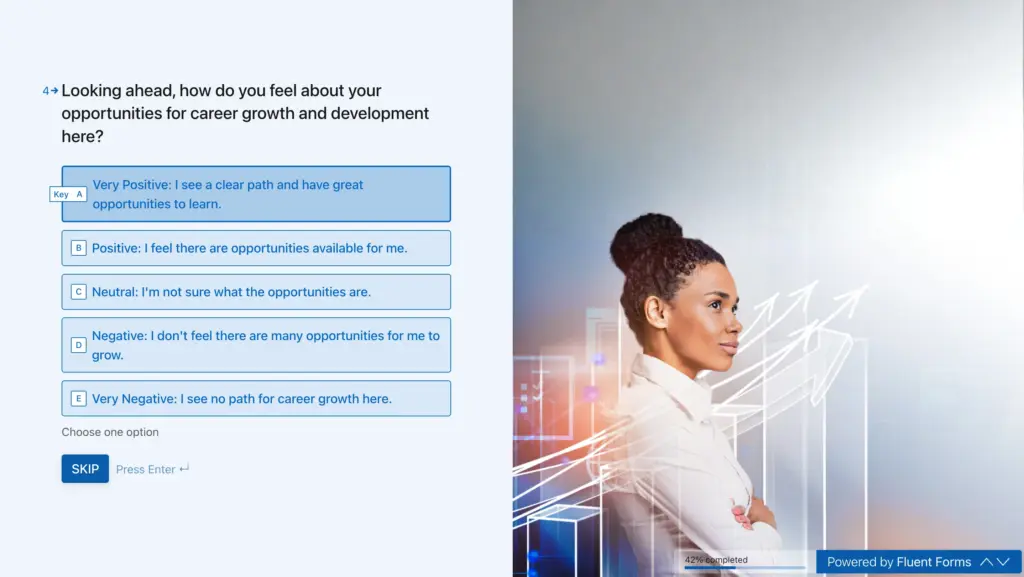
In the design tab, you’ll also find options to enable/disable animations (scroll to next/previous section, scroll to top, etc.), key hints, removing branding, etc.
Here’s a conversation-style personality quiz form, so you can see the difference yourself.
Learn how to use this template on your site.
Form settings and messages
Customize your form’s meta settings from the meta tab beside the design tab. Set meta title, description, and featured image. You can also add a security code/text that’ll be added to the form’s URL.
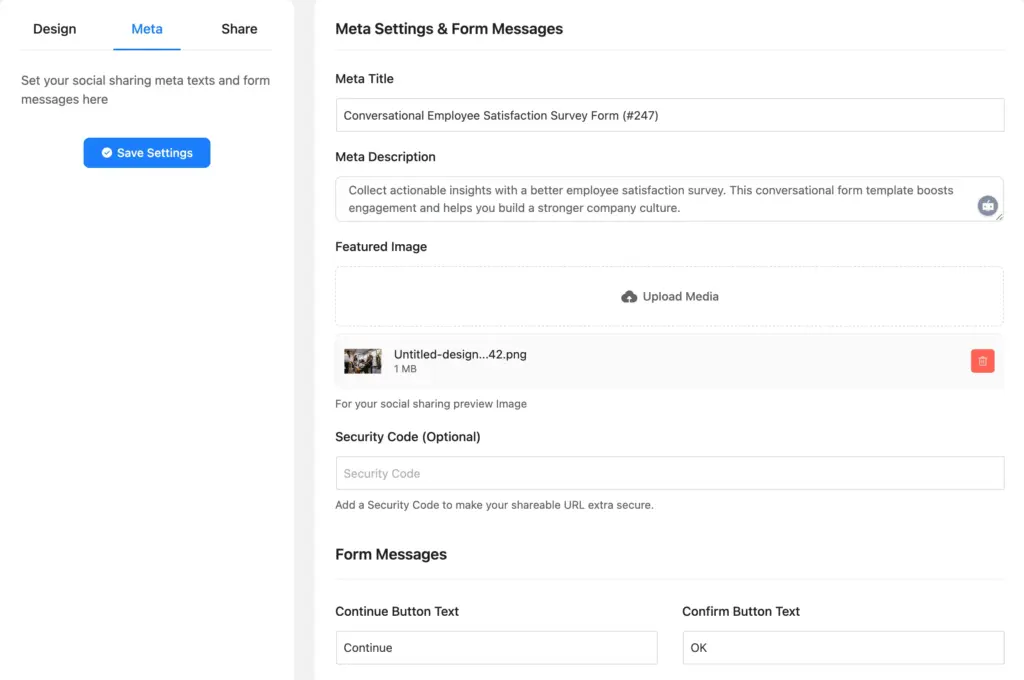
Below that, you can customize the messages, hints, and button texts to align them to your form’s purpose.

Apart from the conversational form, specific settings & messages, you can customize the general settings as well from the Settings & Integrations window at the top. A few common options include
- Customizing the confirmation message with media and dynamic shortcodes (dynamically fetching information from the user’s submitted answer)
- Deciding whether to show the confirmation message on the same page or on a custom page.
- Customizing email notification for admin, user, and other email addresses
- Conditional confirmation message, email notification, and email routing.
- Double opt-in confirmation for email addresses
- Form scheduling and restriction
- Quiz and survey settings
- Integration feeds and workflows
- Automating PDF feed sharing from form submission
- Custom CSS (custom JS is only available for regular forms)
Once you’ve configured your form’s settings, it’s complete and ready for sharing. Let’s explore how to share a conversational form in the next section.
Sharing your conversational form
You can share the form on social channels via a direct URL. Anyone can access the form using this link and submit their response.
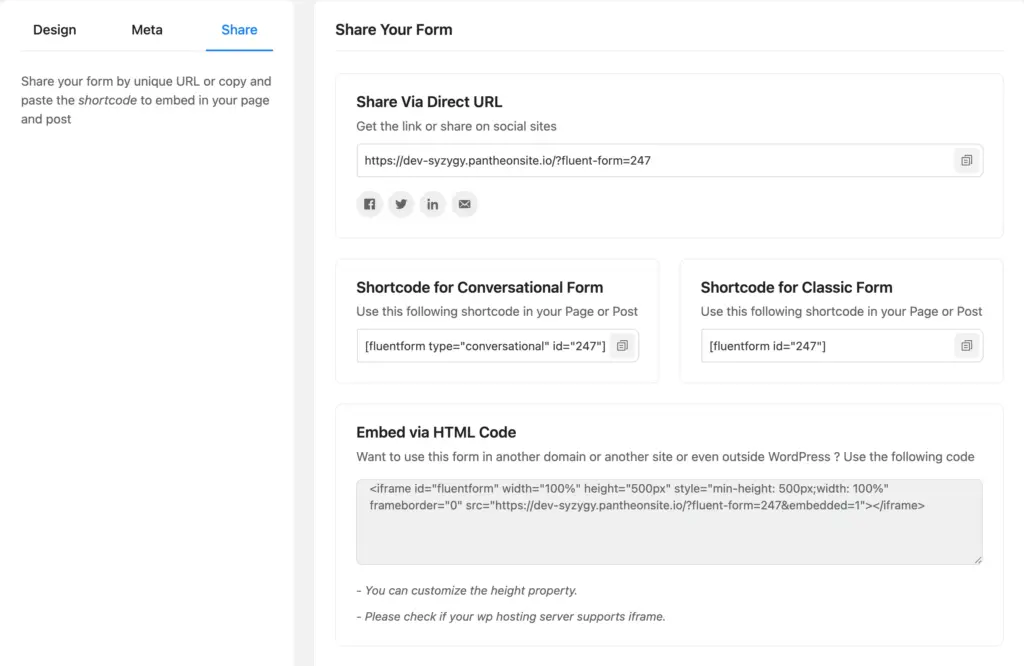
Besides, you can embed the conversational form on a page using its shortcode. However, if you don’t want the form to span the whole page, use the HTML code instead to create a viewport for the embedded form.
Where conversational forms work best
A conversational approach can be applied to almost any form, but it shines most in these scenarios by turning a task into a guided conversation.
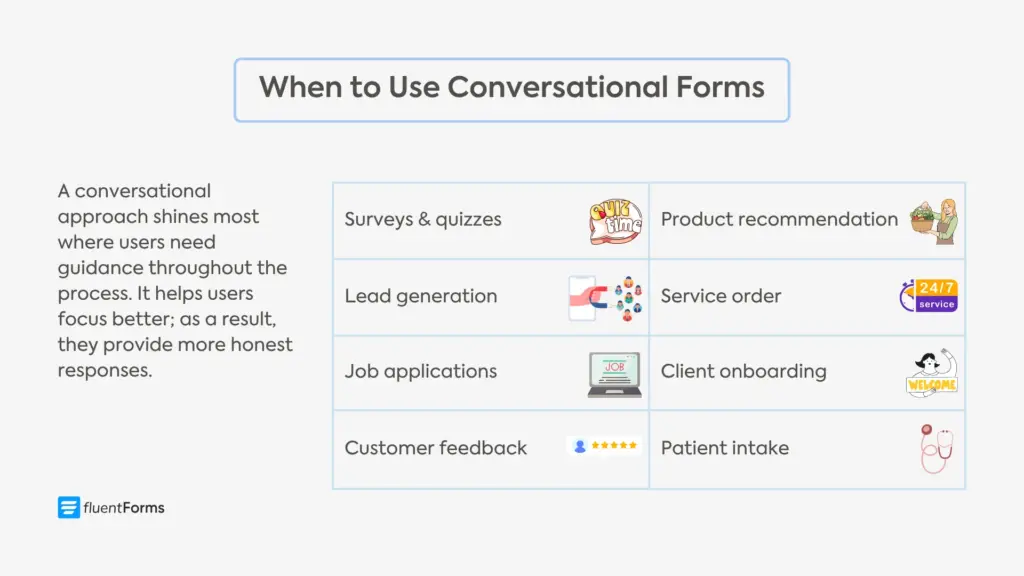
Surveys & quizzes: A long list of questions is intimidating. By presenting them one at a time, your survey and quiz feel like a focused chat, leading to higher completion rates.
Lead generation & qualification: Go beyond a static “Contact Us” form. Guide potential customers through a series of questions to identify their needs and qualify them in real time, creating a memorable and effective first impression.
Job applications: A lengthy application is a major barrier for top talent. A conversational approach breaks it into manageable steps, creating a more welcoming and modern candidate experience that significantly reduces abandonment.
Customer feedback: Asking for feedback should feel respectful of your customer’s time. The interactive format feels more personal and encourages people to share more detailed, honest opinions.
Product & service recommendations: Act like a personal shopper for your users. Ask a series of questions about their needs and preferences to guide them to the perfect product or service, just like a helpful sales associate would.
Client onboarding & intake: Gathering detailed information from a new client or patient can be complex. Conversational forms ensure no detail is missed by guiding them step-by-step, which is especially helpful when users might be stressed or in a hurry.
These are just the tip of the iceberg. The possibilities are endless when it comes to Conversational Forms. However, in my experience, conversational forms work best if you have 5 to 10 questions.
If you have 30/40 questions in your form (for example, a quiz form), maybe a multistep form with 5-7 steps works better instead of a conversational form, which will require completing 40 steps.
Build Smarter Forms for Free

Conversational form best practices
A conversational form isn’t just a traditional form broken into pieces. It’s a fundamental shift from a data-entry chore to an interactive dialogue. Here’s how you can make them more efficient and user-friendly.
1. Decide on your voice: Find your persona first, are you a helpful assistant or a friendly expert? Use that persona to guide users through a natural, conversational tone.
|
Instead of |
Enter Email |
|
Try |
And where should we send your results? |
2. Start easy to warm up users: Start with a welcome screen or ask for simple, low-effort information first (like a multiple-choice answer or a first name) to get the user invested. Save more personal details like a phone number, for the end.
3. Frame questions around the user’s benefit: Instead of just demanding data, explain why you’re asking. This builds trust and increases the likelihood of getting an answer.
|
Question |
What’s your budget? |
|
Better |
To help me find the perfect plan for you, what’s a comfortable monthly budget to work with? |
4. Use conditional logic to hide irrelevant questions: This is the magic of conversational forms (or any form). Use conditional logic to ask relevant follow-up questions based on previous answers. This shows you’re listening and creates a personalized, guided path for every user.
5. Show the finish line with a progress indicator: Without a progress indicator, the user has no way of knowing how long the form is. And they may not be inclined to invest their time if they can’t see the end line. A progress bar or a “Step 3 of 7” counter manages expectations and motivates users to finish, reducing abandonment rates.
Another effective way is to state the estimated time on the welcome screen, like, “This will only take 2 minutes.” However, you have to be honest about the estimation to gain users’ trust.
6. End with an immediate value: Utilize the confirmation message to provide value to your users whenever possible. It’ll establish trust and build relationships way better than plain old “Thanks.” For example: Got it, thanks! Your free quote is on its way to your inbox. In the meantime, here’s a guide to [Related Topic] you might find helpful.
Now that you know how to make the most of your conversational forms, remember, the work isn’t done when the user clicks submit. Integrate your form with your CRM, email marketing tool, or project management tools to automate your workflow and ensure no lead is forgotten.
Guide users one question at a time
At the end of the day, every form has a job to do: generate leads, gather feedback, register users, sell products, etc. The difference is that a conversational form does that job better.
They keep users invested and guide them through the process one step at a time. This, in turn, brings more qualified leads with higher completion rates. You get to make smarter business decisions with better quality data. Moreover, your brand reputation strengthens through a great user experience.
And you now have just the right tool at your disposal to create conversational forms in WordPress. Start small, test it out, and remember that the goal is simply to offer a smoother user experience.
So, don’t just build another form. Build a business asset for tomorrow.

Sarika writes for Fluent Forms and loves to offer insights into small businesses. She’s curious and enjoys discussing ideas, interests, and perspectives. In her free time, she’s either marvelling at architectural beauties or trying different cuisines.


Leave a Reply