
How to Easily Accept Payments with Stripe in WordPress Forms
If you’re collecting payments or donations on your WordPress site, you want the process to feel seamless. No redirects. No friction. Just a clear form, a clear payment method, and a clean submission flow. That’s exactly where Stripe shines – and Fluent Forms makes the integration effortless.
Stripe is trusted globally for its fast, developer-friendly infrastructure. Fluent Forms ties that power directly into WordPress, allowing you to build smart payment forms in minutes. This guide walks you through what Stripe offers and how to set it up step by step using Fluent Forms.
TL;DR
- Stripe is a global payment platform used by millions of businesses to accept online payments securely.
- Fluent Forms integrates Stripe directly into WordPress, letting you collect payments inside your forms.
- Build payment forms for products, donations, subscriptions, bookings, or event registrations.
- Customers complete payments without redirects using embedded Stripe checkout.
- Setup takes only a few steps: connect Stripe, create a form, add payment fields, and publish.
- Support multiple payment methods including cards, wallets, and region-specific options.
- Automate receipts, confirmations, and CRM workflows after each payment.
- Combine Stripe with other Fluent Forms integrations to build complete payment and automation workflows.
What is Stripe
Stripe is a global payment infrastructure built to help businesses accept money online with speed, reliability, and total flexibility. From solo creators to Fortune-level companies, Stripe powers millions of businesses with a clean developer experience and industry-leading checkout performance.

Here’s what makes Stripe exceptional:
- Multiple modern payment methods
Cards, wallets like Apple Pay & Google Pay, bank redirects, recurring billing, ACH, and region-specific methods – Stripe covers a wide range of global payment options. - Hosted payment pages and payment links
Generate instant, shareable checkout links or full payment pages without setting up a separate storefront. - Automated payouts
Transfer funds to your bank account quickly, schedule payouts, or route money across multiple accounts. - Subscription and billing engine
Create recurring plans, manage renewals, send invoices, and automate the entire subscription lifecycle. - Fraud prevention with Stripe Radar
Stripe analyzes billions of data points to detect risk and reduce disputes. - Detailed analytics and reporting
View revenue, trends, customer lifetime value, payout history, and detailed charge logs inside Stripe’s dashboard.
Stripe’s ecosystem is built to scale globally – whether you’re selling digital products, running a SaaS platform, taking donations, offering memberships, or handling professional service payments.
Why integrate Stripe with Fluent Forms
Connecting Stripe to your form turns it into a full checkout experience – not just a payment button.
Fluent Forms is designed for fast, modern workflows that businesses rely on daily.
You get a drag-and-drop form builder, smart conditional logic, advanced payment fields, accurate price calculations, and a clean interface. Stripe adds a secure global payment layer that ties everything together.
What you can build with Stripe + Fluent Forms:
- Digital product checkout forms
- Membership or subscription billing forms
- Donation forms with custom amounts
- Booking and appointment payments
- One-time service payments
- Class, event, and webinar registrations
- Custom payment pages with dynamic pricing
- Internal billing workflows for freelancers or agencies
Do you know? Stripe Payment gateway is available in Fluent Forms free version with 1.9% transaction fee. Recurring payments are also included via the Subscription field. Pro removes the 1.9% fee, leaving only Stripe’s charges.
Benefits of integrating Stripe with Fluent Forms
Multiple payment options
Cards, wallets, bank redirects – Stripe gives customers the flexibility they expect.
On-site checkout with embedded Stripe
Users complete the entire payment inside your form, reducing drop-offs and improving conversions.
Automated receipts and synced workflows
Fluent Forms can send confirmations, trigger CRM tagging, add customers to pipelines, or start onboarding actions automatically.
Advanced pricing and subscription models
Set up one-time charges, recurring billing cycles, metered pricing, add-ons, or logic-based amounts.
Scalable and developer-friendly
As your business grows, Stripe’s extensible API and Fluent Forms’ workflow features grow with you – no rebuilds required.
Step-by-step guide to Stripe integration with Fluent Forms
Step 1: Sign up for Stripe
If you already have a Stripe account, you can move ahead. If not, create one – the registration process is quick and straightforward.
Step 2: Configure Stripe in Fluent Forms
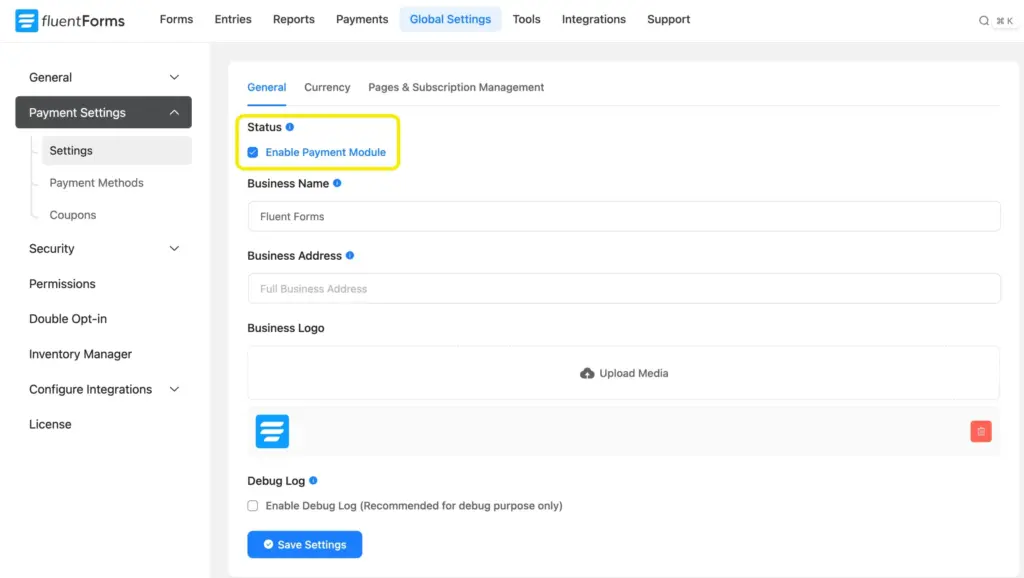
Go to your Fluent Forms dashboard and open Global Settings. Under the Payment section, enable the Payment Module. This will unlock all supported payment gateways, including Stripe.
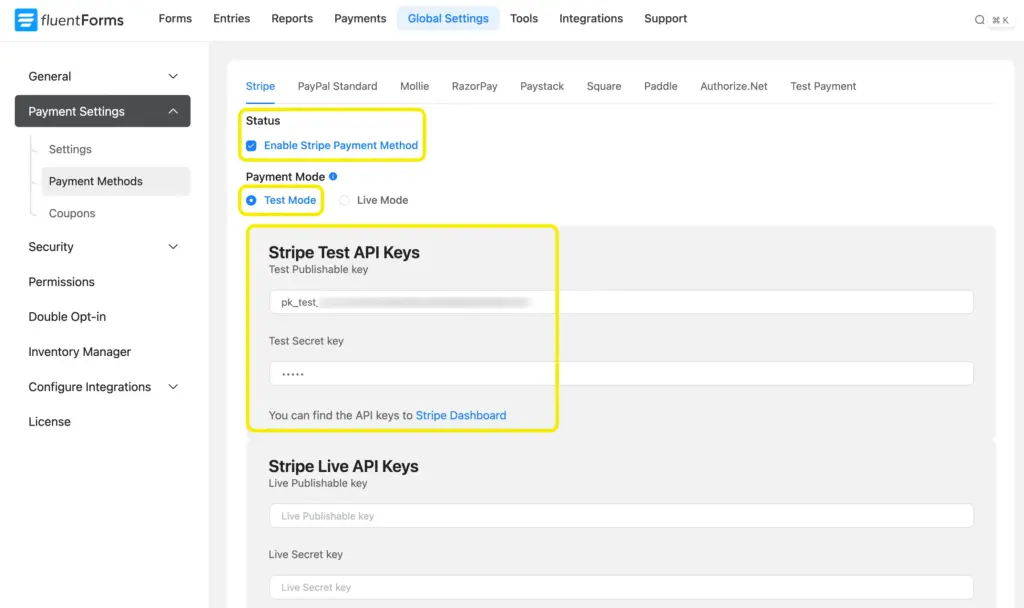
Next, open the Stripe tab from the Payment Methods list and activate Enable Stripe Payment Method. Keep the gateway in Test Mode while you set things up.

Click Connect with Stripe, and you’ll be redirected to Stripe’s secure environment to authenticate your account. Once verified, Fluent Forms connects automatically and you’ll be guided through a short setup that includes:
- Your personal information (legal name, email, address, phone, date of birth)
- Business information (industry, website, product type)
- Your payout details (routing number, account number, payout account)
- Customer support details (statement descriptor, support phone, address)
- A final review of all the provided information

Submit the form, and your Stripe connection is ready to use.
If you prefer using API keys instead of the one-click connection, you can do that too. Add the following filter to your theme’s functions.php file or a code snippet plugin:
add_filter('fluent_form_disable_stripe_connect', '__return_true');Then log in to Stripe, scroll to the footer, click Developers, and find your Publishable Key and Secret Key.

Paste both into the Stripe settings inside Fluent Forms.
Step 3: Create your payment form
With Stripe successfully connected, it’s time to build your form.
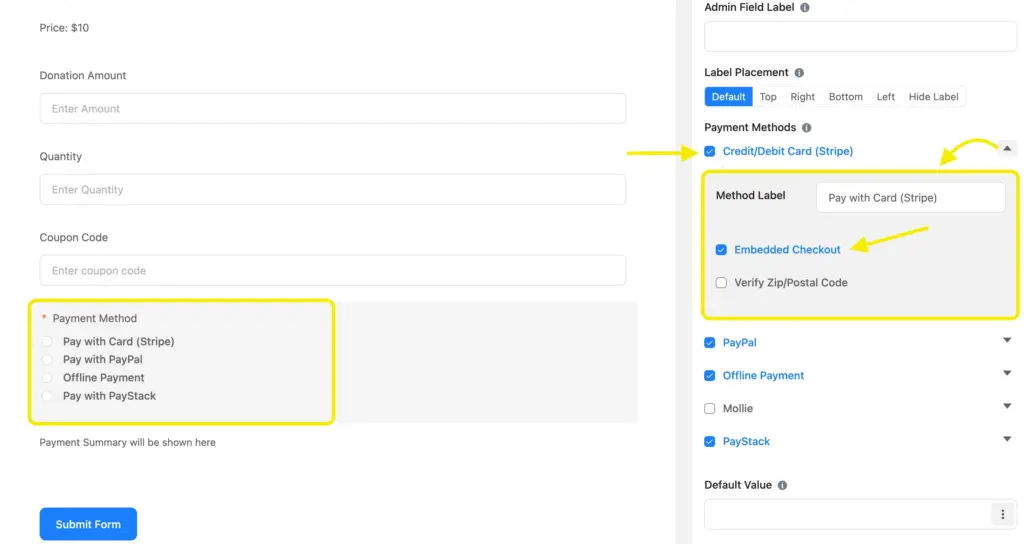
Create a new form or choose a template, then add the fields you need – such as payment items, custom amounts, quantities, or calculation fields. Finally, insert the Payment Method field to activate Stripe payments for this form.
Save your form, and you’re ready to start accepting payments with Stripe on your WordPress site.
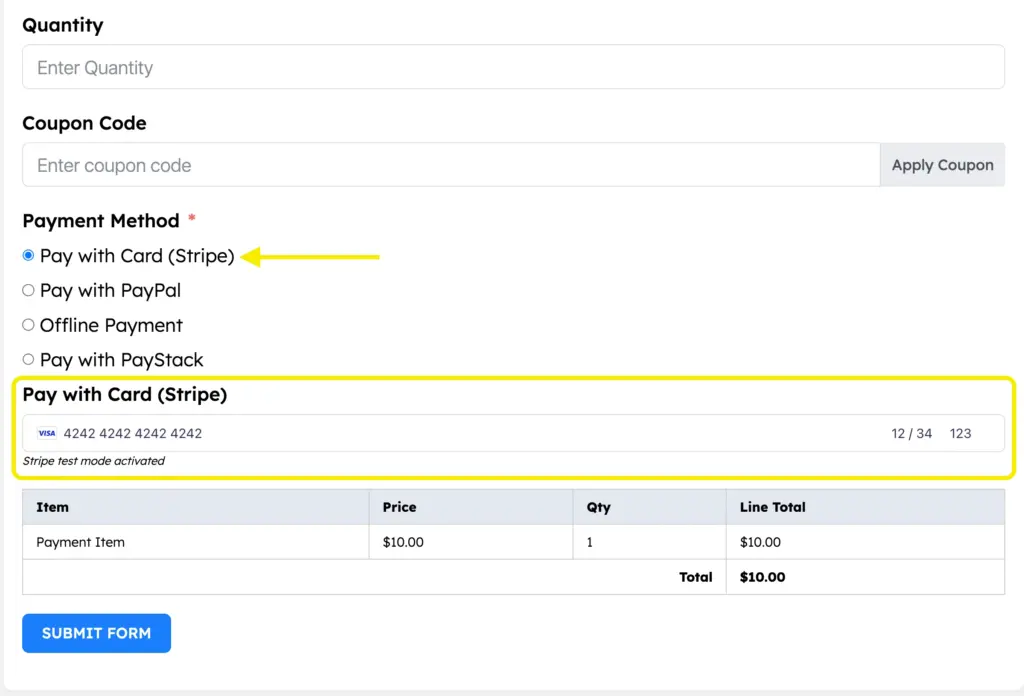
Try out the cake order form below:
For testing purposes, you can use test cards from Stripe documentation.
Your data will be automatically deleted after form submission. We don’t store them.
Do more with your forms
Connecting Stripe already unlocks huge value for businesses, especially if you rely on fast, secure, multi-channel payments. But Fluent Forms doesn’t stop there.
You also get:
- PayPal, Paystack, Razorpay, Mollie, Authorize.net, Paddle and Square. Use multiple gateways based on your audience or region.
- Email marketing integrations like MailerLite, ActiveCampaign. Perfect for nurturing new customers or automating follow-ups after a payment.
- Automation & CRM tools like FluentCRM, Mailchimp. Automatically tag users, start onboarding, or trigger sequences.
- Booking tools like FluentBooking. Accept payments for appointments or sessions in a single workflow.
With Fluent Forms, you get more than a form builder – it becomes a system where payments, communication, and automation work together. If you’re using Paystack already or planning to, this integration gives you a clean, optimized flow that grows your business without friction.
Any questions about the setup? Drop a comment below!

This is Sumit. He’s a physics major who’s trying to understand both the physical as well as the WordPress worlds. Whenever he’s not busy, plays fifa or spends time with his family.


Leave a Reply