
How to Connect AffiliateWP WordPress Plugin to Your Website
Are you looking for the best affiliate plugin for your WordPress website to manage your affiliate program? There are plenty of affiliate tools in the WordPress directory. But not all of them are rich in quality. Either they are complex to set up or too expensive for small businesses or startups.
If you’re already looking for a solution, then you’ve come to the right place! This article will show you how to connect AffiliateWP WordPress plugin in WordPress with an amazing form builder. So, let’s get into the process.
AffiliateWP- an affiliate plugin for WordPress
AffiliateWP is one of the best affiliate marketing plugins for WordPress. It gives a complete affiliate management system with unlimited integrations for e-commerce and membership platforms. The tool is very sleek and easy to use. The core features of the plugin include the following:
- Unlimited affiliates
- Real-time reporting
- Analytics
- Coupon tracking
- Customizable emails
- Affiliate dashboard
- Different referral rate types
Moreover, AffiliateWP comes with some pro-add-ons, such as PayPal Payouts, Tiered Affiliate Rates, Recurring Referrals, etc. Besides, the plugin offers plenty of integrations with other plugins. It’s very important for affiliate tools to incorporate with other plugins for better results. Some of the third parties are:
- Formidable Forms
- LifterLMS
- MarketPress
- PayPal Buttons
- Paid Membership Pro
- Stripe
- Zippy Courses
- Restrict Content Pro
And more!
And now it’s integrated with Fluent Forms, a robust form builder tool in WordPress! Above all, AffiliateWP offers affordable pricing packages for users considering its features and functionalities.
Let’s explore how to connect the AffiliateWP WordPress plugin on your website using Fluent Forms. Why with this tool? At the end of this article, you’ll find that, too. So, let’s started!
Connect AffiliateWP WordPress plugin with Fluent Forms
To make the tutorial, we’ll go through the following steps.
- Create a form
- Activate AffiliateWP integration
- Get the ID of AffiliateWP
- Publish the form
Let’s discuss the steps in detail.
Step 1: Create a form
We want to create an affiliate sign-up form for our users and connect AffiliateWP WordPress plugin to the form to collect the referrals.
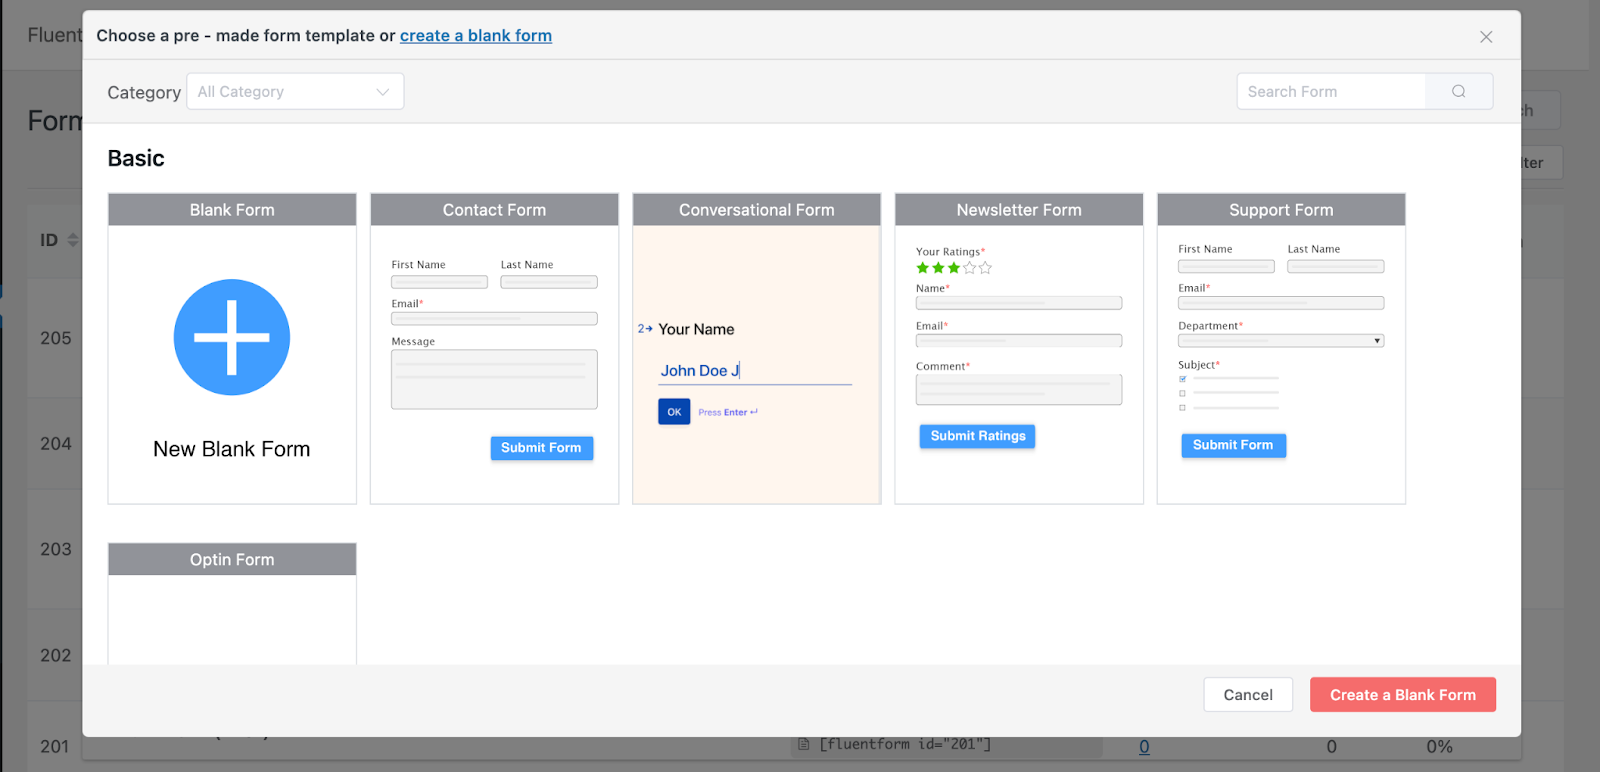
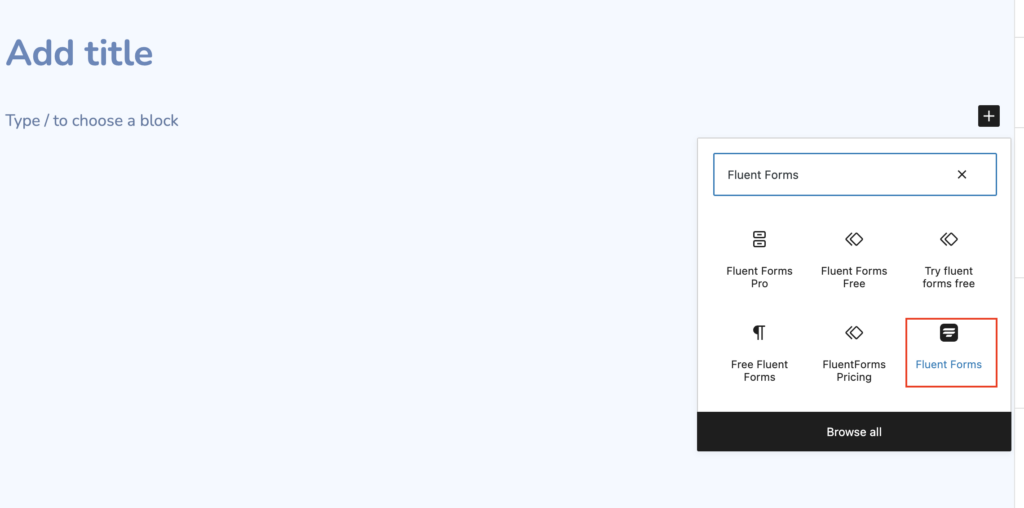
First of all, you’ll need the Fluent Forms pro version to use the AffiliateWP integration. Now go to your WordPress dashboard, and click on the Fluent Forms pro button from the left sidebar. Then tap on the Add a New Form button.
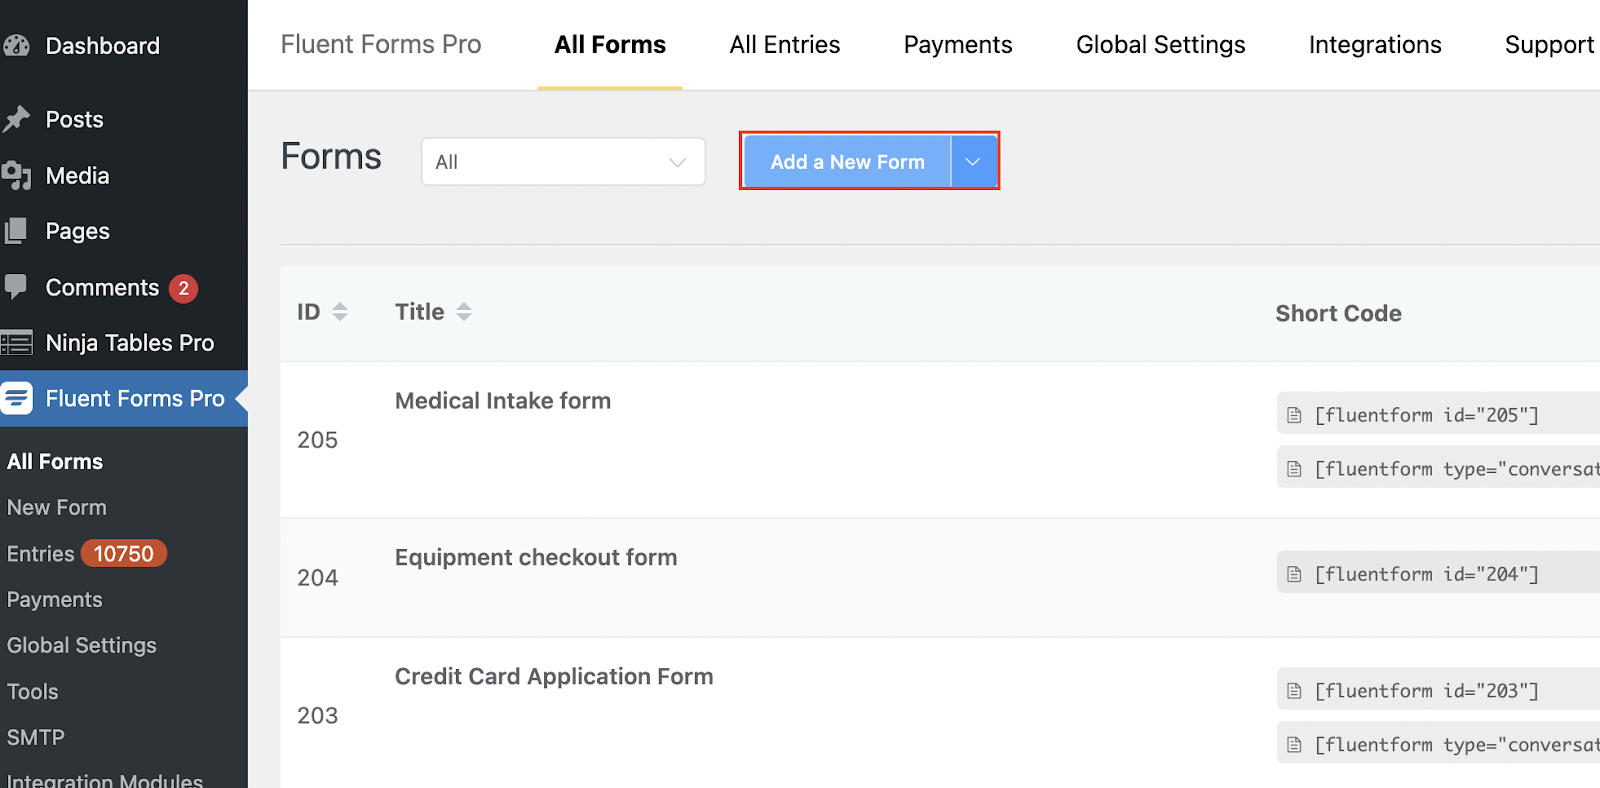
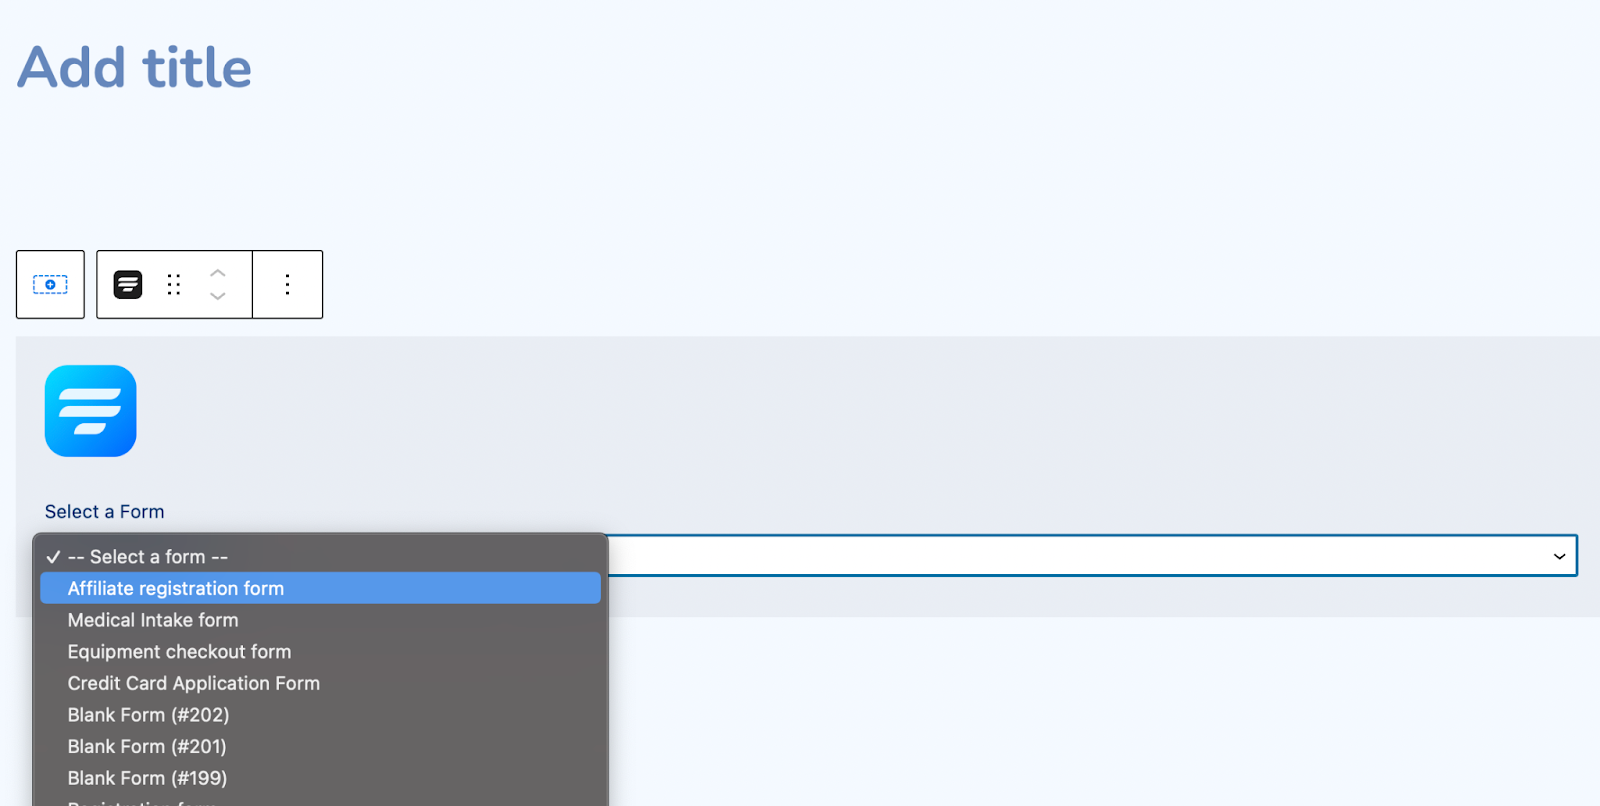
After that, you’ll get the available pre-built template options there. Choose any one from them. We’re going for the Blank Form option.
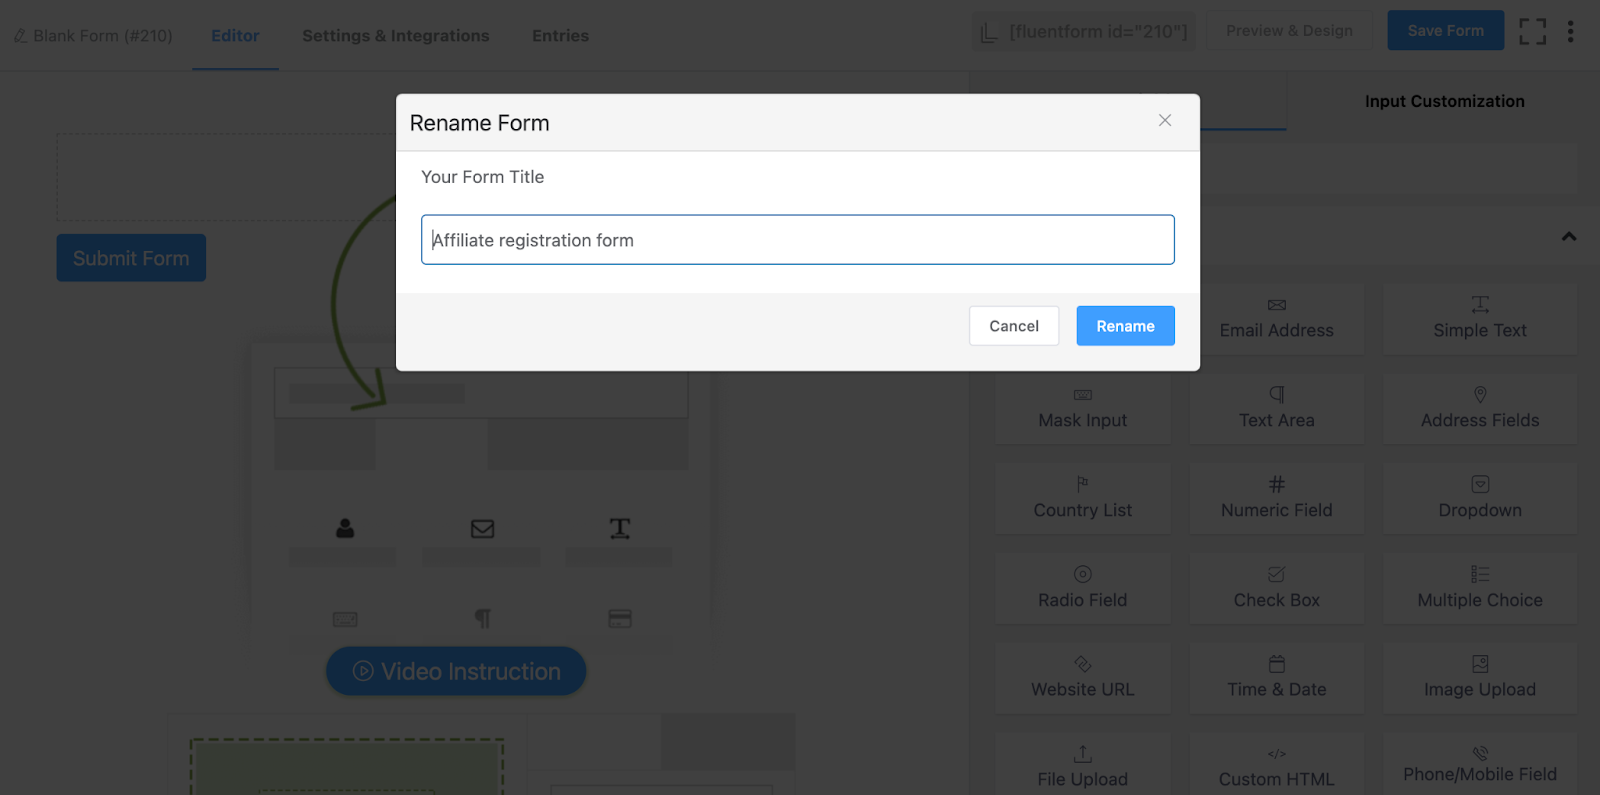
Name your form afterward from the top left corner of the editor.
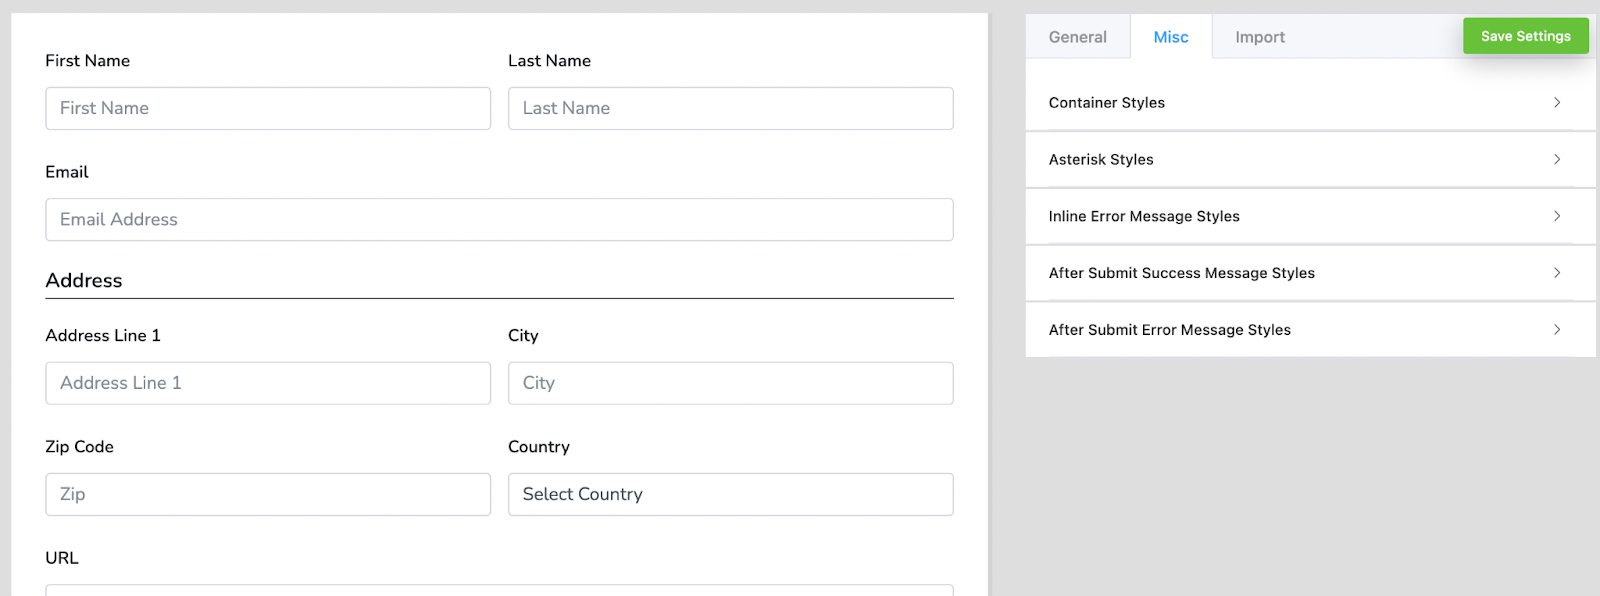
Now, drag and drop the necessary field from the Input Fields section on the right side. We’re adding the Name Field, Email Field, Address field, and Website URL field from the General Fields section.
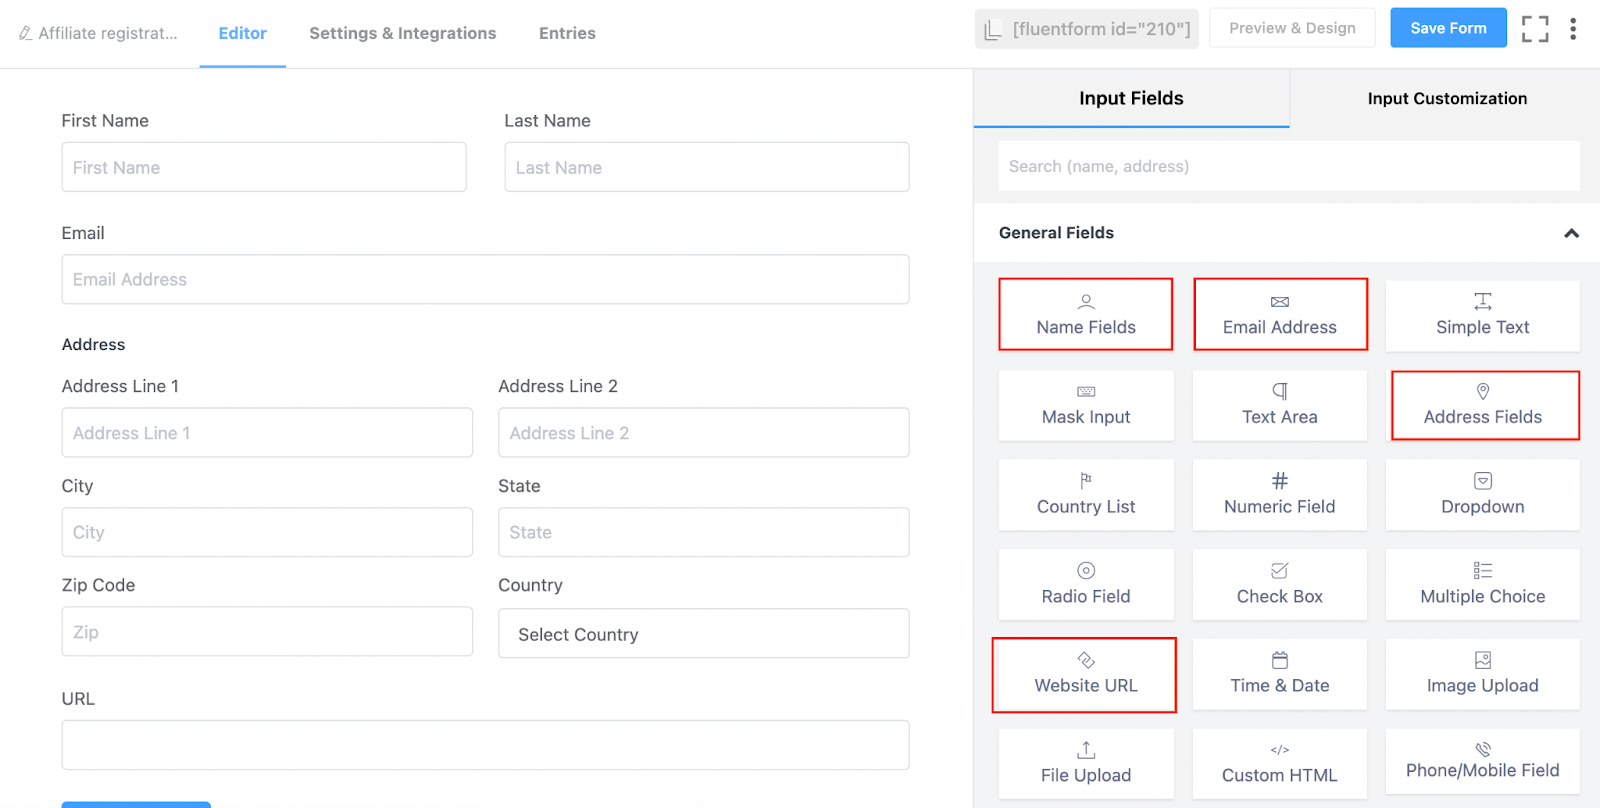
Now, if you want to edit the fields, tap on the pencil icon of each field by hovering over them. We’re editing the address field and deleting address line 2 and its state options.

Don’t forget to click on the Save Form button from the top right corner when done.
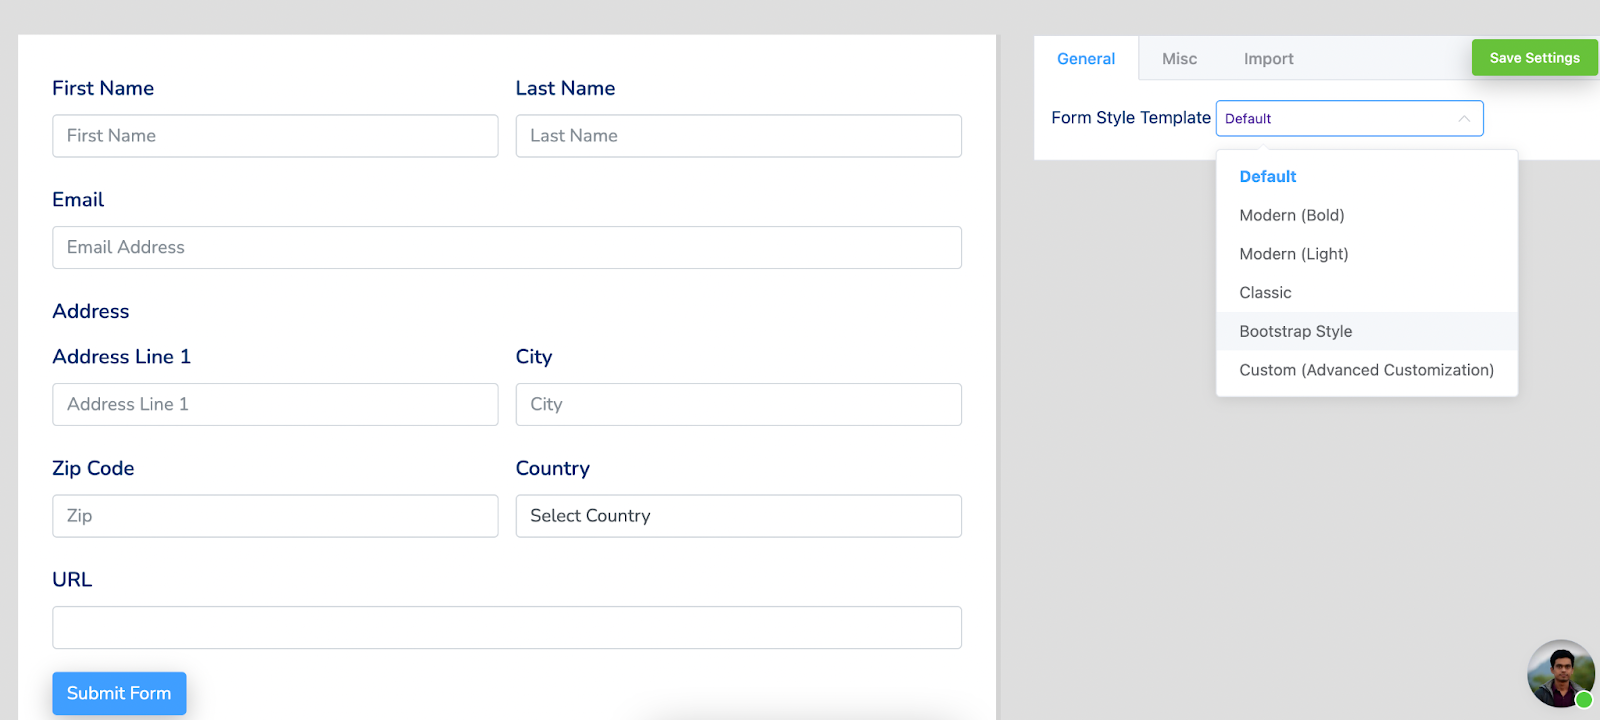
Go to the Preview & Design section of the form editor to add some colors to your form. From there, select any form template from the Form Style Template. We’re going for the Bootstrap Style.
Then move on to the Misc section, and style your containers, asterisks, inline error message, after submit success message, after submit error message, etc.
We’re just changing the background color from the container styles.
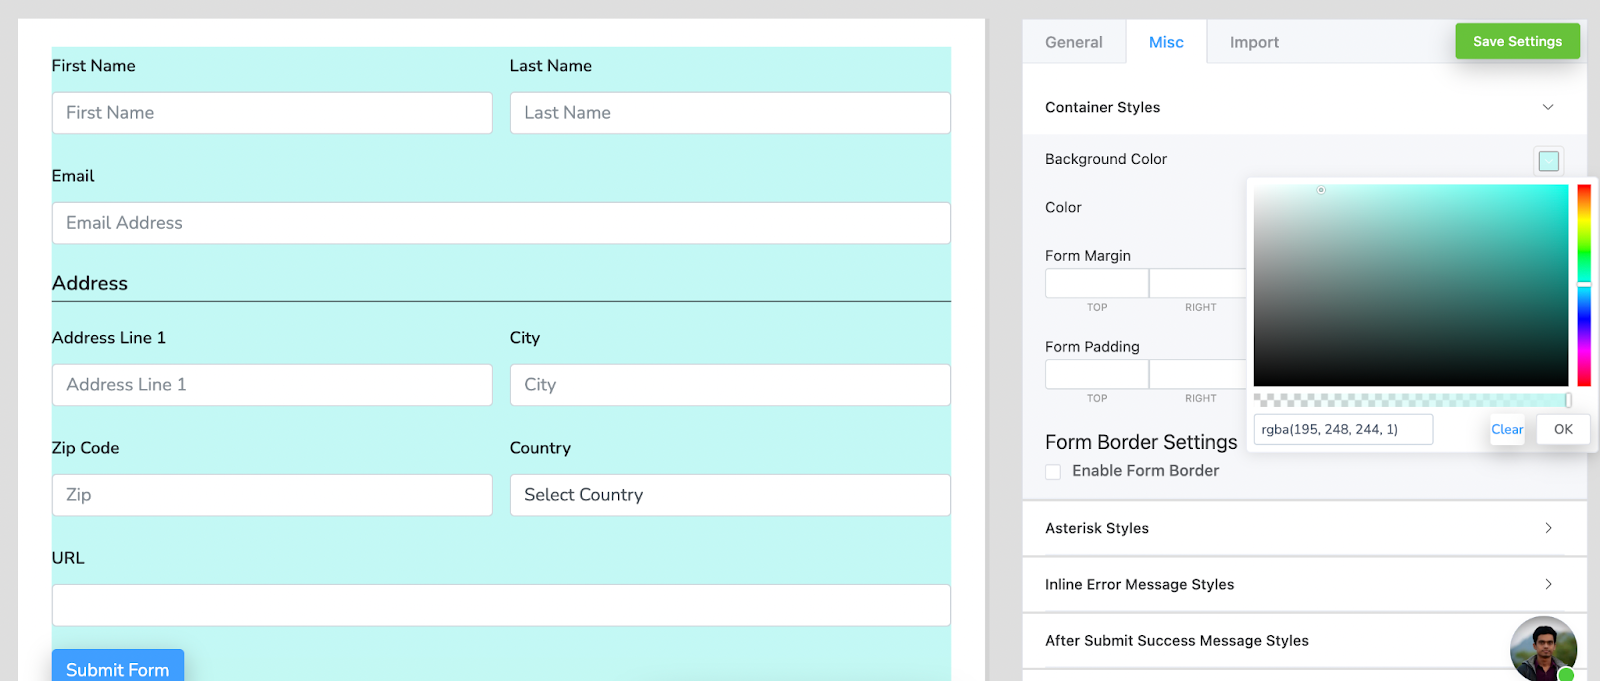
Save the settings when done. Here is the preview of our form.

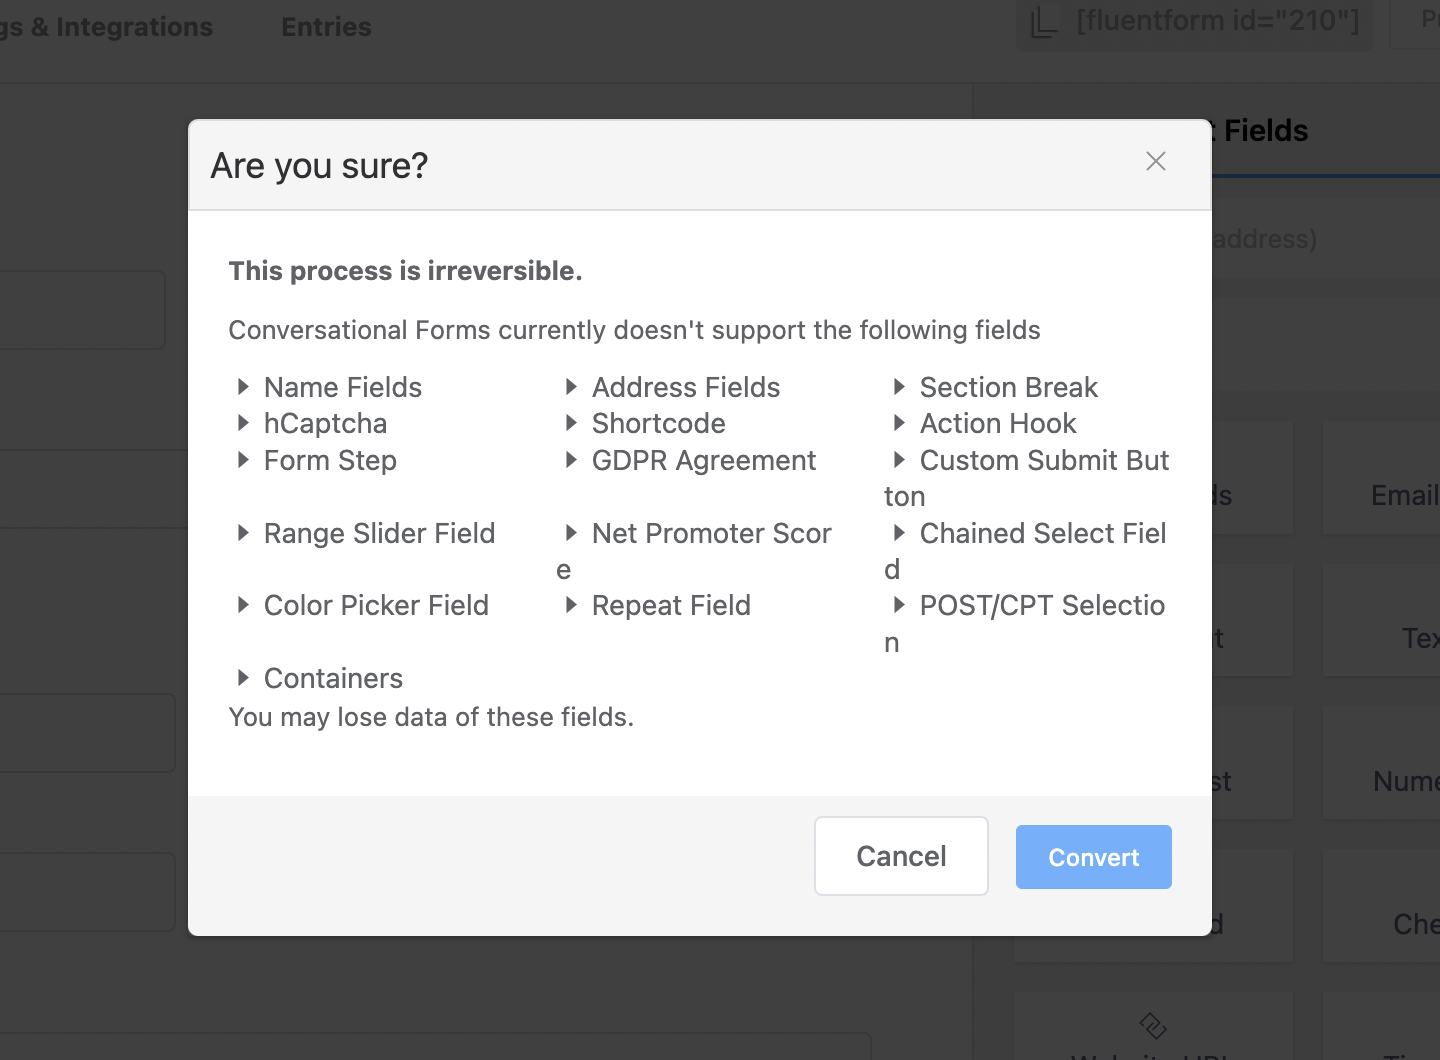
Now, if you want to convert your normal form into a conversational form, go back to the form editor again. There, hover over the three-dotted icon in the top right corner. You’ll see an option that says Create to Conversational Forms text. Click on it.

After clicking on that, you’ll see a confirmation popup on the editor. Click on the Convert button from that popup.
After that, you’ll get the editor of conversational forms.
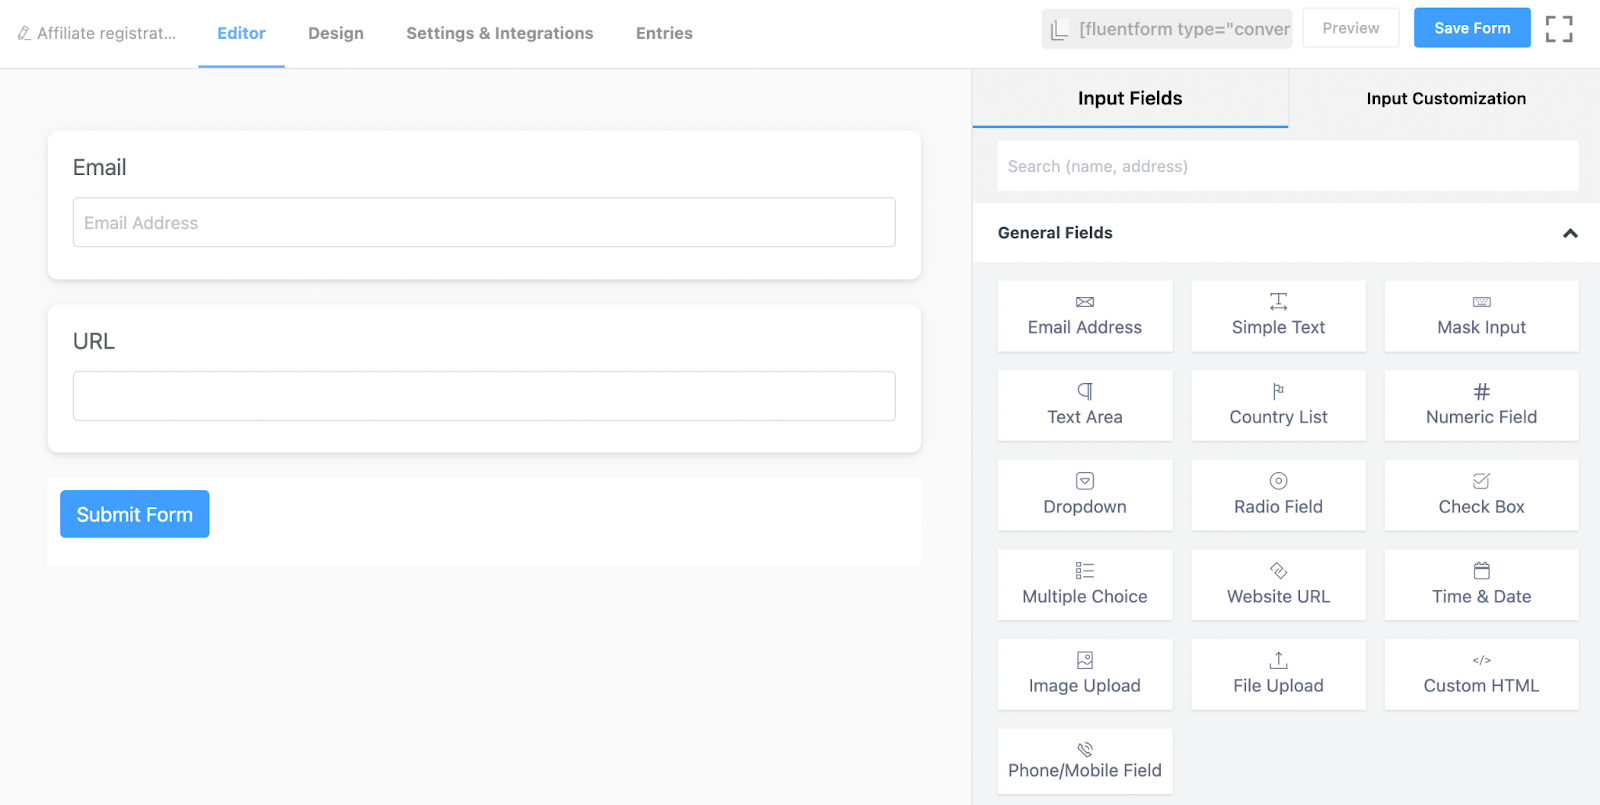
For now, we’re skipping this field because we’ve already added the necessary fields for our form.
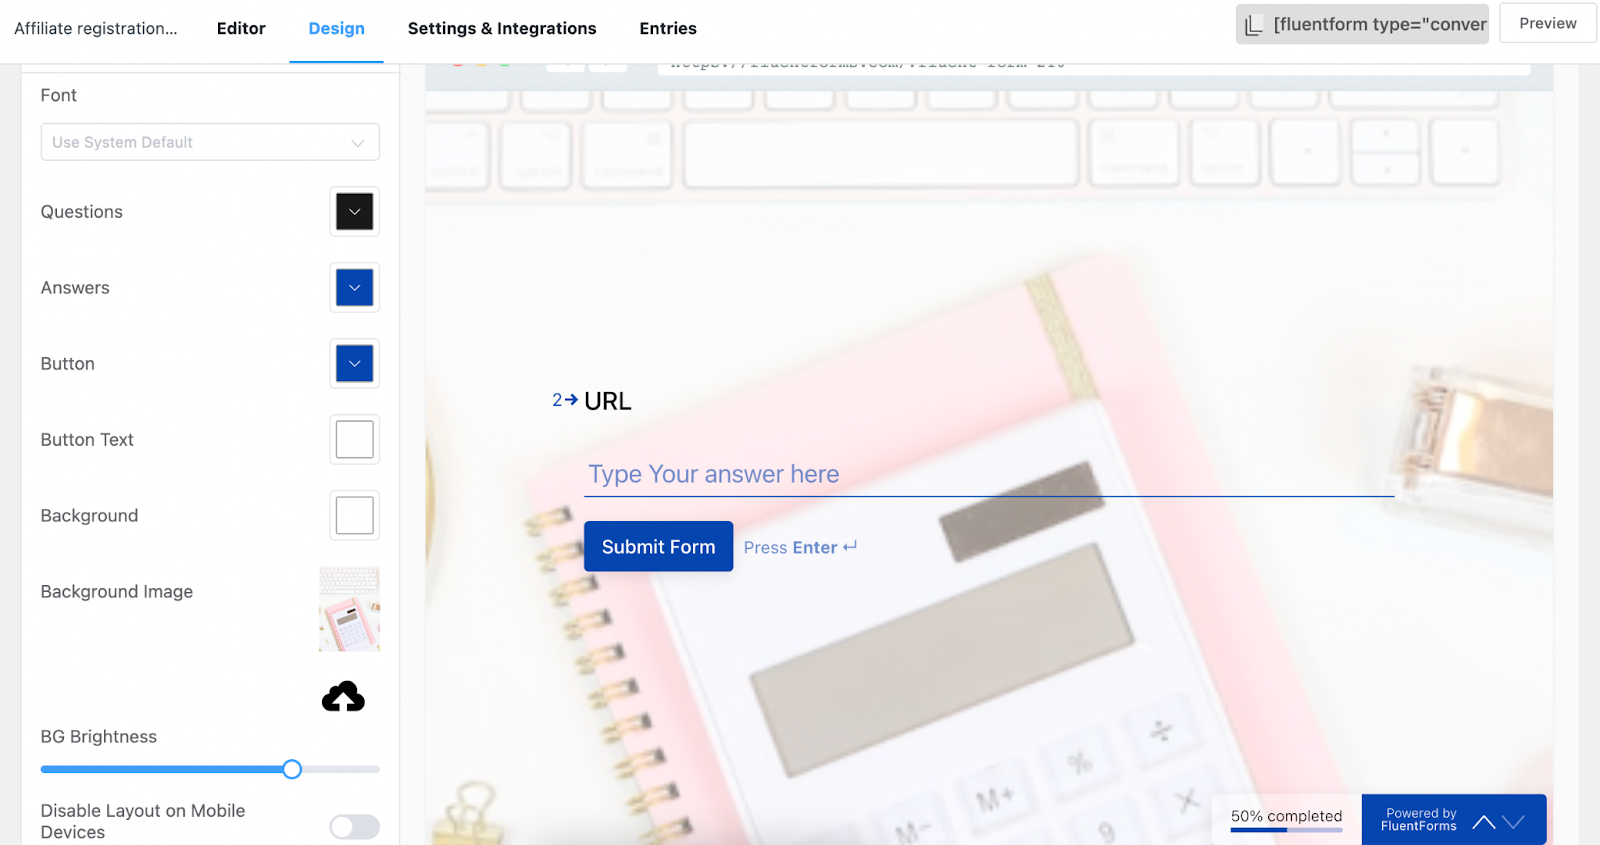
Moving on to the Design section from the editor. Here, you’ll get the options for choosing the font, the color of questions, answers, button, button text, background color, background image, enable or disable mobile view, enable or disable branding, etc.
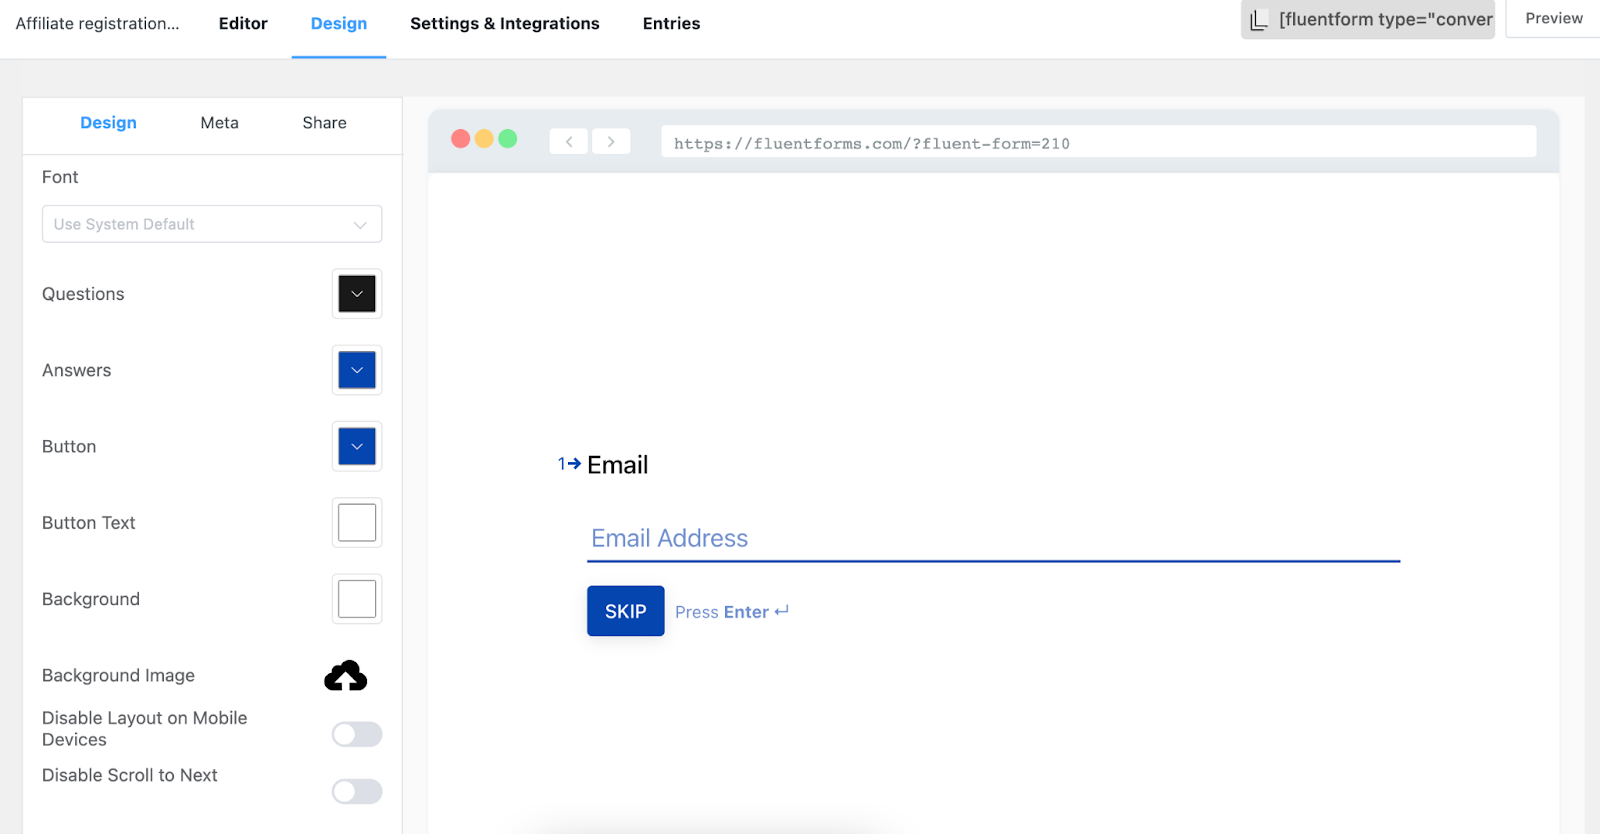
We’re just adding a background image to the form.
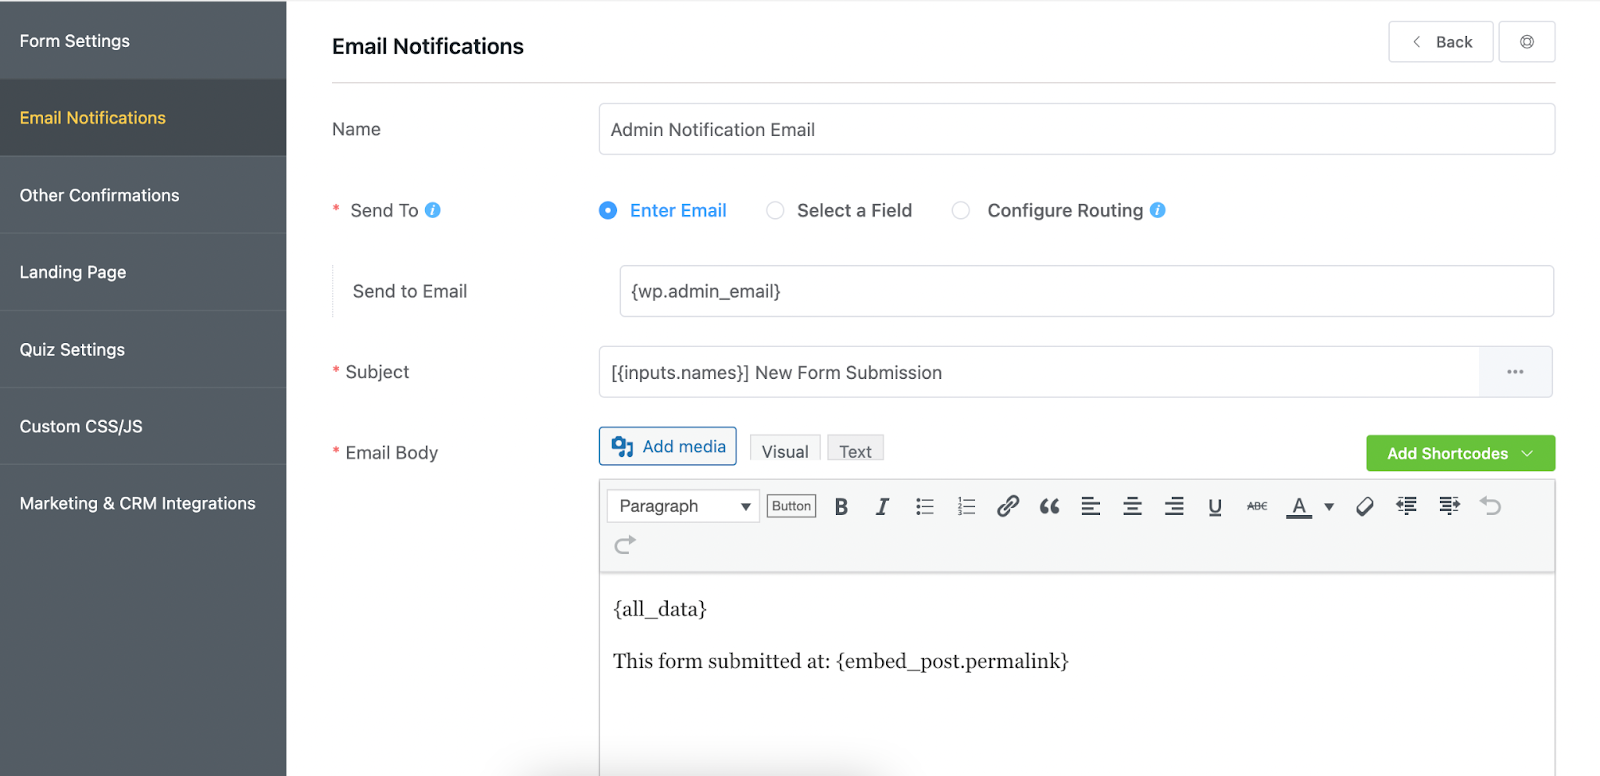
You can move on to the Settings & Integration section if you want to set Form Settings, Email Notifications, Other Confirmations, Landing Page, Quiz Settings, Marketing & CRM Integrations, and Custom CSS/JS of the form.
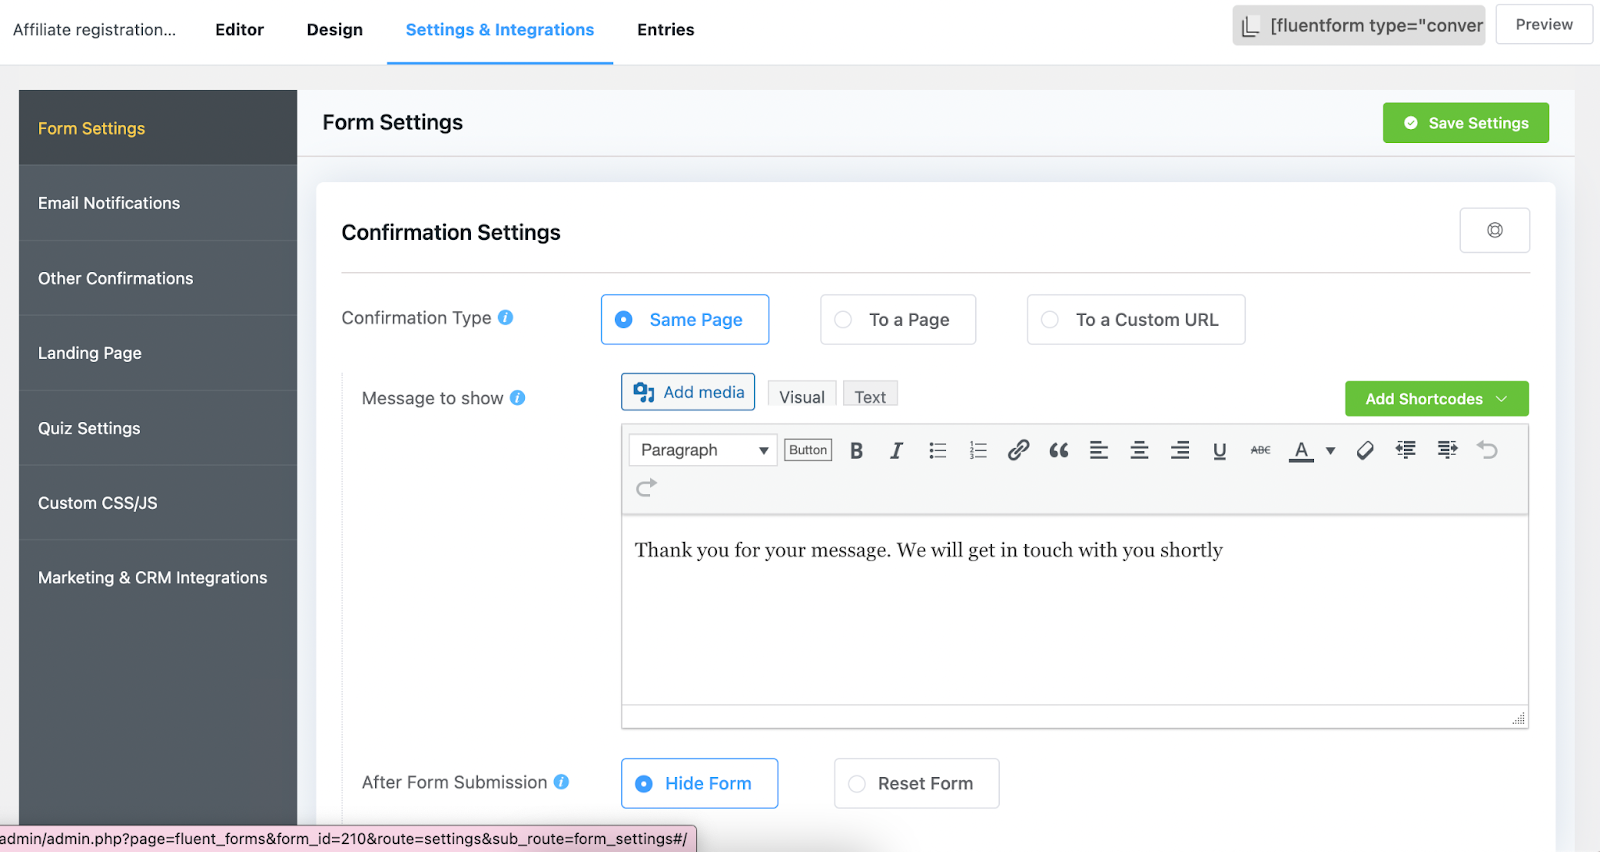
We’re just setting the email notifications of the form.
Our form is ready. Now let’s see how to set up the connect the AffiliateWP WordPress plugin with our form.
Step 2: Activate AffiliateWP integration
Go to the Integrations section of Fluent Forms pro. Search for the AffiliateWP plugin form there.
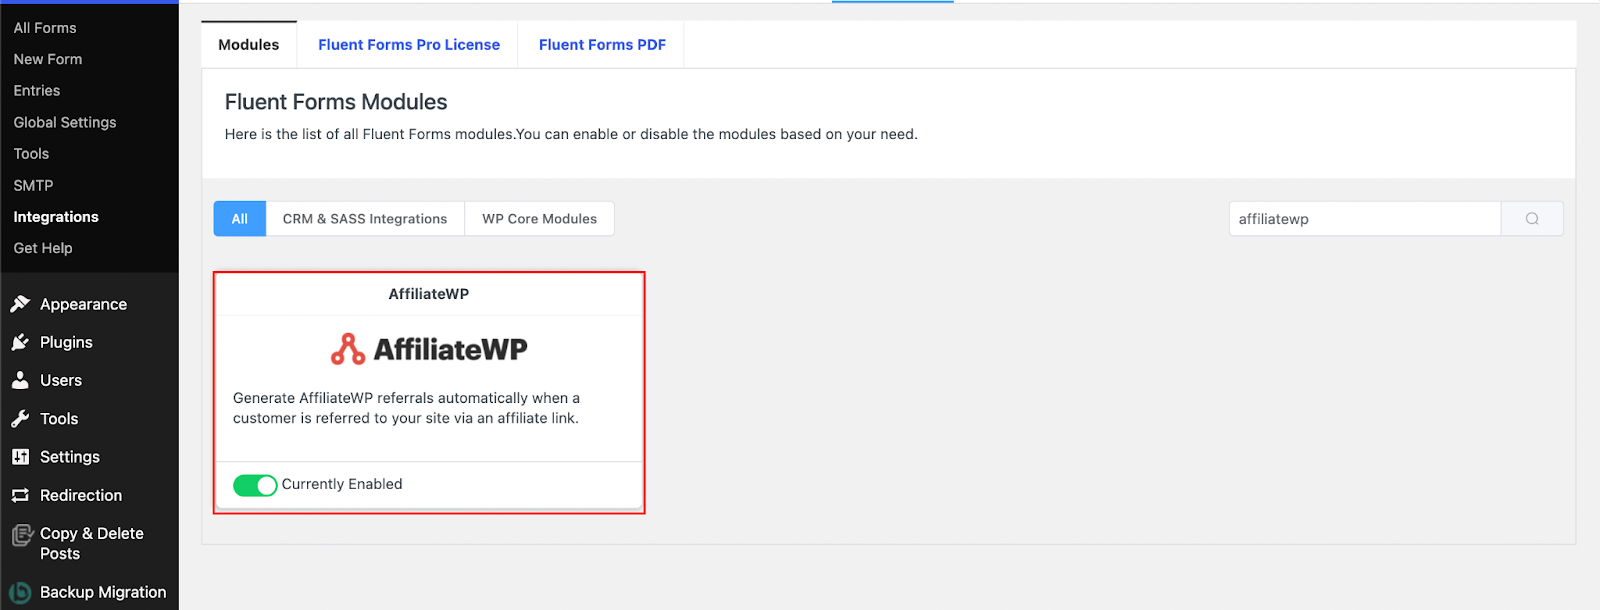
Then, move on to the AffiliateWP plugin’s dashboard. There click on the integrations option from the editor.
Tick on the Fluent Forms option from there, and tap on the Save Settings button.

Go to the settings option of the respective form. On the first option, which is form settings. You’ll get the affiliate option.
Step 3: Set the ID of AffiliateWP
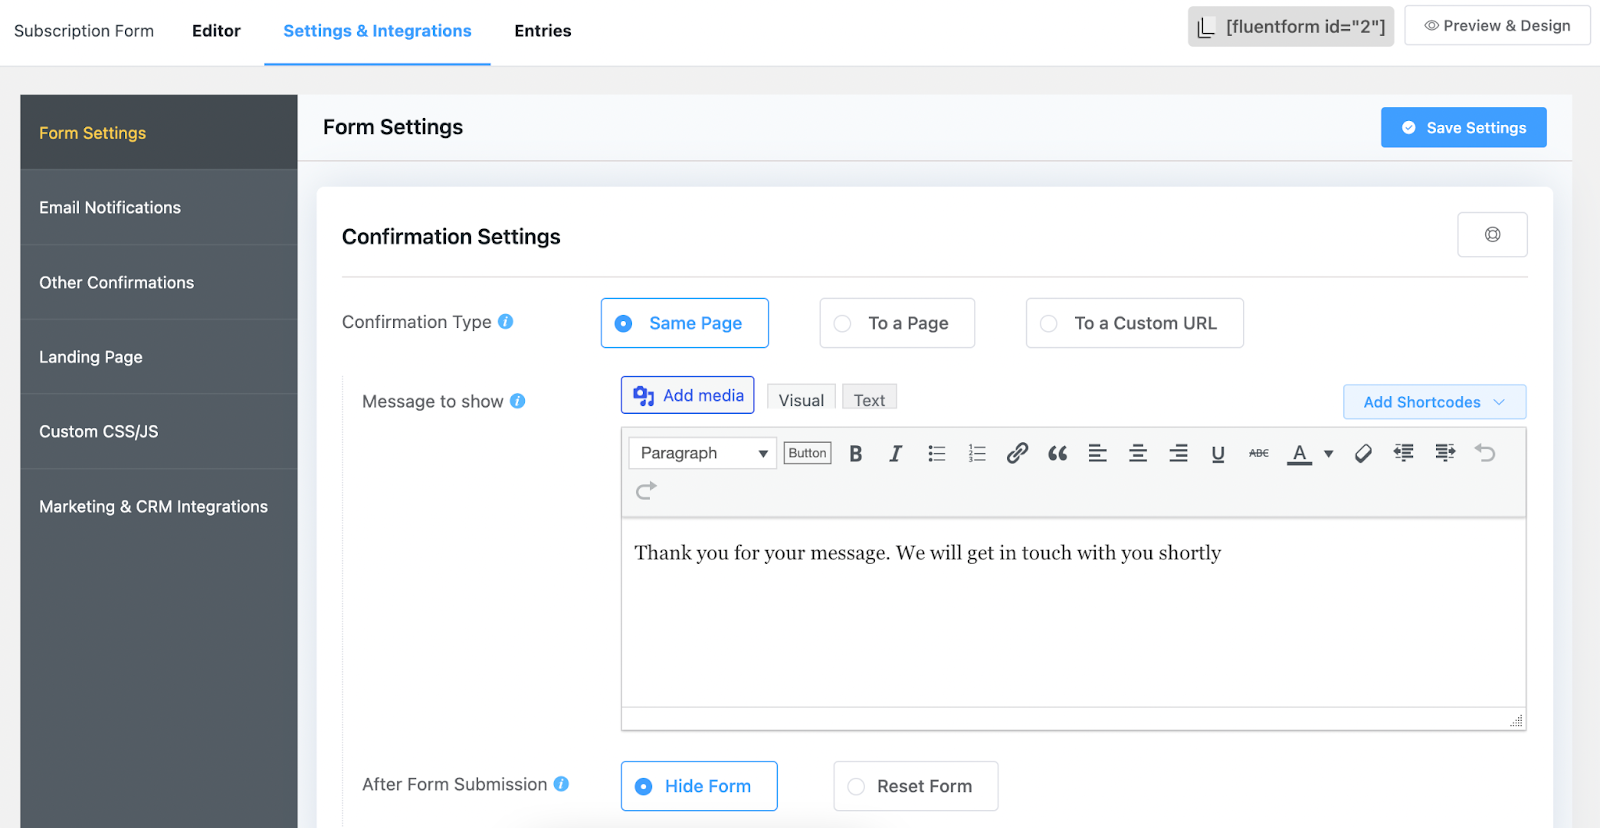
Just scroll down a bit, and you’ll get it on the last portion of the section. Tick the Enable button on the Allow referrals part, and select Sale there. Don’t forget to click on the Save Settings button when done.

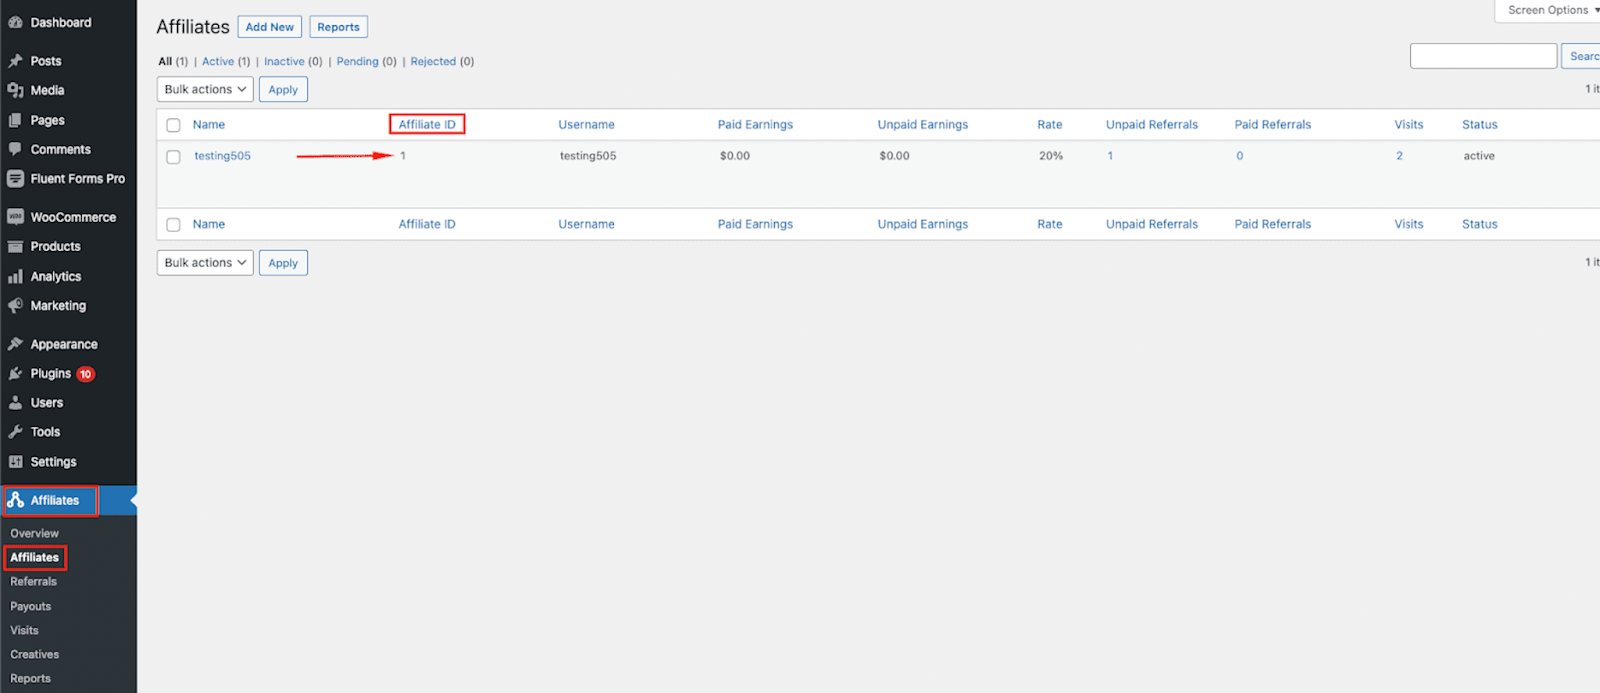
Now, go to the AffiliateWP plugin’s dashboard again, and select the the Affiliates option from the left sidebar. You’ll see an Affiliate ID on the dashboard there. Copy it.
Step 4: Publish the form
You can publish your form with Fluent Forms in two easy ways. If you want to show your form on a page, move on to the pages section from the WordPress dashboard and click on the Add New button.

You’ll get the Fluent Forms’ Gutenberg block by clicking on the editor’s plus (+) icon.
Now select the form and publish it on your website.
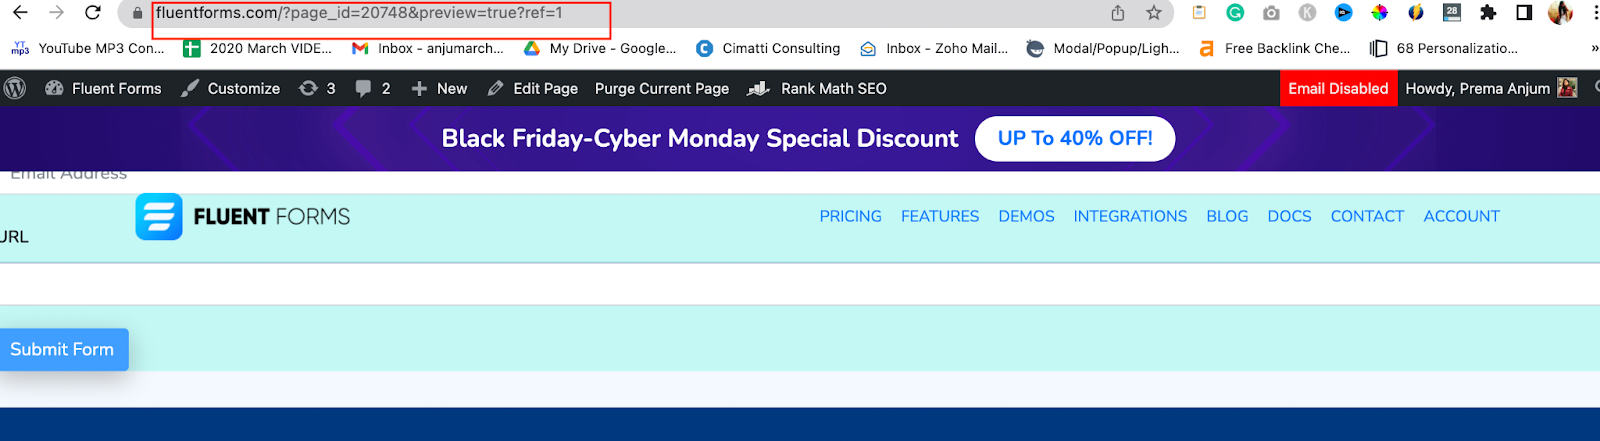
Keep in mind that, for affiliate forms, you’ve to add the affiliate ID link just after the form’s page. In this matter, the affiliate ID is ?ref=1. So, let’s add it on the form’s page in a new tab.
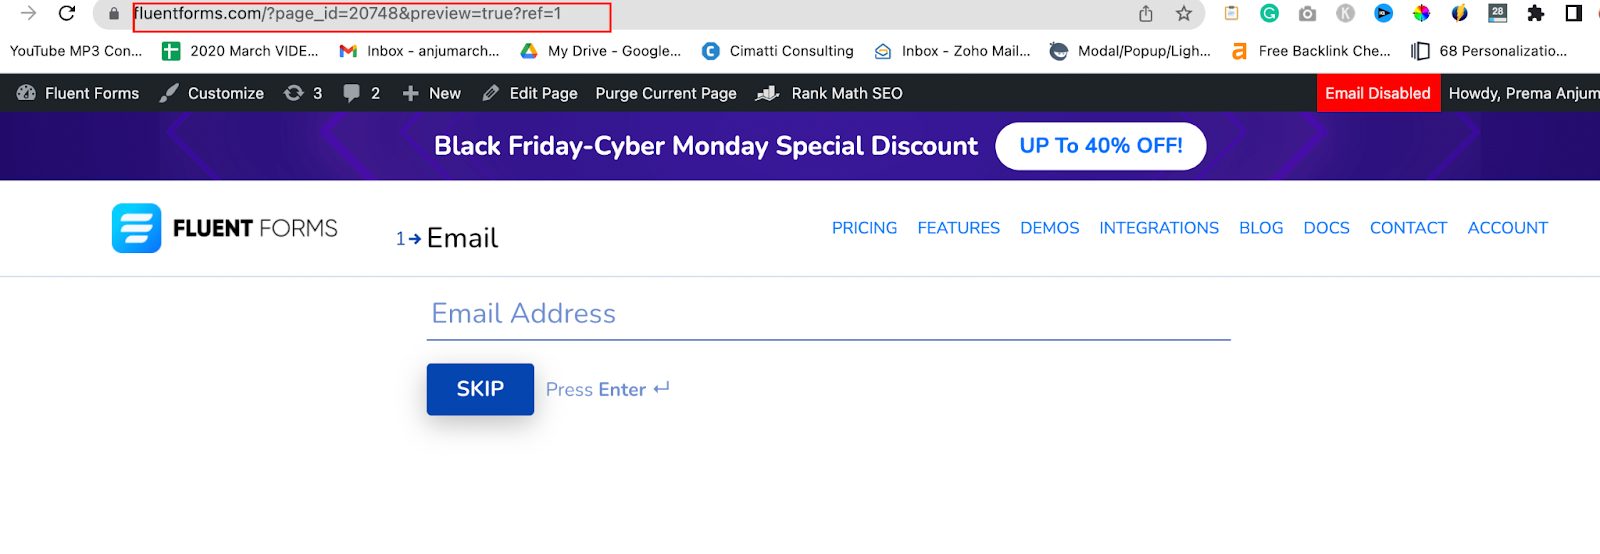
Share this full link with your users to get the affiliate submission on your AffiliateWP WordPress plugin dashboard.
You can also follow the same process for publishing it on your blog posts.
There is another way to publish your form. Copy the form’s shortcode and paste it anywhere on your website.
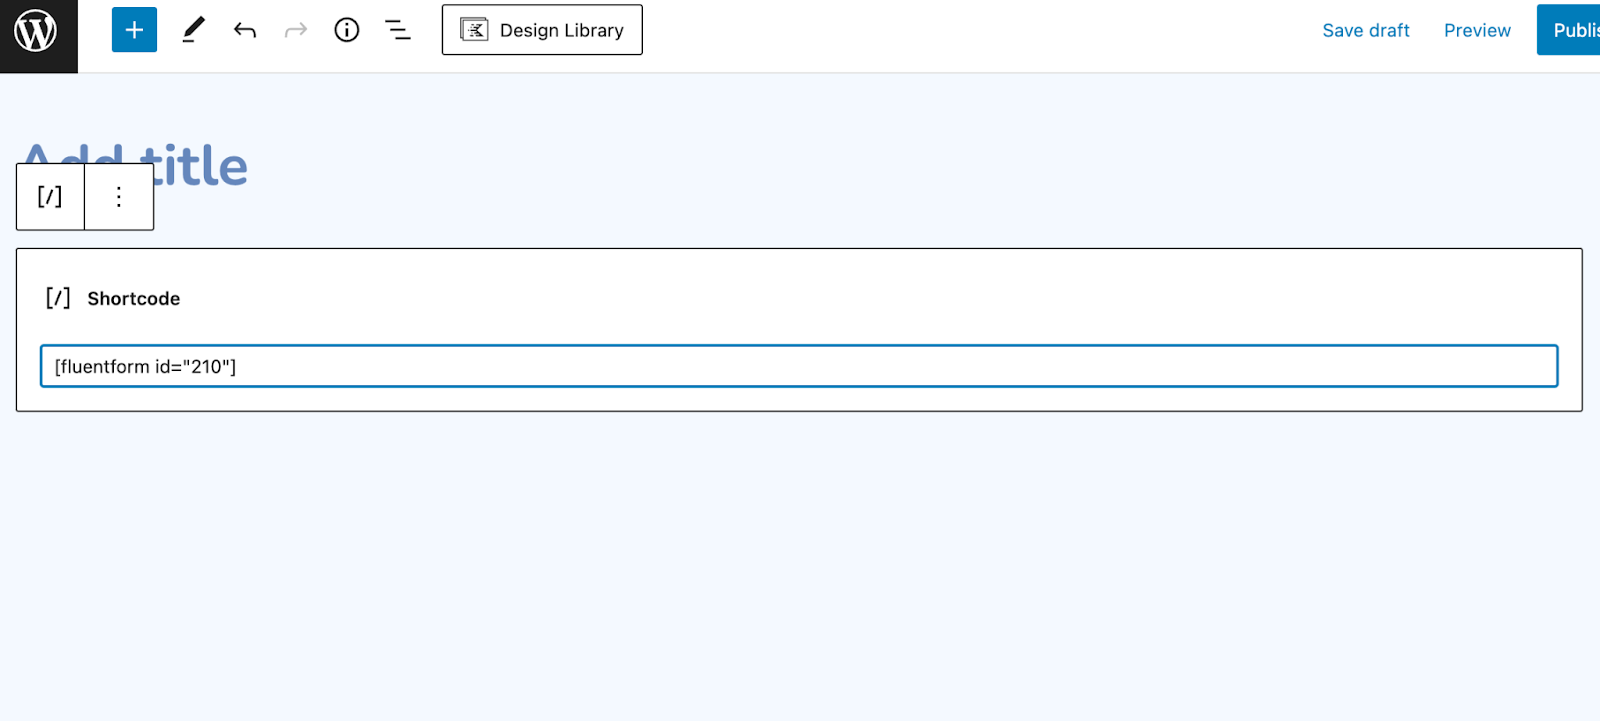
And again, you’ve to add the affiliate ID just after the form page link, and you’ve to share that full link with your affiliates.
Easy! Isn’t it?
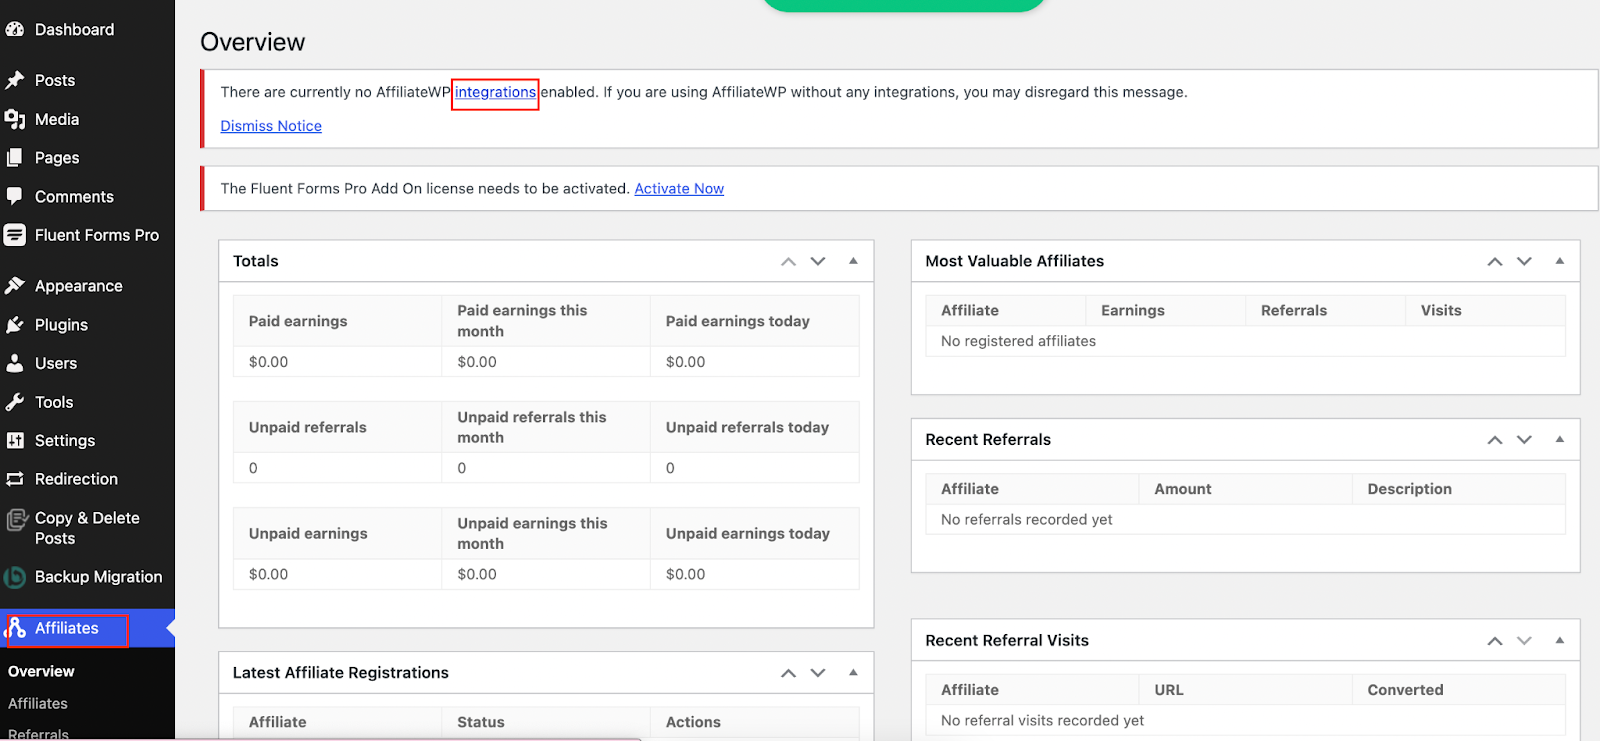
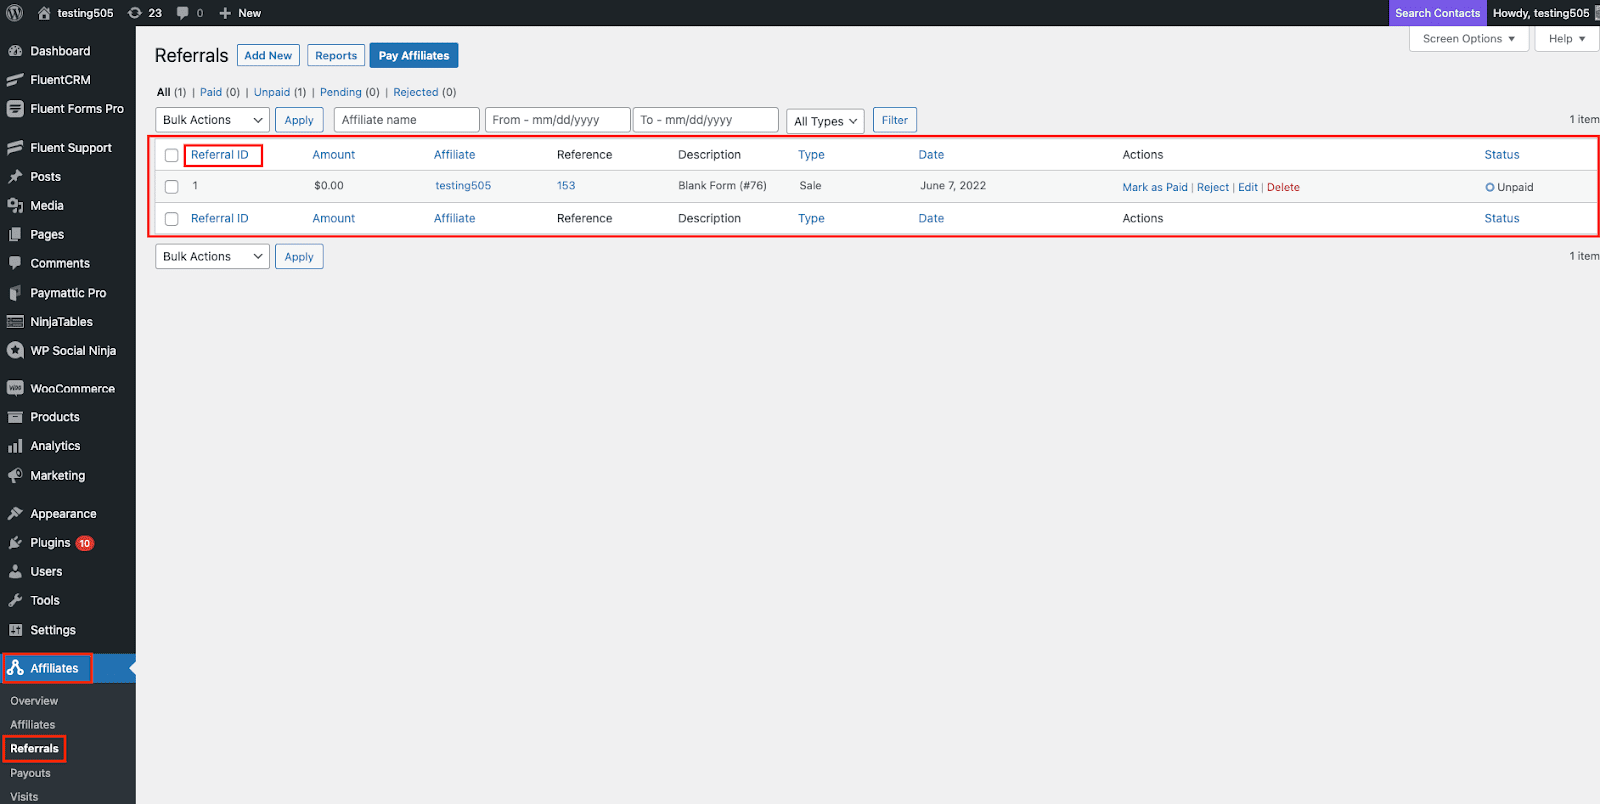
Now, AffiliateWP will automatically generate referrals when a customer is referred to a site via an affiliate link. You can see the Referrals by going to the left menu on the dashboard and then Affiliates > Referrals.
Fluent Forms in a nutshell
Fluent Forms is a lightweight yet powerful form builder in the WordPress community. From making sign-up forms to quiz forms, payment forms to conversational forms is just a matter of a few minutes with Fluent Forms. The main features and functionalities of the plugin are:
- Drag and drops
- Conditional logic
- 60+ input fields
- Conversational forms
- GDPR field
- 70+ pre-built templates
- Signature add-on
- 40+ third-party integrations
Moreover, Fluent Forms gives you plenty of options to collect payments on your eCommerce and WooCommerce store. Because it has
- PayPal
- Stripe
- Mollie
- Paystack
- Razorpay
In addition, Fluent Forms’ global styler feature lets you make some amazing forms for your website. On top of that, when it’s about pricing, Fluent Forms asks very small prices from its users than other tools in the market.
So, what are you waiting for? Grab Fluent Forms now. Check out our blog posts for more tutorials like this, and follow us on YouTube, Facebook, Twitter, and Instagram, for more information about Fluent Forms.

Hello, This is Prema. I work as a marketing strategist for Fluent Forms at WPManageNinja. When I am not playing with words, I go to explore nature.


Leave a Reply