
Connect Calendly to WordPress with Zapier For Easy Scheduling
Scheduling forms work great for conversions. More and more marketers are opting to embed a scheduling form on their landing page so they can provide their users with a more personal experience. This reflects significantly on conversions and, in turn, revenue.
But how to get that scheduling form to work? Don’t worry! We got you. We have just what you need. Calendly is the perfect tool to get your visitors, literally, booked. So read on to find out how great Calendly is and how to connect Calendly to WordPress.
Calendly
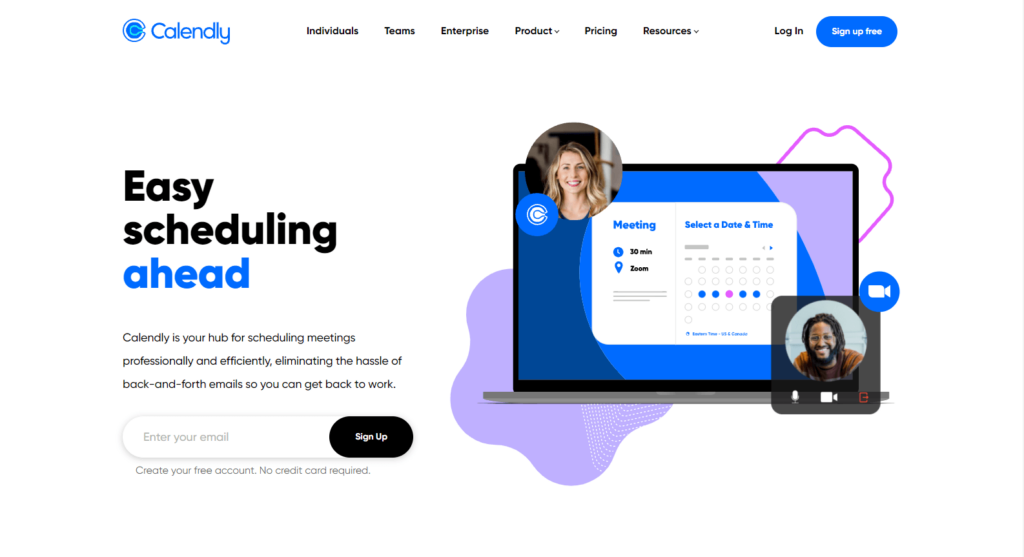
Calendly is a fantastic tool to have on your site. It can be added as a landing page and works with various CMSs like WordPress, Squarespace, Leadpages, etc. It is a one-stop solution for scheduling meetings without the need for back and forth emails.
Even the free version of Calendly comes equipped with appointment functionalities and features that make communication easy. Just configure Calendly on WordPress, and it will sort everything out for you.
- Availability preferences
- Share links or embed on site
- Instant confirmation
- No calendar conflicts
- Automatic reminders and follow-ups
- Easy rescheduling
You can trust Calendly to do everything from thank you emails to courteous bookings. Because rescheduling is so straightforward, cancellations drop significantly.
How to connect Calendly to WordPress with Zapier
Pair up Calendly with a scheduling form and see the magic at work. We’ll use Fluent Forms to demonstrate how you can connect Calendly to WordPress because of all the amazing features the form builder offers, like Zapier. Zapier is an industry leader in connecting apps and automating workflows. So without further ado, let’s proceed.
Step 1: Create a scheduling form
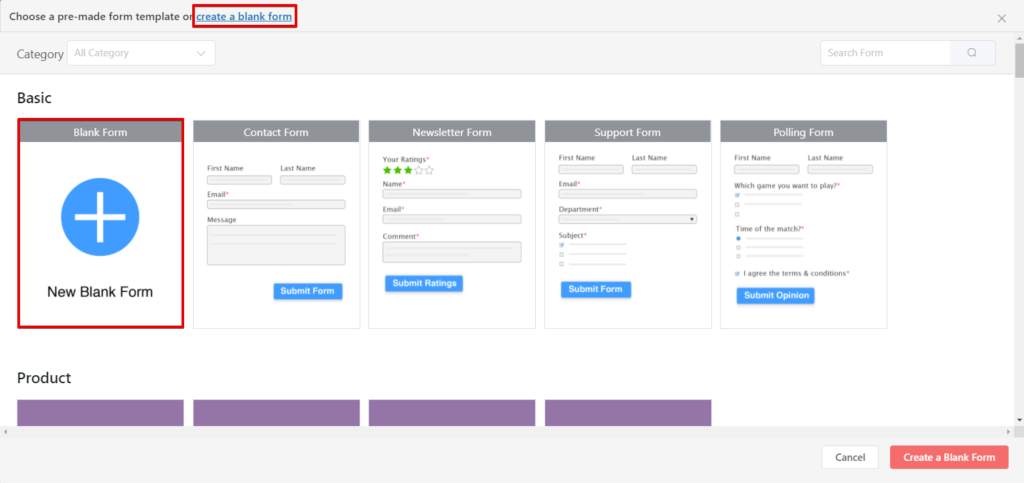
To create your scheduling form, go to the Fluent Forms dashboard, and click on the Add a New Form button. We’ll go with a blank form.
After the form has been created, notice the abundance of input fields. Fluent Forms offers as many as 30 form fields for free, and you can extend that to a staggering 58 with an upgrade.
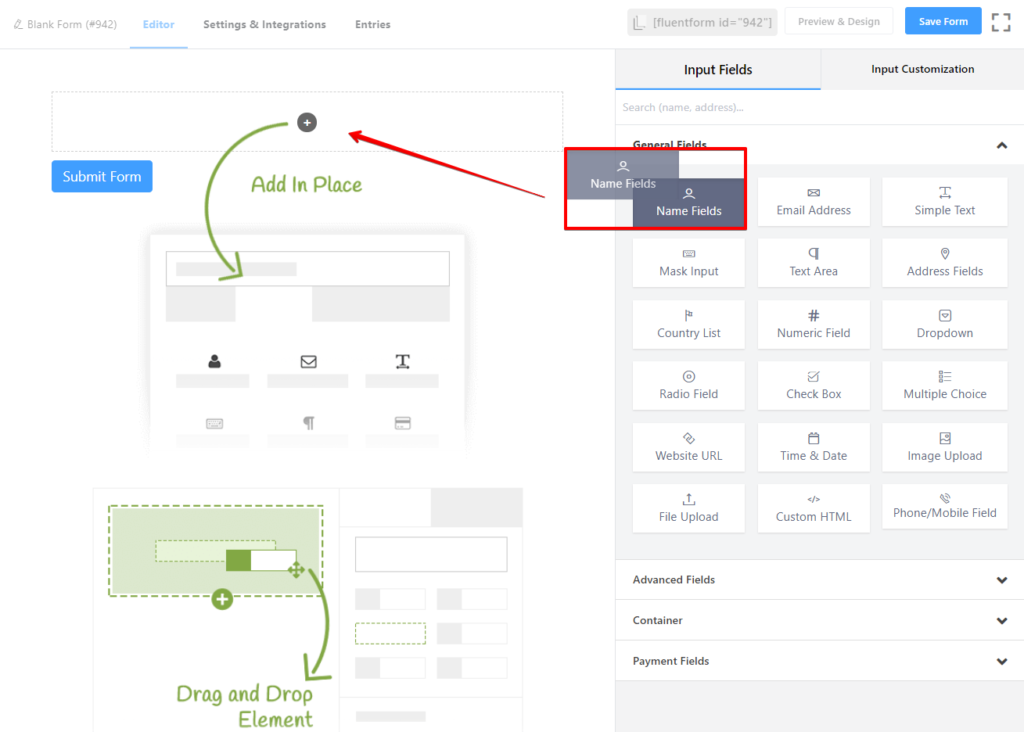
Drag the fields you need, like Name, Address, Email, Date & Time, Dropdown, etc., and place them accordingly. Configure them to suit your need, and you have a high-functioning scheduling form at your hand.
Step 2: Create a Zap
The next, and obvious step, is connecting your form builder with Zapier. To do that, you’ll have to create a Zap. And it’s really easy to do so. Just go to the Zapier dashboard and follow the steps mentioned below.
- You’ll notice a Make a Zap button on the left sidebar, click on it.
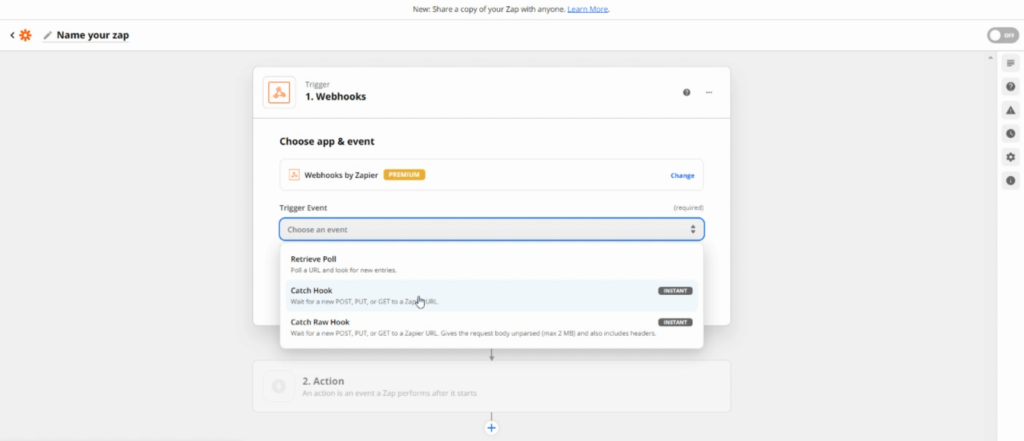
- A selection of apps will appear. We will go with the Webhooks by Zapier.
- Then select the Catch Hook event for connecting Fluent Forms with Zapier.
- Continue.
- Remember to copy the Custom Webhook URL.
And with that, you have successfully created a Zap.
Step 3: Create a Zapier feed
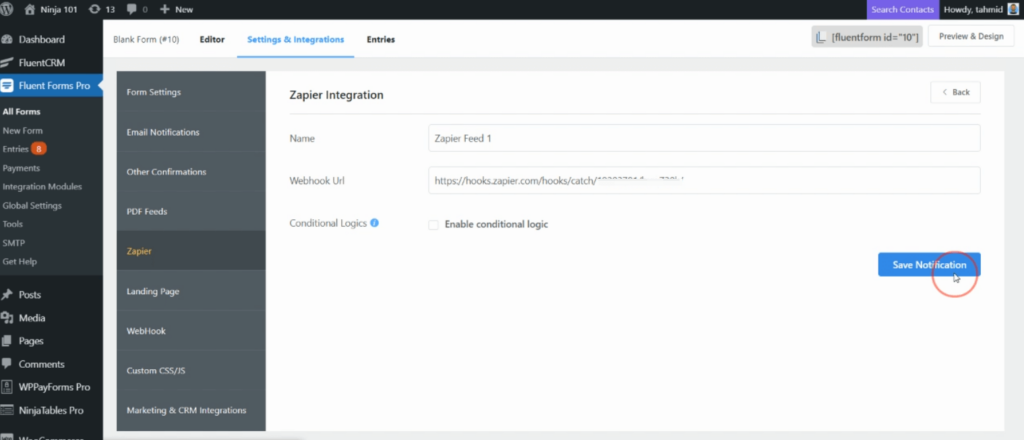
Now to prepare the forms, we have to create a Zapier feed. So head to your Fluent Forms dashboard and select the scheduling form you created in step 1 to connect with Calendly.
- Go to the Settings & Integrations from the tabs.
- Locate Zapier from the left side menu.
- Hit the Add Webhook button.
- Remember the Webhook URL you copied previously? Paste it.
- Save Notifications.
Your Zapier feed is ready. Always remember to test it before using it. You can test it from the Zapier dashboard. Just head back and hit the Continue button to refresh. If new data appear once you fill out a test form, then congratulations! Your Zapier hook is working.
Step 4: Create an action
Now that you have a working Zapier hook, it’s time to create a trigger. Before you start the following steps, remember to hit the Continue button.
- Type in Calendly on the search bar, and select it.
- Next, we selected the Create Task event as the Action Event.
- Continue.
- Now sign in to your Calendly account (or simply select it if you are already signed in).
- Here, you can define the action further by configuring the description, due date, entity type, category, details, etc.
- Remember to Test & Review.
Head back to your Calendly dashboard, and you will notice an additional task. With each successful form submission, more will be added later on. To view details, simply click on the tasks.
Step 5: Turn on Zap
Once you are done with all the testing, it’s time to place the cherry on the top. Turn on Zap to view everything from your Zapier module. To do that, just click on the Go to my Zaps button on the popup, and you’re done!
Calendly with Fluent Forms
Come to think of it, scheduling appointments and automating emails and landing page forms – they aren’t that worlds apart when you have the right tool, that is. And that’s just how unique Fluent Forms is. It can literally take in any two elements from seemingly two ends of the universe and come up with an awesome feature.
But if you are still not convinced, why not take it up for a drive? Test out the form builder yourself and see if it is worth the hype. I’ll give you my word. You’ll get the ride of a lifetime.

Mahiyath is a digital marketer for Fluent Forms. She likes to explore through the alleys of WordPress and learn about the themes and plugins, currently specializing in WordPress forms. When she’s not doing that, she’s planning her next adventure.


2 responses to “Connect Calendly to WordPress with Zapier For Easy Scheduling”
-
What version of Zapier is required? What does the date and time fields look like on the form? Doe they look like Calendly or are they drop down fields?
I’m currently having trouble getting the time & date fields into FluentCRM. I would like all email to be sent from FluentCRM rather than Calendly so I have a record in the contact record.
My free version of Zapier does not let me connect to Calendly.
Thanks.-
Hi! Kindly open a support ticket so our team can closely look into what seems to be the issue and guide you through it.
Support ticket – https://wpmanageninja.com/support-tickets/
-


Leave a Reply