
Add a Country Dropdown List to Your Online Forms

When it comes to knowing your customers, collecting information about the country from where customers are coming is crucial. Or, sometimes, you might want to know the demographics of people submitting a form on your website. In both cases, it is important that you add a country dropdown list to your online forms.
Including a dropdown list makes it effortless for users to select the country from the list instead of manually writing down the country name.
In this article, we will introduce you to an easier and faster way of adding a country dropdown list to your online forms using Fluent Forms.
Traditional way of adding a country dropdown list
Before finding a no-brainer solution for this, let’s see how it can be done in a traditional way. If you want to manually add a country dropdown list to your online forms, you have to write literally hundreds of lines of code. Besides that, you have to invest yourself in learning some basic programming. But who wants to go through all of these hectic processes when you have a much better solution?
That is where Fluent Forms comes into play. This form-builder plugin is the ultimate savior when it comes to adding a customizable country dropdown list to your online forms. Let’s get introduced to Fluent Forms.
What is Fluent Forms?
When it comes to WordPress form builder plugins, Fluent Forms is the best choice since it is the smallest and most lightweight. This form builder’s drag-and-and-drop capabilities are just amazing. Using Fluent Forms, you can create a wide range of forms. Aside from that, it’s the fastest form-builder plugin currently available on the market.
Fluent Forms offers a seamless user interface so that even a beginner-level user can easily use this plugin. This form builder plugin is now trusted by more than 500K websites, and the number is rising. The most notable features of Fluent Forms are the following –
- Ready to use input fields for greater user experience
- Drag and drop form builder for ease-of-use
- Multi-column form layout for ultimate freedom
- Dozens of pre-built form templates for quick form building
- Conditional logic for better control over the forms
- Conversational forms for interactive forms
- 45+ native integrations for additional functionality
- Visual data reporting for a quick overview
- Calculated fields for measuring numbers based on inputs
How to add a country dropdown list
Below are the steps to follow while adding a country dropdown list –
- Step 1: Installing the Fluent Forms plugin
- Step 2: Adding a country dropdown list to your form
- Step 3: Customizing the Countries in your dropdown list (Optional)
- Step 4: Publishing the form on your WordPress site
So, without any further delay, let’s jump into the tutorial.
Step 1: Installing the Fluent Forms plugin
First, you have to install the Fluent Forms plugin. To do that, hover over Plugins on the left sidebar of your WordPress dashboard and click on Add New. Search for Fluent Forms, click on Install Now and Activate the plugin.
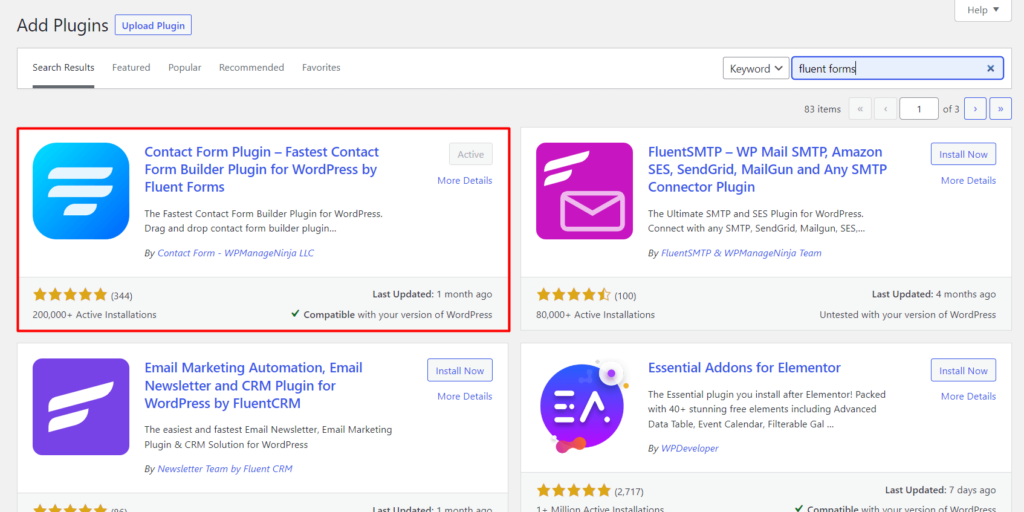
Alternatively, you can also install Fluent Forms plugin from wordpress.org.
Step 2: Adding a country dropdown list to your form
After installing the Fluent Forms plugin, create a new form where you will be adding the country dropdown list. Hover over Fluent Forms in your WordPress dashboard and select New Form to build a form.
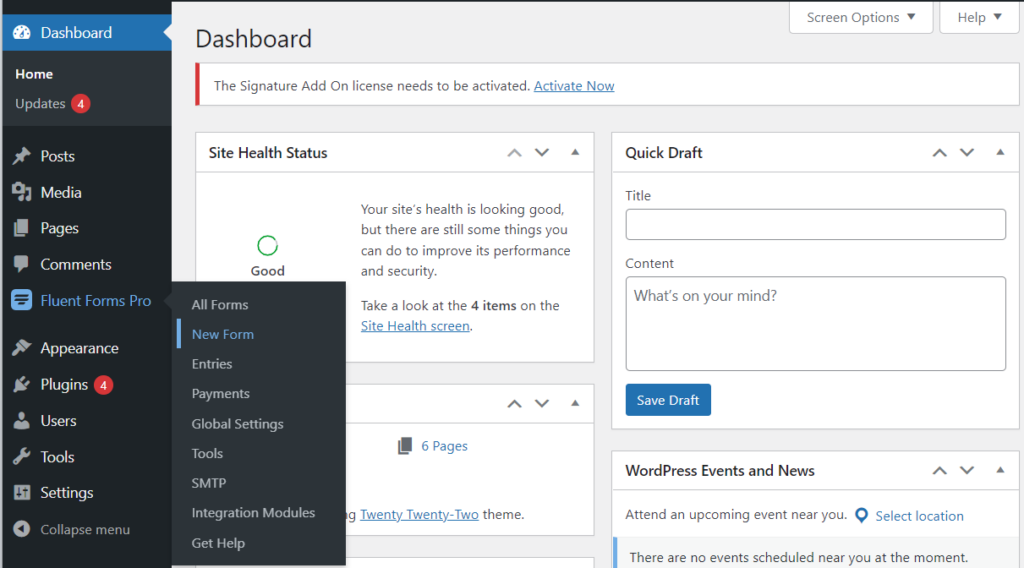
Another method of creating a form is selecting the Add a New Form button from the All Forms window. A pop-up window appears when you click New Form or the Add a New Form button, allowing you to choose a pre-built template or start from scratch when creating a form.
To create a form from scratch, hover over New Blank Form and click on Create Forms.

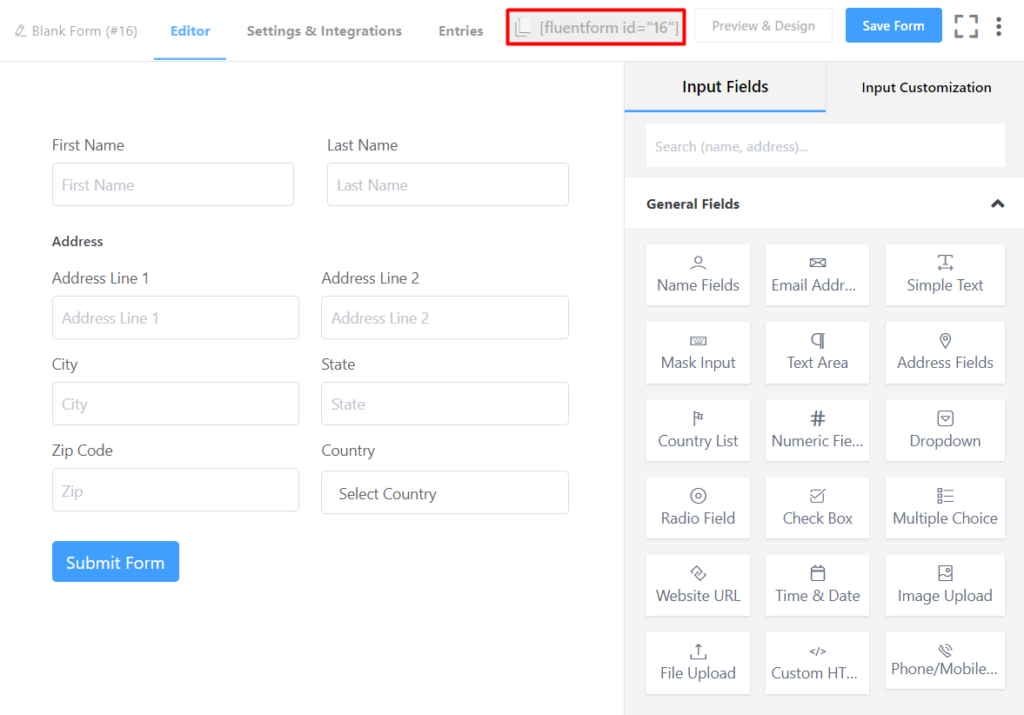
After creating a form, you will arrive on a page similar to the one below.
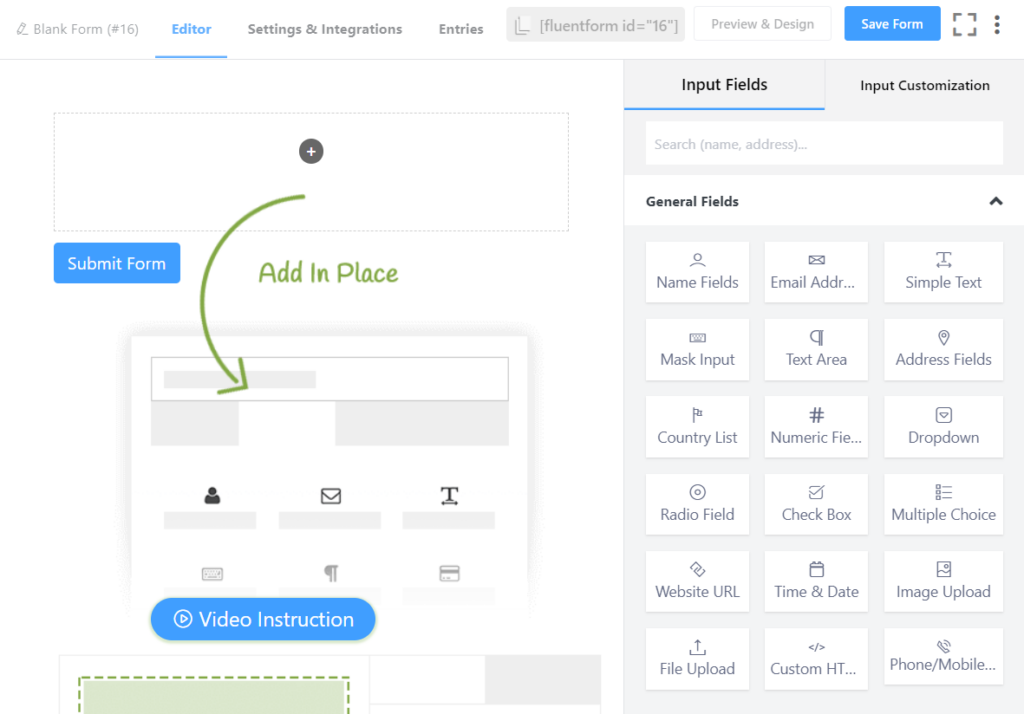
Now you can add input fields according to your needs by clicking on the input field buttons or simply dragging and dropping them into the editor.
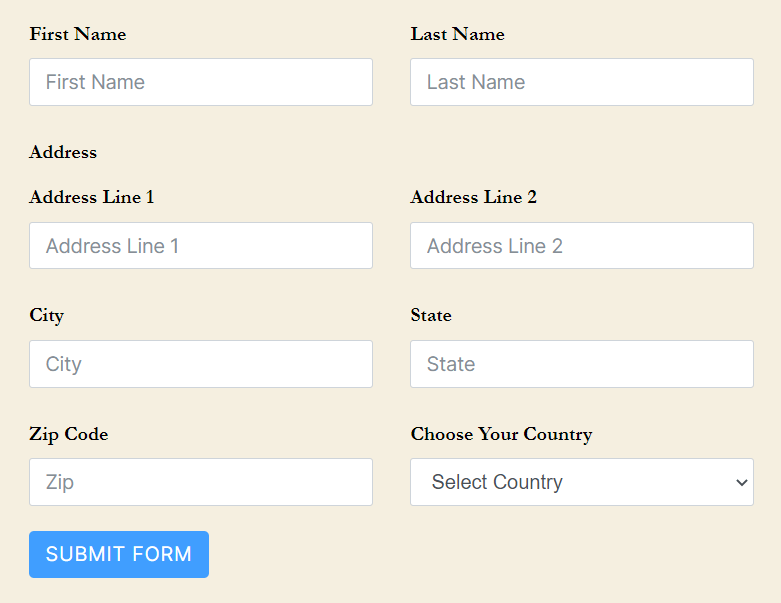
To add the country dropdown list, click on the Address Fields to insert it into your form.
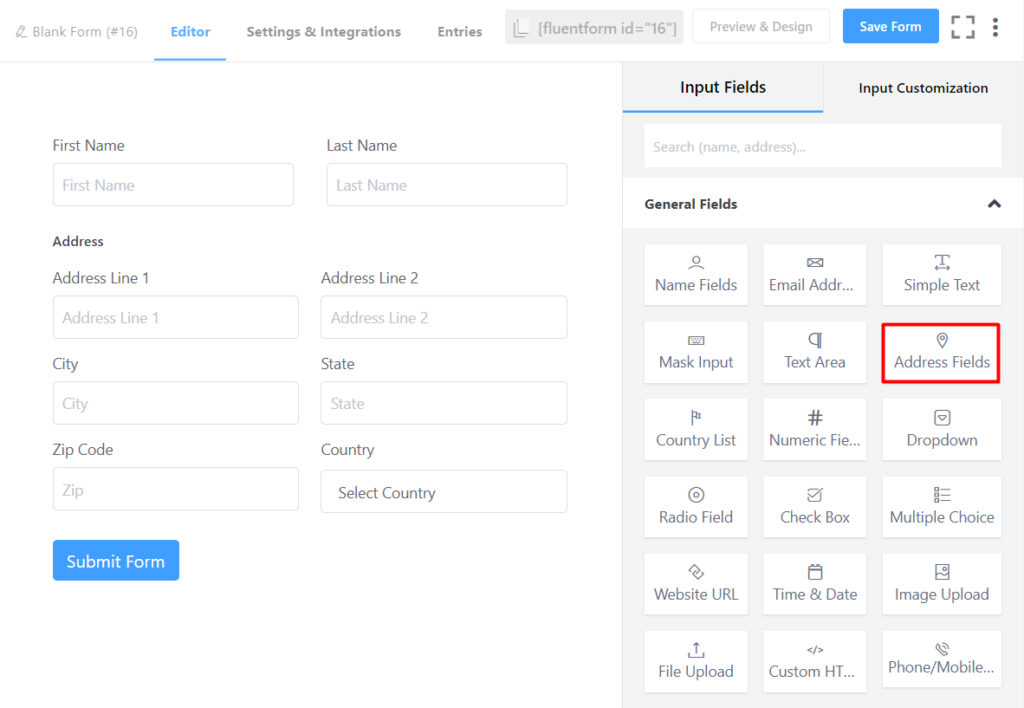
The Address input fields of Fluent Forms contain a country dropdown list by default.
There you go! You have just added a dropdown list with the name of all the countries to your form.
Step 3: Customizing the Countries in your dropdown list (Optional)
Now let’s see what Fluent Forms offers when it comes to customizing the country dropdown list. When you click on the Address Fields in the editor window, you will be presented with various Input Customization options for each of the address fields. When you click on the arrow icon beside each address field, you will see some field-specific customization options such as Label, Place holder, Required, etc.
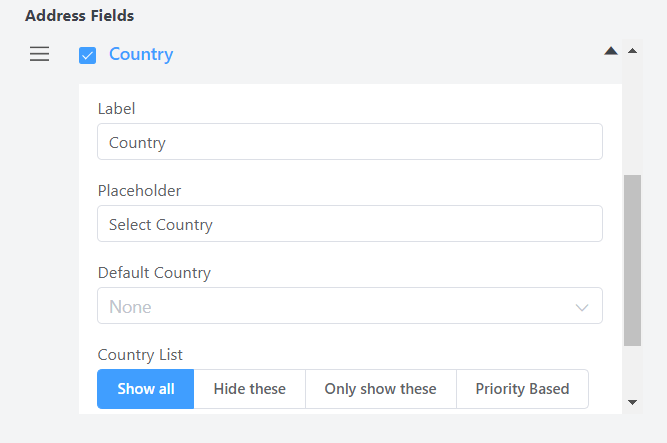
For the country dropdown list, you can play with the following customizations options –
- You can change the label and placeholder of the dropdown list.
- You can select any Default Country.
- You can show all the countries in the dropdown list.
- You can hide/show selected countries.
- You can group some countries based on priority and label the group as you want.
Don’t forget to save the form.
Step 4: Publishing the form on your WordPress site
Now that you have created a form with a country dropdown list, it’s time to publish the form on your WordPress site. There are two ways of doing it.
You can use either the default WordPress block editor Gutenberg to select your form created with Fluent Forms or the shortcode to display the form wherever you want.
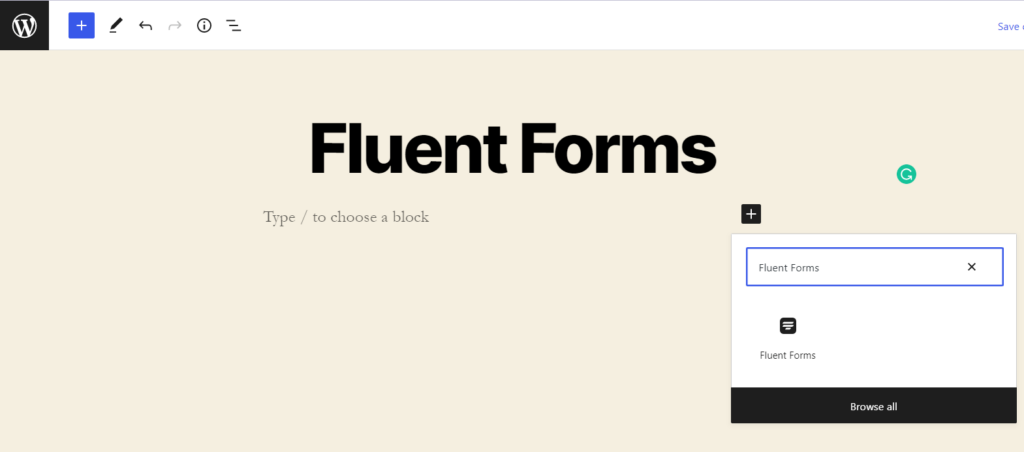
To publish your form using Gutenberg block editor, hover over Pages from the left sidebar of the WordPress dashboard and click on Add New. Give the page a title. Click on the plus (+) icon or type forward-slash (/) on the empty space of the editor. Then type Fluent Forms and select it.
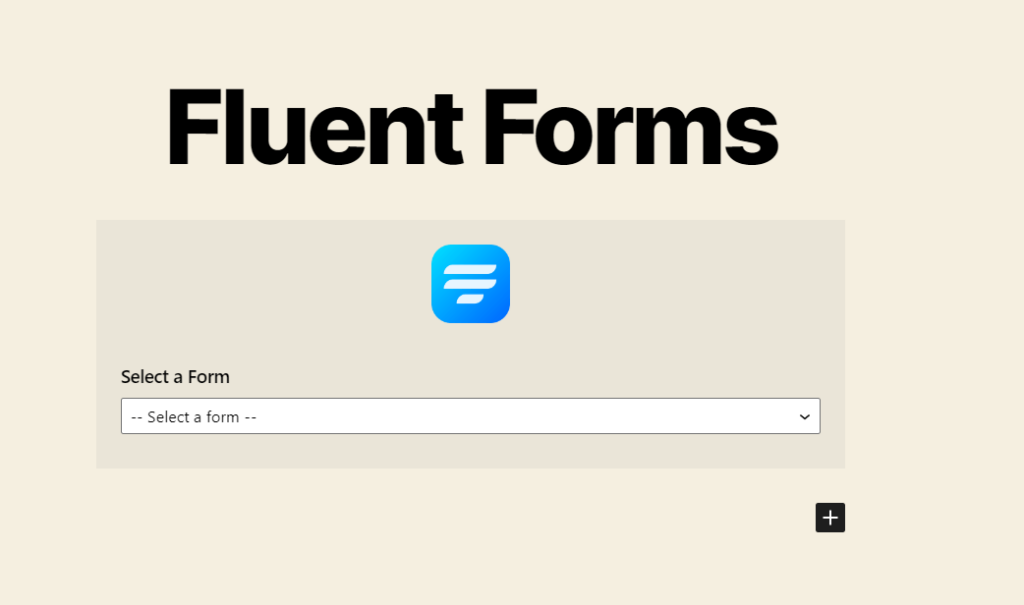
You will see a dropdown menu with a list of every form you have made using Fluent Forms. Choose the form that will appear on the page.
Click on Publish if you think you are good to go after previewing the page.
You can follow the same process when publishing your form on an existing page.
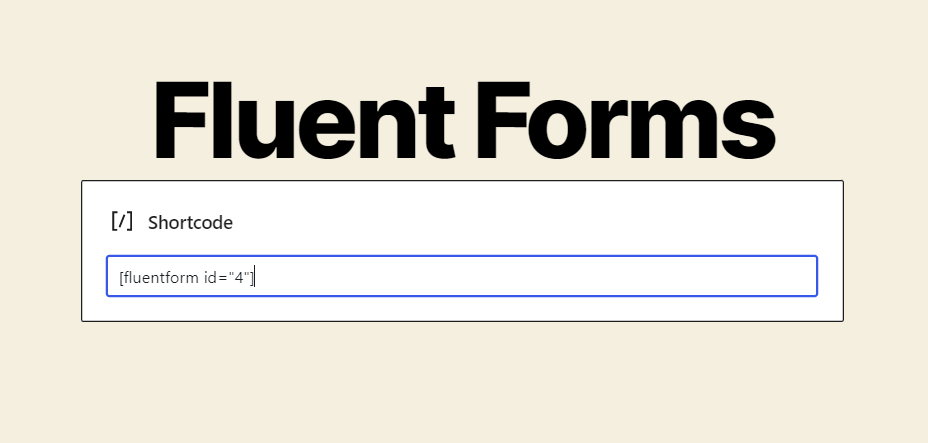
The alternative way of using the block editor to publish your form is to use Fluent Forms’ shortcode feature. You will get a shortcode on the top-right section of the form editor window whenever you create a form.
Click to copy the shortcode and paste it onto the page where you want to publish your form.
Congrats! You have just created a form with a country dropdown list.
To conclude
Adding a country dropdown list to your web form gives your users a seamless way to provide country information. On top of that, you can easily add it to your form. Fluent Forms also gives you various customization options for more flexibility.
If you have further queries, comment down below, and don’t forget to follow our social media plugins for more tutorials like this.

An Econ major turned into a Digital Marketer by choice. Hello! This is Ashraf and I am here to enlighten you on various WordPress topics and help you make informed decisions.


Leave a Reply