How to Migrate WordPress.com Website to WordPress.org
Are you feeling limited by WordPress.com?
If your site is growing and you want more control, flexibility, and room to expand, moving to WordPress.org is the right step. The process may seem big at first, but once you understand the steps, the entire migration becomes simple and predictable.
This guide walks you through the migration from WordPress.com to WordPress.org clearly, with tips to avoid common mistakes and keep your content safe.
Let’s get started.
TL;DR
- You can migrate your WordPress.com website to WordPress.org by exporting your content and importing it into a self-hosted site.
- Buy a domain and hosting plan, then install WordPress using your host’s one-click installer.
- Export your WordPress.com content using Tools → Export and download the file.
- Import the file into WordPress.org using Tools → Import and the WordPress importer.
- Assign authors, review media files, and update links after the import.
- Either make your WordPress.com site private or set up a paid redirect to preserve SEO.
- After moving, configure plugins, themes, menus, and permalinks on your new WordPress.org site.
WordPress.org vs WordPress.com
Let’s get an overview of the key differences between WordPress.org vs WordPress.com.
| Aspect | WordPress.org | WordPress.com |
|---|---|---|
| Cost | Free software, hosting/domain costs apply | Free plan with limits, paid plans from $4/month |
| Hosting | Self-hosting, user-managed | Managed hosting, no setup needed |
| Customization | Full control, any theme/plugin | Limited by plan, restrictions on free tier |
| Monetization | Complete freedom | Restrictions on free plan, more on paid plans |
| Security | User manages | Managed by platform |
| Support | Community forums | Varies by plan, from basic to 24/7 expert |
| Ownership | Full content ownership, easy to move | Full content ownership, some moving limits |
If you’re struggling to decide, then this blog about WordPress.org vs WordPress.com might help you.
And if you have already decided to transfer, then let’s move forward.
When should you migrate from WordPress.com to WordPress.org?
Here are clear signs it is time to move from WordPress.com to WordPress.org.
You need more control
If you want custom themes, plugins, membership systems, or advanced design freedom, WordPress.org is the right choice.
You want to earn money
WordPress.com restricts monetization on free plans. If you plan to run ads, sell products, or build an online business, WordPress.org gives you full freedom.
Your site is growing
More traffic, more content, and more complex needs require a platform that can scale with you. WordPress.org handles growth easily.
You want to develop your skills
Managing your own site teaches you more about WordPress and gives you room to experiment and build exactly what you want.
5 Easy steps to move from WordPress.com to WordPress.org
Alright, if the decision is made, that means you’re moving to WordPress.org!
This might feel like a big deal, but we’ve broken it down into five simple steps. Whether you’re tech-savvy or a total newbie, you’ve got this.
Let’s get your content from Point A to Point B without breaking a sweat.
1. Choose your domain and host
WordPress.org requires a hosting provider. Look for one that is reliable, supports one-click WordPress installation, and ideally includes a free domain for your first year.
If you want a custom domain (like yoursite.com), this is the time to register it.
2. Export site content from WordPress.com
When you’re ready with your domain and host, it’s time to export your content first. Go to your WordPress.com dashboard.
Then click on Tools, and you’ll find the Export option there. Clicking on Export will redirect to a page like this.
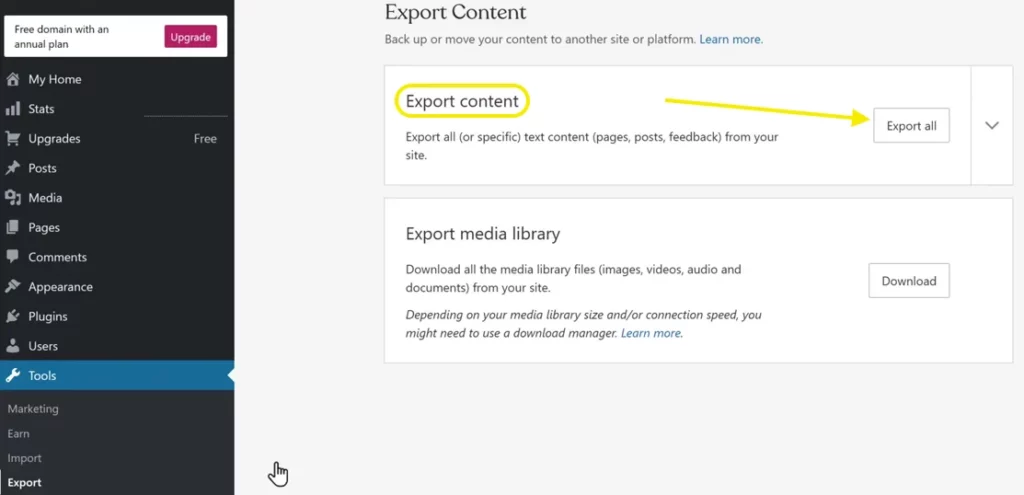
You have to click on Export all if you want to move everything; you can also choose specific things to export.
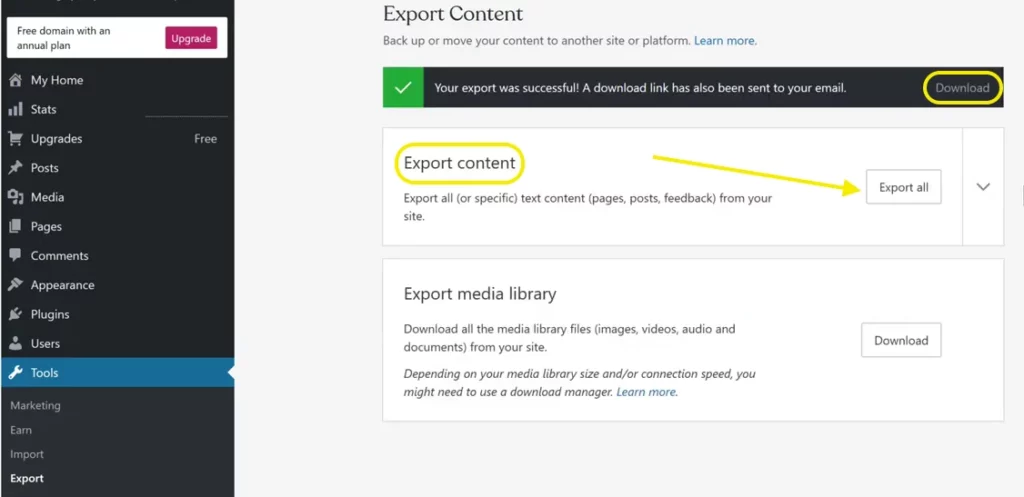
After clicking Export all, it will take a while, and a Download option will appear. Click on it to download your content to your device.
This file contains your posts, pages, comments, categories, and media references.
3. Install and set up WordPress.org
As you’re done exporting your content, now you have to set up your place where you want to use that content, meaning your WordPress.org site.
Installing WordPress.org is quite easy, and most of the hosting providers have a one-click installation solution that makes this job super-easy.
Once you’ve logged into your hosting account, find the control panel. This could be something like cPanel or Plesk, it depends on your host.
Many hosting services offer one-click WordPress installation, typically found under “Website” or “Software and Services.” Look for tools like Softaculous, Fantastico, or QuickInstall to get started fast.
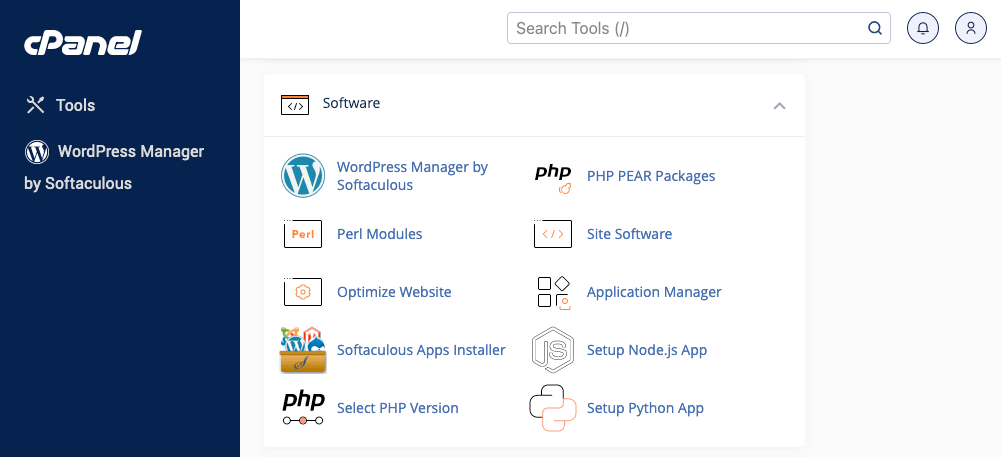
Click on the WordPress installer, and it will guide you through the setup process. You’ll need to enter some necessary details like your site name, username, and password. Keep these pieces of information somewhere safe in case you forget!

Once you’ve installed WordPress, it’s time to give your site a fresh look. Choose a simple theme to get started, you can pick a fancy one later.
4. Import content into the self-hosted WordPress.org website
Now you’re ready to import your content to your self-hosted WordPress.org website.
Go to the Tools section of your WordPress.org dashboard. There you’ll find the Import option.
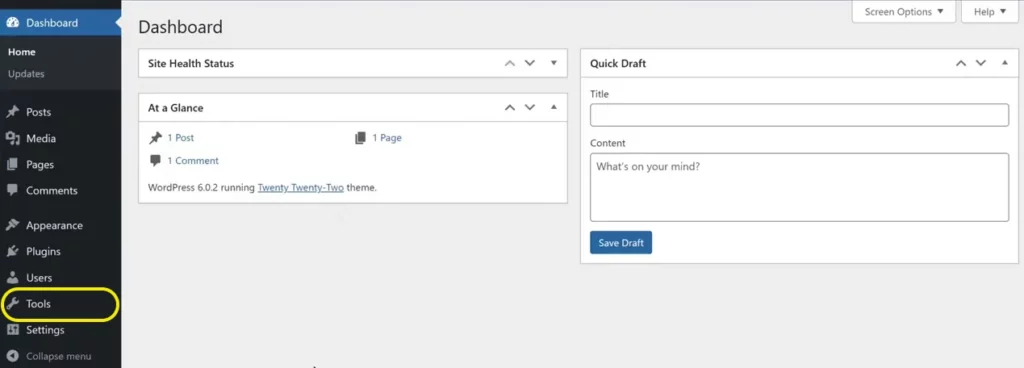
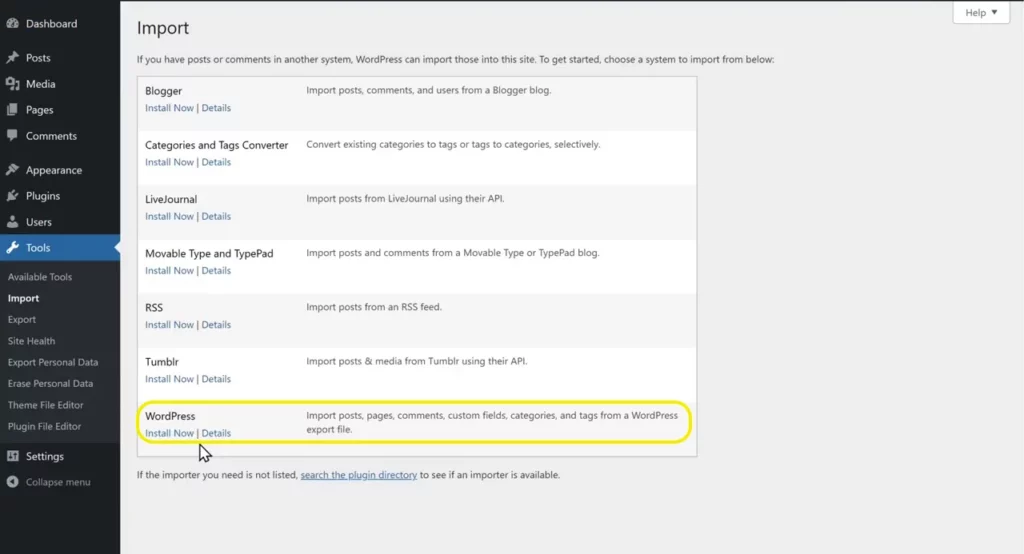
Clicking the Import option will take you to this page, and you’ll find the WordPress importer; you’ll have to install it.
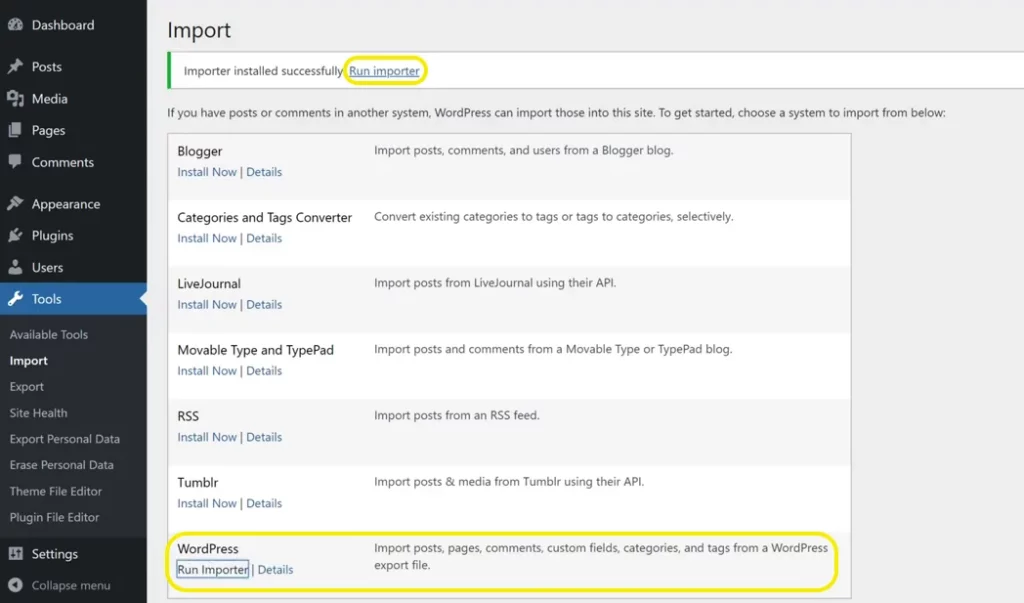
Now, when the importer is installed successfully, a Run importer option will appear; click on it.
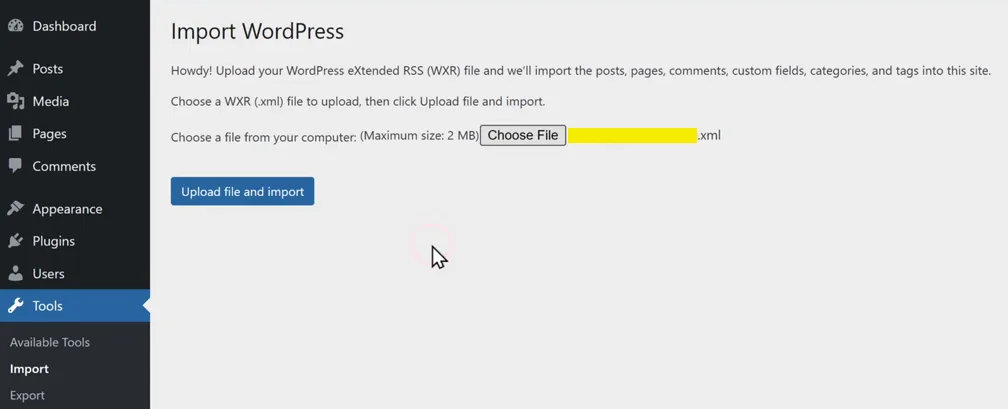
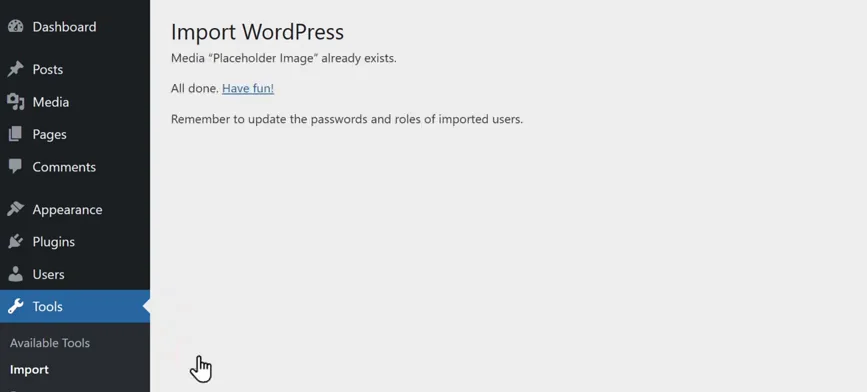
You’ll be redirected to a page named Import WordPress, where you have to upload the file from your device that you exported from your previous site.

This shows that the import is done!
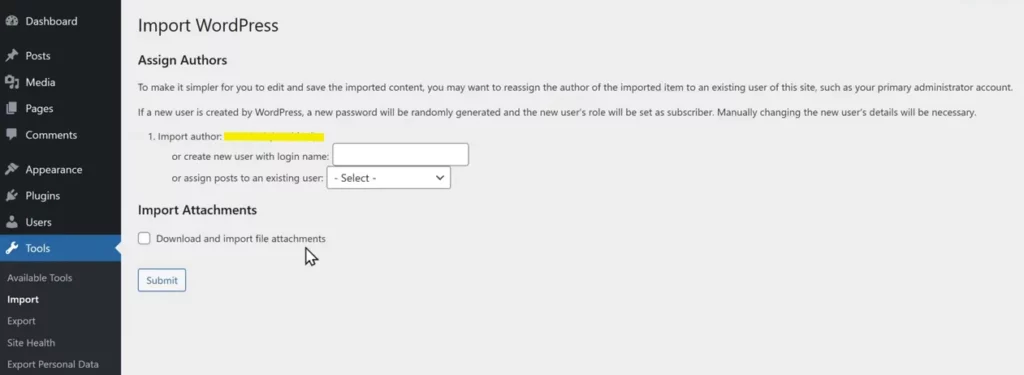
Don’t forget to Assign Authors to your WordPress site. You can create a new one or choose from existing ones.
5. Make Your WordPress.com site private (or redirect)
You have two choices:
Option A: Make WordPress.com private
If you no longer want traffic going to the old site:
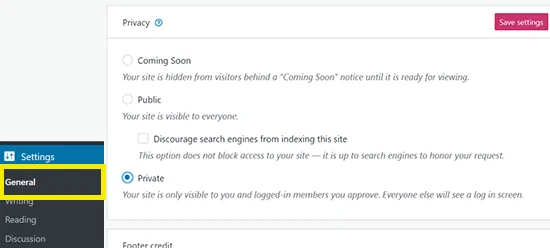
- Go to Settings → General → Privacy
- Select Private
But keep one thing in mind!
If you have a growing blog and a decent audience base, it means your site is well-indexed by Google, so you might need to think about redirecting people from your old site.
Option B: Redirect to your new site
If your site has existing traffic or is already indexed:
Go to Settings → Redirect
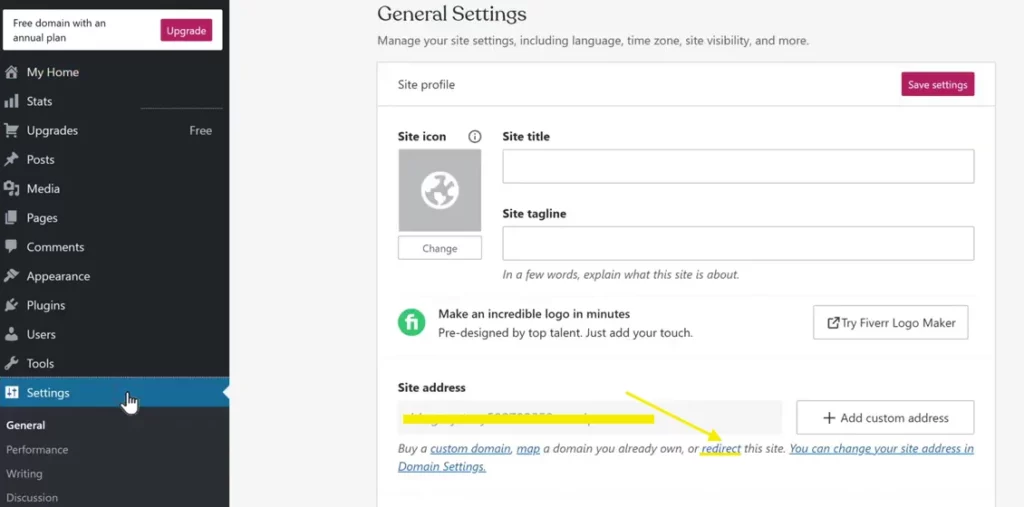
Enter your new domain
Put your billing information and proceed to payment. Pay the $13 per year fee.
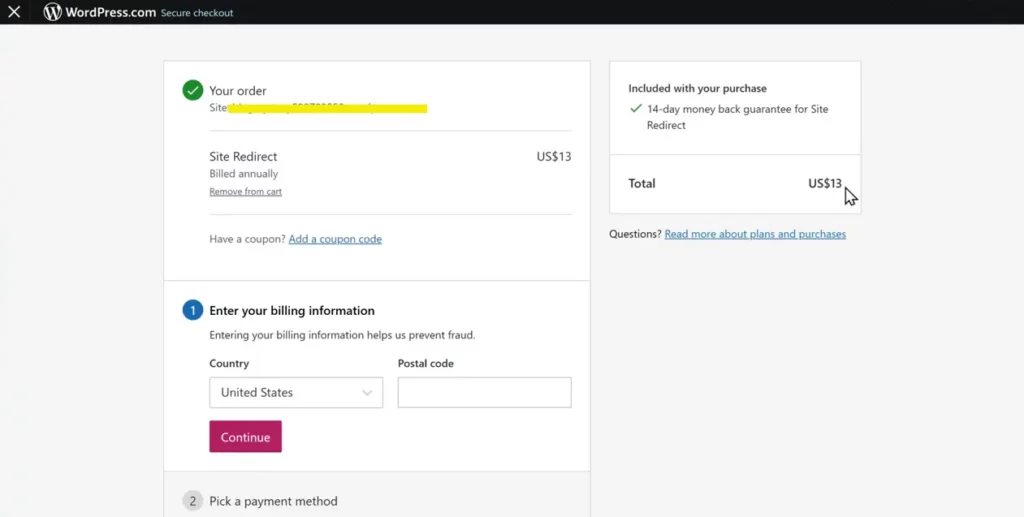
With successful payment, you will be provided with a confirmation like below.
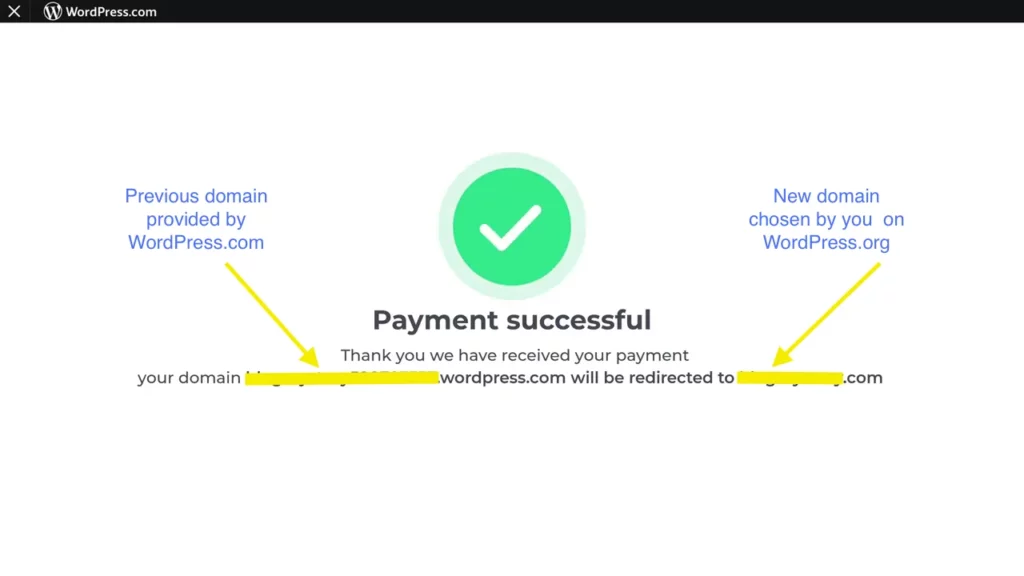
This keeps your SEO intact. Now you’re all set to use your site in WordPress.org.
Things to watch out for when migrating
Migrating is mostly a smooth process, but you might face some struggles if you make the common mistakes. Here’s how to dodge the common pitfalls and keep your site up and running.
- Broken Links and Images: Links or pics might not transfer right, leaving you with 404 errors. Run a plugin like Broken Link Checker post-migration. Re-upload any missing media manually.
- SEO Slip-Ups: Search rankings could dip without proper redirects. Set up 301 redirects and install Yoast SEO to manage your sitemap and metadata.
- Theme/Plugin Hiccups: WordPress.com themes or widgets might not play nicely on WordPress.org. Find similar WordPress.org themes/plugins and test them out.
- Lost Customizations: Custom CSS or widgets don’t auto-migrate. Copy CSS from WordPress.com’s customizer and paste it into your new site. Rebuild widgets by hand.
- Subscriber Snags: Email lists or comments might not come along. Use Jetpack to sync subscribers; ensure comments are in your export file.
- Downtime Drama: Your site could be offline during the switch. Migrate during quiet hours and test everything before going live.
- No Backup, No Bueno: Something goes wrong, and you’re stuck. Back up your WordPress.com site before starting- better safe than sorry!
Moving forward
Congratulations. You have successfully migrated your site to WordPress.org. Now you have full control over your design, plugins, and monetization.
Customize your new theme, install plugins that match your goals, and start building a site that grows with your vision.
Have questions? Drop them in the comments. We’re here to help.

This is Sumit. He’s a physics major who’s trying to understand both the physical as well as the WordPress worlds. Whenever he’s not busy, plays fifa or spends time with his family.


Leave a Reply