Increase ROI with FluentCRM and WordPress Forms
Online forms are the most effective way to store up leads. Nurturing your prospects, helping them to follow your marketing funnel comes right after that. When you’re looking to boost your conversion rate, there’s no other alternative than catching aspiring clients and leading them to the right path.
What could do a better job than a WordPress form and an email marketing automation tool? Connecting FluentCRM and WordPress forms could be the best decision you’ve made so far. The combination will visibly increase ROI (return on investment), enabling you to see your company’s growth and test different strategies to get even better results.
Before learning how to connect FluentCRM and WordPress forms to boost ROI, we need to know the basic idea of FluentCRM.
What is FluentCRM?
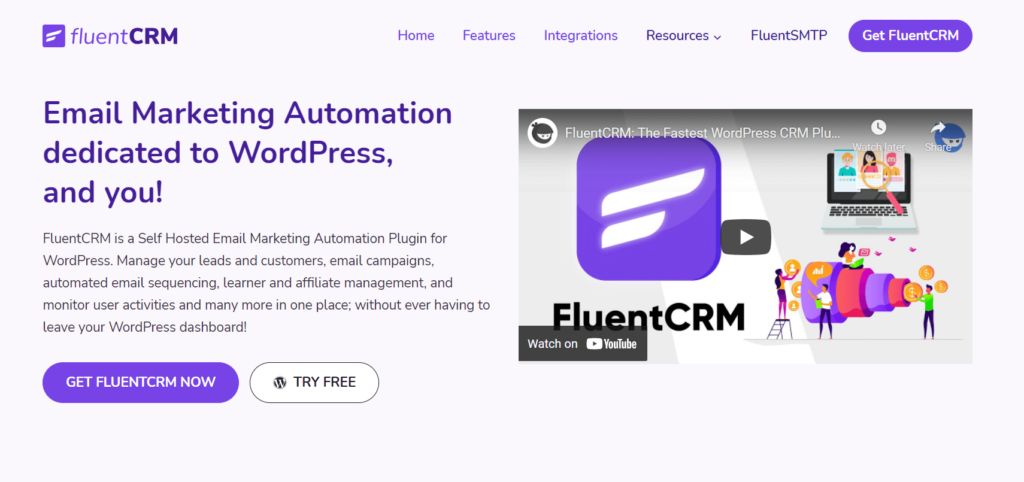
CRM or Customer Relationship Management is a technology that helps manage customer relationships and assist in customer retention to drive sales growth.
FluentCRM is the best self-hosted email marketing and CRM solution for WordPress. Manage your customer relationships, build email lists and run sophisticated campaigns, automate email sequence, manage learner and affiliate, monitor user activities, and a lot more without leaving your WordPress dashboard. There’s a free version of FluentCRM that offers a bunch of features to increase your conversion rate!
What is Fluent Forms?
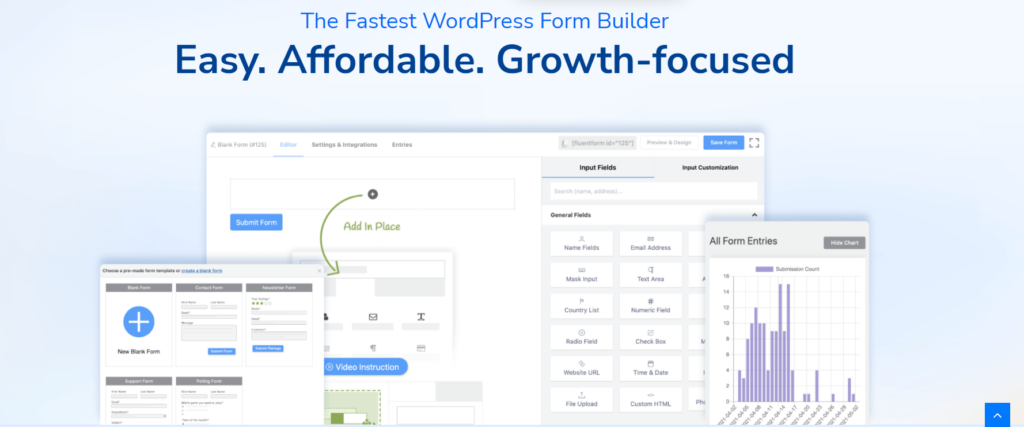
Fluent Forms is the most lightweight and sophisticated form builder in the market. Its straightforward UI makes it distinct from other form builder plugins. The plugin is packed with tons of features and functionalities to make it a full-flagged tech tool. 45+ input fields in four different categories, 70+ pre-built templates, all the essential third-party integrations, multiple payment options, conversational form ― you name it, Fluent Forms got it.
Moreover, the Fluent Forms team is adaptive and continuously introduces new features and updates catering to their customers’ needs. A 100,000+ strong community is backing up the story. Try the free version if you want to check it out first. Even the free version of this plugin offers more than some plugin’s premium version can’t afford. Compare the free and pro version of Fluent Forms to get a clear idea.
As we get a brief idea about both plugins, let’s find out how to increase ROI with FluentCRM and WordPress forms, in this case, Fluent Forms.
Increase ROI with FluentCRM and WordPress Forms
Follow these 3 steps to increase ROI with FluentCRM and WordPress Forms ―
Step 1: Integrate FluentCRM with Fluent Forms
To get started, make sure that you have FluentCRM and Fluent Forms installed in your dashboard.
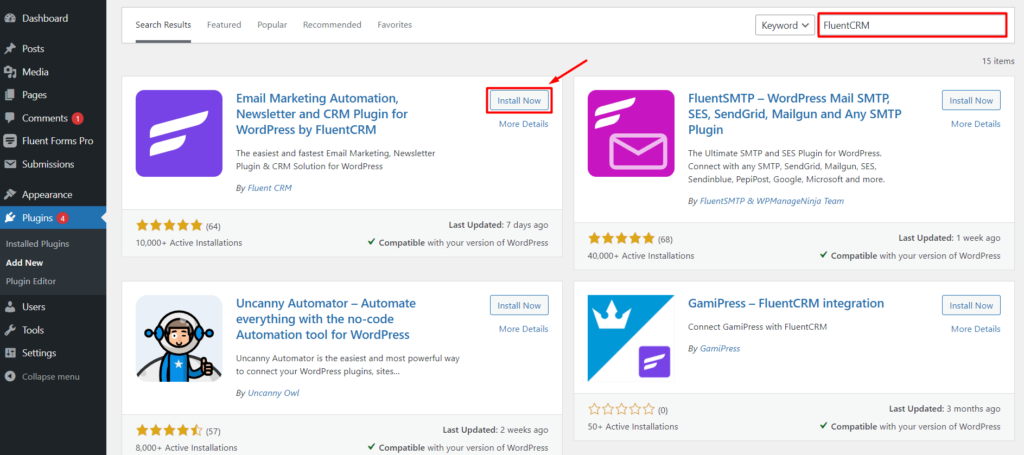
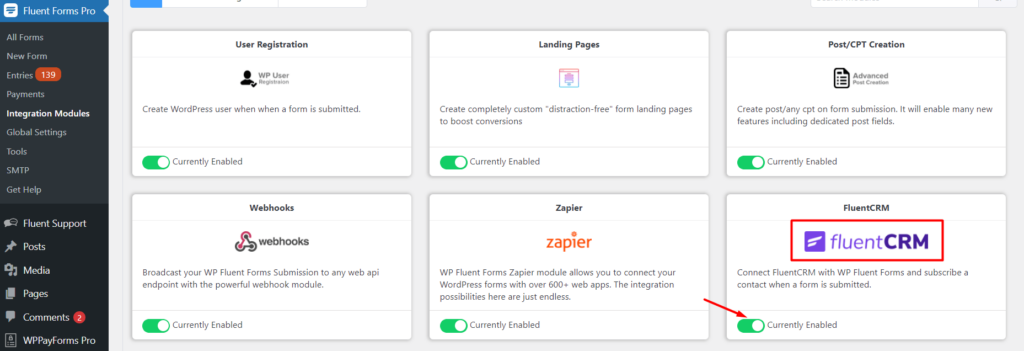
After the installation, activate both plugins and then go to your Fluent Forms dashboard. Now go to the Integration Modules option and Scroll to the FluentCRM module to toggle on.
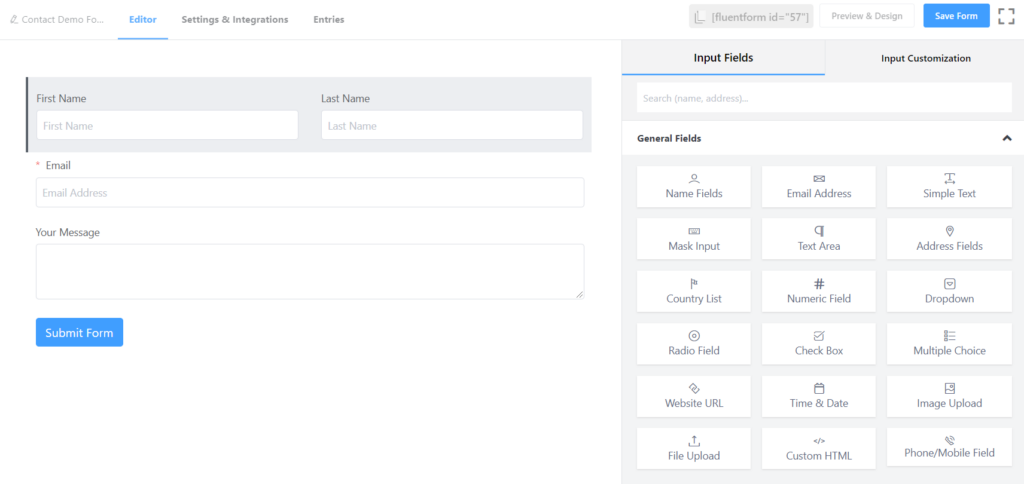
Next, create a New Form from scratch or choose from pre-built templates. We’re going to use Contact Form for demonstration purposes.
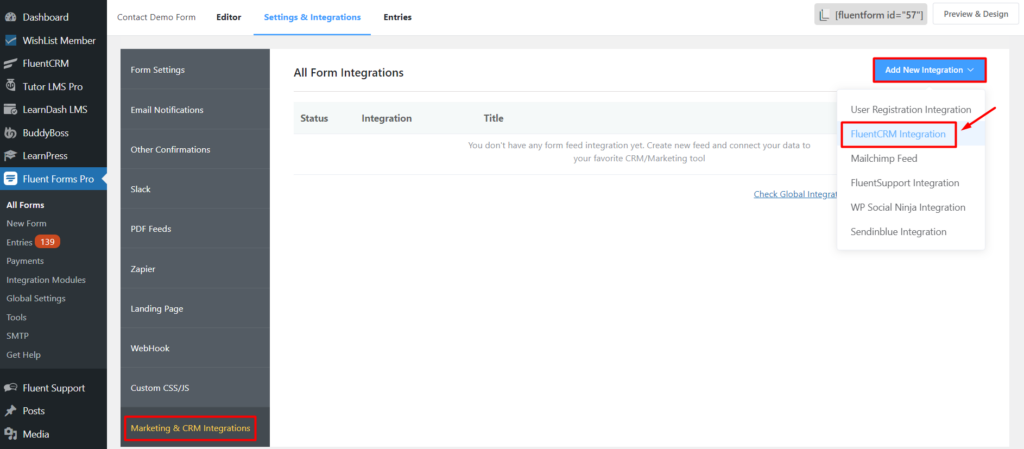
Now, head over to the Settings & Integrations tab for configuring the FluentCRM integration. Simply go to the Marketing & CRM option. After that, click on the Add New Integration button from the right top and you’ll find the FluentCRM Integration option from the dropdown. Select it to configure the FluentCRM integration feed.
You can add a Feed Name as you like, select the FluentCRM List you’d like to add your contacts to in FluentCRM List. Use the Primary Fields option and associate your FluentCRM merge tags to the appropriate Fluent Form fields. You can also add Other Fields where you select which Fluent Form fields pair with their respective FluentCRM fields.
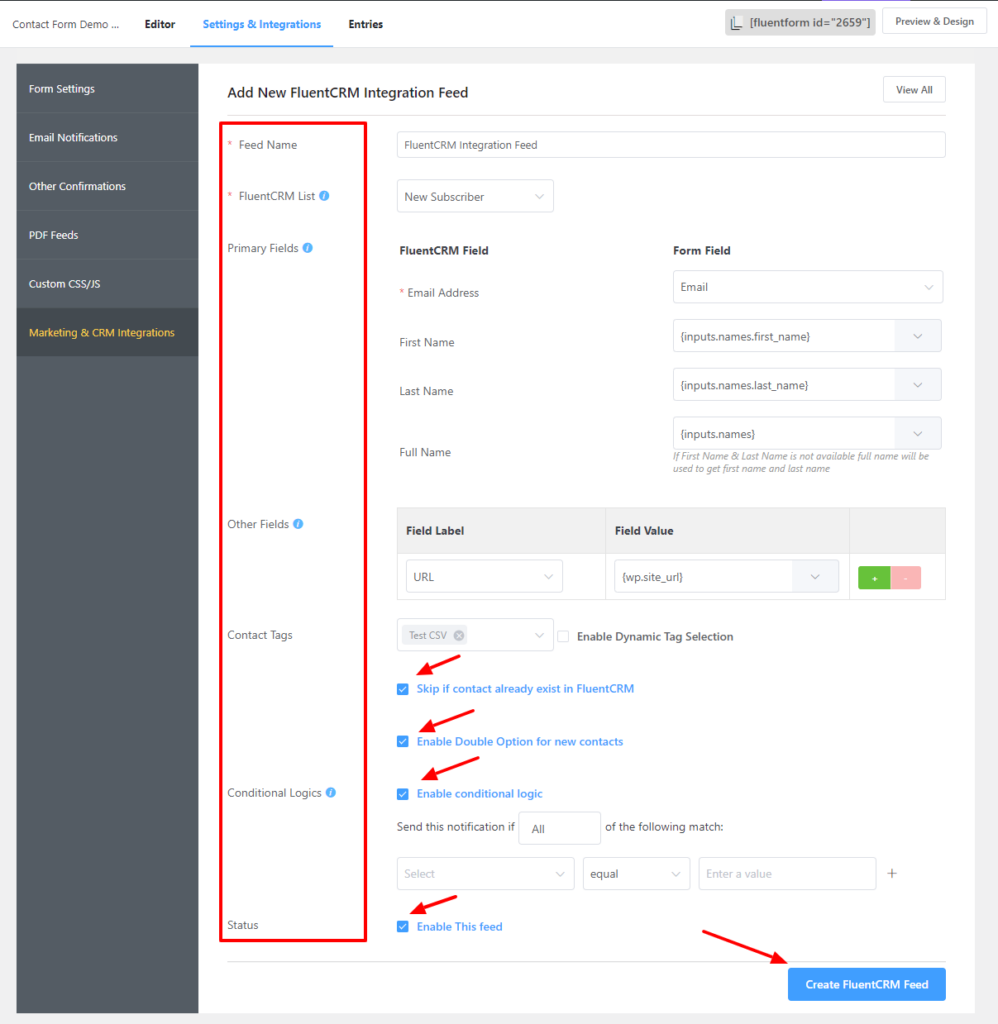
Choose your Contact Tags from the dropdown menu. You have the options to Enable Dynamic Tag Selection, Skip if a contact already exists in FluentCRM, and Enable Double Opt-in for new contacts. You can also set Conditional Logics to send notifications as per your need. Lastly, check the Enable This Feed option and click on the Create FluentCRM Feed button to wrap up the integration.
Simply copy the short code and paste it wherever you want to show your form and collect leads and grow an effective email list for the next step.
Step 2: Email marketing campaign with FluentCRM and Fluent Forms
Right after setting up your Fluent Forms and FluentCRM, you’re ready for email campaigns. Before launching the campaign, brainstorm a bit to set your primary goal. Once you’re done with setting your list and primary goal, follow these steps to set up an email campaign:
- Make sure you have subscribers in your contact list. If not, import your contacts into FluentCRM.
- After that, set up your business settings or email settings before you start sending your first email campaign.
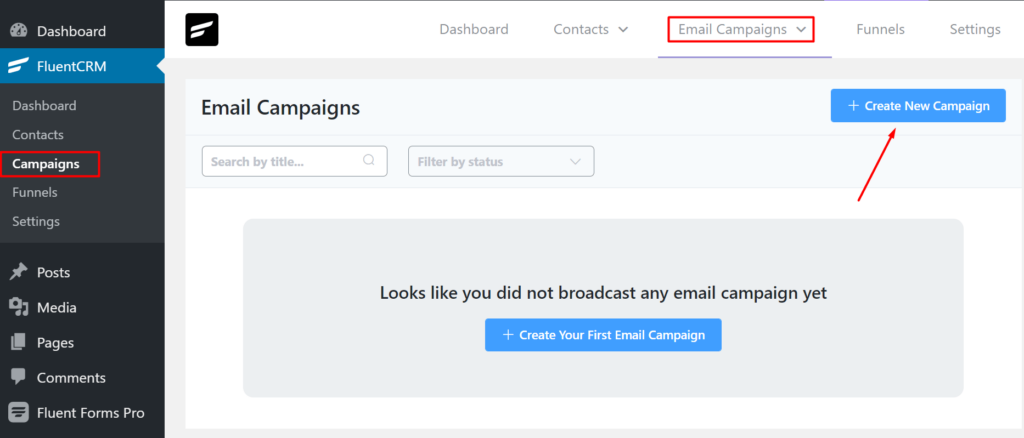
- Now go to the Email Campaigns tab from FluentCRM, click on the Create New Campaign button. Give a Title and hit continue.
4. Set up your Email Body; you can also choose from the pre-built template or Import From Library.
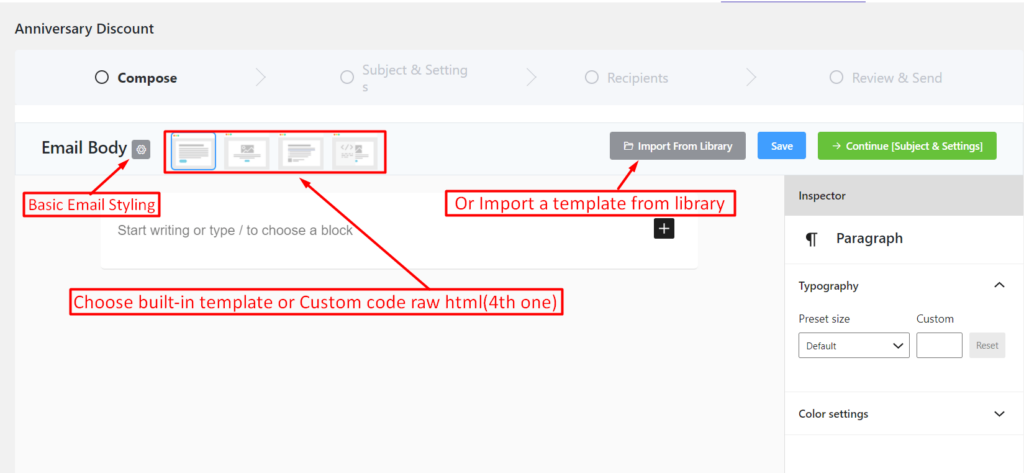
5. Add content to the email (texts, media, etc.); you have the option to save it while editing, hit Continue to go to the next section, Subject & Settings.
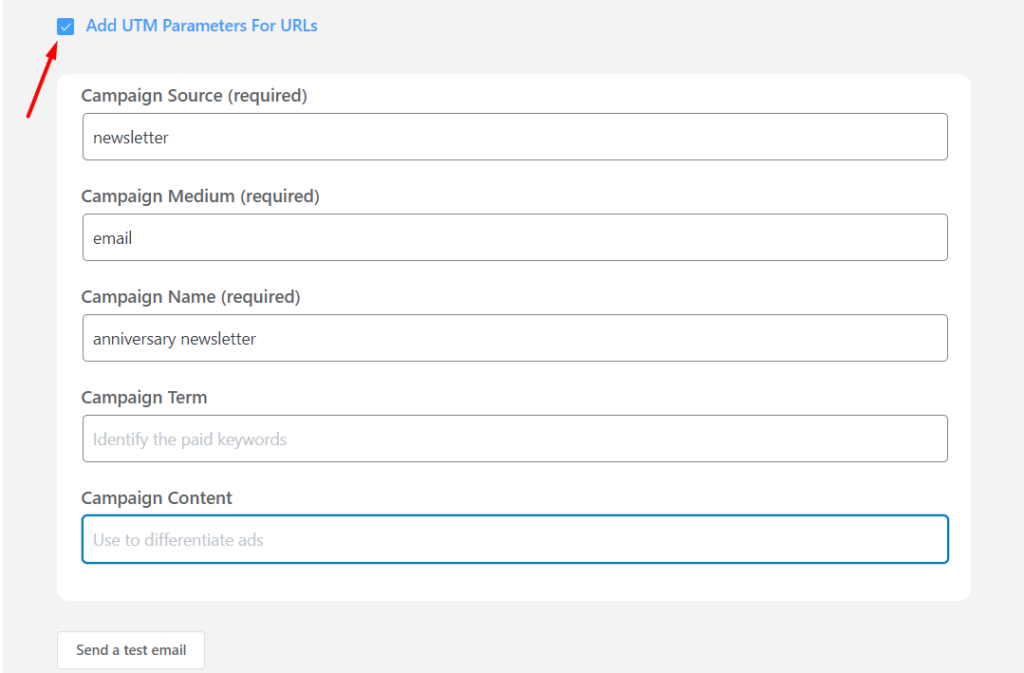
6. Set up the subject, do multiple A/B tests for finding better engagement. You can also set email preheader, custom form name and email, add UTP parameters for URLs.
7. Now you can add recipients by List & Tag and also from Dynamic Segment.
As you’ve successfully set up an email campaign with Fluent CRM, finally, you can Review & Send your email.
Step 3: Marketing automation with FluentCRM and Fluent Forms
Once your form is up and running, new contacts will join your email list. Catching leads is much easier with Fluent Forms as you have so many options in your hand to make different types of forms.
FluentCRM will take you from here. Create email marketing automation and run sophisticated campaigns to increase ROI with FluentCRM and Fluent Forms.
FluentCRM’s email marketing automation includes four major elements. And they are:
- Triggers: Three types of triggers, event, behavior, or time-based available in FluentCRM are essential for initiating email marketing automation.
- Action Blocks: These are the actions you’re going to take throughout the funnel, like sending an email, adding the user into a list, etc.
- Benchmarks Blocks: Benchmarking the behavior of the users for example, whether they purchased a product, clicked into a link, etc.
- Conditionals: Conditionals will let you set multiple paths based on if/else conditions.
If you want to engage with your contacts, go to the Automation and select Create a New Automation to create a new marketing automation funnel.
A pop-up window will appear; you can add a suitable Internal Label and choose the New Form Submission (Fluent Forms) trigger to initiate the automation funnel. Then a pop-up box will appear with some options to finally set up the trigger.
And here’s how you should set up the trigger:
- Select Your Form
- Map Primary Data
- Map Other Data
- Subscription Status
- Conditions
Once you’re done with the trigger, you can easily create your marketing automation funnel with Actions, Goals, and Conditions. Moreover, FluentCRM integrates with WooCommerce automatically, which can ensure your highest profit by easing your work!
Wrapping up
A big round of applause for you! Not only have you integrated one of the promising email marketing automation tools (FluentCRM) with the most effective lightweight form builder (Fluent Forms), but you have also created an email marketing campaign and marketing automation. This is a huge leap towards expanding your business, and FluentCRM and WordPress forms are here to help you explore a whole new world of marketing.
We hope you find this article helpful. If you have any questions regarding this or any queries about lead generation and email marketing, let us know in the comment section. Happy marketing.




Leave a Reply
You must be logged in to post a comment.