
Mollie Payments: Integrate & Accept Online Payment Effortlessly

Gone are the days when collecting payments from customers across different European countries was a real challenge.
Suppose, your business was based in Germany, and accepting payments from a client in Belgium. In this case, you had to find out a way to convert Belgian Francs into Deutsche Mark.
There were no unified payment methods which made it hard to do business outside your country.
However, in the absence of a unified digital payment method, Mollie Payments has emerged as a game changer in the Europen region.
Mollie offers a practical solution for businesses in Europe with all the popular digital wallets as payment options for shoppers in different countries.
In this article, we’ll discuss what’s Mollie offering and how you can use it with an online form to accept online payment for your business effortlessly.
What is Mollie Payments
Mollie Payment is one of the most popular online payment methods, particularly for European nations. Based in Amsterdam, Netherlands, Mollie serves over 30 countries in Europe with 2 dozen local payment methods for merchants of all sizes.
To date, 110,000+ merchants all over Europe use mollie payment methods to accept online payments for their businesses.
Also, Mollie is authorized PCI-DSS Level 1 and complies with the European Banking Authority’s guidelines on Internet payment security.
Mollie Payments: Advantages of using Mollie
Mollie captures the attention of thousands of vendors throughout Europe with its unique offerings. Both businesses small and large rely on Mollie payments.
It’s feature-rich, effortless usage, and integrates with your website, smoothly facilitating accepting and managing online payments.
Let’s explore some of the benefits of using the Mollie payment processor:
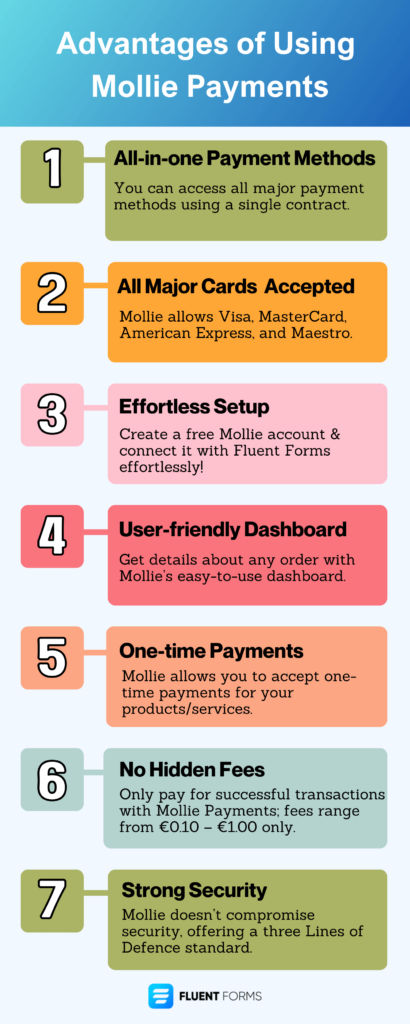
- All-in-one integration for all payment methods: Mollie lets you access all major payment methods using a single contract.
- Nearly all major payment methods accepted: Mollie allows all prominent credit cards; Visa, MasterCard, American Express, and Maestro.
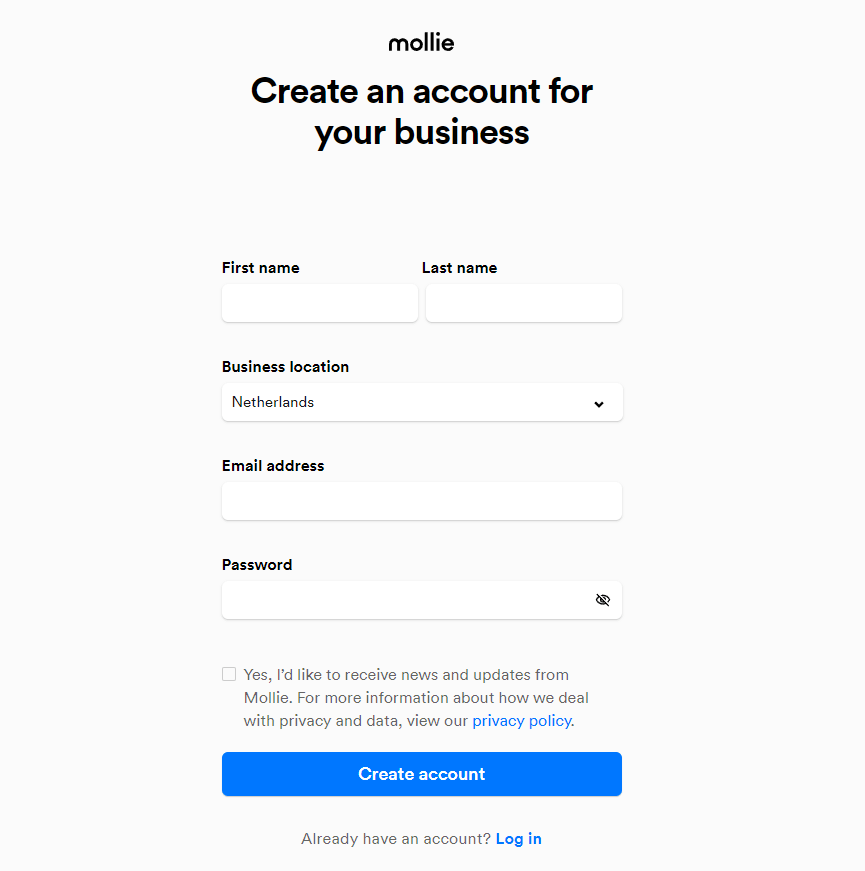
- Effortless setup: you can create a free Mollie payment account, easily connect it with Fluent Forms, and start taking payments hassle-free.
- User-friendly dashboard: get details about any order with Mollie’s comprehensive and easy-to-use dashboard. You will have different filter options; filter by order number, customer name, the amount paid, and more.
- One-time payments: Mollie allows you to accept one-time payments for your products/services.
- No sudden/hidden fees: Only pay for successful transactions with Mollie Payments. And fees range from €0.10 – €1.00 only.
- Overall Security: Mollie doesn’t compromise security, operating a Three Lines of Defence standard. As a part of that standard, independent Compliance and Audit officers regularly review Mollie’s internal structures to provide the utmost security. Another good thing is that Mollie is fully PCI-DSS Level 1 certified which means all sensitive data is encrypted and protected.
Mollie Payments: Use cases for using Fluent Forms and Mollie
The Fluent Forms Mollie integration is available with our Pro version which allows you to sync your forms with your Mollie account.
If you’re confused if Mollie is right for your business, here are some use cases for using Mollie with Fluent Forms to accept payments on your website:
- Sell physical/digital products/services: You don’t need a complex eCommerce plugin to sell and accept payments with Mollie. You can accept payments using Fluent Forms and the Mollie integration.
- Sell online event tickets: you can use Fluent Forms and Mollie to sell tickets for online events such as a conference, meetups, etc. You can accept payments, register attendees and collect all the necessary information as well.
- Accept payments for services: if you’re providing any sort of service, you can use Fluent Forms to create comprehensive client questionnaires and you can also quickly get paid for services with Mollie integration.
- Take donations for NGOs: if you run or work for a non-profit organization (NGO), you can use Mollie to collect donations on your website.
- Charge virtual workshops: You can use Mollie payments to charge for virtual workshops.
Now that we’ve covered how you can use Fluent Forms and Mollie to accept payments online, let’s go through another popular aspect.
Do you know? Fluent Forms has major payment features as a WordPress form builder.
Mollie iDEAL payment options & others
One of the most useful integrations over the past few years is iDEAL, a payment method that allows shoppers to pay through their bank. The good thing is that iDEAL is now available as one of the payment getaways through Mollie. You just need to make sure to enable it within your Mollie account to get started with iDEAL payments.
Other payment methods via Mollie include PayPal, Sofort, all major credit cards, SEPA bank transfers, and many more.
Now, keep on rolling to set up your Mollie payments.
5 steps to get started with Fluent Forms & Mollie Payments
To use Mollie Payment with Fluent Forms, you’ll need an active Fluent Forms PRO license and a Mollie account.
Let’s go through the 5 steps necessary to integrate Mollie with Fluent Forms.
Step 1: Install & activate Fluent Forms
If you don’t already have Fluent Forms Pro, then you need to install and activate the Fluent Forms plugin on your WordPress website.
The process is Easy peasy.
Go to your WordPress dashboard and click on PLUGINS from the left menubar, and then select Add New.
Then you will find a Search Bar where you need to type Fluent Forms.
Fluent Forms will immediately appear on the screen and you just need to press Install first and then click Activate.
You have TWO options to purchase the Fluent Forms Pro-add-on –
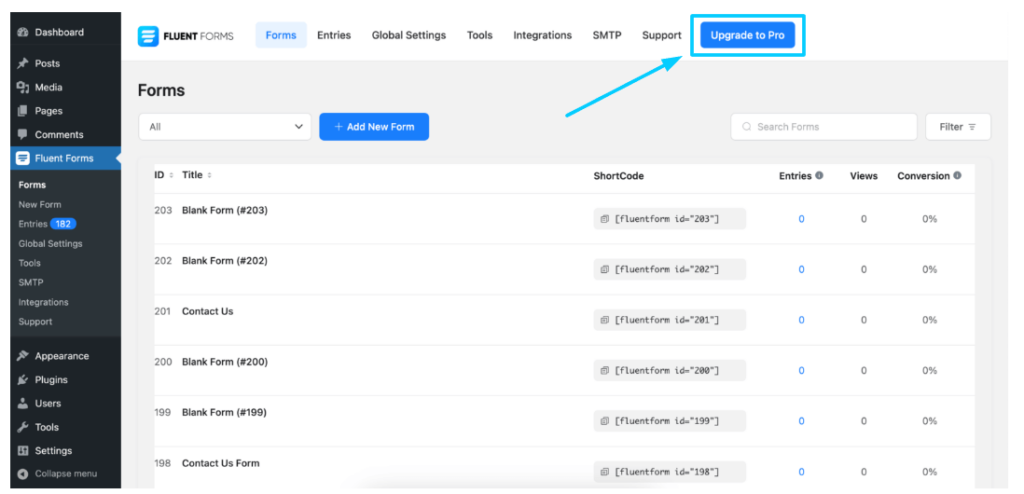
- Option 1: You can purchase the Fluent Forms Pro-add-on directly from your dashboard. Click on Fluent Forms and you will find the Upgrade to Pro button. Click and select the license plan that fits your need.
- Option 2: This way you can purchase the Pro add-on from WPManageNinja.
For a better understanding, watch the video below.
Step 2: Enable the payment module
First of all, you need to go to your website dashboard. Then find Fluent Forms Pro on the left menubar and head to Global Settings.
Then go to the Payment Settings, and you will find an option “Enable Payment Module”. Just enable it.
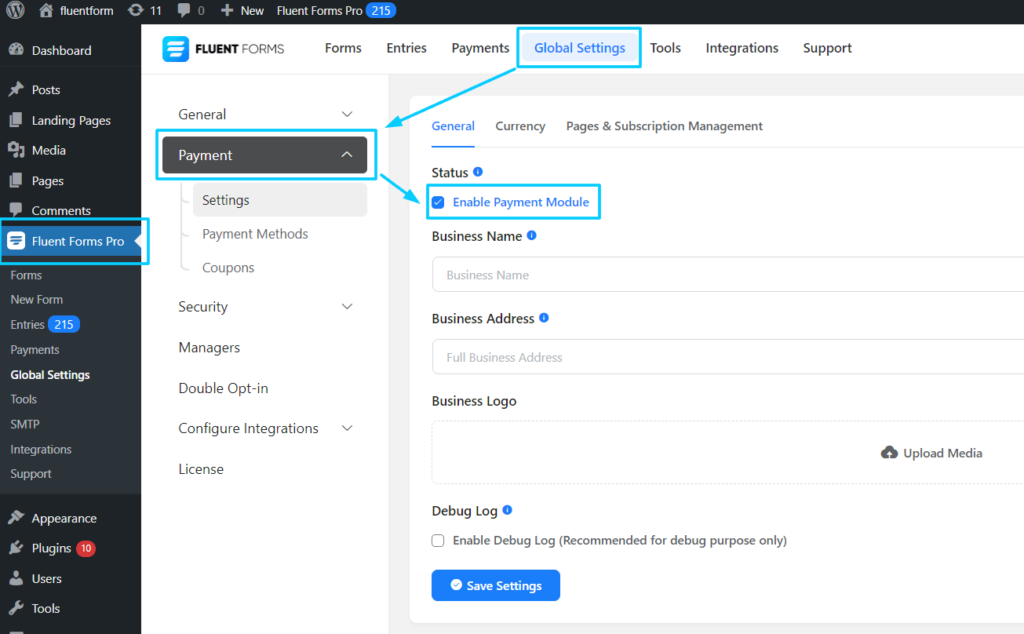
Also, from these setting options, you can configure payment settings like business name, business address, and logo. You can also set the default currency, currency sign position, and page & subscription management as well.
Step 3: Enable Mollie payment method
Stay on the same settings page and select “Payment Methods”. You will find the Mollie payments option with other prominent gateways like Stripe and RazorPay.
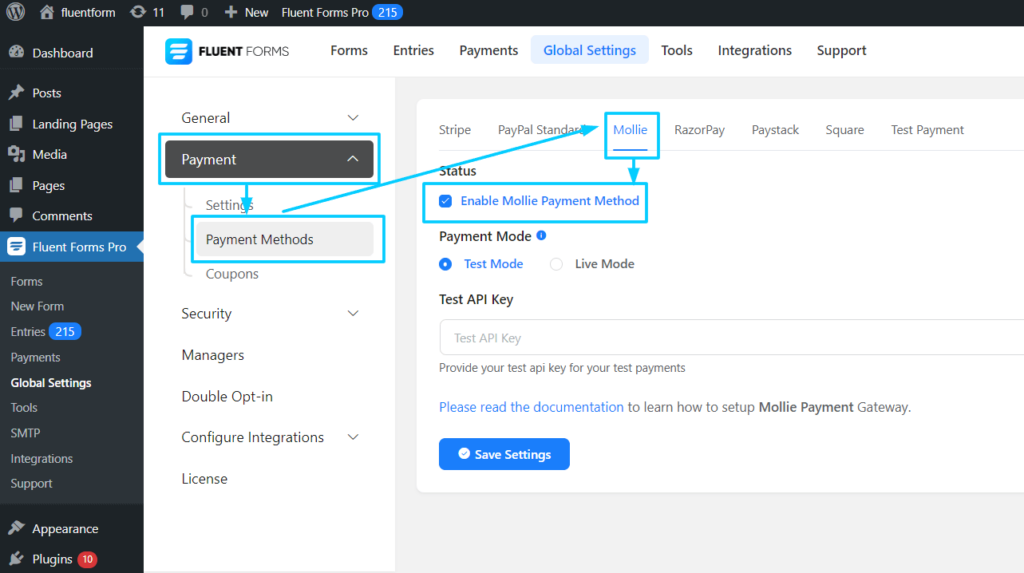
Hop onto the Mollie Settings tab, and check the Enable Mollie Payment Method box.
You’re also allowed to set your preferred payment mode before moving on to the Mollie configuration.
There are two options; Test Mode and Live Mode. As we only need to set it up for demonstration, we’ll be using the Test Mode. But you can follow the same steps for enabling Live Mode.
Step 4: Configure Mollie Payments integration
In this step, you need to log in to your Mollie account to get your API key.
And then Click on the API keys below the Developers option.
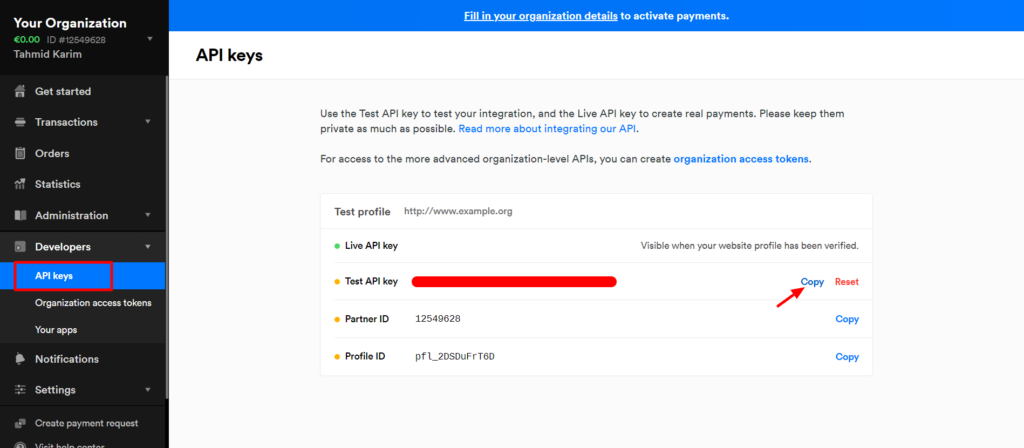
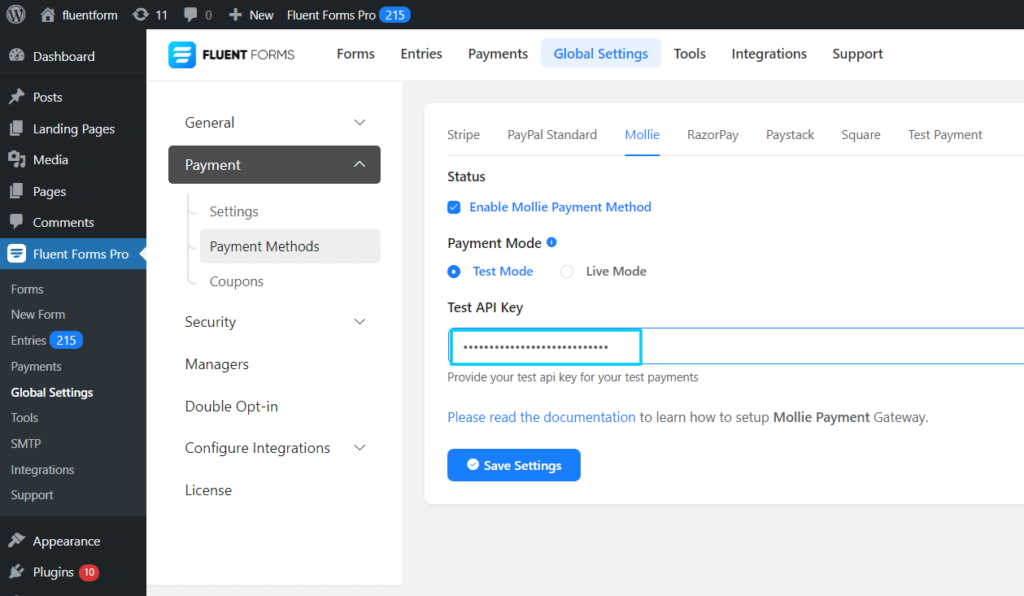
Upon clicking on this option, a set of API keys will appear. There will be a Live API key and a Test API key. Simply copy the Test API Key.
Next, head back to the Fluent Forms dashboard, and paste the keys into Test API Key.
Then click on Save Settings.
Step 5: Create a payment form
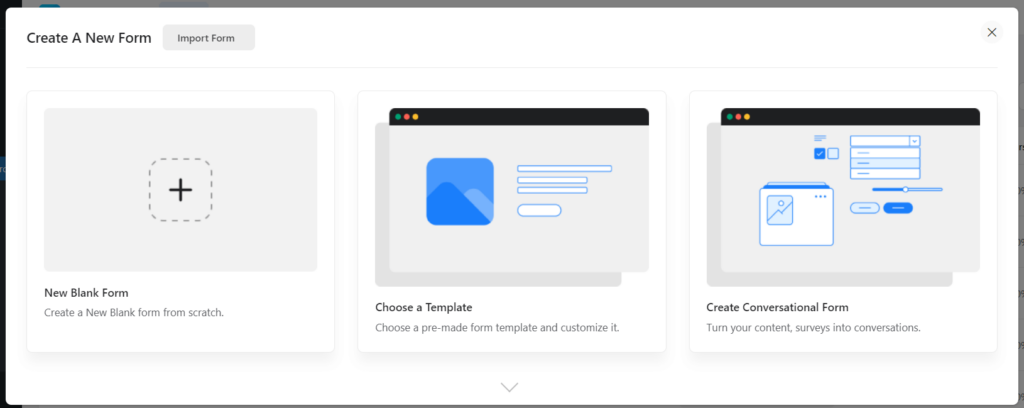
Now you’re almost ready to use Mollies Payments with Fluent Forms. Just Go ahead and create a payment form; you can either use 70+ prebuilt templates or create one on your own and add a payment field.
With Fluent Forms, you can create any type of form effortlessly. You’ll have fields like Payment Field, Custom Payment Amount, Item Quantity, Coupon, and whatnot. You can also quickly create WordPress payment forms with calculations.
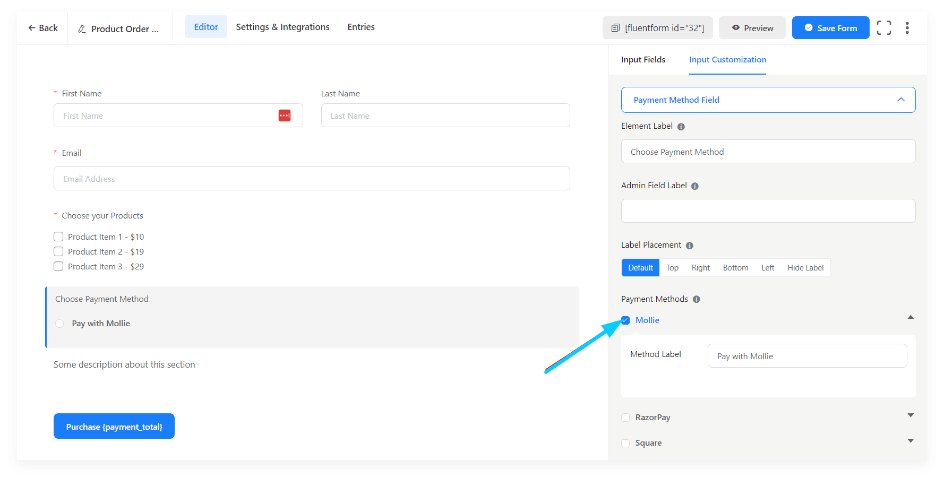
However, keep in mind that on the Payment Method field, ensure that you Check the Mollie option to let your users pay through the Mollie payment methods.
Related resource: Mollie payment integration with Fluent Forms documentation.
Enjoying this article?
We regularly publish actionable content on our blog. Subscribe to get them delivered straight to your inbox.
We won’t spam you. You can unsubscribe whenever you want.
Final Words: Mollie Payments
Certainly, Mollie sets its appearance apart from other payment gateways by enabling merchants in Europe to accept online payments effortlessly.
As Mollie allows online shoppers to choose how they want to pay, European vendors can expand their business in the new marketplaces without bothering about whether they can accept popular payment methods from different countries.
On the other hand, Fluent Forms’ integration with Mollie allows you to effortlessly offer a wide range of digital payment options through customizable online forms.
If your selected currency is Euro, Mollie can allow customers in other European countries to use a number of regional payment gateways during the checkout stage, including iDEAL
If you haven’t already used Fluent Forms, just give it a try and see how an online form with Mollie integration can help you reach a new height in business.
60+ Third-party Integrations
Expand your form functionality with seamless integrations.


Ashik Elahi is a seasoned Digital Marketer with a passion for Content Marketing. He believes in the power of storytelling and crafting valuable content that resonates with readers.


Leave a Reply