
An Easy way to create a WordPress Staging Site: Set Up Through Your Host
WordPress staging environment is commonly used by almost every website owner. It lowers the risk of your website getting crashed.
You can test your content, plugins, or whatever you want, without publishing it to your audience. But how you can create it?
To answer that question, we’ll cover the easy way to create a WordPress staging site and how to manage it.
What is a staging site or staging environment
A staging site is like an exact copy of your real site. The fun part is that you can do whatever you want on a staging site, and it won’t affect the real one.
Creating a staging environment helps you experiment with your site without risking anything.
Simply put, it’s like entering a stage before the play, rehearsing your lines, and tweaking anything you want without fearing getting judged. Whatever you do in a staging site isn’t shown to the website visitors.
Who needs a staging site
Now, do you need a staging site? How can we determine this?
If you run a business with a website- like a bakery, a pet store, or a yoga studio- you can’t afford for your site to crash when customers are browsing or in the process of booking payments.
Big corporations always have a staging site because their site is also a great source of customer engagement and revenue. When your business is small, you also must have a staging site. Why?
As a small business, getting your site crashed because of some experimentation might hurt your business badly. Customers might bounce off while getting constant 404 errors on your website.
A staging site lets you test updates without risking sales or scaring off visitors.
Benefits and challenges of a staging site
Creating a staging site comes with both benefits and challenges.
Now, about the benefits:
- You can update WordPress safely
- Creating staging websites is easy
- You have complete freedom to test your changes
Regarding the challenges:
- Usually, the staging feature isn’t free
- Longer website updating time
How to create a staging site on WordPress
There are several ways to create a WordPress staging site. We can categorize them according to their difficulties.
Beginner-friendly ways to create a WordPress staging site:
- Create one through your web host
- Use a plugin
A slightly advanced way to create a WordPress staging site:
- Create staging site manually
In this blog, we’ll only cover the process of creating a staging site on WordPress through your web host.
Creating a staging environment through your host
If you’re using a budget hosting service, there might be a possibility of not having a staging option.
We’ve gathered some popular hosting services that offer WordPress website staging functionality.
It will also help you find your suitable hosting options with comfortable staging.
Staging site with Bluehost
Bluehost is a very popular hosting service that provides a staging solution for your site.
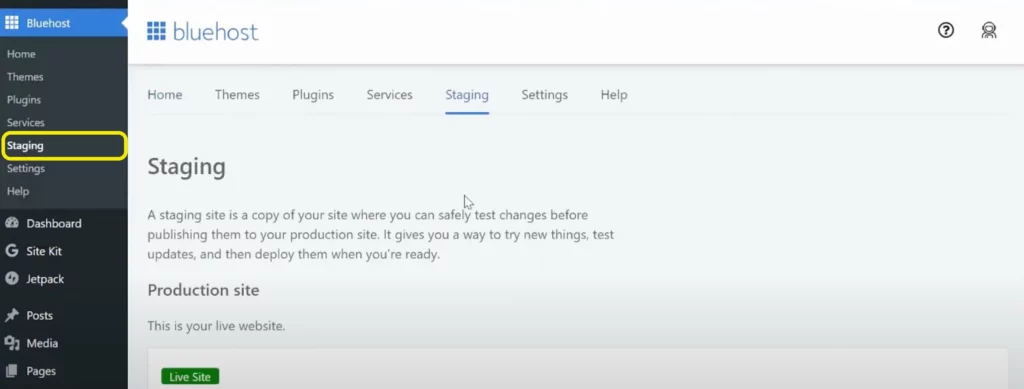
Setting up a staging site with Bluehost requires these simple steps:1. Login to your WordPress admin panel. From here, choose Bluehost on the left-hand sidebar, and then choose Staging.
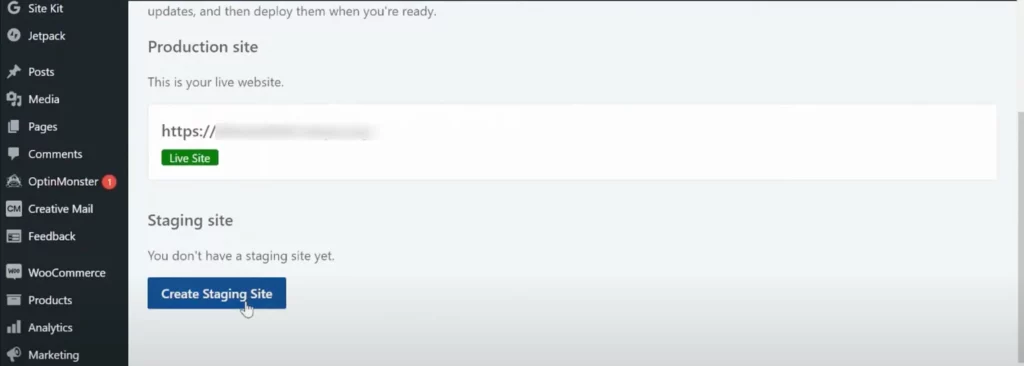
2. Now, scroll down and click on the Create Staging Site button; it’ll take some time to finish.
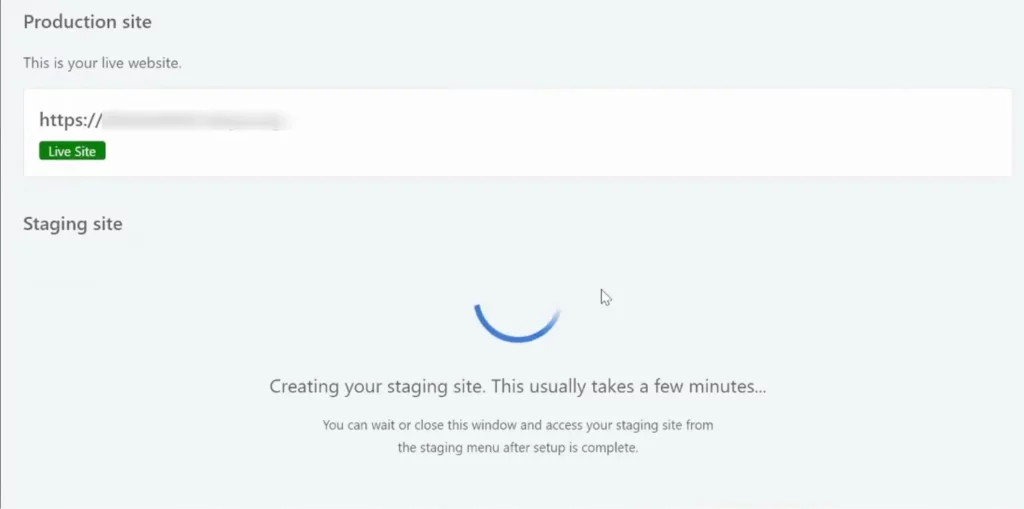
3. You’ll be redirected to the Staging tab when your staging environment is ready. Click on Go to Staging Site to access the staging area.
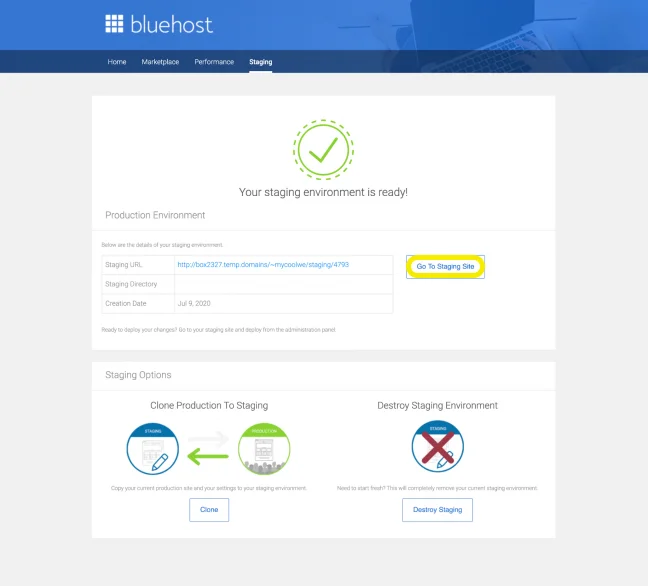
4. When you are ready to deploy the changes, go to the staging page again (from your WP admin area), scroll down to the Deployment Options, and choose the option as per your need.
Confirm your selection and wait for the process to finish.
Staging site with WP Engine
WP Engine is a well-known hosting provider, and one of its handy features is a one-click tool called Legacy Staging.
This lets you create a test version of your live WordPress site and push changes back when you’re ready.
Here’s how to make it work for you, step by step.
1. Log in and open the wp-admin area of your site.
2. Look at the left-hand menu and click on the “WP Engine” option.
3. Select “Legacy Staging” from the settings that pop up.
4. Hit the blue “Copy Site From Live To Staging” button. This duplicates your live site into a staging environment where you can test away!
Now, you’ve got a safe space to experiment without touching your live site.
Pushing Changes from Legacy Staging to Live
Ready to take your staging tweaks public? Here’s how to deploy your Legacy Staging site back to the live version:
1. Start in the wp-admin area of your WordPress site again.
2. Click WP Engine in the left sidebar.
3. Pick the Legacy Staging option from the menu.
4. Look for the red Deploy Site From Staging To Live button and give it a click.
5. Choose how you want the database handled (WP Engine will guide you here), then confirm by hitting the red Deploy Site From Staging To Live button again.
And just like that, your tested changes go live for the world to see.
Staging site with Siteground
SiteGround also has a one-click staging solution. To create a staging site with SiteGround, follow these simple steps:
1. Login to SiteGround’s dashboard, scroll down to WordPress Tools, and click on the Staging option.
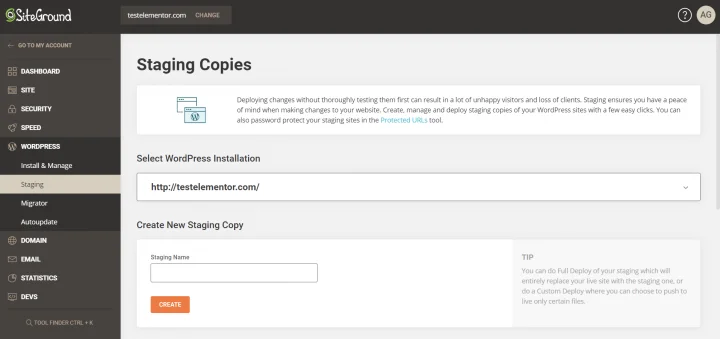
2. Add your website to the staging site manager, then click Add WordPress.
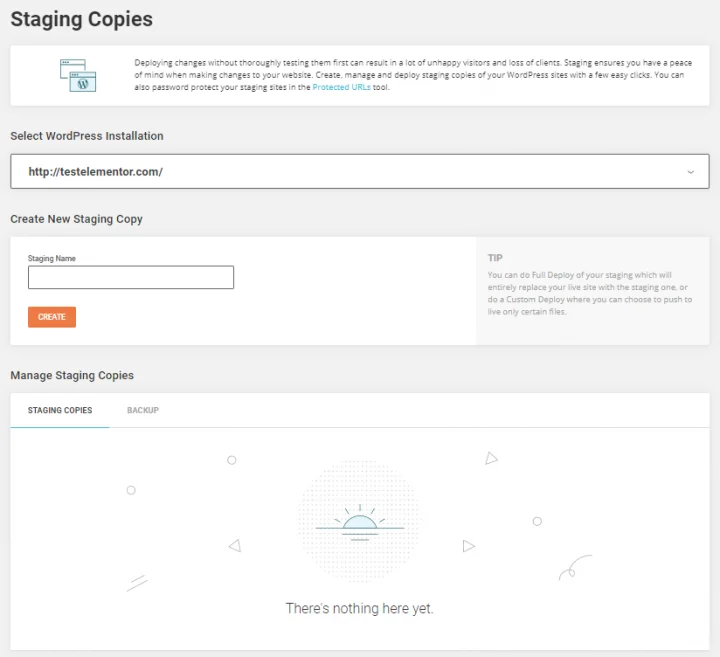
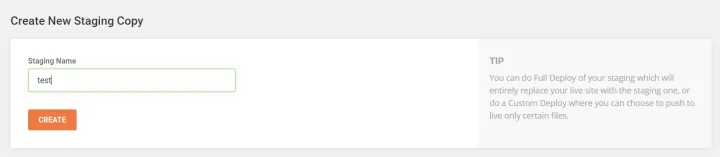
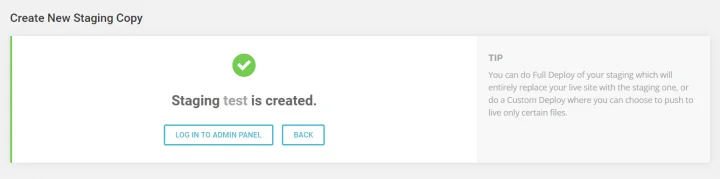
3. Select the URL of your website. Once the website is detected by SiteGround, you can click on Create Staging Copy.
4. Add a password and provide your login credentials.
5. You can now edit your copy.
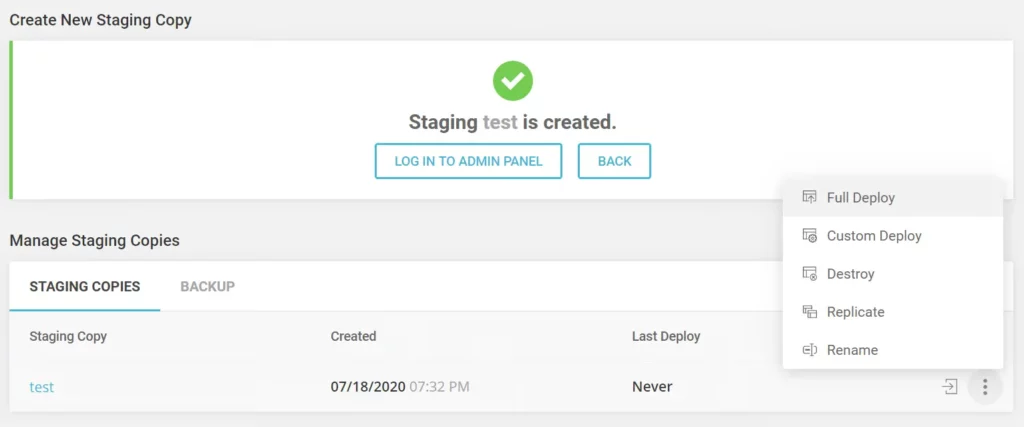
6. Once done, you can go to the SiteGround’s dashboard and publish your site by going to Manage Staging Copies and clicking the Push to Live button, and voila, you’ve got a live WordPress site with the changes you’ve made.
Staging site with Hostinger
Hostinger offers staging for their WordPress Business and cloud hosting users. It is accessible from hpanel and it’s a beginner-friendly method.
You can create a staging site with Hostinger by following these steps.
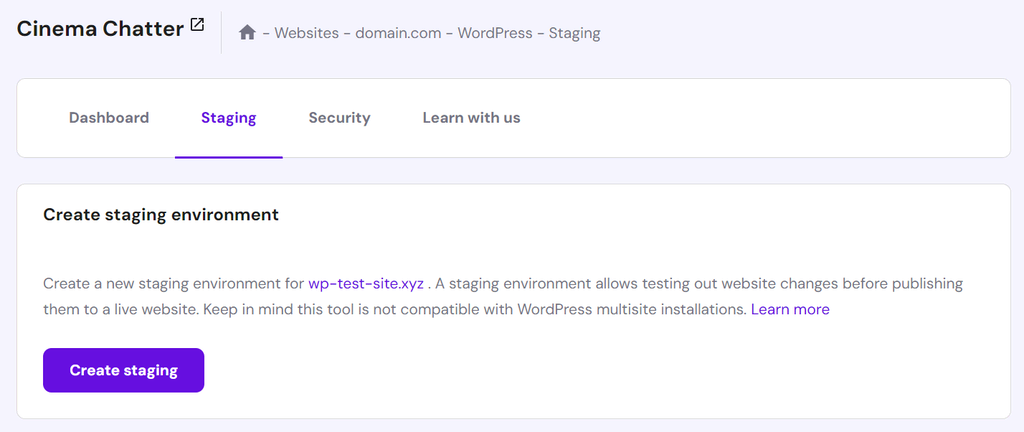
1. Go to your hosting control panel and navigate to the WordPress dropdown menu, where you’ll find the Staging tab.

2. In the Staging tab, select the Create staging button.
3. Enter the subdomain name for the staging site and click Create.
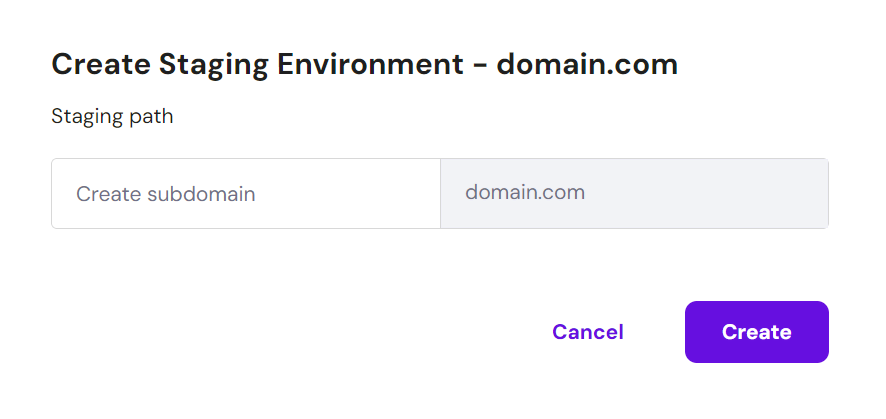
4. The duplication process can take up to 15 minutes, depending on the size of the production website. Hit the Close button to dismiss the confirmation message.
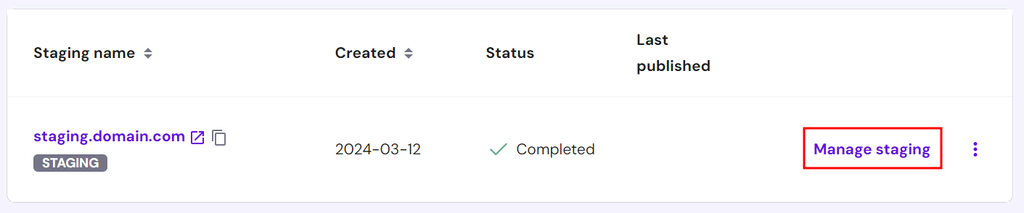
5. Once done, scroll down to the staging site list and click Manage staging next to the newly created environment.
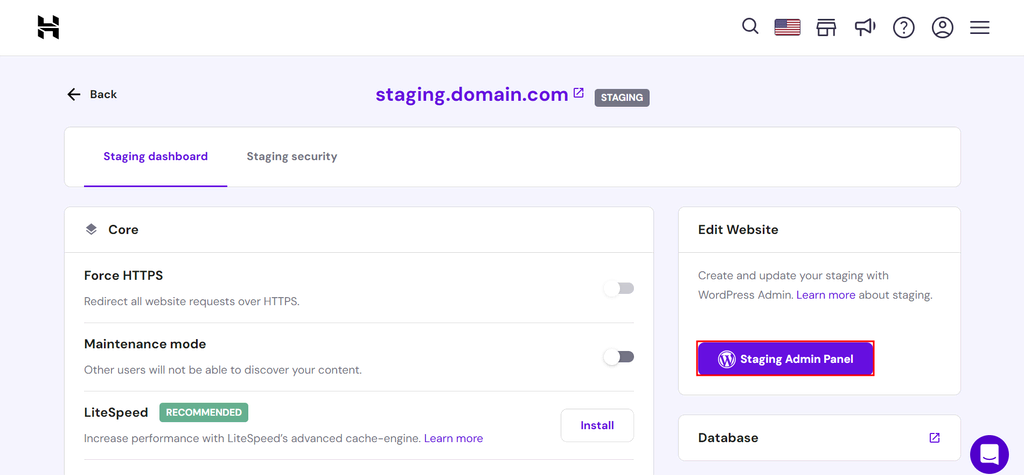
6. In the staging dashboard, select Staging Admin Panel to access the WordPress admin area and start making changes.
You can deploy the staging site live whenever you want. Make sure to check before publishing it.
Staging site with xCloud
xCloud is a hosting service that offers an easy staging solution.
Check out the steps below to create a WordPress staging environment on your own:
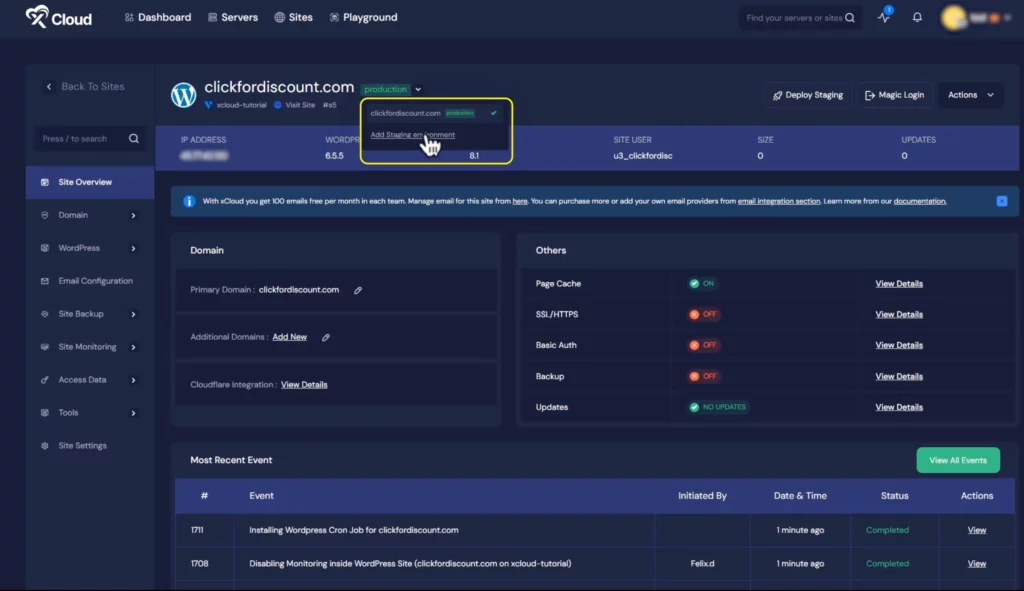
1. Go to your hosting service’s dashboard and select the site you want to clone. Click the dropdown beside the site name and select Add Staging environment.
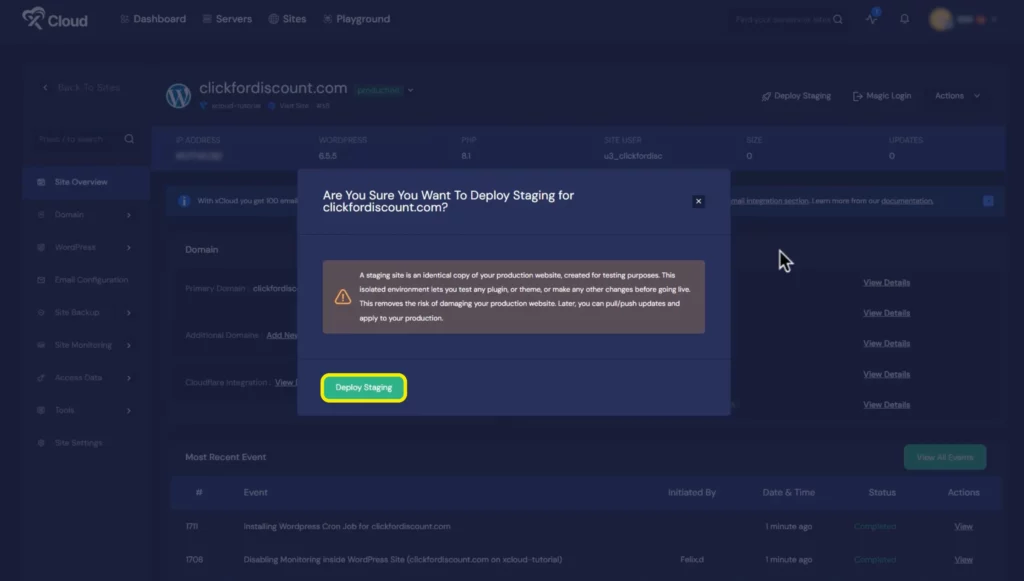
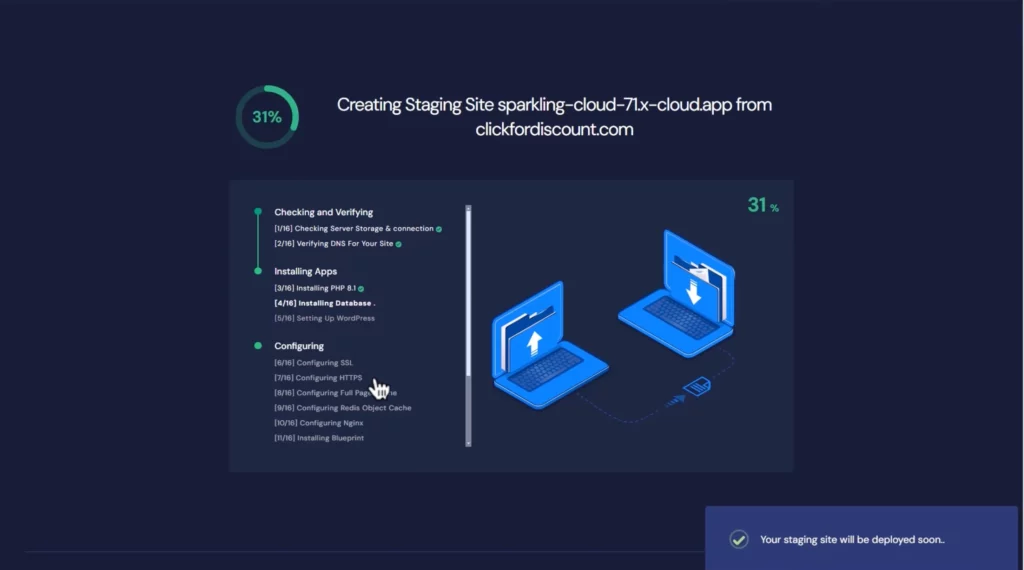
2. You’re now one step away from creating a staging site. Click Deploy Staging and it’ll take a several minutes for your staging environment to get ready.
Wait for it to load…
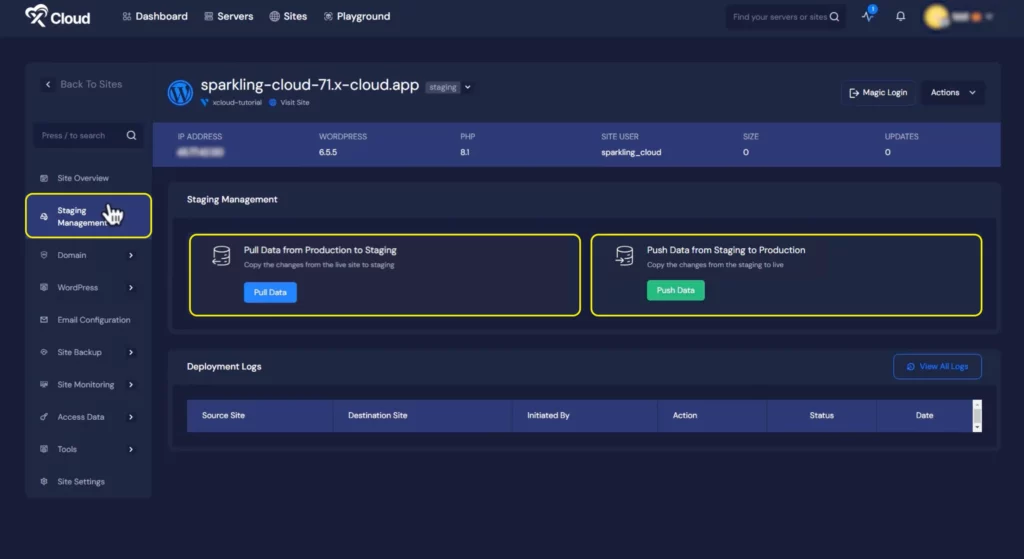
3. Now you’re all set with your staging site and it’ll have a different name and tagged as staging.

4. You can go to Staging Management to revert between pulling data from staging to live and vice versa.
Thus, you can easily create and play around with your staging site as you wish.
Wrap up
There are also many hosts that offer staging sites. It’s upto you which hosting service you want to use and which process of staging is comfortable to you.
You can test updates, experiment with new plugins and make changes as you wish. That’s why a staging site is always recommended.
This is the first blog of our WordPress staging sites series featuring hosting companies WordPress staging features. Next, we will discuss how to create a staging site manually and using WordPress staging plugins. Make sure you check those too.
How do you like to create your staging site? Was this tutorial helpful for you? Let us know in the comments below!

This is Sumit. He’s a physics major who’s trying to understand both the physical as well as the WordPress worlds. Whenever he’s not busy, plays fifa or spends time with his family.


Leave a Reply