
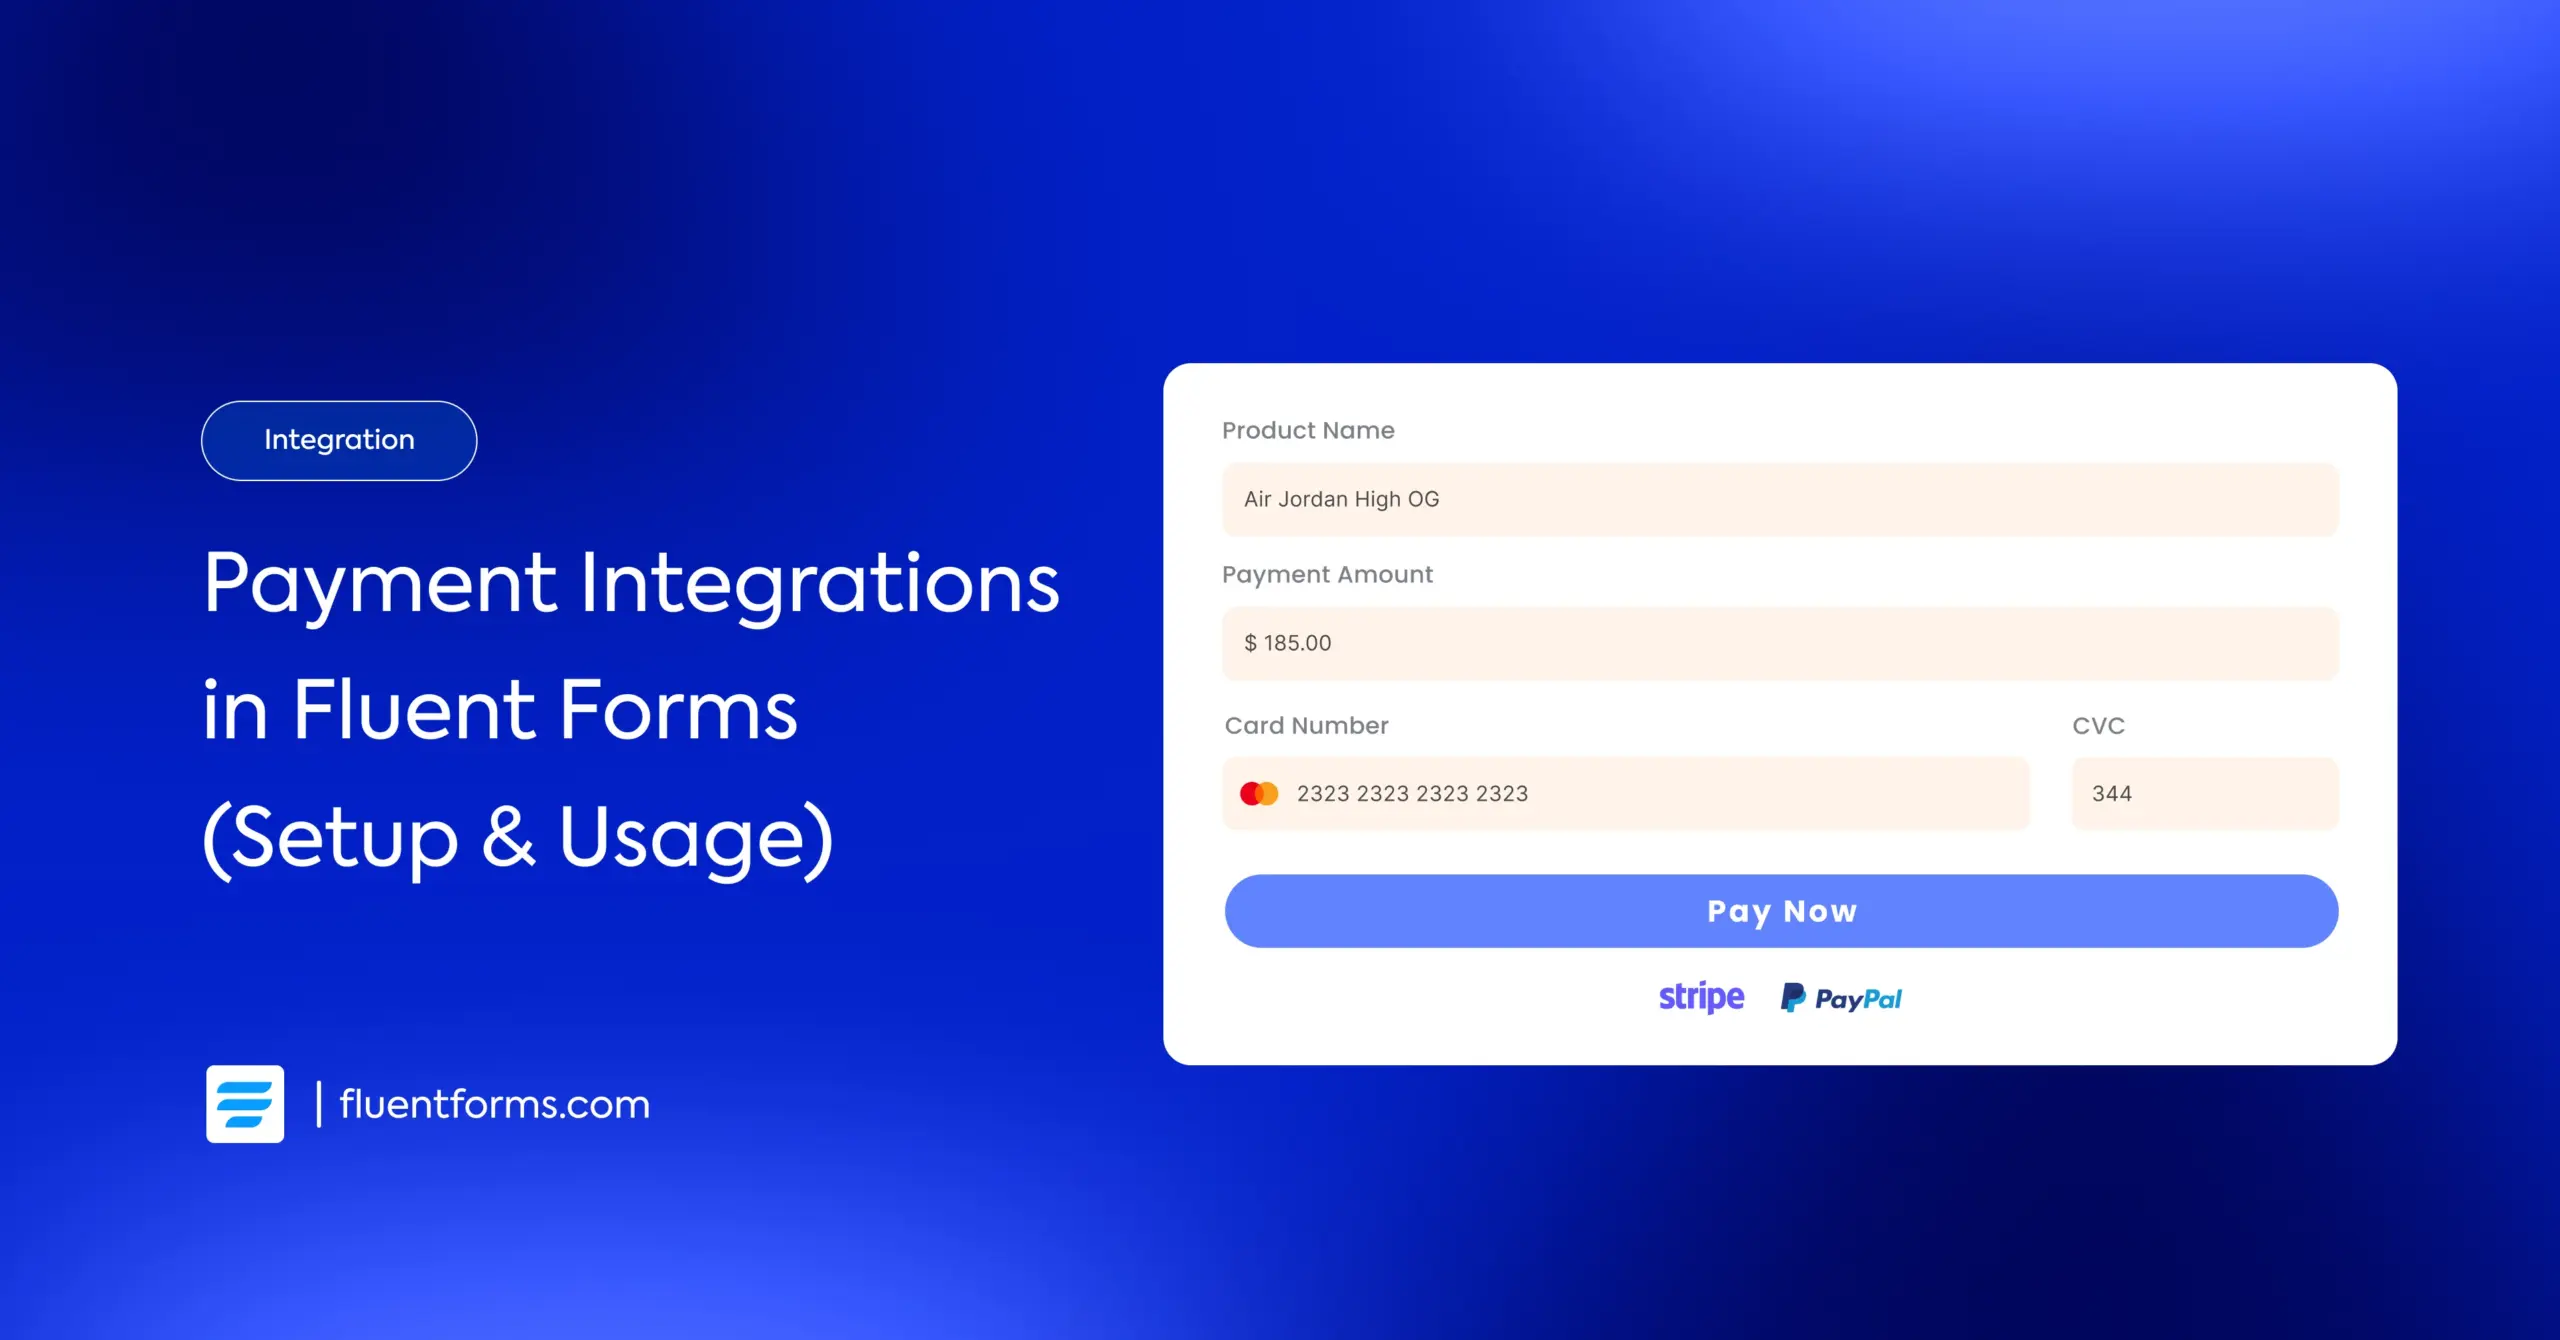
Collect Payments with Fluent Forms Payment Integration
Whether you’re selling a product, offering paid services, taking donations, or collecting fees – at some point, your website needs a clean way to accept payments. Fluent Forms makes that effortless.
Instead of installing a full eCommerce system, Fluent Forms gives you a fast, flexible payment workflow built directly into your forms. You choose a gateway, set up your preferences, and create a form that handles the entire transaction without complex configurations or custom code.
This guide walks you through how Fluent Forms handles online payments and how you can start collecting money in just a few steps.
TL;DR
- Accept payments directly inside your WordPress forms without installing a full eCommerce system.
- Connect major gateways like Stripe, PayPal, Mollie, RazorPay, Paystack, Square, Paddle, and Authorize.net.
- Build payment workflows using simple drag-and-drop fields inside Fluent Forms.
- Collect one-time payments, subscriptions, donations, registrations, and service fees from the same form.
- Embedded checkout keeps users on the form, reducing friction and improving completion rates.
- Automate payment records, invoices, and transaction tracking inside your dashboard.
- Add advanced payment tools like custom payment amounts, payment summaries, coupons, and subscriptions.
- Set up the gateway once, publish your form, and start collecting payments within minutes.
Why do you need payment integrations
When you connect a payment gateway to a form, the form stops being a simple input tool. It becomes a checkout system, a donation workflow, a subscription portal, or a booking engine – all built directly into your website. And with embedded checkout, users complete the entire payment inside the form itself, without a single redirect. Faster flow, fewer drop-offs, and a much cleaner user experience.
Payment integrations also ensure your form can support the wide range of methods customers expect today – cards, wallets, mobile payments, UPI, PayPal, and region-specific options. Everything stays secure, automated, and organized.
Here’s how payment integrations enhance your form-driven workflows:
Save time
Your form collects the payment and sends all transaction data to your dashboard or accounting system automatically. No manual entry. No duplication.
Reduce errors
Payments, totals, and invoices are generated instantly. Calculations remain accurate, even when your form includes dynamic pricing or quantity selectors.
Improve cash flow
Because payments land in your system immediately, managing payroll, inventory, or recurring revenue becomes far easier.
Reduce labor cost
Automated payments mean you don’t need staff manually reconciling or updating records – the form handles everything for you.
Unlock new workflows
Your form can now sell products, take donations, collect registration fees, schedule paid bookings, run subscriptions, trigger CRM sequences, deliver digital items, and more – all powered by the payment gateway behind it.
In short, payment integrations transform your forms into complete revenue workflows, and embedded checkout makes the entire experience fast, seamless, and conversion-friendly.
Payment integrations in Fluent Forms
Fluent Forms is one of the most powerful form builders in WordPress – fast, flexible, and built for real business workflows. And the payment features extend that flexibility without needing a separate plugin.
You can use Fluent Forms to collect:
- One-time payments
- Service fees
- Registrations
- Donations
- Subscription payments
Everything happens inside your form using simple drag-and-drop controls.
Before creating a payment form, you will need to configure your payment settings.
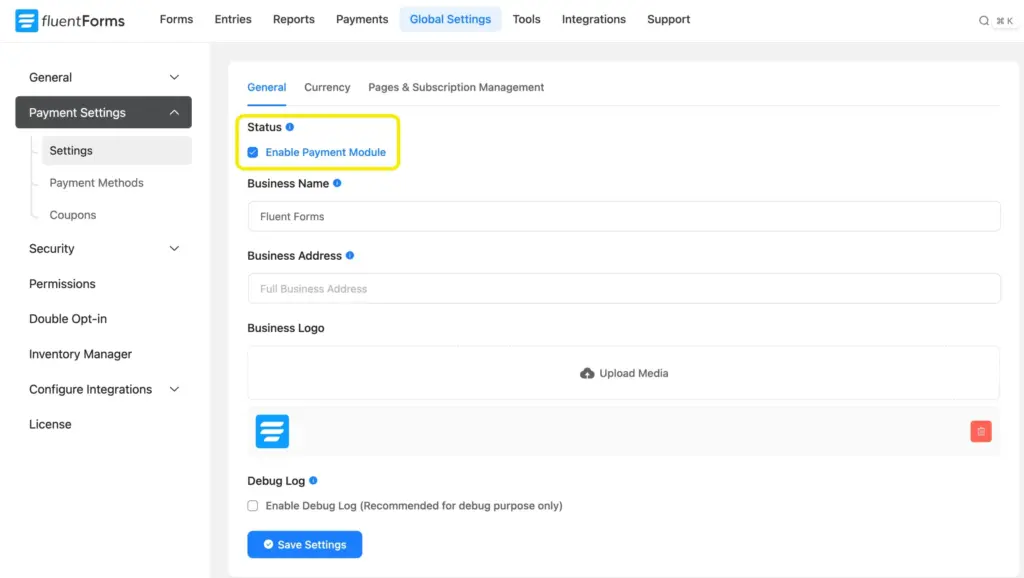
Configure the form settings for Fluent Forms payment integration
Go to the Global Settings of Fluent Forms from your dashboard. Select Payment from the left sidebar. Click on the Enable Payment Module button.
Now set the Business Name, Business Address and Business Logo. Click on the Save Settings.
Next, go to the Currency Settings. Set the Default Currency using the dropdown menu. Also, you can customize the Currency Sign Position and Currency Separators.

There is a Pages & Subscription Management tab from where you can set a Payment Management and Payment Receipt Page.

Now head over to the Payment Methods. Fluent Forms offers eight payment methods, such as –
You also have a Test Payment method, which allows you to verify if the entire payment process is functioning smoothly without processing actual transactions.
This feature is particularly useful for ensuring that everything is set up correctly, from form submission to payment confirmation, before going live.
For demonstration purposes, we will show how to integrate Stripe and PayPal into your form.
Build Smarter Forms for Free

Fluent Forms payment integration with Stripe
If you don’t have a Stripe account, you’ll need to create one to obtain the API key.
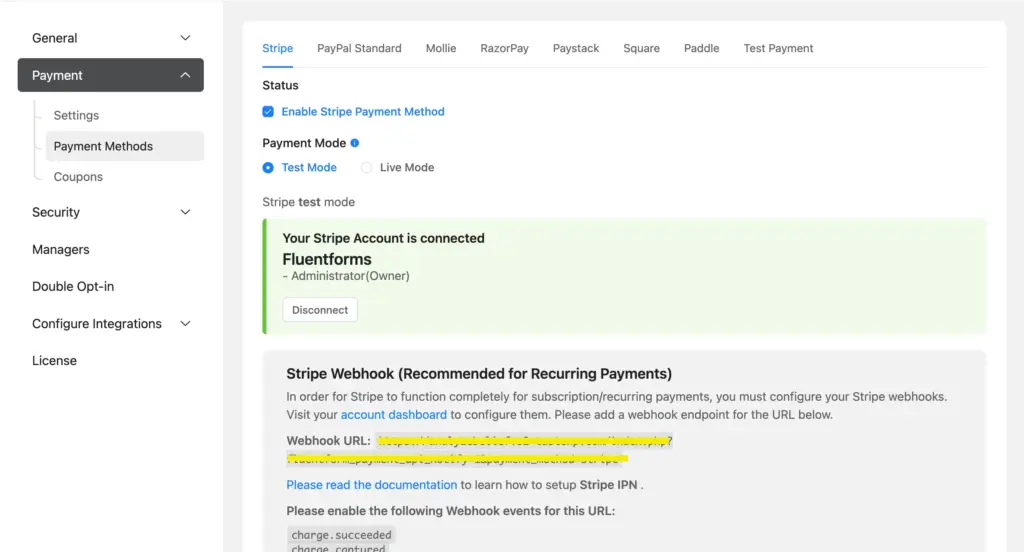
Now from the Fluent Forms Pro > Global Settings > Payment > Payment Methods window, check the box beside Enable Stripe Payment Method.

There are two modes: Test and Live Mode. Choose your preferred mode.
You will see a Connect with Stripe button. Click on it, and you’ll be redirected to the Stripe website, where you’ll need to log in to your account.

After logging in, you will be prompted to connect the account with Stripe. In a while, you will see that your Stripe account is connected with Fluent Forms.
Now, go back to the Fluent Forms dashboard and create your form. Add necessary input fields in your form. We have created a bakery order form.

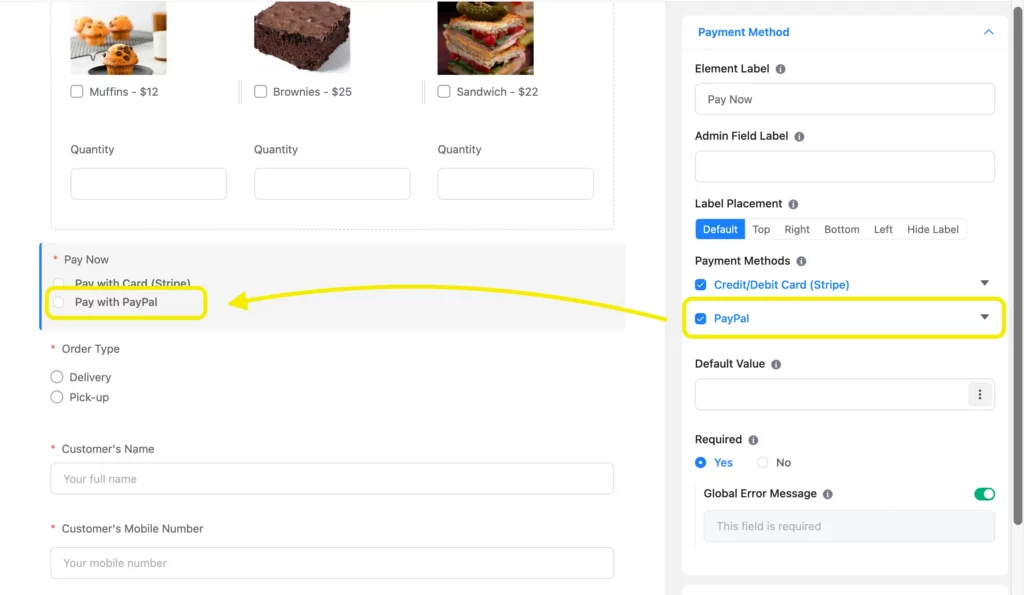
Next, add the Payment Method field to your form and customize it according to your need.

You will see a Pay with Card (Stripe) option as a payment method.
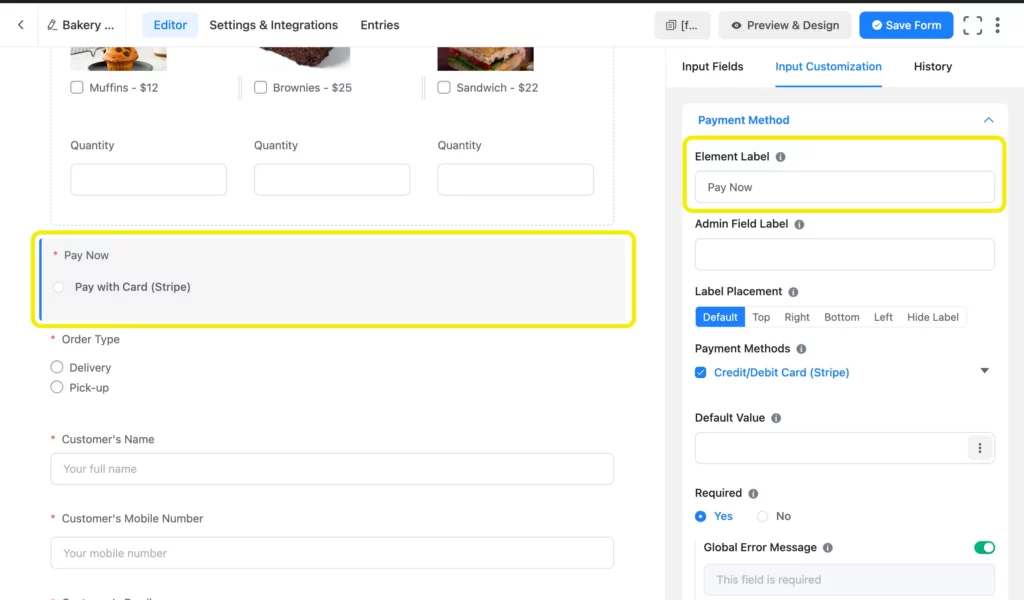
Don’t forget to save the form, and preview it before publishing on your website.
And that’s it! Now, let’s check out the integration process for PayPal.
Fluent Forms payment integration with PayPal
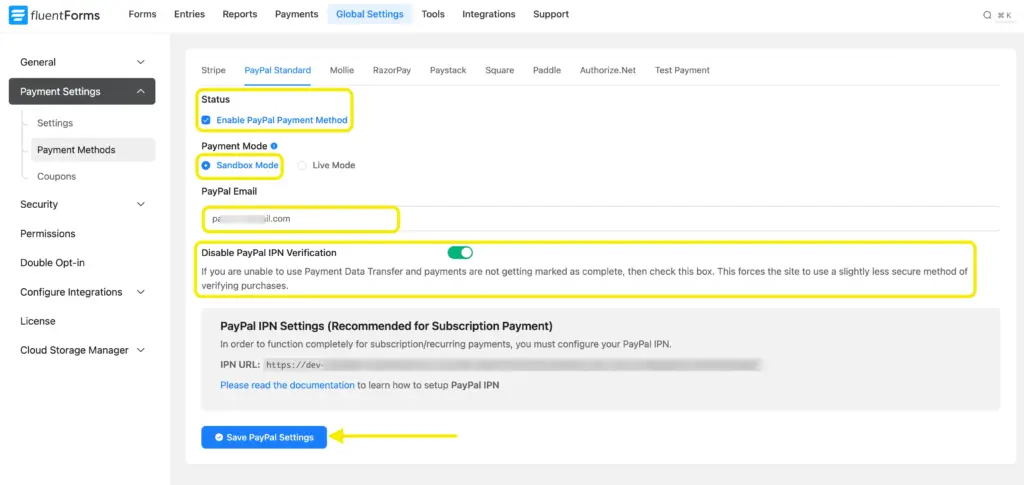
To integrate PayPal with Fluent Forms, go to Fluent Forms Pro > Global Settings > Payment > Payment Methods > PayPal Standard. Now check the box beside Enable PayPal Payment Method. Just like Stripe, you have two modes here: Sandbox Mode and Live Mode.
Provide your PayPal Email (the email that you used to sign up for a PayPal account) and click on the Save PayPal Settings button.
Now that Paypal is integrated with Fluent Forms, you will see PayPal as a payment method when you customize the Payment Method field in the form editor window. Just tick the box beside PayPal to add it to the form as a payment method.
Yes, integrating payment methods in your forms is this easy with Fluent Forms.
More payment features of Fluent Forms
As an advanced form-builder plugin, Fluent Forms offers more payment related features such as Subscription payment, Custom Payment Amount, Payment Summary and Coupon.
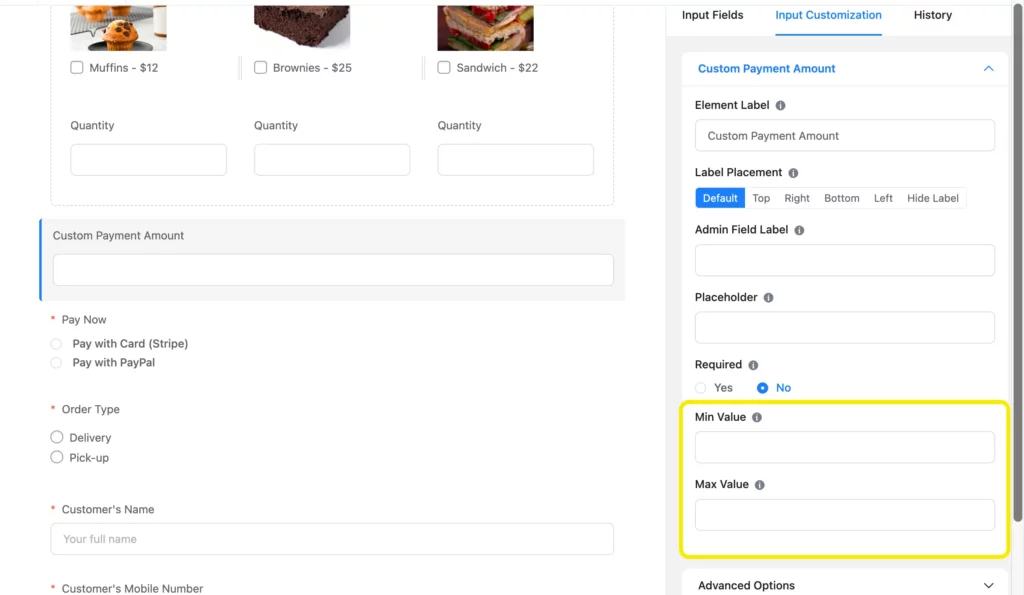
Add Custom Payment Amount to your form
You can use the Custom Payment Amount field for letting users decide the payment amount themselves. That doesn’t mean you have no control over the payment amount. You can set the Minimum and Maximum Value of the custom payment amount.
Show a Payment Summary
Showing a payment summary is very helpful for your users to stay informed about their transactions. To provide a dynamic payment summary in your form, select the Payment Summary field.

Now whenever a user selects any Payment Item, the Payment Summary will be updated automatically.

In some cases, you have to add the payment summary to meet certain compliances.
Ending note
Fluent Forms gives you everything you need to accept payments directly inside WordPress – no heavy plugins, no complicated setup. Enable your payment gateway, configure your details, build your form, and you’re ready to collect payments for products, services, bookings, donations, or subscriptions in minutes.
And once payments are running smoothly, you can start layering more power into your forms. Add calculations, coupons, summaries, conditional logic, CRM flows, email automation, or even full onboarding sequences. Fluent Forms doesn’t just process transactions – it helps you build complete workflows that keep your business moving.
If you have a question about a specific payment flow or want help shaping your next form, drop a comment below. I’m here to help.

This is Sumit. He’s a physics major who’s trying to understand both the physical as well as the WordPress worlds. Whenever he’s not busy, plays fifa or spends time with his family.


Leave a Reply