
How to Create the Perfect Bakery Order Form for Your Customers

Picture this: it’s a busy morning at your bakery, with customers flooding in, dying to get their hands on your delicious treats. Amidst the hustle and bustle, your staff is struggling to keep up with orders, leaving customers hungry and annoyed. You realize that something needs to change.
This is where a bakery order form comes in. It can streamline your ordering process and provide a better experience for your customers. In this article, we’ll take a deep dive into how to create the perfect bakery order form. So let’s get started!
Introducing Fluent Forms: the ultimate form builder for WordPress
Creating a bakery order form in WordPress requires a plugin that can collect information about orders as well as accept payments. There are many options to pick from. You can either choose a form-maker plugin or an e-commerce plugin. However, some e-commerce plugins can be costly and may break your bank. So why look here and there when you have an easy and cost-effective solution available?
We recommend Fluent Forms, the most lightweight form-builder plugin in the market right now. It is a drag-and-drop WordPress plugin with tons of great features and functionalities.

Some other features of Fluent Forms that make it stand out are —
- Drag-and-drop form builder plugin for smooth user experience
- Dozens of useful pre-built form templates for quick form building
- Conversational forms for the best form-filling experience
- PDF add-on for creating PDF invoices from form submissions
- Payment feature for accepting payments from your clients in a seamless way
- Conditional logic for more control over your forms
- 45+ native integrations for additional functionality
- Multi-column form layout for ultimate freedom
- Calculated fields for measuring numbers based on inputs
- Quiz and survey module for creating quizzes and running surveys
Sounds good? Let’s move to the step-by-step guide on how to create a bakery order form in WordPress using Fluent Forms.
How to create a bakery order form
Follow the steps below to create the perfect bakery order form –
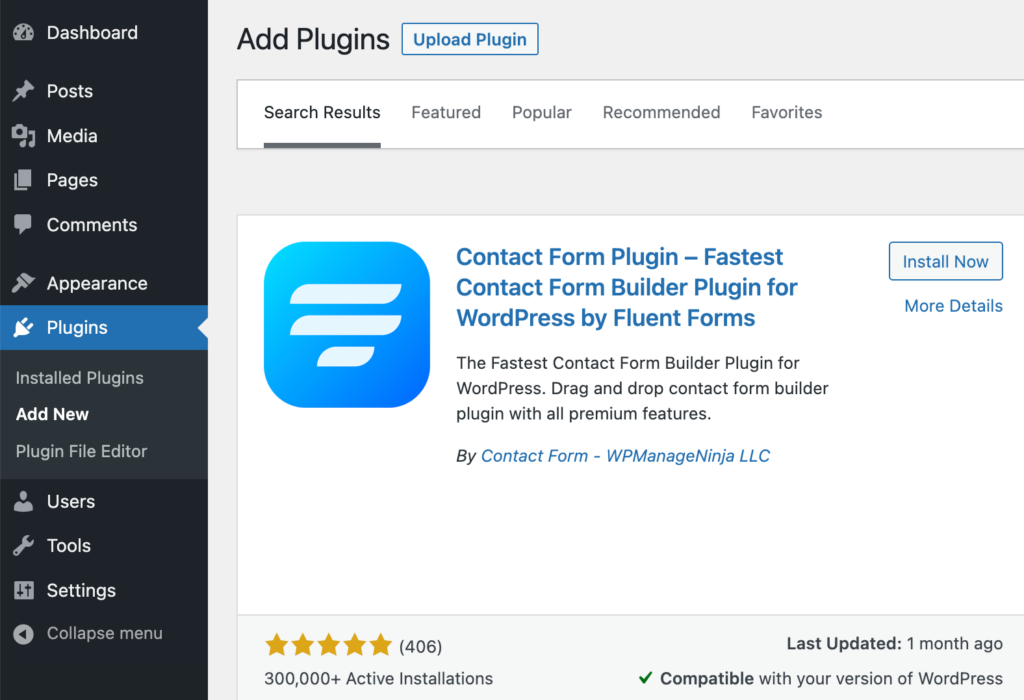
Step 1: Install Fluent Forms
To install Fluent Forms, go to the Plugins section in your WordPress dashboard, click on Add New, search for ‘Fluent Forms’, and then install and activate it.
Upgrade to the Pro version of Fluent Forms if you want to add a payment feature to your bakery order form and accept payments from your customers.
Step 2: Create a bakery order form from scratch
Once you have installed Fluent Forms, hover over Fluent Forms Pro on your WordPress dashboard and click on New Form > Create Form to start creating a form from scratch.
Alternatively, you can choose any pre-built order form template and customize it according to your needs.

After clicking on the Create Form button, you will see the form editor interface of Fluent Forms. On the right-hand side of the window, there are 45+ input fields to choose from.
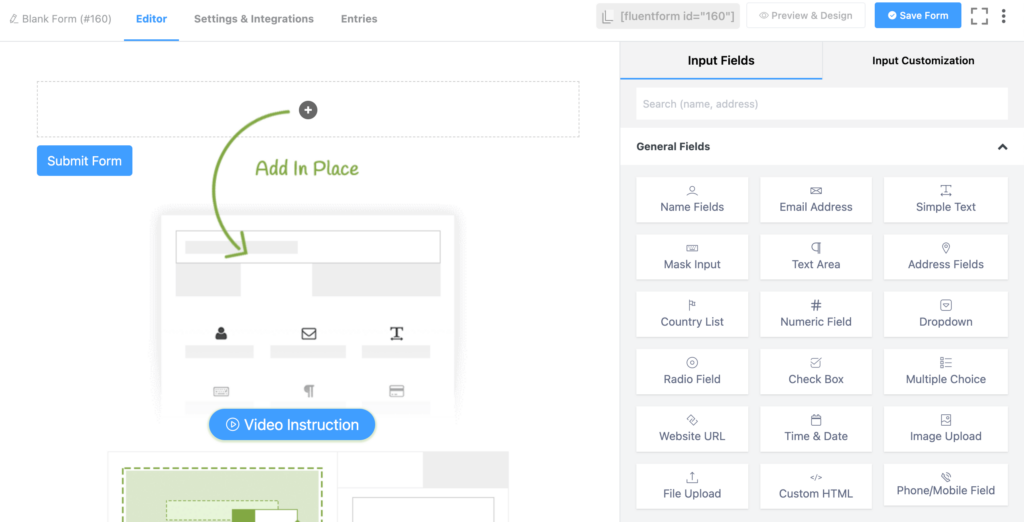
Before adding the input fields, rename the form by clicking on the rename button on the left side of the window.
Now it’s time to add necessary form fields. A typical bakery order form contains the following input fields –
- Bakery products
- Price
- Quantity
- Order summary
- Payment method
- Order type
- Customer name
- Customer mobile number
- Customer email
- Delivery address
First, add a Custom HTML field for providing a title to the form. Customize the field by taking advantage of the rich content editor.
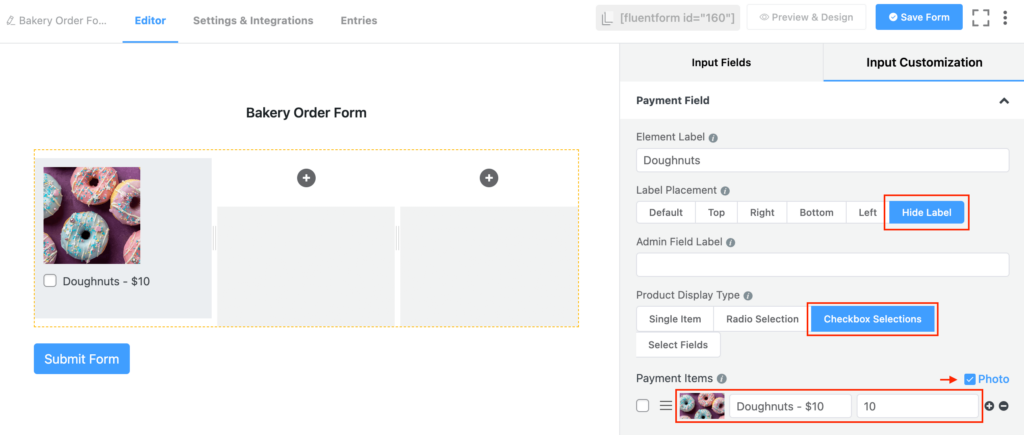
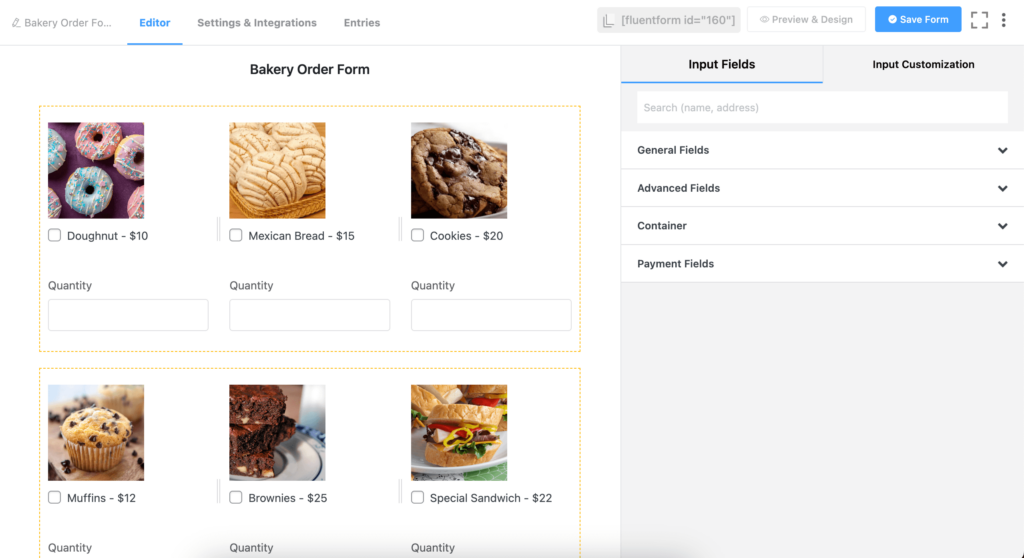
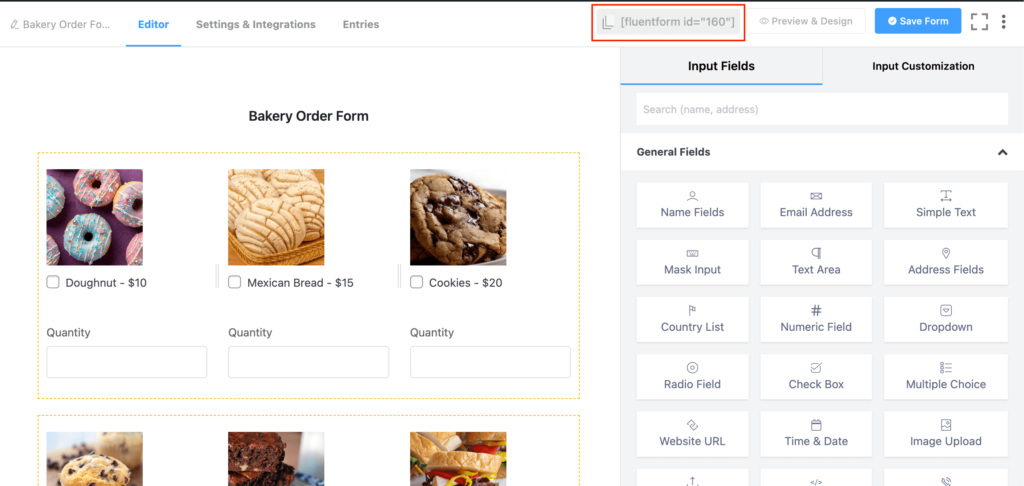
Step 3: Add products to your form
Next, add a Three Column Container to your form that will display three products in a row. Drag and drop the Payment Field on one of the containers. Now customize the Payment Field by putting the product name in the Element Label. Select Hide Label as the Label Placement and Checkbox Selections as the Product Display Type.
You need to enable the payment module and activate different payment methods to be able to use the payment feature of Fluent Forms.
In the Payment Items section, set your product label and the corresponding price. Mention the price in the product label if you want to show the price to the customers. You can also add a relevant photo of the product by ticking the checkbox beside Photo and uploading a photo that represents your product.
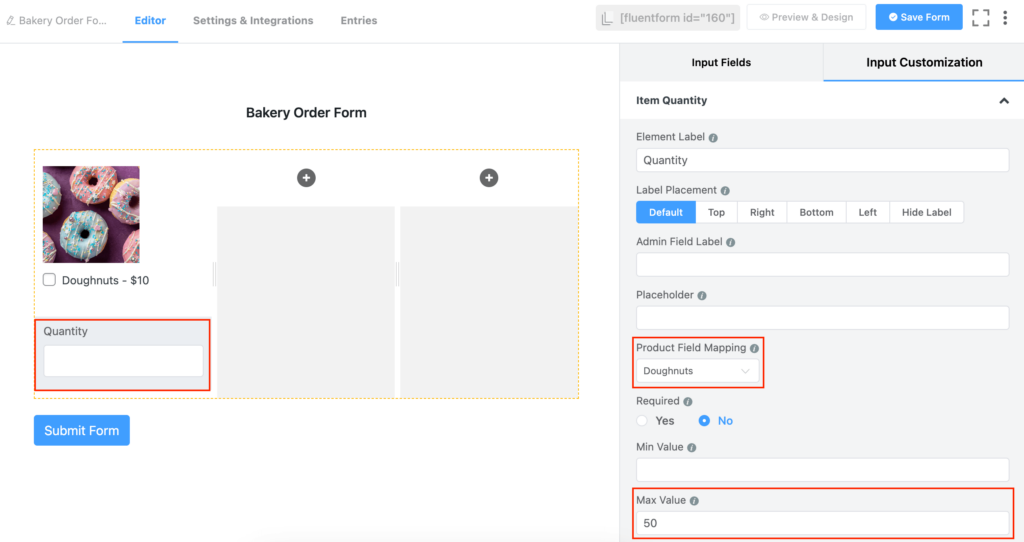
We have listed our first product in our bakery order form. Now it’s time to add a Quantity field for each product.
Drag and drop the Item Quantity field in the container under the relevant product. Customize the field by mapping the corresponding product from the dropdown menu. You can also set a minimum and a maximum quantity that a customer can order from the Input Customization of the Item Quantity field.
Follow the same process to add other products to your bakery business. You can add more containers to add more products to your bakery order form.
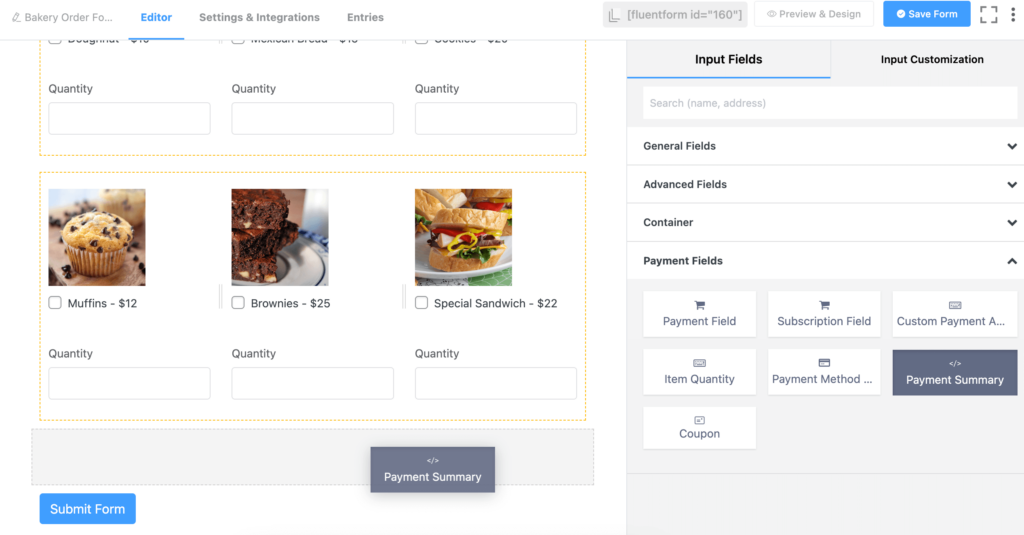
Step 4: Add payment methods
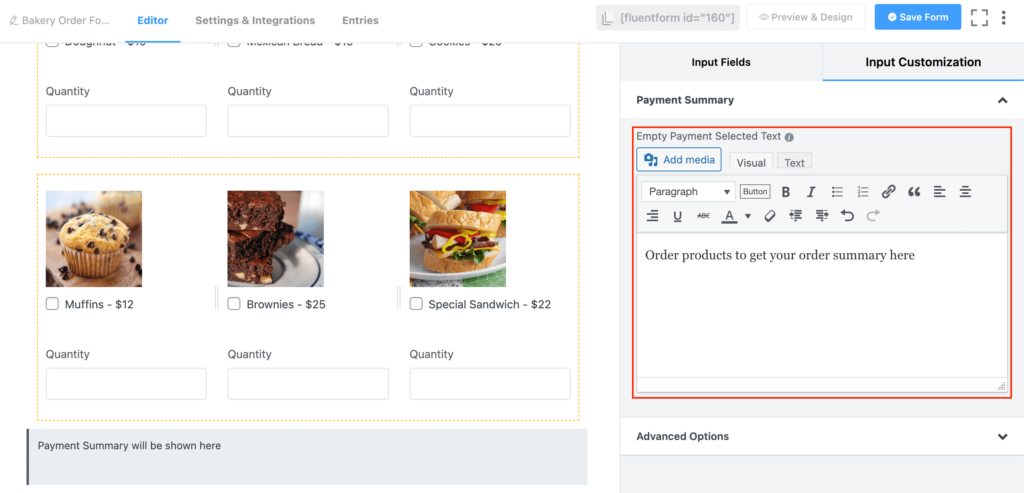
Now add the Payment Summary field from the Payment Fields tab. This will show a dynamic summary of a customer’s order.
You can customize the text shown in place of Payment Summary when a customer has not selected any product.
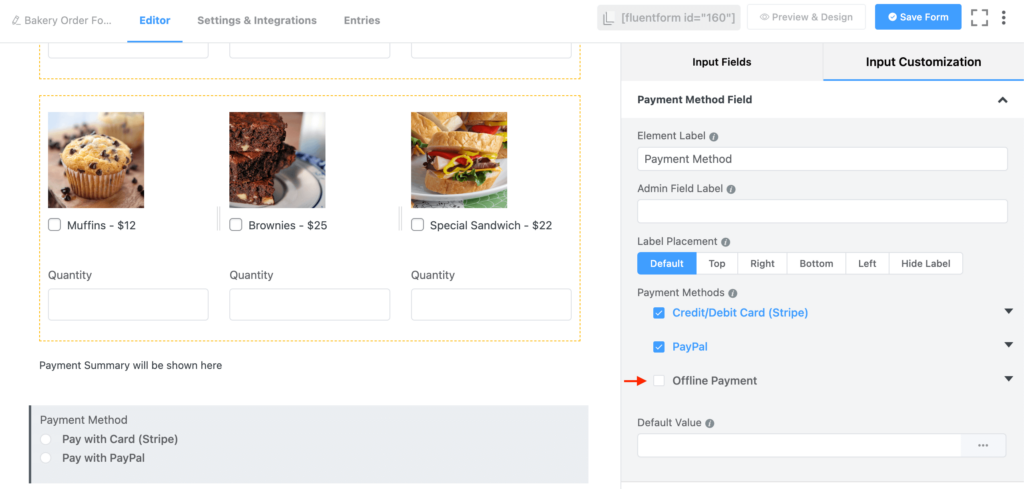
Now it’s time to add different modes of payment to your bakery order form. Click on the Payment Method Field. Fluent Forms offers a wide range of payment methods including Stripe, PayPal, Razorpay, etc. An offline payment method is also available.
You can enable or disable any payment method by customizing the Payment Method Field.
Step 5: Add fields for delivery method and customer information
Let’s now add fields for collecting information about the customer and delivery method. For letting customers choose their desired order type, add a Radio Field and provide two options: Delivery and Pick-up.
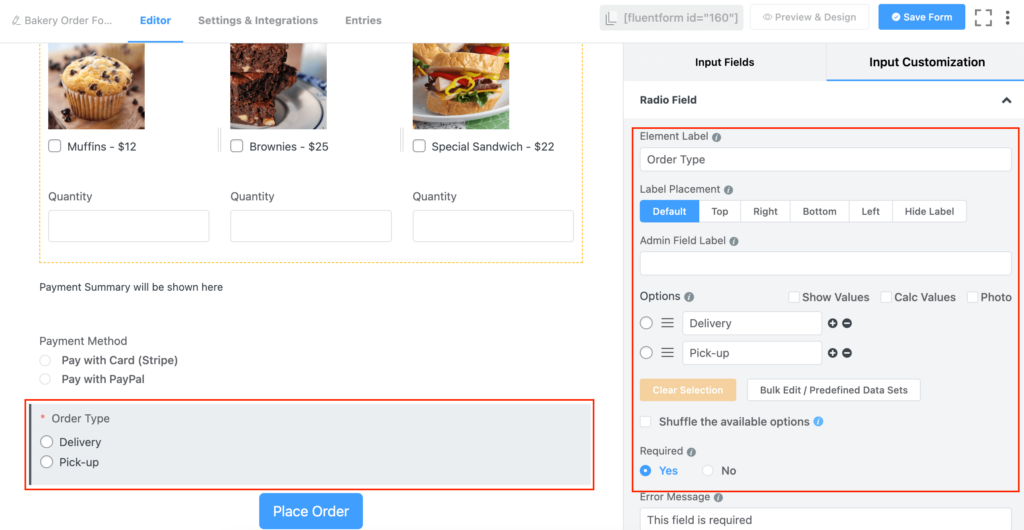
Next, add the Name Fields, Phone/Mobile Field, Email Address and Address Fields for collecting customer information and delivery address. Make necessary customizations in the input fields to match the form.

Step 6: Customize the Submit Form button (Optional)
We are almost at the end of developing our bakery order form. For the last step of the form-building process, you can customize the default Submit Form button. To do this, click on the Submit Form button on the form editor. This opens up multiple customization options where you can change the –
- Submit Button type
- Submit Button Text
- Button Style
- Button Size and
- Content Alignment
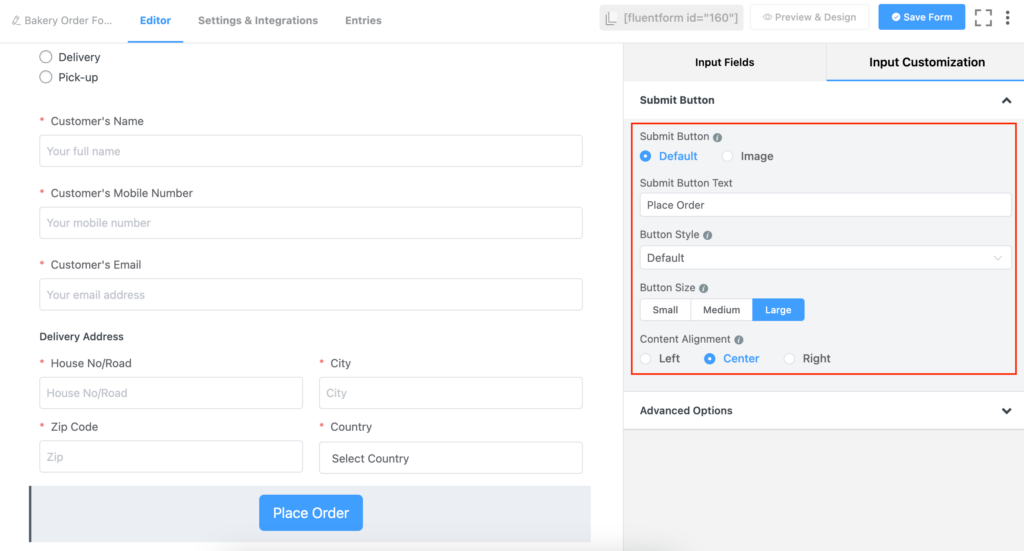
We have changed the submit button text to “Place Order”, enlarged the button size and center-aligned the button.
There you have it! Our bakery order form is ready. Before publishing it on the website, let’s quickly check out some form’s settings.
Step 7: Configure your form’s settings
You will find a tab called Settings & Integrations on top of the form editor interface. Click on this tab to access various settings.
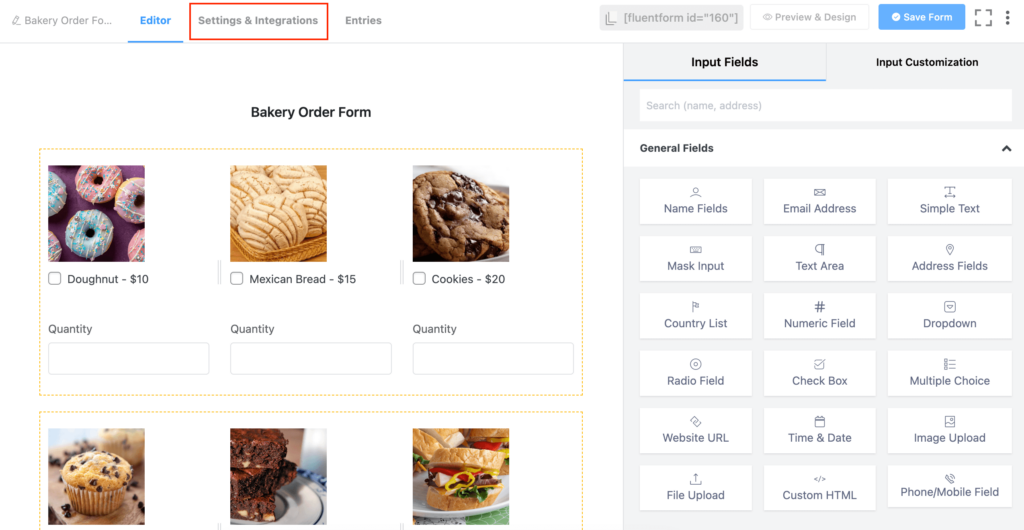
From the Settings & Integrations tab, you can do the following –
- Change the confirmation message that is shown when a user submits a form
- Enable double opt-in confirmation
- Configure form layout
- Apply different scheduling and restriction rules
- Configure email notifications
- Create PDF feeds for generating PDFs from each form submission
- Design a dedicated landing page for your form
- Use custom CSS and JS in your form
- Configure various payment options
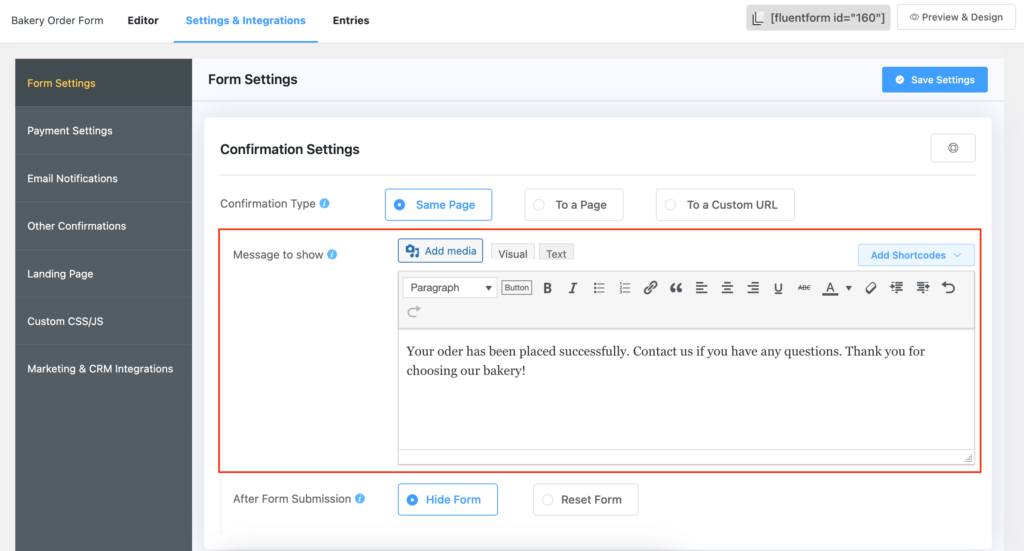
We would like to show a message to the customers after they place an order. From the Form Settings window, customize the Message to show.
Fluent Forms also lets you treat your customers with coupon codes and promote your bakery business. Not just that! You can also generate PDF invoices automatically for each order placed.
Step 8: Publish your form
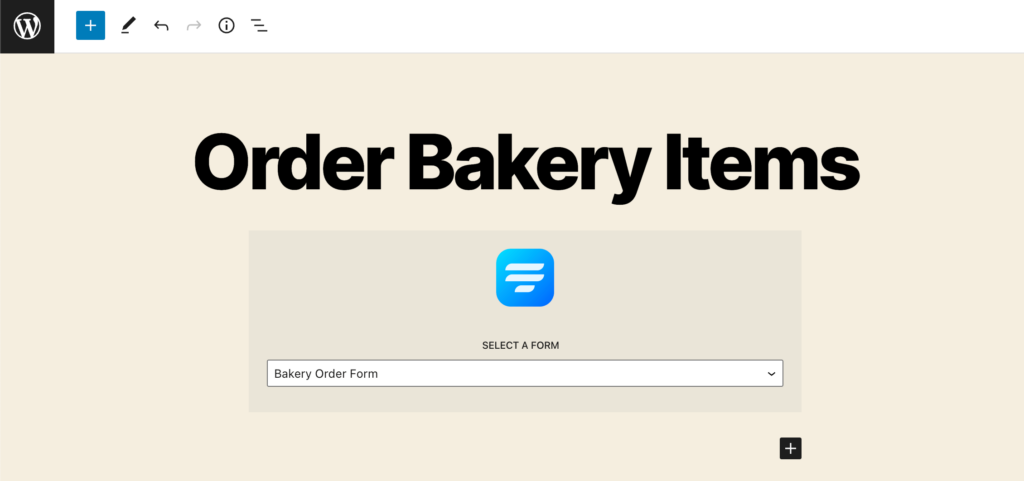
You can publish your form in three ways. First, you can use the Gutenberg block editor to choose the bakery order form you have just created. Click Add New under Pages in the WordPress dashboard’s left sidebar. Give the page a title. In the block editor’s blank area, click the plus (+) sign or insert a forward slash (/). Then, in the search box, write Fluent Forms and select the form from the dropdown menu.
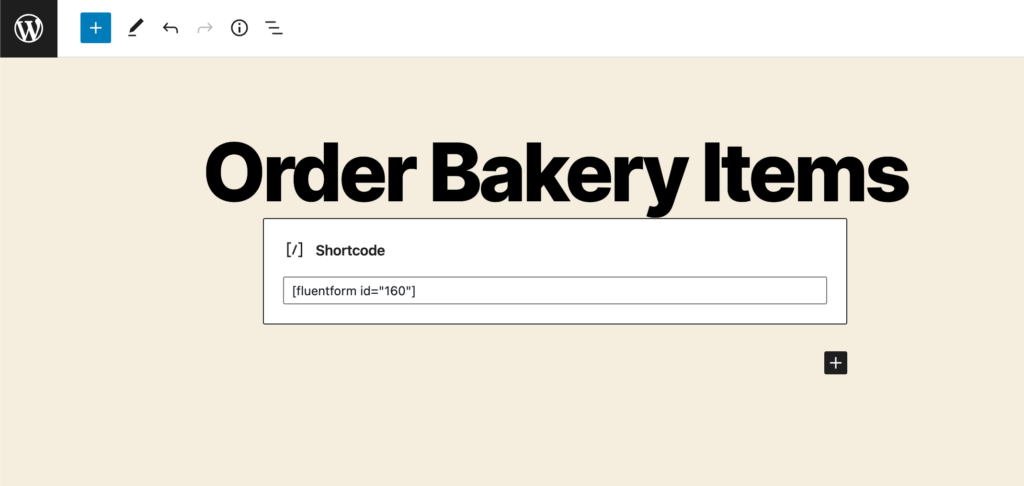
Fluent Forms’ Shortcode feature is a second option that you can use to show your form. The shortcode is found at the top of the window that displays the form editor.
Click on the shortcode to copy it and then paste it using a shortcode block anywhere you want to display the form on your website.
The third and most impressive approach is to publish your form on a dedicated landing page. To do this, go to Settings & Integrations > Landing Page. Check the box to Enable Form Landing Page Mode. The landing page is fully customizable.
Try out the bakery order form below:
For testing purpose, you can use test cards from Stripe documentation.
Your data will be automatically deleted after form submission. We don’t store them.
Wrapping up
Creating a perfect bakery order form is crucial for ensuring customer satisfaction and growing your business. By following the steps described in this article, you can create a bakery order form that will make the ordering process a breeze for your customers.
Comment down below if you still have any questions. For more tutorials like this, make sure to check out and follow our social media channels.

An Econ major turned into a Digital Marketer by choice. Hello! This is Ashraf and I am here to enlighten you on various WordPress topics and help you make informed decisions.


Leave a Reply