Create WordPress Posts from Form Submissions
Let users submit content through forms and automatically create WordPress posts. Collect blog posts, listings, or user-generated content without manual publishing.
Let Users Submit Content from the Frontend
Allow users to submit posts directly from a form. Turn form entries into published content and keep your website updated without writing everything yourself.
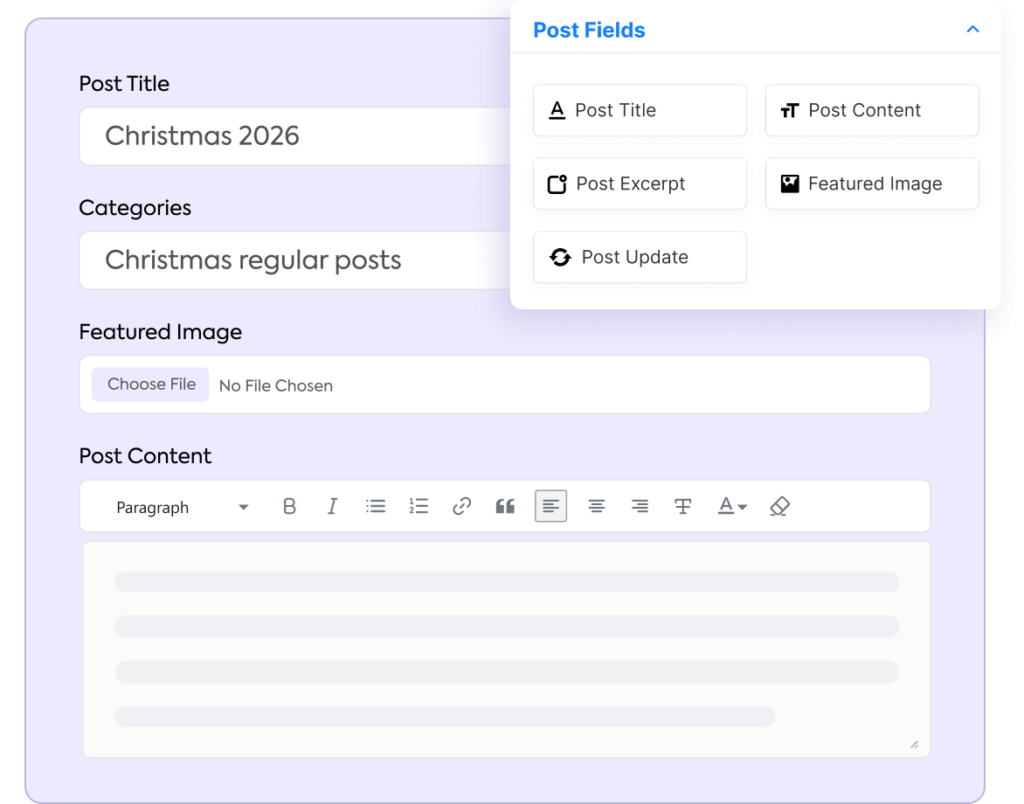
Post Form Fields
Collect post title, content, categories, featured image, and more using form fields mapped directly to WordPress posts.

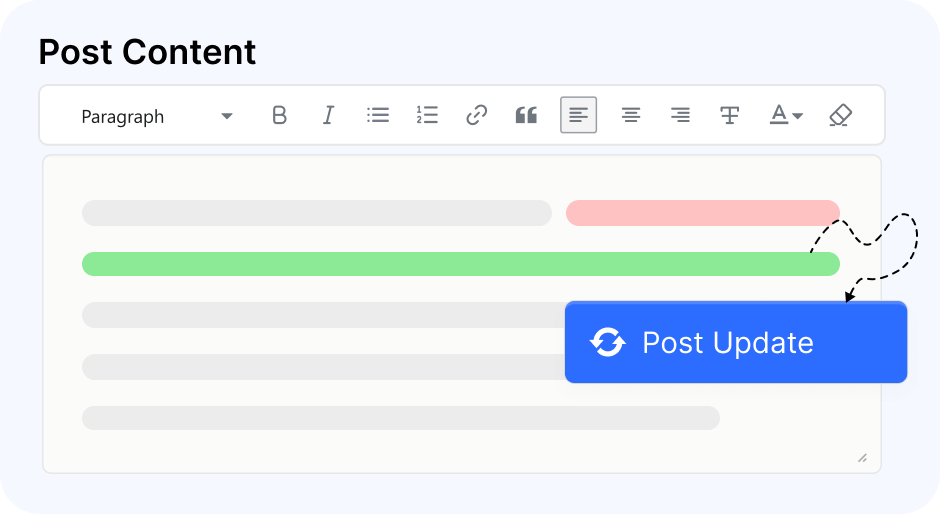
Create or Update Posts
Automatically create new posts or update existing ones based on form submissions.
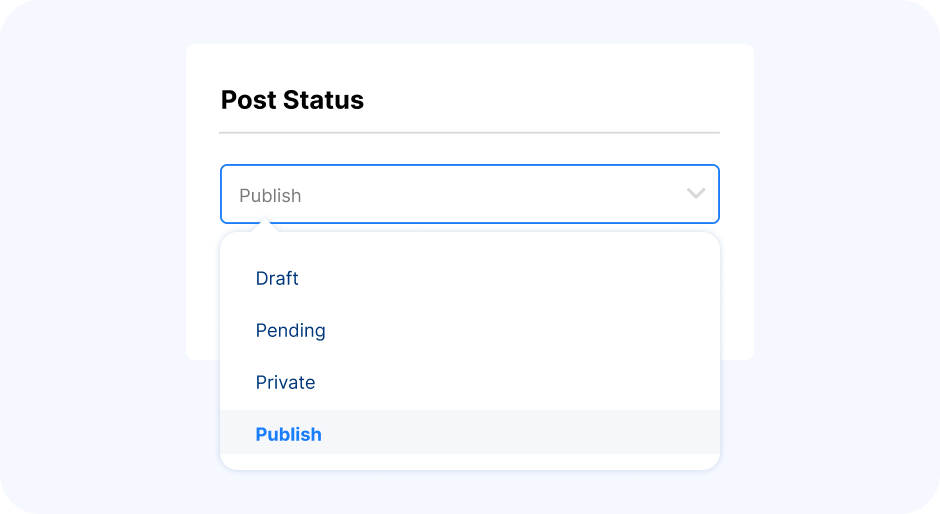
Control Post Status
Set submitted posts as Published, Draft, Pending, or Private to manage content approval and visibility.
Turn Form Submissions into WordPress Content
See Post Submission Forms in Action
Watch how users can submit content and create posts directly from a form.
Don’t Miss Out Other Features
Like this feature? A heap of powerful features is available there for you, too.

1-click Form Migration
Migrate from other forms plugins without any hassle or losing your data.

Action Hooks for Developers
Action hooks unlock advanced form functionalities not natively integrated.

Form Scheduling
Schedule a form when you want to show it and restrict when you don’t.

Save and Resume
Users can save forms and resume the form submission process using the same form link.

Double Opt-in Confirmation
Verify each submission and make sure that only valid users make it to your contact list.

Email Summaries
Know how your forms are performing, and get a weekly summary to your provided email.
Trusted by 700,000+ Users
See how Fluent Forms is solving real life problems for real people around the world

Fluent Form has transformed my experience with WordPress form builders. Its intuitive design allows for quick and easy form creation, perfect for any WordPress user, regardless of technical skill. The customization options are extensive, enabling forms to seamlessly blend with site aesthetics.

The form works like a charm, the team keeps delivering constantly, top support, FluentForms combined with FluentCRM / Booking / Support, no doubt is one of the best decisions for your online business.

I’ve been using Fluentforms for a while now, and I must say it has made my life so much easier. Has everything ready to use BUT.. the best of all is SUPPORT. The support team behind this plugin is top-notch. Support is so EXCELLENT. It’s better than you to have 2-3 additional persons in your office!

After having some problems with configuring Microsoft Exchange it has all come good. This is the best Form maker I have used! So much more in the free version than other plugins!

I use fluent in all my projects. It is simply to best and easy to configure with seamless email delivery and notification system that work very well with Gmail and other email providers. If there is a rating above 5✨, I would rate it higher.

Switching from Ninja Forms and WP Forms to Fluent Forms. Would be willing to buy a reasonably priced license I can use across multi domains/sites.
Create Powerful Forms for Every Need
We understand your needs, that’s why Fluent Forms comes with affordable pricing without compromising any features.
$63/year
Single Site License
1 Domain License
Most Popular
$159$127/year
Agency License
5 Domain License
$239/year
Unlimited License
Unlimited Domain License
$279
Single Site License
1 Domain License
Most Popular
$599$479
Agency License
5 Domain License
Questions in Mind? We Have Them Answered.
Join 700K+ happy customers all over the world