
Create a Real Estate Form that Generates Quality Leads
In the world of real estate, every interaction, whether it’s a conversation, a handshake, or even a mere online click, matters. Real estate professionals are realizing that their most lucrative deals might not originate from a face-to-face meeting, but with a simple online form submission.
Now if you have a website for your real estate business, you might be thinking, “How do I effectively capture and convert this digital interest?” A strategically designed form on your website can be the game-changer. It serves not just as a tool for collecting information but also as the initial communication starter that provides value to potential clients.
In this blog, we’ll explain why lead generation is crucial in real estate businesses and show you the steps to creating a real estate form for lead generation.
Why lead generation matters in real estate businesses?
In the real estate industry, potential buyers look for a piece of property they can call home. On the flip side, sellers aim to maximize returns on their investments, ensuring that their property finds the right buyer. In this scenario, the importance of quality leads cannot be understated.
A lead generating real estate form, as the name suggests, is one that is specifically designed to capture potential client information for the purpose of lead generation. It isn’t just any form but is optimized to attract, engage, and convert website visitors or online audiences into potential clients.
For real estate businesses, having a digital presence isn’t just about showcasing property listings; it’s about building relationships, understanding client needs, and sealing profitable deals. Here’s why real estate forms matter so much in real estate businesses:
- First point of contact: Often, a lead generating form is the initial touchpoint between a potential client and the business. This interaction sets the tone for future communications.
- Enhanced user experience: A well-crafted lead generating form, tailored for real estate audiences, ensures that the user gets value from their very first interaction with the business.
- Quality over quantity: While collecting a large number of leads is necessary for the business to grow, the quality of those leads is more important. Through precise questions, businesses can filter through potential clients, ensuring they engage with individuals who have a genuine interest in making deals.
- Data-driven decisions: The insights harvested from these forms allow businesses to adjust their marketing approaches, refine property listings, or even tweak website layouts based on real-world preferences.
However, creating such forms in WordPress websites can be made easy with the right tools. And this is where a form builder plugin comes into action. So let us introduce you to a top-notch form-building solution: Fluent Forms.
Meet Fluent Forms
When it comes to WordPress form plugins, there are so many of them in the market. But Fluent Forms stands out. Why, you ask? Because Fluent Forms isn’t just another form builder; it is the smartest and most lightweight form plugin that is able to meet almost every need of its users.
Let’s take a look at the notable features of Fluent Forms –
- Drag-and-drop form builder with a sleek user interface and a smooth experience
- Dozens of pre-built form templates for making forms quick and simple
- Conversational forms feature for changing the form-game
- Conditional logic for more control over your forms
- Integration with 45+ tools for additional functionality
- Multi-column form layout for greater flexibility in form design
- Calculation fields for measuring numbers based on users’ inputs
- Creating quizzes and surveys using the Quiz Module
- Payment feature for accepting payments in a seamless way
Creating a real estate form for lead generation
Now that you know the power of Fluent Forms, it’s time to create a real estate form for your business using this feature-rich tool.
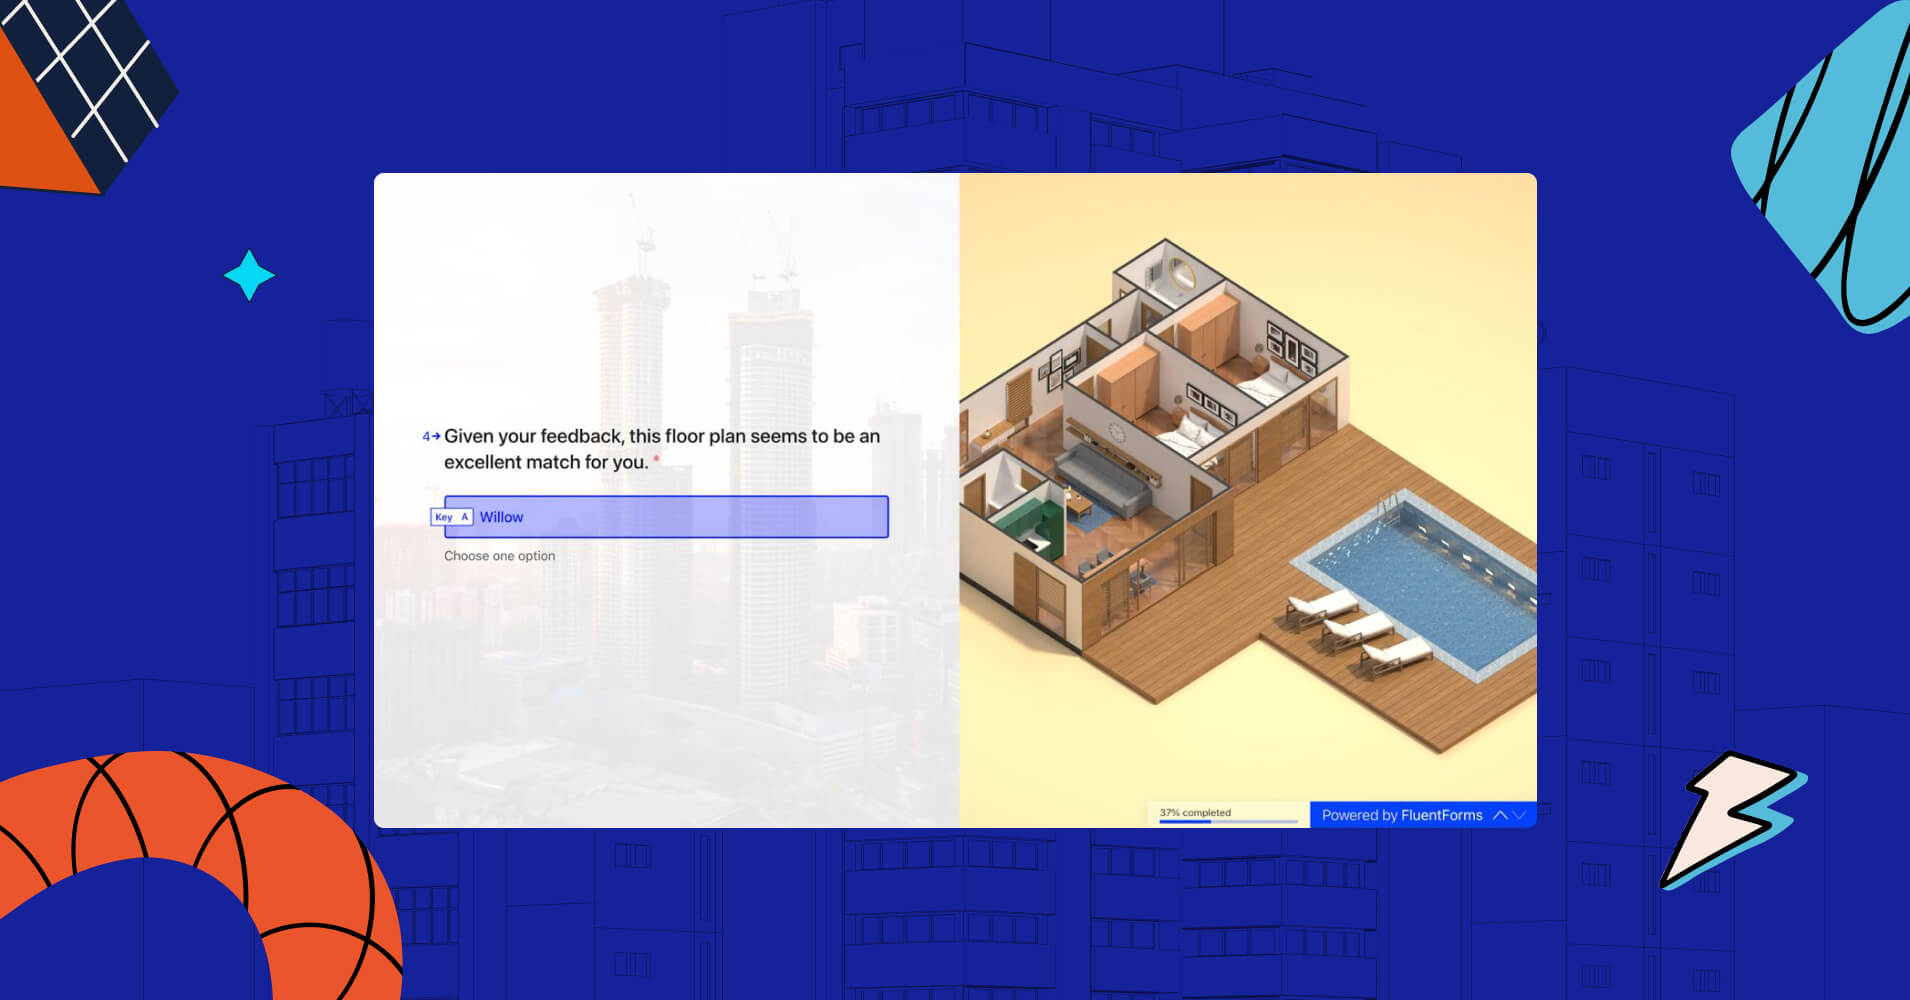
Instead of guiding you through a traditional form creation, we’ll be exploring how to craft a more engaging, conversational form – a modern approach that promises better user interaction and higher conversion rates.
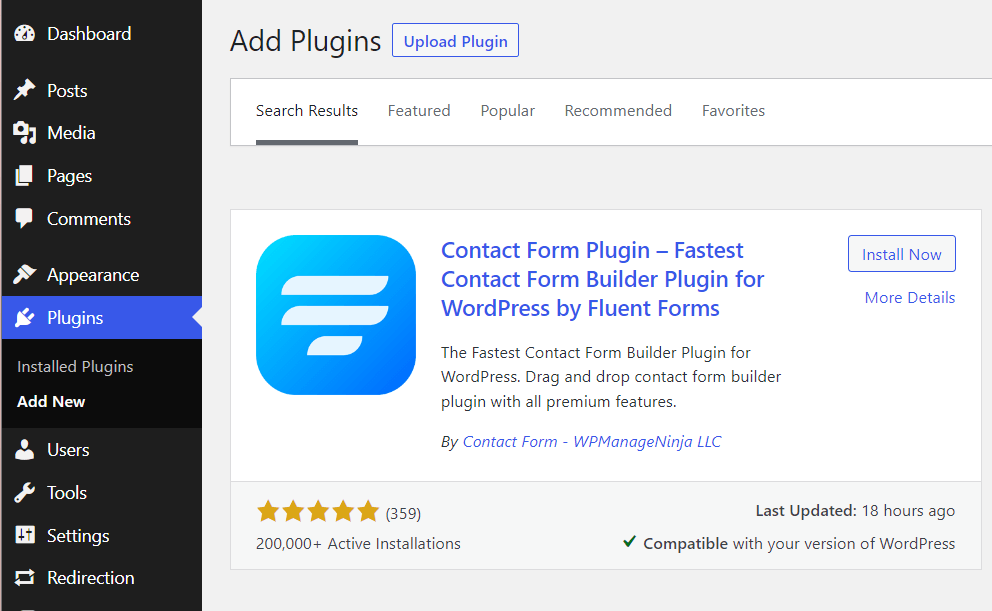
Step 1: Install Fluent Forms
First, you have to install Fluent Forms. The process is similar to installing any other WordPress plugin. Go to Plugins and click on Add New. Now, search for Fluent Forms. Then install and activate it.
You can create the real estate form that we’ll be showcasing using the free version of Fluent Forms. But for customizing the design and adding more input fields, you need to upgrade to Fluent Forms Pro.
Step 2: Create a conversational form
Now go to Fluent Forms Pro and click on New Form. You will see a popup window.

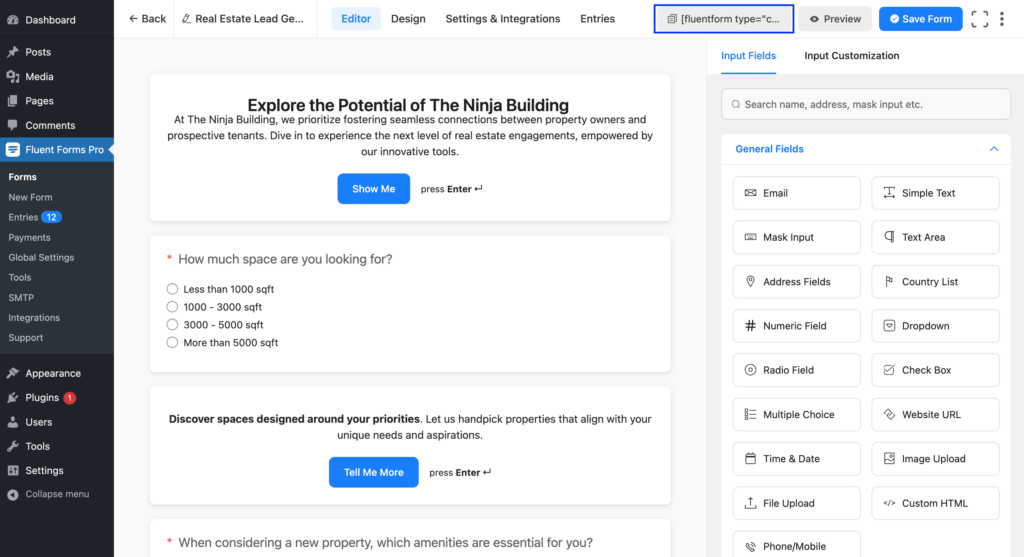
Click on Create Conversational Form. You will see a form editor interface where you can add various input fields to your form.
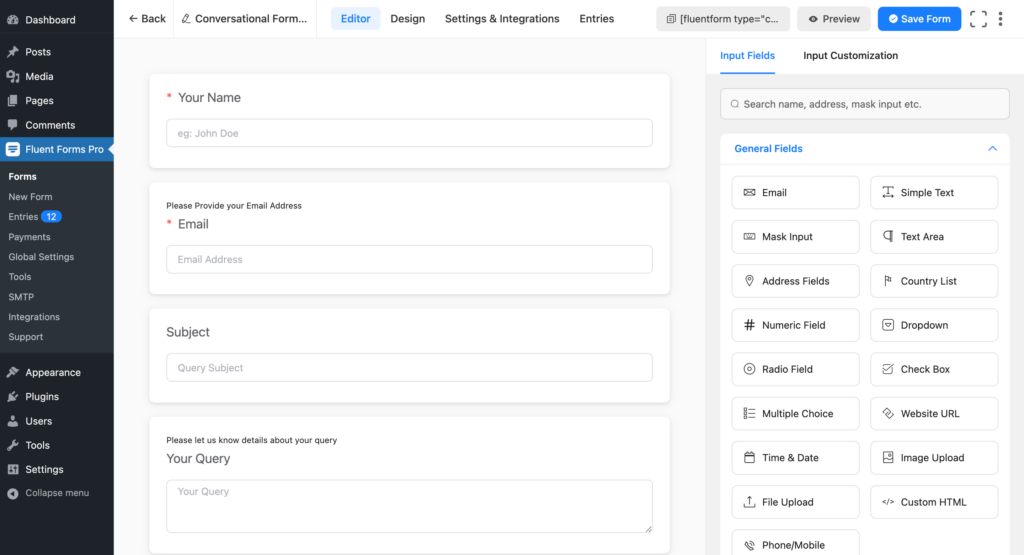
Start with renaming the form.
When creating a conversational form, you will see some input fields already added to your form. Delete them as we want to build a form from scratch.
Step 3: Adding required questions
Now add a Welcome Screen. You will find it in the Advanced Fields tab. Edit the content of the Welcome Screen by simply clicking on the added field.
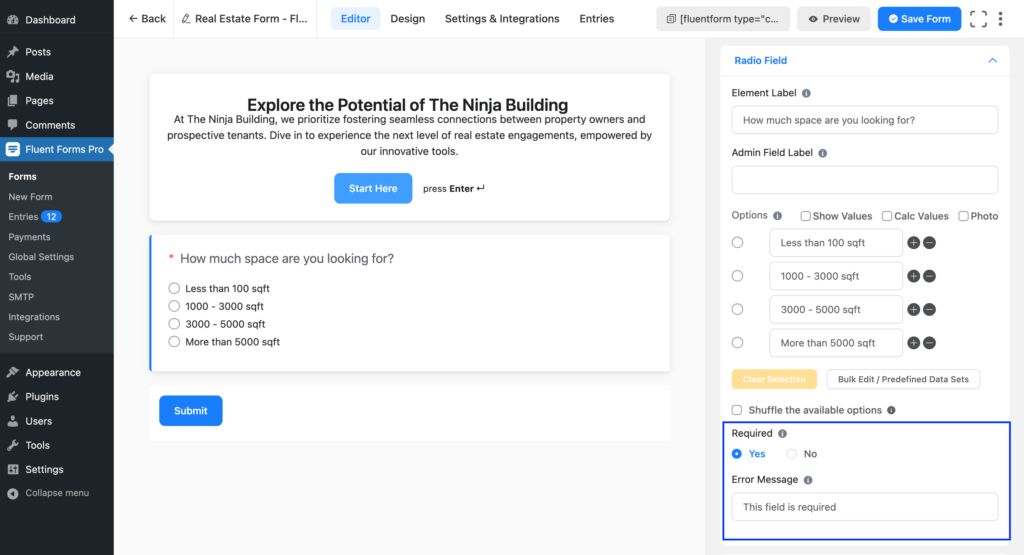
After editing the Welcome Screen, add your first question. To add a question, simply drag and drop a Radio Field to the form editor. Edit the input field by clicking on it. Write your question in the Element Label and add necessary Options for users to choose from.
Input Customization also lets you make a field Required, enable Conditional Logic, edit the Layout Type, and more.
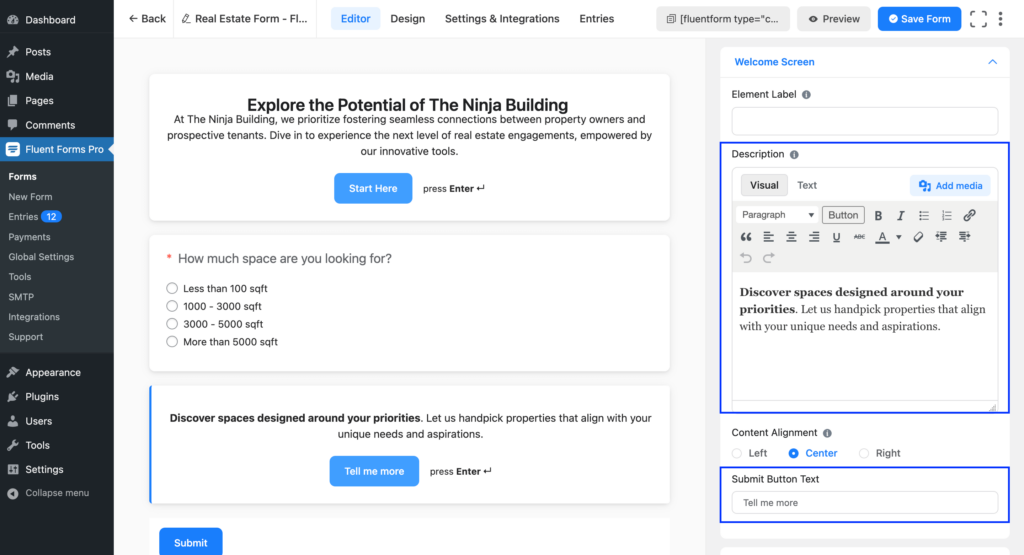
If you want to show the user a message on the next screen after he responds to the first question, add another Welcome Screen field below the question. The Welcome Screen field gives you various customization options. You can edit –
- the Description using a rich text editor
- Content Alignment
- Submit Button Text
- Button Style and
- Layout Type.
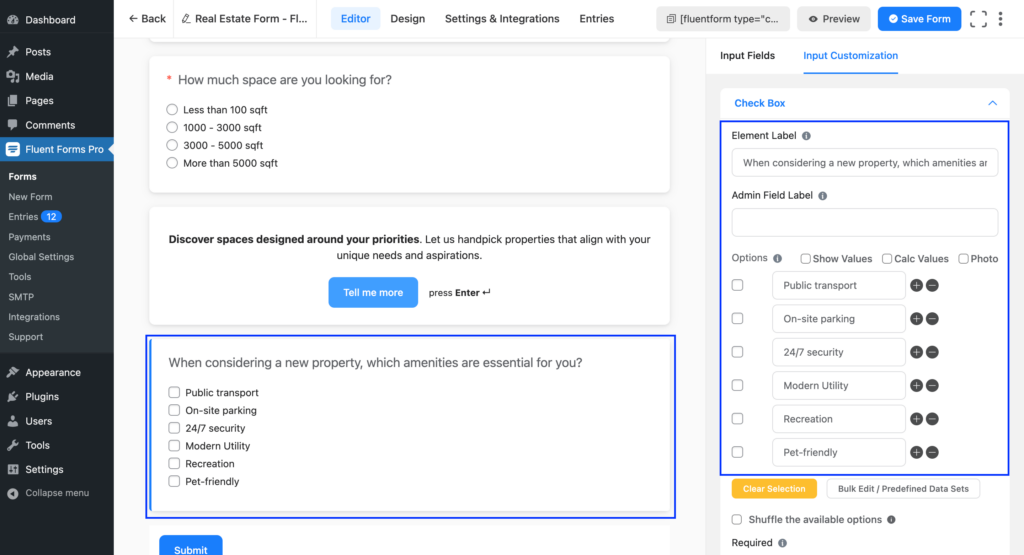
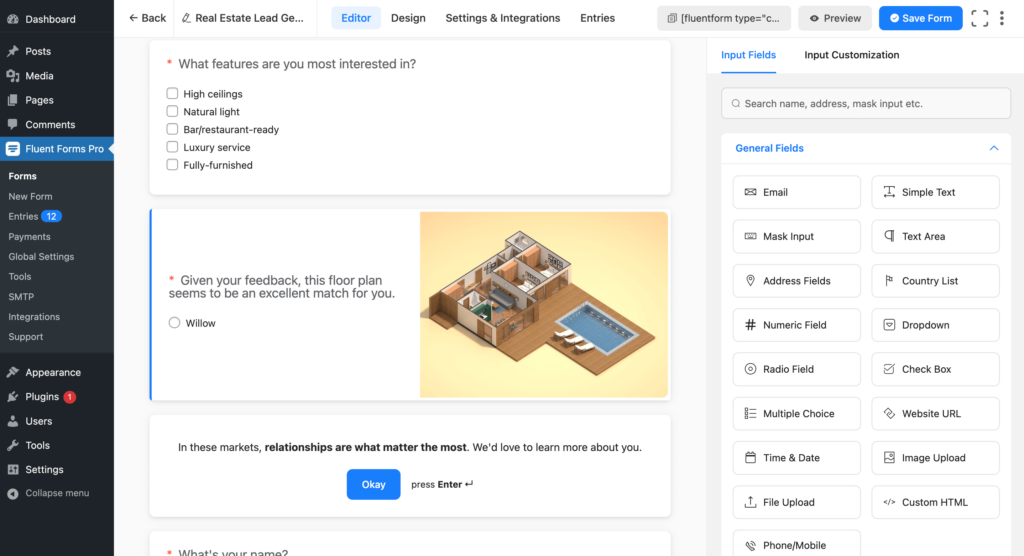
For the next one, we would like to add a question with checkbox. Click on Check Box from the General Fields tab of Input Fields. Add your question in the Element Label and customize the Options.
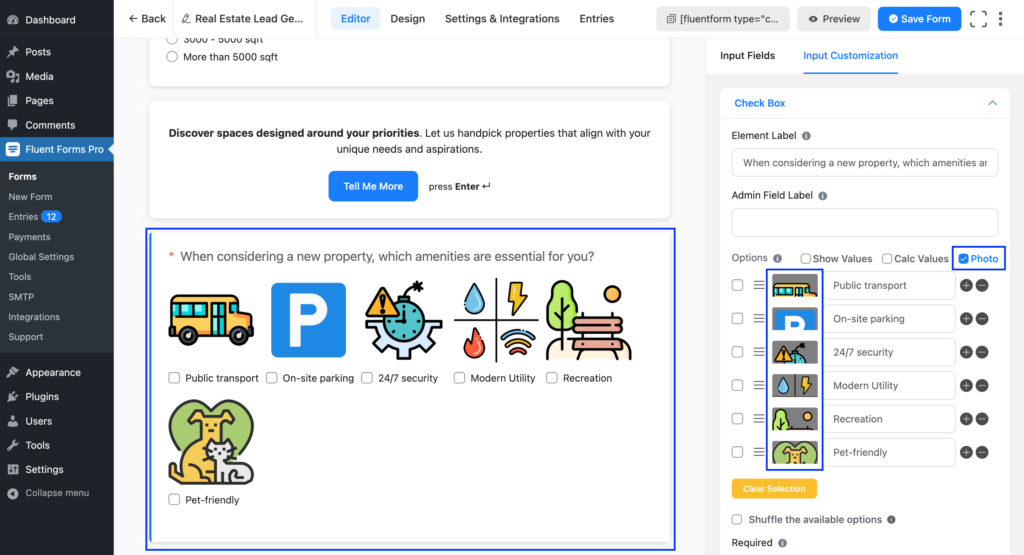
If you want to add relevant photos to accompany the checkbox options, you can also do that here. Just tick the box beside Photo and upload photos for each option.
Similarly, add other questions of various types and customize them according to your needs. It is recommended that you use Welcome Screen to provide a pause, making the form’s progression feel more like a natural conversation.
After adding industry-specific questions, add some questions to collect users’ contact information. You can ask for their name, company details, email address, etc.
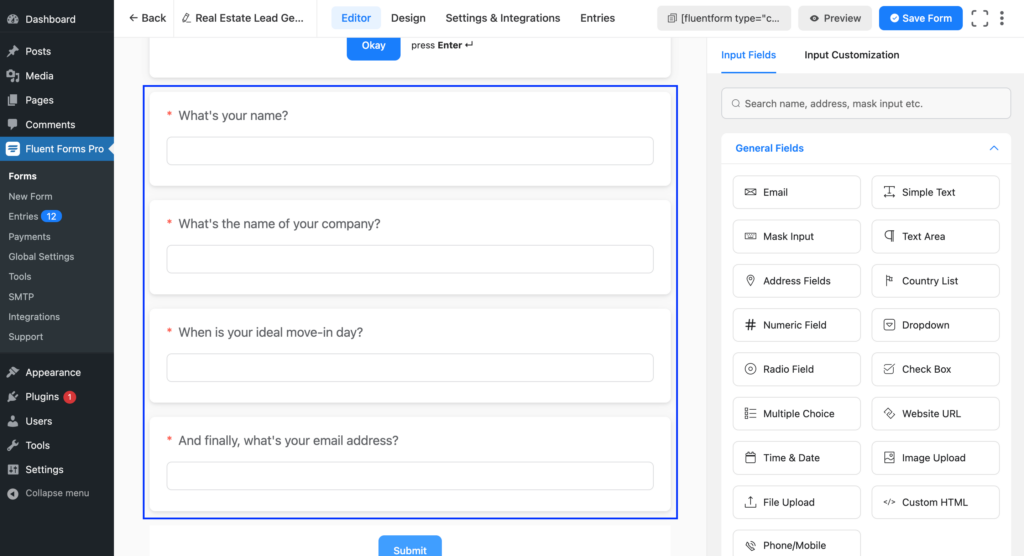
Once you have added all the required input fields, click on the Save Form button on the top-right corner.
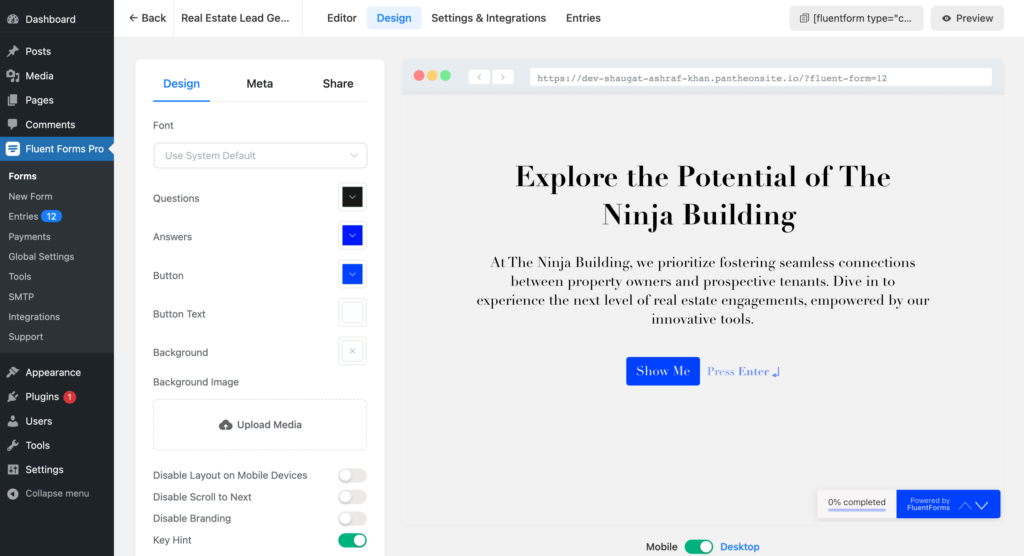
Step 4: Customize the design
Go to the Design tab from the form-editor interface. You will then be landed on the Design window from where you can –
- change the font
- change color of the questions, answers, button and button text
- change background color
- set a background image with adjustable brightness
- disable layout on mobile devices
- disable scroll to next and more.
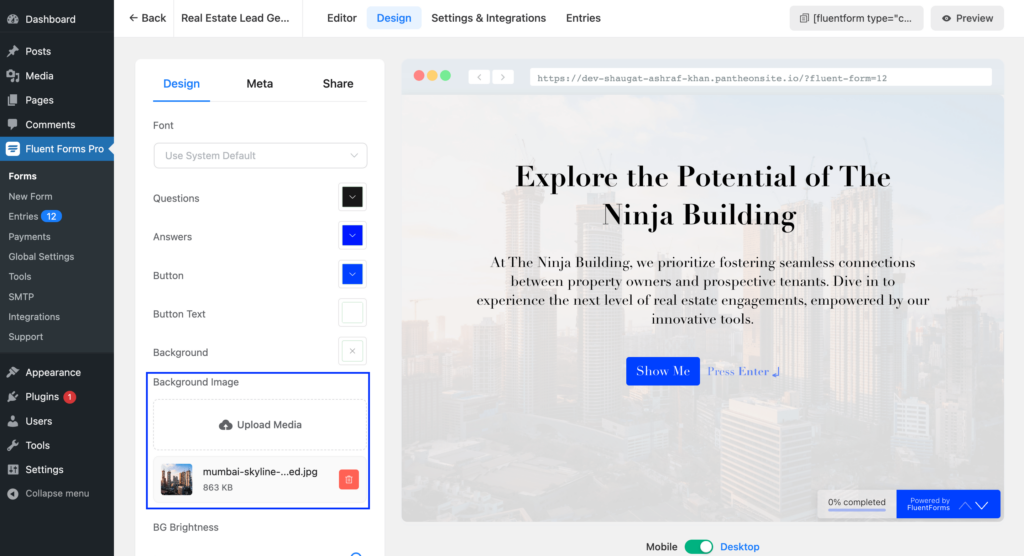
We have added a background image to our form by clicking on the Upload Media button below Background Image.
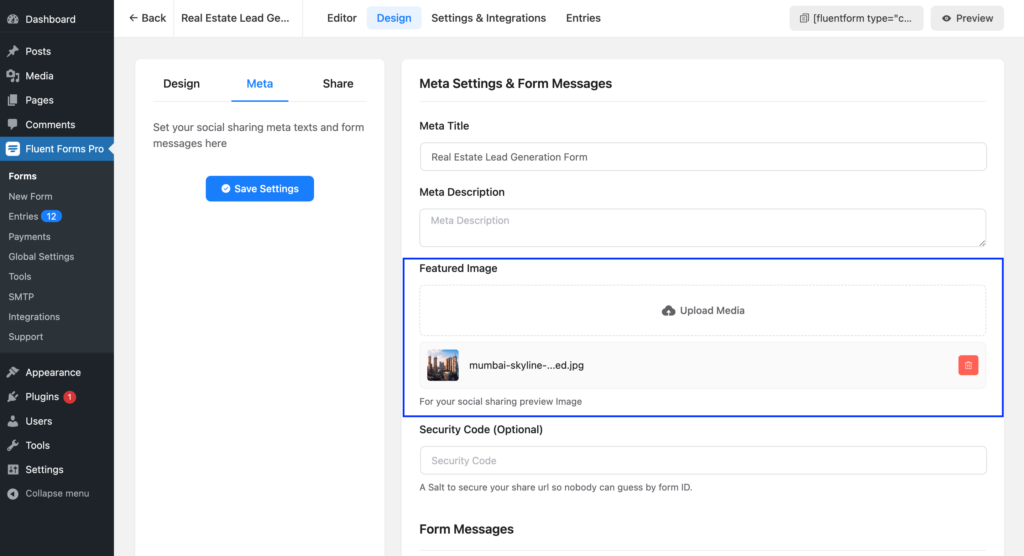
In the Meta tab of this Design window, you can customize meta information for social sharing and some form messages.
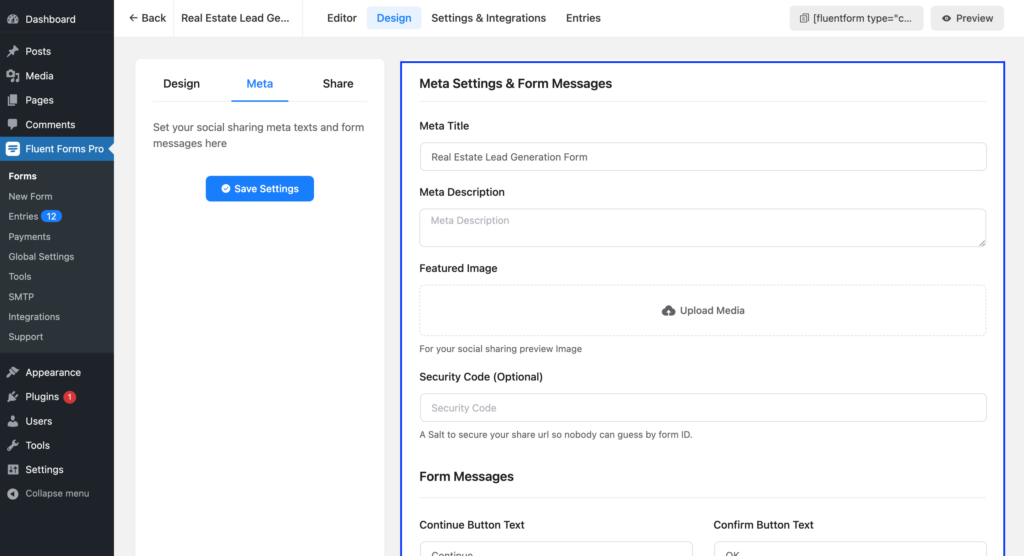
In our form, we have added a Featured Image.
Once done, don’t forget to click on the Save Settings.
Step 5: Configure the form’s settings
Before publishing the form, you have one last thing to do and that is to configure your form’s settings. You will find a tab called Settings & Integrations on top. Click on this tab to access various settings.
From the Settings & Integrations tab, you can do the following –
- Change the confirmation message that is shown when a user submits a form
- Enable double opt-in confirmation
- Configure form layout
- Apply different scheduling and restriction rules
- Append survey result
- Configure email notifications
- Create PDF feeds for generating PDFs from each form submission
- Design a dedicated landing page for your form
- Use custom CSS and JS in your form
- Integrating various services with Fluent Forms
We will only tweak the Message to show under Confirmation Settings.
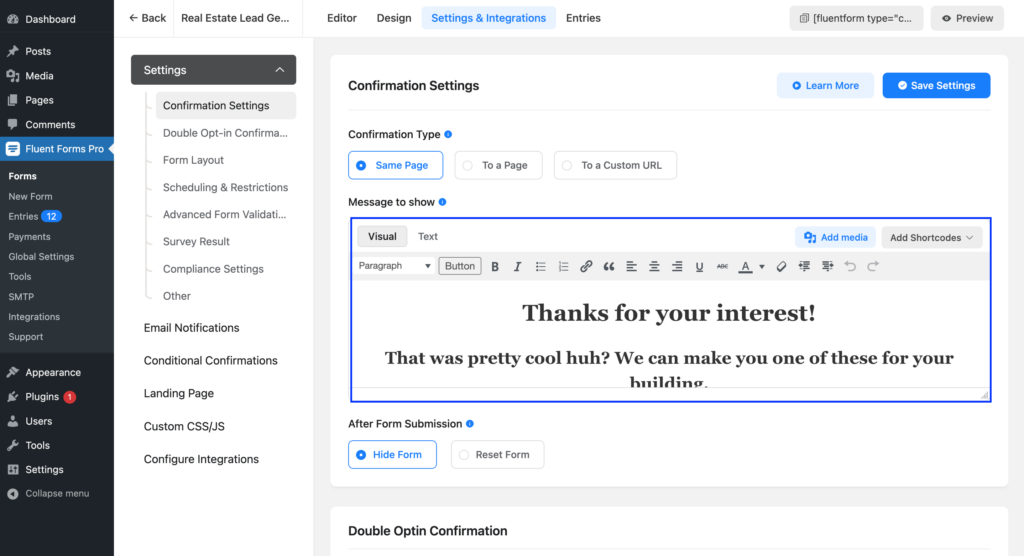
Click on the Save Settings button once you are happy with all the settings. After making the necessary adjustments in the form settings, your form is now ready to be published.
Step 6: Publish the form on your website
You can publish your real estate form in three ways.
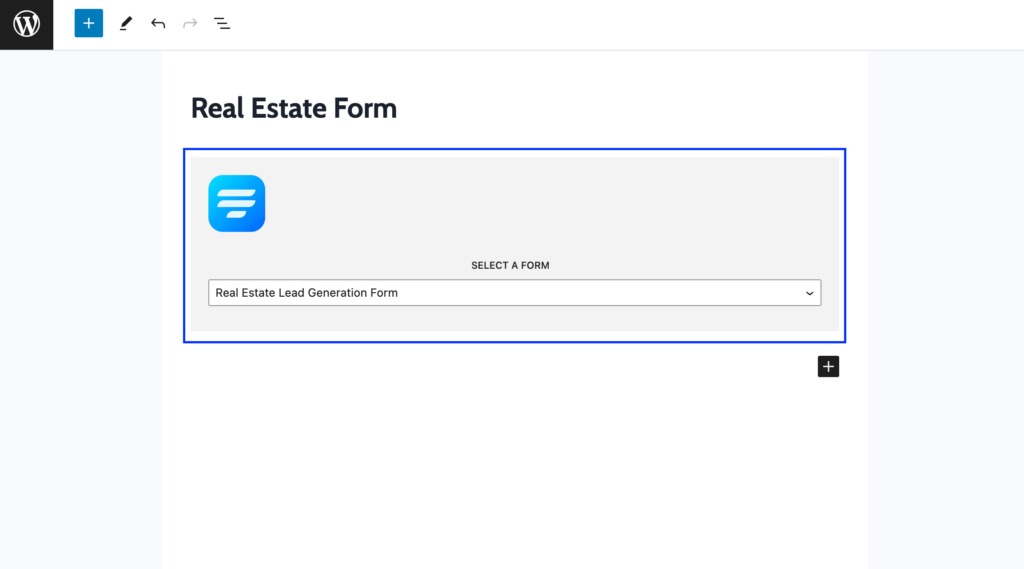
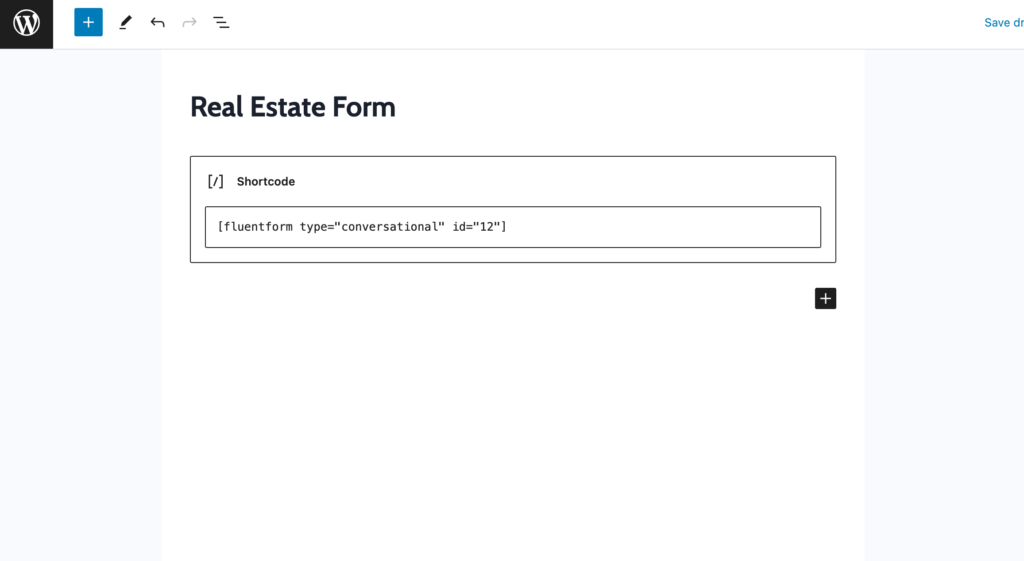
First, you can use the Gutenberg block editor to choose the form you have just created. Click Add New under Pages in the WordPress dashboard’s left sidebar. Give the page a title. In the block editor’s blank area, click the plus (+) sign or insert a forward slash (/). Then, in the search box, write Fluent Forms and select the form from the dropdown menu.
Fluent Forms’ Shortcode feature is a second option that you can use to show your form on your website. The shortcode is found at the top of the window that displays the form editor.
Click on the Shortcode to copy it and then paste it using a shortcode block anywhere you want to display the form on your website.
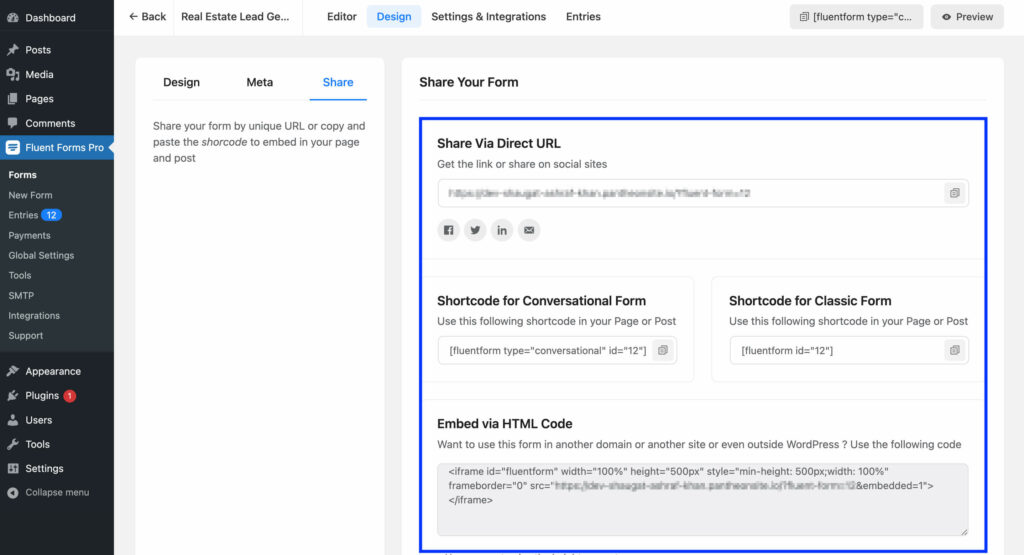
The third approach is to publish your form on a dedicated page. Conversational Forms of Fluent Forms provide shareable URLs to share your form on social media channels or even embed it anywhere you want. Go to the Share tab under the Design window. Here you will find the direct URL to the form to share. Also, you will find the HTML code to embed your form even on platforms outside WordPress.
Try out the real estate form that we have just created below:
Your data will be automatically deleted after form submission. We don’t store them.
Conclusion
Having an optimized real estate form is more than a luxury—it’s a necessity. It isn’t just a tool for data collection; it’s your first meaningful interaction with potential clients.
A well-crafted real estate form can serve as the cornerstone of your digital lead generation strategy, attracting quality leads that add real value to your business.
And with user-friendly tools like Fluent Forms, creating an effective real estate form has never been easier. Comment down below your strategy for optimizing a real estate form and follow our social media channels for more tutorials like this.

An Econ major turned into a Digital Marketer by choice. Hello! This is Ashraf and I am here to enlighten you on various WordPress topics and help you make informed decisions.


Leave a Reply