
Create a Personality Quiz in WordPress [6 Easy Steps]

How many times did you see people participating in some crazy personality quizzes and sharing the results on their social media accounts? You are familiar with the type…“How insane are you?” or “Which type of dog are you?” and so on.
But have you ever wondered why some businesses have these fun personality quizzes on their website? Obviously, it’s there for a reason.
Building a personality quiz in WordPress might seem like a daunting task. But it’s not what you think! Here, we will help you gain a good understanding of what personality quizzes are, why so many brands use them, and how you can create a personality quiz in WordPress.
Personality test – what and why?
Marketers use personality tests to boost traffic, generate leads, and strengthen customer relationships with their brands. This is a fun and effective way to turn website visitors into leads and sales.
A personality quiz is a set of questions that allow users to learn about themselves in an exciting way. Users answer those fun questions and mindlessly fill in their name, email, address, etc.
In this way, personality quizzes allow you to initiate conversations with your audience and convert them into email subscribers and customers.
But why should you have a personality quiz on your website? Well, it is a fantastic way to create a sense of trust among the audience with a personalized content experience.
By using quizzes, you can uncover something interesting or unexpected about the customers, encouraging them to share the quiz result with their friends. This will boost your social media engagement and eventually bring more traffic to your website.
To summarize why you should have a personality quiz on your website –
- Build trust and gain attention with personalized content
- Grow your email subscriber and lead list
- Boost your social media engagement and promotion
- Bring more traffic to your site
- Generate more ad revenue
Now you must be thinking about how to make a personality quiz in WordPress. We are here to help you out with that.
Picking the right plugin for creating personality quizzes
To create a personality quiz in WordPress, first of all, you need a plugin that can make such quizzes and provide feedback based on users’ submissions. There are many quiz builder plugins in the market which makes it hard for you to pick the best one.
We have picked Fluent Forms as the quiz builder plugin for creating a personality quiz in WordPress. Fluent Forms is a fantastic plugin for building quizzes in no time. In addition to building quizzes, you can do a ton of other things to grow your business.
Some of the most notable features of Fluent Forms that are relevant to creating quizzes are –
- Fluent Forms has built-in reporting and analytics
- You can build a questionnaire on a particular topic
- Exporting results for further analysis is possible with Fluent Forms
- Integration with a number of email marketing tools
- You can send results via automated personalized email
- Randomized answers and questions
and much more. Other than these, Fluent Forms has a lot of brilliant features and functionality as a form-builder plugin. These are –
- Conversational forms
- File and image upload
- Form scheduling and restriction
- Advanced post creation
- Dozens of pre-built templates
- Multiple payment solutions
- Multi-steps forms
- User registration
Because the quiz module is only accessible with Fluent Forms Pro, you have to purchase the paid version to start creating quizzes.
Creating a personality quiz in WordPress
Follow the steps below to create a personality quiz in WordPress –
Step 1: Install Fluent Forms
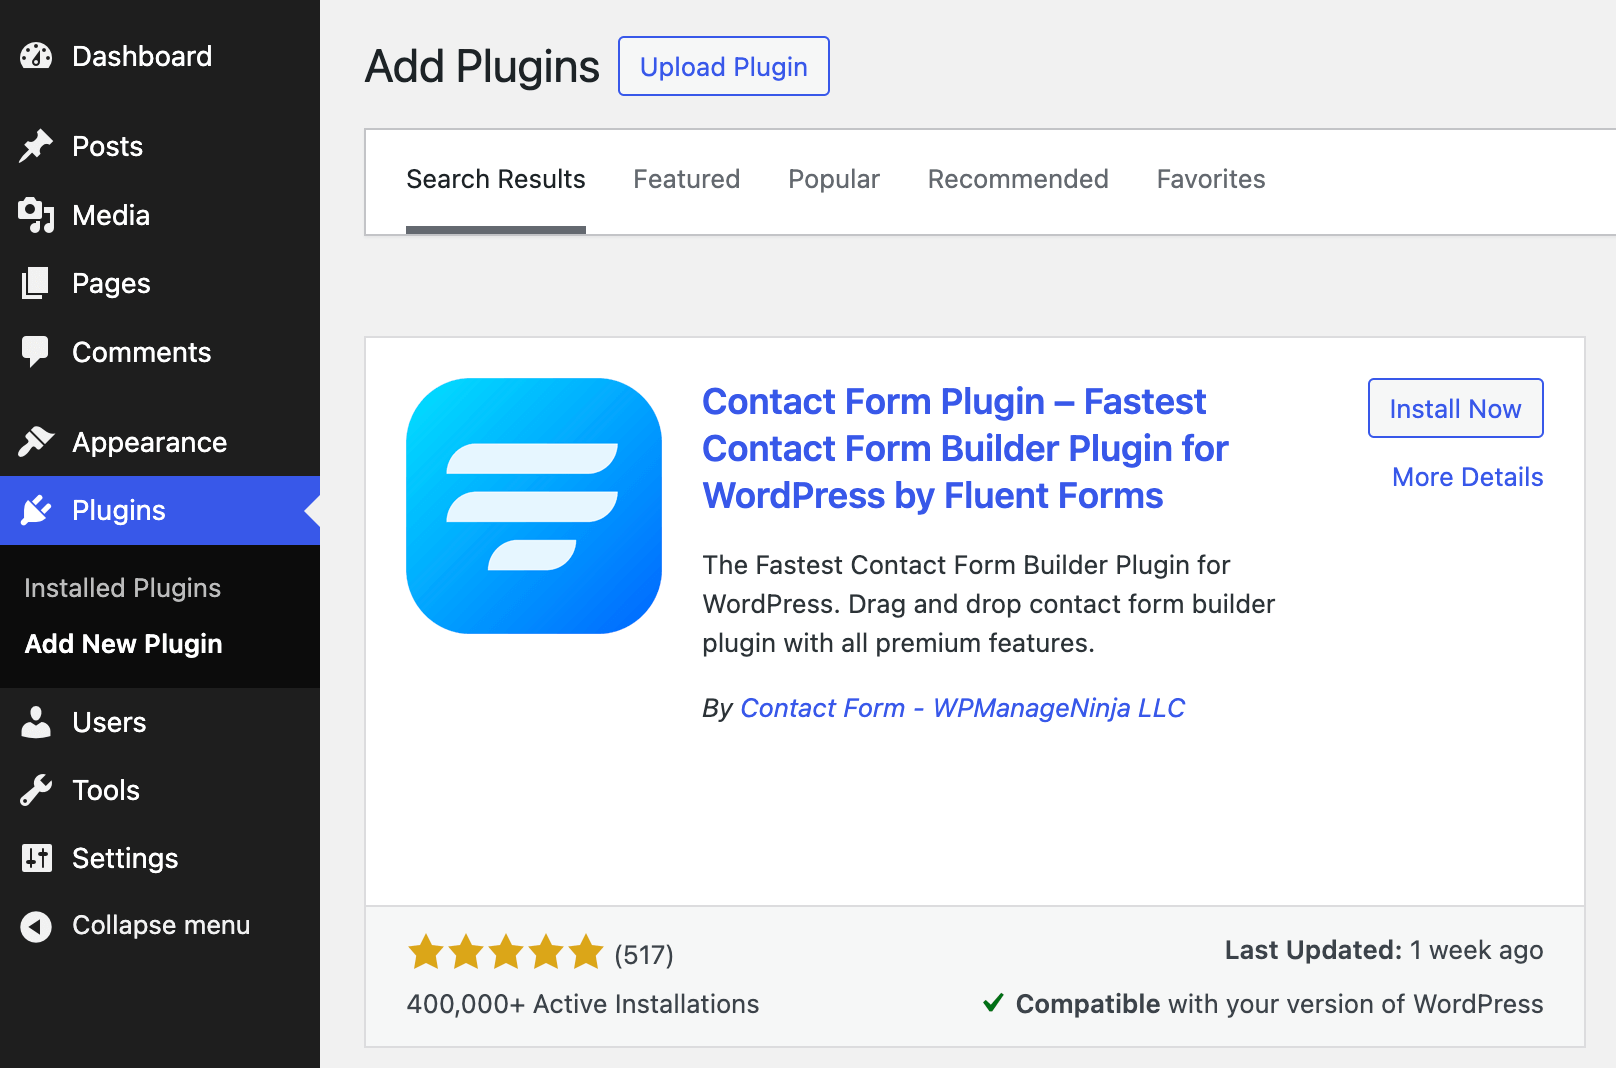
Installing Fluent Forms is just like installing any other WordPress plugin. Go to the Plugins section of the WordPress admin dashboard and click on Add New Plugin. Now, search Fluent Forms, install and activate it.
To access the quiz feature in your personality test, you will need the pro version of Fluent Forms. This enables you to go more miles with a lot more features and functionalities. Once you have installed it, upgrade Fluent Forms to the Pro version and activate it with the license key.
Step 2: Create a personality quiz
To create a personality quiz in WordPress, hover over Fluent Forms Pro on your WordPress dashboard and click on New Form and select New Blank Form. You will see a window similar to the image below.
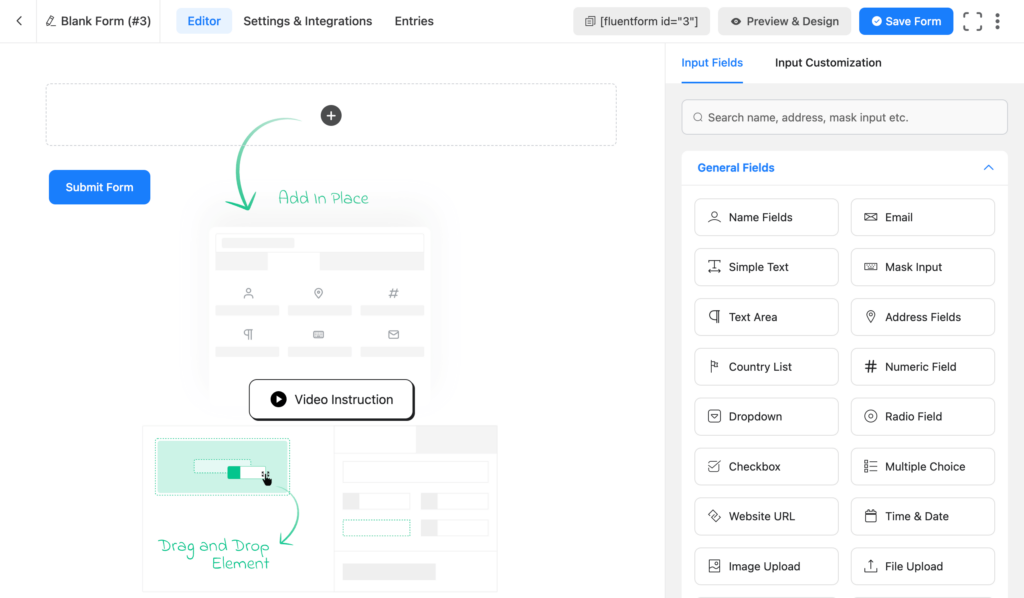
This is the form editor window. Give the form a name by clicking on Blank Form in the upper left corner of the window.

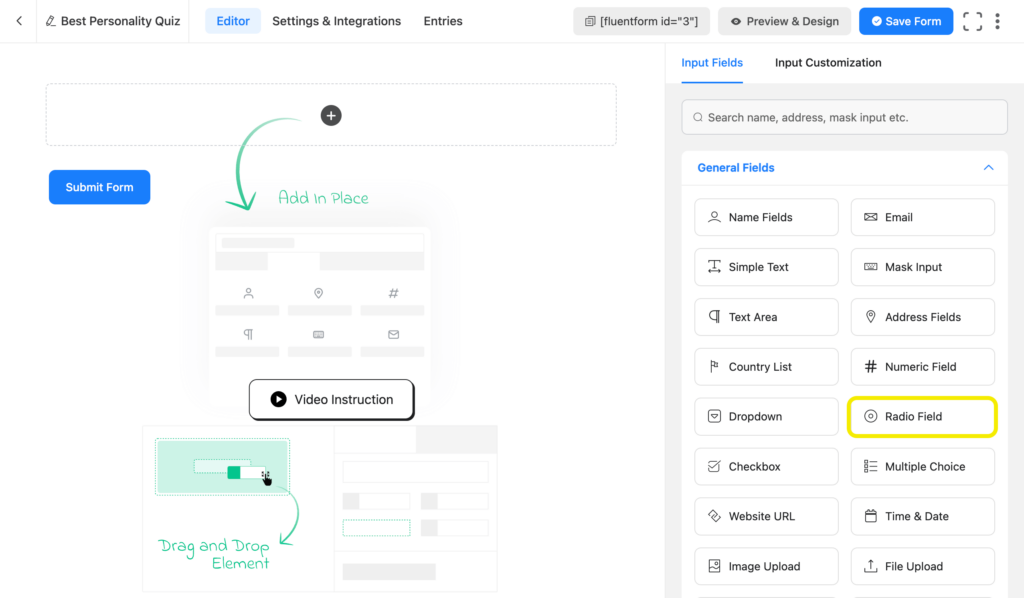
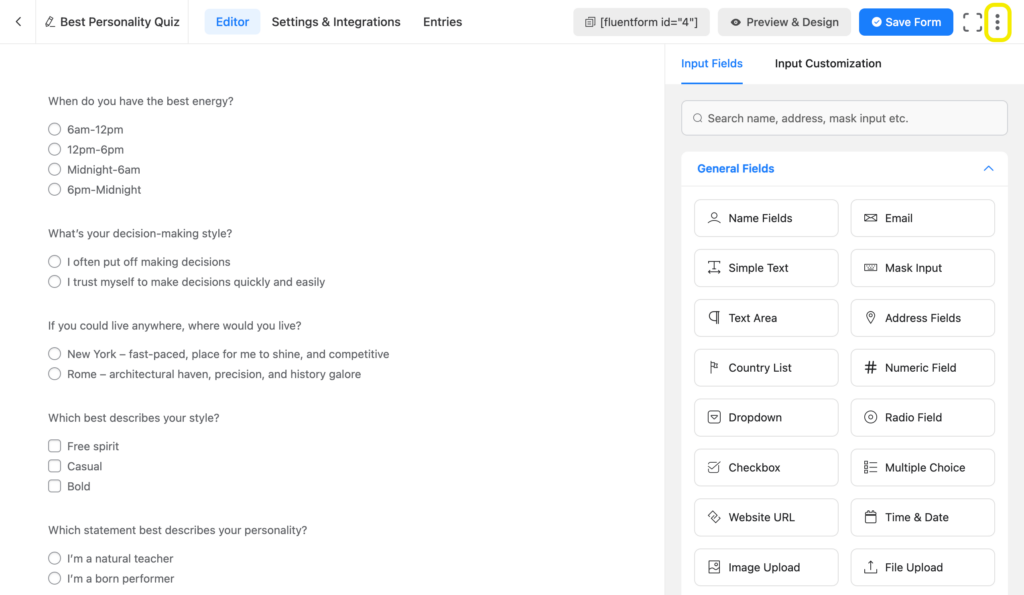
Now, it’s time to add some questions to the personality quiz. We will use Radio Field for adding our questions and the answers. Adding a Radio Field is easy. Just click on the Radio Field from the Input Fields tab or drag and drop the field on the form editor.
Clicking on the added field will give you many Input Customization options. Write your question in the Element Label field and your answers in the Options field.
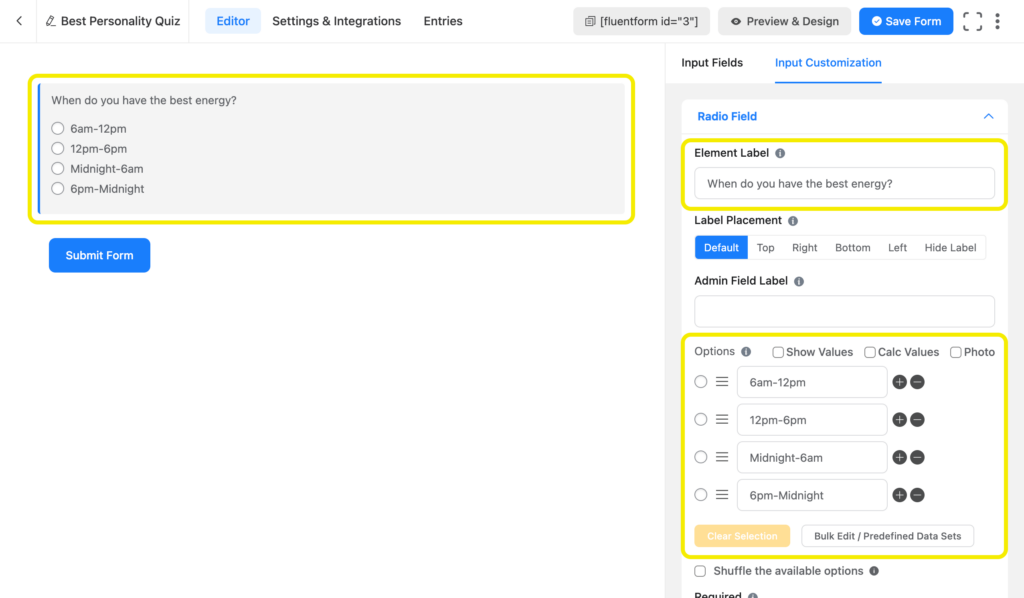
You can also mark this question as Required if you want not to allow users to submit the quiz without selecting an option.
Add other questions following the same process.

Click on Save Form once you have added all the questions.
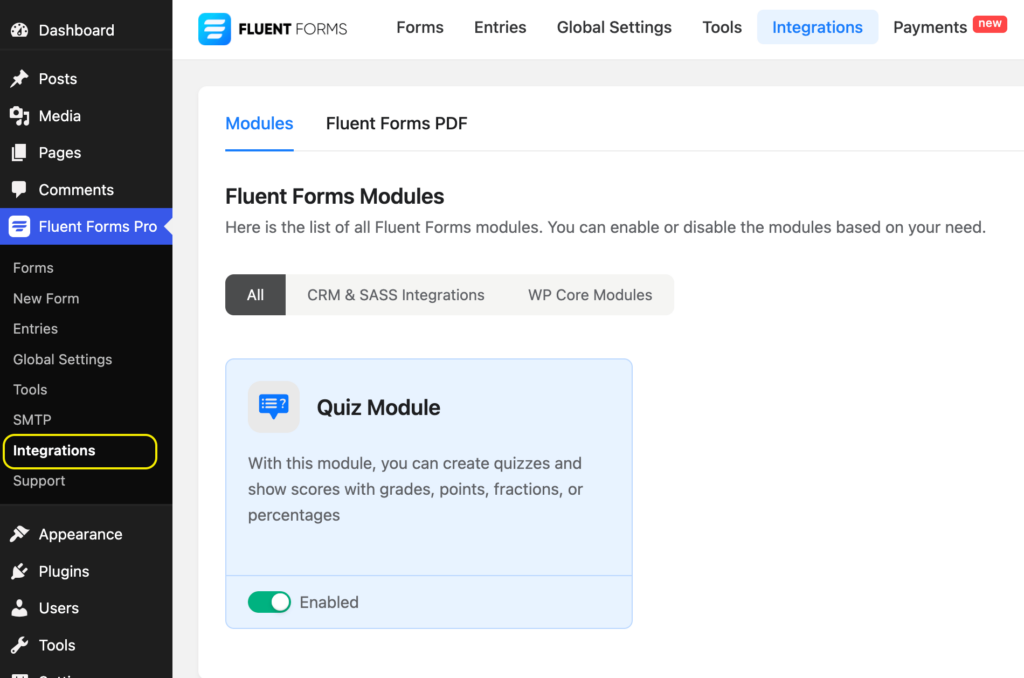
Step 3: Enable Quiz Module
To be able to use the Quiz feature of Fluent Forms, go to the Integrations and turn on the toggle switch of the Quiz Module.
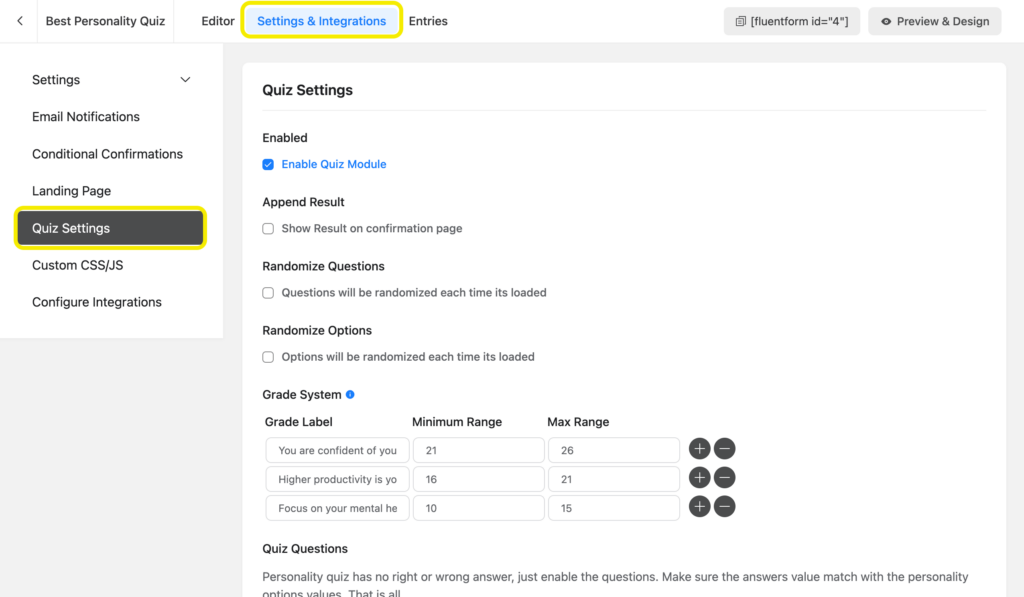
Now go to the Settings & Integrations tab of the quiz form you have just created and click on Quiz Settings. Check the box beside Enable Quiz Module.
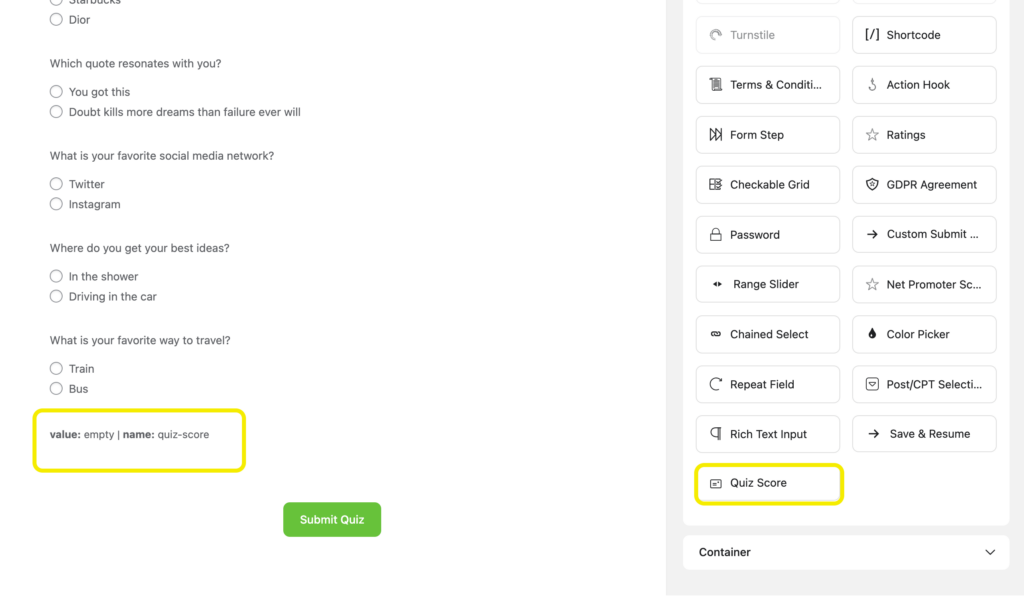
You need to add a Quiz Score field to allow the quiz form to calculate scores based on user inputs. Just click on Quiz Score from the Advanced Fields tab.
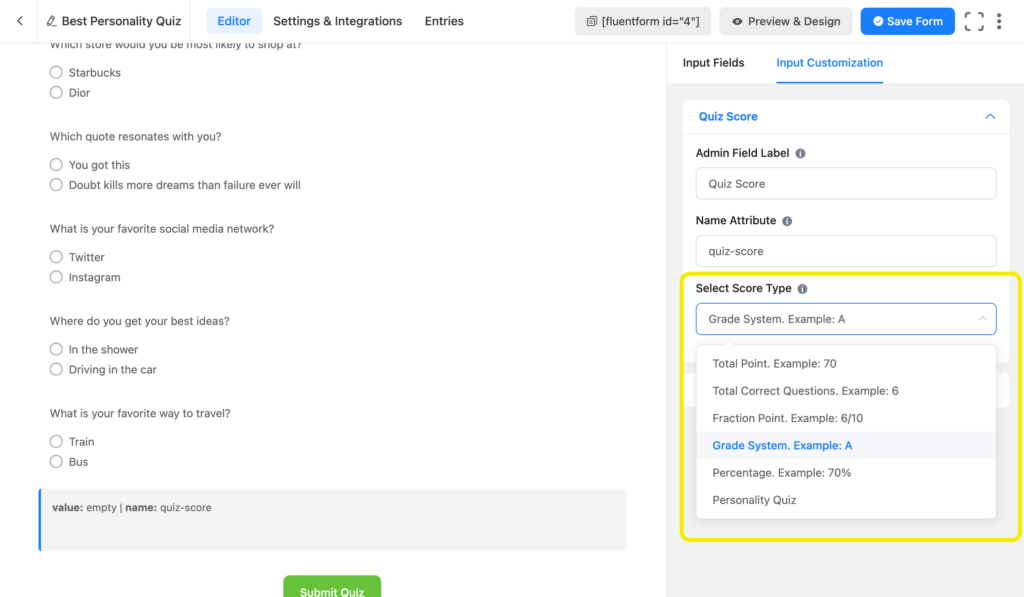
Click on the added Quiz Score field to access Input Customization. Then choose Grade System from the dropdown menu of Select Score Type.
For a more straightforward approach to create Personality Quiz, refer to this documentation: https://wpmanageninja.com/docs/fluent-form/advanced-features-functionalities-in-wp-fluent-form/creating-a-personality-quiz-form-in-fluent-forms/“
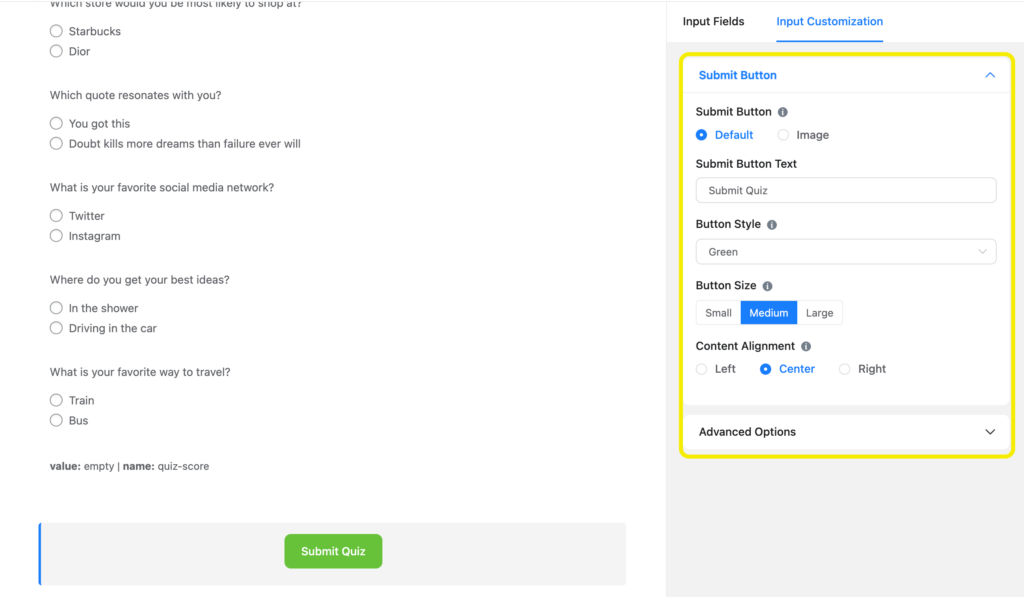
Before we move into the next step, let’s quickly customize the Submit button. Click on the default Submit button to get the customization options. Change the Submit Button Text to Submit Quiz. You can change the button style, size, and alignment to match your needs.
Step 4: Configure Quiz Settings
In this step, you have to configure Quiz Settings to assess the different personalities of the users and show results based on user inputs.
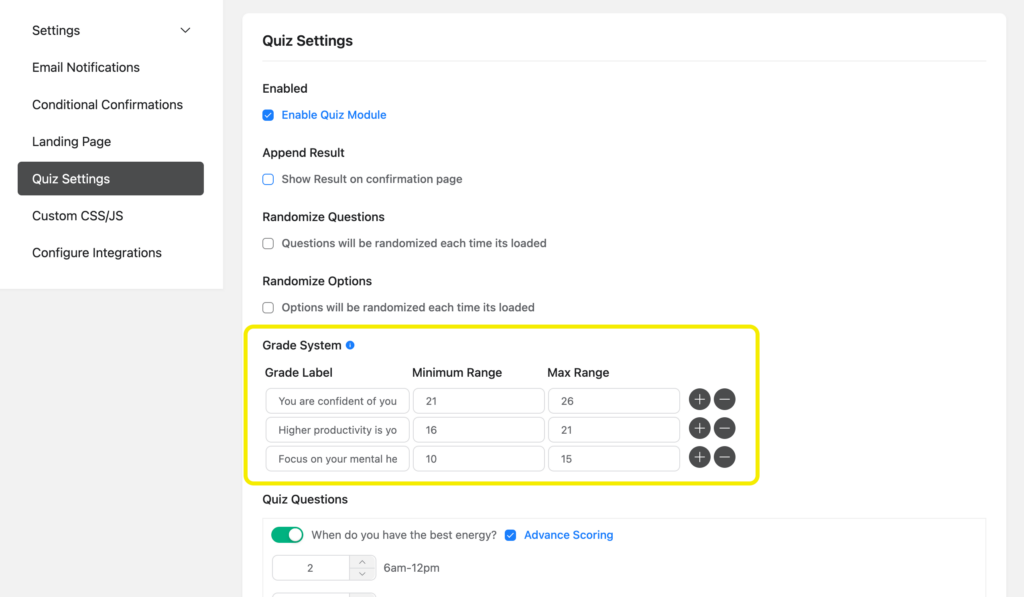
First, uncheck the box that says “Show Result on confirmation page.”
Now, you have to change the Grade System to show the customized result when a user submits the personality test. But before defining the Grade Label, we recommend you assign scores for each option.
To do this, scroll down to the Quiz Questions. Here you will find all the questions you have added to your quiz. Just turn on the toggle switch beside each question, and you will be able to assign scores. For our personality quiz, there is no right or wrong answer. We want to assign a certain score for each option. This is why we have to enable the Advance Scoring option.
Assign specific scores to each option of the added question.
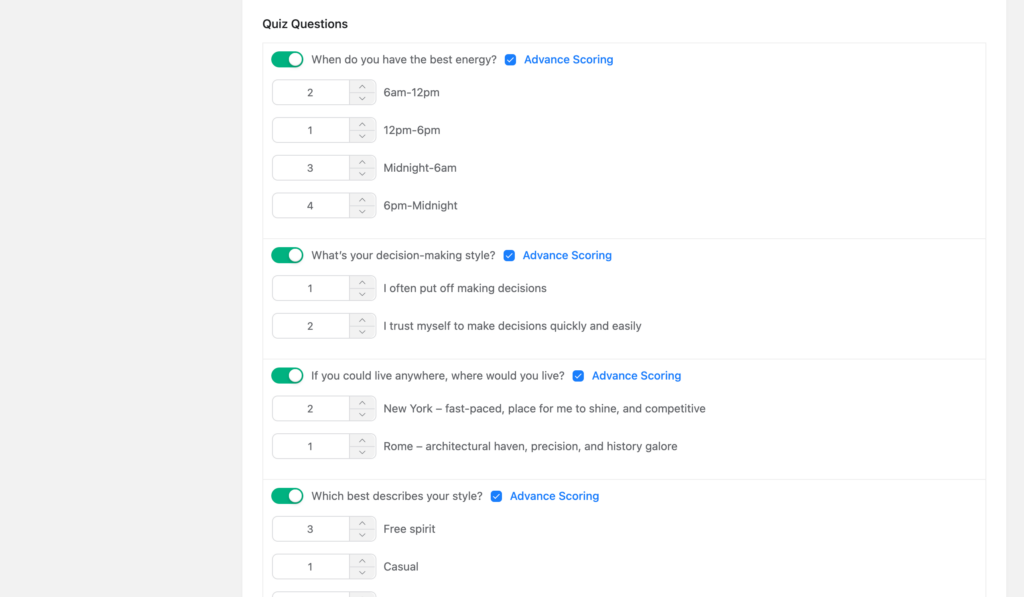
Do the same for all the questions.
Once you are done assigning scores to the options, it’s time to set the Grade System. Under the Grade Label, provide different results that will be shown to the users after quiz submission. For each Grade Label, define a minimum and maximum range based on your assigned scores.
Don’t forget to click on Save Settings.
Step 5: Configure form settings
You are almost done with creating a personality quiz for your website. Now you have to configure form settings to show users their personality type based on the inputs.
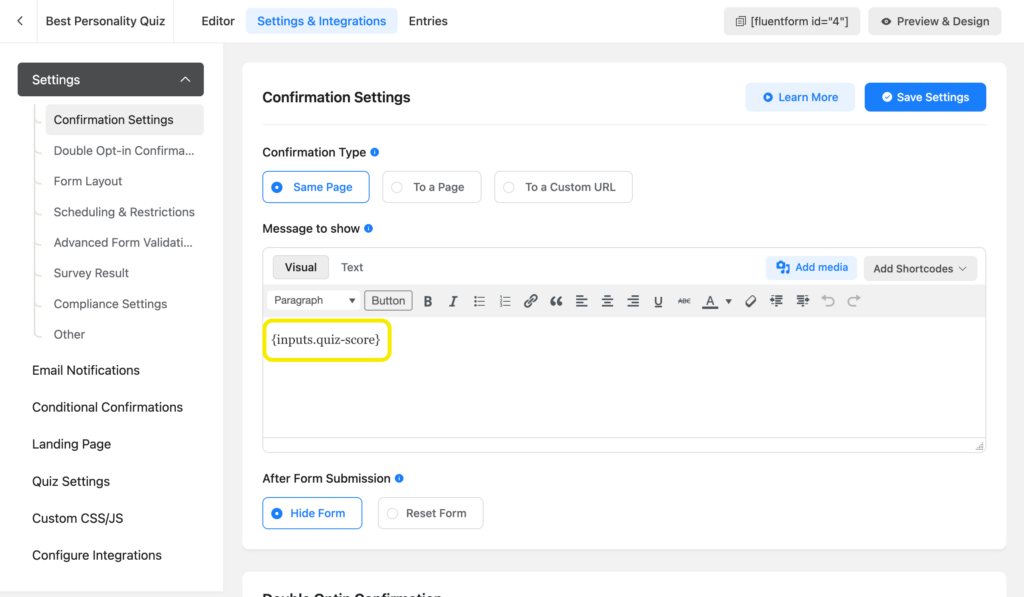
From the Confirmation Settings, change the Message to show. By default, it is set to display “Thank you for your message. We will get in touch with you shortly.”
You can customize this message according to your needs. For now, we only want to show the personality type after quiz submission. Fluent Forms’ shortcode feature comes in handy in this case. Click on Add Shortcodes and select Quiz Score.
Click on Save Settings if you are happy with the settings. You can preview the quiz by clicking on the Preview & Design button in the top right corner.
There you go! A personality quiz is now ready to be published on your website.
Step 6: Publish your form
You can bring your form live on your WordPress site in three ways.
First of all, you can use the Gutenberg block editor to select the quiz you have just created using Fluent Forms. In the WordPress dashboard’s left sidebar, hover over Pages and click Add New Pages. Give the page a title. In the block editor’s blank area, click the plus (+) sign or insert a forward slash (/). Then type Fluent Forms and choose the quiz.
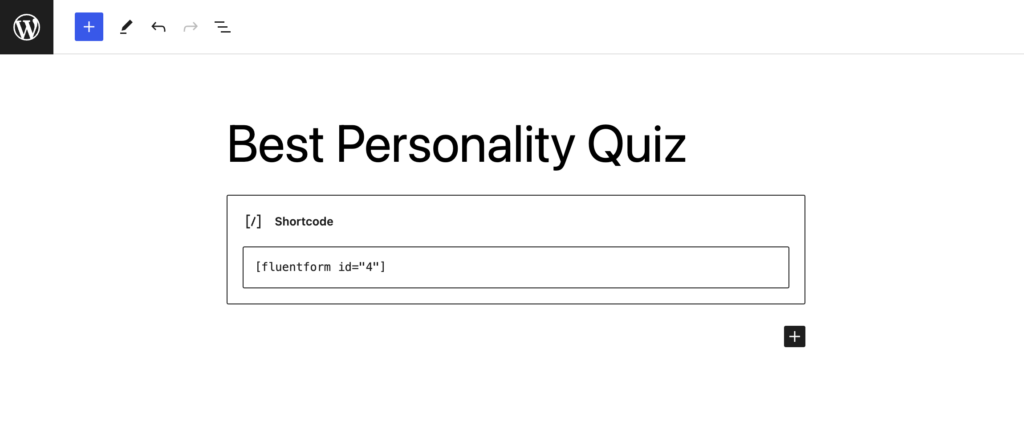
An alternative second way to do that is to use Fluent Forms’ Shortcode feature. You can find the shortcode of the quiz on top of the form editor window.

Just click on the Shortcode to copy it. Paste this shortcode using a shortcode block anywhere you want to display your quiz on your website.
The third and most amazing way is to publish your form on a dedicated landing page. Go to Settings & Integrations > Landing Page. Check the box beside Enable Form Landing Page Mode. Here you can fully customize the landing page according to your brand identity.
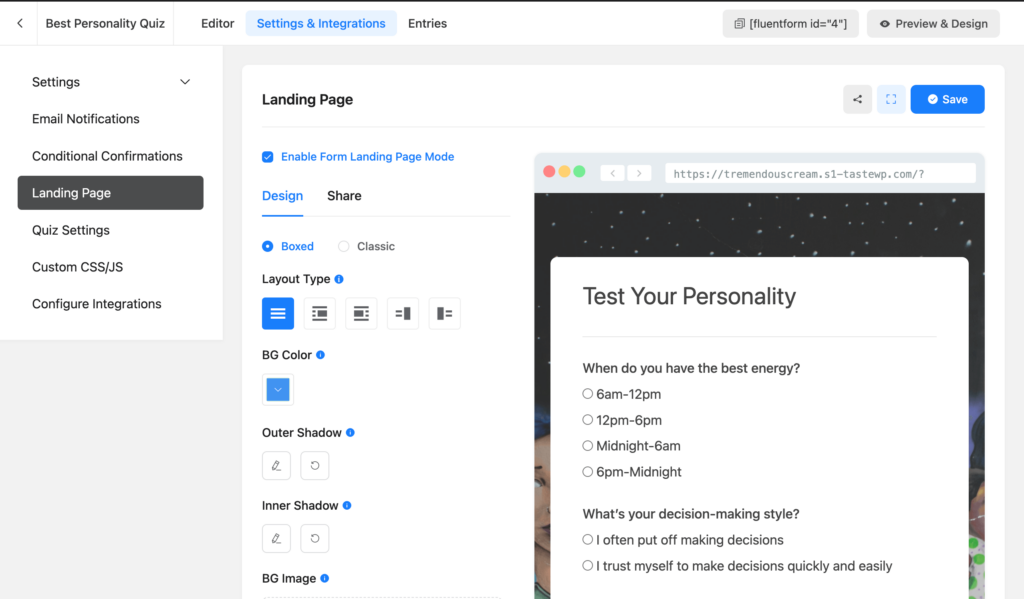
Don’t forget to click on Save Settings after necessary customization.
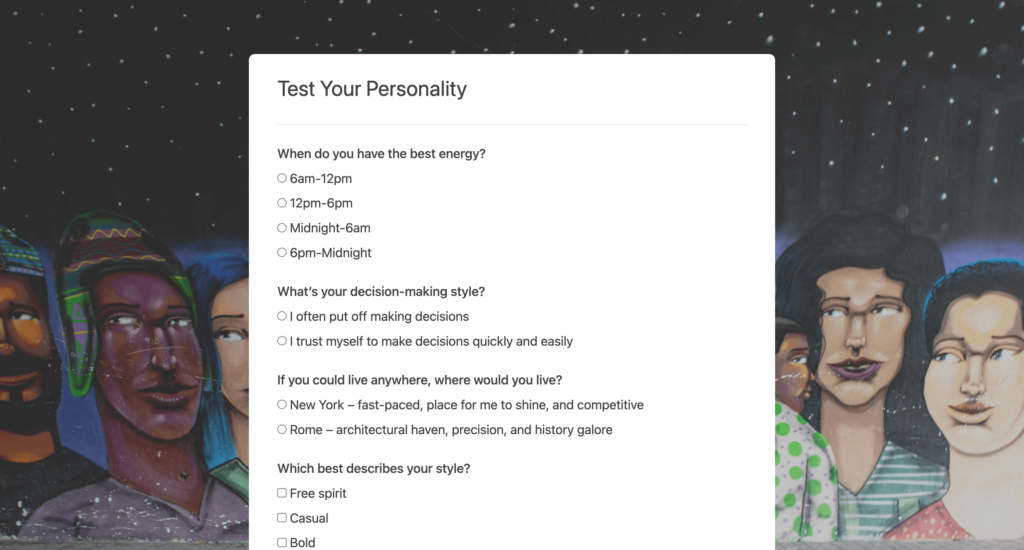
Responding to the questions will show pre-defined feedback on users’ personalities based on their input.

Your personality quiz is now ready for your audience to play with! You can share the URL of the landing page to let your audience participate in the quiz.
Create a Conversational Personality Quiz (Bonus)
To give your audience a better quiz experience, you can convert your traditional quiz into a conversation type of quiz. It is easy peasy to set up. Click on the three dots on the top right corner of the form editor window and select Convert to Conversational Forms.
Conversational quizzes will give your user the best experience, and as a result, you can see a high submission rate.
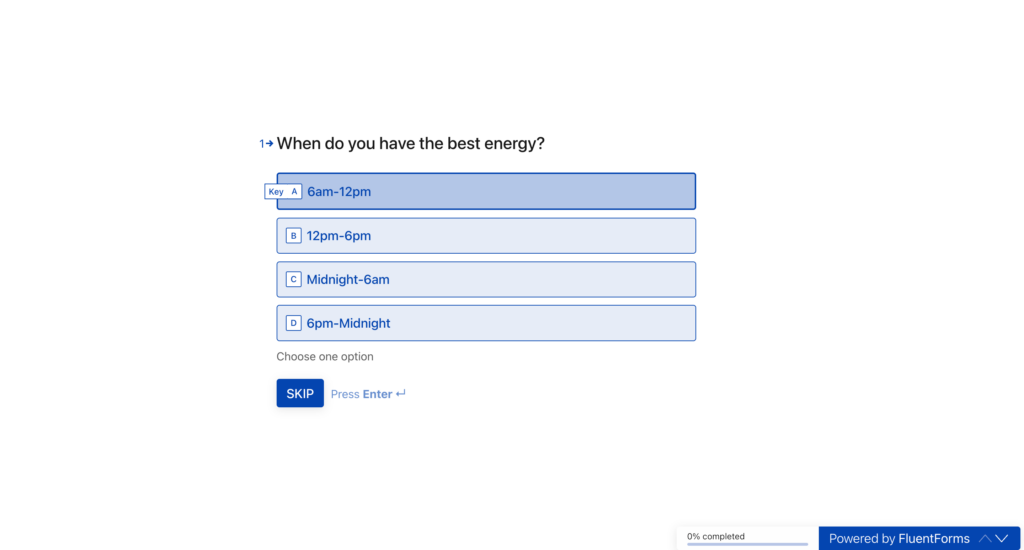
This interactive type of quiz presents one question at a time, so your audiences are not distracted by other questions. Also, you can customize the interface to align the overall look with your brand identity.
Wrapping up
A personality quiz on your business website can be a great way of bringing more traffic to your site, generating leads, getting insights into your customers, and increasing brand awareness.
In this article, we have shown you the detailed step-by-step process of creating a personality quiz in WordPress. Let us know in the comment section below if you have created yours. Drop us a comment if you have any further queries.
Stay tuned to our social media channels and Fluent Forms website for more tutorials like this.

An Econ major turned into a Digital Marketer by choice. Hello! This is Ashraf and I am here to enlighten you on various WordPress topics and help you make informed decisions.

4 responses to “Create a Personality Quiz in WordPress [6 Easy Steps] ”
-
Hi, I’m trying to make a personality quiz, but the “advanced scoring” field doesn’t appear when I enable the questions – why?
-
You should check our new personality quiz feature on Fluent Forms Pro.
https://wpmanageninja.com/docs/fluent-form/advanced-features-functionalities-in-wp-fluent-form/creating-a-personality-quiz-form-in-fluent-forms/This might solve your problem.
-
-
Hi, is possible to make the results section (score) longer? I would love to provide an in-depth analysis for my quiz-takers.
-
You can do this while assigning longer grade levels. Alternatively, you can use Conditional Confirmation to do so.
-


Leave a Reply