Create Adaptive Forms Using Dynamic Field in WordPress
You have a form on your website where users can select a dish from your restaurant menu. The menu is stored in a CSV file, and you need to manually update the form every time a new dish is added or removed.
This can be tedious and prone to errors. Or, maybe you’re running a blog and users need to select a specific post to provide feedback on. Manually adding each new post to the form would be inefficient.
Wouldn’t it be better if your form could automatically pull in and display updated information without manually updating static options every time some new data is added?
In this tutorial, we will walk you through the steps to create a form with a dynamic field.
What is a Dynamic Field?
A Dynamic Field in Fluent Forms allows you to create form fields that are automatically based on the data available on your WordPress site and beyond. Dynamic Field can be of various types: Radio, Checkbox, Select, or Multi-Select.
Unlike static fields, where options are manually added and updated, dynamic fields pull data from various sources—such as posts, taxonomies, users, other form submissions, or even external data sources.
Dynamic Field makes a form truly dynamic, as the name suggests. It ensures that the options presented to users are always relevant, timely, and accurate. By using the Dynamic Field feature, manual form maintenance on your end is significantly reduced.
How to Use Dynamic Field in Fluent Forms
First, from your WordPress dashboard, go to Fluent Forms Pro > New Form. You will get a popup asking where you would like to start from. You can start fresh or choose a pre-built template.

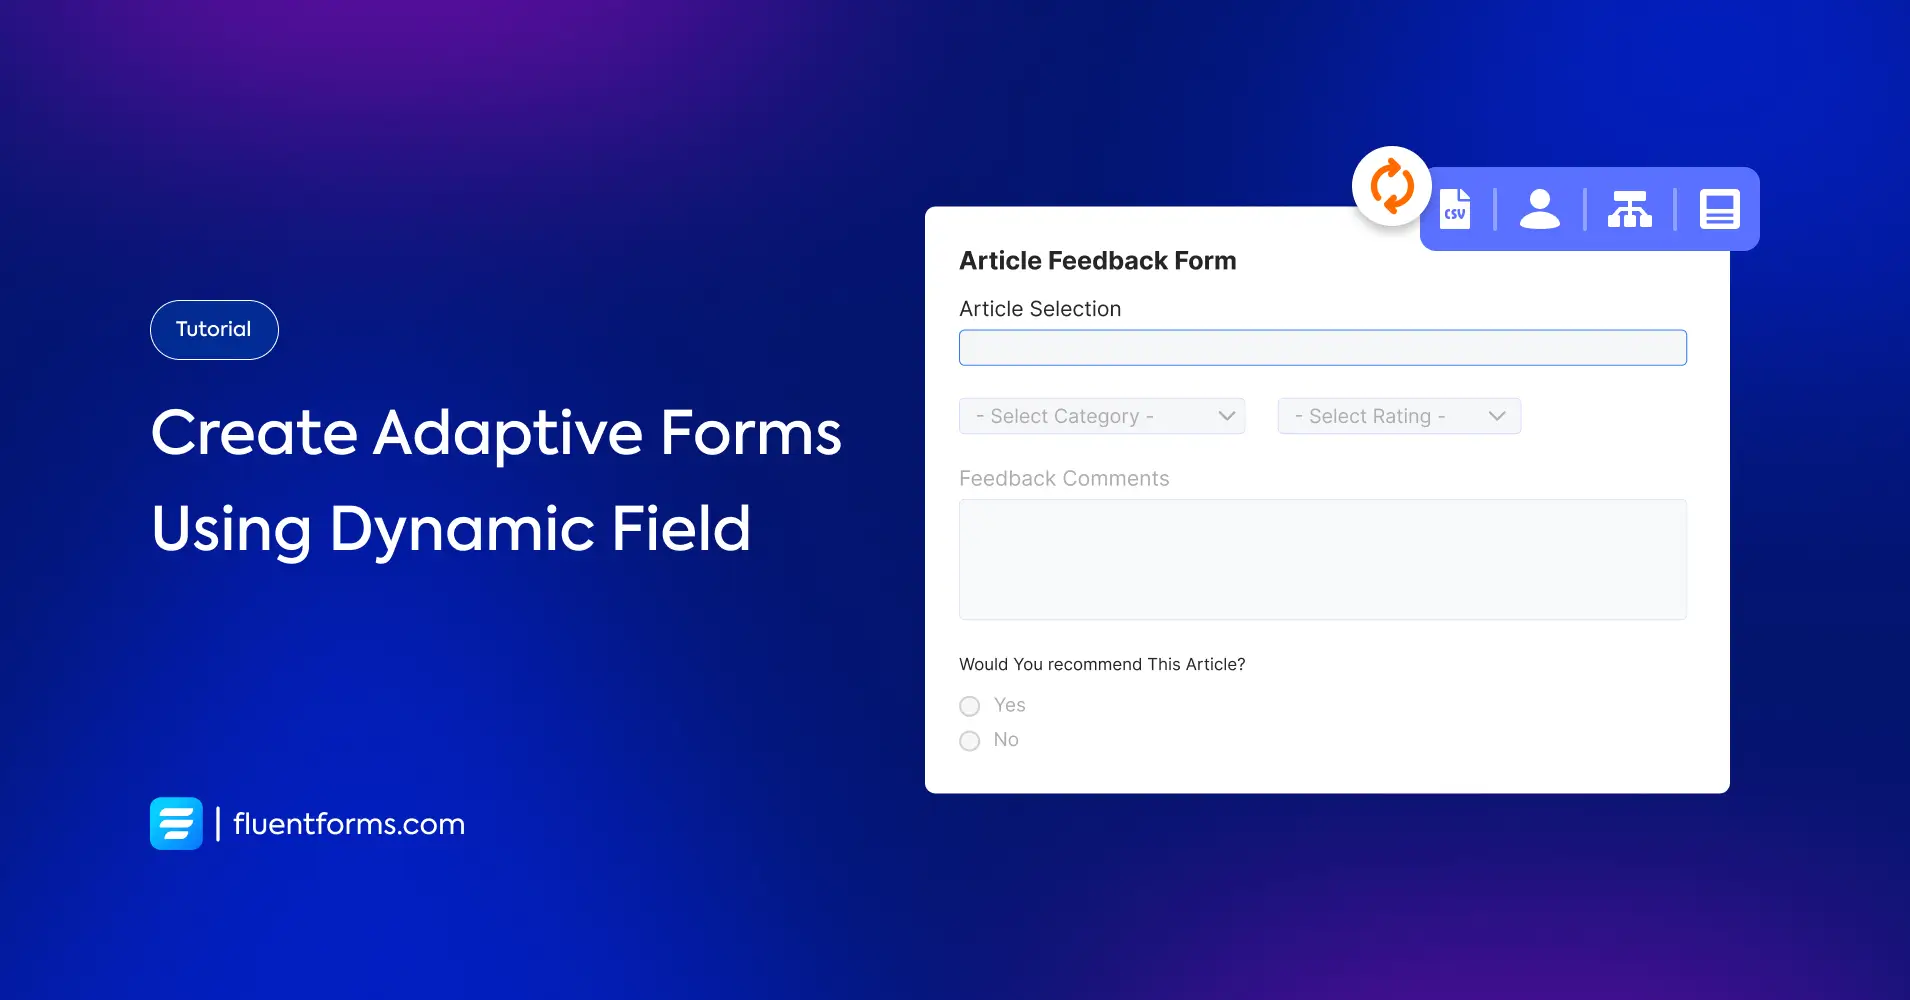
We opted to start building the form from scratch. For demonstration purposes, we will create an Article Feedback Form where users can submit their feedback from a list of published articles.
Once you land on the form editor window, you can add necessary form fields to your form and customize each input field. We have added the following fields to our form:
- Custom HTML for form heading
- Repeat Field for letting users select feedback category and rating
- Text Area for providing comments
- Radio Field for asking whether the user will recommend the article or not
- Email Address for collecting feedback provider email address

Now we want to let our users select the article from the list of published articles. As a blog site publishes articles on a regular basis, the list will not be static. To accommodate the list of published articles, we have to take advantage of Dynamic Field. Let’s add a Dynamic Field to our form.

Now we have to customize the field. To do so, click on the field and you will be presented with a bunch of Input Customization options.
We have changed the Element Label and Source from which the field options will be populated dynamically.

The Dynamic Field of Fluent Forms supports four field types:
- Radio
- Checkbox
- Select
- Multi-Select
and five sources:
- Post
- Taxonomy Term
- User
- Fluent Forms Submission
- Dynamic CSV
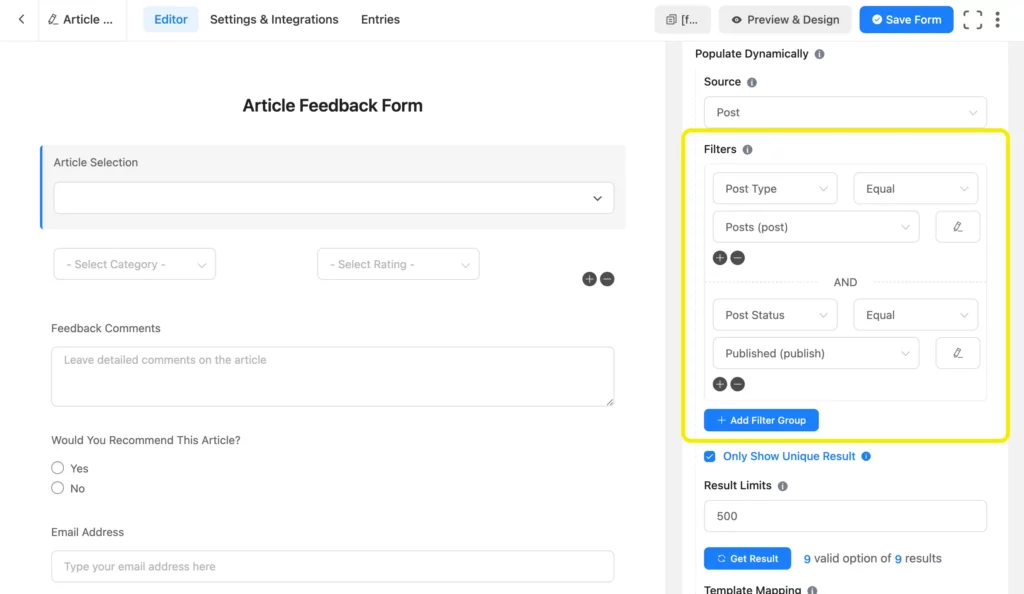
The Post type dynamic field allows you to show your website’s post and gives your users an option to select from the list of post types. You can add multiple Filters to show a specific group of posts. We want to show posts with Published status.
There are a few other options available for more advanced customization, such as –
- Customizing the Template Mapping with available dynamic shortcodes
- Showing the list of options in ascending/descending order
- Retrieving the options dynamically
- Enabling users to search from the list
- Shuffling the options
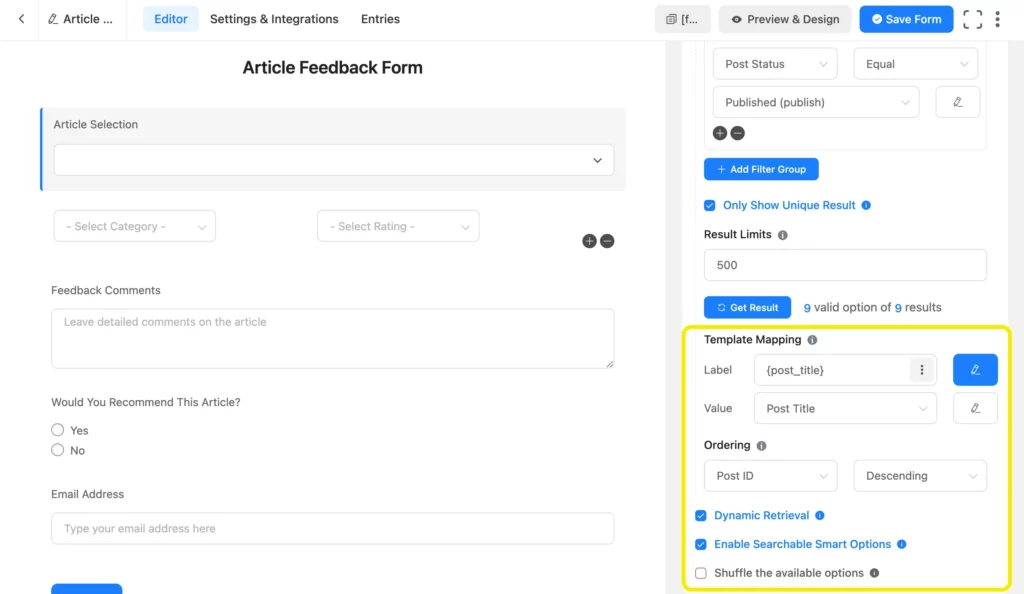
To make sure that the dynamic options are fetched correctly, click on the Get Results button.
That is it. Don’t forget to click on the Save Form button before moving anywhere.
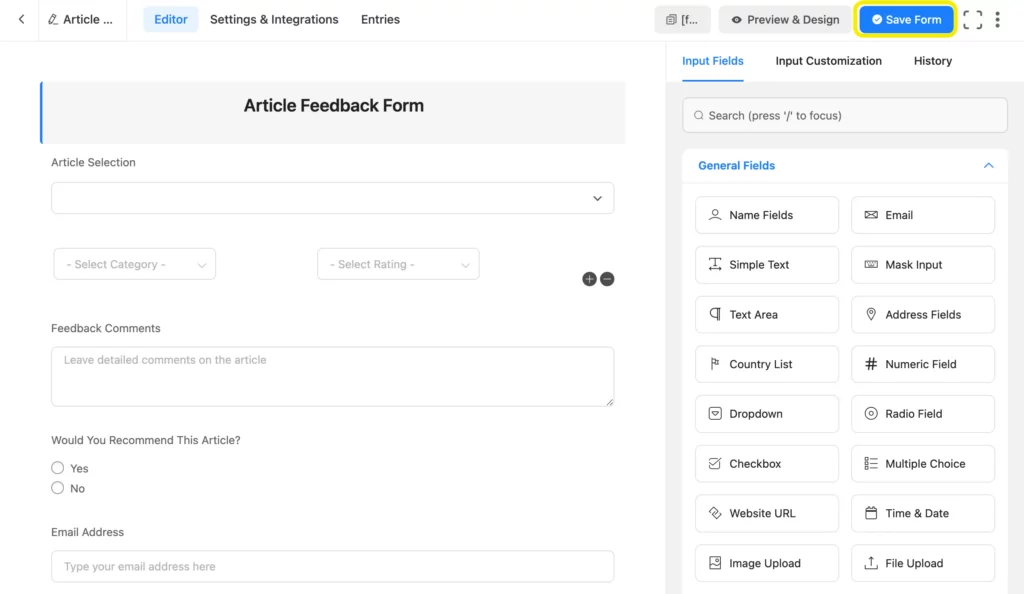
Now, as your form has all the necessary input fields in your Article Feedback Form, you can publish the form on your website.
Before publishing the form, you can tweak some configuration settings according to your needs from the Settings & Integrations tab. Here you have every form-specific configuration settings you might need from changing confirmation settings to configuring integrations.

From the Settings & Integrations tab, you can do the following –
- Change the confirmation message that is shown when a user submits a form
- Enable double opt-in confirmation
- Configure form layout
- Apply different scheduling and restriction rules
- Configure email notifications
- Create PDF feeds for generating PDFs from each form submission
- Design a dedicated landing page for your form
- Use custom CSS and JS in your form
- Configure various payment options
Again, don’t forget to click on the Save Settings button once you have made the necessary changes in the Settings & Integration window.
Publishing the Form
Now if you are happy with the form, it’s time to publish it on your website. There are primarily three methods of publishing a form in Fluent Forms. First, you can use the Gutenberg block editor to choose the Article Feedback Form you have just created. Click Add New Page under Pages in the WordPress dashboard’s left sidebar. Give the page a title. In the block editor’s blank area, click the plus (+) sign or insert a forward slash (/). Then, in the search box, write Fluent Forms and select the form from the dropdown menu.

Fluent Forms’ Shortcode feature is a second option that you can use to show your form. The shortcode is found at the top of the window that displays the form editor.
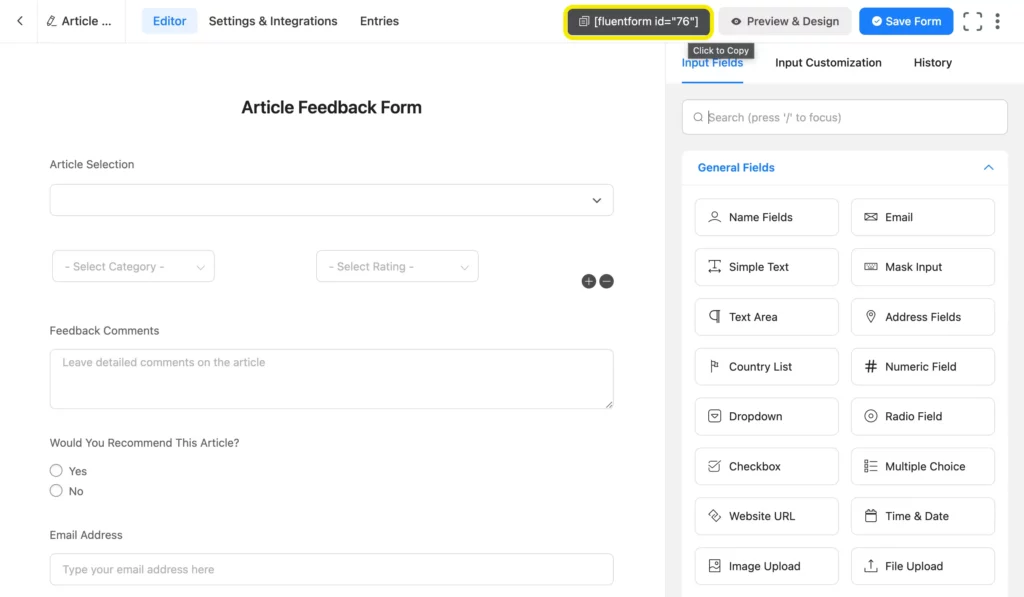
Click on the shortcode to copy it and then paste it using a shortcode block anywhere you want to display the form on your website.

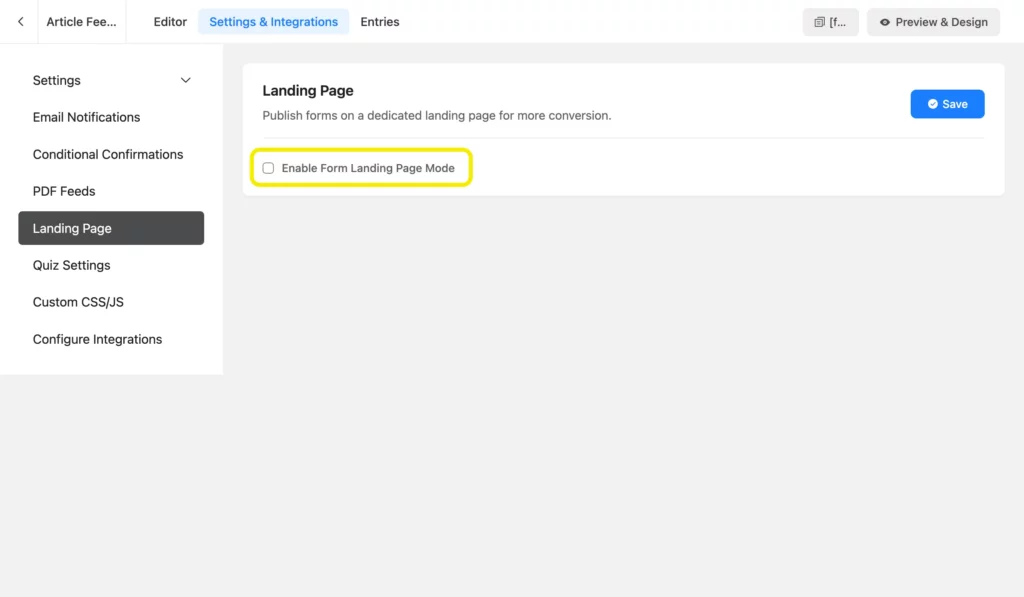
The third and most impressive approach is to publish your form on a dedicated landing page. To do this, go to Settings & Integrations > Landing Page. Check the box to Enable Form Landing Page Mode. The landing page is fully customizable.
Wrapping Up
With Fluent Forms’ Dynamic Field, you can keep your forms up-to-date in a smart way. This saves you time and ensures users always see the latest options.
So try Dynamic Field out and make your forms smarter today!


Leave a Reply