
Embedded Checkout in WordPress: Stripe and Razorpay
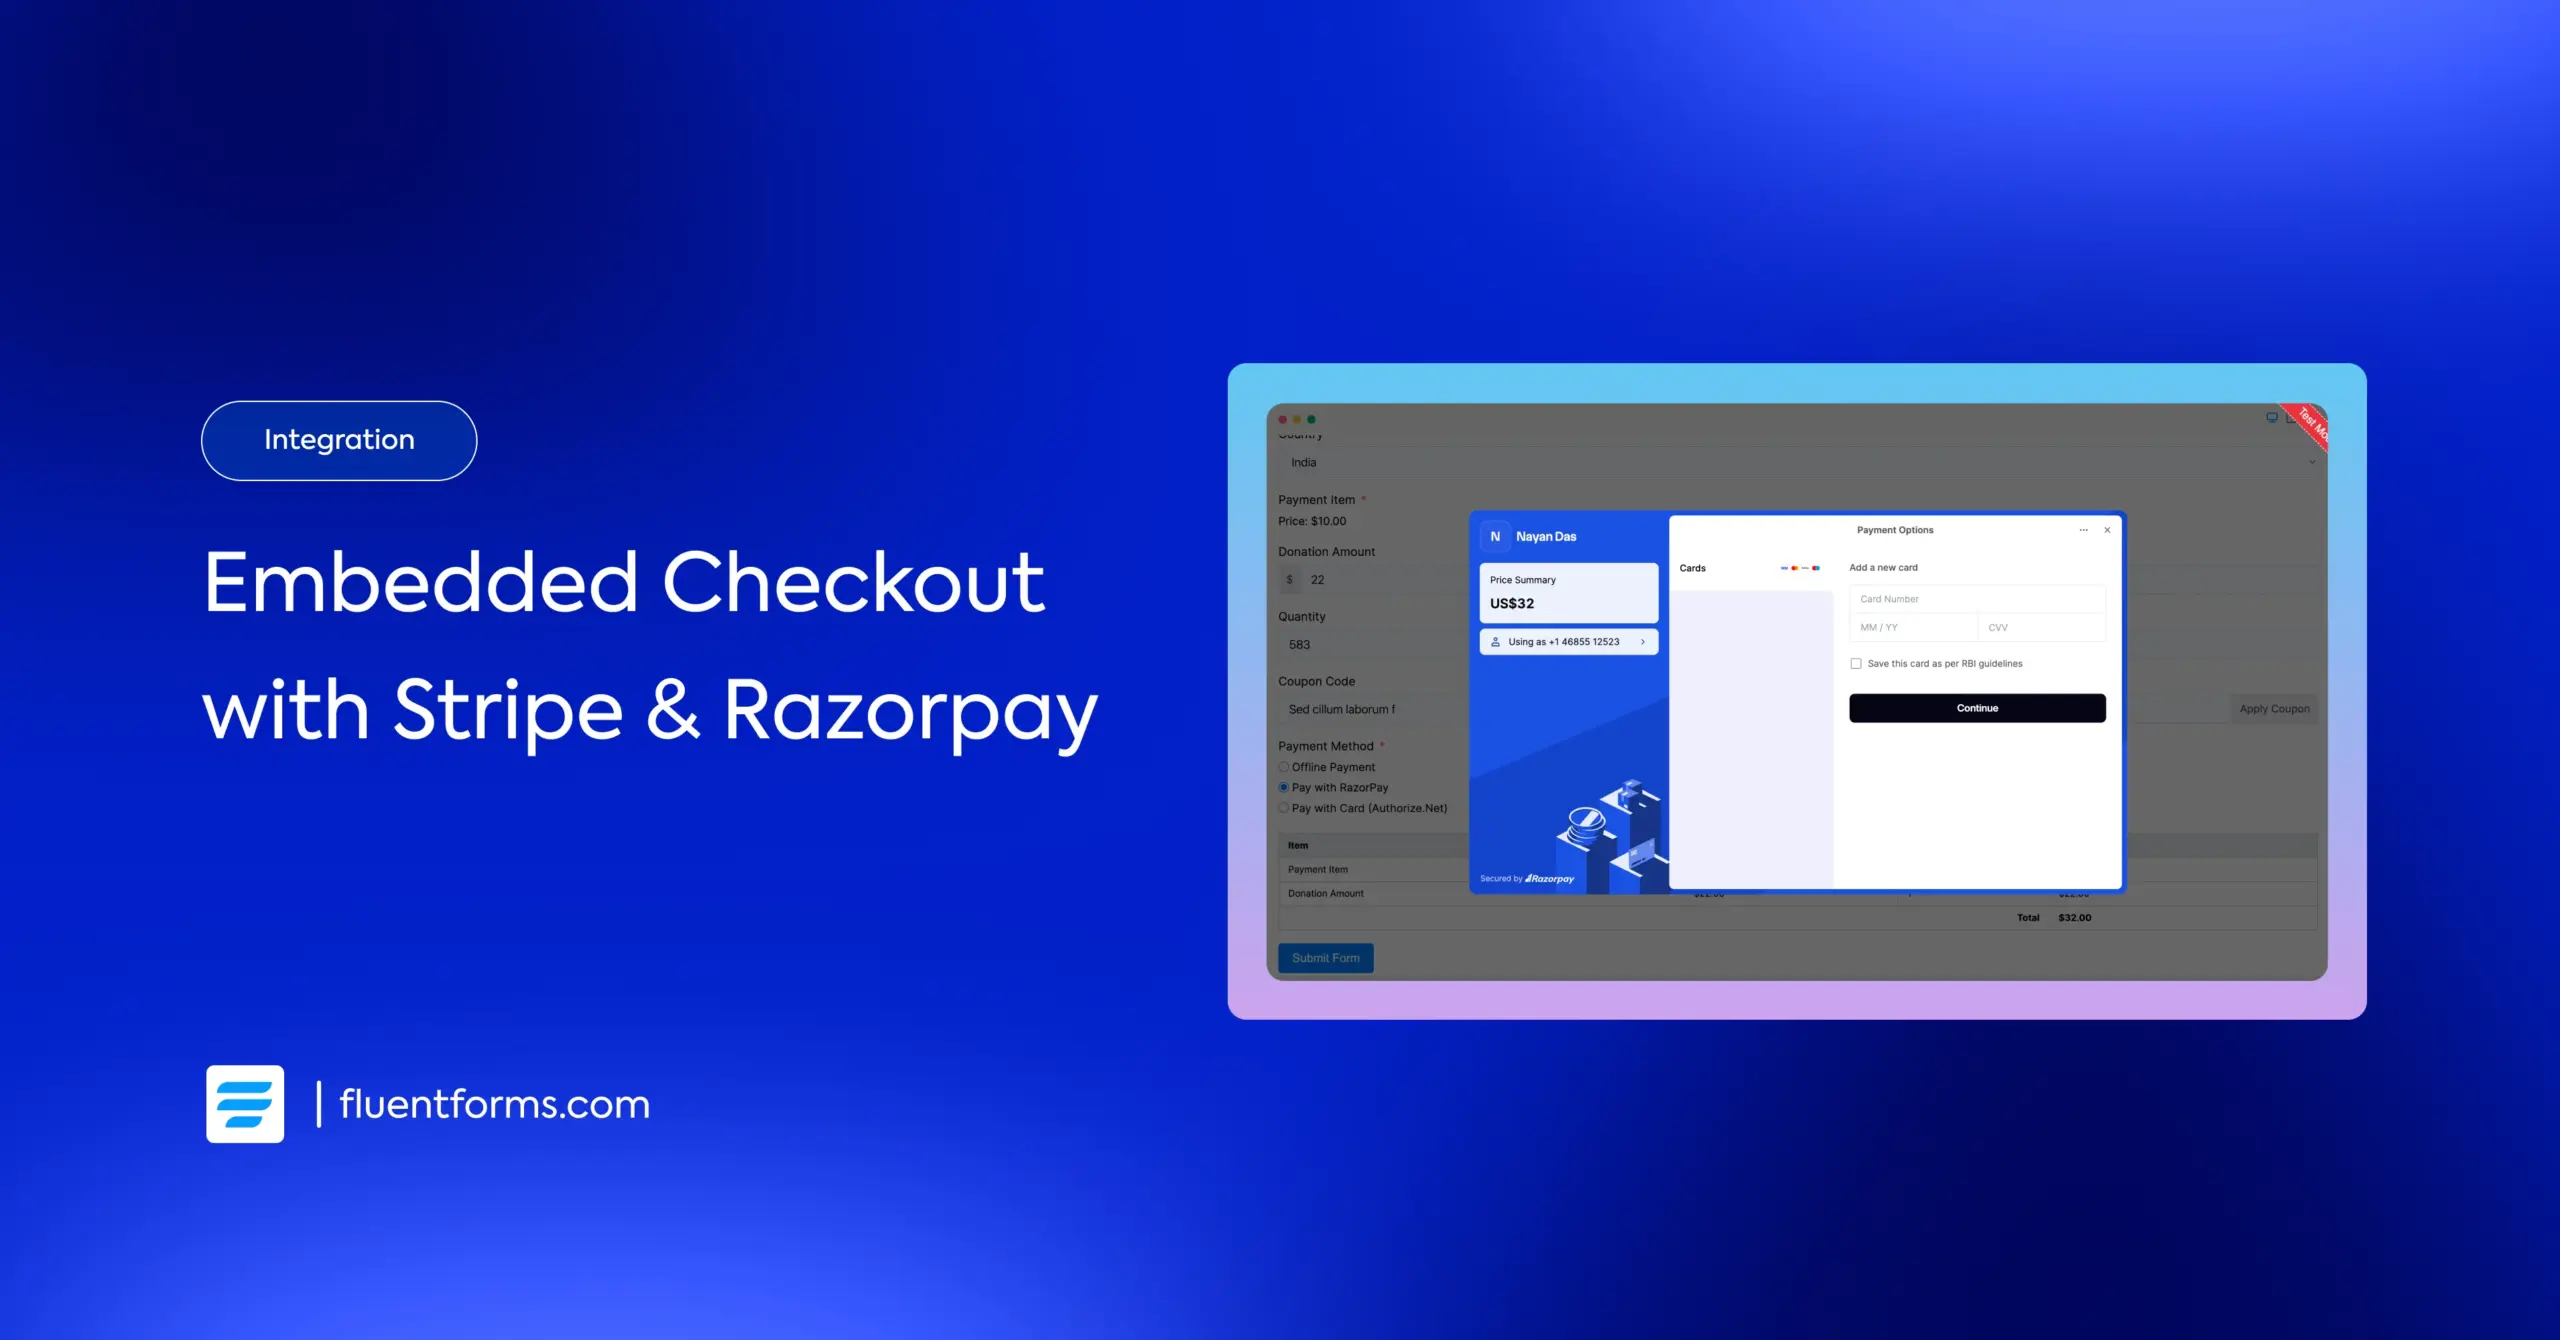
Collecting payments through WordPress forms used to mean one thing – redirecting users to a different page and hoping they would finish the transaction. Embedded checkout solves that problem instantly. Your visitors stay on the same page, complete the payment right inside the form, and finish the process without breaking their flow. Faster checkout. Fewer drop-offs. More revenue.
Stripe and Razorpay both offer refined embedded checkout experiences, and Fluent Forms ties them into WordPress with an incredibly clean setup. Whether you’re handling donations, selling digital items, collecting booking fees, or managing recurring subscriptions, embedded checkout makes the experience smoother for users and far more reliable for your business.
This guide breaks down what embedded checkout is, and how to set it up for both Stripe and Razorpay inside Fluent Forms.
TL;DR
- Embedded checkout lets users complete payments directly inside your form without redirection – faster, cleaner, and conversion-friendly.
- Stripe and Razorpay both support embedded checkout, and Fluent Forms makes the setup extremely smooth.
- Stripe works with borderless, developer-friendly infrastructure, while Razorpay brings India’s most flexible UPI-powered ecosystem.
- Setup requires enabling payment modules, connecting your Stripe or Razorpay account, and turning on embedded checkout in the payment method field.
- With Fluent Forms, you get a complete on-site checkout system plus automation, CRM workflows, subscriptions, calculations, and more – all inside WordPress.
What is embedded checkout
Instead of redirecting users to an external payment page, embedded checkout keeps the entire transaction inside your form. The payment fields load securely within the form, the user pays on the spot, and the process ends exactly where it started.
Stripe and Razorpay both handle the security behind the scenes – encrypted frames, secured tokens, and strict data handling – so your website never touches sensitive card or bank data. The flow feels natural and uninterrupted, and the user completes the payment faster than ever.
Why use a WordPress form builder for embedded checkout
When you’re collecting money, you rarely need “just a payment button.” You usually need more details – customer info, product choices, dates, variants, coupons, recurring cycles, and more. A form builder gives you full control over all of that.
Fluent Forms makes the experience clean and efficient. You get drag-and-drop building, advanced validation, conditional logic, calculations, payment summaries, and extensive integrations with CRMs, automation tools, and email marketing platforms.
Using Fluent Forms gives you:
- Multiple payment gateways
- Embedded or redirected checkout
- Subscription payments
- Modal checkout
- Zero-API Stripe connection
- Numeric calculations
- Landing page forms
- 100+ form templates and 65+ input fields
So instead of stitching together multiple plugins, everything works within one system.
Embedded checkout with Stripe
Stripe sets the global standard for modern online payments. It’s designed for fast, borderless transactions and provides one of the cleanest on-page checkout experiences available.

How to use embedded checkout with Stripe in Fluent Forms
Step 1: Sign up for Stripe
If you already have an account, continue. Otherwise, create one – it takes only a moment.
Step 2: Configure Stripe in Fluent Forms
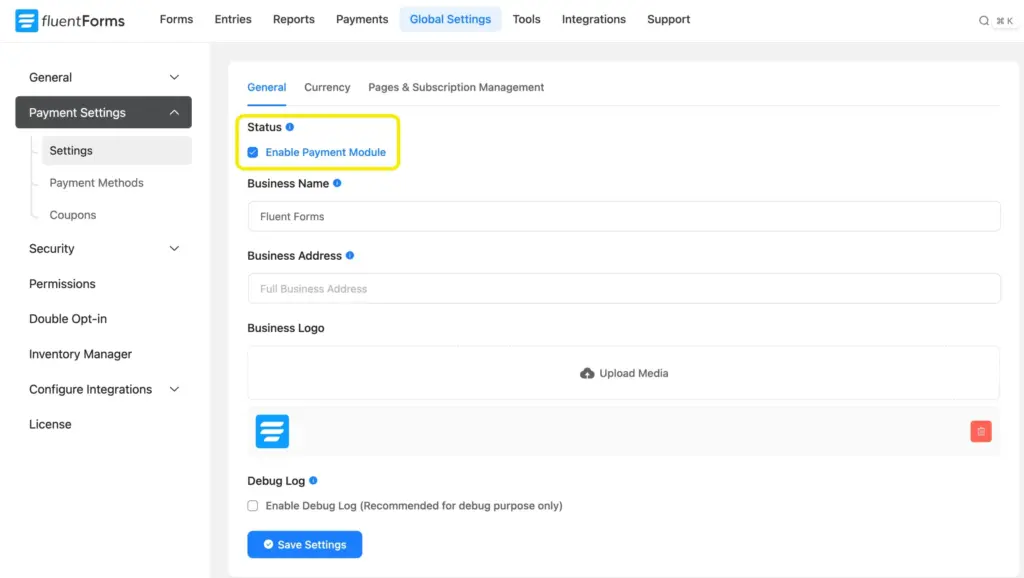
Open your Fluent Forms dashboard, go to Global Settings, and enable the payment module. This unlocks all payment gateways.
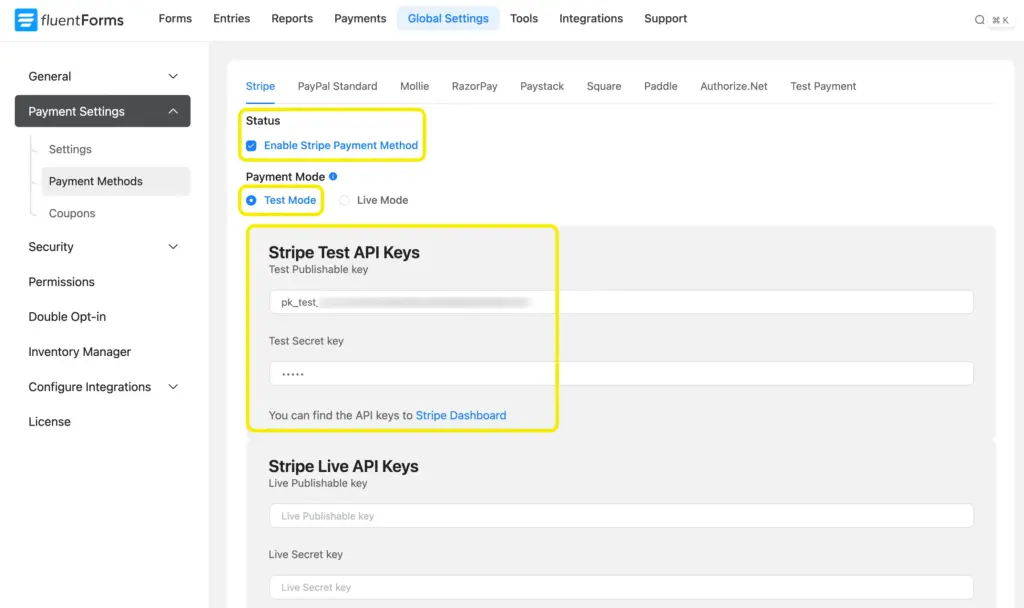
Now open the Stripe tab under Payment Methods and enable Stripe. Keep it in Test Mode while setting up.

Click Connect with Stripe, and you’ll be brought to Stripe’s secure page to verify your account. Once authenticated, Fluent Forms connects automatically.

You’ll be asked for:
- Personal details – legal name, email address, date of birth, address, phone number, etc.
- Business details – industry, business website, and product description.
- Payouts – routing number, account number, and account for payouts.
- Customer support details – statement descriptor, shortened descriptor, customer support phone number, and customer support address.
- Review – Cross-check all the information you provided so far before hitting the Submit button.
Once completed, your connection is secure and ready.
You can also integrate Stripe with a traditional API Key. In that case, kindly add the following code to your theme’s functions.php file or code snippet plugin.
add_filter('fluent_form_disable_stripe_connect', '__return_true');To get the API Key, log in to your Stripe account and click on the Developer bar on the footer. Once the workbench is expanded, you’ll find the Publishable key and Secret key.
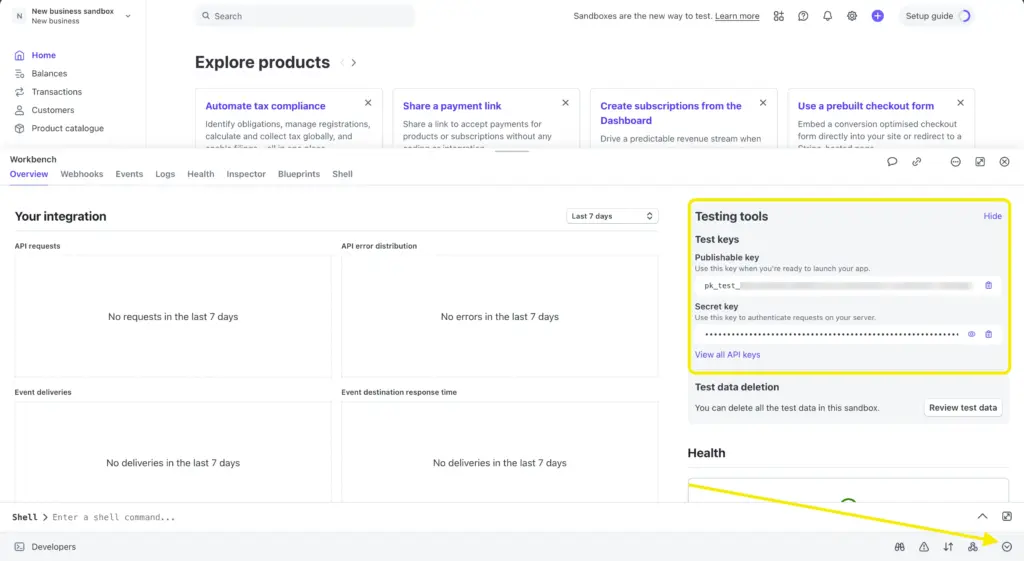
Paste them into the Fluent Forms payment method setup page and you’re good to go.
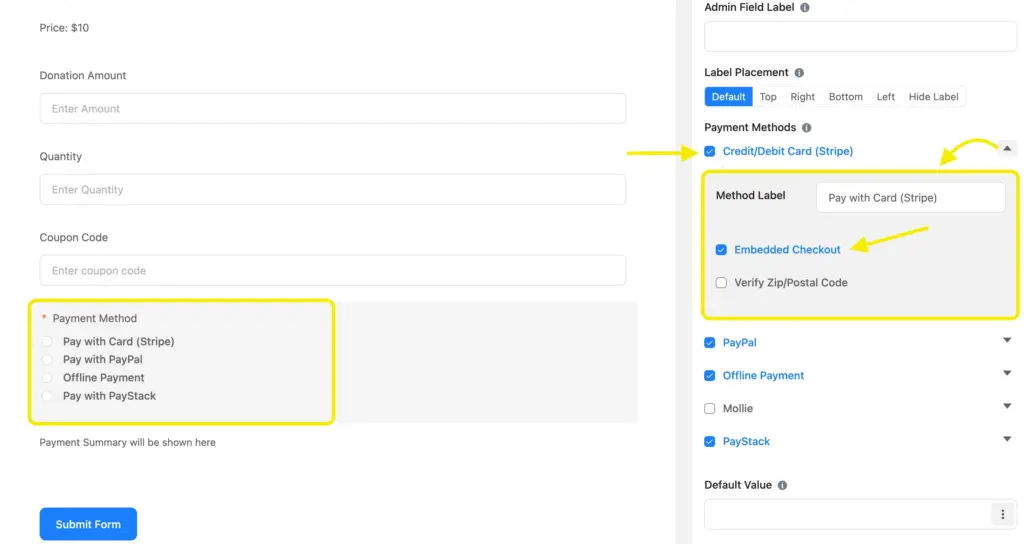
Step 3: Create your form and enable embedded checkout
Add a new form, insert the fields you need, and include a payment method field. Expand the Stripe settings inside that field, and toggle on Embedded Checkout. Save your form – Stripe embedded checkout is ready.
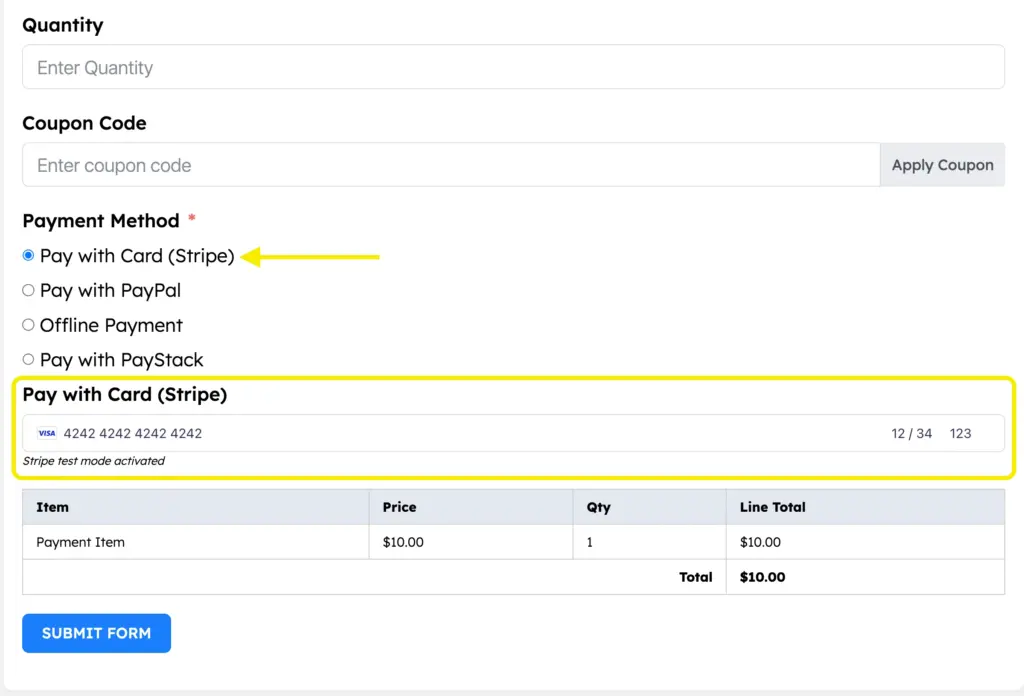
This is how the embedded checkout will look:
Do you know? Stripe Payment gateway is available in Fluent Forms free version with 1.9% transaction fee. Recurring payments are also included via the Subscription field. Pro removes the 1.9% fee, leaving only Stripe’s charges.
Embedded checkout with Razorpay
Razorpay powers India’s most flexible payment ecosystem – UPI, cards, net banking, wallets, pay-later, EMI, subscriptions, payment links, and more. Its embedded checkout pairs perfectly with Fluent Forms for a fast, modal-style payment experience.

How to use embedded checkout with Razorpay in Fluent Forms
Step 1: Sign up for Razorpay
Create an account if you don’t have one already.
Step 2: Configure Razorpay in Fluent Forms
From Fluent Forms → Global Settings, open the Payment section and enable the payment module.
Go to Razorpay under Payment Methods and enable it. Keep Test Mode active while configuring.

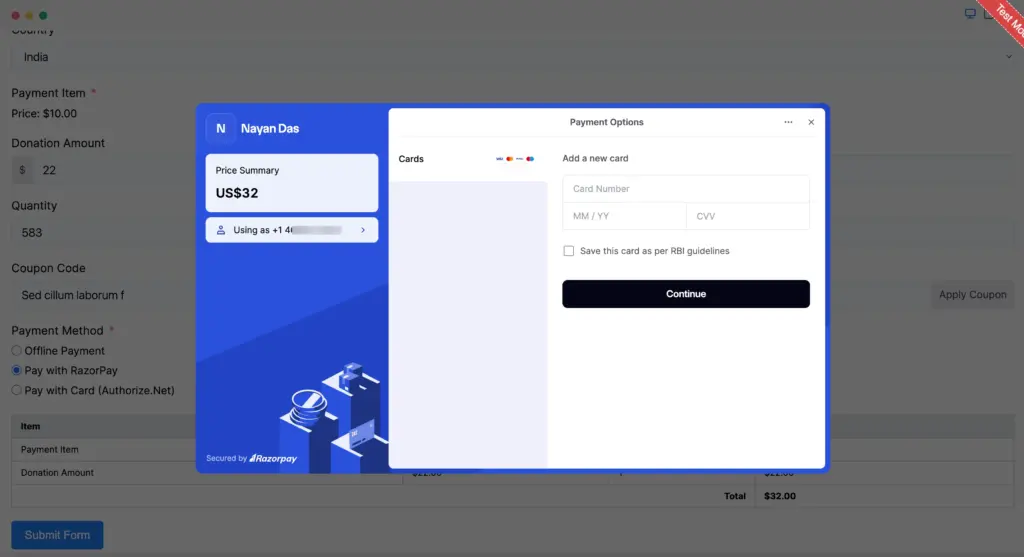
Now choose your checkout style. Select Modal Checkout Style – this is what enables embedded checkout directly inside your form instead of redirecting to Razorpay’s hosted page.Log in to your Razorpay dashboard, head to Account & Settings. Generate your Test Key, and copy the Key ID and Key Secret.
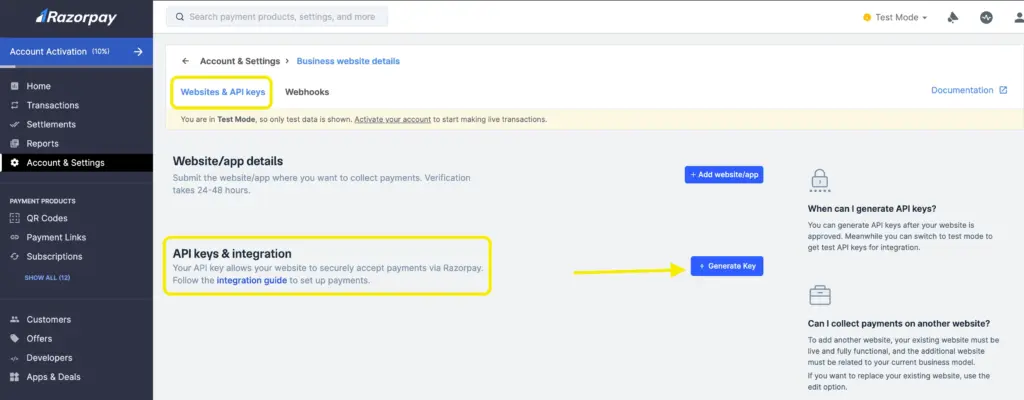
Paste both into the Fluent Forms settings and save.

Step 3: Create your form
Add a new form, insert your required fields (name, email, phone, payment fields, etc.), and save.
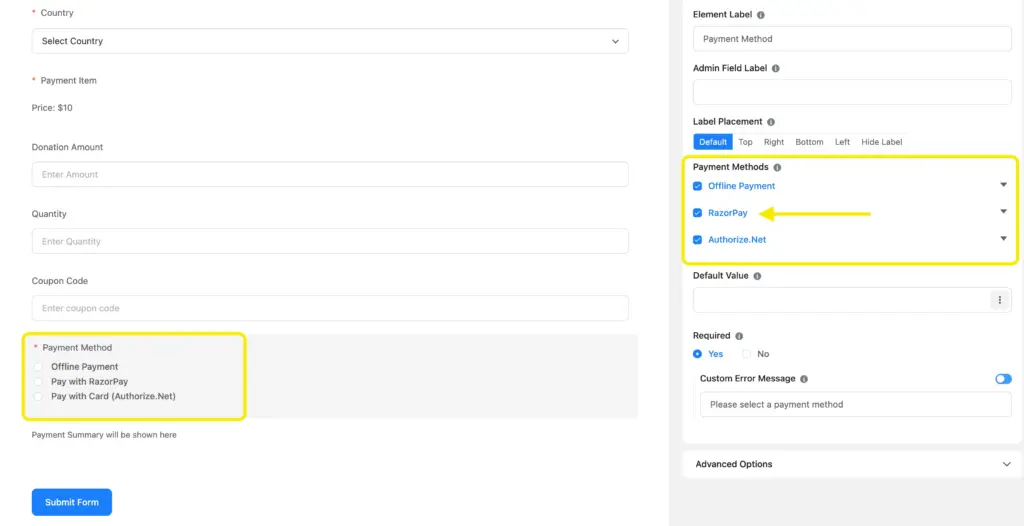
Since you already selected the modal checkout, Razorpay’s embedded checkout is automatically active for the form. No extra toggles needed.
Other payment integrations you might want to check out:
Collect payments with Fluent Forms
Embedded checkout is efficient, intuitive, and conversion-friendly – the kind of upgrade that immediately improves your user experience and reduces payment drop-offs. Pairing Stripe or Razorpay with Fluent Forms gives you a fast payment workflow backed by a full form-building ecosystem.
And once payments are running smoothly, you can explore more. Fluent Forms Pro includes conversational forms, file uploads, chained selects, advanced date rules, landing pages, analytics, and 65+ integrations for email marketing, CRM, support and automation.
If you’ve tried embedded checkout already, which gateway works better for your audience – Stripe or Razorpay? Share your experience or questions below.

This is Sumit. He’s a physics major who’s trying to understand both the physical as well as the WordPress worlds. Whenever he’s not busy, plays fifa or spends time with his family.


Leave a Reply