
How to Get Notifications that Someone Submitted a Form on WordPress
How will you know when a form gets submitted on your WordPress site?
A form submission notification via email is enough to send you a notification instantly.
To get notifications that someone submitted a form on your WordPress website, a WordPress contact form plugin like Fluent Forms allows you to do it by setting the email notification.
The advantage of getting a form submission notification
Whether it’s an order form or a contact form, instant form submission notification helps you proceed with the further steps regarding a user’s action.
- Instant action
- Database update
- Submission categorization
- Removing unnecessary entries
- Prioritizing the submitted forms
Step-by-step guide to getting a notification once a form is submitted
Let’s get the steps on how you can enable notifications when a form is submitted to your site, using the functionalities of the fastest WordPress form plugin, Fluent Forms.
Step 1: Go to the settings of the form
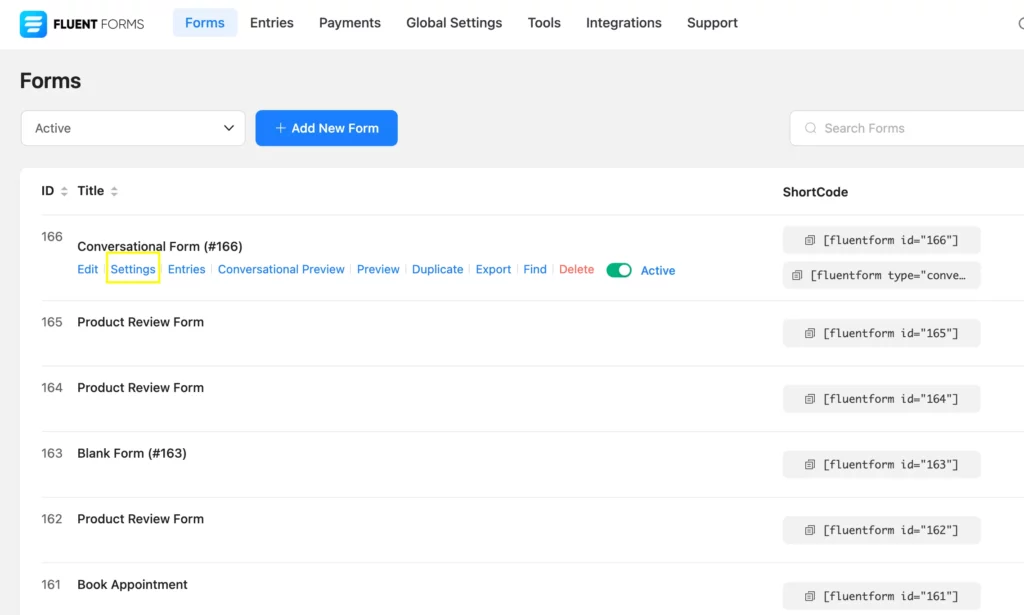
Once you click on the Forms button inside Fluent Forms, you will see the list of the forms you have already made. From there, you can select the one you want to receive notifications for.
To enable notification for a form, hover over the form name, and you will see the options. To continue setting up the notification, select the Settings option.
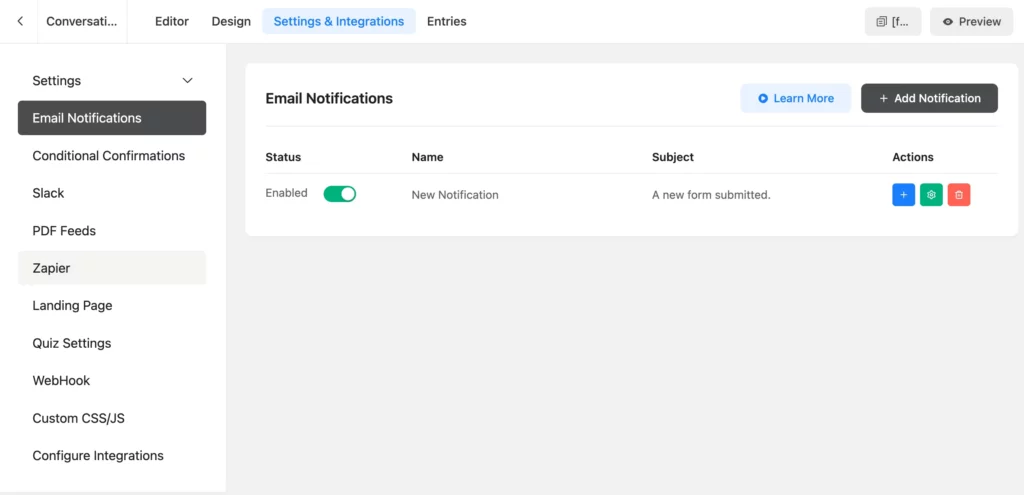
Step 2: Add email notification
After clicking on the Settings option, you will see a page like shown below in the image. From multiple setting options, click on Email Notifications, and then Add Notification to continue enabling notifications for the form you have chosen.
Step 3: Add the receiving info
Using the notification system of Fluent Forms, you can easily add the notification name and the email address to which you want to receive the notification. You can also add a subject.
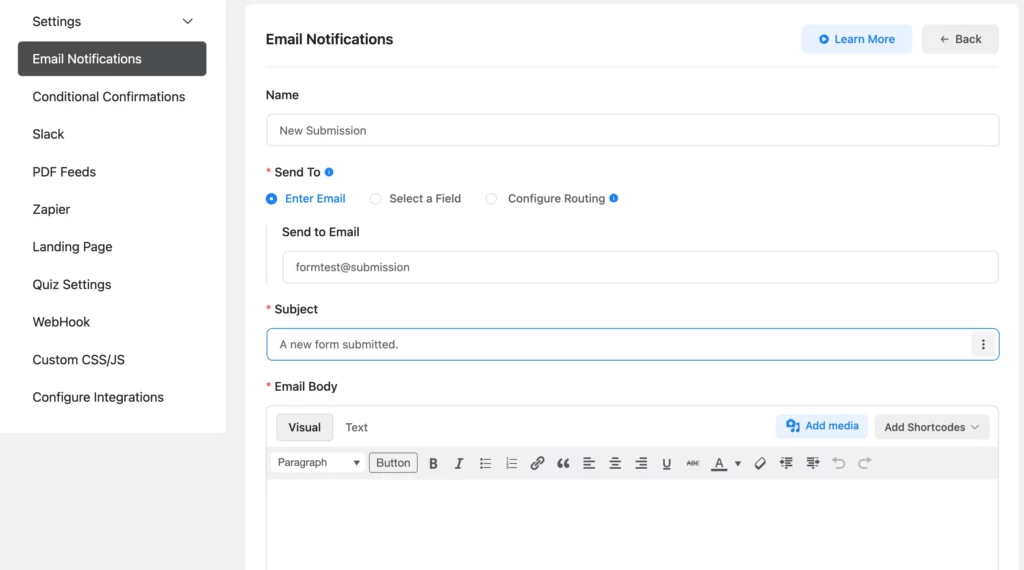
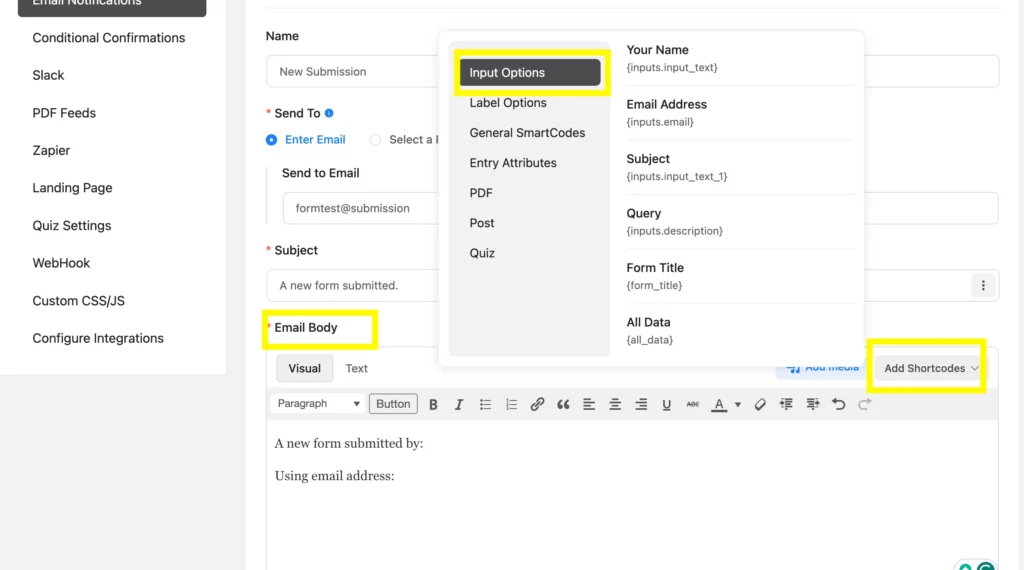
Step 4: Email subject and body
Fluent Forms allows you to customize the email subject and email body easily. You can add shortcodes for both the email body and the subject. If you add the All Data shortcode then all form submission data will be send with email notification. This is a quick way review each form submission without logging in to your WordPress website.
Step 5: Notification for particular submissions (Optional)
By enabling the Conditional Logics, you can implement a notification for particular fields or values. It helps you filter the notification process and gets you notifications for only those you prioritize.

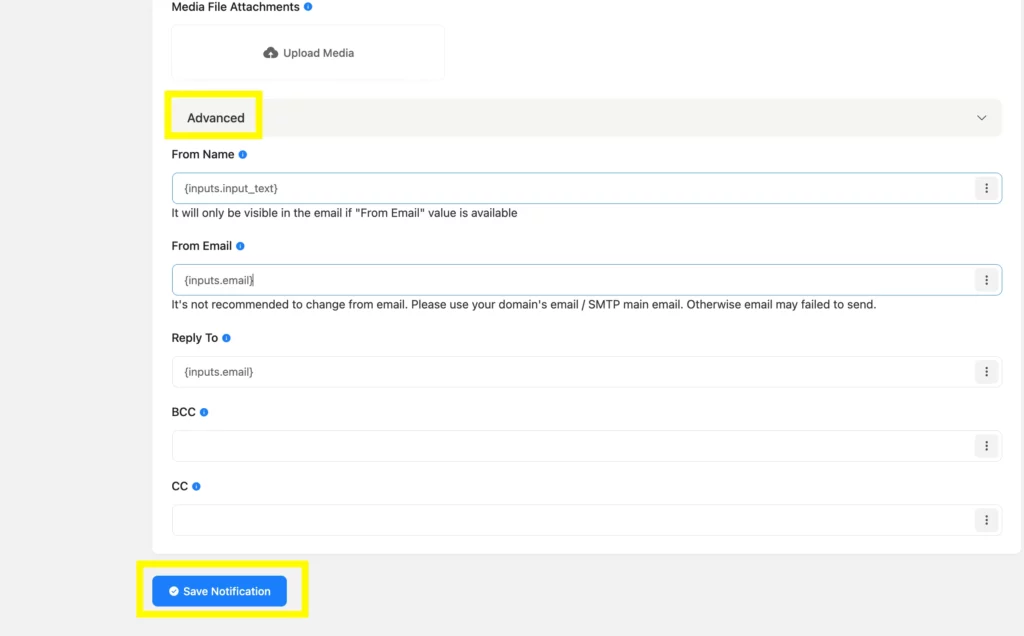
Step 6: Advanced options
Enabling the advanced options, you can select the From Name, From Email, Reply To email, BCC, and CC using the shortcodes.
At the bottom, you will see the Save Notification button, which ensures the notification settings are saved.
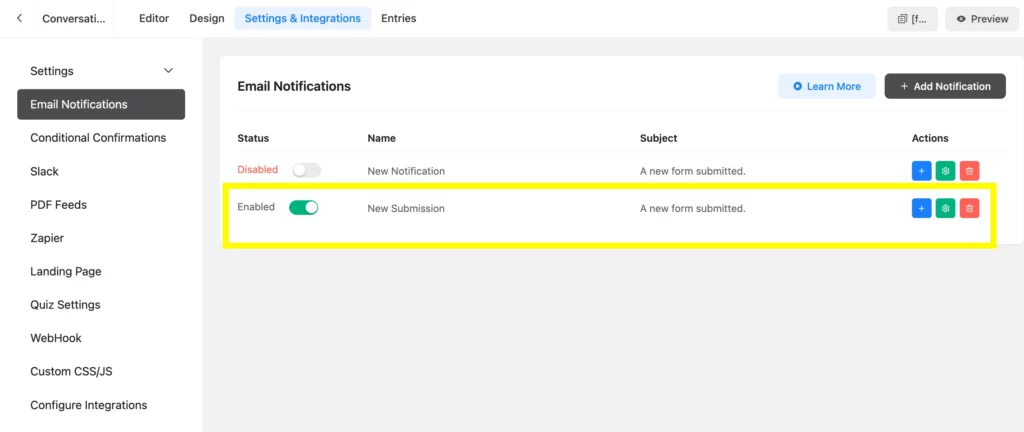
Step 7: Edit the saved notifications
Once you have saved the notification settings, you can now edit the settings. You can also enable or disable the notification.
Related feature
Conditional email notification
Why get too many notifications when you need specific ones?
The conditional email notification in Fluent Forms allows you to get a notification for specific attributes. Using Fluent Forms, you can get notifications if a form meets certain conditions on your WordPress site.

Hi, this is Aparup. I am a Literature postgraduate, mixing my creative thoughts with my experience in the tech industry to surpass AI. Professionally, I am a content marketer seeking solutions to users’ problems regarding WordPress.


Leave a Reply