
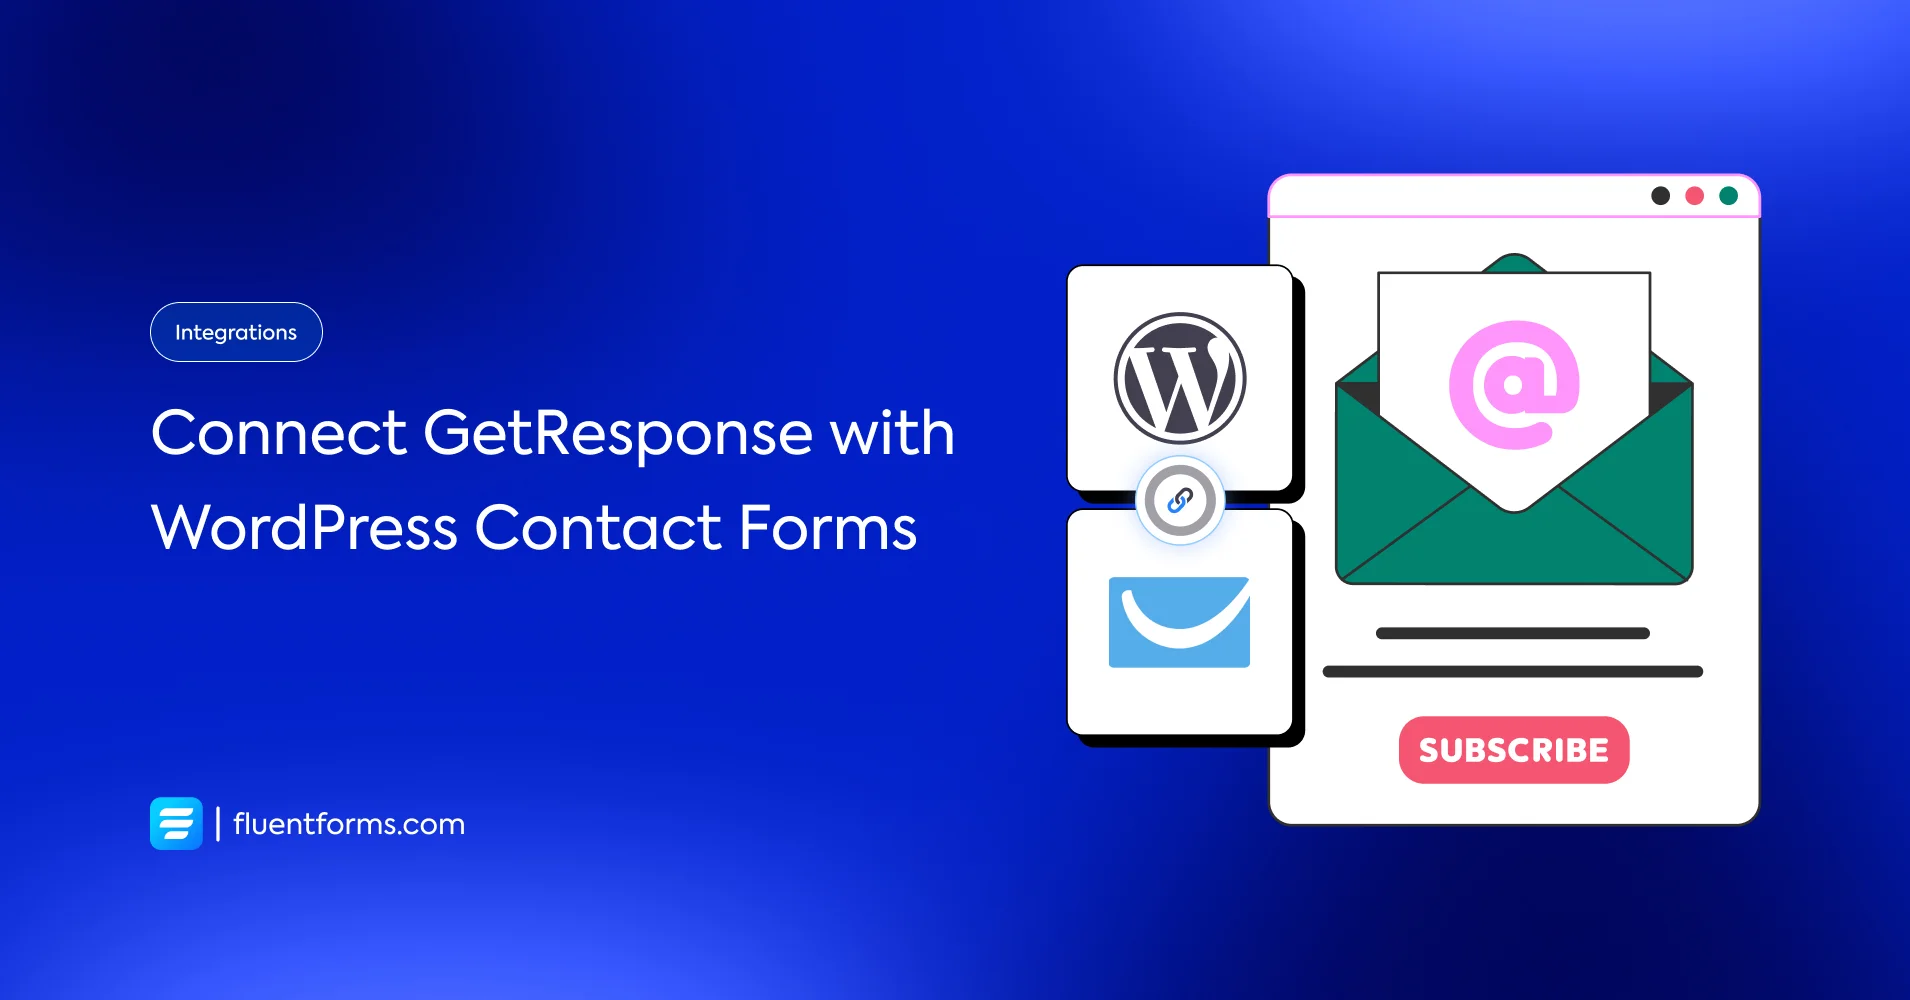
How to Skyrocket Your Email Success with GetResponse Integration
Email marketing is an indispensable part of almost all digital experiences. Whether you run an online store, a travel agency, a health institute, or even a personal blog, promotional emails are synonymous with digital growth.
So, if you are on the sending end of it, you probably know that there are a number of tools that go into work. One such tool is GetResponse.
Also, if you are new to this, these email marketing standard practices will ensure a better email marketing campaign.
GetResponse

It is a complete marketing platform that provides marketing solutions like landing pages, CRM, advanced automation, email marketing, etc. From simple tools to advanced features, GetResponse covers a wide range of functionality, and this puts them ahead of the game.
It is an incredible choice if you want to scale your business. Whether you’re looking to increase sales for your business or automate your email marketing campaigns, GetResponse has something for everyone.
Why Fluent Forms
Fluent Forms is one of the best contact form plugin for WordPress. It lets you create excellent forms for your WordPress website. It provides a ton of fantastic features to meet your data collection and lead generation requirements.
Fluent Forms allows you to design a wide range of forms, from simple contact forms to more advanced payment forms.
The key features of Fluent Forms are –
- 60+ input fields to collect any type of information
- Numeric calculation to create forms with calculators
- Multi-step forms to break long forms into multiple steps
- Conversational forms to provide a better form-filling experience
- Advanced post creation to collect user-generated content
- Conditional logic to show/hide input fields based on user behavior
- Integration with popular payment gateways to collect payments and donations
- Spam protection using hCaptcha, reCAPTCHA, Turnstile, Honeypot, Akismet
- Quiz and survey with advanced scoring
- Advanced form styler to align form with your brand identity
- Custom CSS and JS to create more advanced forms
- Export entries in CSV, Excel, ODS and JSON format
- PDF add-on to turn form submissions into PDF files
- Form scheduling and restriction based on different rules
- Double opt-in confirmation to ensure efficient data collection
- Email notification after form submission
- Conditional confirmation to show confirmation messages based on predefined conditions
- Advanced form validation to accept eligible submissions
- Fully responsive and accessible to ensure inclusivity
- 55+ integrations to expand core functionalities
Currently, more than 500K websites use this form builder plugin, and the number is constantly growing. Although the free version of Fluent Forms can handle most of your basic needs, the Pro edition further pushes the limit.
Integrate GetResponse with Fluent Forms in 5 steps
To integrate GetResponse with Fluent Forms, you have to follow the steps below –
1. Subscription form
2. Enable GetResponse integration
3. Create a GetResponse feed
4. Email notification
5. Embed form
These steps are elaborated for you below.
Step 1: Subscription form
Subscription forms are vital to an effective email marketing campaign. They help significantly in collecting emails that are paramount to a successful email campaign.
Here, we will show you how to create a form using WordPress form builder – Fluent Forms.
Simply head to the Forms section from your dashboard and click on the Add New Form button. Several templates will appear in front of you. Click on the Newsletter form, and you are good to go.
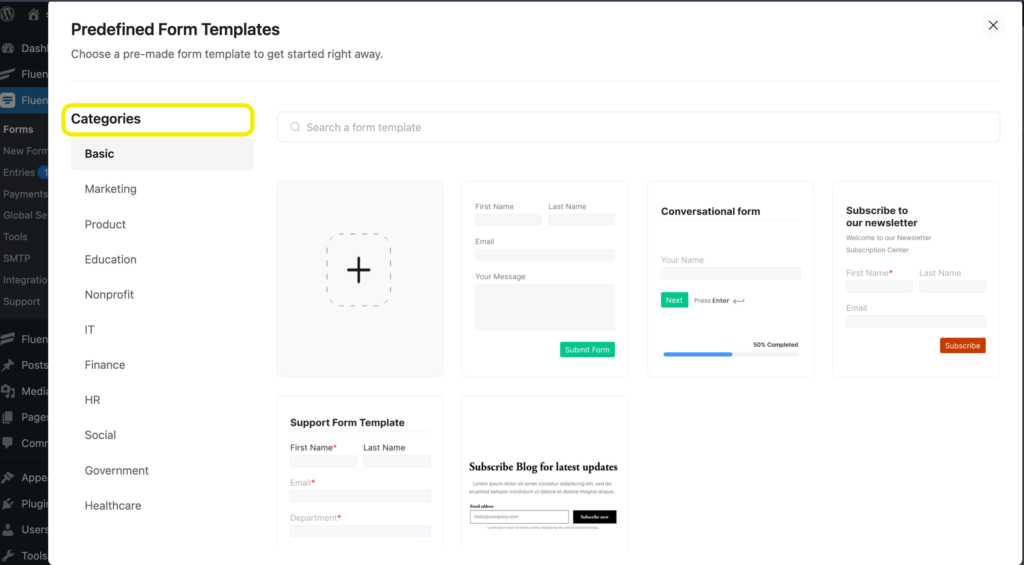
The newsletter form contains relevant fields like name, email, comment, ratings, etc. But if you feel like configuring it, go on ahead and add or deduct any field you need.
Finish other necessary steps like renaming the form, stylizing it, etc. Adding a GDPR field is a handy practice for email collection.
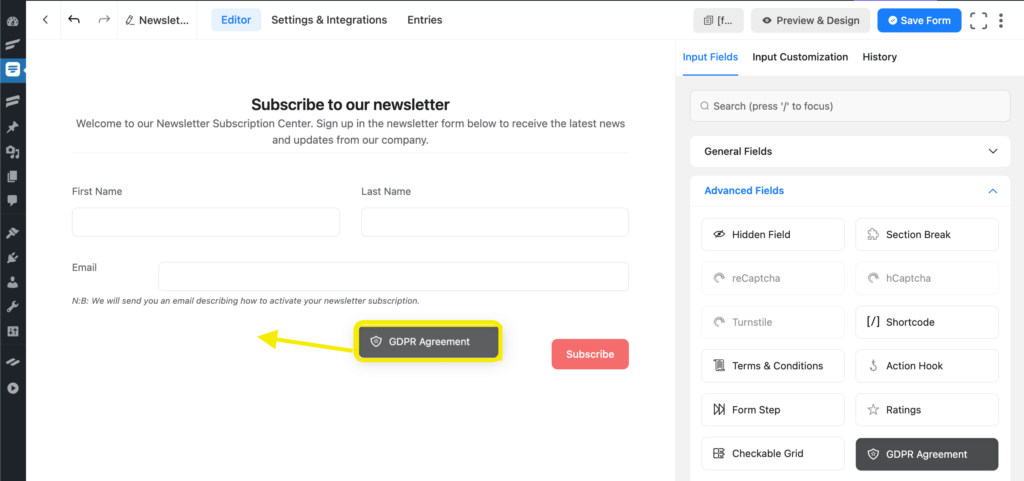
Word to the wise, keeping up-to-date with the best practices for GDPR compliance is always a practical step.
Build Smarter Forms for Free

Step 2: Enable GetResponse Integration
Now, you might have the perfect form for email collection. But the form, on its own, is not enough. You will need to connect it with GetResponse.
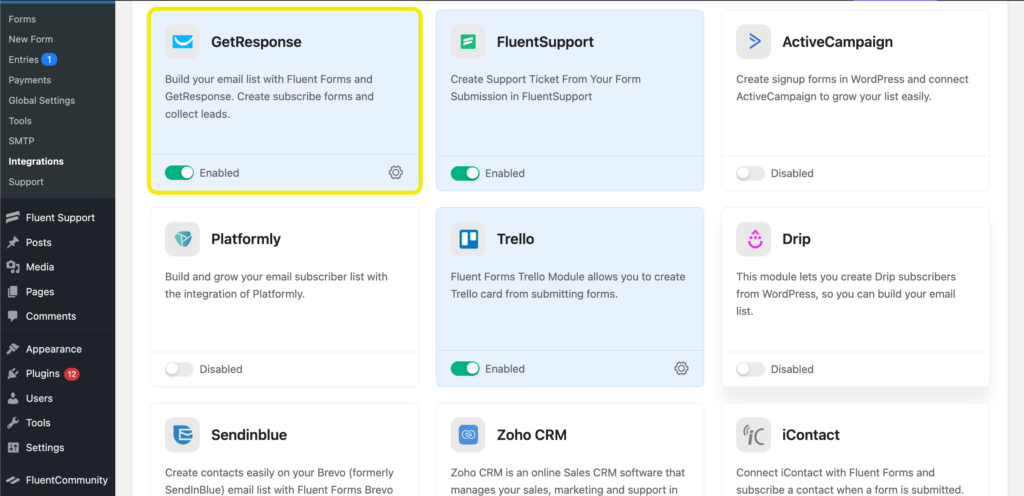
To do that, head to the Modules tab of Fluent Forms. All the available integrations appear here. Scroll down to GetResponse integration and toggle on the Currently Disabled button to activate GetResponse.
Now, head over to the Global Settings of Fluent Forms. You’ll be asked for your API Key. You can obtain them from your GetResponse account. Log in to your GetResponse account and go to the account settings.
If you do not have a GetResponse account, you can create one here.
Click on the menu icon and go to Integrations & API. Now, click on API from the sidebar.
If you do not have an API Key, you can generate one by clicking on the Generate API Key. Simply name the key and click to generate.
Copy the API Key and head back to the Fluent Forms dashboard. Paste it on the GetResponse API Key field and remember to click on the Save Settings button.
Step 3: Create a feed
To create a GetResponse feed, get back to your subscription or newsletter form. Go to the settings of the specific form you intend to use.
From the Settings & Integrations tab of the form, go to the sidebar, and select, Configure Integrations. On the top-right corner, there’s a blue Add New Integrations button with a chevron down icon.
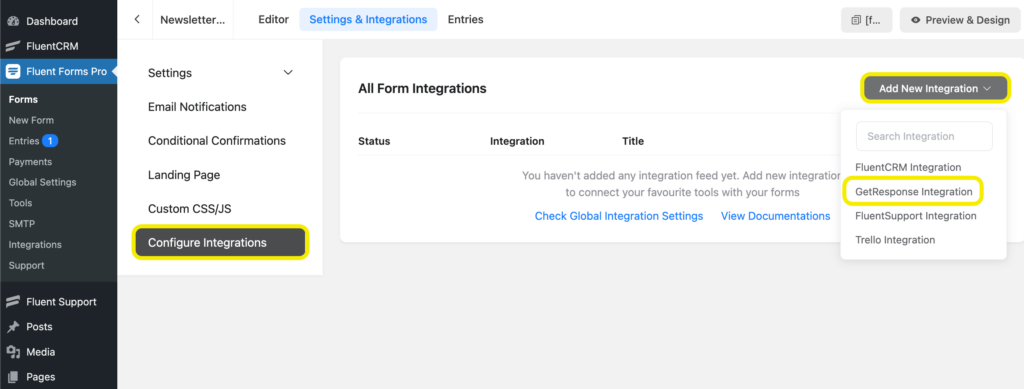
Click on the button to see the full dropdown menu. Select GetResponse.
Next, click on the Create Feed button. If you wish, you can rename it. Then, choose your GetResponse list. If you do not have a preexisting list or a preferred list, click on My First List.
Step 4: Email notification
Enabling email notifications can help you broadly stay in touch with your campaign. Every time someone fills out a form, you will get notified via email. Additionally, if you want to include other team members for exceptional cases, apply simple conditional logic, and the emails will be forwarded.
To set up email notifications, go to the Settings & Integrations tab, and from the sidebar, select Email Notifications. Click on the Add Notification button on the top right corner.
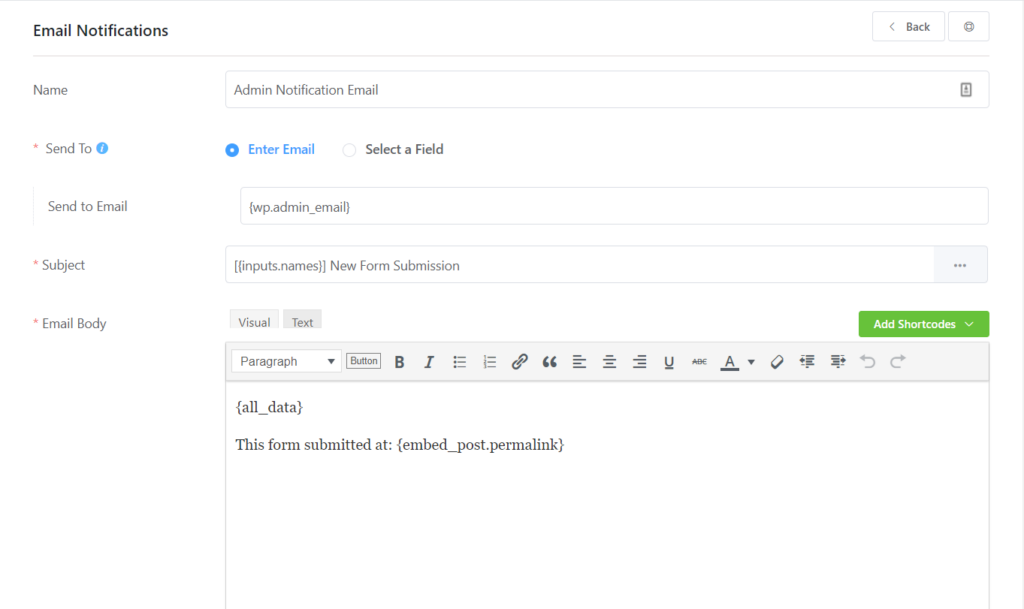
You can now name the notification to separate it from the others and then select where you want your email delivered. You can provide another email address or a field and even configure routing.
Next, define the subject line of your email and compose the email body. You can add media and even buttons. If you wish to edit in HTML, you’re welcome to do that too. In addition, you can also include shortcodes so you can fetch factual data from the form.
Then comes conditional logic. Frequently, emails need to be forwarded to specific departments depending on their contents. You can remove extra steps and forward them directly using conditional logic. Set the conditions, and you are good to go.
Lastly, select the BCC and CC and other essential details in the advanced panel. And don’t forget to hit the Save Notification button.
Step 5: Embed form
Now that you are done with your subscription form and GetResponse activation, it’s time for the finishing touch. Embed your subscription form on posts, pages, and even as sidebar widgets. Research the best position for your form and embed it.
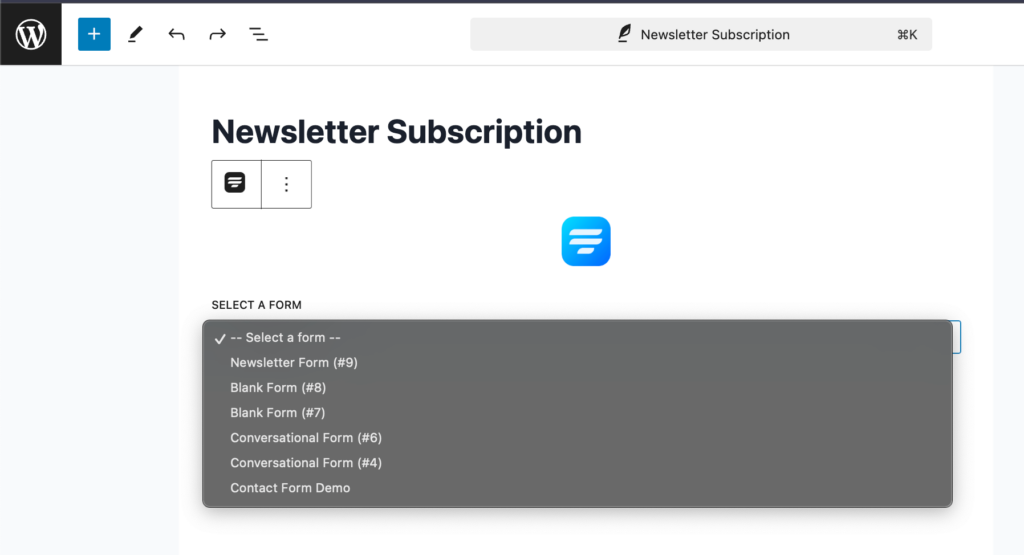
To do that, head back to the post or page you want to add the form to. Click Posts » Add New from your dashboard to edit. Scroll down to the section where you want your subscription form and click on the ‘+’ icon. Select the Fluent Forms logo, and a modal box will be attached to your editor.
Next, choose the form from the dropdown menu. Renaming form in the first step helps you here in distinguishing it from all the forms you have created.
And you are done! Your GetResponse subscription form is good to go. Now that you know how to create and embed a newsletter form, it might be time to get a few tricks on how you can reduce unsubscribe rates up your sleeves.
You can also check out a graphic video tutorial to make things easier.
Related resource: GetResponse integration with Fluent Forms documentation.
60+ Third-party Integrations
Expand your form functionality with seamless integrations.


Mahiyath is a digital marketer for Fluent Forms. She likes to explore through the alleys of WordPress and learn about the themes and plugins, currently specializing in WordPress forms. When she’s not doing that, she’s planning her next adventure.


Leave a Reply