How to Connect ChatGPT with Fluent Forms (Create Forms using Prompt only!)
We, the Fluent Forms introduced OpenAI’s ChatGPT connection in our latest 5.1.18 plugin update. It’s a long-awaited feature, and our users have been suggesting this for a long time. Our developers have been working relentlessly on ChatGPT integration for the last few months. We wanted to make it bug-free and easy to use; that’s why it took time to ship the integration.
How does the ChatGPT Fluent Forms integration work?
ChatGPT integration with Fluent Forms works in two ways. After integrating with your OpenAI API, you can –
1. Create forms by providing written prompts describing what kind of form you want to build and what form fields you want to include in the form.
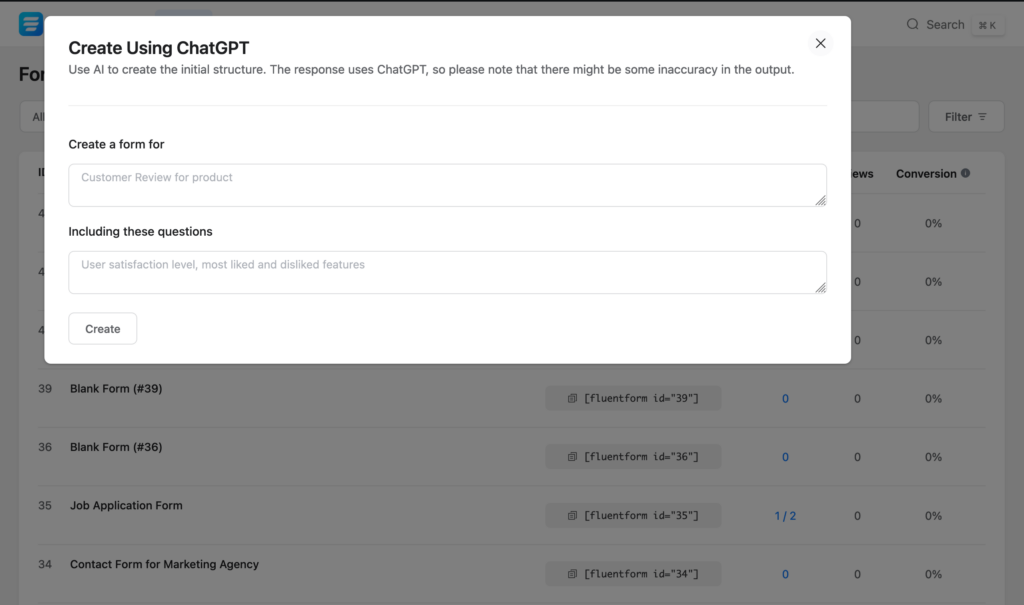
When you click Create, ChatGPT will automatically create your desired form with your expected form fields. Now you can customize the fields as you wish without having to start from scratch.
2. When a user submits the form, you can customize your confirmation message using ChatGPT. You can define any form filed and command ChatGPT to generate any response or message you want to show to your end user.

This is a great way to keep the user engaged with your form even after they finish filling up the form and click submit.
These are two ways you can use the ChatGPT integration with Fluent Forms for now. We are exploring other ways to expand the integration.
Do you know? In our Fluent Forms 6.0.0 update, we introduced a full free ‘AI Form Builder“! If you are only using Fluent Forms free version, now you can use AI to build forms without the ChatGPT integration.
How to connect Fluent Forms with ChatGPT?
Follow these simple step-by-step instructions to connect your Fluent Forms Pro with ChatGPT –
STEP ONE
First, you need to enable the ChatGPT integration from the Fluent Forms Integration setting.
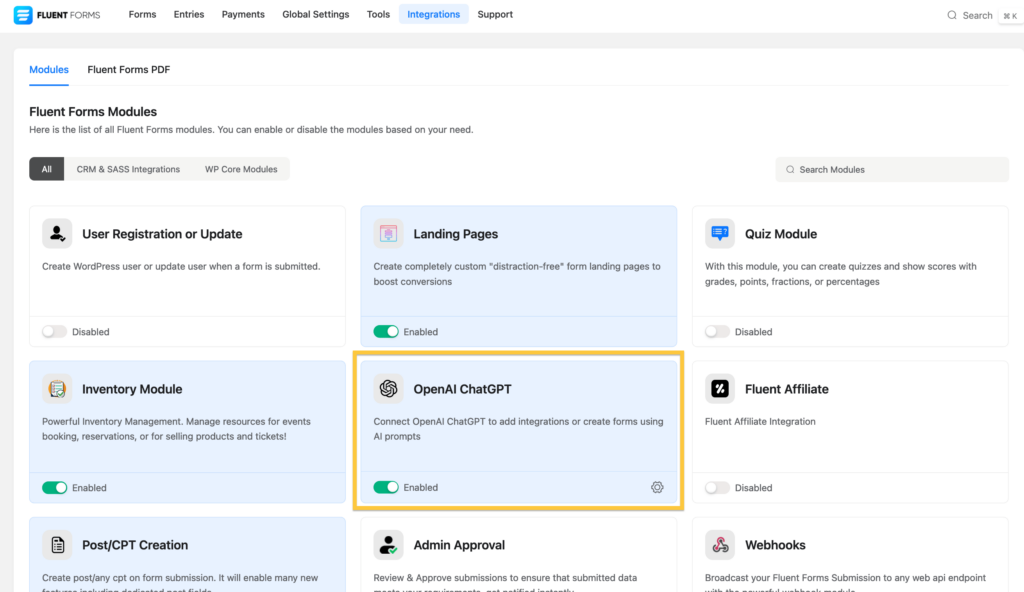
Click the setting icon, it will proceed you to the OpenAI ChatGPT integration’s settings page.
STEP TWO
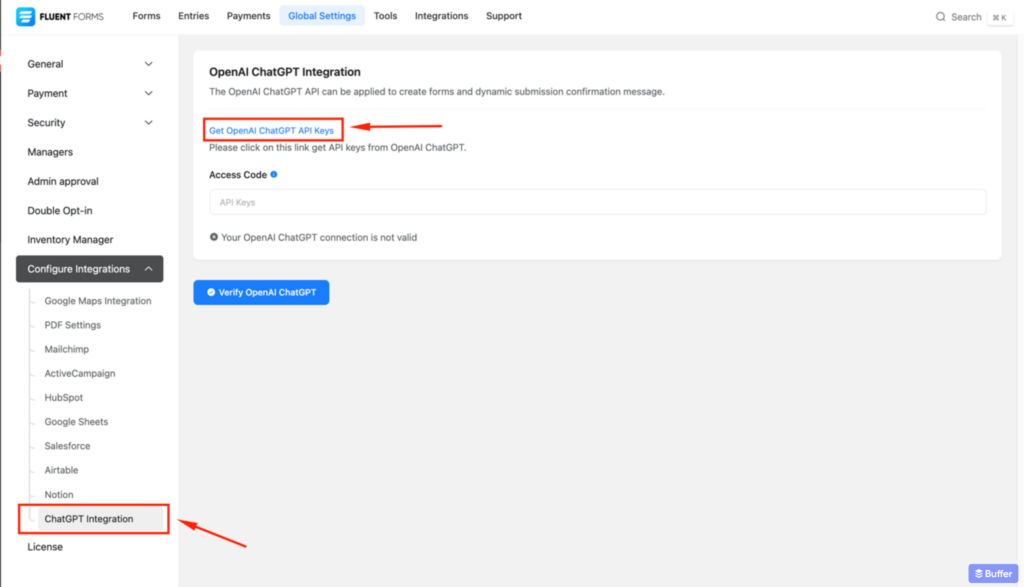
This is the page where you need to provide the OpenAI API keys under the Access Code field. When you provide the keys and click verify, ChatGPT integration will go live.
STEP THREE
Okay, now you might ask – where can I find the OpenAI API keys?
Here’s how – When you click the Get OpenAI API keys, it will send you this page.
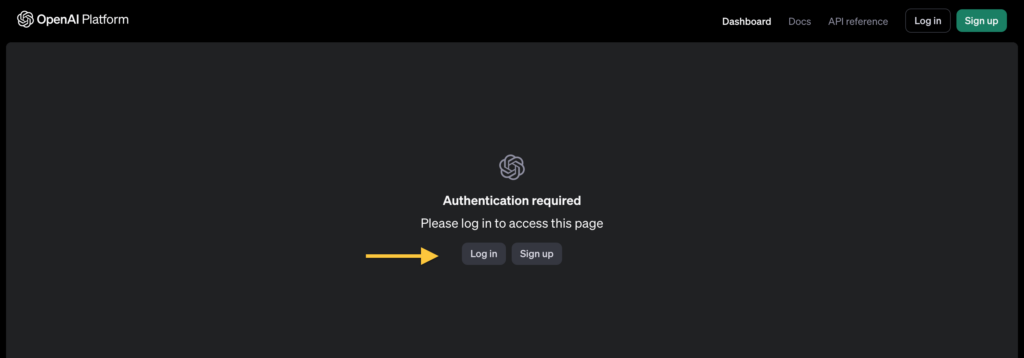
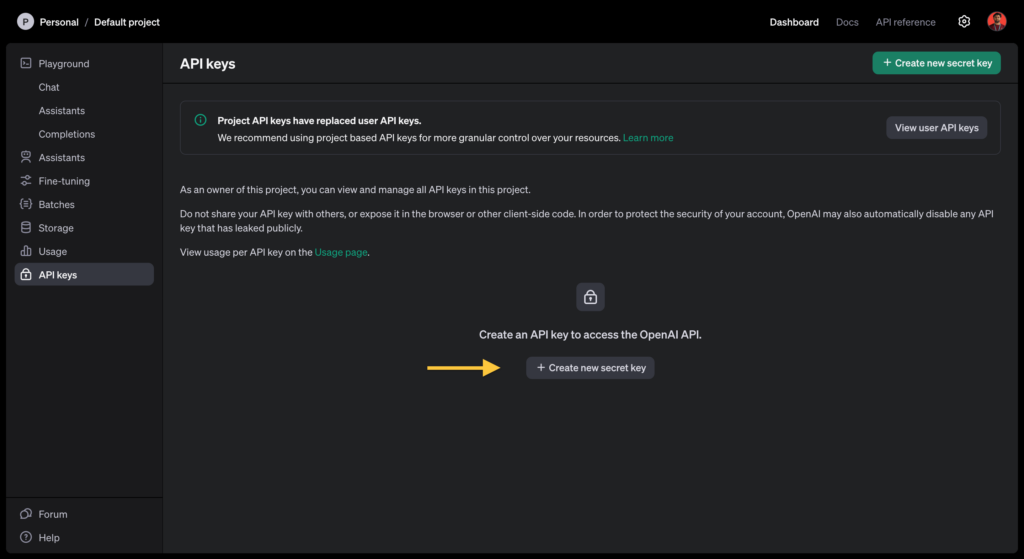
Log in, and click Create new secret key.
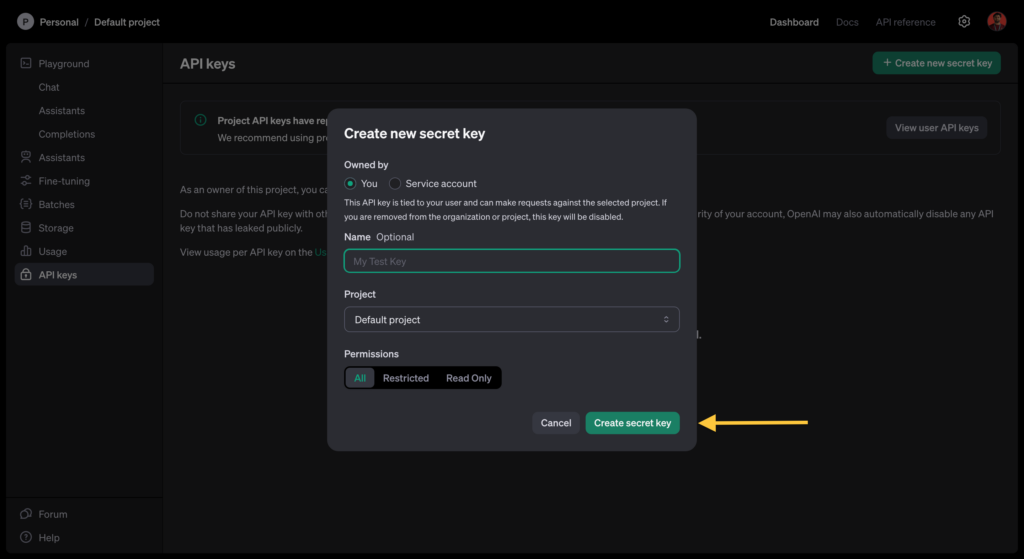
Provide the necessary information here, and click Create secret key.
You’ll get your secret key in the next window.
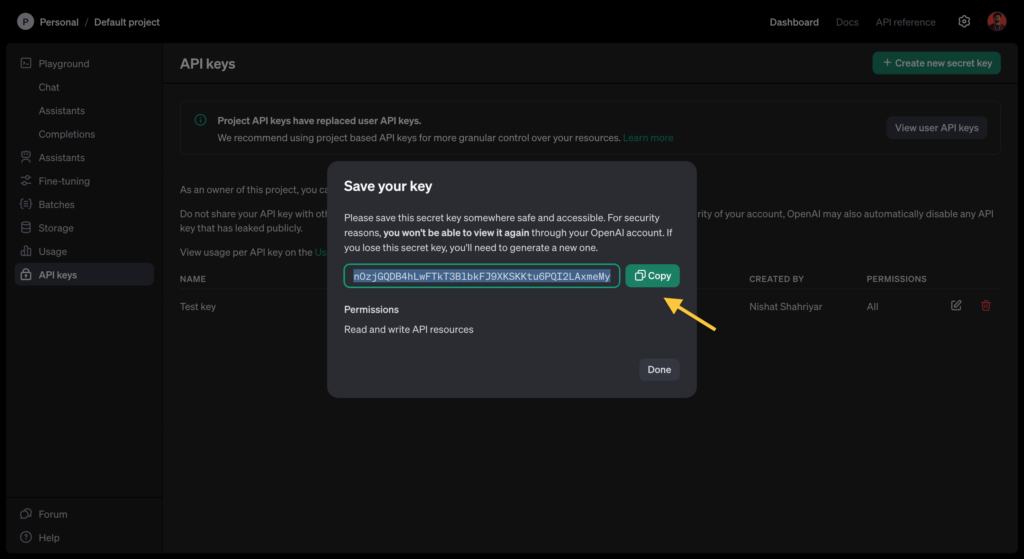
Copy that secret key and paste it on the previous ChatGPT integration setting page’s Access Code field.
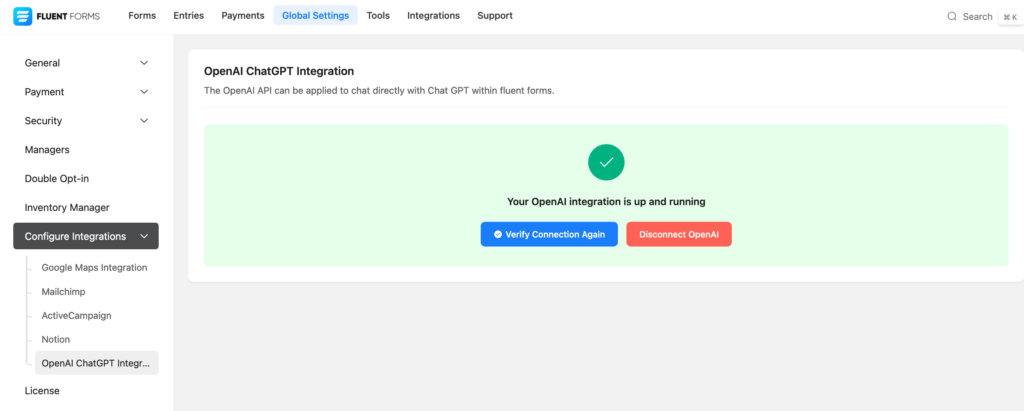
DONE!
Your Fluent Forms Pro is now connected with OpenAI’s API.
If you want to speed up your learning, watch this video from our official YouTube Channel:
How to create a form using ChatGPT prompt
Now that ChatGPT integration connection is running smoothly, let’s create your first form using ChatGPT.
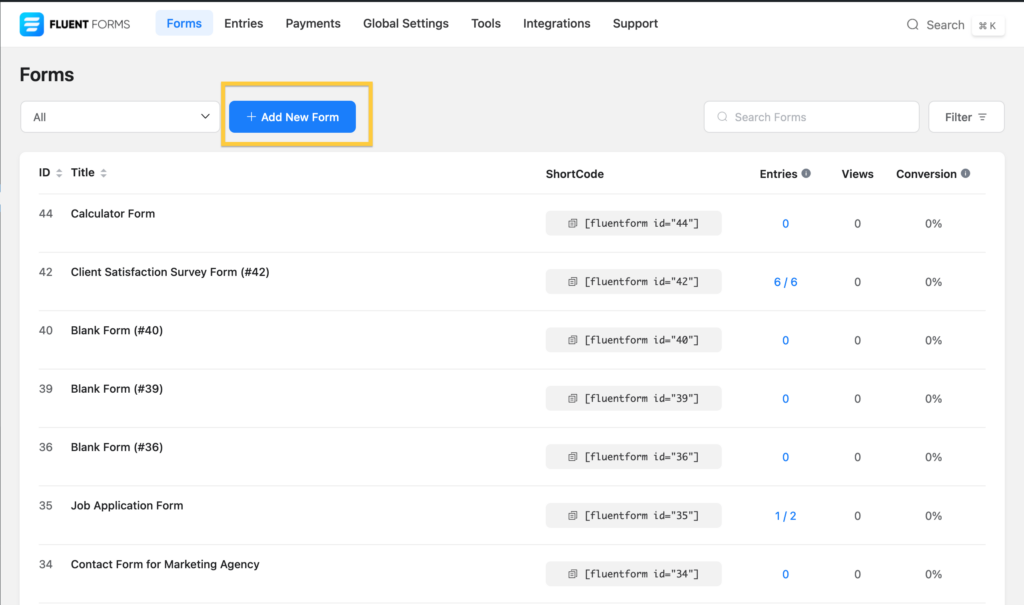
From the Fluent Forms dashboard, click the Add New Form blue button.
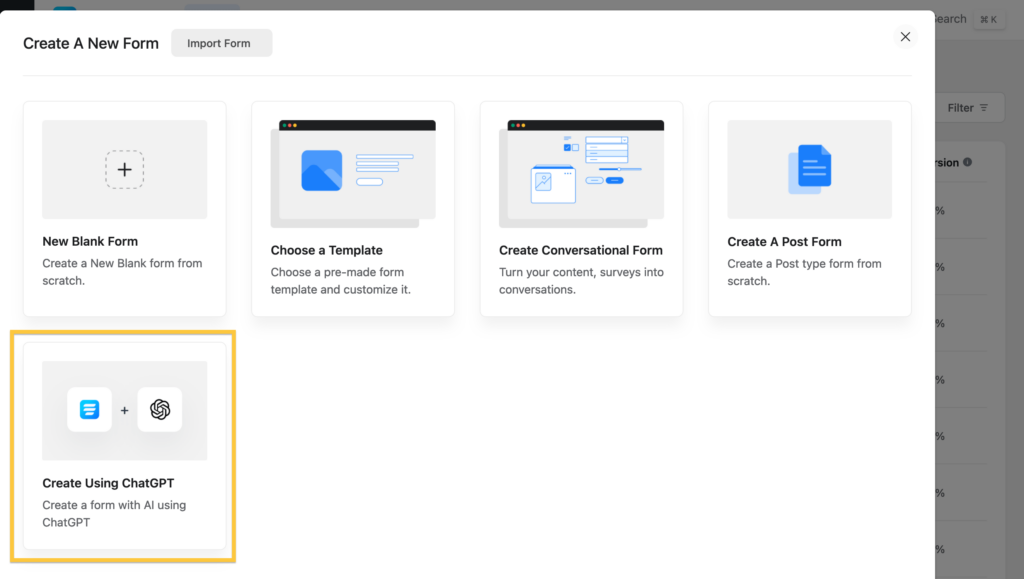
A new pop-up will show up, click the ChatGPT module here.
Define what type of form you want to create on the Create a form for and provide detailed prompts in the including these questions filed.
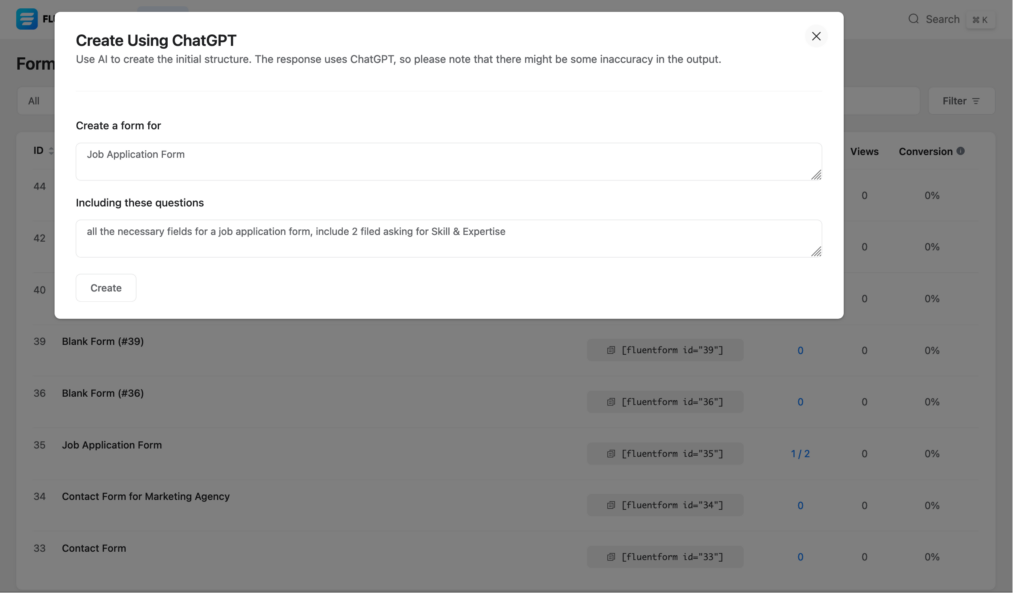
Click Create, and ChatGPT will generate the form with all necessary fields. Now you can customize or remove the fields as you wish.
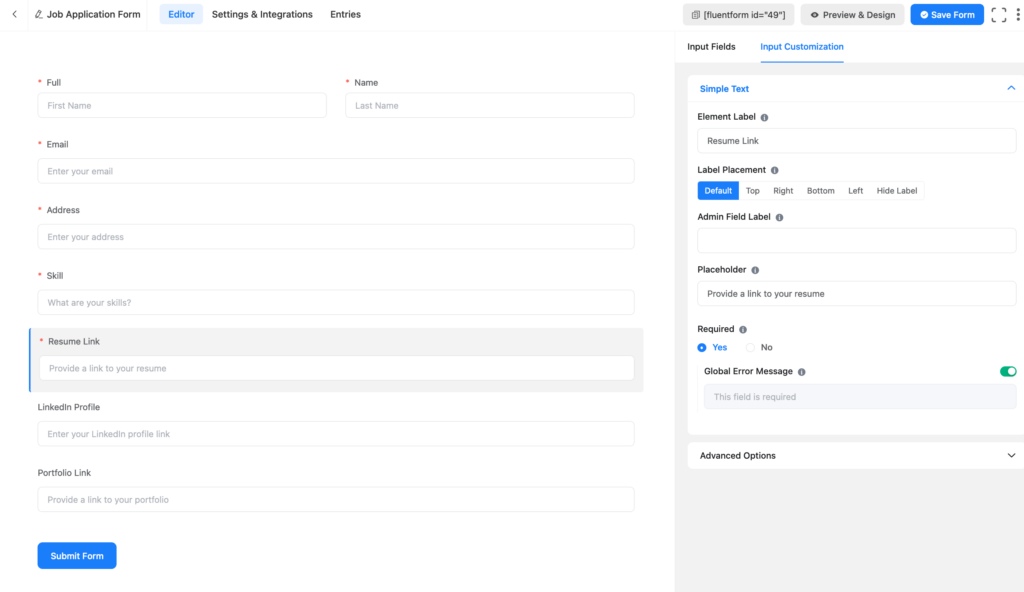
Here, you can see we created a job application form using the prompts we provided. ChatGPT came up with related form fields, which we can customize and edit.
How to customize form confirmation message or send email using ChatGPT
You nicely created a form using ChatGPT, now the next step would be to customize the confirmation message and email using ChatGPT. This will work after a user submits a form.
To achieve this, you need to set up OpenAI ChatGPT integration feed for the forms you want to show confirmation messages or emails and create shortcodes.
You can create multiple ChatGPT integration feeds inside one form and you don’t need to create forms using ChatGPT. Normal forms without ChatGPT can also add a confirmation message or send email using the ChatGPT integration feed. All you need to activate it through that form’s integration settings.
Here’s how you can do this –
STEP ONE
Go to the Fluent Forms dashboard, select any forms you want, and click the settings of that form.
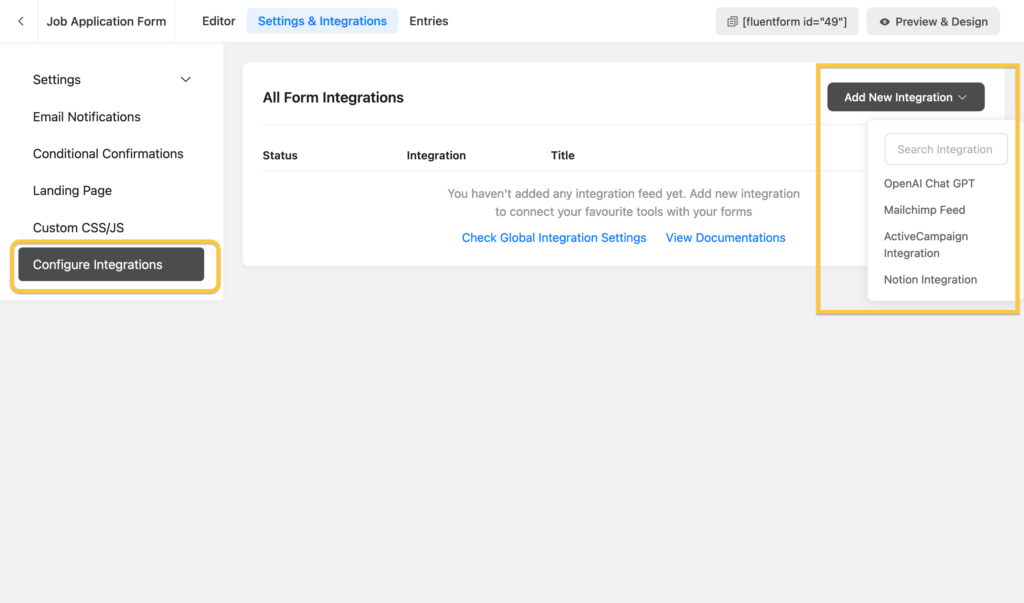
Click Configure Integration, then click the Add New Integration. Here choose OpneAI ChatGPT.
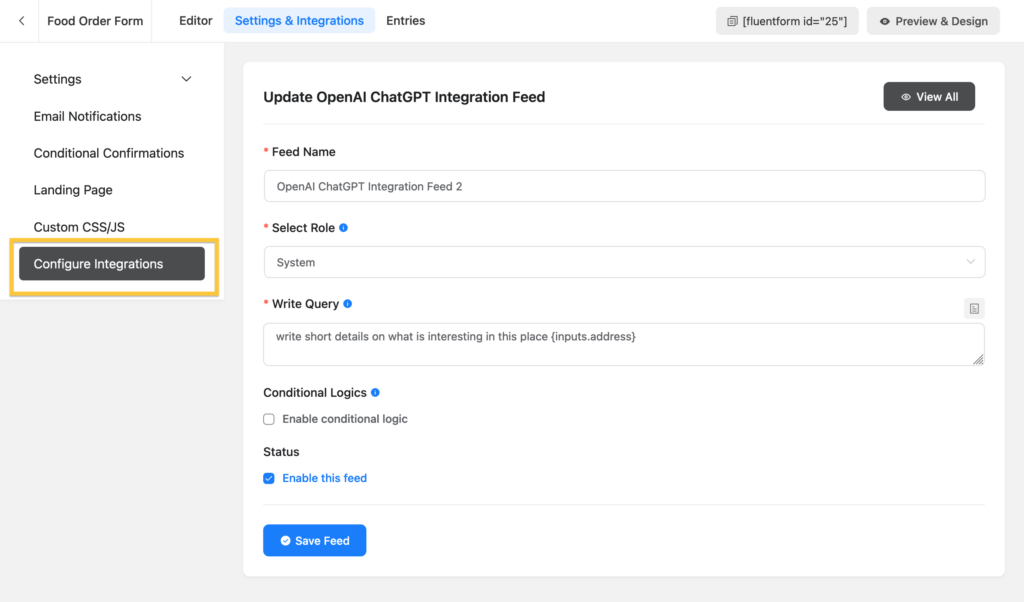
STEP TWO
Provide all necessary info here. Please don’t provide any sensitive information if you don’t want to pass to ChatGPT. You can follow our documentation for this section to understand more about these fields if you want.
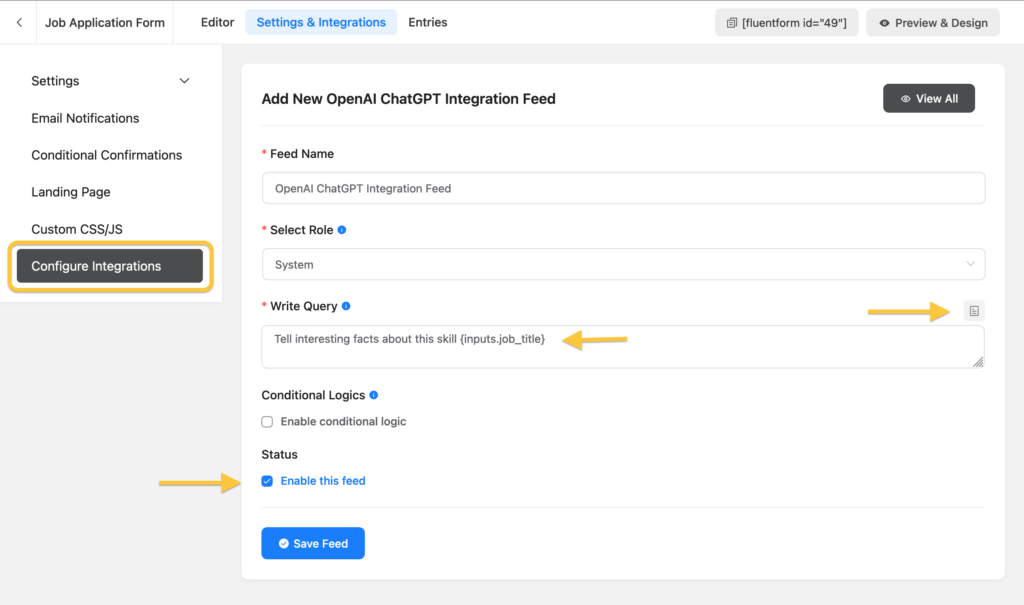
We need you to focus on the Write Query field. Here you can define what field ChatGPT should take and generate a message for your end user. You can define multiple fields and show multiple messages for your user.

STEP THREE
After setting up the ChatGPT integration feed, it’s time to create the shortcode and add them to your form confirmation settings.
From your form settings, Click Confirmation Settings and then Add ShortCode Dropdown.
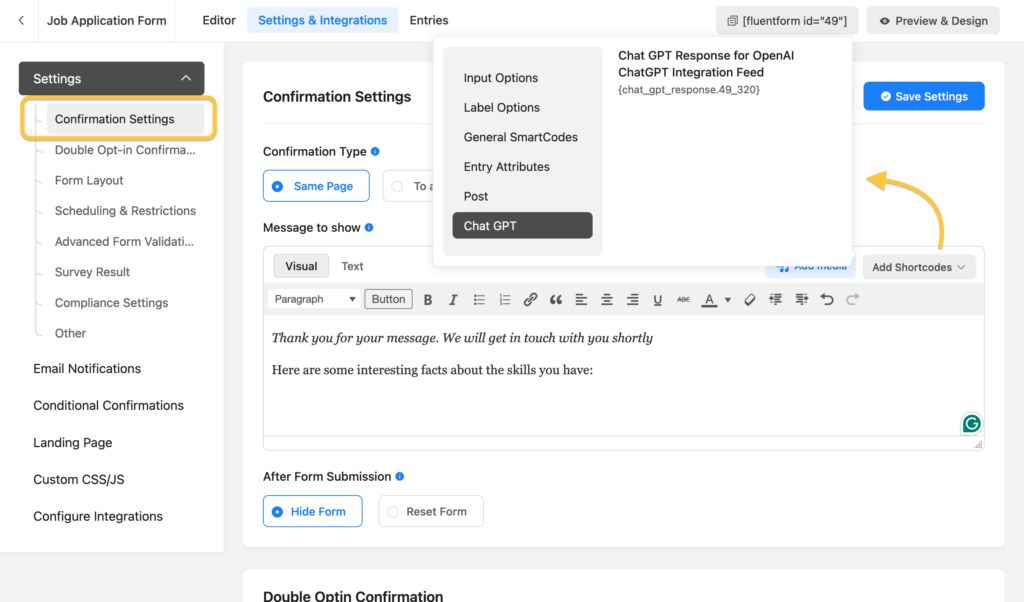
Select ChatGPT, and you will see the OpenAI ChatGPT integration feeds you created. Select your desired one, you can use multiple as you wish.
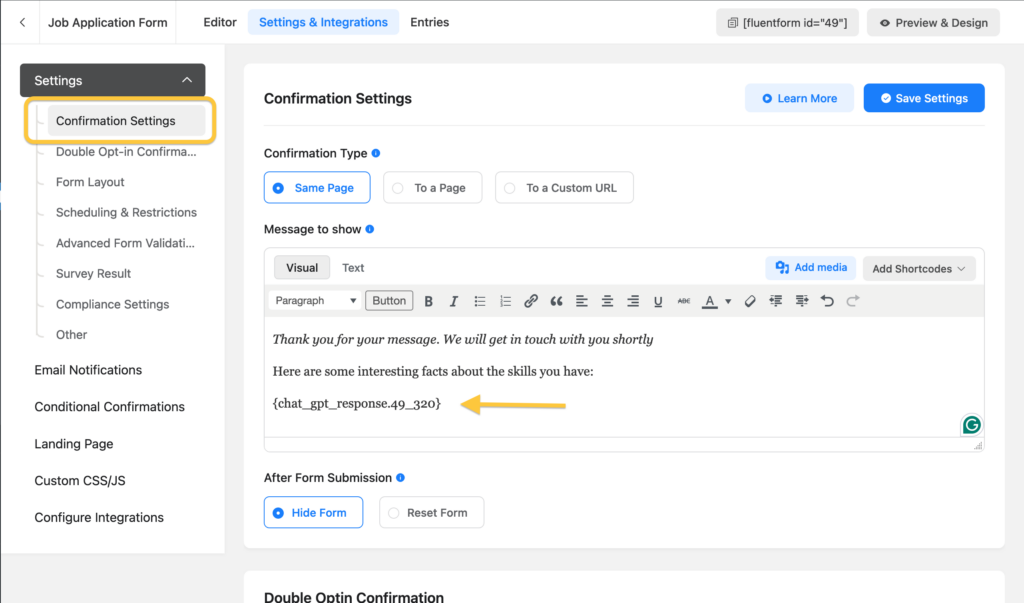
After clicking Save Setting, the confirmation message will go live on that form. So every time someone submits the form, chatGPT will generate your preferred message based on the fields you selected on ChatGPT integration feed settings.

Using the Chat GPT Feed’s shortcode, you can send the Confirmation message after Submission through Email Notification or PDF Feed as well.
Wrap Up
We plan to improve ChatGPT integration with Fluent Forms further. Please, feel free to send us your suggestions and ideas. You can also show us how you are using the integration on our Fluent Forms’ Facebook community.
Fluent Forms team is working on improving our integration modules regularly. If you face any problem integrating, please open a support ticket here, our team will reach you in 24 hours.
I am a Full Stack Product Marketer by day, a Content Creator by night. My passion is Content Marketing through strategy, content creation and 360-degree customer experience. I love exploring new ideas and meeting new people who are always curious. I love spending time with my family when I’m not writing or exploring what’s new in tech.
One response to “How to Connect ChatGPT with Fluent Forms (Create Forms using Prompt only!)”
-
Nice feature 🙂
Is there any options to beautify the output from the chatgpt? from the example above, there is no line break 🙂
Thank you
Regards





Leave a Reply