
How to Integrate Salesforce in WordPress Contact Forms

Form builders and CRMs, or Customer Relationship Management tools, are a match made in WordPress heaven. By integrating the two, you can get a whole lot done. For instance, you can have both lead generation and contact management in a single interface.
We will show you how to integrate Salesforce with WordPress form builder Fluent Forms in just five simple steps to show you how it can be done more efficiently. But before we get to it, a little intro.
This is the way to integrate Fluent Forms with Salesforce via Zapier. But with the latest update, you can easily add Fluent Forms with Salesforce without any third-party tool.
Fluent Forms
The fastest and the most lightweight WordPress form builder plugin, Fluent Forms also delivers when it comes to proficient features. Even the free version, is packed with unique functionalities that can help a user accomplish even advanced tasks like multi-column layout, interactive conversational forms, etc.
Not only that, Fluent Forms is very easy to navigate. This makes it possible for everyone to get their job done on their own, regardless of their coding skills. Moreover, an upgrade to Fluent Forms Pro will unlock features like:
- Double opt-in
- User registration
- Advanced post creation
- Payment fields
- Step forms
- Advanced form validation
- Zapier integration, etc.
Salesforce
Salesforce is a leading CRM that can help your marketing, sales, commerce, IT team, etc., come together as a team, no matter where they are working from. It offers an integrated CRM platform so that you can have a strong hub of connected apps.
This cloud-based tool helps to better manage different departments such as marketing, sales, IT, support, etc., over the internet. While there is no Salesforce free version, it does provide some fantastic features on the paid version to make up for it:
- Contact management
- Task management
- Workflow creation
- Collaboration tools
- Opportunity tracking
- Thorough analytics, etc.
How to integrate Salesforce to WordPress
Fluent Forms doesn’t provide any direct integration with Salesforce presently. But that’s nothing that can stop Fluent Forms Pro users from using Salesforce integration. You can quickly whip up Salesforce to WordPress through Zapier, just as easily.
Zapier offers a workaround so you can connect your forms to over 3000 apps. This opens limitless possibilities, and you can get so much done. So what are you waiting for? Let’s get started.
To make sure you have Zapier integration, upgrade to Fluent Forms Pro.
Step 1: Create a zap
To kick-off, let’s go to the Zapier dashboard and follow the steps mentioned below.
- Notice a Make a Zap button on the left sidebar. Click on it.
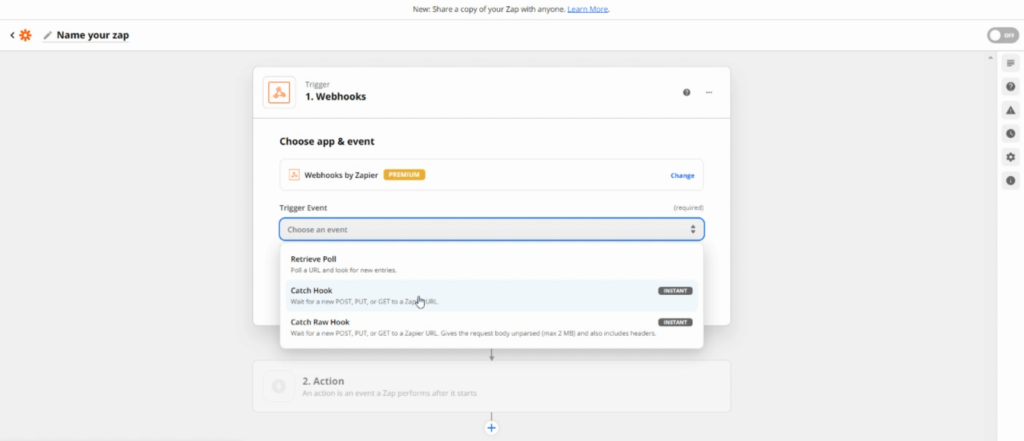
- A list of apps will appear, select the one you need to use as a trigger. Webhooks by Zapier, in this case.
- Now it’s time to select an event that will act as a trigger, Catch Hook, from the dropdown menu.
- Continue.
- Copy the Custom Webhook URL for future use.
Your Zap is ready to use.
Step 2: Create a Zapier feed
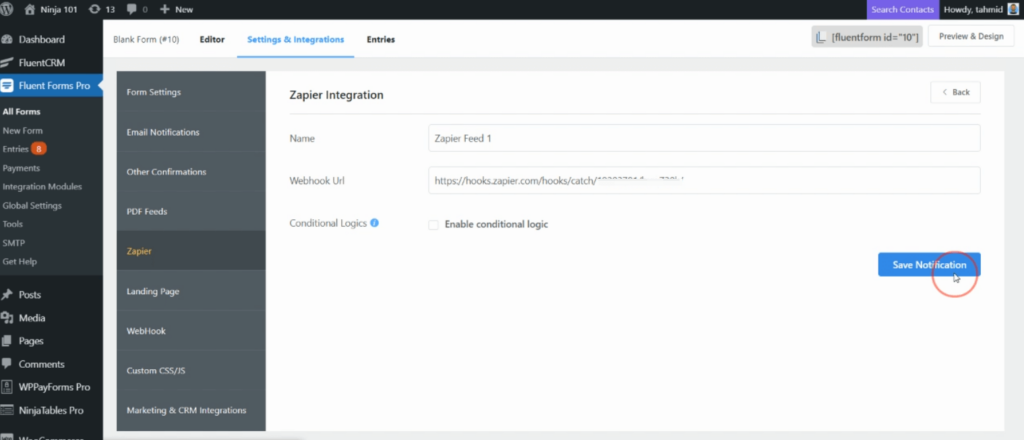
Moving on, it’s now time to create a Zapier feed. To do that, go over to your Fluent Forms dashboard. Open the form you need to integrate Salesforce to and go to the Settings & Integrations.
Select Zapier from the sidebar and click on the Add Webhook button. Here the Webhook URL you copied before will come in handy. Paste it on the Webhook URL field and Save Notifications.
Step 3: Test Zapier feed
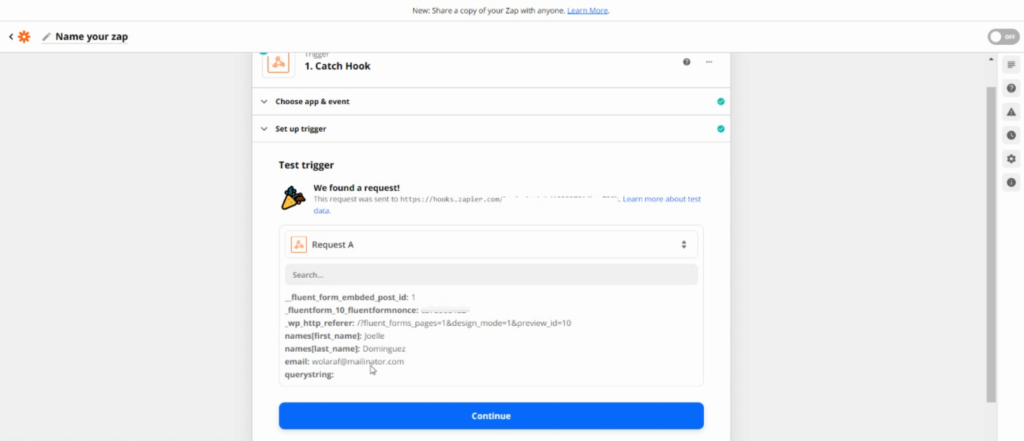
It is always a good practice to test after every step, especially so after creating a Zapier feed. It is critical to the procedure, so you will do well to test it before moving on to the next step.
In order to do that, head back to your Zapier dashboard. To refresh the page, hit Continue and fill out the form you have been working on. If the data appears automatically on your Zapier dashboard, then your Zap hook is working.
Step 4: Create a trigger
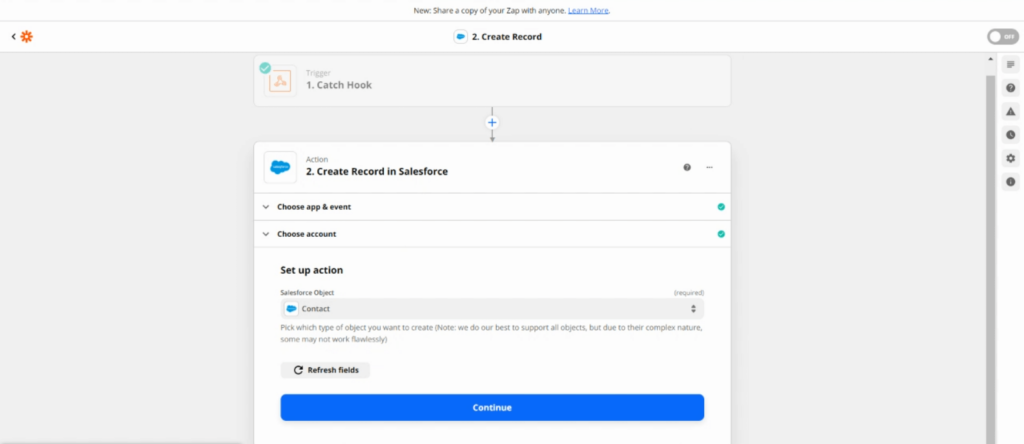
Moving forward, it’s time to set up a trigger. To do that, Continue from where you left off in the previous step and choose the Salesforce option in the search bar.
Next, it’s time to determine an Action. From the App Events option, choose Salesforce. As for Action Event, you can go with the Create Record and proceed to select your Salesforce account. If you do not already possess one, sign up.
Next up, it’s time to assign a value. There are many options that you can go with. We chose Contacts. After a quick refresh, a bunch of fields like Account, Last Name, Email, etc., will appear. It’s time to map them.
Notice that an additional task appears on your Salesforce dashboard. Don’t worry! This is to be expected. With each form submission, more such tasks will appear, and they will provide details about each entry.
Step 5: Turn on zap
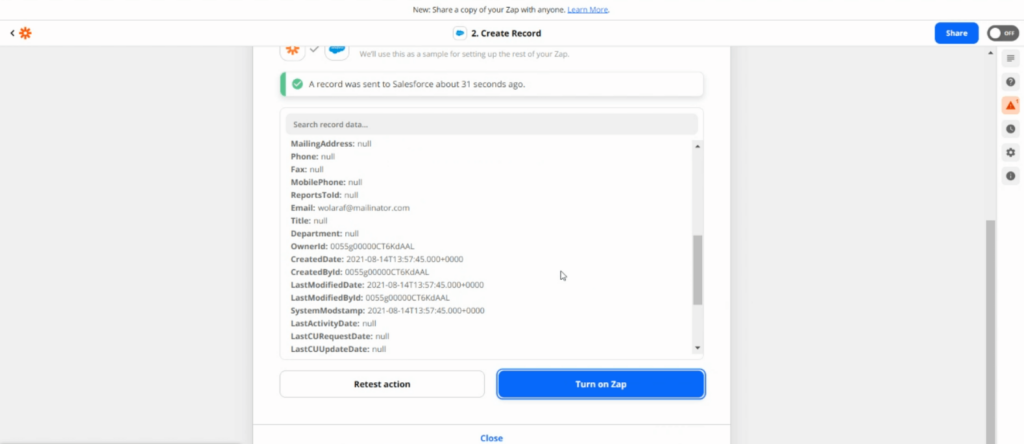
For the integration to work, you need to turn on the zap. It will also enable you to view everything from a single page. To do that, Turn on Zap and click on the Go to my Zaps from the popup. And that’s it.
Salesforce integration summarized
If you had any doubts about Salesforce integration, we hope this blog was able to clear them away. Fluent Forms believes in effortless form creation. And the features are proof of that. Don’t believe us? Try it out yourself.

Mahiyath is a digital marketer for Fluent Forms. She likes to explore through the alleys of WordPress and learn about the themes and plugins, currently specializing in WordPress forms. When she’s not doing that, she’s planning her next adventure.


Leave a Reply