How to Use Rich Content Editor in WordPress

If you are someone who has to create content for your website regularly, we understand your pain. Writer’s block can appear as a real concern for you when it comes to content creation. Besides, managing enough time to generate new content may become challenging. Or, sometimes, you might want to introduce a whole new perspective to your website content.
You can reduce the burden of content creation by letting your guests post their content on your website. Developing a post-creation form that contains a rich content editor will allow you to do so.
And guess what? All this can be done without giving your guests access to the WordPress dashboard. Wondering how? That’s what we are going to show you in this article.
What is a rich content editor?
First, let’s get introduced to the rich content editor.
A rich content editor is a visual editor that provides a toolbar with options to format your content. It is a WYSIWYG editor. WYSIWYG stands for “what you see is what you get,” which means that the way the content appears on your display is exactly what it will look like when published.
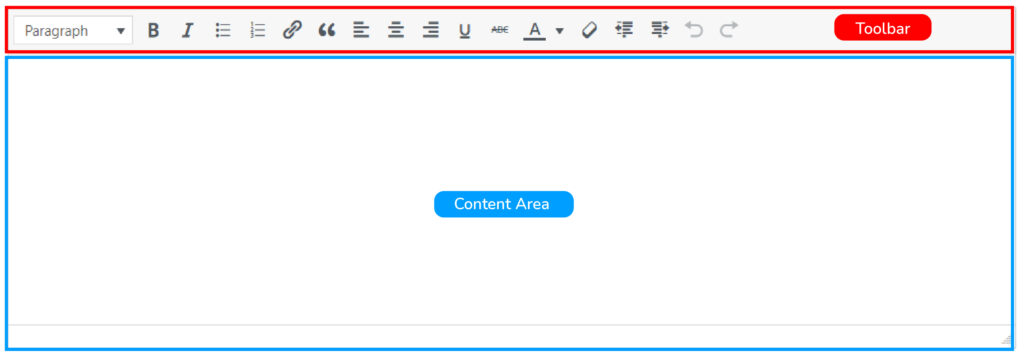
Rich content editor includes an area where you edit your content and a toolbar where you find all the tools to format the content. Typically, the toolbar allows you to —
- Insert links, images, media, and documents
- Format paragraphs
- Format texts
- Clear formatting
- Add tables
- Insert equations
- Embed media etc.
You can also access the tools using some keyboard shortcuts.
Rich content editor in WordPress
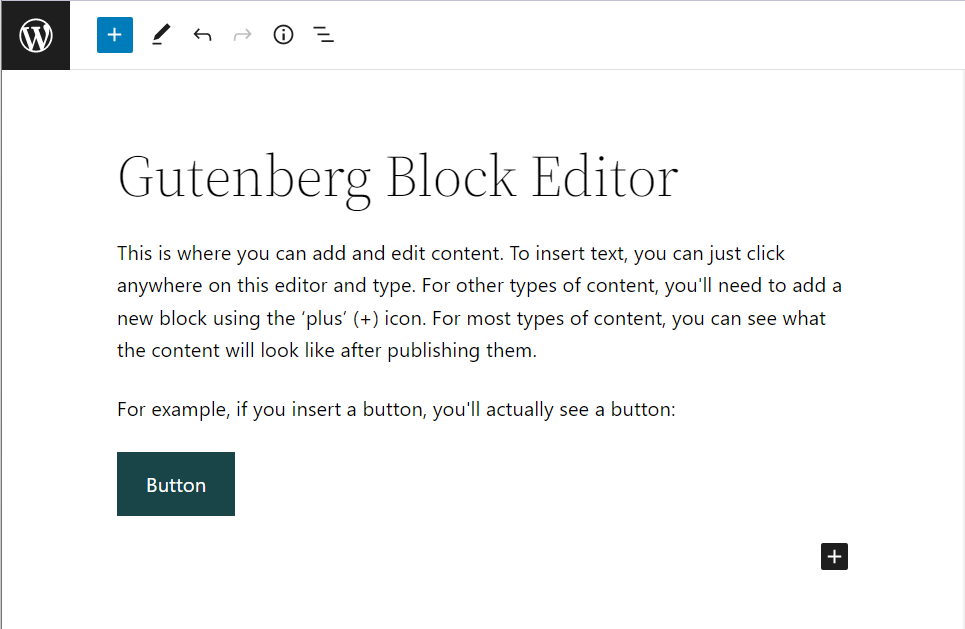
Rich content editor is widely used in WordPress. For example, the default WordPress block editor Gutenberg can be considered a rich content editor, which allows you to create a page or a post with blocks of rich content. The Gutenberg editor looks something like this —
Web forms can also contain a rich content editor to allow users to provide formatted form entries. Creating online forms for WordPress websites requires form-builder plugins. One such plugin is called Fluent Forms, which is, in fact, the most lightweight form-maker in the market. Fluent Forms is a drag-and-drop WordPress form plugin with tons of great features and functionalities. You can not go wrong with this plugin when it comes to designing various types of forms.
Fluent Forms offers a free version that is packed with the most essential features and functionalities to meet your everyday needs. But to get the best out of this crazy form-builder plugin, you need to upgrade to the Pro version.
Some of the features of Fluent Forms that make it stand out are —
- Fluent Forms is a drag-and-drop form builder plugin with a smooth user experience
- It has dozens of useful pre-built form templates for quick form building
- Conversational forms make Fluent Forms stand out
- You can use conditional logic for more control over your forms
- With Fluent Forms, you can use 45+ native integrations for additional functionality
- It gives you the ultimate freedom of using a multi-column form layout
- Fluent Forms has calculated fields for measuring numbers based on inputs
- The payment feature lets you accept payments from your clients in a seamless way
Fluent Forms offers a rich content editor that can serve various purposes. In this article, we will demonstrate the process of utilizing the rich content editor to allow users to publish their posts on your website. Also, we will show you how the rich content editor can be used in designing your form.
Let’s dive in!
Use rich content editor in form-building process
Fluent Forms offers a Custom HTML input field that lets you customize the form by writing your own HTML code. But if you are not very comfortable with HTML, there’s a visual editor for your ease. Once you have installed the plugin in your WordPress dashboard, hover over Fluent Forms Pro and click on New Form. You will see a form editor window similar to the one below.
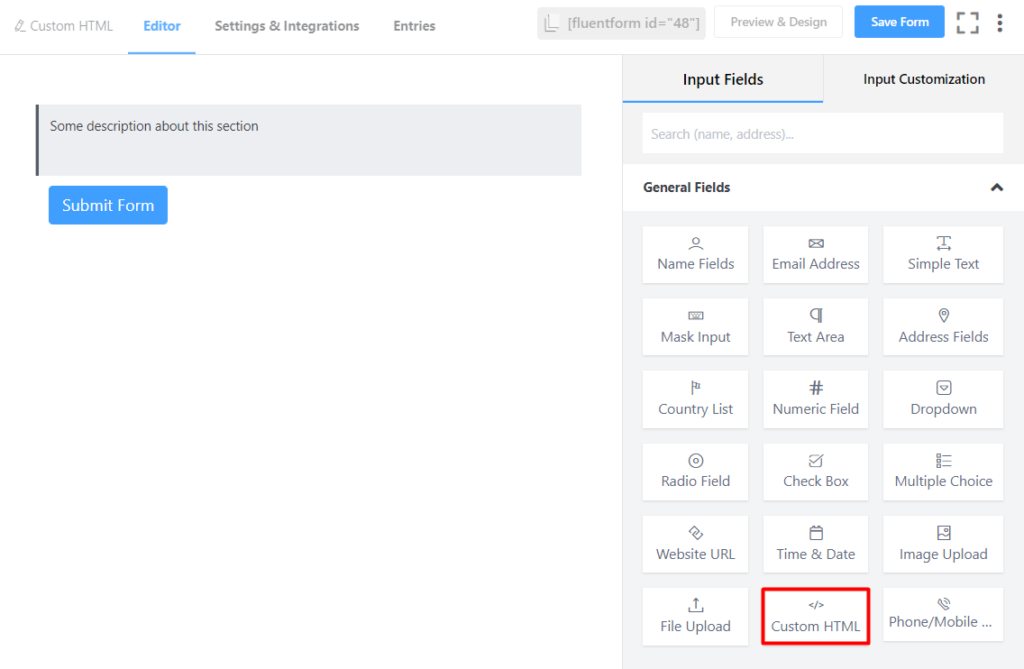
Here you can add necessary fields to your form. There is an input field named Custom HTML under the General Fields tab. Add this field to customize your form by using HTML.
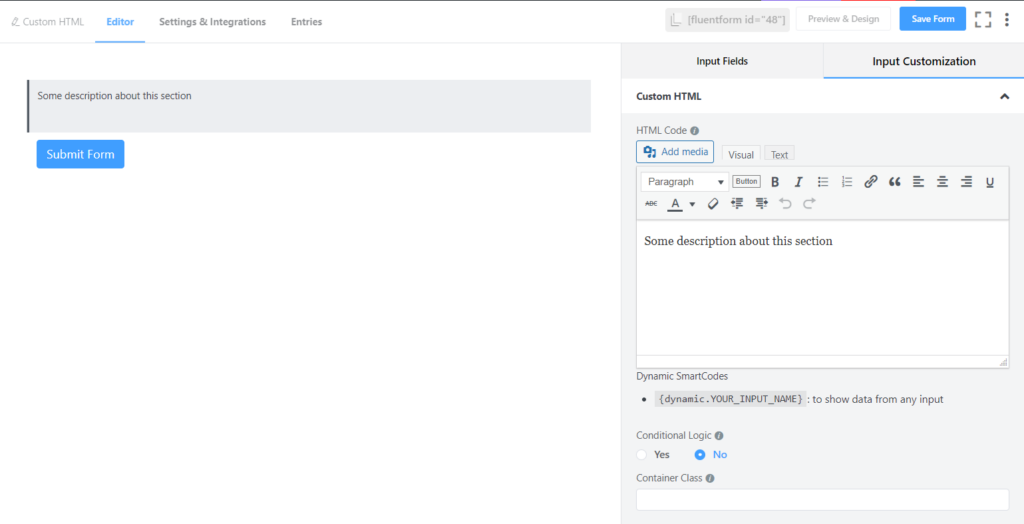
Once you click on the added field, you will get different customization options. You can use either the Visual or the Text editor. There is a toolbar with various tools for formatting the text as you require.
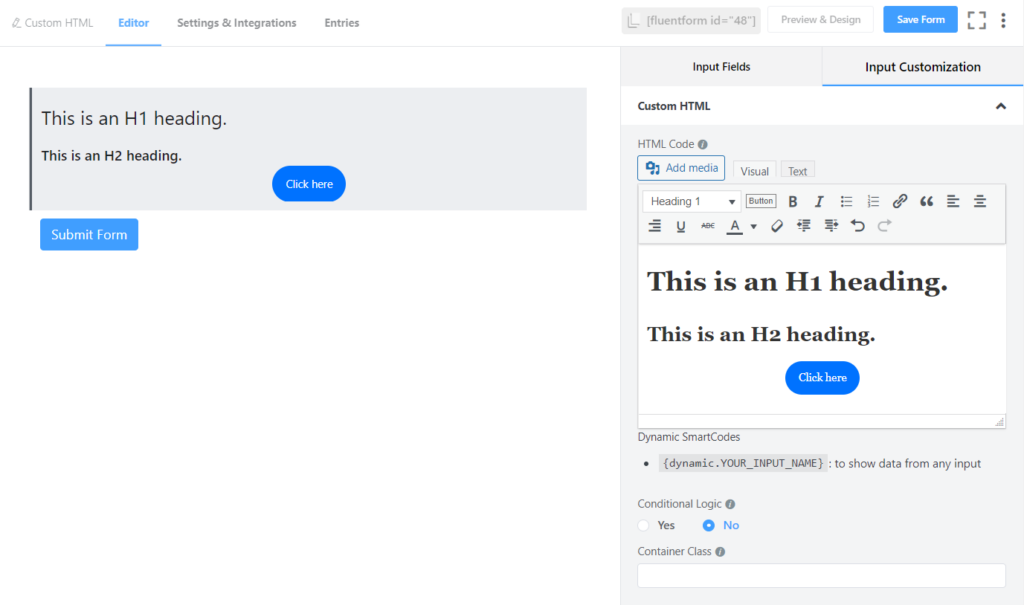
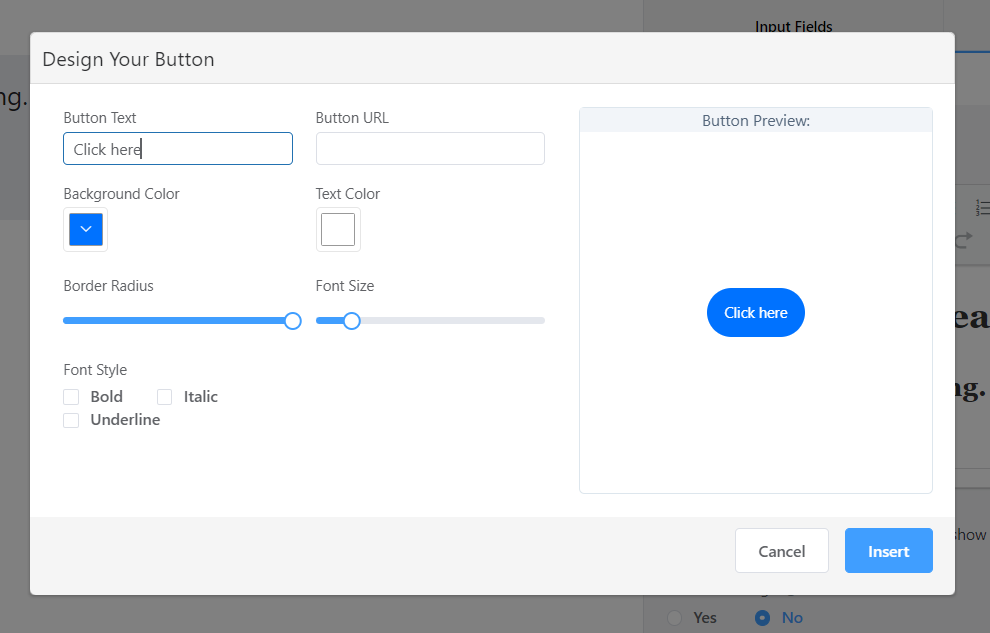
A fully customized button can be included in your form.
You can also add any image by clicking on the Add media button. Furthermore, you can show data from other input fields using Dynamic SmartCodes.
This is how you can use a rich content editor in your form-building process.
Let users publish content using rich content editor
If you want to let your users publish content on your website without giving them access to the dashboard, follow the four steps below —
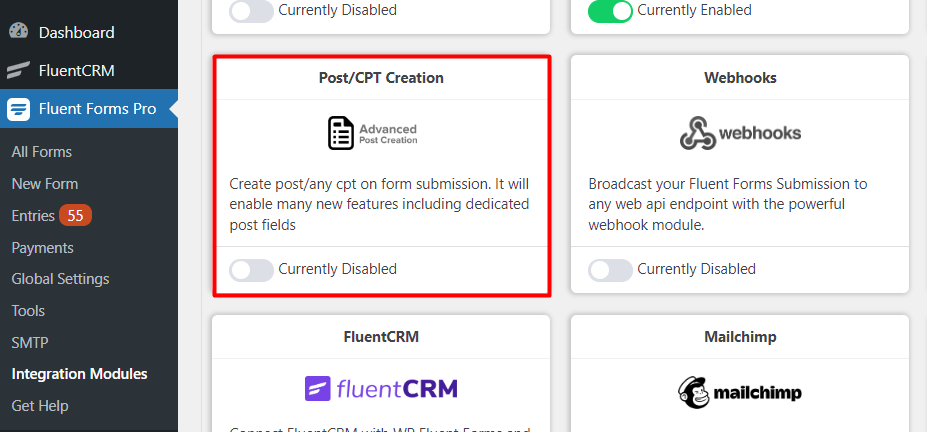
Step 1: Activating Post/CPT Creation module
First, hover over Fluent Forms Pro and go to the Integration Modules.
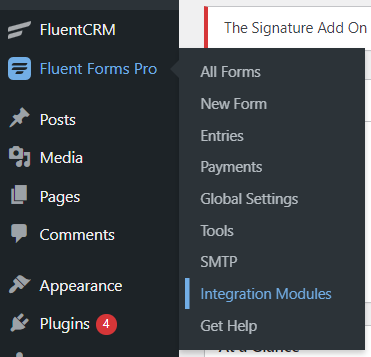
Enable the Post/CPT Creation module.
Step 2: Create a post form
Now go to All Forms and click on the downward arrow icon beside Add a New Form button. From the dropdown menu, select Create Post Form. You will be asked to select a post type. Choose Post from the dropdown menu and hit Continue. A form editor window will appear, as shown below.
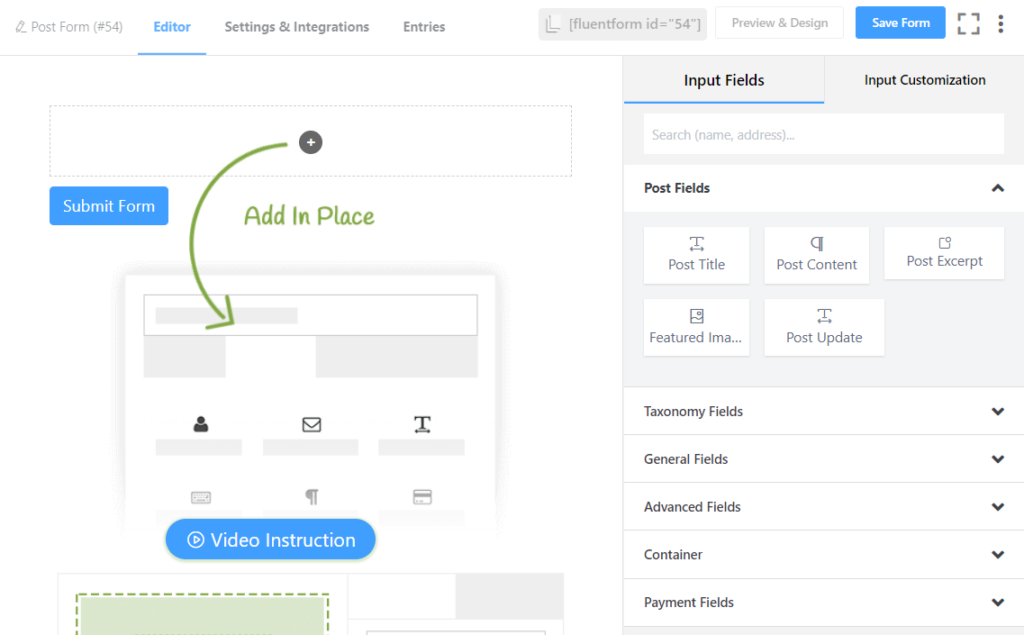
We want to add the following input fields to our post form —
- Post form title and details
- Title of the post
- Content of the post
- Featured image
- Category
- Author’s name
- Author’s biography and
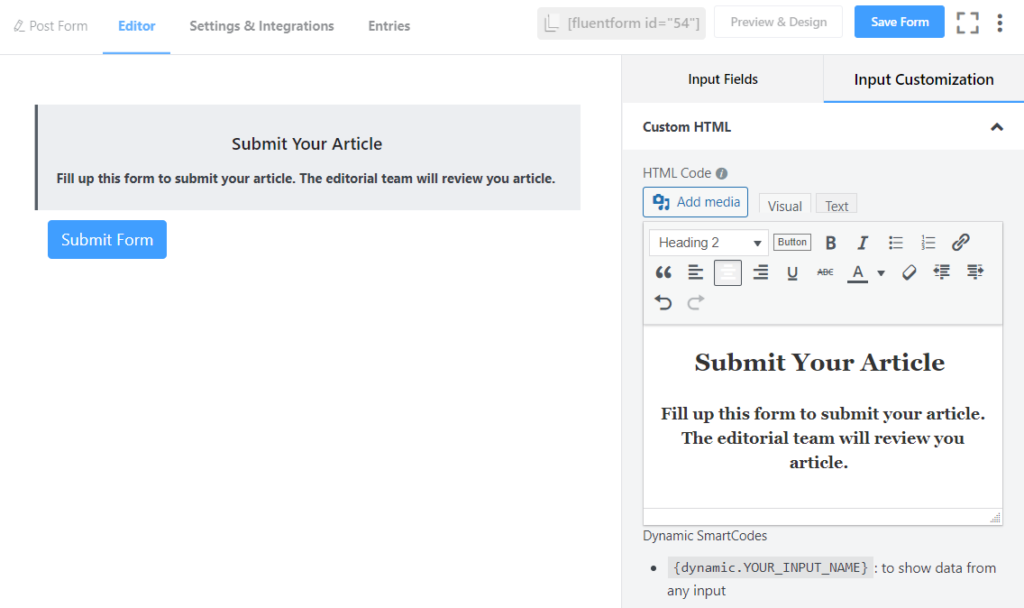
Now let’s start adding fields to our post form. Adding input fields to your form is effortless with Fluent Forms. All you need to do is to click on the desired field you want to add or drag and drop the input fields anywhere on the form editor window. We will add a Custom HTML field for our post form title and details. Click on the added field to customize it. Add a title and some details. You can use either the visual or the text editor.
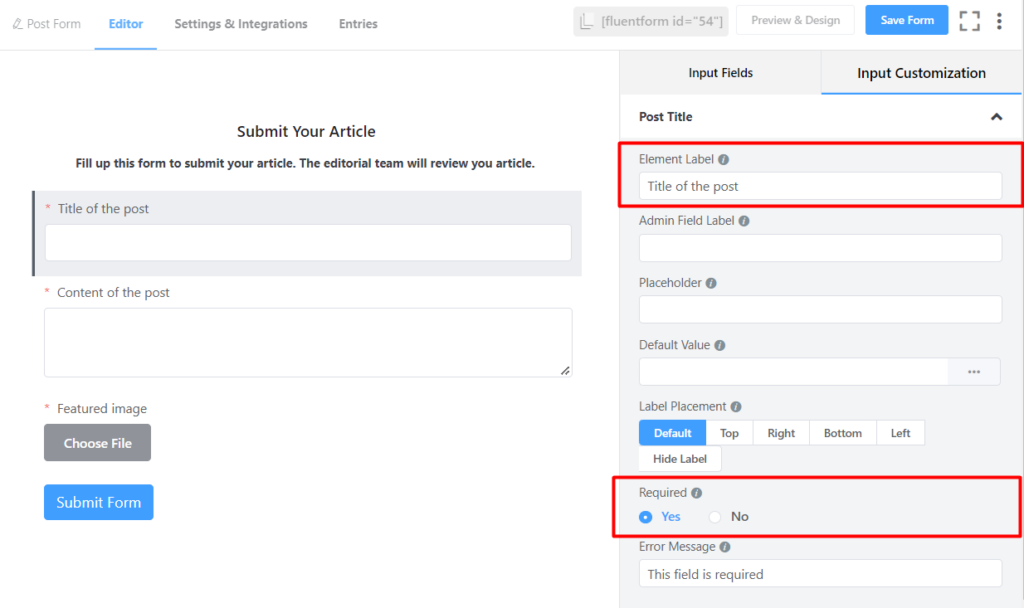
Next, add Post Title, Post Content, and Featured Image to the form. You can change the Element Label and Placeholder text of each of these input fields. Also, you can make these fields mandatory by clicking Yes under the Required option.
Similarly, add other input fields. Categories can be found in the Taxonomy Fields tab. Input fields for Name, Text Area (for Author’s biography), and Email Address are available in the General Fields tab.
After adding all the fields to our form, it will look like the image below.
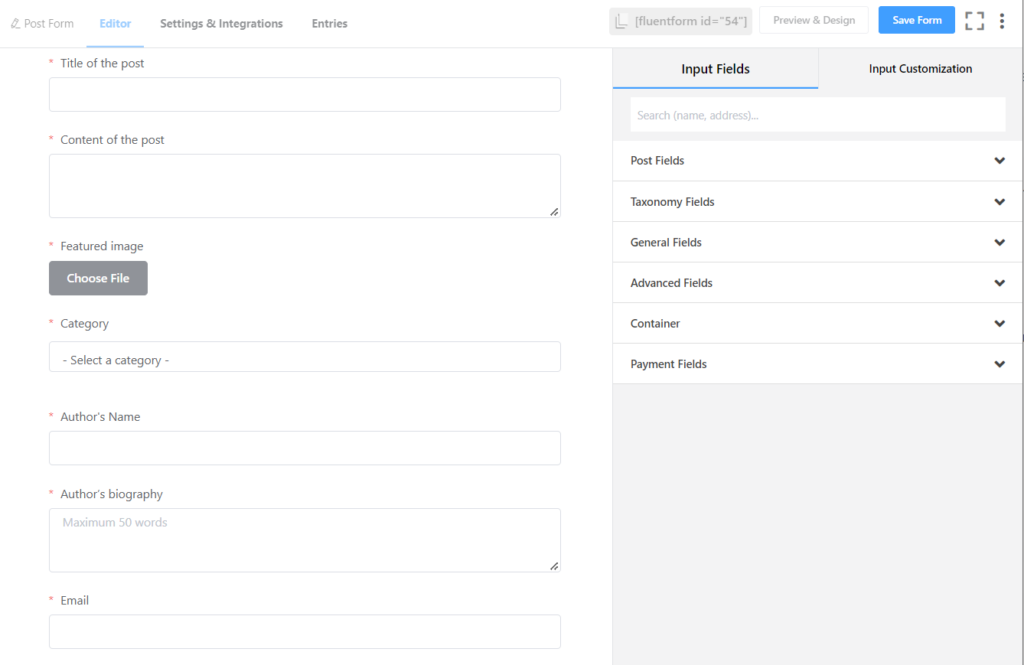
Don’t forget to hit the Save Form button once you are done adding the necessary fields.
Step 3: Configure the form
Go to Settings & Integrations > Post Feeds and click on the Add Post Feed button.
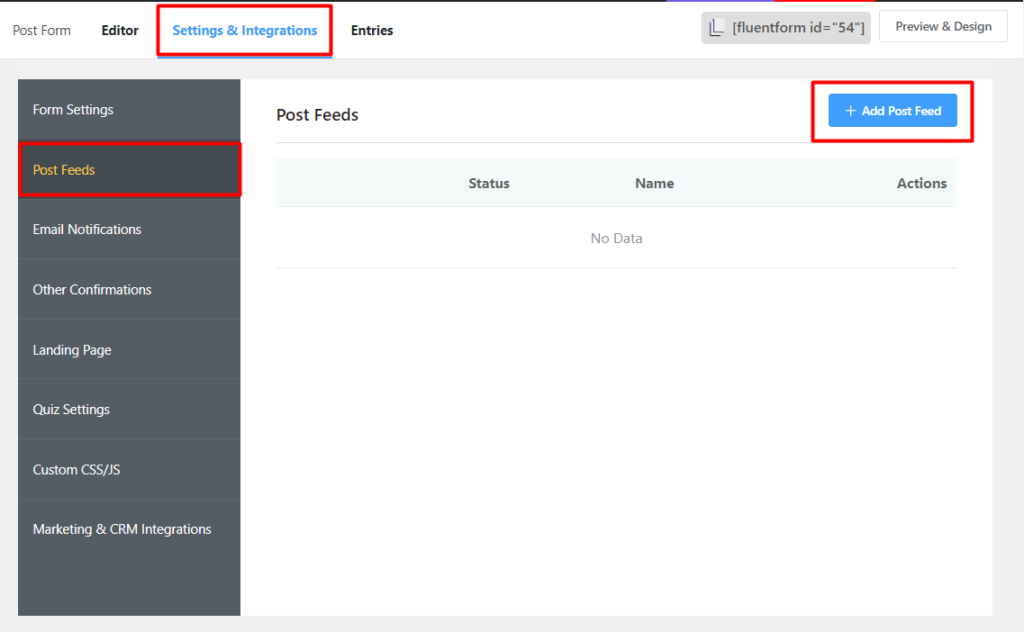
Now make the following changes —
- Provide a Feed Name
- Select Submission Type, Post Status, Comment Status, and Default Category
- Map Post Fields with Form Fields
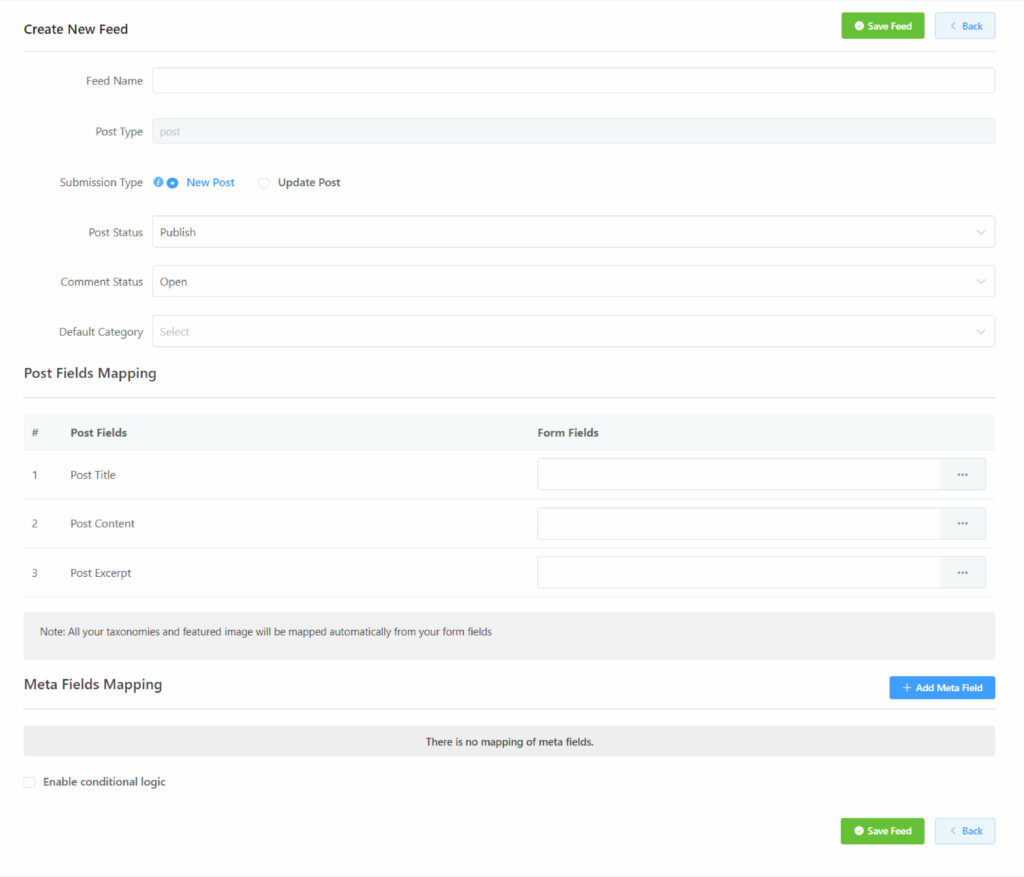
Once you are done configuring the post feed, click Save Feed.
That is it! Your post form is ready to be published, and collect submissions from your guest authors. But don’t forget to test the form before publishing it.
Step 4: Publish the form
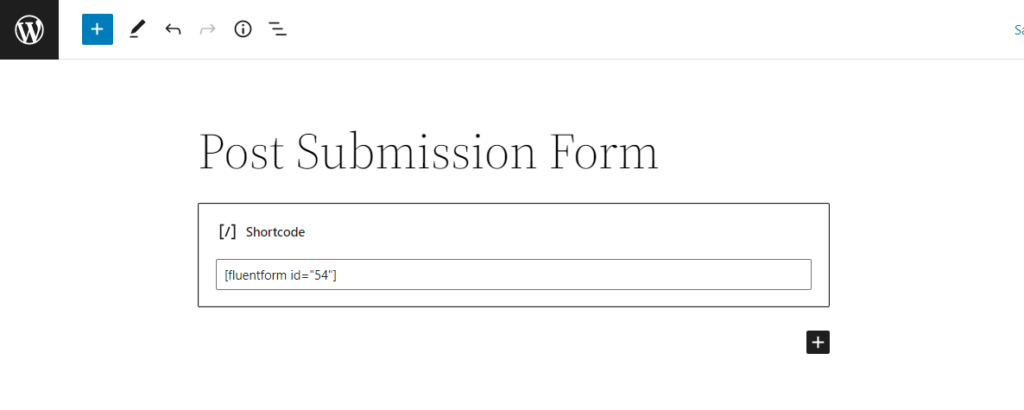
Publishing the post form can be done in three ways. You can use the Gutenberg block editor to select the form. Click on Add New under Pages in the WordPress dashboard. Give the page a title. In the blank area of the block editor, click on the plus sign (+) or type a forward slash (/). Then type Fluent Forms and choose the form you have just created.
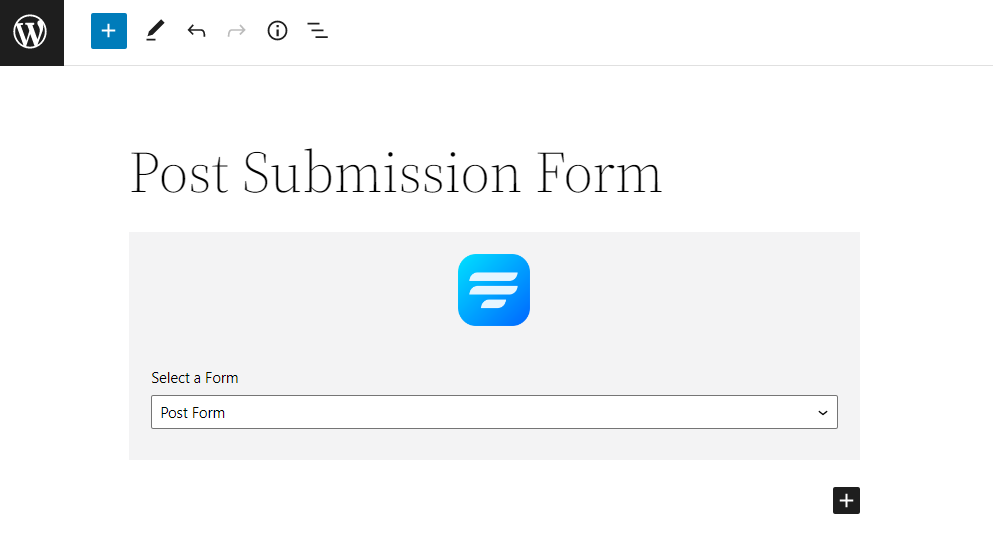
A second way to do that is to use Fluent Forms’ Shortcode feature. You can find the form’s shortcode on top of the form editor window.
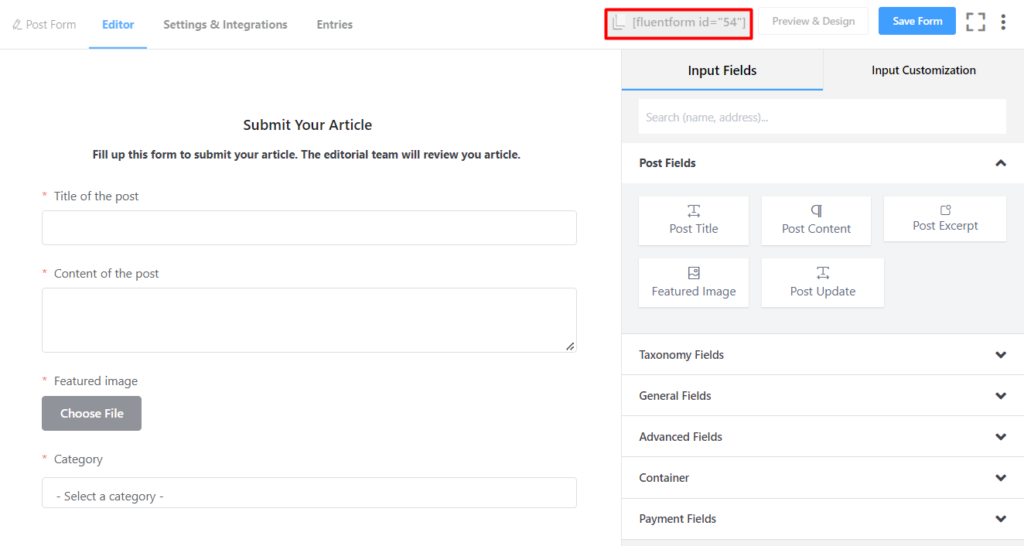
Simply click on the Shortcode to copy it. Paste this shortcode using a Shortcode block anywhere you want to display your form on your website.
The best way is to publish the form on a dedicated landing page. Go to Settings & Integrations > Landing Page. Check the box beside Enable Form Landing Page Mode. Here you can fully customize the landing page according to your brand identity. For example, you can add a beautiful background image to make your landing page aesthetically more pleasing.
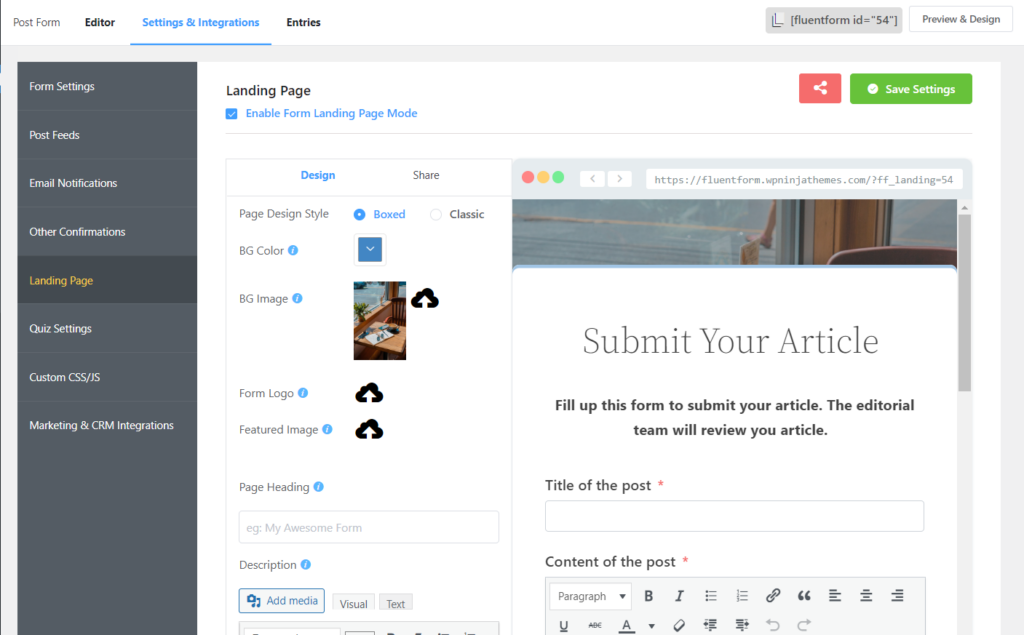
Click on Save Settings after necessary customization. It should be mentioned that you can add Custom CSS to style your form further.
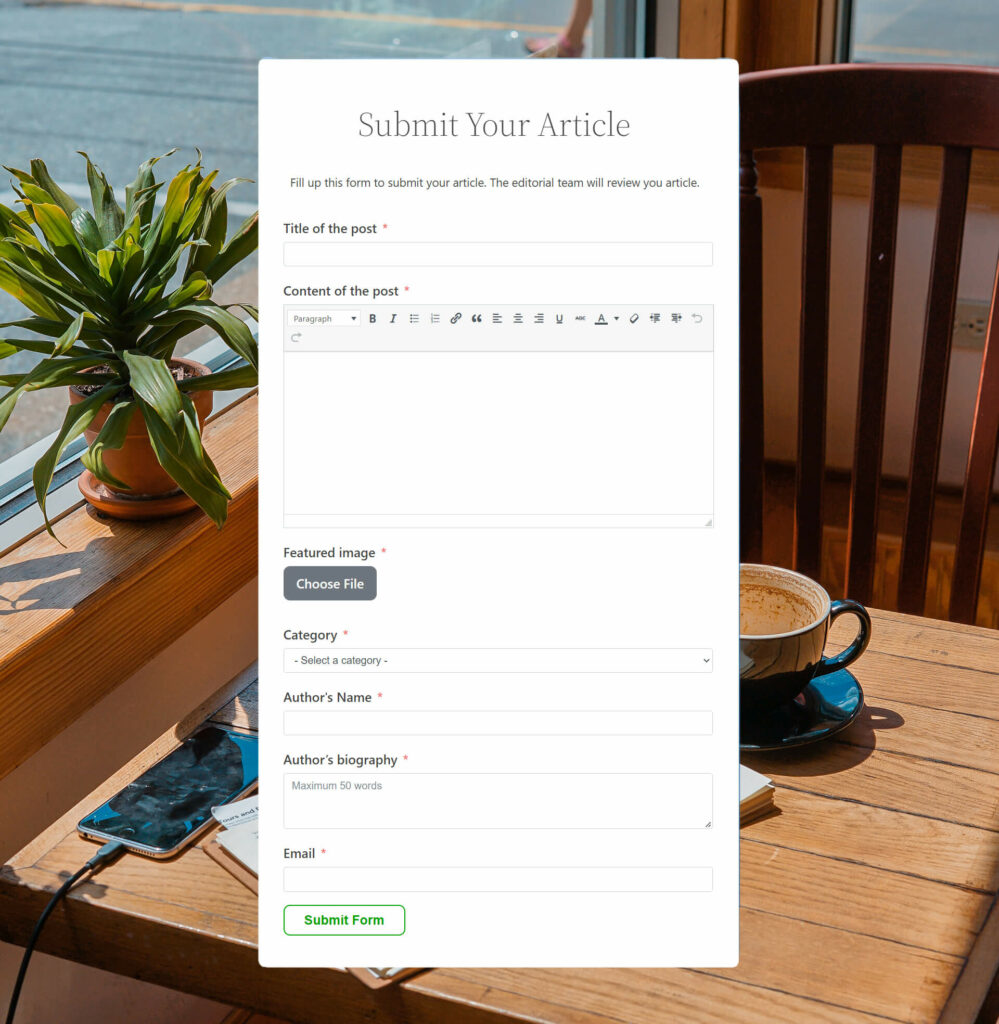
Try out this demo form where we used rich content editor:
Your data will be automatically deleted after form submission. We don’t store them.
Wrap up
Creating content might be a huge struggle when you don’t know what to make. Allowing guests to create content for you is an excellent way to increase traffic to your website and keep things interesting for your viewers.
In this article, we showed you the detailed process of how to implement front-end posting and take full advantage of a rich content editor. Comment down below if you have any queries. Follow our social media channels for more tutorials like this.
2 responses to “How to Use Rich Content Editor in WordPress ”
-
Rich text editor seems to be broken, it does not work for me.
-
Hey, Mate
It seems like a plugin/script conflict. Would you please contact our support and tell them details about your issue? Also, please include screenshots during the ticket submission.
-



Leave a Reply