How to Use Conditional Logic for Email Notifications in WordPress Forms
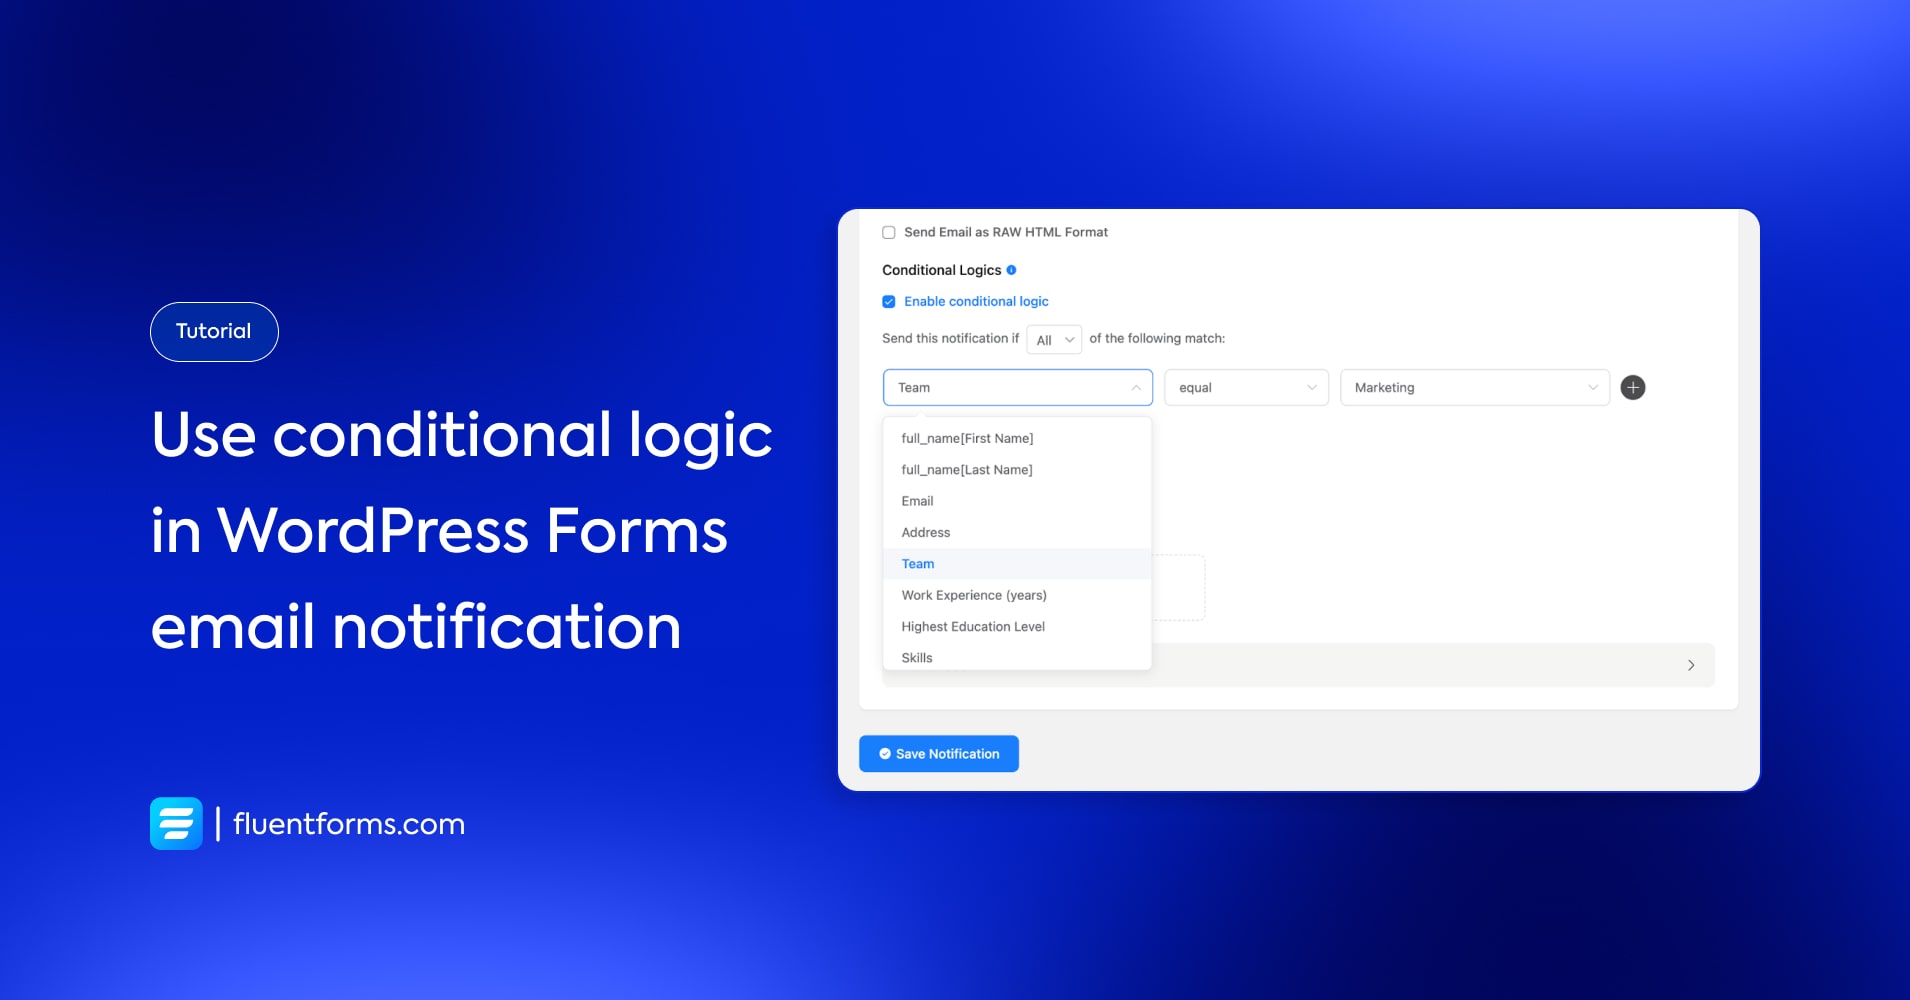
Conditional logic specifies certain things in a form. It is about setting up different conditions regarding the form fields for specific audiences.
If you select this, you get that; if you don’t, you get to see something else- that is how conditional logic works.
Conditional logic is not only limited to input fields. Sending email notifications is also possible with conditional logic. Let’s see how to do it with Fluent Forms, a contact form builder plugin for WordPress.
How to use conditional logic
The notification can be enabled both on the admin end and the user end. Let’s learn both.
Notification for admins
Go to the form ‘settings’ that you want to enable notifications for.
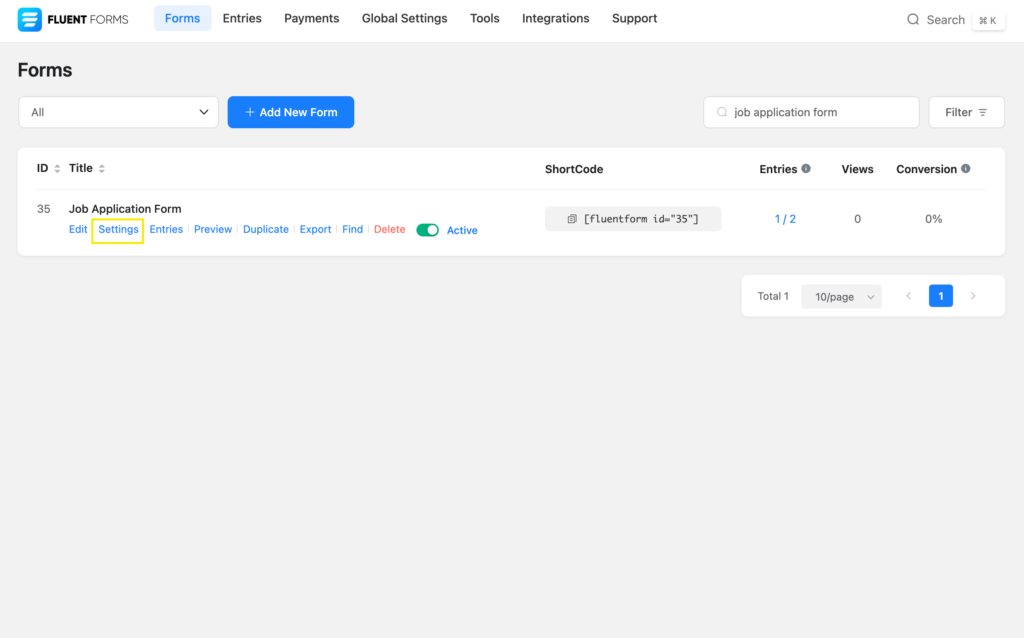
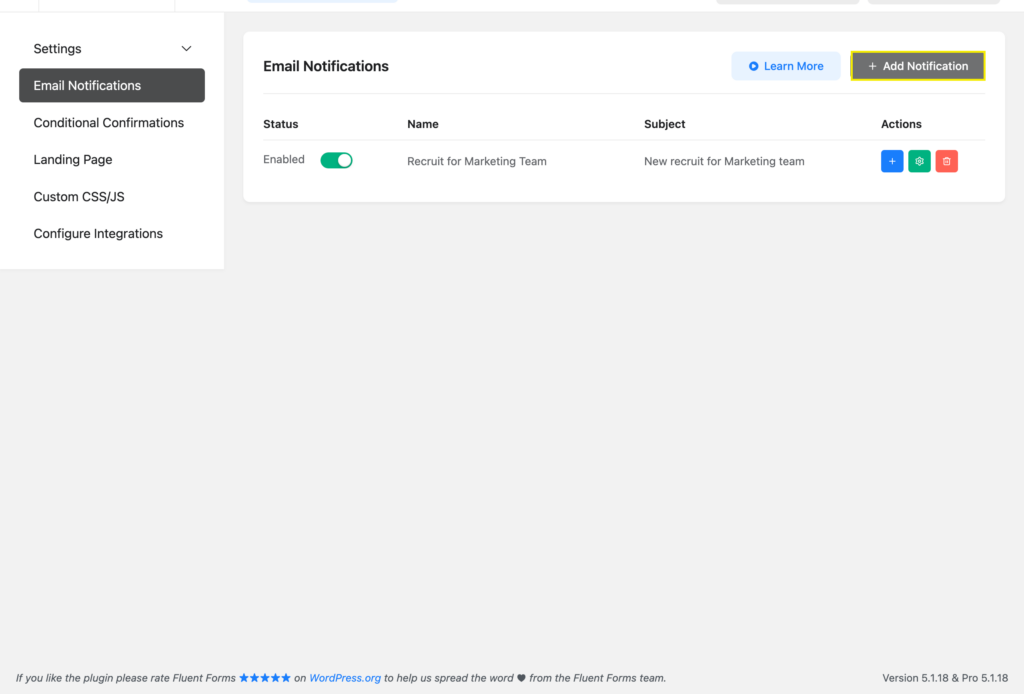
Now click on ‘Email Notification’. See, there’s no default notification set up. Now click ‘Add Notification’ to start.
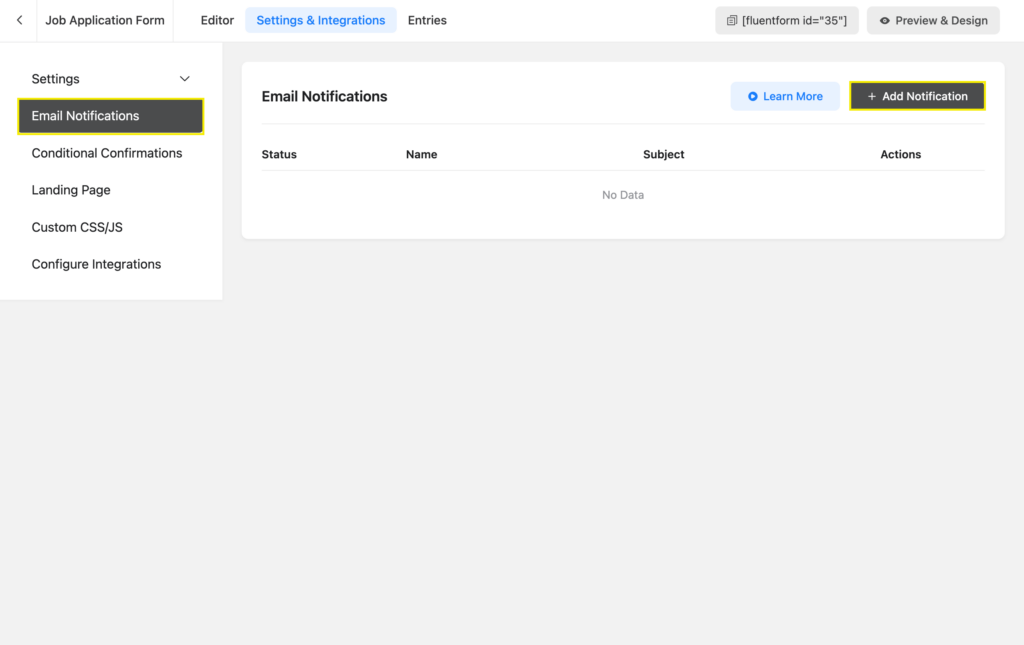
You can see an interface that includes some fields and editable text areas.
Name field- Name/class of the notification.
Send to field- Specify the recipient’s email address. You can write your own or choose from the email field.
Subject- A proper subject line for the email.
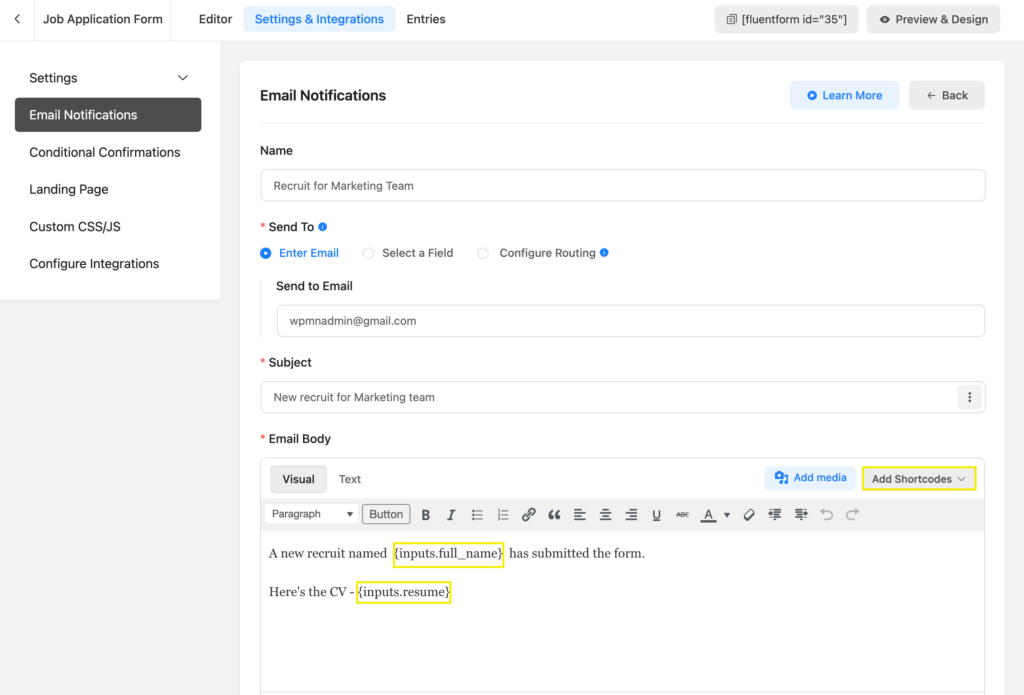
Email body- Here you write necessary things i.e.: get notified about the specific type of audience (as they fill up). It can be any precise age group or distinct interest.
In our case, let’s say we want notifications only for people who chose the ‘Marketing’ option.
By using the ‘Add Shortcodes’ feature, we can get notification emails bearing the exact fields that we want. Here we’ve included the recruit’s name and their CV.
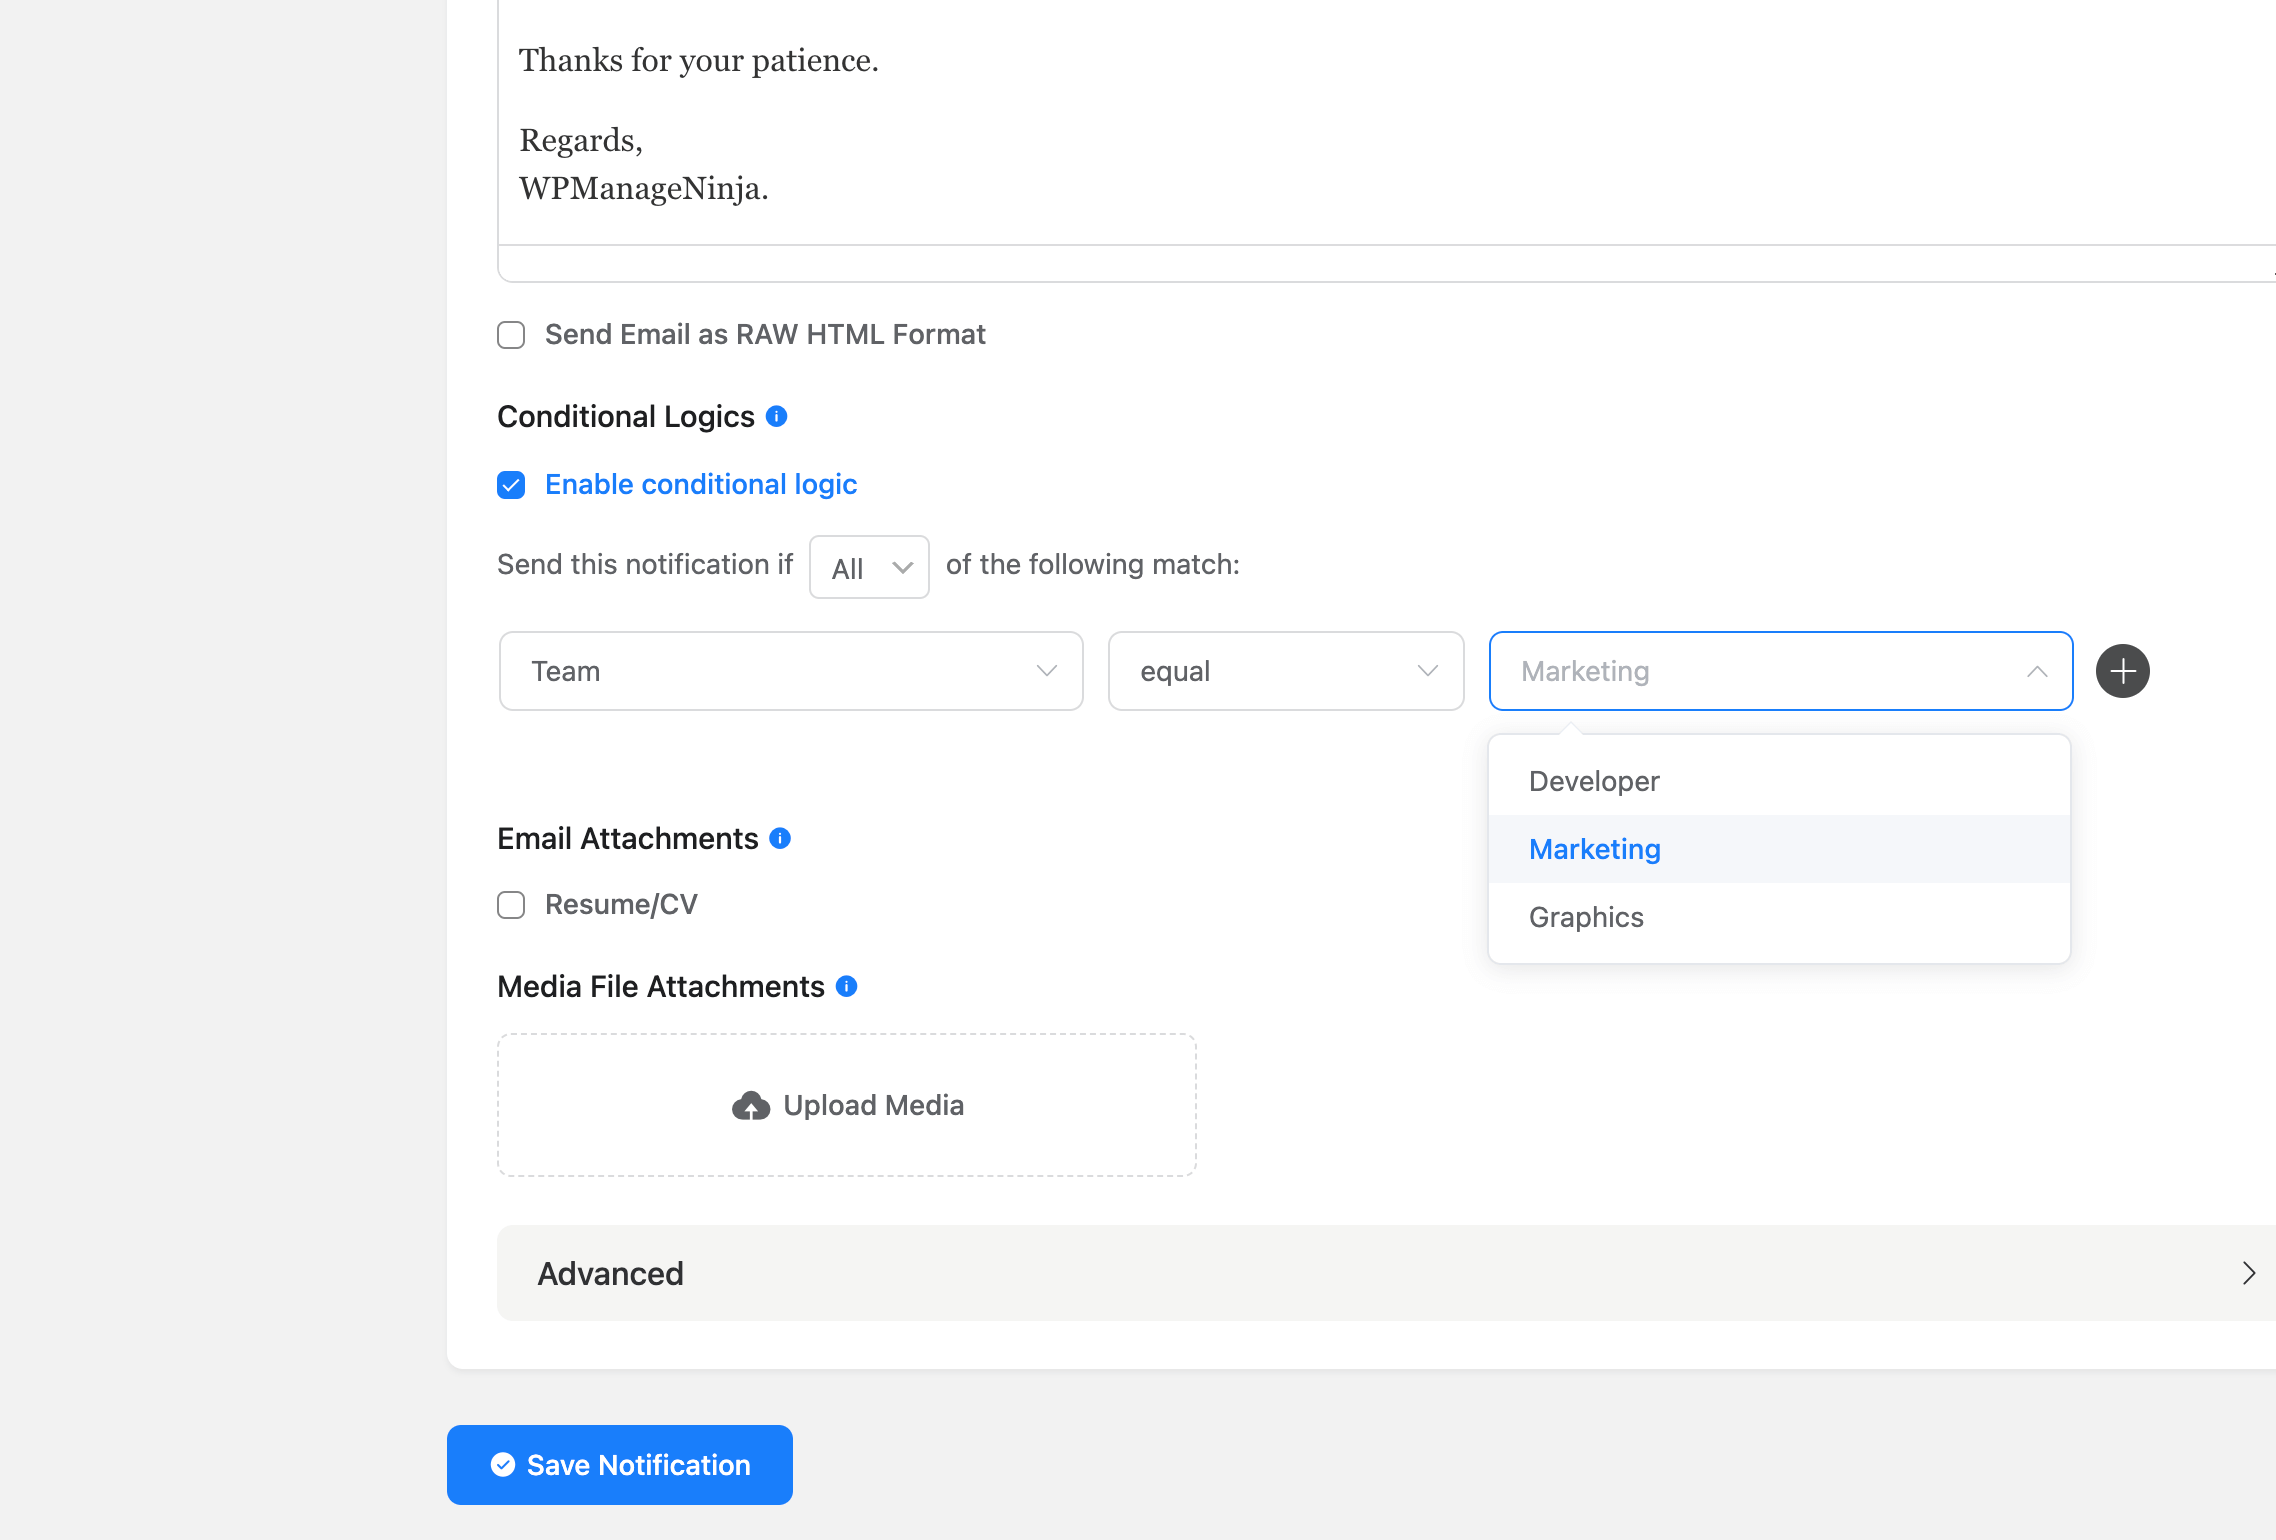
Time to use the conditional logic. Enable them first. You will be provided with the conditions that you want to match to trigger a notification.
For instance:
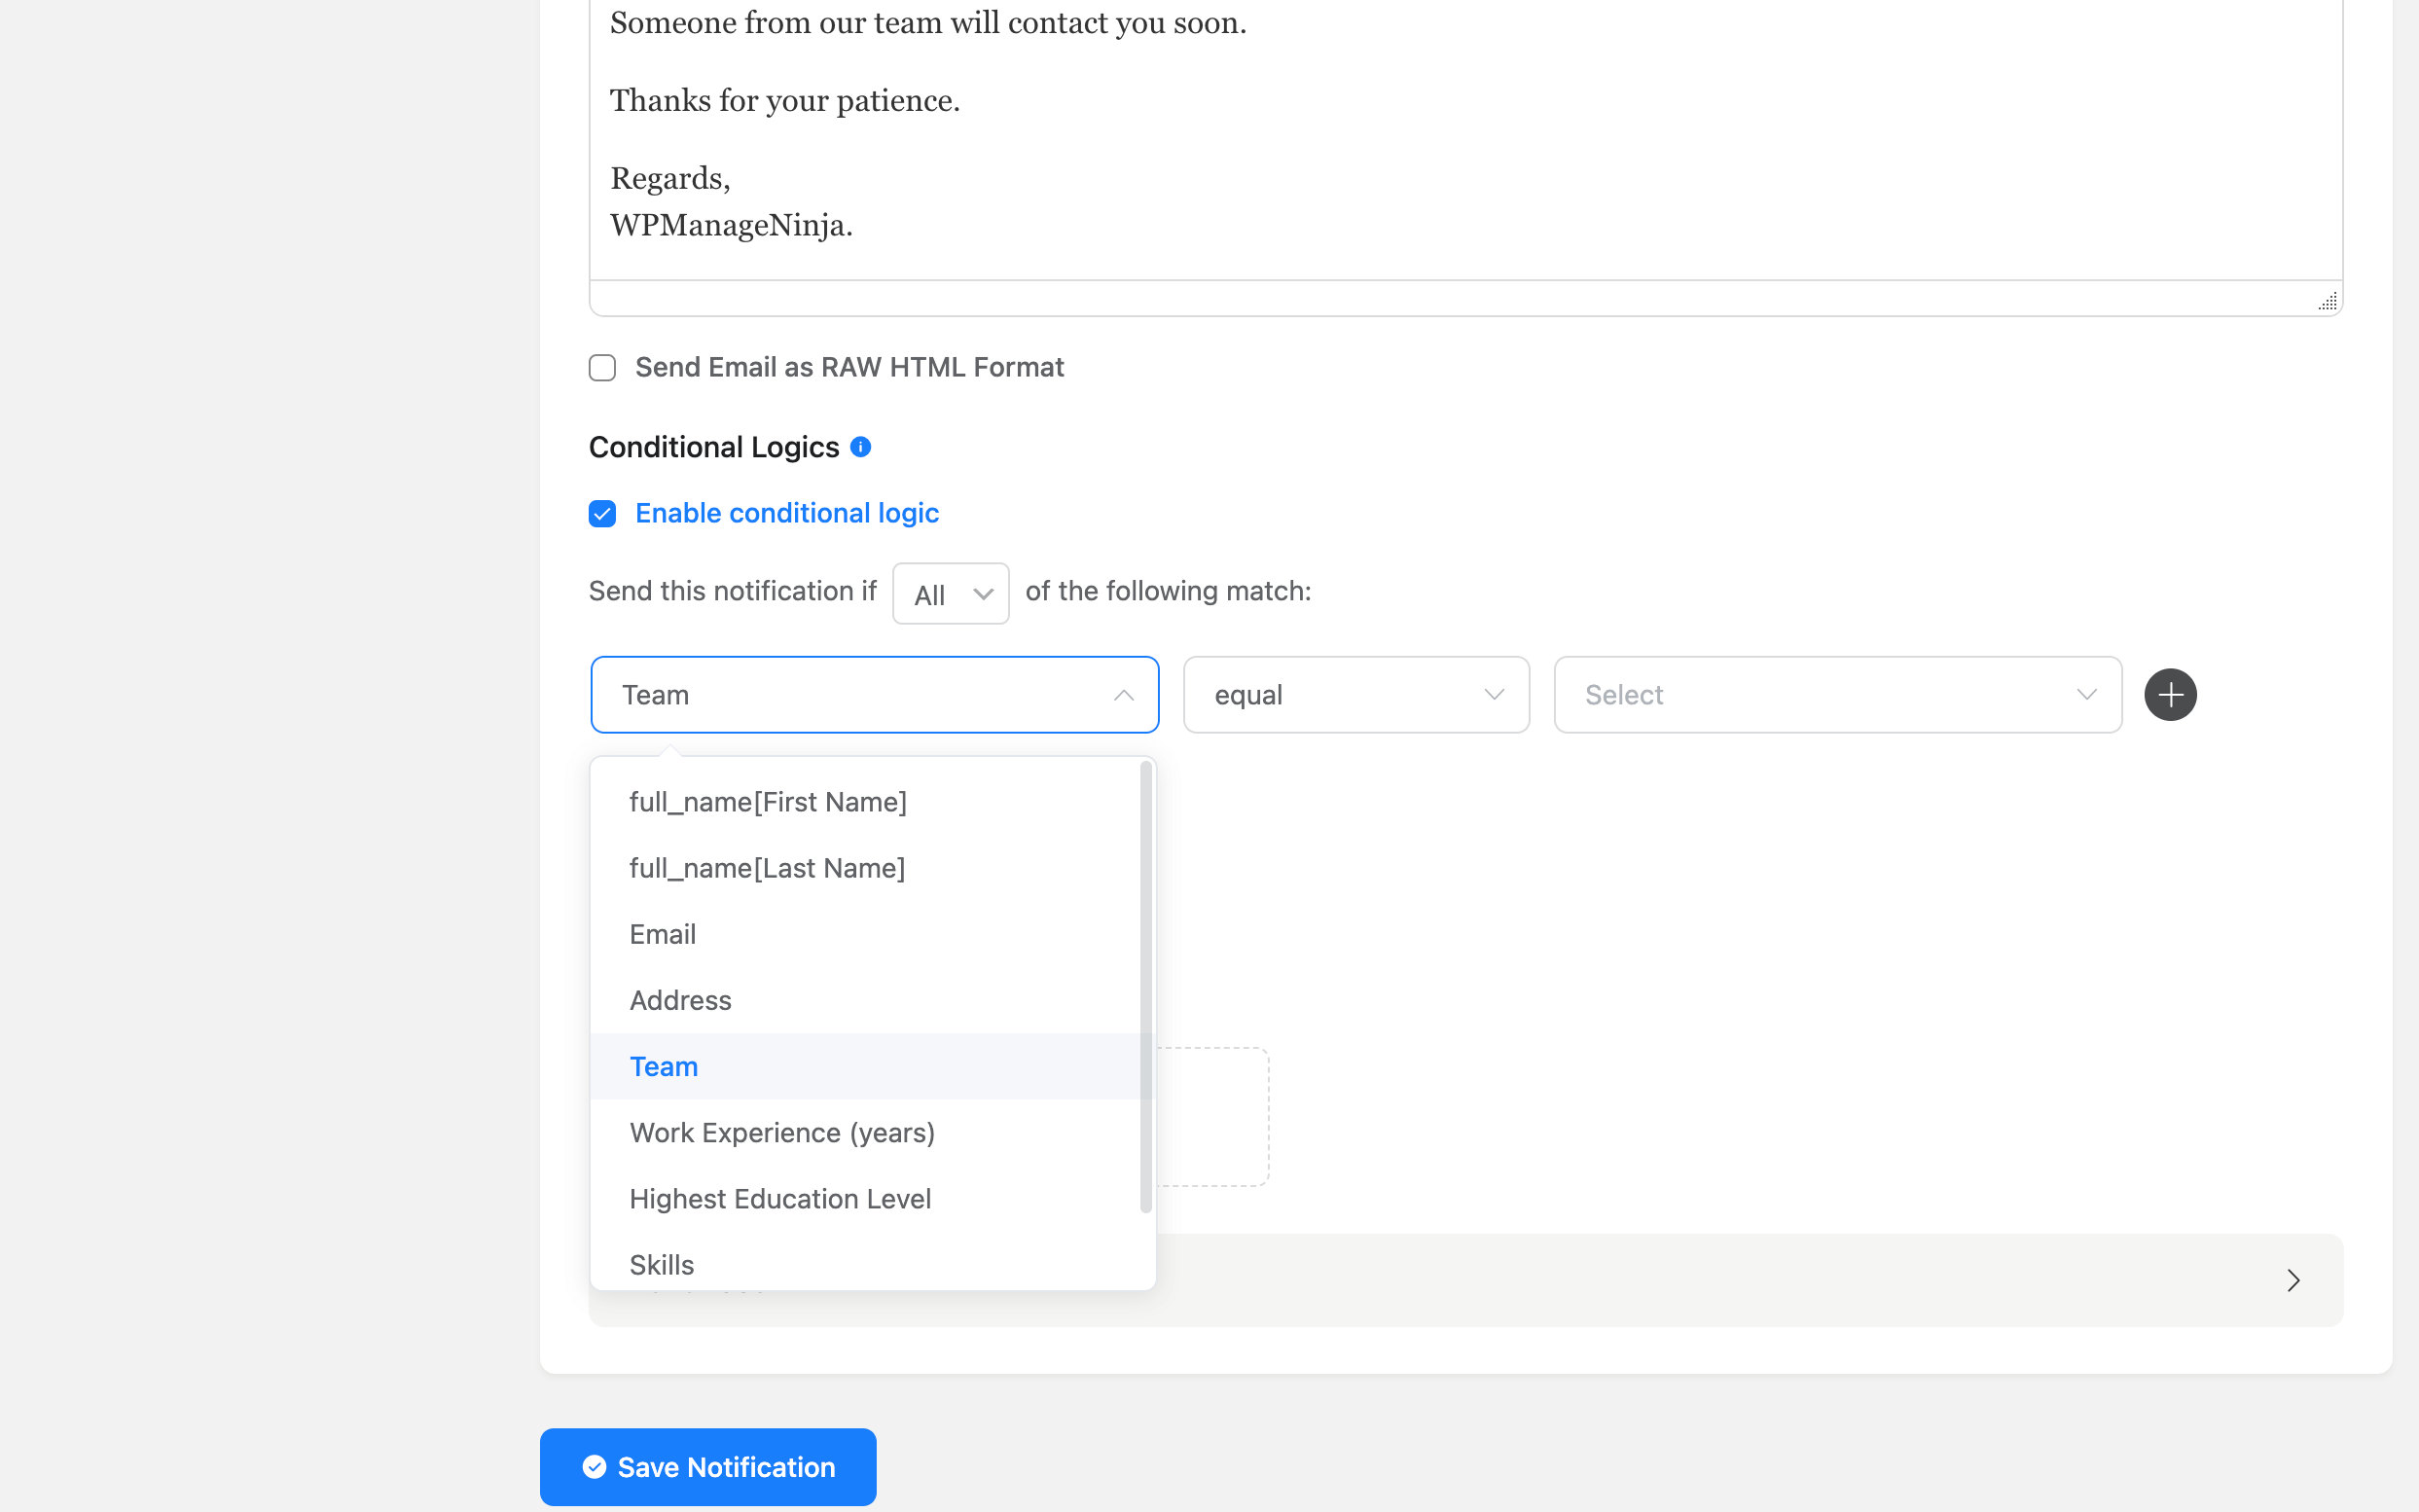
The first box has the fields declared. We chose the ‘Team’ field.
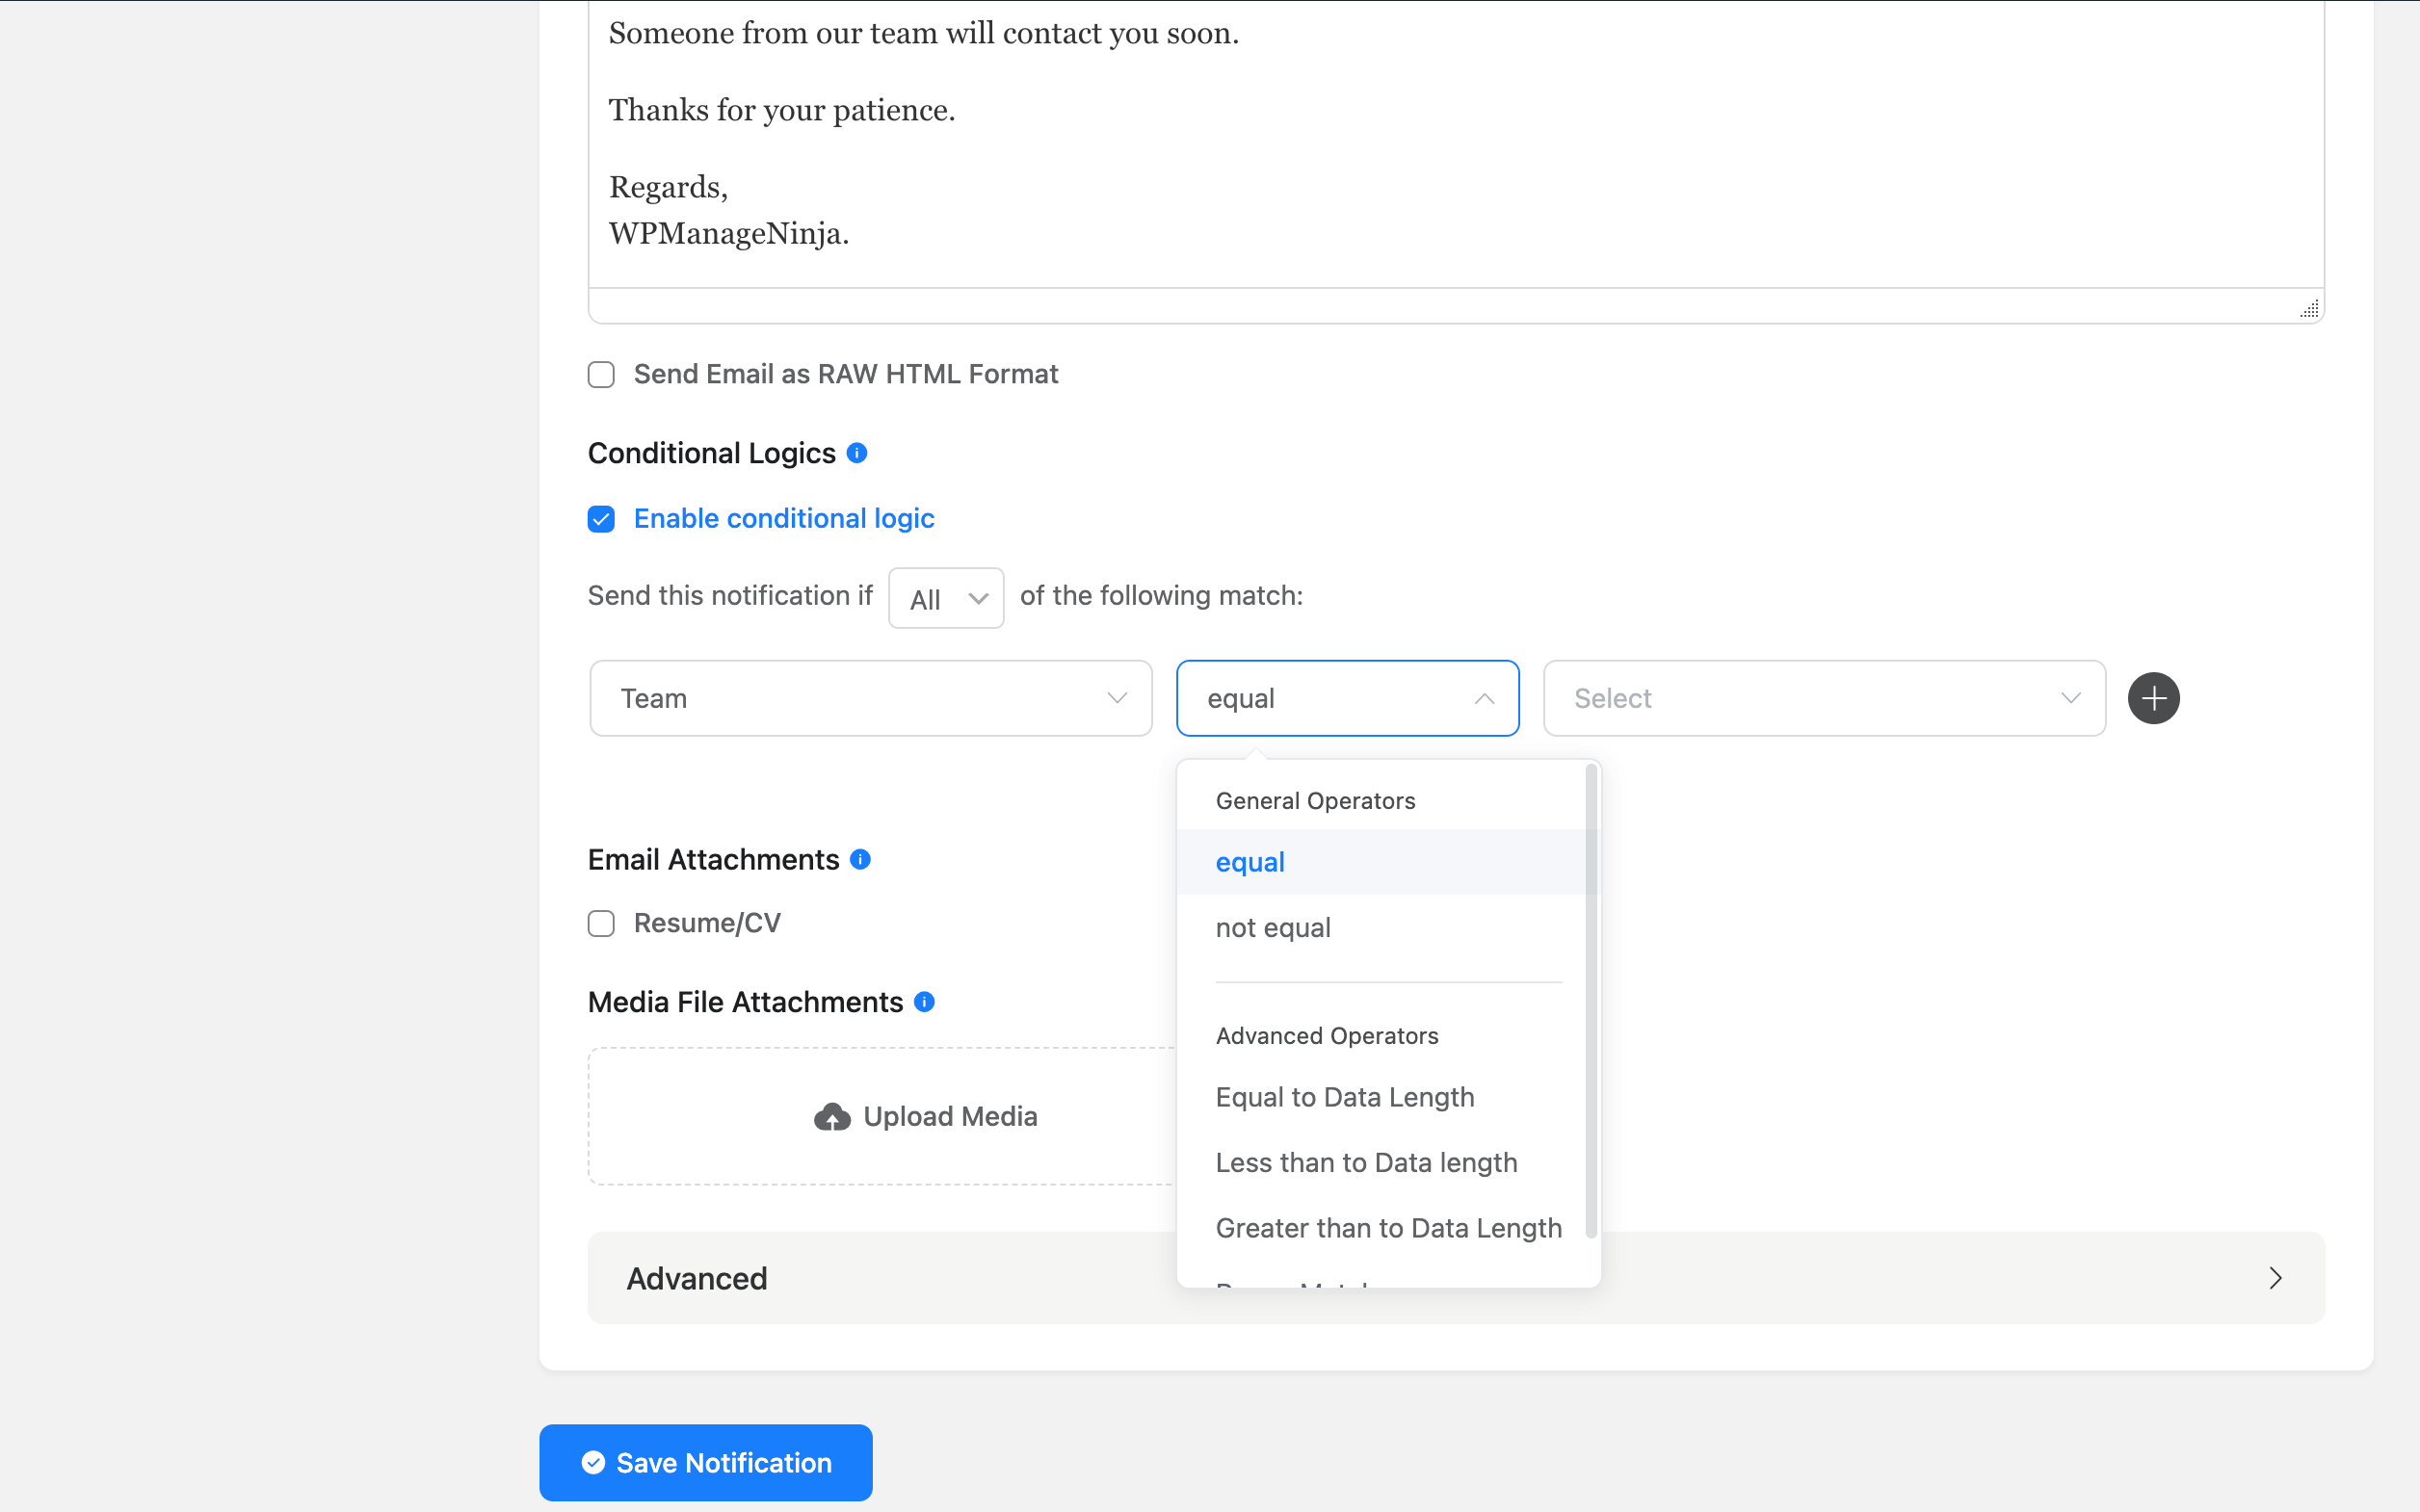
The second box offers options if you want the condition to agree or disagree. Select as you like. We chose it to be equal.
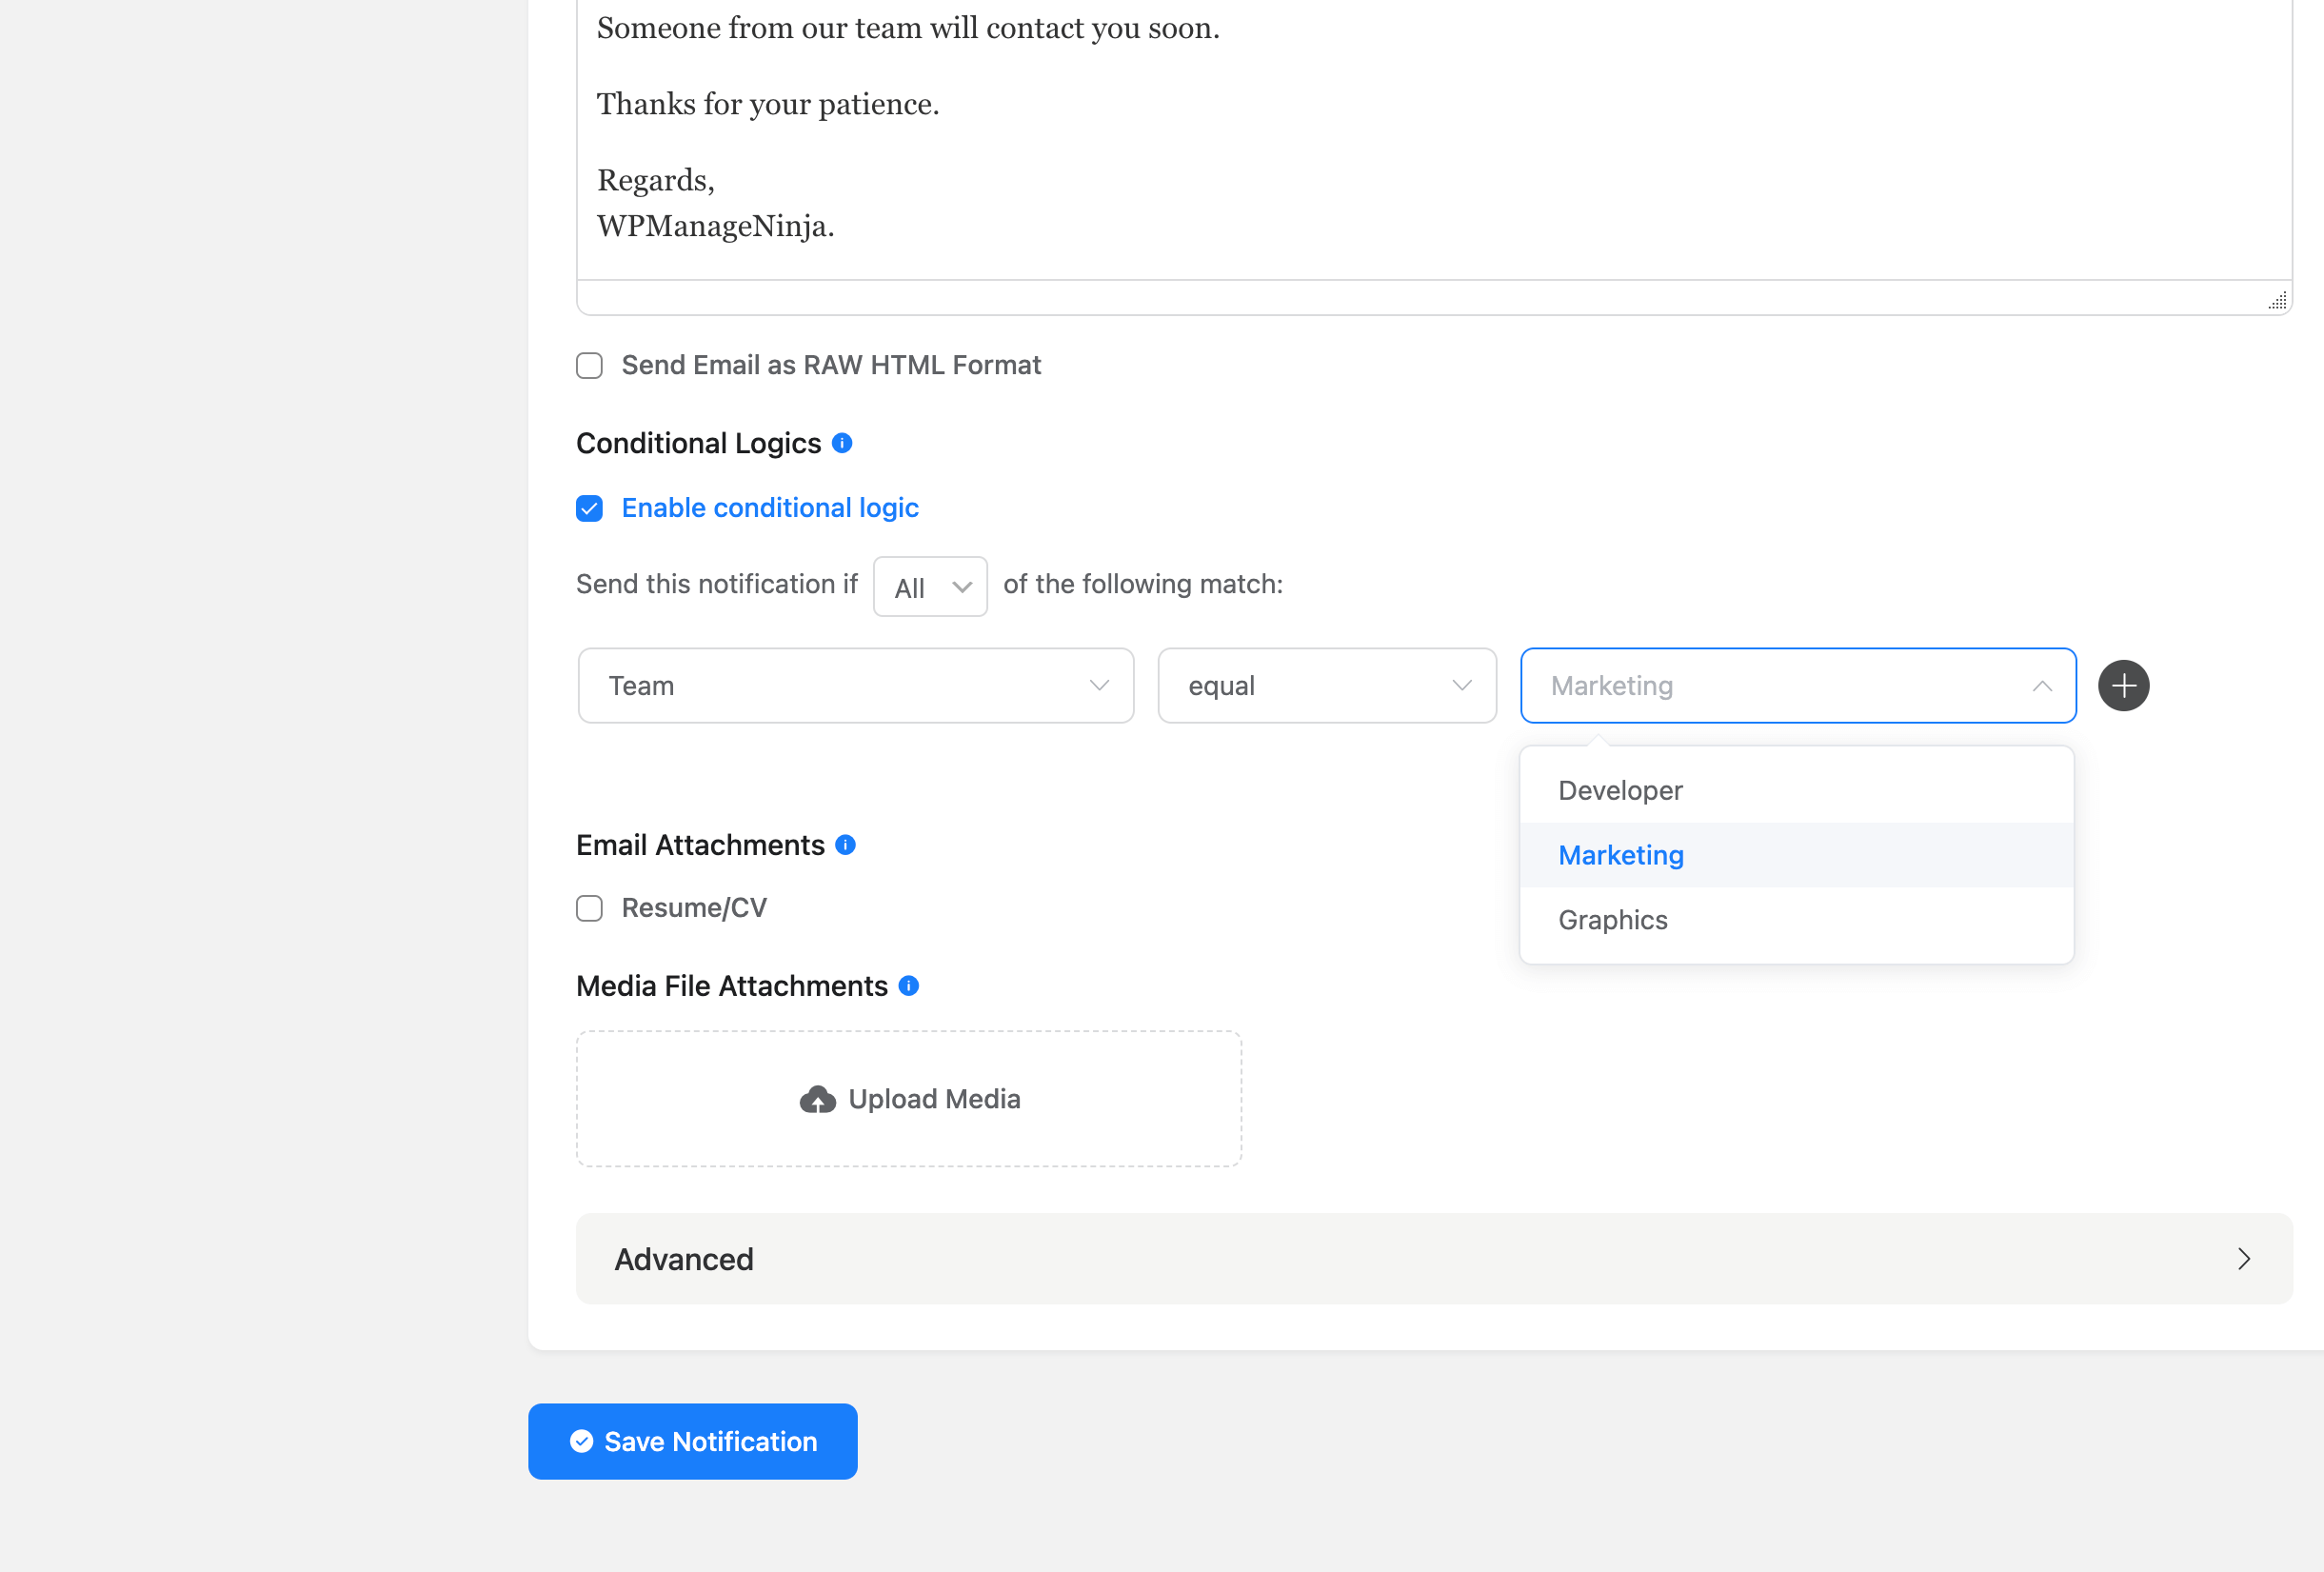
The third box is the input that you wish to match. As we wanted to get notified when somebody chose ‘Marketing’ we put it right there.
Notification for users
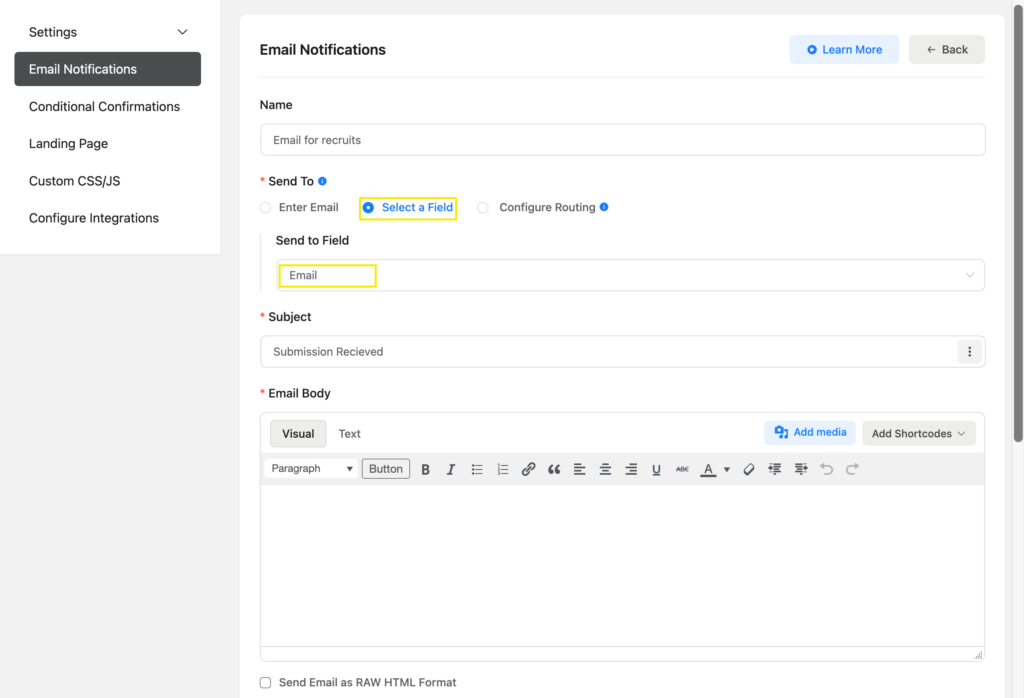
Go to the form settings again. And start from ‘Add Notification’.
As you want your users to receive the mail, put their email field into work. Choose ‘Select a Field’ option and select the email field they filled with their mail.
Now fill up the fields as you want your users to see.
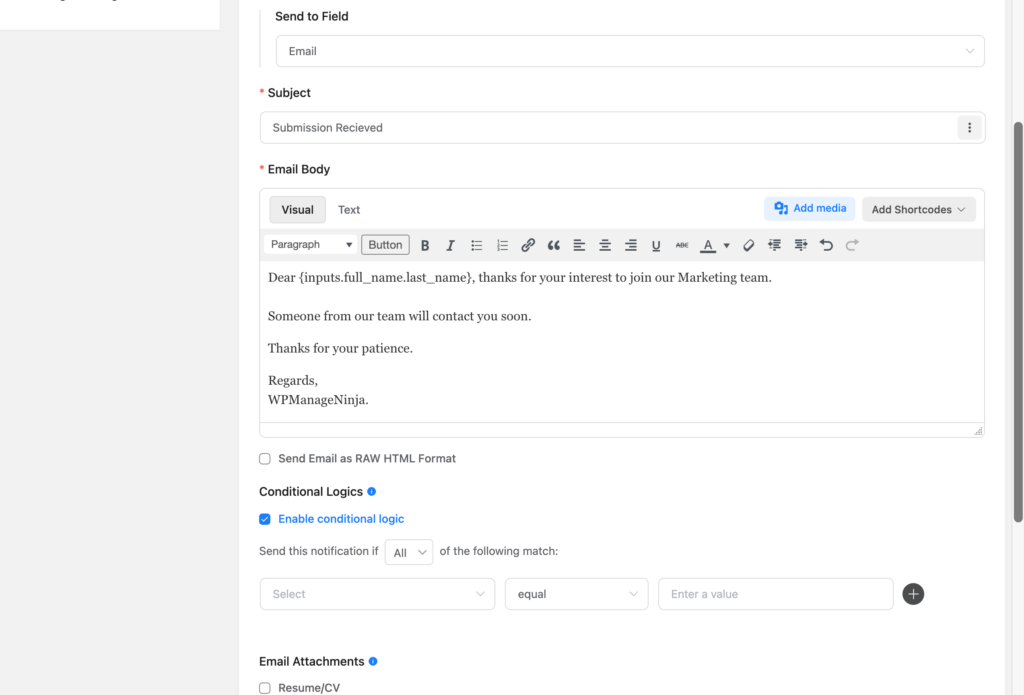
Now enable the conditional logic as you want. We wanted to send it only to the ‘Marketing’ team pickers. You can add conditions and make necessary changes.
Save the notification. Your users will receive a notification when the conditions are matched.
Use cases
Conditional email notification is used simply to avoid overwhelming submissions. It is used to get notifications for the desired actions only. This way you can easily meet your specific targets.
It can also be tailored to receive only specific information that you want to see to ease the process or work directly with that data. This feature can help both the users and admins regarding the form submission process.
The “Conditional logic for email notification” feature can be used in job recruitment forms, tour planning forms, and many other types of forms for targeted notifications.
Related articles
Interested to know more about conditional logic? These articles might help you:
1. Top 5 Free WordPress Form Plugins with Conditional Logic
2. 7 Uses of Conditional Logic on WordPress Forms
3. How Conditional Logic Helps in Your Business with Fluent Forms



Leave a Reply