Here are 5 Easy Steps to Send Confirmation Email to Multiple Recipients in WordPress

Imagine buying an iPhone online and not receiving a confirmation email. You have been just forwarded to a generic message, no confirmation email, no recap of your order, no tracking info, nothing else. How would that make you feel?
In 2022, it is crazy to think that some companies just ignore the importance of a strong email confirmation. But they forget the fact that to earn customers’ loyalty and referrals. But we’ve to remove worries from customers’ minds, and that’s possible through a good confirmation message after form submissions.
So, in this article, we’ll show you how to send email confirmation to multiple recipients in WordPress using a WordPress plugin. First, let’s know about confirmation emails.
What is a confirmation email?
A confirmation email is an automated email triggered by a specific user-based action. These emails are sent when a user fills out a form on your WordPress website.
Types of confirmation emails
Here we’ve discussed 4 different types of confirmation emails that are just after form submission.
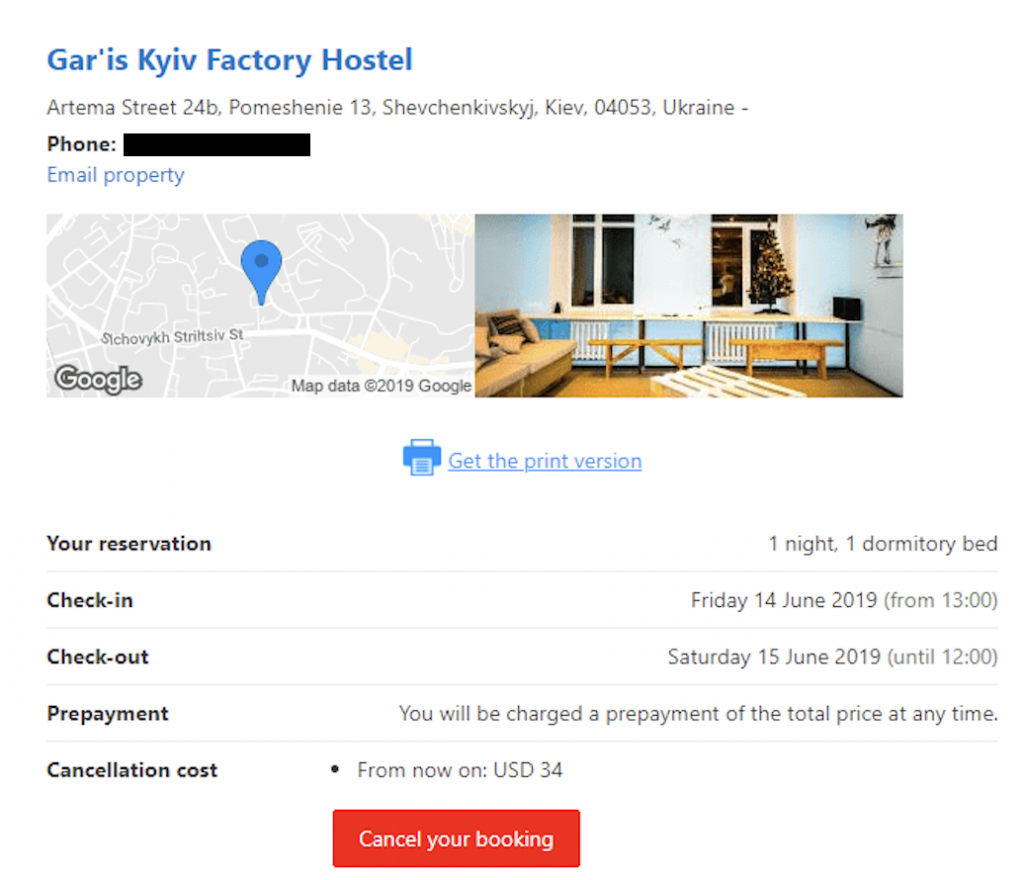
1. Booking confirmation
A booking confirmation email is generally a thank you email for appreciating them for choosing you. This confirmation email is sent to customers who booked online flight tickets, hotel rooms, tours, restaurant tables, etc. Here’s a preview of the hotel booking confirmation email.
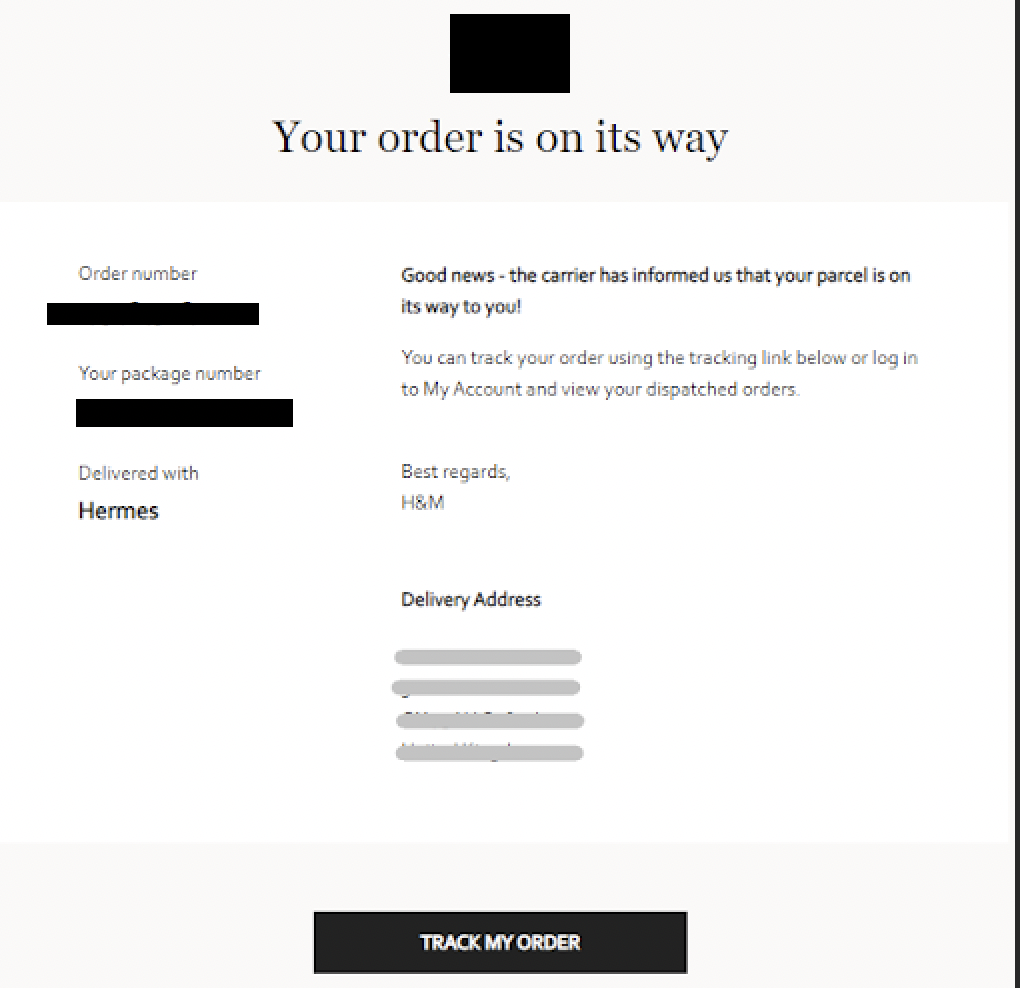
2. Order Confirmation
An order confirmation email is the first transactional email you send to customers when an order has been placed on your website. This email includes the information about the order the user made. It removes the post-order anxiety that most people experience while shopping online. Here’s an example of an eCommerce store’s product order confirmation email.
3. Subscription confirmation
A subscription confirmation email is sent to users after subscribing to your newsletters. These emails could be used in a double opt-in confirmation process. Check out the Netflix subscription confirmation email below.

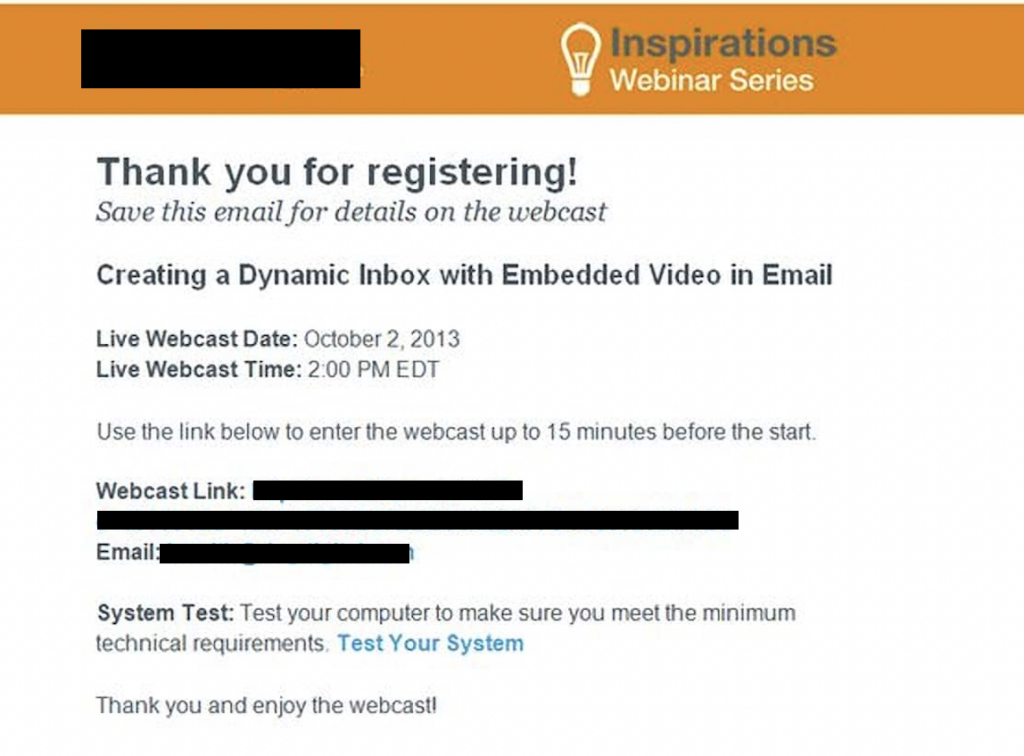
4. Registration Confirmation
A registration confirmation email is sent to users after completing a registration process for an event, such as a concert, fair, product, or service. Besides, registration confirmation messages can be sent to welcome emails. Let’s check out a webinar series confirmation email by Inspirations.
Now let’s jump right to how to send confirmation emails to multiple users in WordPress.
Sending auto replies after a WordPress form submission with Fluent Forms
For this example to work, you’ll need the following:
- A WordPress website
- A form builder plugin
- An SMTP plugin
Once you’ve made sure on the above items, you’re just 2 steps away from setting up a form and confirmation email on your WordPress website!
Now, we will set the confirmation message email with the following steps.
- Create a form with Fluent Forms
- Customize your form
- Set the form settings
- Customize email notifications with FluentSMTP
- Publish form
Let’s discuss the steps in detail.
Create a form with Fluent Forms
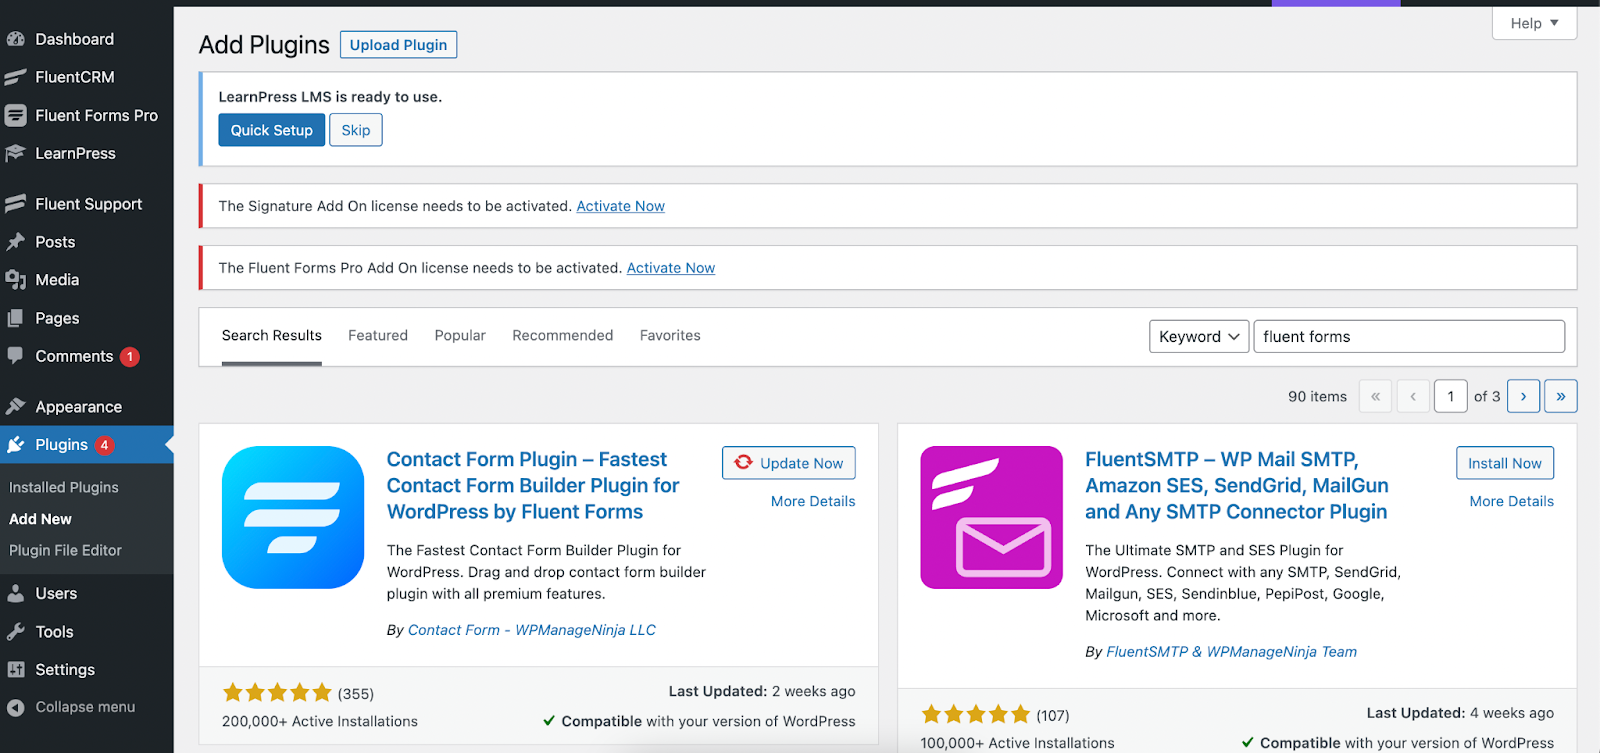
Go to your WordPress dashboard, and move on to the plugins section. Then search for the Fluent Forms pro on the search bar from the Add New section, and install it. We need the pro version because we’ll use some advanced plugin fields.
Why are we using Fluent Forms? Scroll down for the answer.
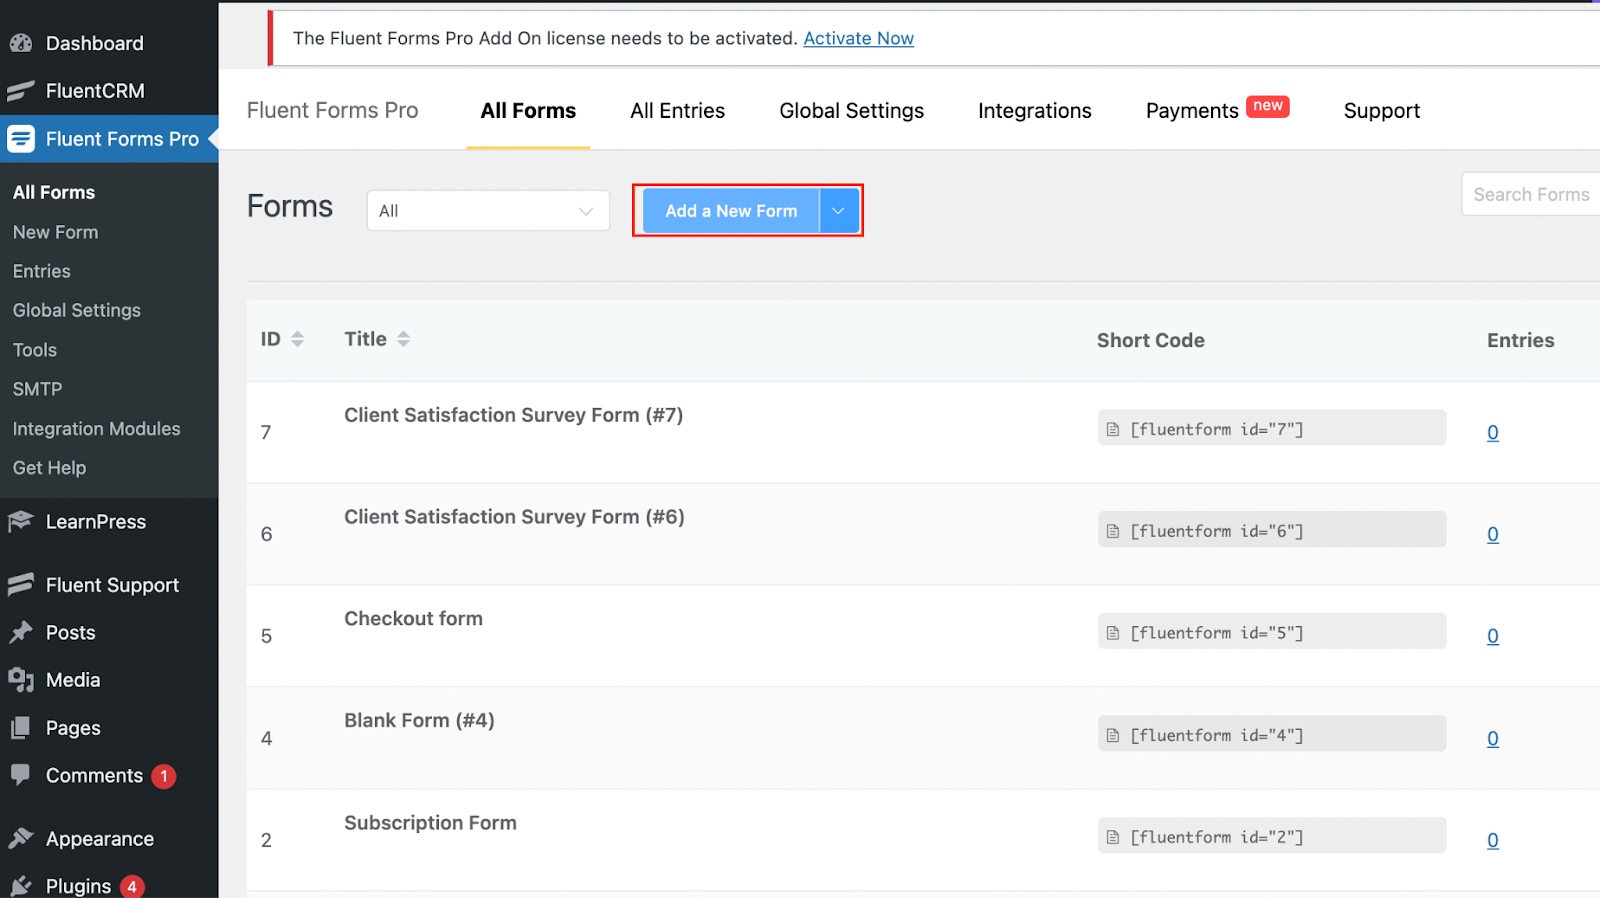
Now, we’re making an event registration form for demonstration purposes. Go to the Fluent Forms pro dashboard. Choose the All Forms section, and click the Add a New Form button.
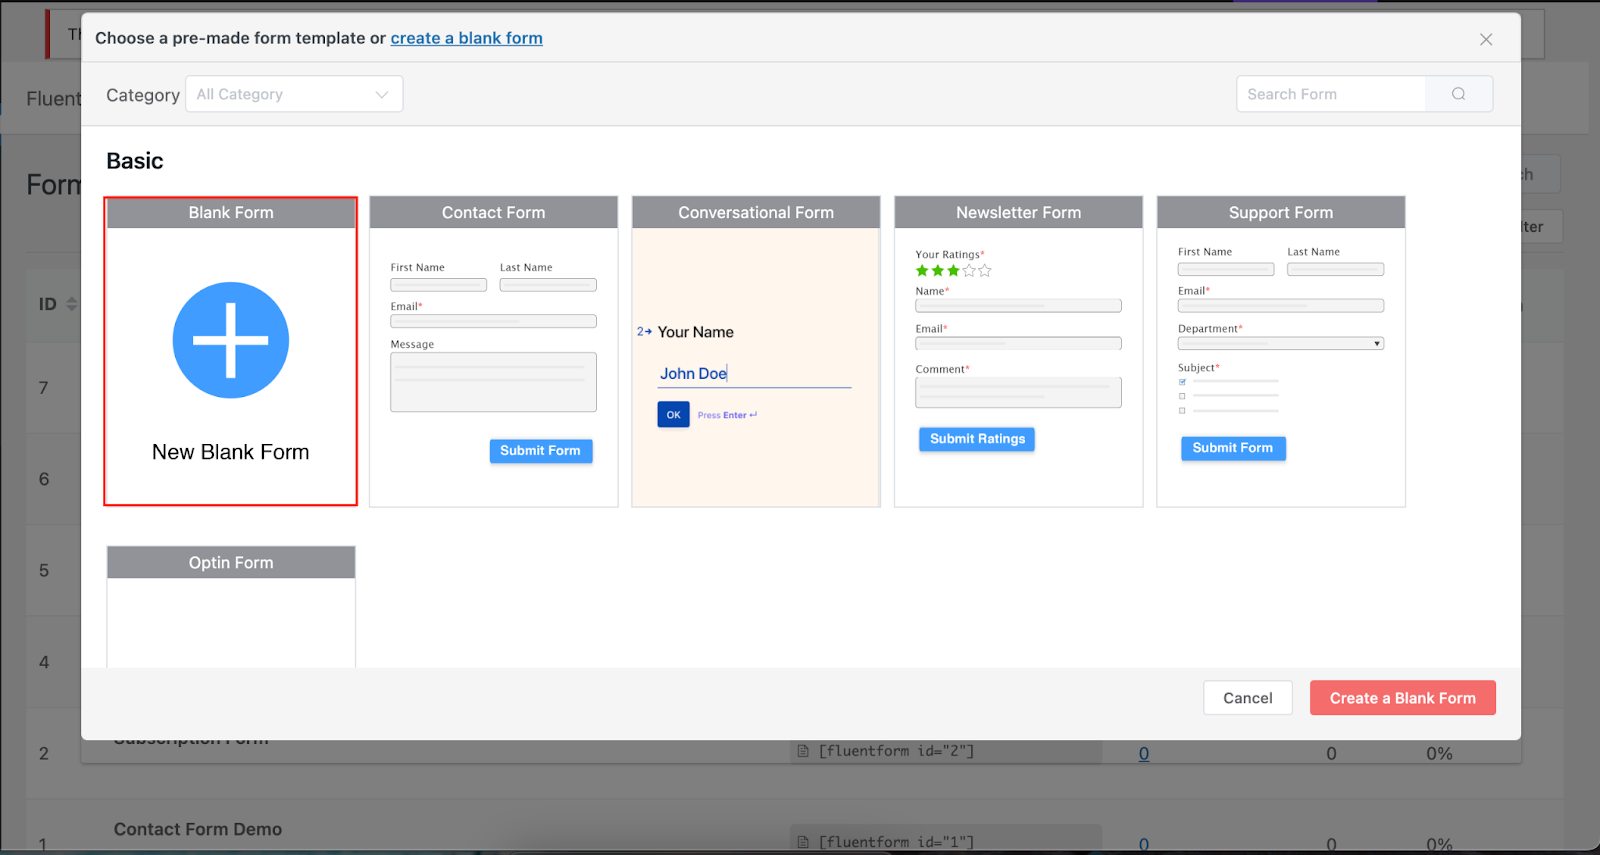
Then we select the Blank Form option, as we want to customize our form on our way.
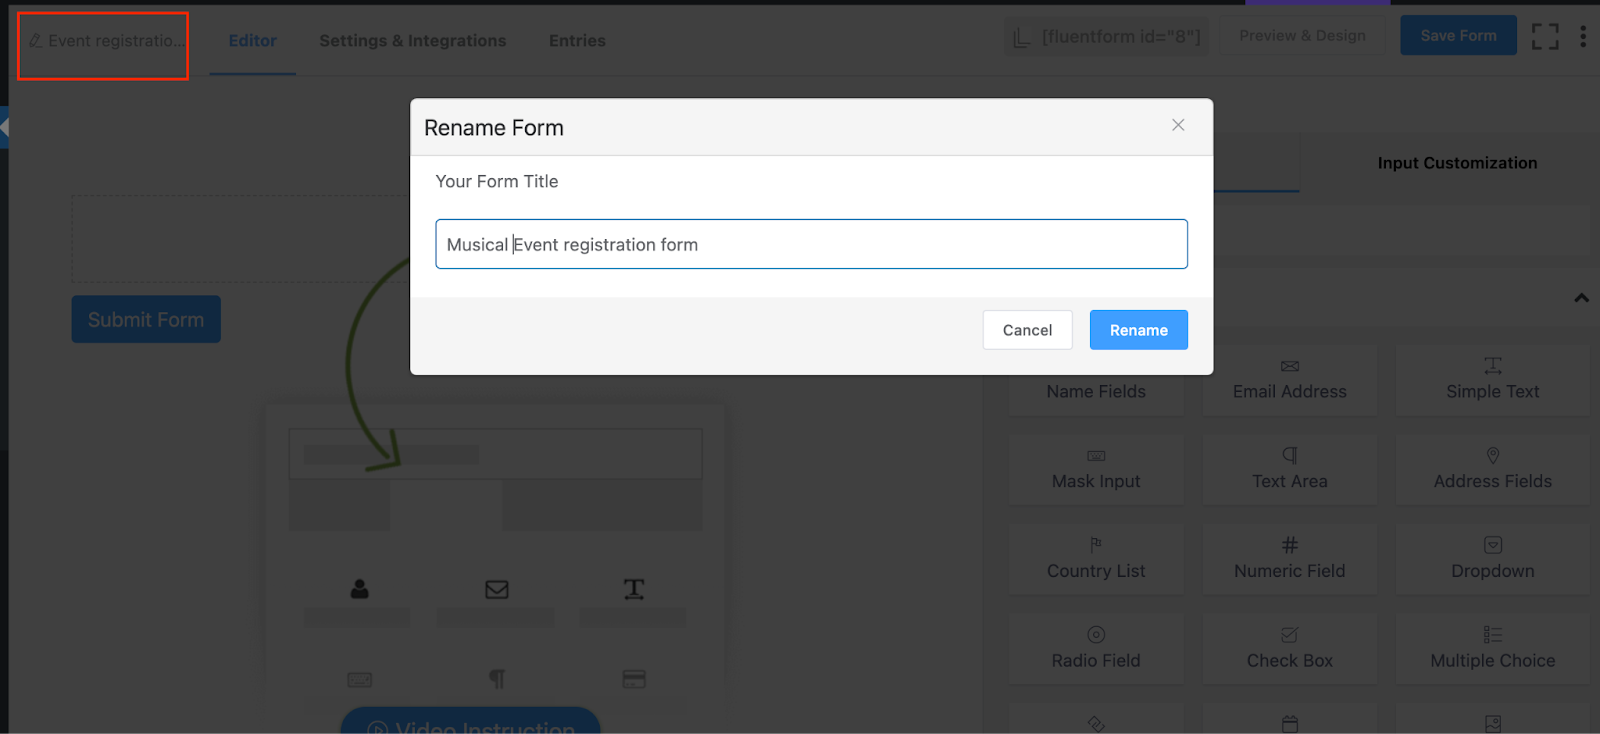
Now you’ll be taken to the form editor. Name your form by clicking on the Blank Form option from the top left corner of the form.
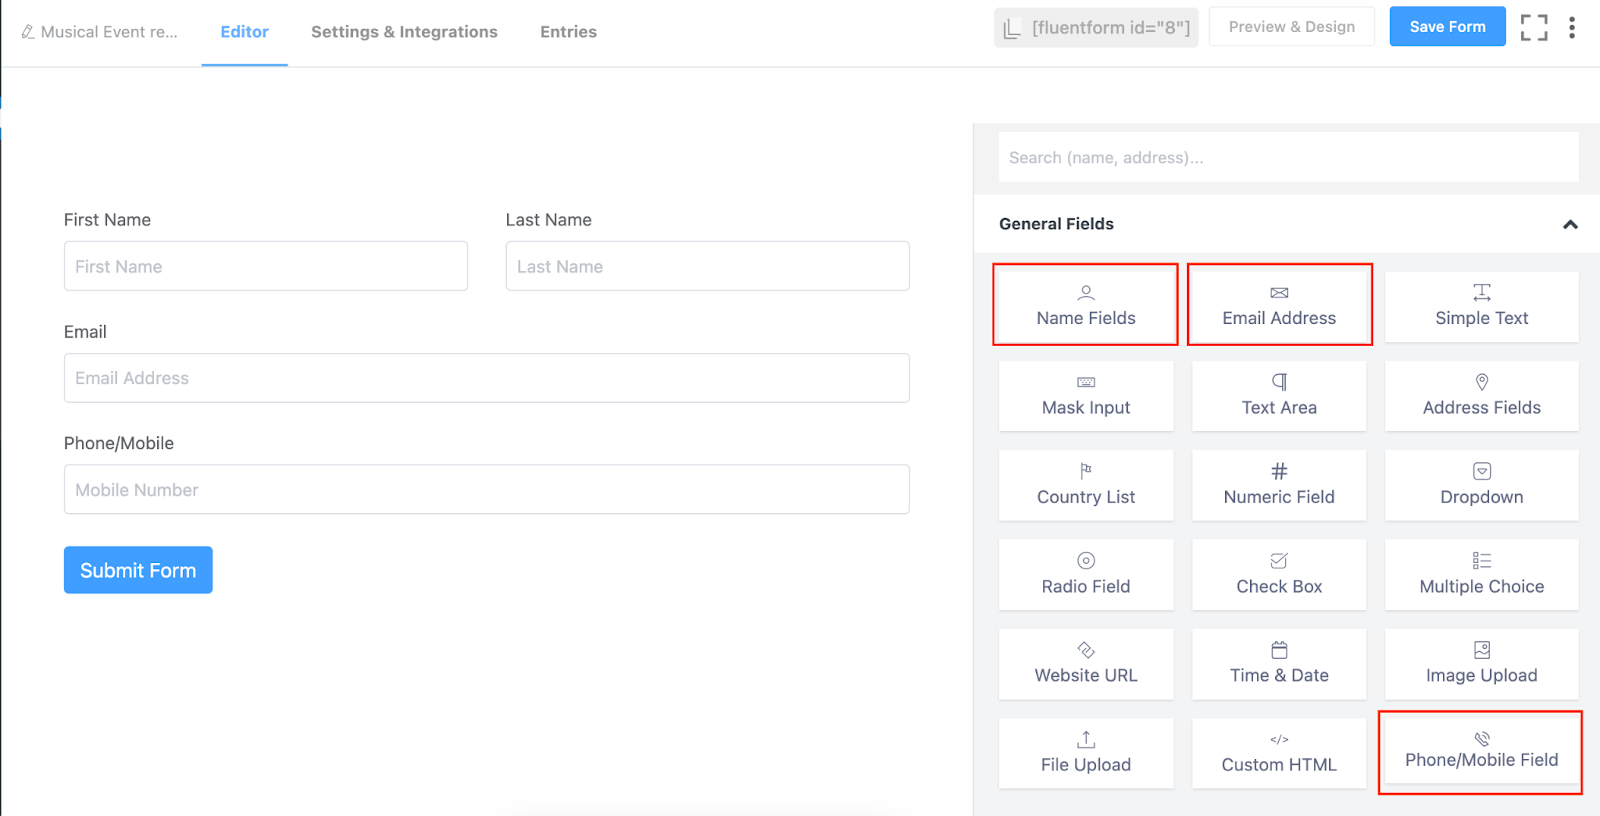
Then, add the name, email, and number fields from the General Fields section.
Go to the Input Customization section of each field by clicking on the pencil icon of each field. For example, we only keep the First Name option from the name field.
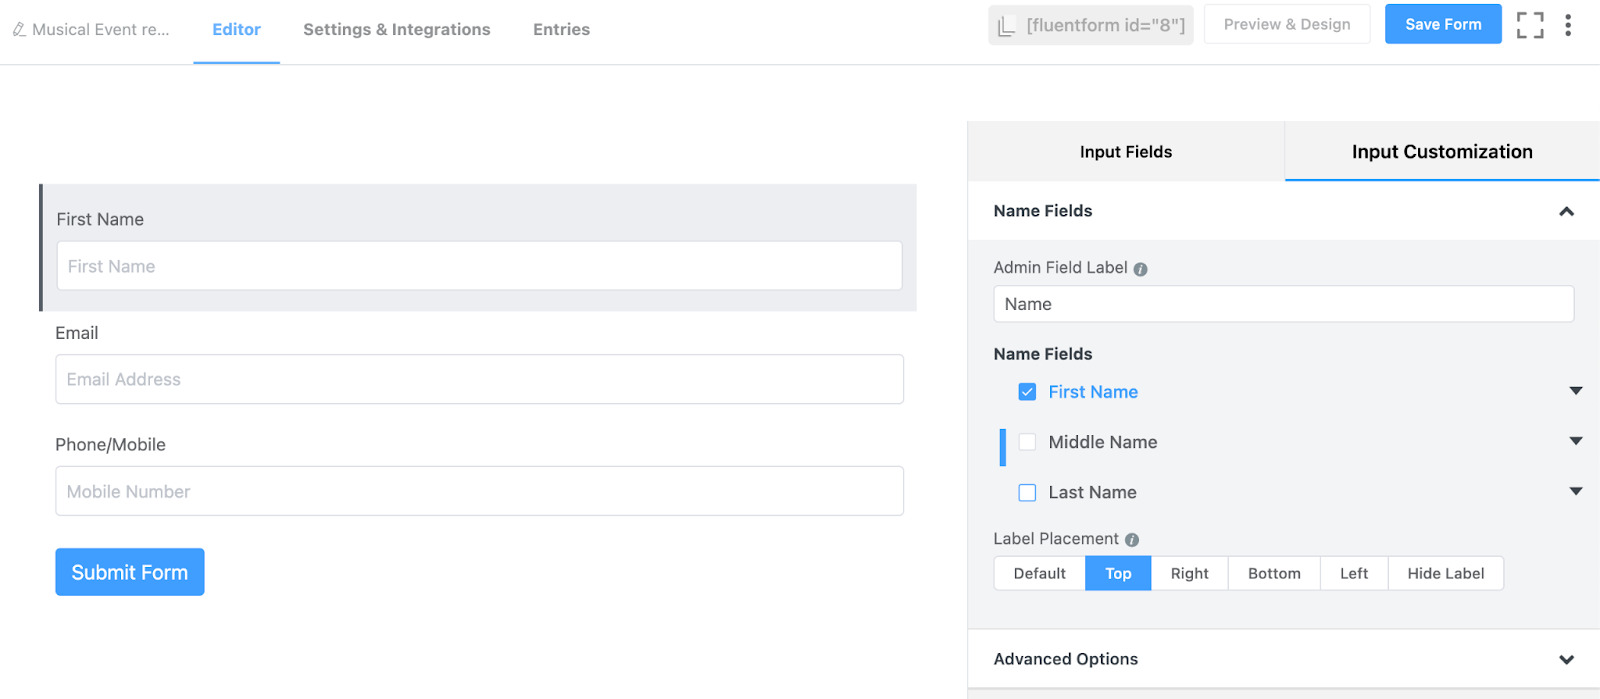
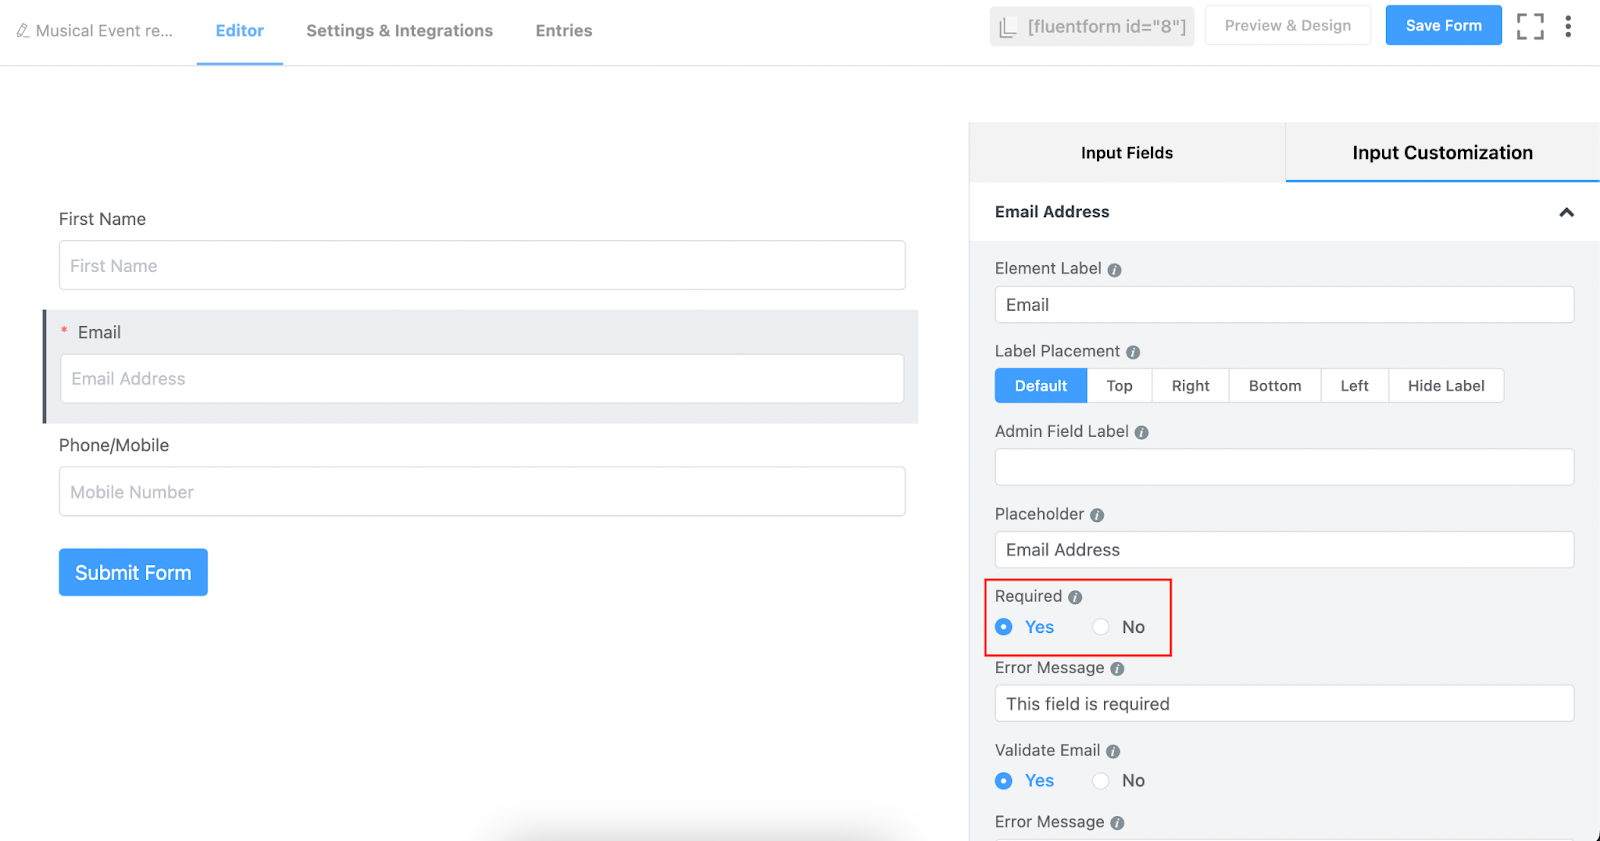
Besides, mark the email and number fields as required.
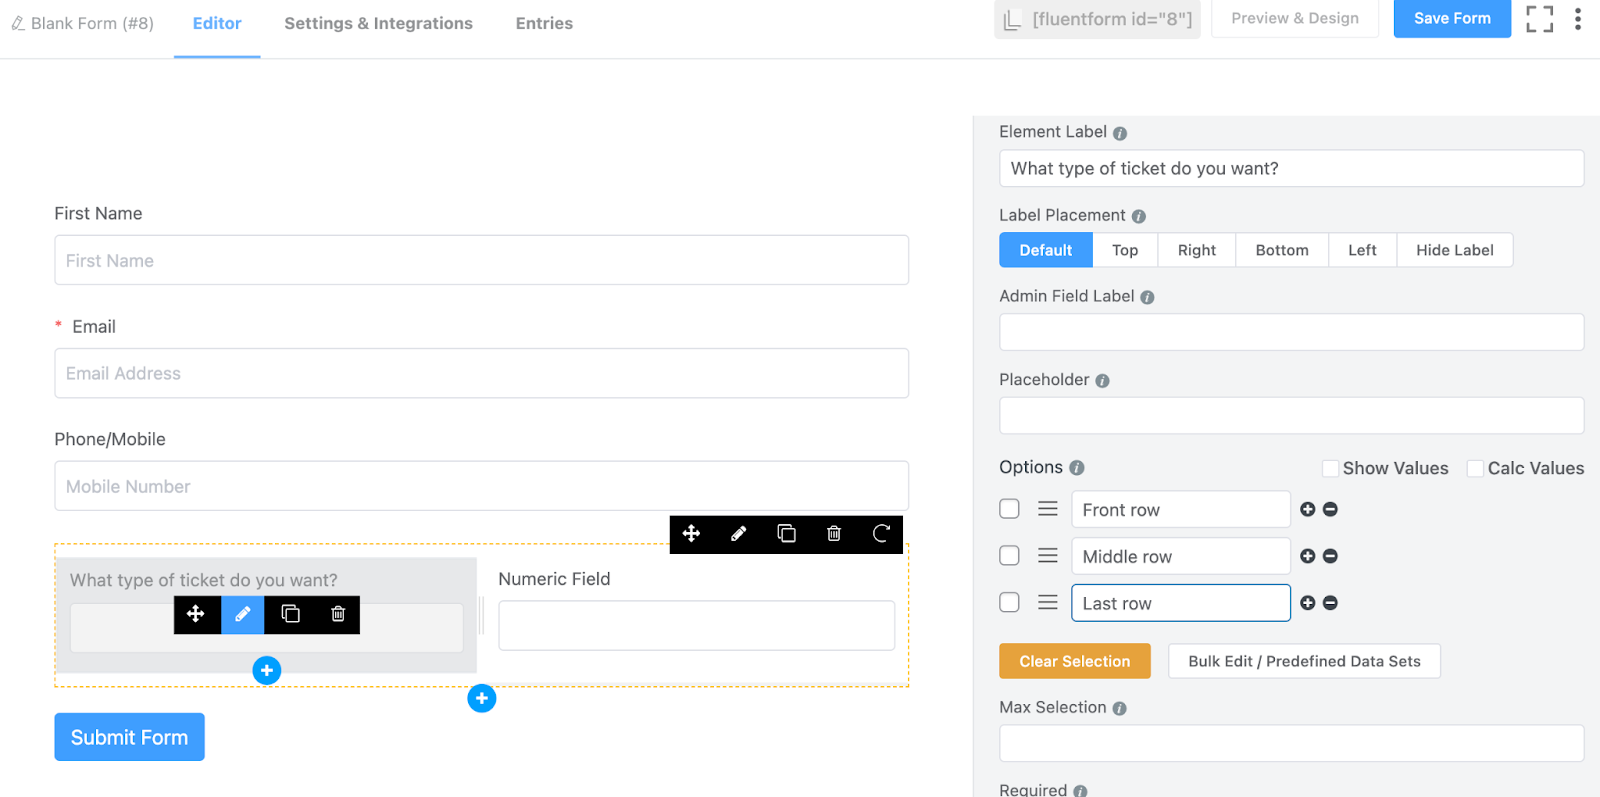
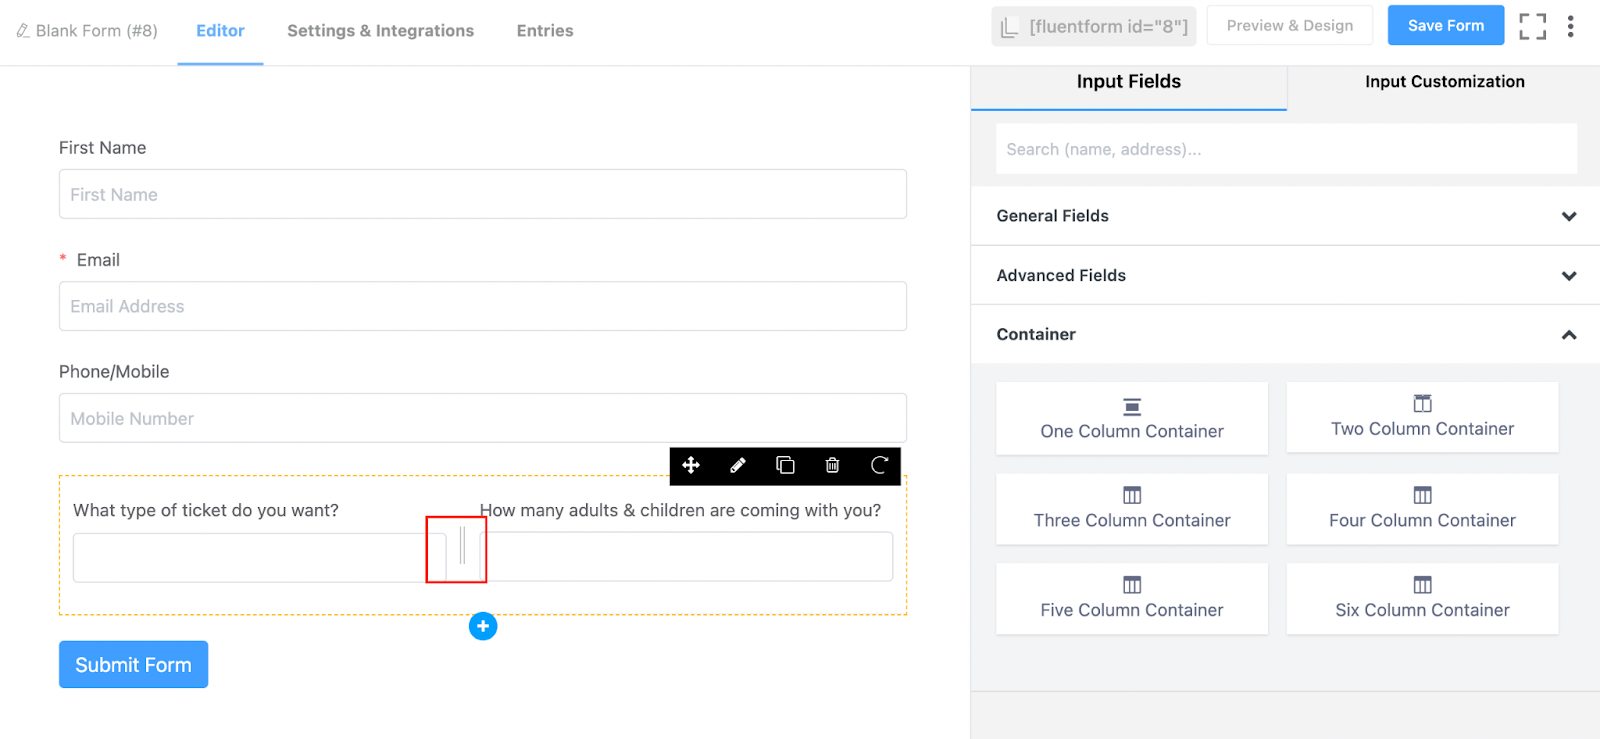
Now select a two-column container field from the Container section. Here we’re asking about the ticket type and number of adults and children. To do so, we’re adding a Multiselect field from the Advanced Fields section and a Numeric Field from the General Fields section on both sides.
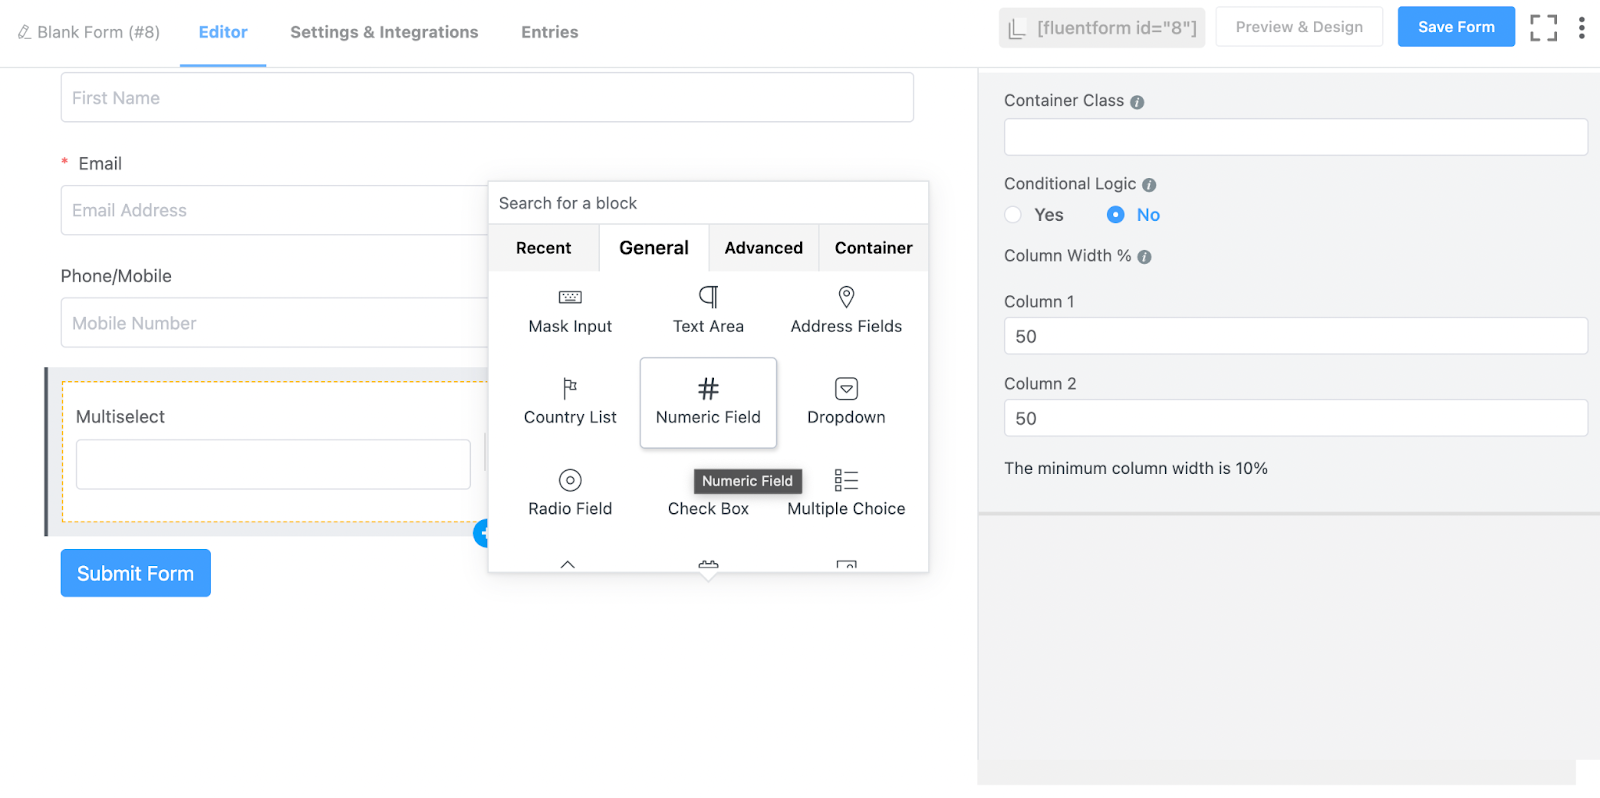
Now, on the multi-select field, we’re asking about the ticket type, and the number filed is for the number of people.
You can set the column width for each field according to the length of the question.
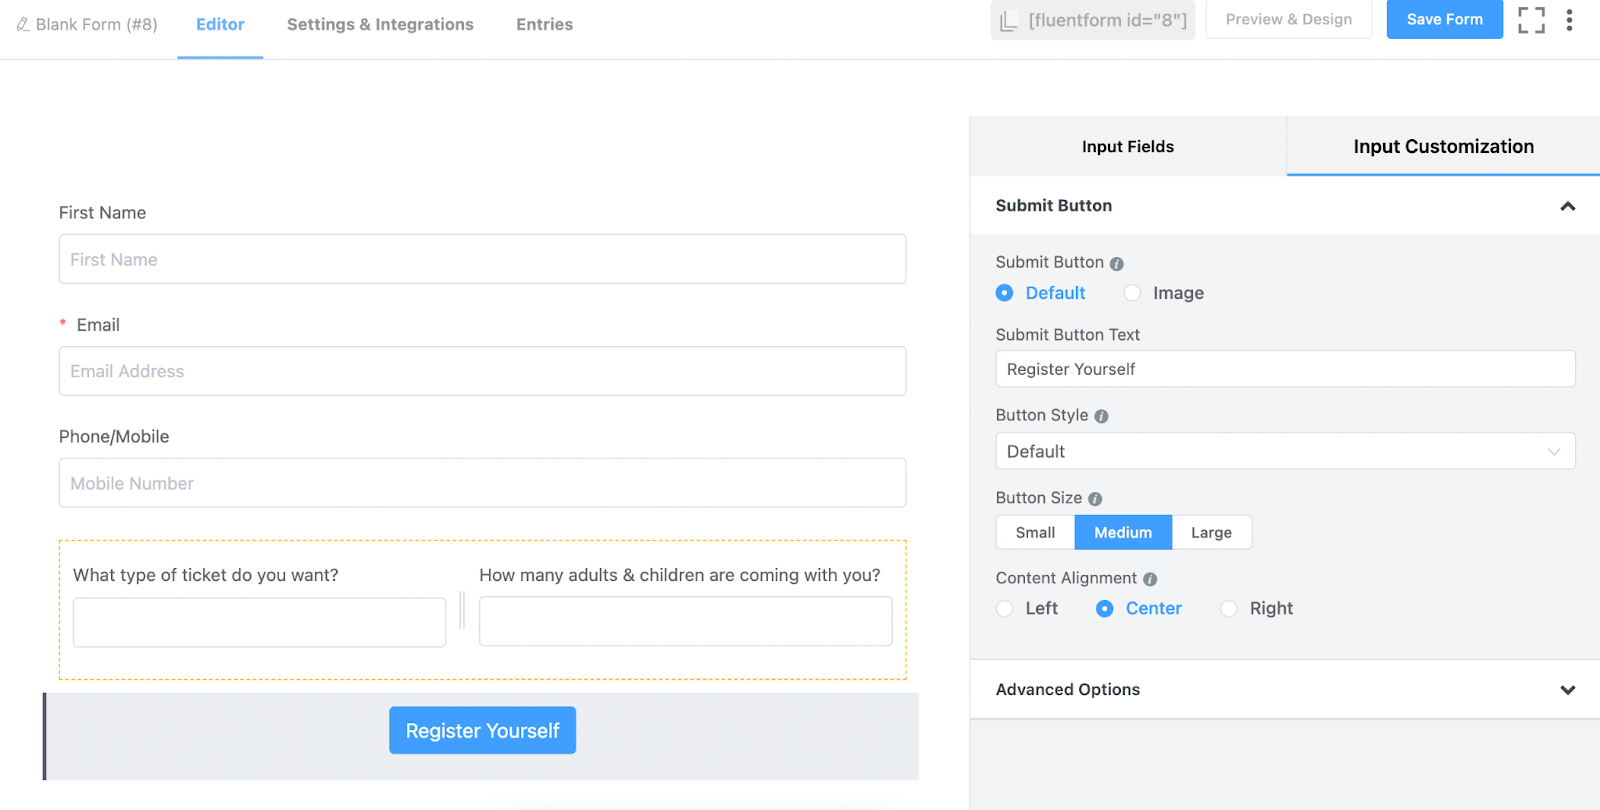
Now, we’ll customize the submit button directly because we’ll collect the payment on the arrival of the guests. We’ll keep this information safe on our event record and collect payment according to that.
Now, go to the input customization section of the submit button. Here we’re naming it “Register Yourself” and placing it in the center.
That’s it! Don’t forget to save the form when adding fields is done! Now let’s add some colors to our form.
Customize your form
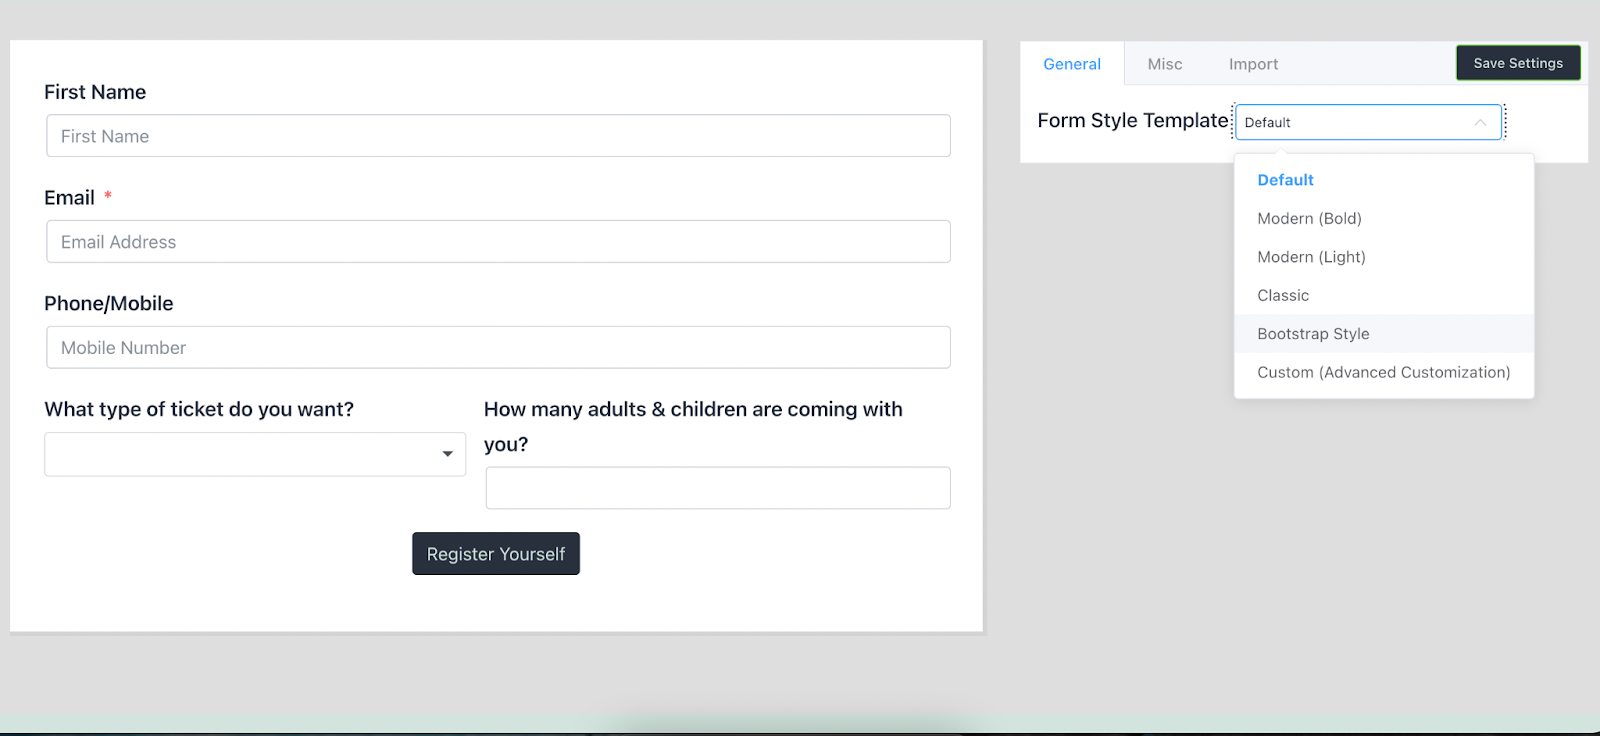
Click on the Preview & Design button next to the Save Form button. After that, tap on the Form Style Template, and select a template. It’s the global styler option of Fluent Forms. We’re going for the Bootstrap Style.
Then move on to the Misc section to customize the Container Styles, Asterisk Styles, Inline Error Message Styles, After Submit Sucess Button Styles, After Submit Error Message Styles, etc. We’re just changing the container color and the border of the form.
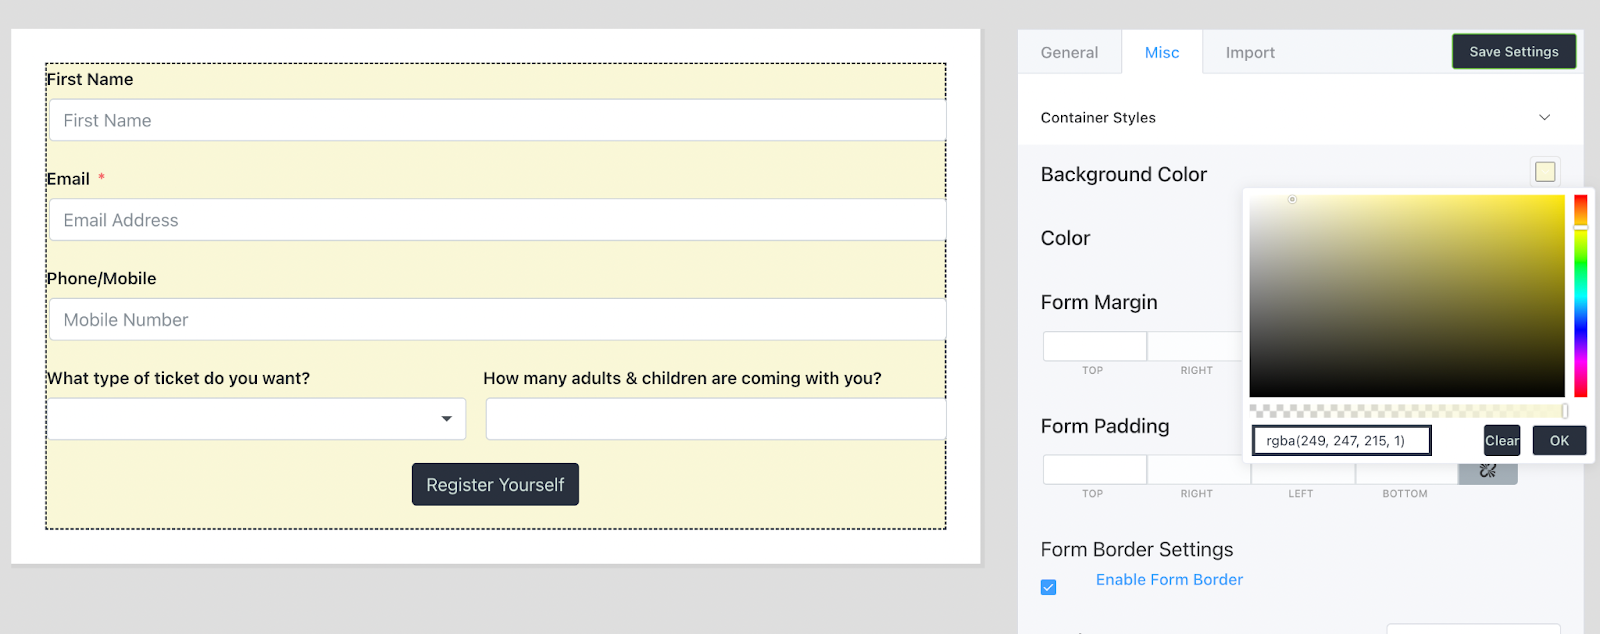
Don’t forget to save the settings when done.
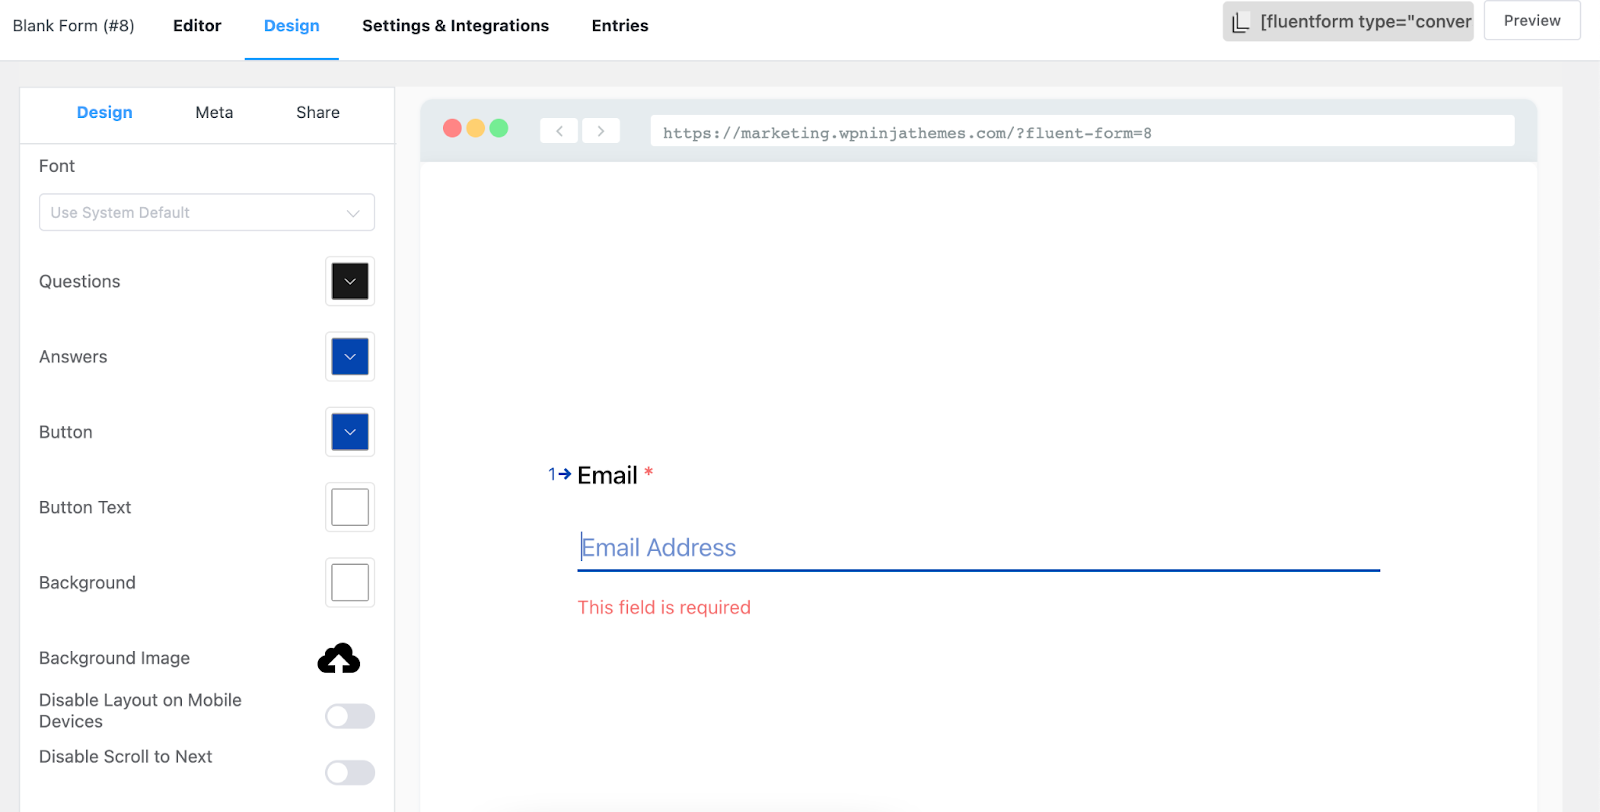
If you want, you can also turn your form into a conversational form with Fluent Forms. Get back to the form editor again, and click on the three-dotted options to open up a Convert to conversational Form button. Tap on that.

We’re skipping the conversational form editor as we don’t want to add any fields here. So, directly moving on to the Design part. Here, you can set the questions color, answers color, button color, button text, background color, and background image, enable or disable mobile layout, enable or disable the scroll to text, enable or disable branding, etc. We’re not adding anything because we want to use the simple event registration form.
That’s it! Our form is ready. Now, let’s see how to send confirmation email.
Set the form settings
Move on to the Settings & Integrations section from the form editor part. Here, you can set the confirmation type and confirmation message, enable double opt-in, set form layout, and many other things on the Form Settings part.
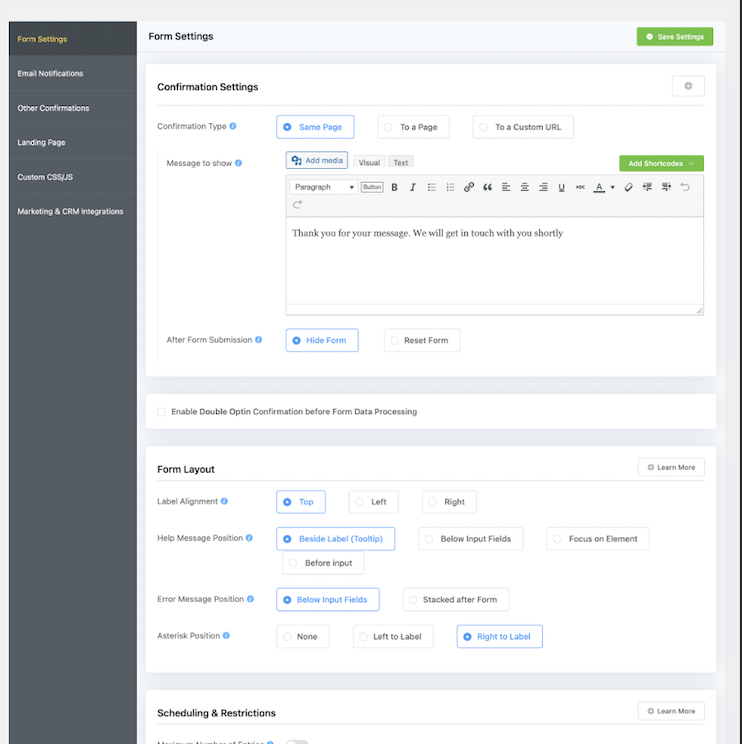
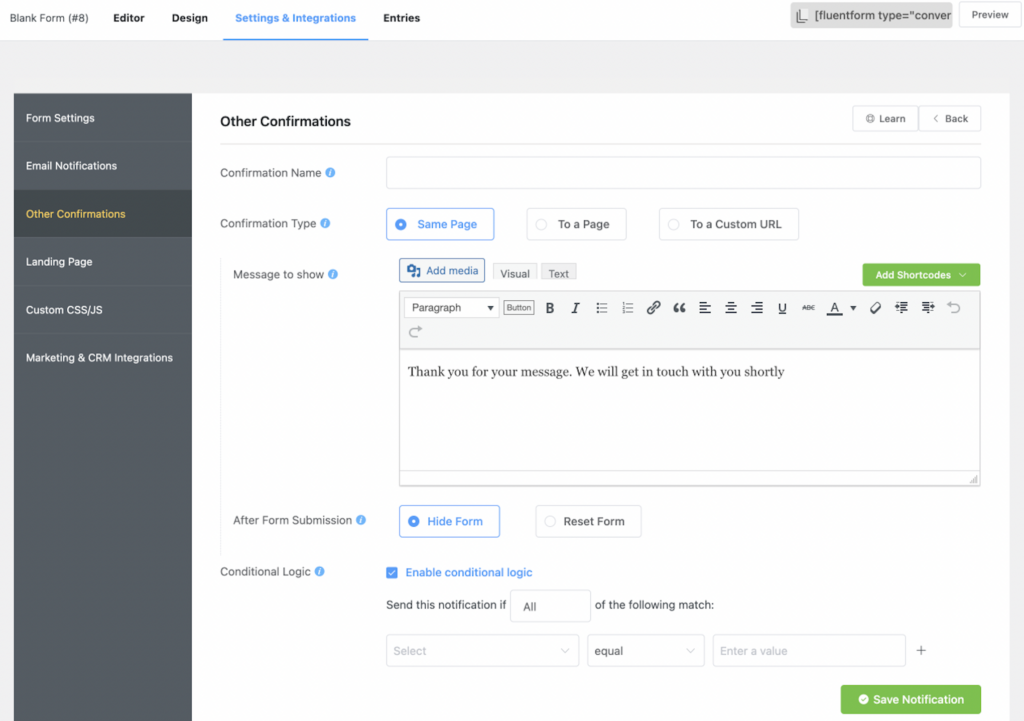
In this part, we’re skipping the Email Notification part because we’ll discuss it separately in the next section. So, directly move on to the Other Confirmations settings of the form. Here, you can add other confirmations, like what to do after the form is submitted, or you would like to enable the conditional logic on the form submission, etc.
Next, scroll down to the Marketing & CRM Integrations part. You can connect 40+ third-party integrations of Fluent Forms, such as Mailchimp, Sendinblue, ConvertKit, ZohoCRM, etc.
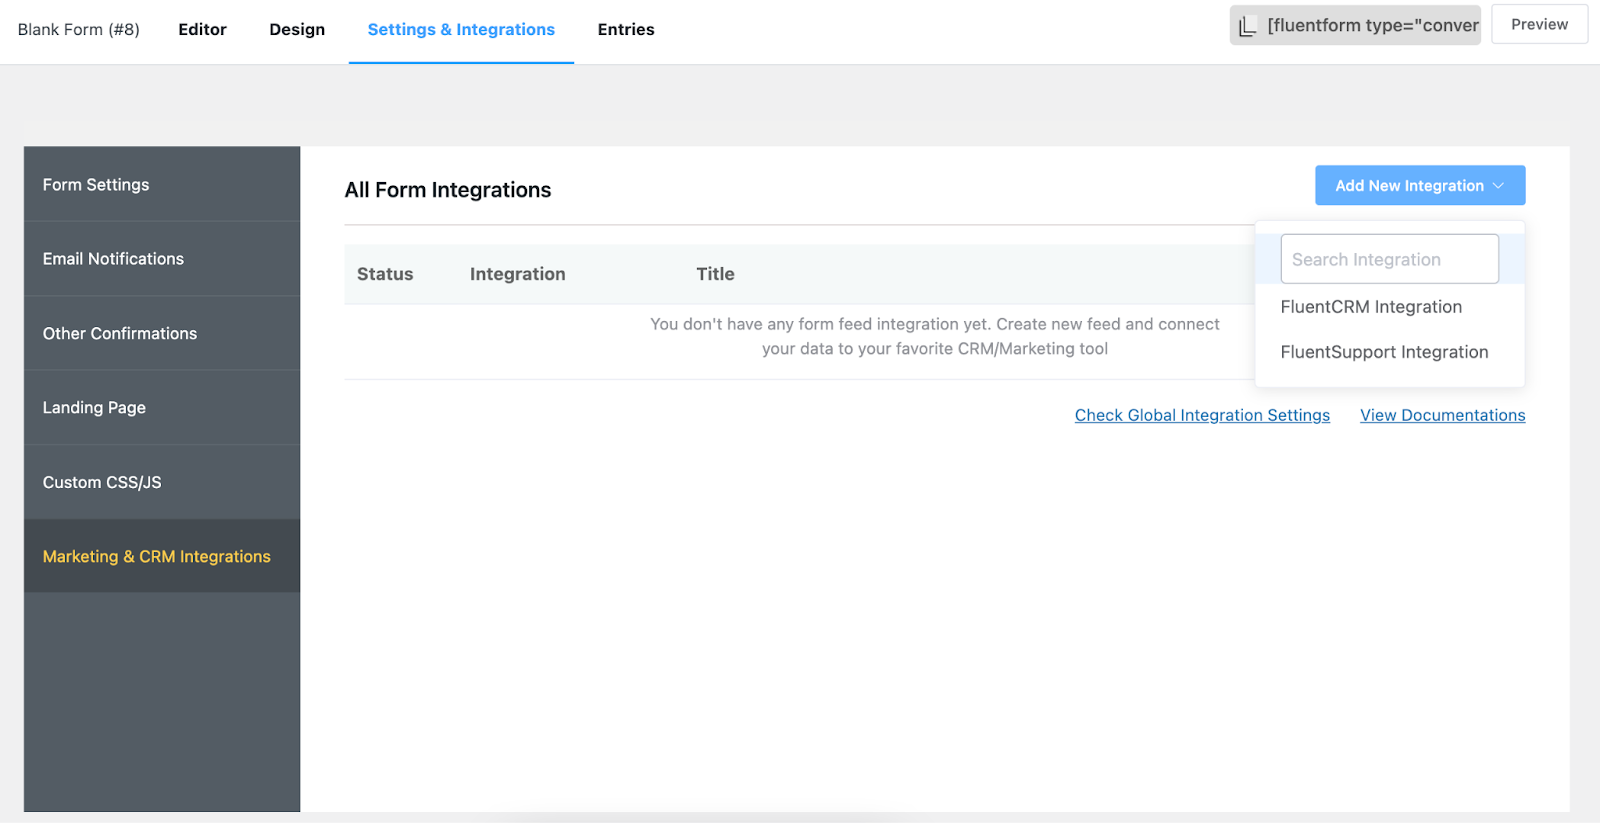
For now, we’re skipping this part.
Customize email notifications with FluentSMTP
Go to the Email Notifications section of the settings options we skipped earlier. First of all, enable the email notifications button.
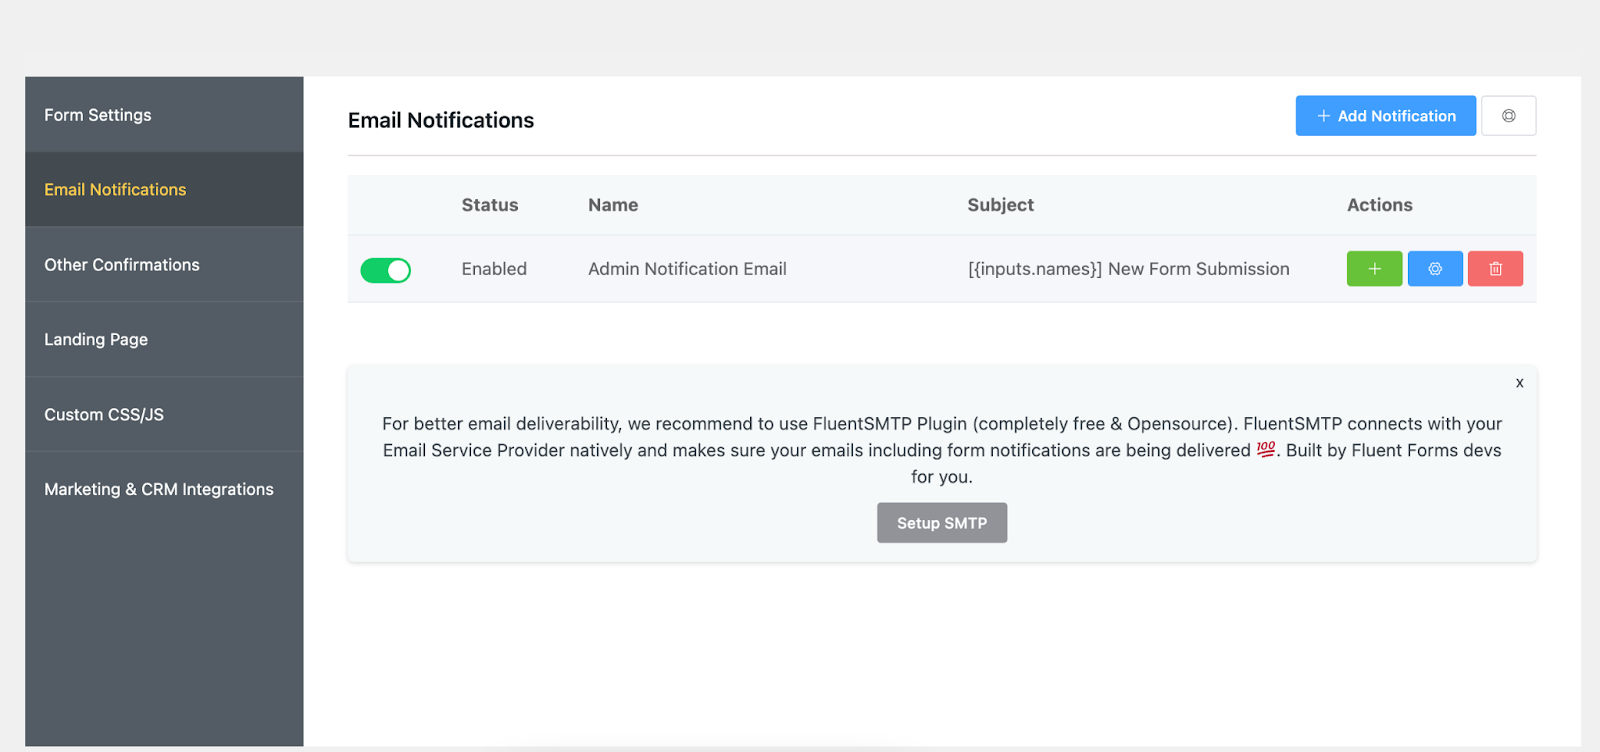
Then, if you didn’t install the FleuntSMTP plugin yet, you’ll be asked to do that for better email deliverability on the dashboard. Click on the Setup SMTP button, and you’ll be asked to Install and Activate FluentSMTP Plugin.
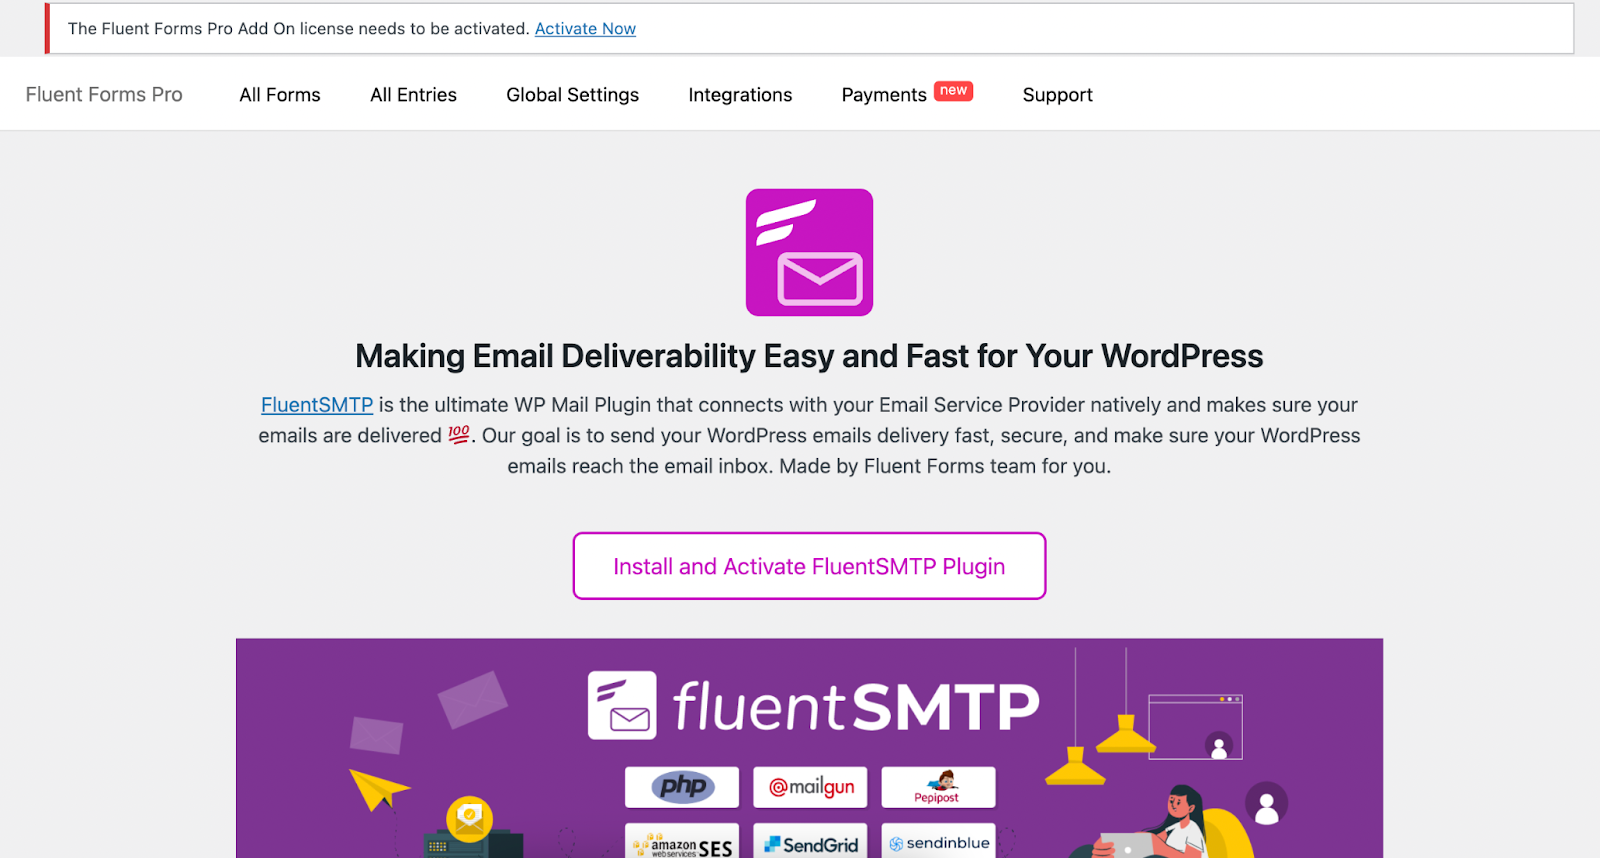
Click on that button to activate it. Then you’ll be asked to select your email service provider. We’re choosing the SendGrid option.
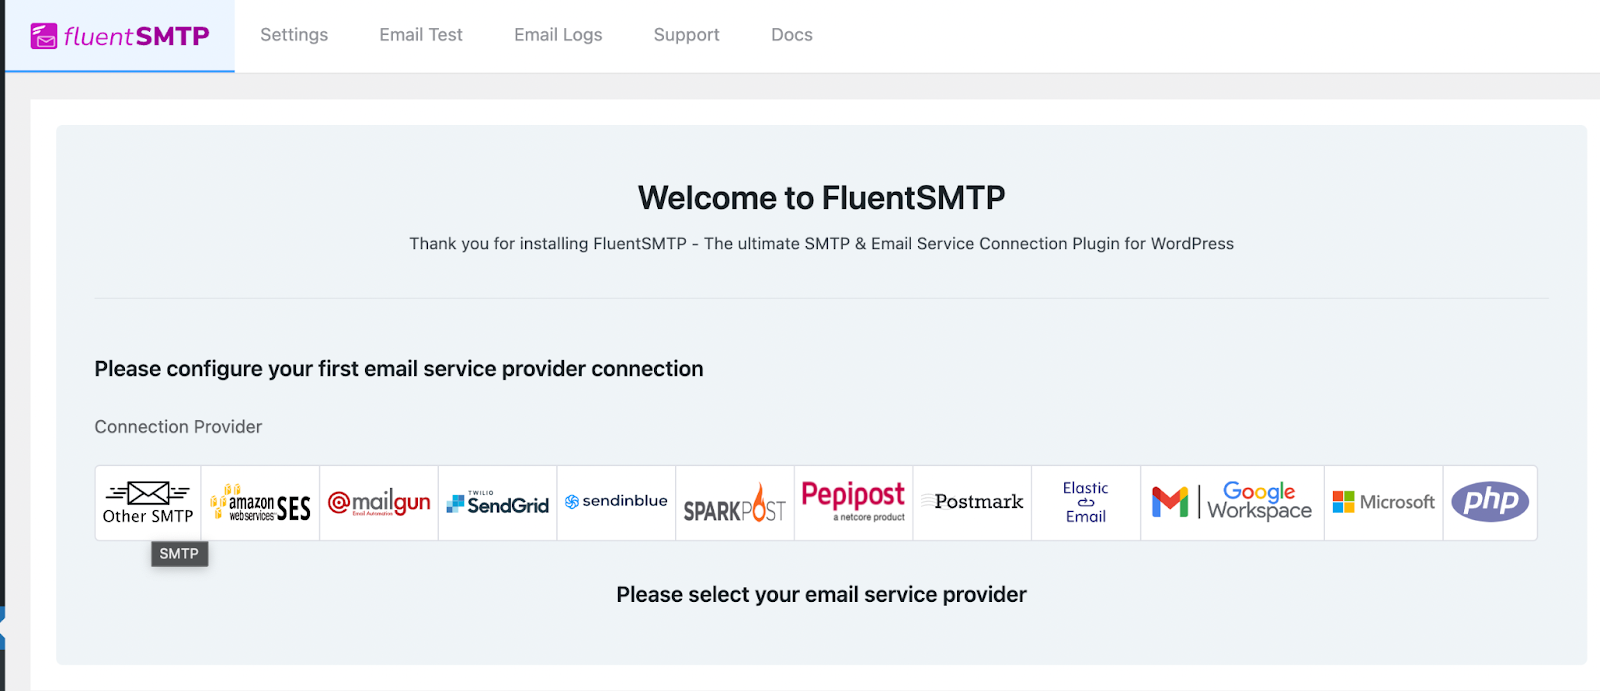
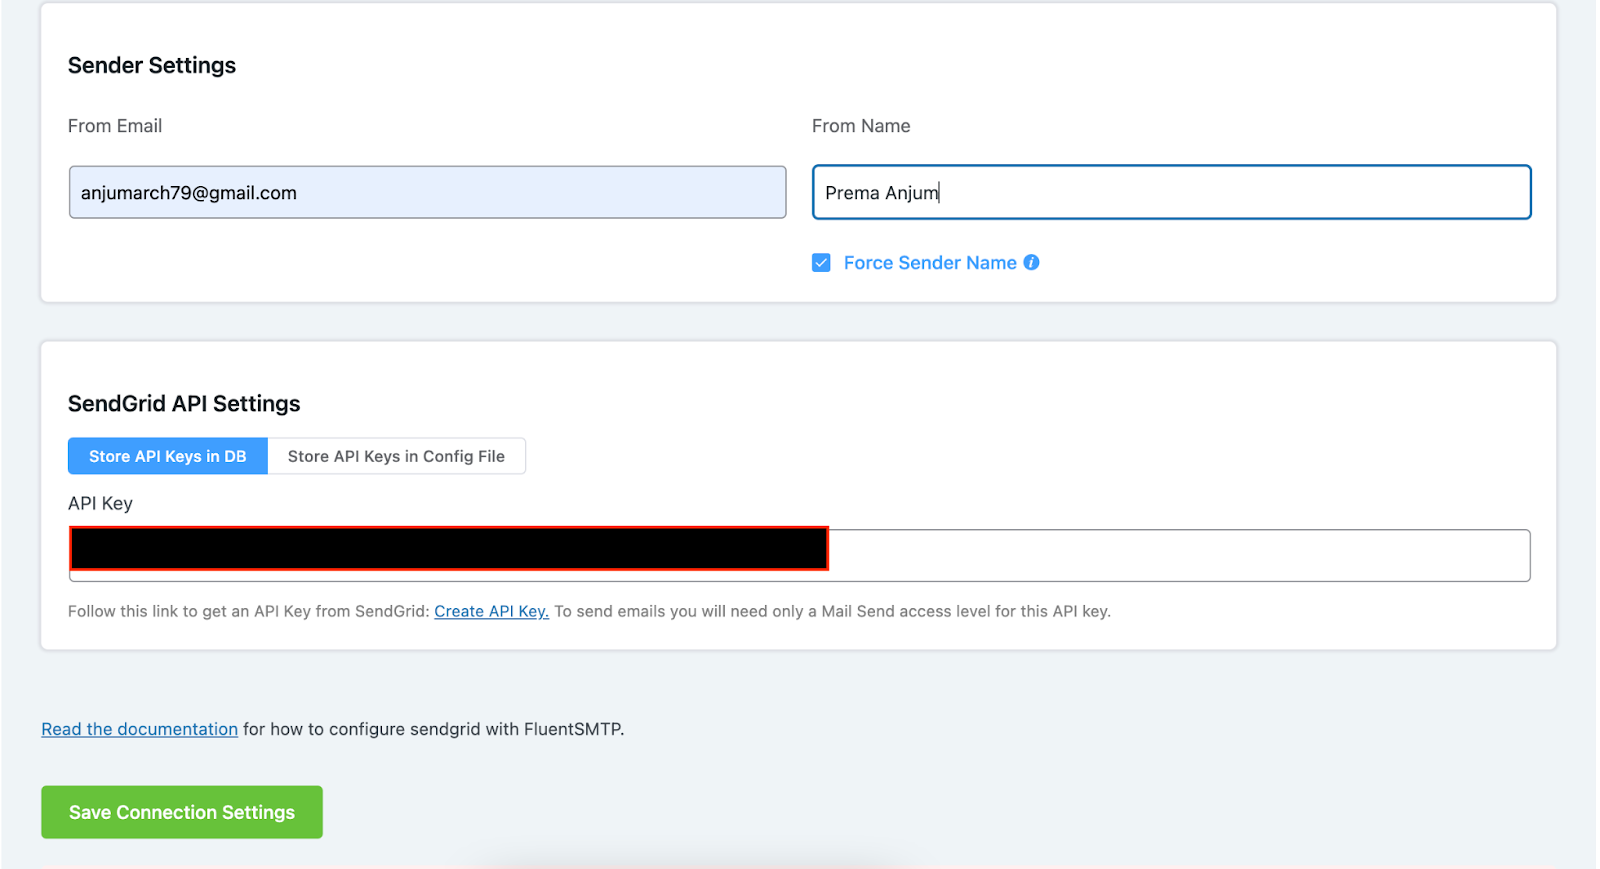
Now set up the From Name, Email, SendGrid’s API key, and Save Connection Settings. Now to get SendGrid’s API key, follow the process below.
How to get SendGrid API key
If you already have a SendGrid account, then log into your account, or if you don’t have one, create one. Then, go to SendGrid’s dashboard, and click on the Settings option.
From there, first of all, you have to verify the sender authentication. To do so, click the Sender Authentication button from the settings panel.
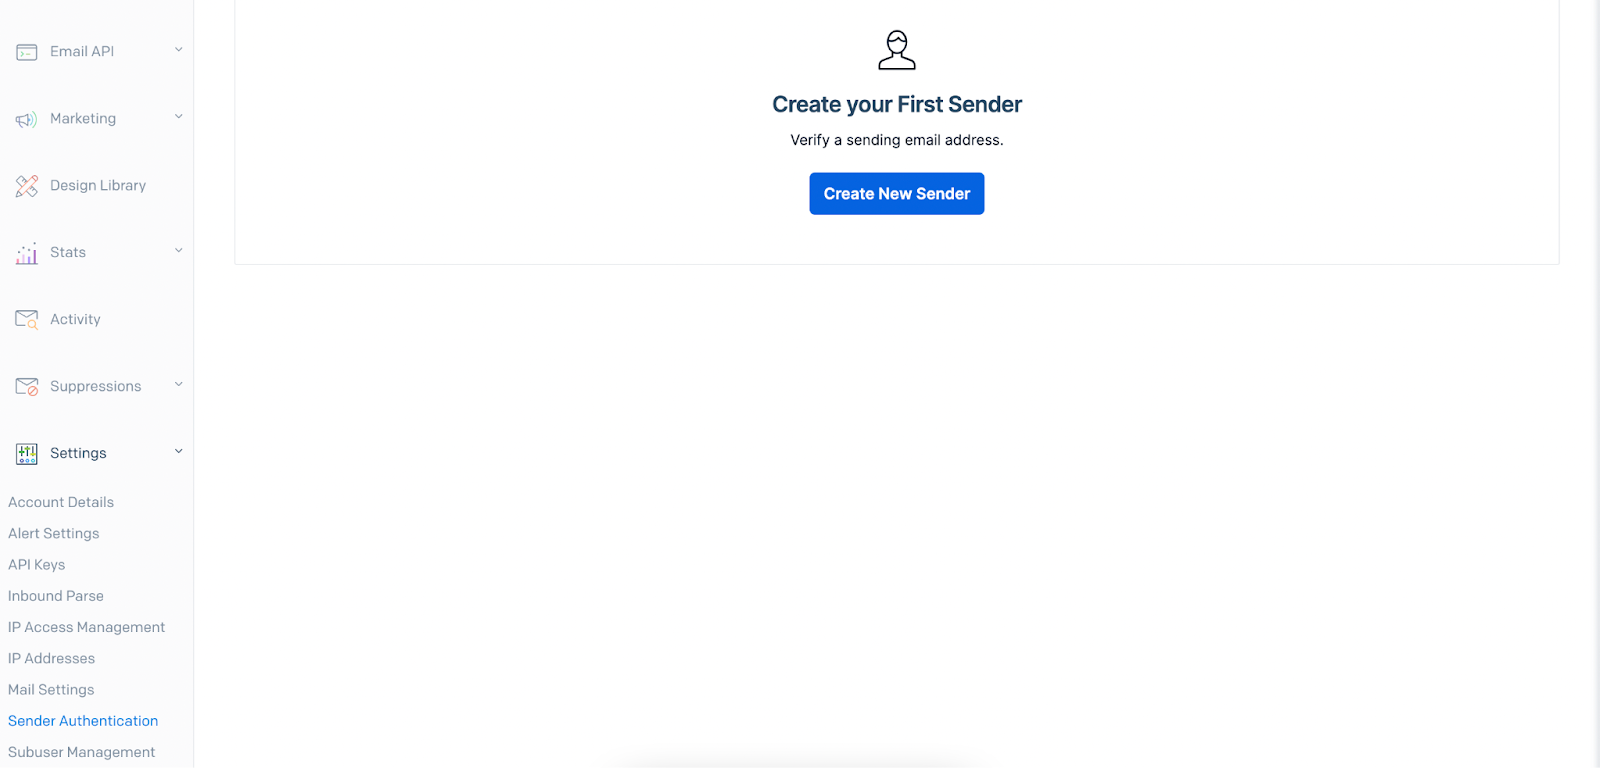
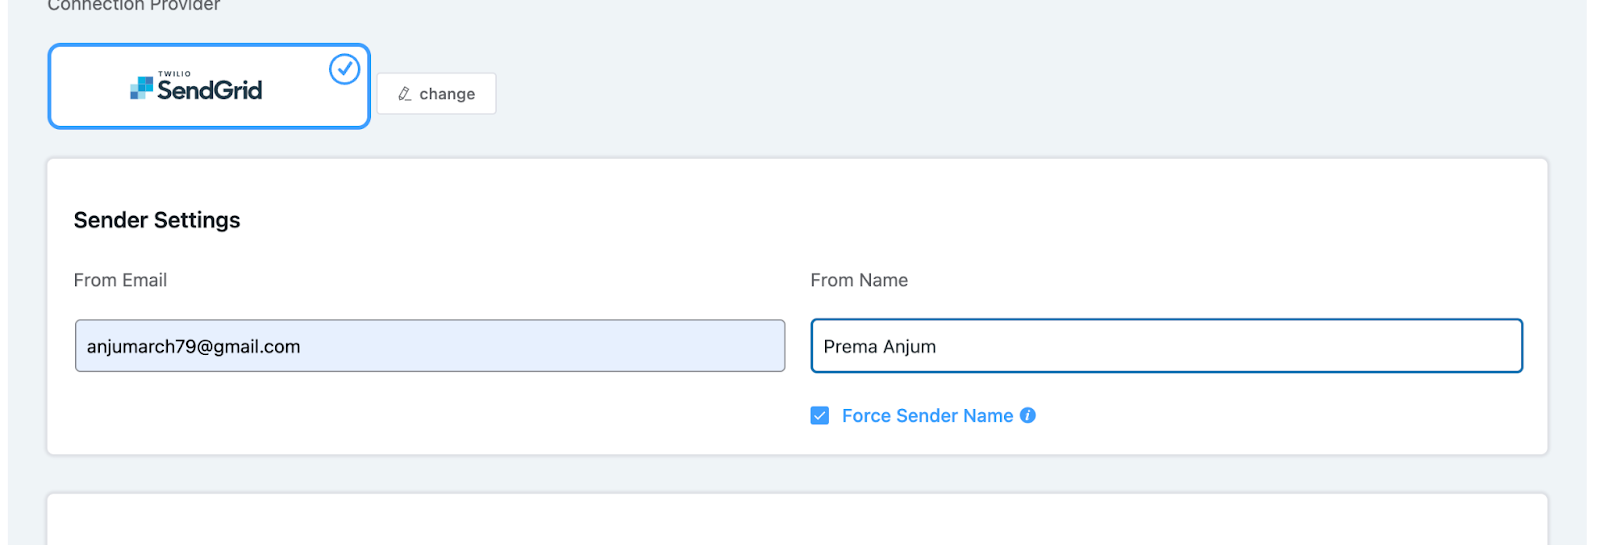
Here, click on the Create New Sender option. Then give your name, email, and company details you want to use on your SMTP account.
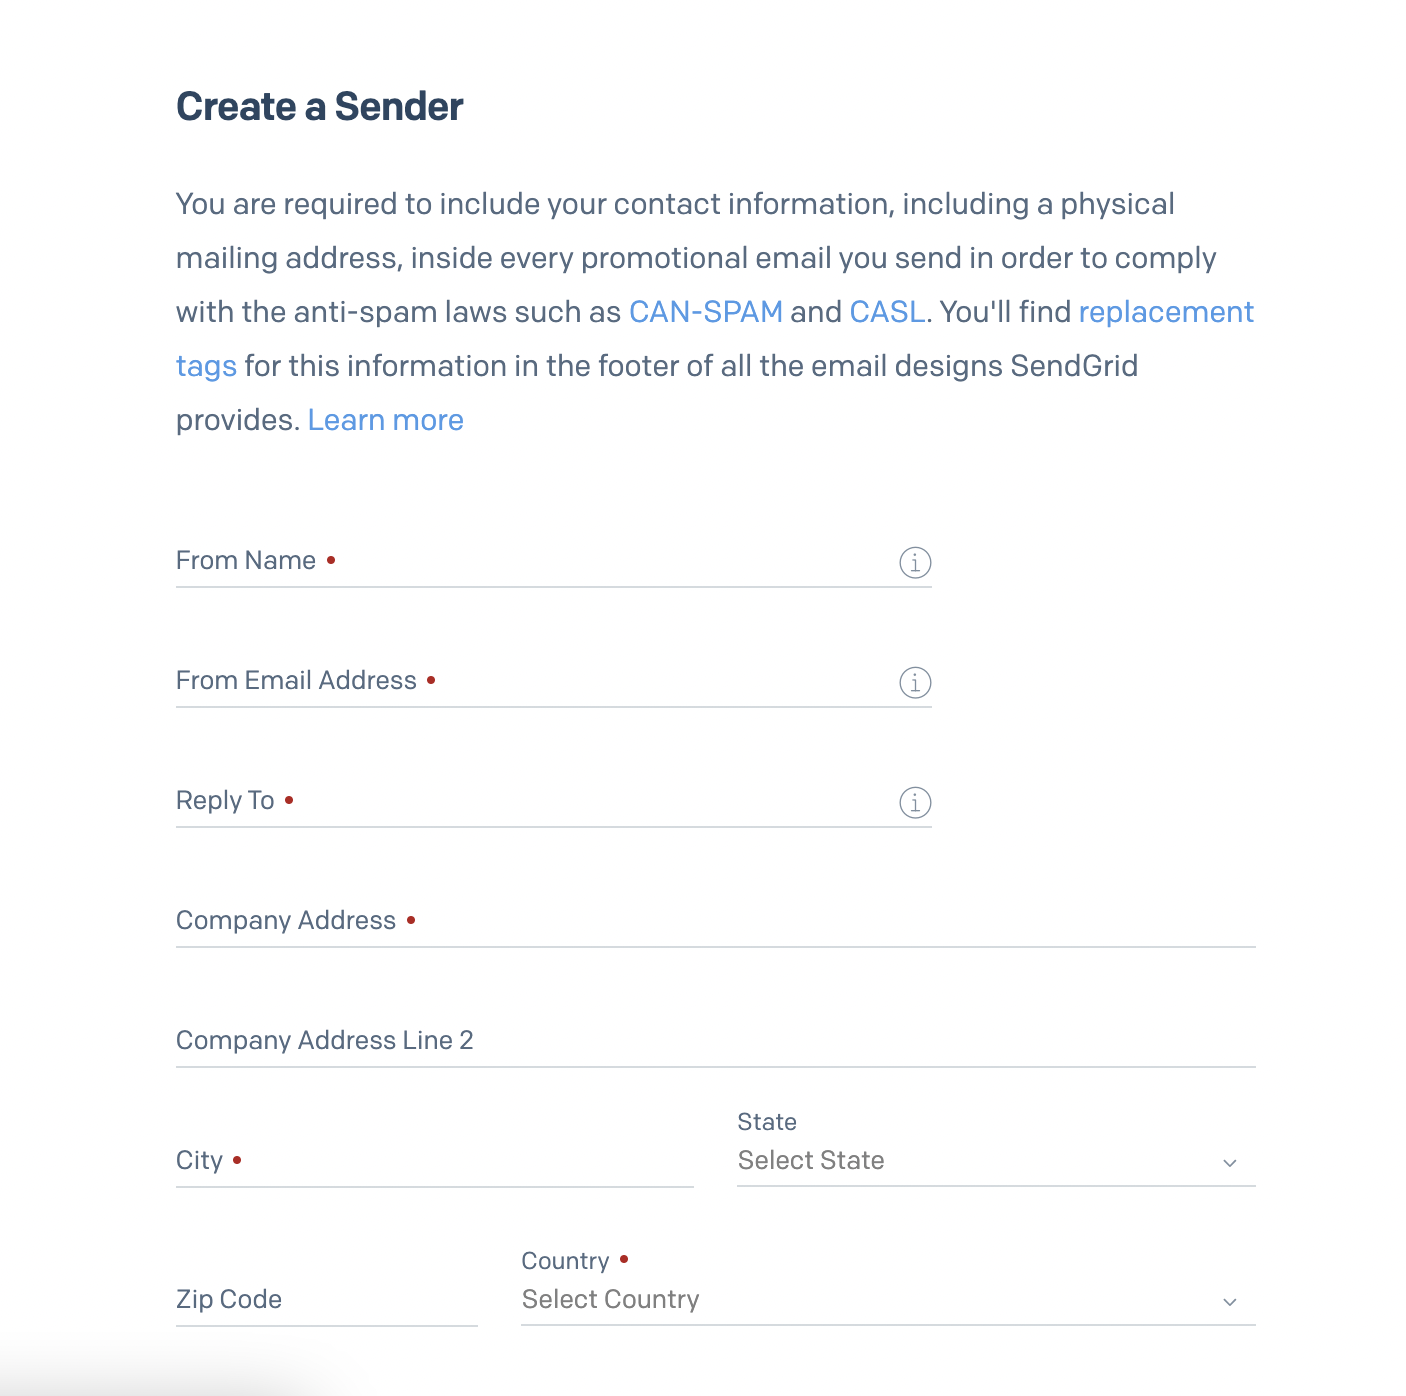
Now move on to your Fluent Forms dashboard, and place the From Email and Name as you have created for the SendGrid account.
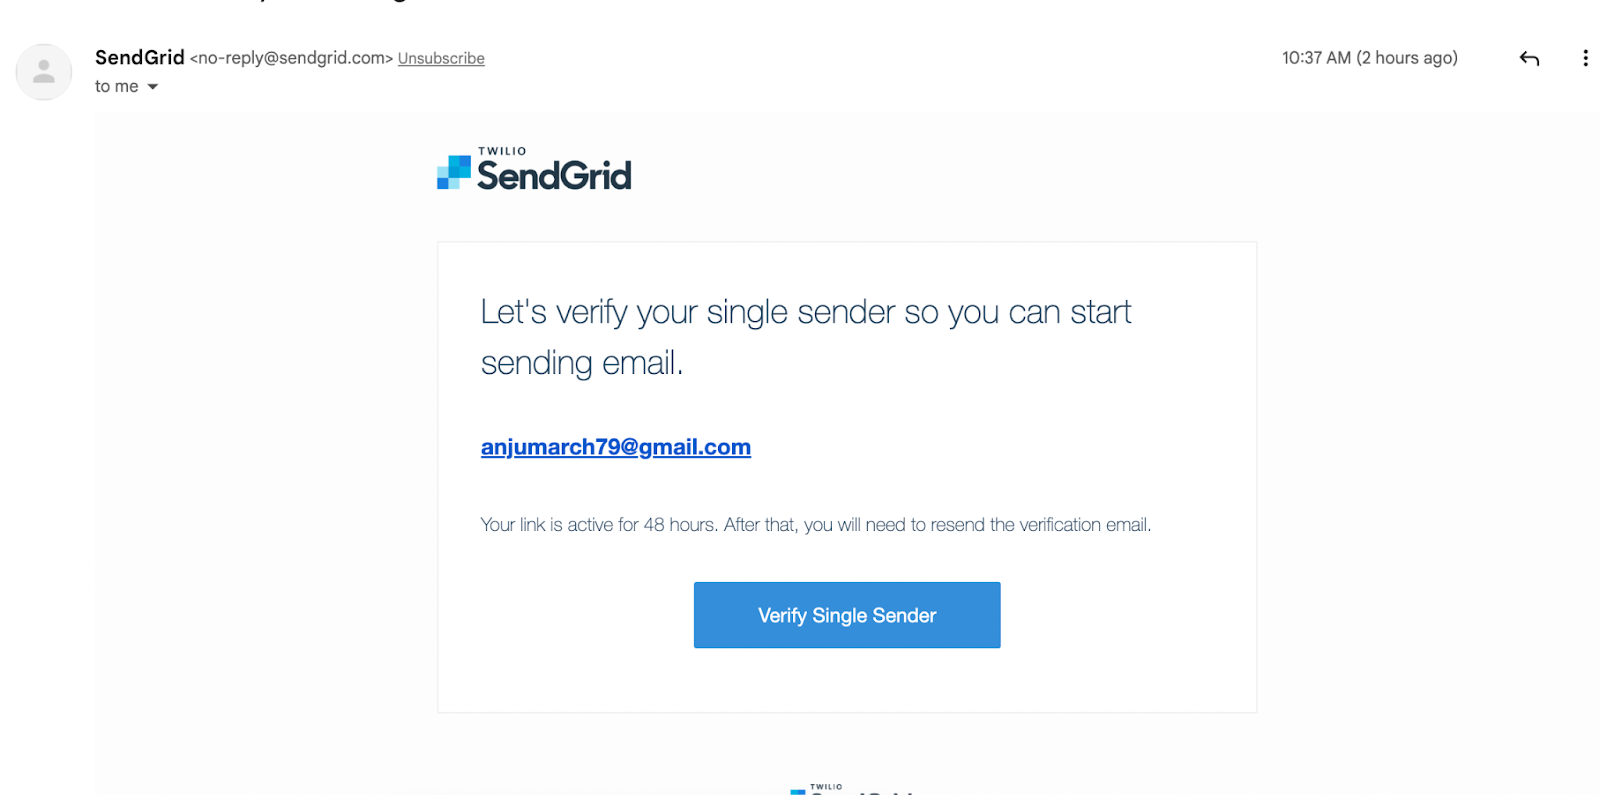
After that, you’ll receive a verification email on your email to confirm the verification.
Then move on to SendGrid’s dashboard again to get the API key. Now from the Sender Authentication, go to the API Keys section on the settings option.
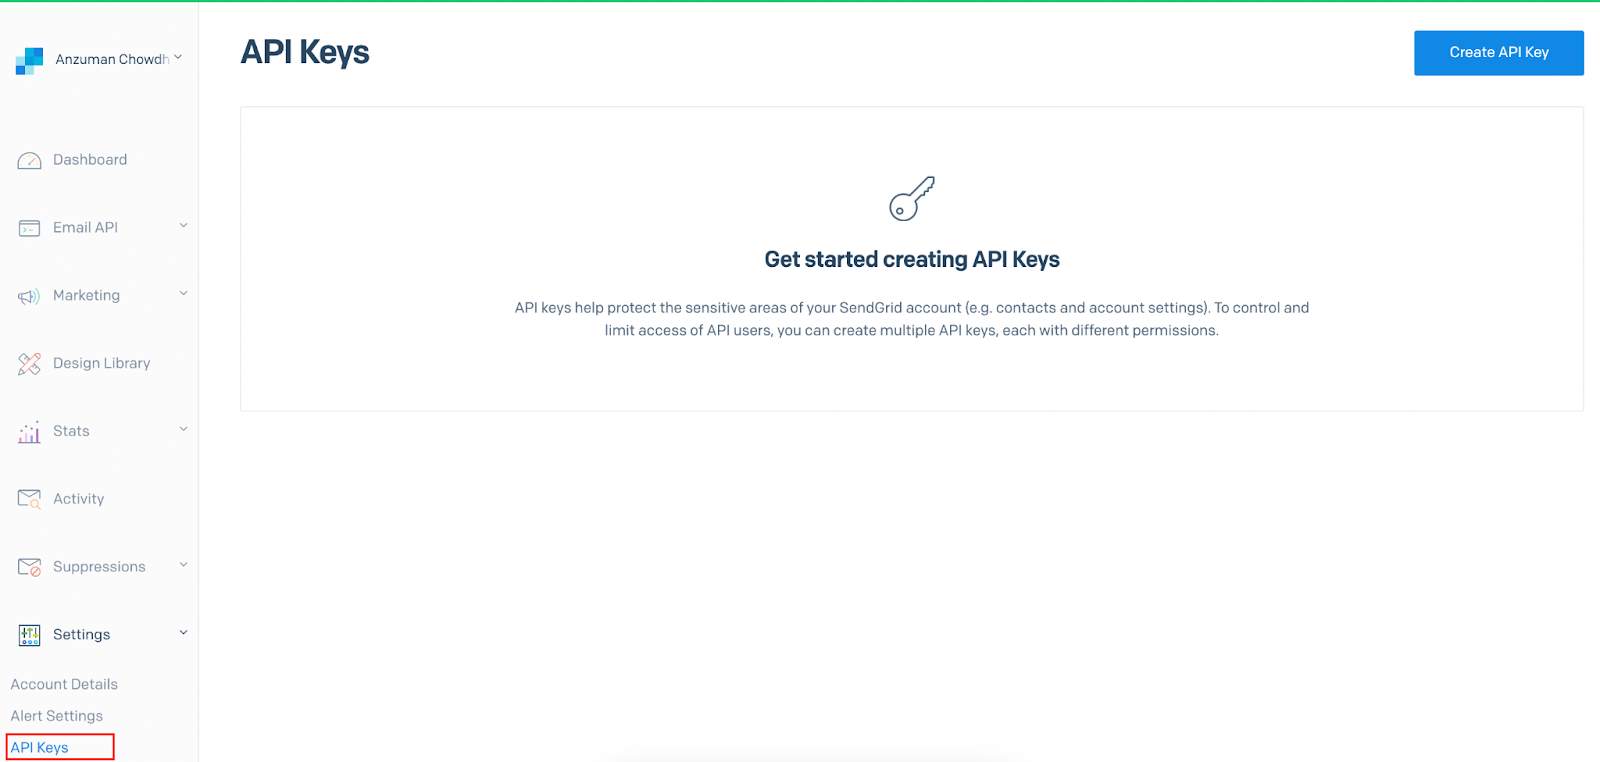
Now, tap on the Create API Key button from the top right corner. Then choose any option from the three available choices that are about access. We’re going for the first one, which is Full Access.
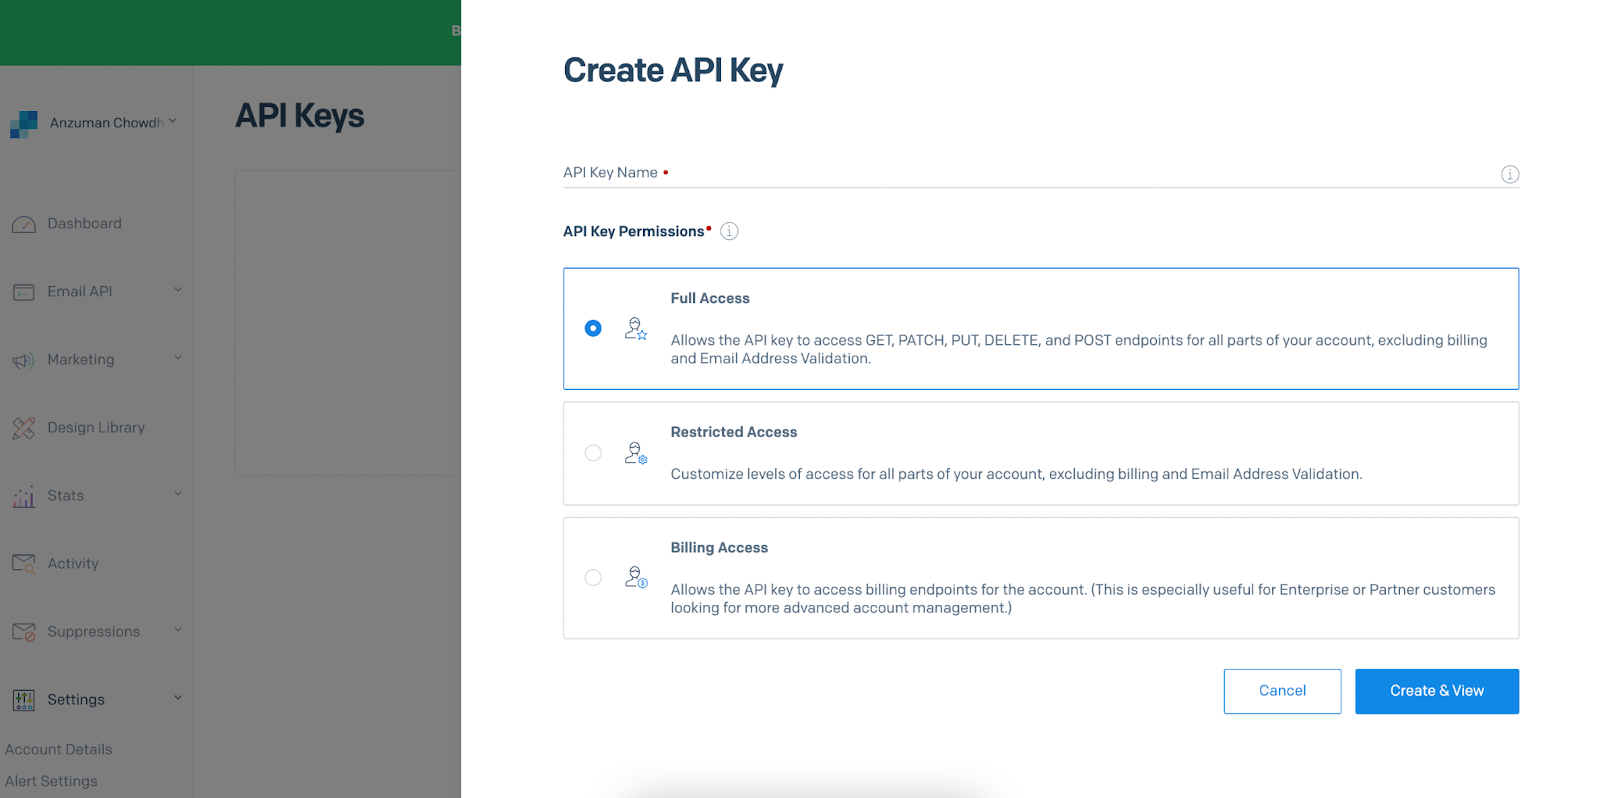
After that, you’ll get the API key right on your screen.
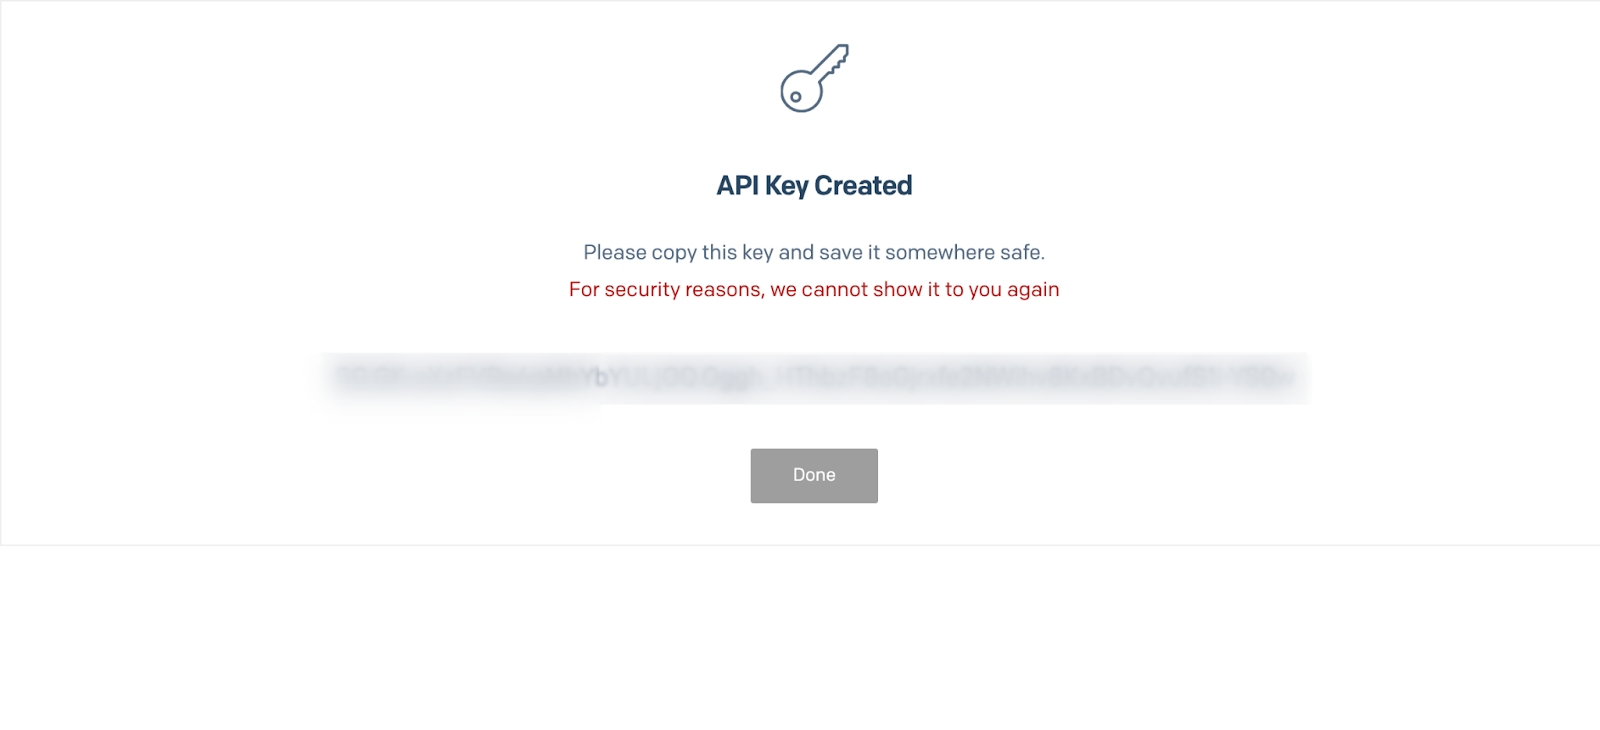
Copy that and paste it into your Fluent Forms dashboard.
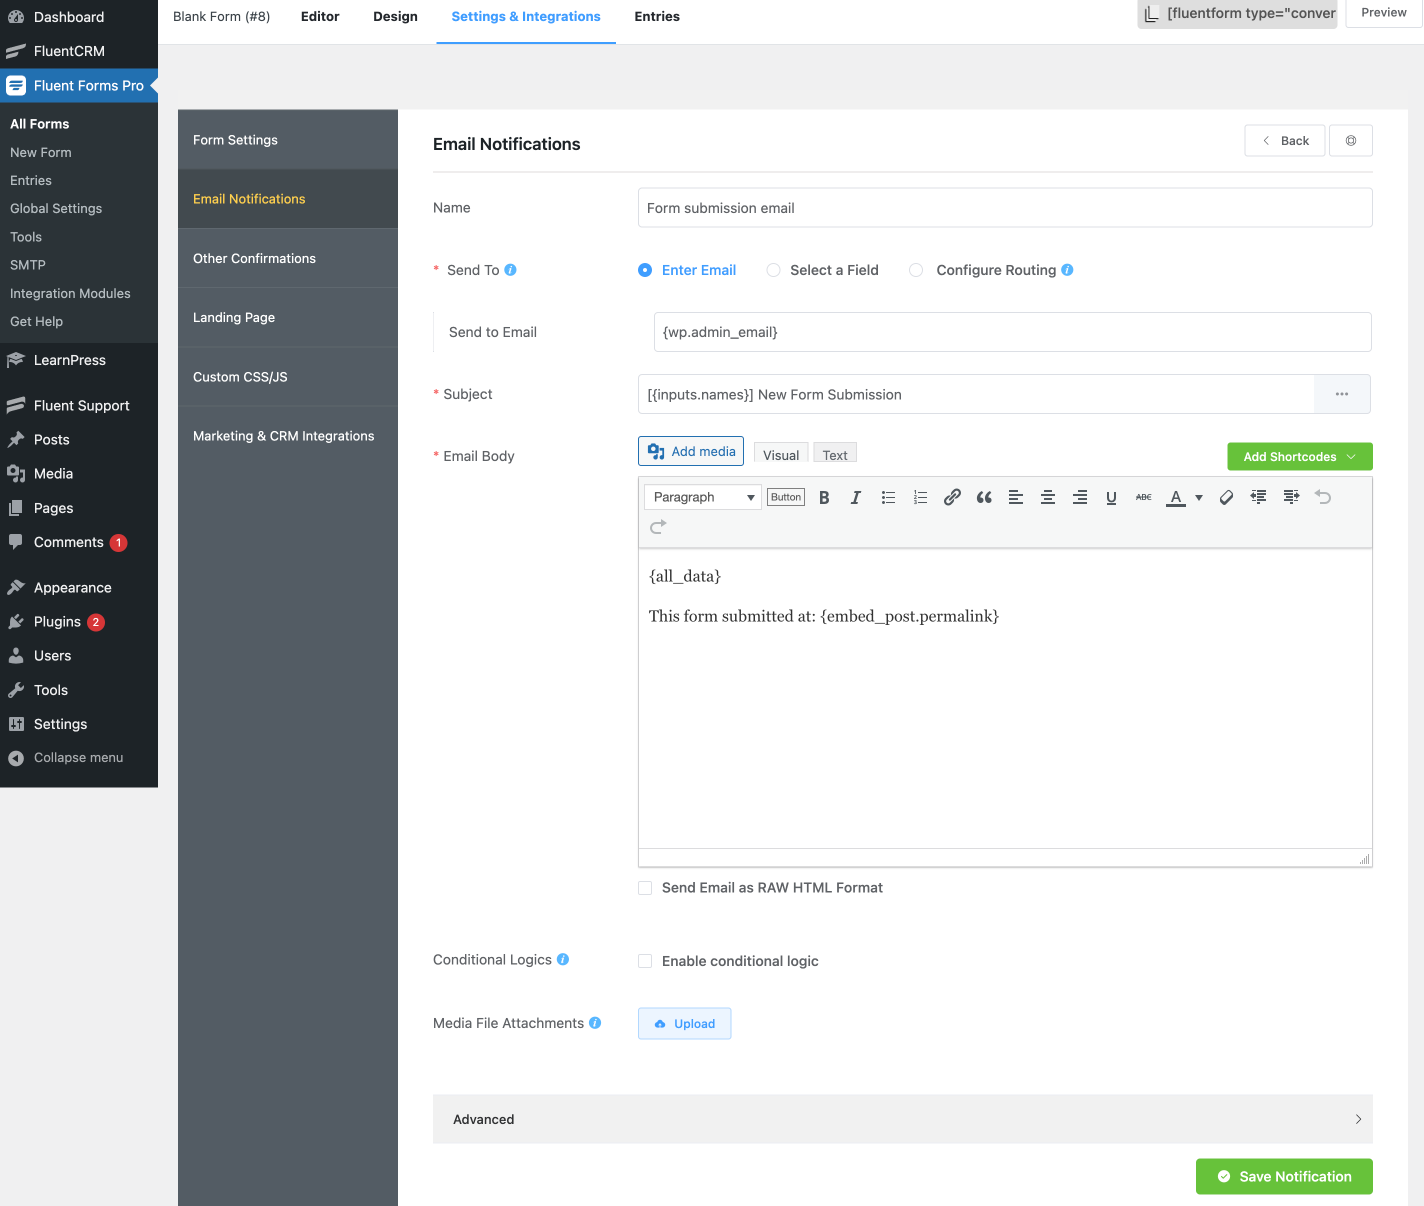
Now your form is connected with FluentSMTP, and you can send confirmation email with this settings. Move on to the email settings option again of your form. Set the email settings from there. For example, give a name to the email, set the main subject and body, set conditional logic if you want, etc.
Choose Select a Field in Send to option.
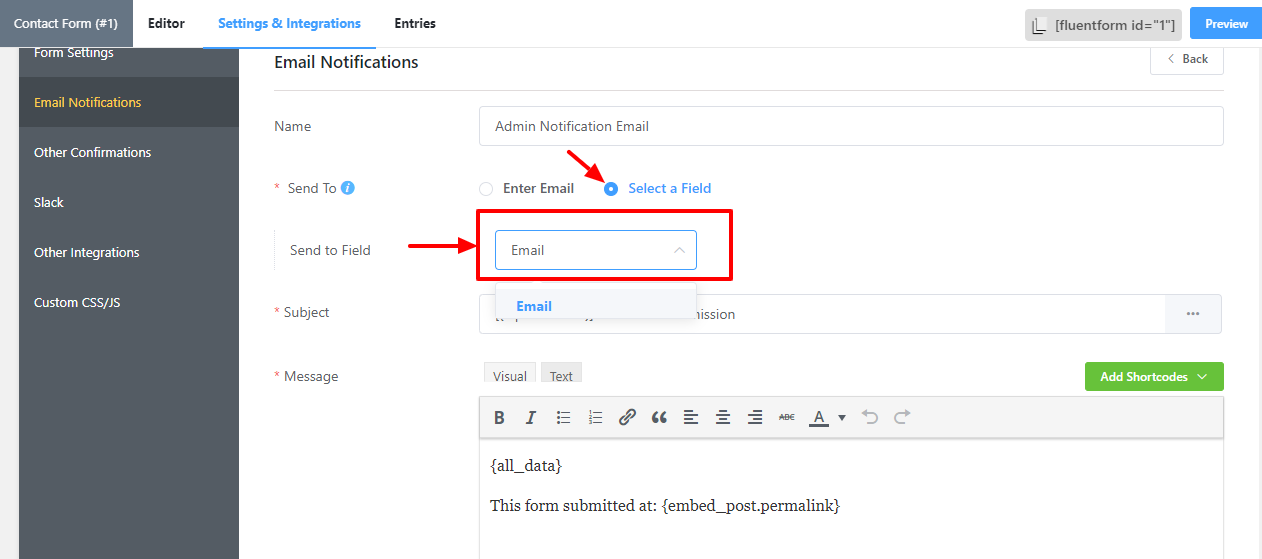
To make this feature work, define an Email input field in your form whose value will receive the confirmation email. You can select this field from the drop-down menu beside the Send To Field.
Set the Subject & Message that is to be sent out to the entries in the following fields. Use the Add Shortcodes drop-down for ease of use. For advanced customization, edit the message body in HTML codes in the Text tab.
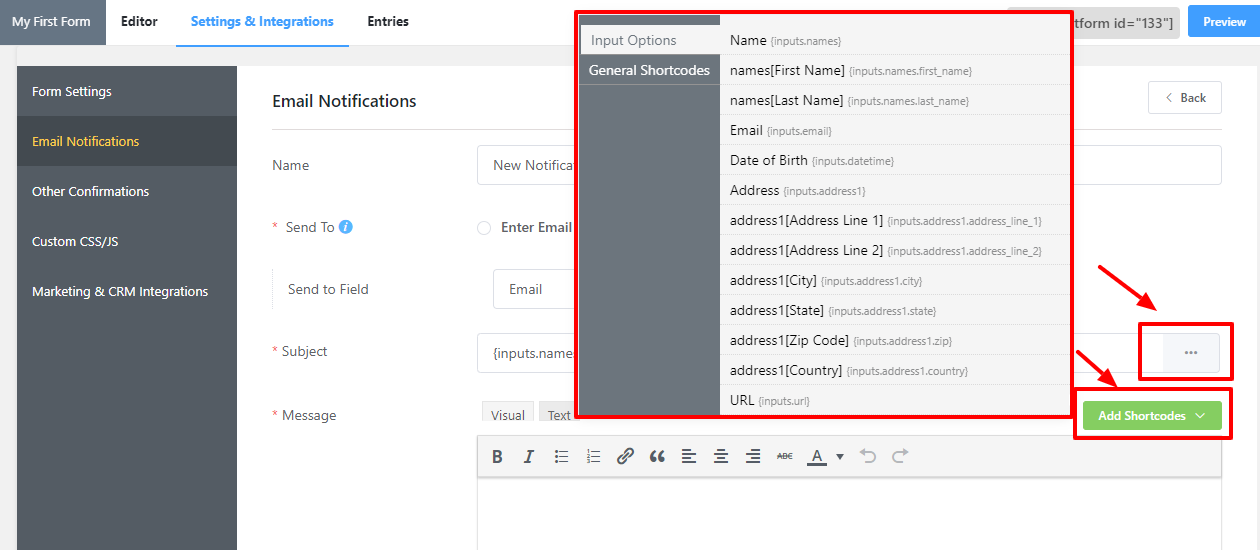
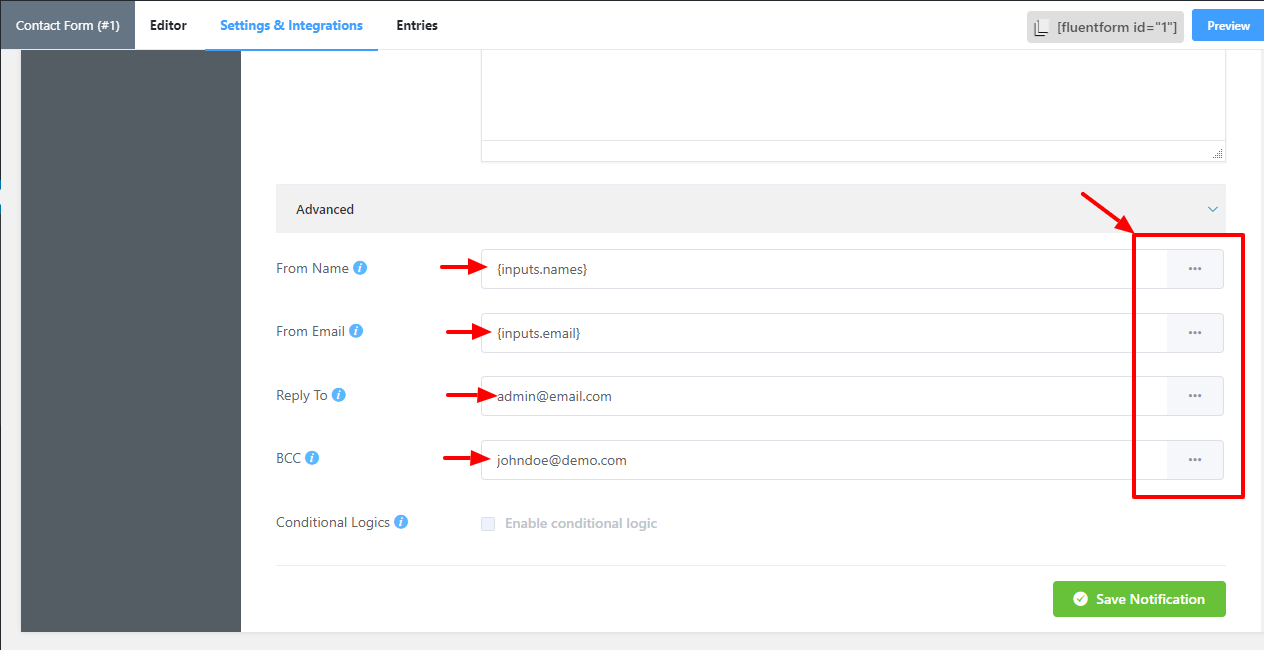
In the Advanced option, you can also define the From Name, Email Address, and Reply-To address to be shown in the notification email sent to the address. And define which email addresses the notification emails will be sent to in the BCC field.
Besides, you can add a media file to the emails.
Finally, save the settings when done.
Now let’s test if the email notification settings are working. Go to the preview section of your form, and submit a form for testing purposes.
After submitting the form, here’s our email confirmation.
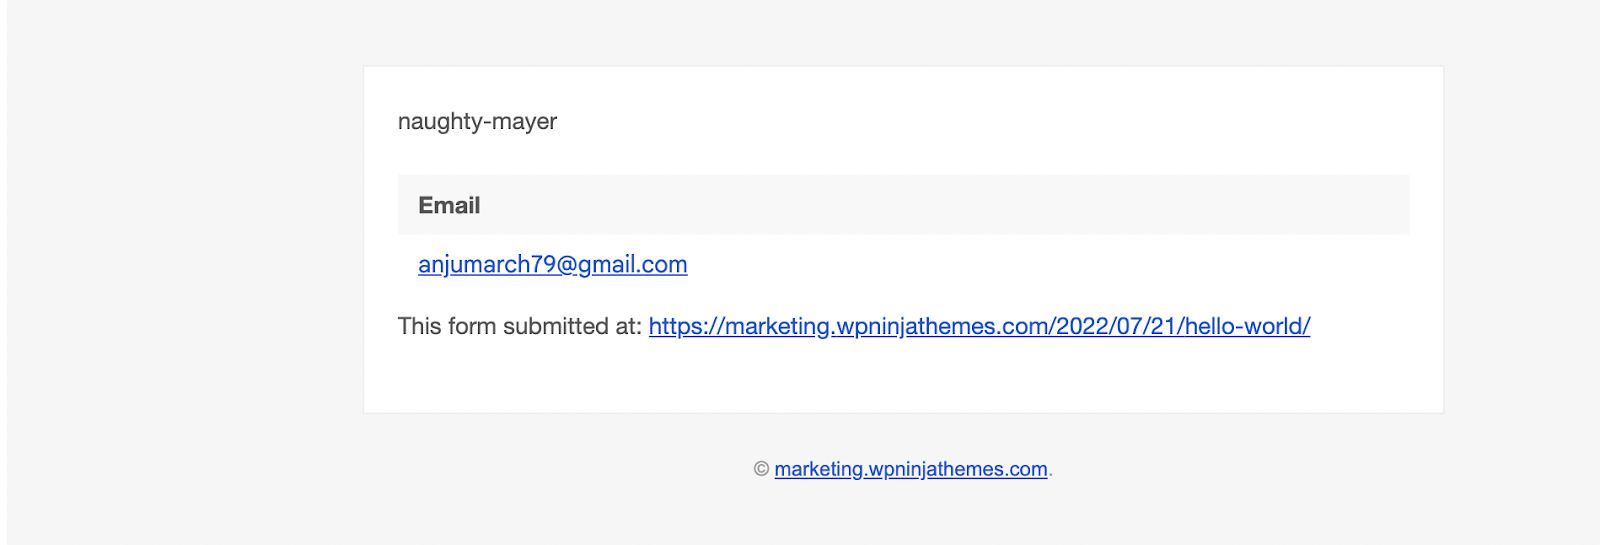
Cool! right?
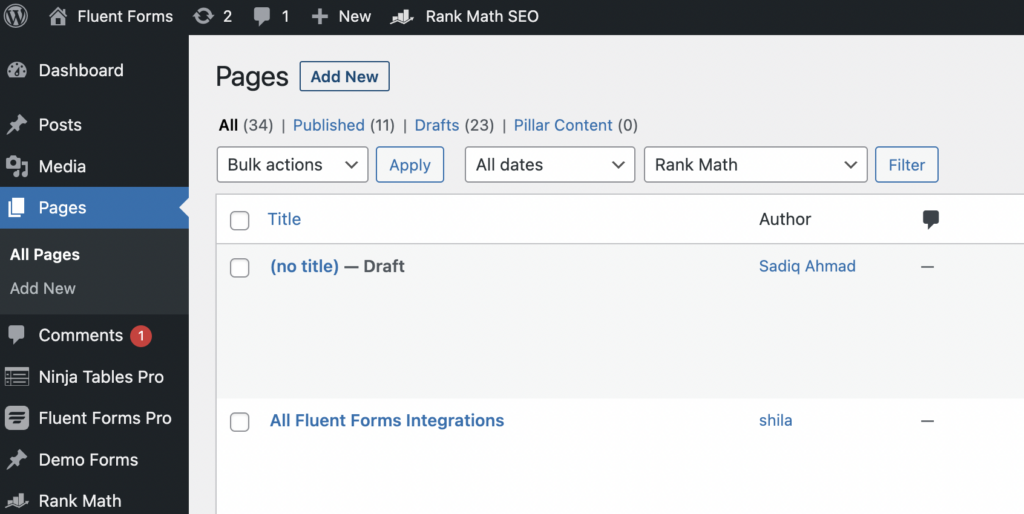
Make your form live
Publishing forms with Fluent Forms is super easy. For instance, if you want to show your form on a page, go to the pages section from the WordPress dashboard, and click on the Add New button.
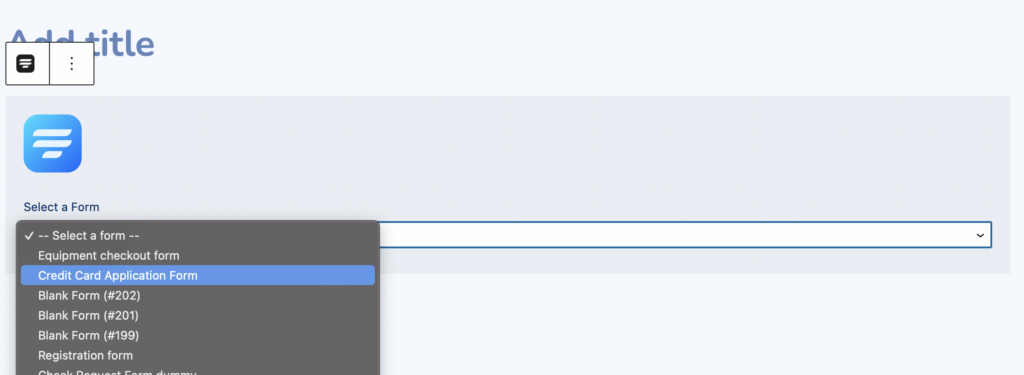
Then click on the (+) icon to get the Fluent Forms Gutenberg editor.
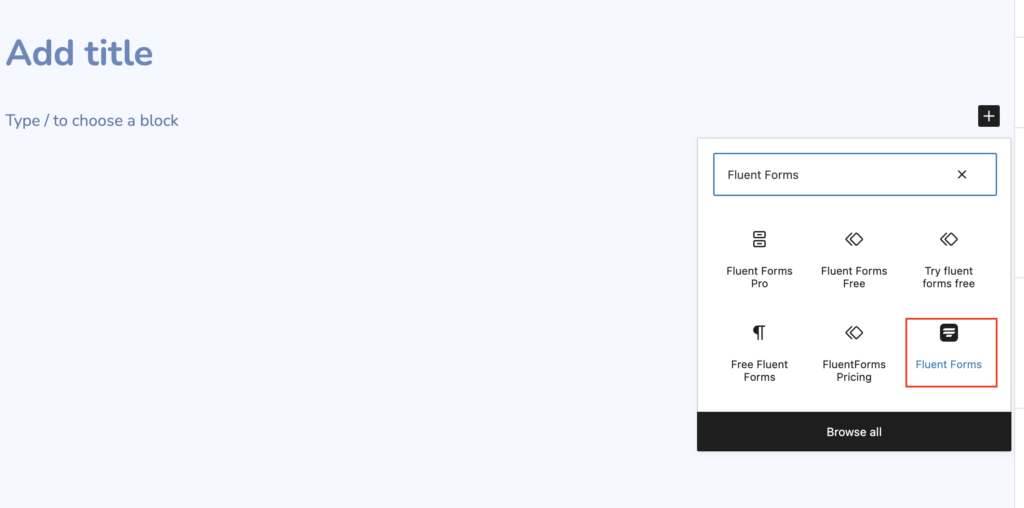
Now select the form and publish it on your website.
Follow the same process to publish the form in any blog post.
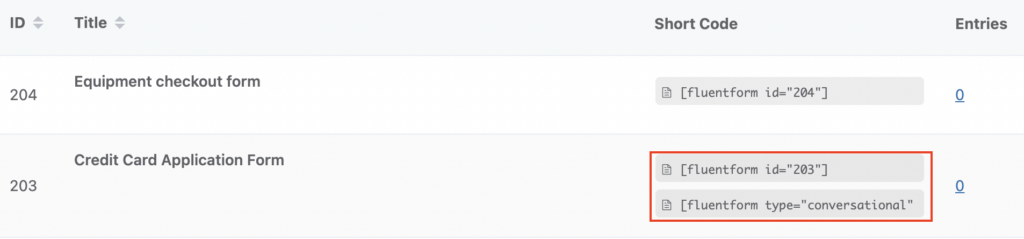
There is another way to publish the form. You can copy the form’s shortcode and paste it anywhere on your website, either to a blog post or a page. One more thing, you’ll get both the shortcodes of conversational form and normal form. You can copy anyone for your convenience and paste.
Fun! Isn’t it? You can make any contact form without any coding knowledge with Fluent Forms.
Why set up automated email confirmation in WordPress?

Confirmation emails are crucial for building a successful journey with your users, subscribers, and customers. Besides, they help you to explain the process to your users and inform them that you’ve received their information. As a result, users can double-check the information they’ve made. Some more benefits of sending confirmation emails to your users are:
- Helpful for providing valuable follow-up information like tutorials, links, etc
- Build brand awareness
- Keep customers engaged with you
- You can offer information and advice
- Open a line of communication with your subscribers
One of the main reasons to send confirmation emails to multiple users is to validate the user’s action on your website. So, what are you waiting for? From now on, send the confirmation email on each form submission on your WordPress website.
Why is Fluent Forms the best form builder plugin?

Fluent Forms is one of the most robust yet lightweight tools in the WordPress community. It has some excellent features and functionalities to make your form-building experience easier. Its notable features are:
- 70+ pre-built templates
- Drag and drop interface
- Conditional logic
- 60+ input fields
- Conversational forms
- 40+ third-party integrations
- Spam protection
- GDPR field
- Signature add-on
Besides, you can use the plugin to collect payments on your WooCommerce store. Because it supports
- Stripe
- PayPal
- Mollie
- Razorpay
- Paystack
Moreover, Fluent Forms’ global styler option helps you to make the most colorful and beautiful contact forms for your website. On top of that, Fluent Forms is the most user-friendly tool that 200K people love. All in all, when it’s about pricing, Fluent Forms asks a very small amount compared to its functionalities.
Takeaways
Therefore, Fluent Forms is the ultimate solution for your WordPress website in terms of form building. Check out our blogs for more tutorials like this.
Follow us on Facebook, Twitter, Instagram, and YouTube to get more updated information on Fluent Forms.

Hello, This is Prema. I work as a marketing strategist for Fluent Forms at WPManageNinja. When I am not playing with words, I go to explore nature.


Leave a Reply