
How to Allow Users to Add Fields to a Form

Forms are typically created with a fixed set of fields that can not be increased according to the users’ needs. This can sometimes make it difficult for users to submit the necessary information. But there’s a way out which makes me write this article.
So if you want to allow users to add fields to your form, look no further. Because in this article, I’ll show the step-by-step process of how you can let users add extra fields in WordPress forms.
Why you should allow users to add fields
By giving users the ability to add fields to your forms, you can make the form more adaptable to different use cases. Let’s say you’re creating a job application form for your company. By allowing users to add extra fields, you can let them provide any additional information that might be relevant to their application.
For example, they might want to add a field for a link to their portfolio or a field for a recommendation from a previous employer. By doing so, you can ensure that you get all the information you need to make an informed hiring decision.
In the case of an event registration form, attendees might want to add fields for mentioning any dietary restrictions or accessibility needs they have, which can help event organizers provide appropriate accommodations.
These are just two use cases out of so many where you might need to allow users to add fields.
Now you must understand that having the ability to let users add additional fields to a form is a big flexibility in form-building. Fluent Forms has a feature called ‘Repeat Field’ which is capable of giving the flexibility to add input fields to the forms at the front end.
So if you are not already familiar with Fluent Forms, let’s get introduced to it.
Fluent Forms – an overview
Fluent Forms is the most lightweight form-builder plugin in the market right now. It is a drag-and-drop WordPress plugin with tons of great features and functionalities. You can not go wrong with this plugin when it comes to designing various types of forms.
Fluent Forms offers a free version that is packed with the most essential features and functionalities to meet your everyday needs. But to get the best out of this crazy form-builder plugin, you should upgrade to the Pro version.
Some of the features of Fluent Forms that make it stand out are —
- Drag-and-drop form builder plugin for smooth user experience
- Dozens of useful pre-built form templates for quick form building
- Conversational forms for giving the best form-filling experience
- Conditional logic for more control over your forms
- 45+ native integrations for additional functionality
- PDF add-on for generating PDFs from form submissions
- Multi-column form layout for ultimate freedom
- Calculated fields for measuring numbers based on inputs
- Payment feature for accepting payments from your clients in a seamless way
- Quiz and survey module for creating quizzes and running surveys
Sounds perfect? Let’s move to the step-by-step guide on how to allow users to add extra fields to a form using Fluent Forms.
How to allow users to add fields to a form
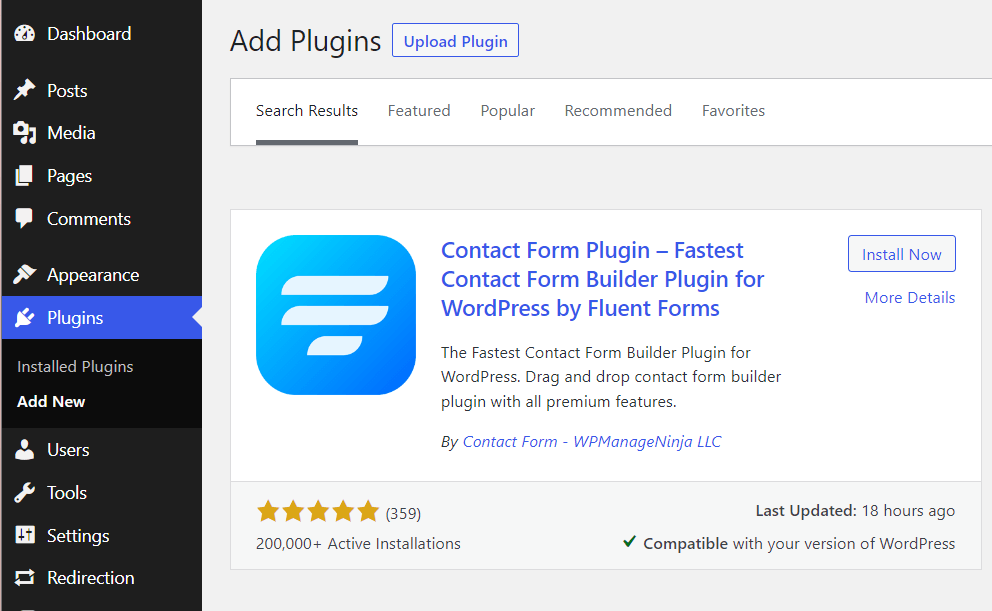
Step 1: Install Fluent Forms
Installing Fluent Forms is easy and similar to installing any other WordPress plugin. Simply go to the Plugins section in your WordPress dashboard, click on Add New, search for ‘Fluent Forms‘, and then install and activate it.
To use the Repeat Field, you’ll need to upgrade to the Pro version of Fluent Forms. With Fluent Forms Pro, you’ll gain access to a range of additional features and functionalities.
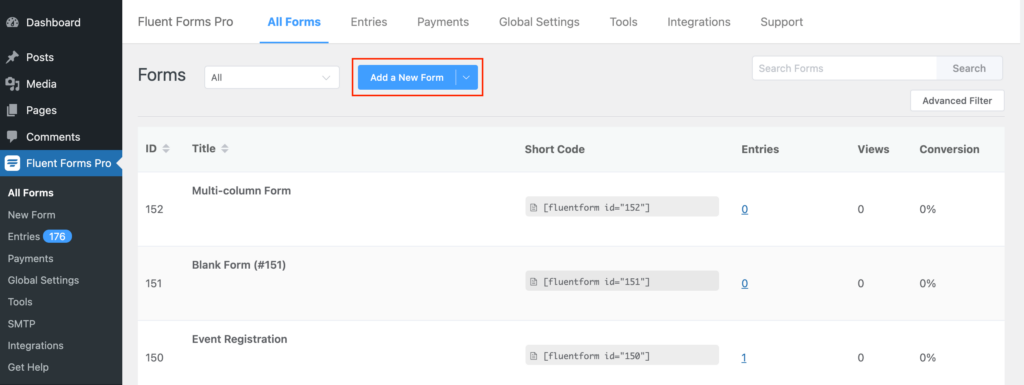
Step 2: Create a new form
To create a new form, click on Fluent Forms Pro from the left sidebar of the WordPress dashboard. Now click on the Add a New Form button.
You will see a window with the pre-built templates. But let’s start with a New Blank Form.
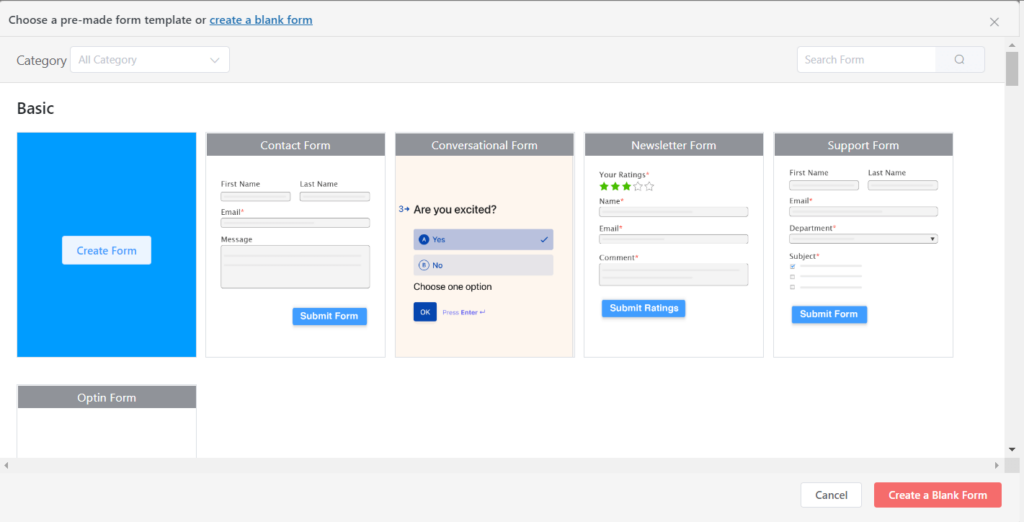
Hover over New Blank Form and click on Create Form. You will see the form editor interface of Fluent Forms.
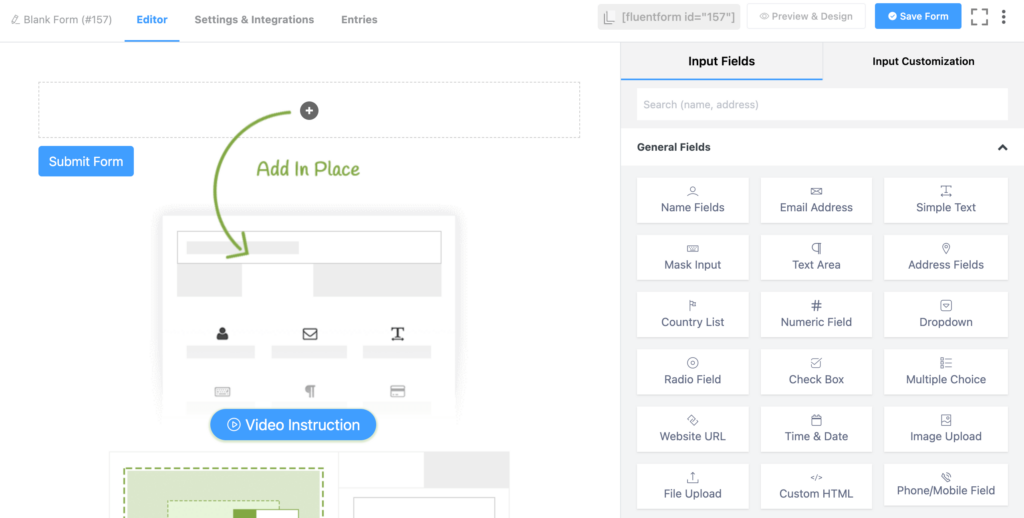
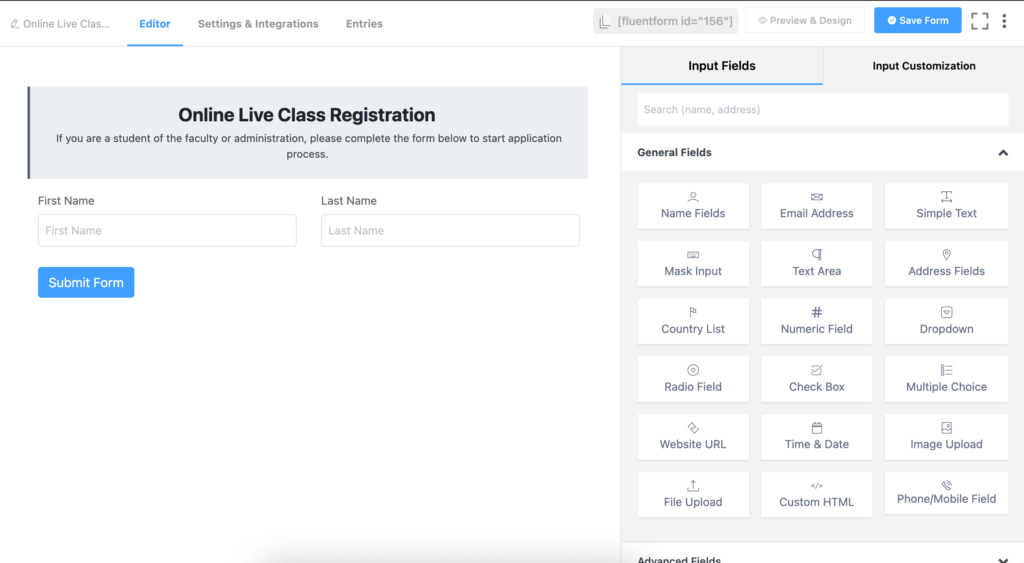
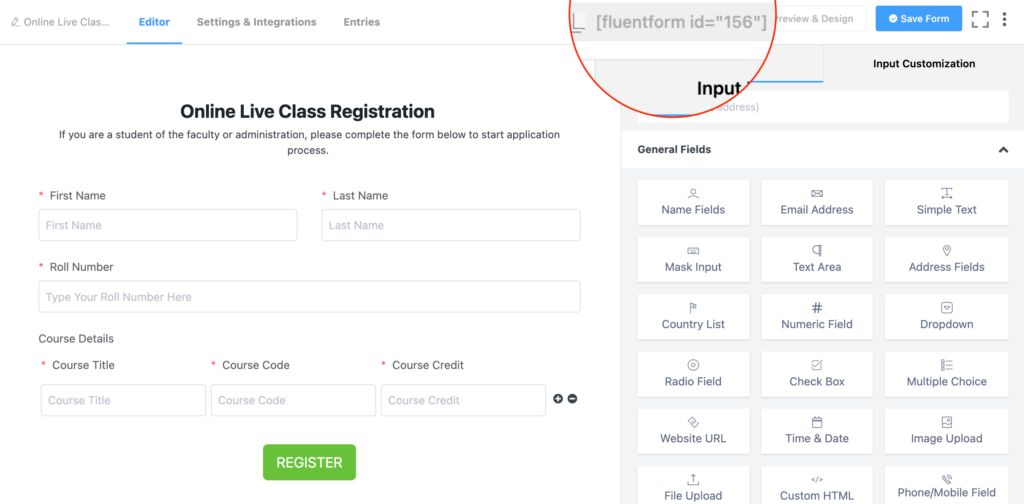
On the right-hand side, you will find various types of input fields that you can add to your form. Simply click on or drag and drop any field wherever you want it to appear. To customize any added input fields, just click on them.
Let’s create an Online Live Class Registration form where we will let students add fields for including multiple courses.
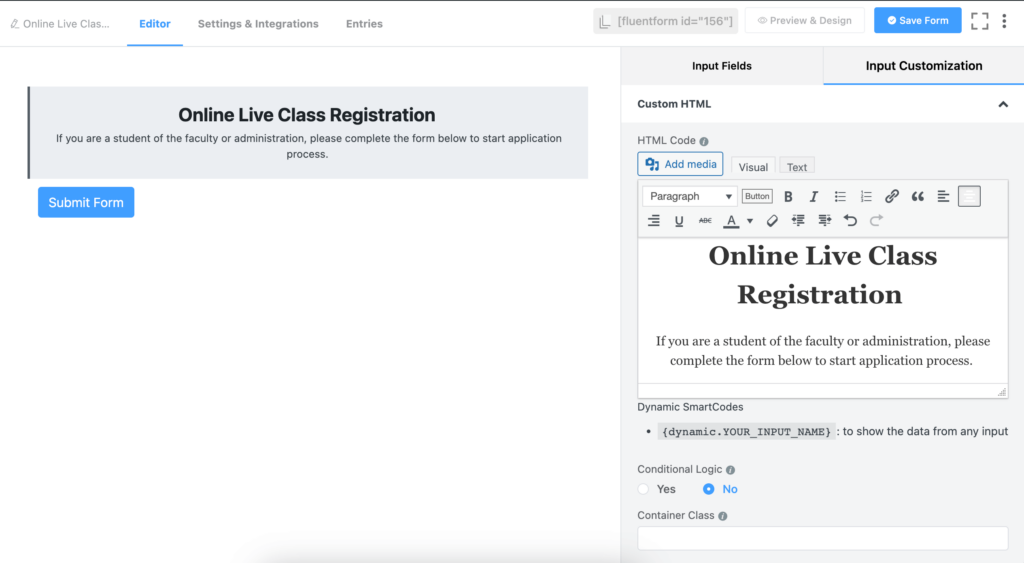
First, add a title and a short description to the form by clicking on the Custom HTML input field and customizing it.
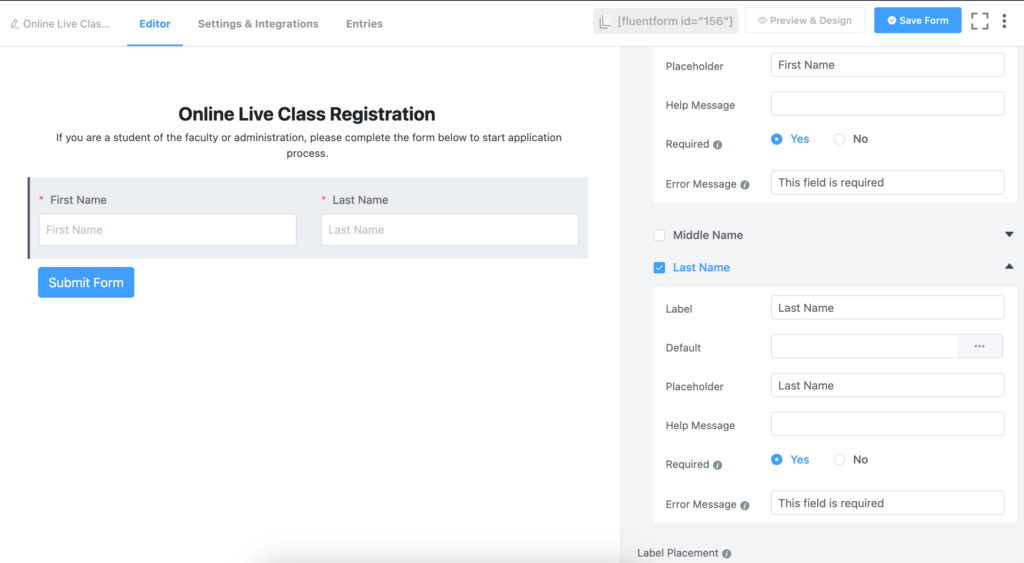
Now add Name Fields to your form.
Click on the added fields for Input Customization. You can customize the label, placeholder text, help and error message. You can also make any field required so that a user can not submit the form unless filling up that required field.
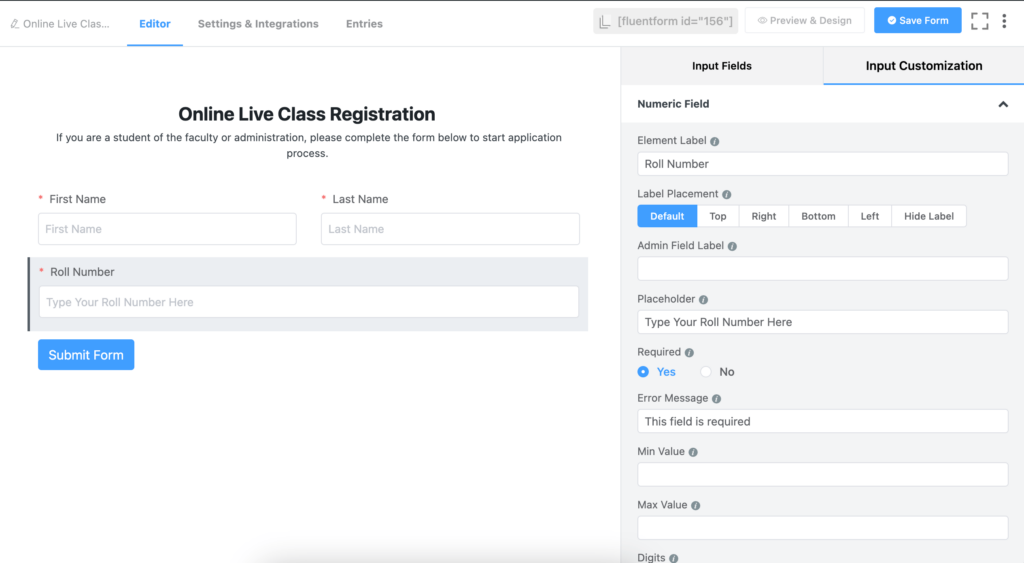
Let’s now add a Number Field for Roll Number and customize it.
Step 3: Add repeat field
Now we want to add fields for letting students provide details about their courses. Students can add more fields according to their needs. In this case, we need to use the Repeat Field feature of Fluent Forms.
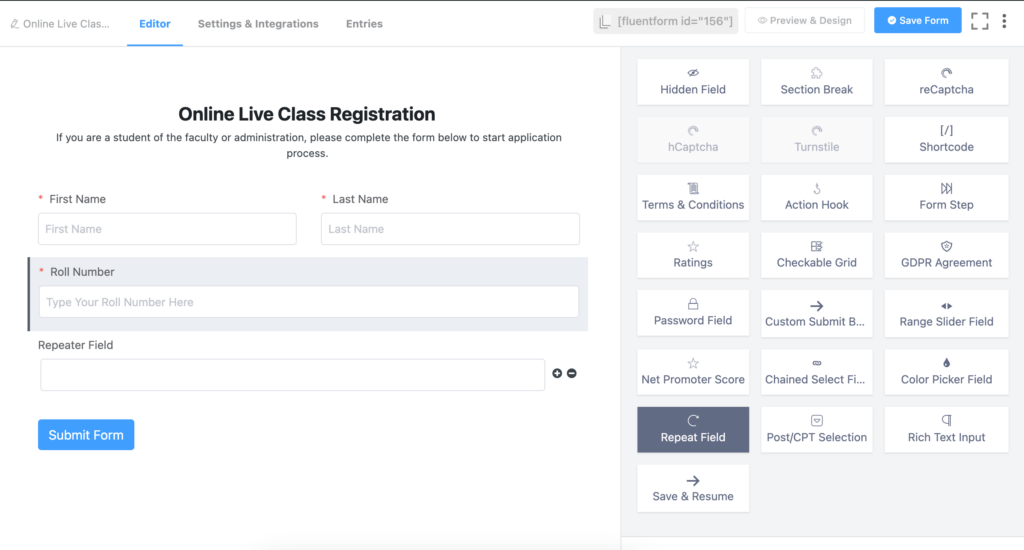
Click on the Repeat Field from the Advanced Fields tab to add it to your form.
Open the Input Customization options by clicking on the Repeater Field. Change the Element Label to Course Details.
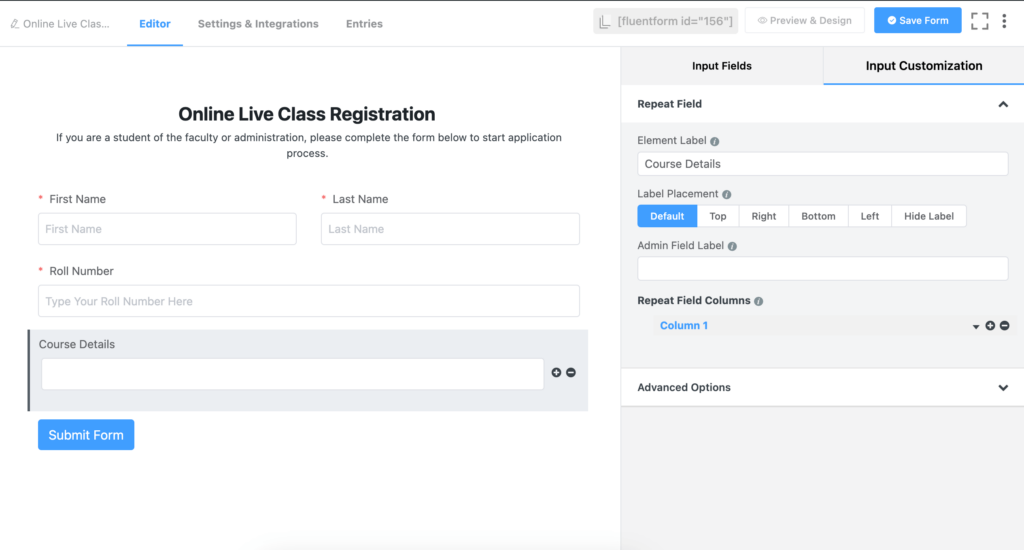
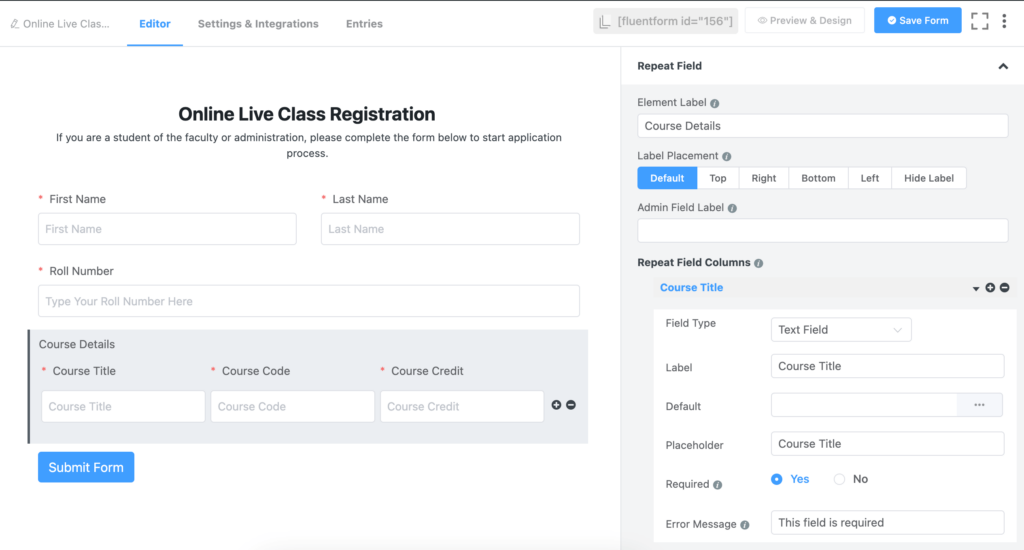
Now add two more columns by clicking on the + sign beside Column 1 under Repeat Field Columns. Click on the down arrow beside each column to customize the columns. We changed the column Label and Placeholder. We also marked the fields as required.
Finally, you can customize the Submit button by clicking on it.

In our case, we have changed the Submit Button Text, Button Style, Button Size and Content Alignment.
Don’t forget to click on the Save Form button once you are done adding the necessary fields to your form.
Step 4: Configure form settings
Before publishing the form on your website, let’s check out some form settings that you can configure. You will find a tab called Settings & Integrations on top of the form editor interface. Click on this tab to access various settings.

From the Settings & Integrations tab, you can do the following –
- Change the confirmation message that is shown when a user submits a form
- Enable double opt-in confirmation
- Configure form layout
- Apply different scheduling and restriction rules
- Append survey result
- Configure email notifications
- Create PDF feeds for generating PDFs from each form submission
- Design a dedicated landing page for your form
- Use custom CSS and JS in your form
- Integrating various services with Fluent Forms
Now we would like to show a message after the form submission. From the Form Settings window, customize the Message to show.
Using Fluent Forms Shortcode feature, you can set dynamic confirmation messages. For example, we have used students’ names and course details in the confirmation message.
Step 5: Publish your form
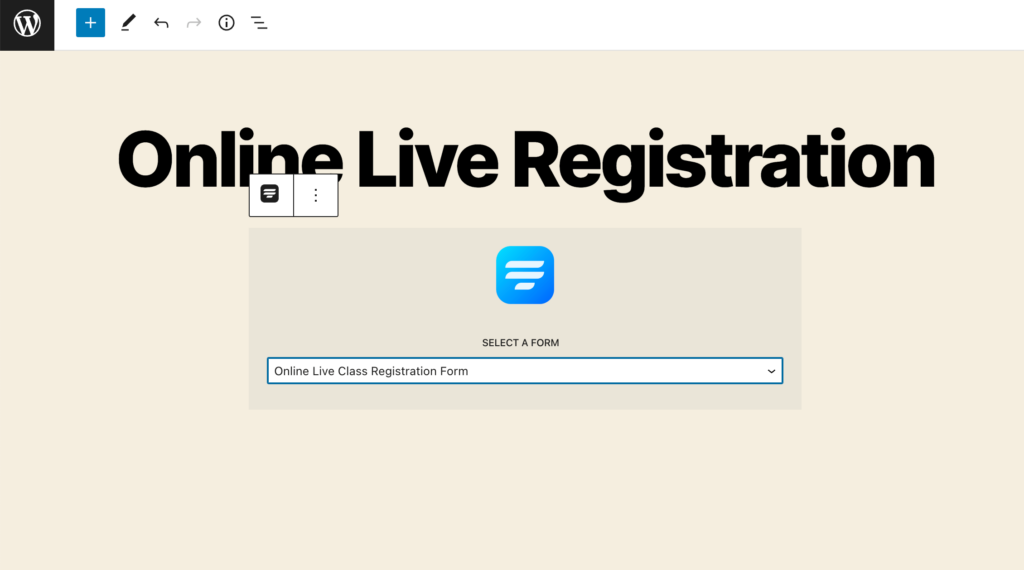
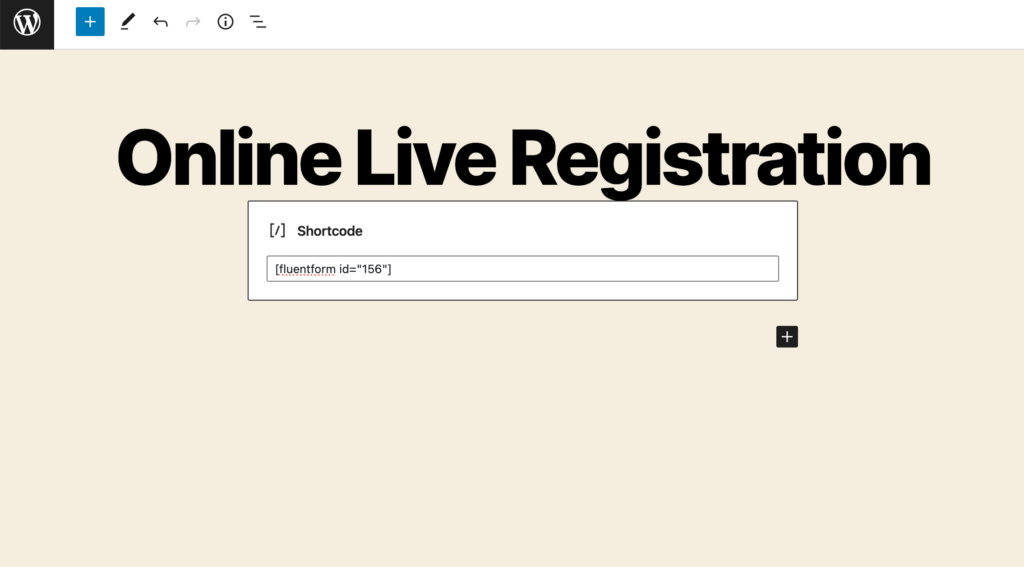
You can publish your form in three ways. First, you can use the Gutenberg block editor to choose the multi-column form you have just created. Click Add New under Pages in the WordPress dashboard’s left sidebar.
Give the page a title. In the block editor’s blank area, click the plus (+) sign or insert a forward slash (/). Then, in the search box, write Fluent Forms and select the form from the dropdown menu.
Fluent Forms’ Shortcode feature is a second option that you can use to show your form. The shortcode is found at the top of the window that displays the form editor.
Click on the shortcode to copy it and then paste it using a shortcode block anywhere you want to display the form on your website.
The third approach, which is probably the most impressive one, is to publish your form on a dedicated landing page. To do this, go to Settings & Integrations > Landing Page.
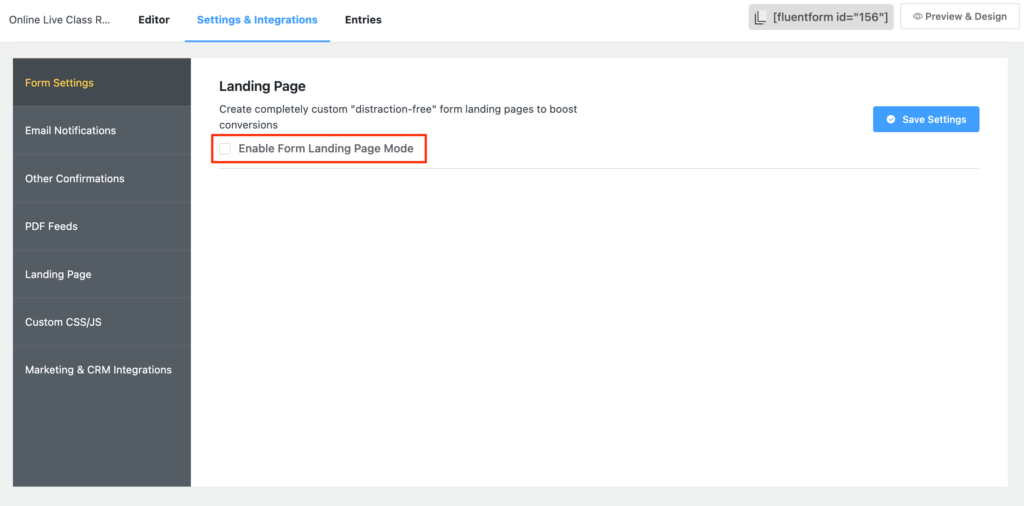
Check the box to Enable Form Landing Page Mode. The landing page is fully customizable to match your brand identity.

Try out a class registration form below where we allow you add fields:
Your data will be automatically deleted after form submission. We don’t store them.
Wrapping up
Allowing users to add fields to a form enhances user experience and enables them to customize their form to their specific needs.
In this article, we tried to give you a detailed guide on how you can allow users to add fields to your WordPress form. So don’t forget to follow our social media channels for more content like this.

An Econ major turned into a Digital Marketer by choice. Hello! This is Ashraf and I am here to enlighten you on various WordPress topics and help you make informed decisions.


Leave a Reply