
Generate PDF Invoice and Seamlessly Send Them to Customers
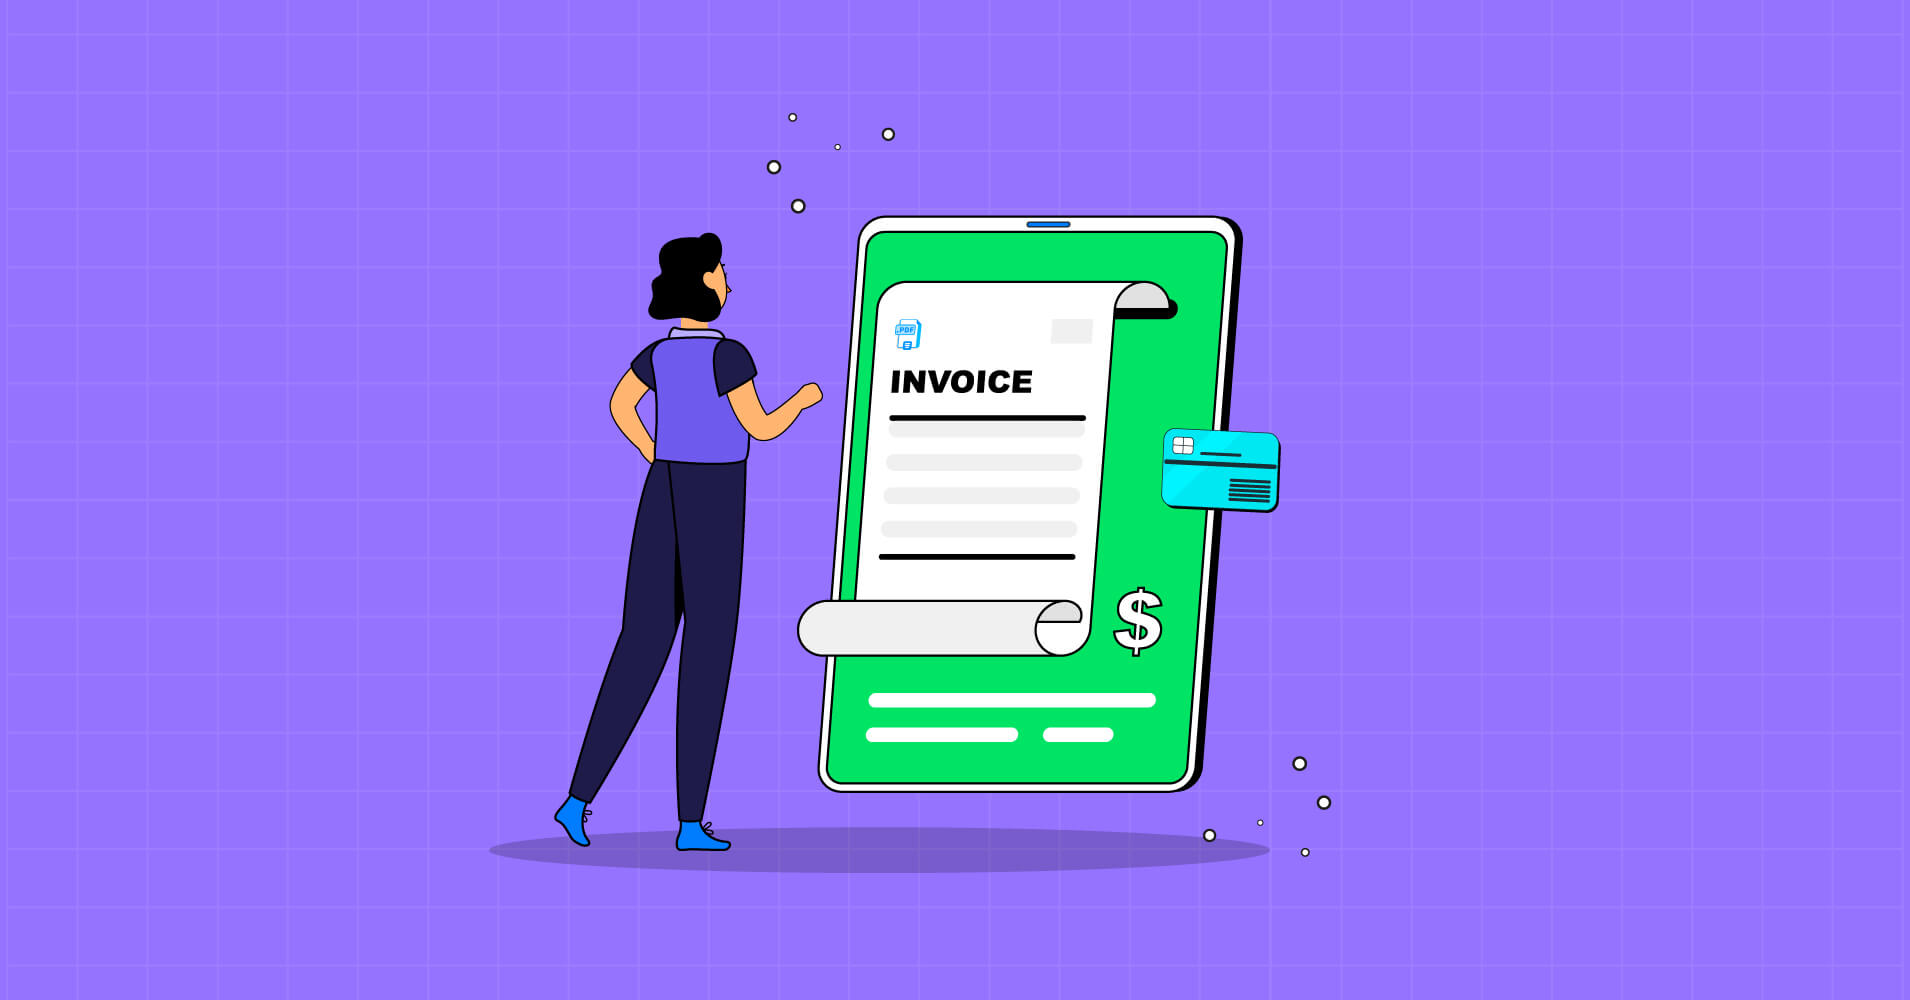
Are you selling products or services online? Then you must be looking for an easy solution to generate and send invoices for each order.
Obviously, you can create invoices by putting necessary information manually using a text editor and sending them to your customers one by one. But that is a tiresome job, especially if you are dealing with a hefty amount of orders. Moreover, there are high chances of errors when you create invoices manually.
In this article, we will give you a complete solution that will enable you to generate PDF invoices and send them automatically to customers.
Why are invoices necessary?
Invoices are necessary for every deal and transaction. They ensure that your customers know the amount of money that needs to be paid for the products or services purchased. At the same time, invoices are necessary to ensure that you, as a seller, get paid by the customers at the right time. Also, you can keep track of your sales and cash flow using invoices.
Moreover, these documents can also be deemed as a legal agreement between buyers and sellers. Often your legal obligation includes generating invoices against each transaction your business makes.

A clear invoice reflects professionalism and helps you run a business smoothly while faulty invoices tend to confuse your customers and can lead to a poor customer experience. What’s even worse is that wrong invoices can result in payment delays. So, you should find a way that creates and sends invoices in a seamless way.
Tools required to generate PDF invoices and send them to customers
You can automate the complete process of creating and sending invoices once a customer fills out the order form on your website. To do this, you will need three tools –
- Fluent Forms Pro for designing the product order form
- Fluent Forms PDF Generator Module for automating invoice processing upon each form submission
- FluentSMTP for solving email deliverability issues
First, let’s get introduced to Fluent Forms. There are many form-builder plugins in the market. But not all of them can fulfill your needs as Fluent Forms does. It is packed with all the features you will need to run a small or medium business.
We have chosen Fluent Forms to create the product order form because it is the most lightweight form builder plugin with crazy functionalities. Some of the key features of Fluent Forms are –
- It is a drag-and-drop form builder for ease of use
- It has dozens of pre-built form templates for quick form building
- Fluent Forms has conversational forms for creating interactive forms
- You can use conditional logic for better control over the forms
- There are 50+ integrations for additional functionality
- Fluent Forms has payment fields that allow customers to pay for products
Now, one of the most common problems that WordPress users frequently face is email deliverability. In this regard, we have chosen FluentSMTP to solve this issue. FluentSMTP is the most feature-rich WordPress SMTP plugin. And guess what? FluentSMTP is completely free!
We have chosen the necessary tools, so let’s jump into automating the process of creating and sending invoices for each order form submission.
How to make a PDF invoice in WordPress
Follow the steps below to generate PDF invoices and send them automatically to your customers.
Step 1: Install Fluent Forms, FluentSMTP, and PDF Generator Module
First, you need to install Fluent Forms and FluentSMTP. Go to your WordPress dashboard. Hover over Plugins and click Add New. Type Fluent Forms in the search bar. Once Fluent Forms is displayed, click Install Now > Activate. Follow the same process for installing and activating FluentSMTP.

You need to upgrade to the Pro version of Fluent Forms to use the payment fields needed to create a product order form. The Pro version of Fluent Forms enables you to go limitless with many more features and functionalities.
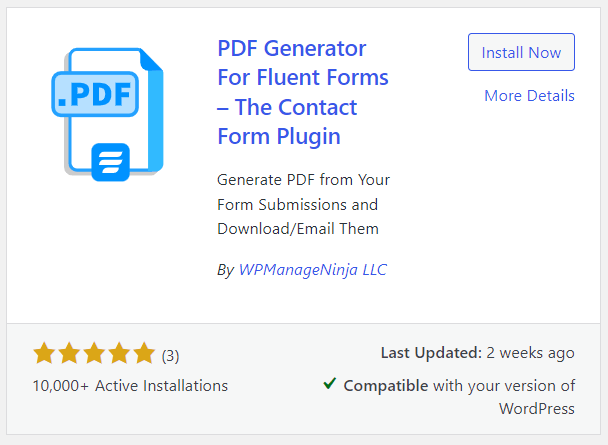
To install and activate the PDF Generator Module, go to Plugins > Add New and search for PDF Generator For Fluent Forms.
Now go to Integrations > Fluent Forms PDF and click on the Install Fonts button. To configure PDF settings, go to Global Settings > PDF Settings. Here you can customize the Paper Size, Orientation, Fonts, and more.
Step 2: Configure the payment method
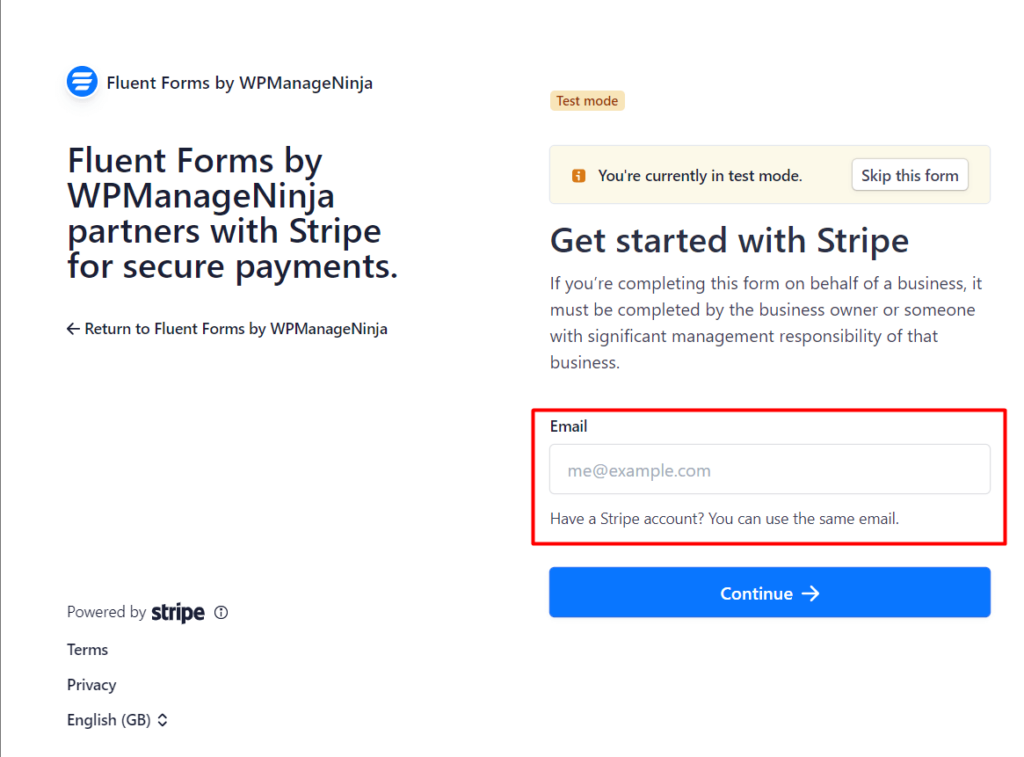
Once you have installed Fluent Forms, it’s time to configure the payment methods as we want to create a product order form that can collect payment. Fluent Forms allow users to accept payments from popular payment gateways like Stripe, PayPal, RazorPay, Mollie, etc. You have to integrate them with Fluent Forms to take payments through the form. Go to Global Settings from your dashboard and select Payment Settings from the left sidebar. To integrate Stripe with Fluent Forms, you need a Stripe account. Click on the Payment Methods tab and Enable Stripe Payment Method. The default payment method is set to Test Mode. Hit the Connect with Stripe button.
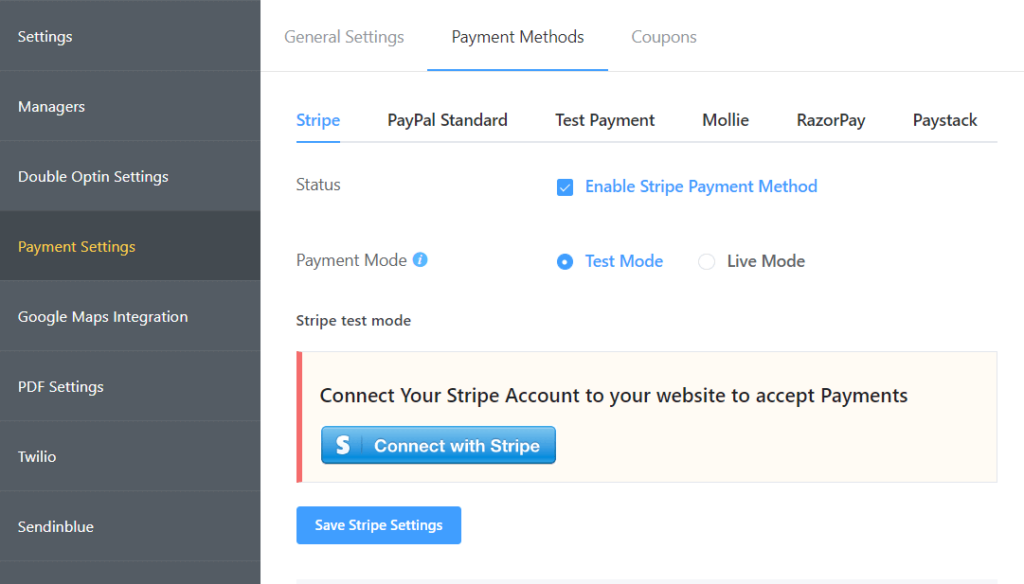
Provide your email address and click on Continue. Follow a few steps to connect Stripe with Fluent Forms.
Now that Stripe is connected to Fluent Forms, you will be able to test if the payment module is working perfectly or not. While simulating successful payments, you can use test cards provided in the documentation of Stripe. If you see that everything is working fine, you can switch to Live Mode in Stripe.
Fluent Forms also give you access to collect payments from PayPal, Mollie, RazorPay, etc. You can also collect offline payments by enabling the Test/Offline Payment Method.
Step 3: Create a product order form
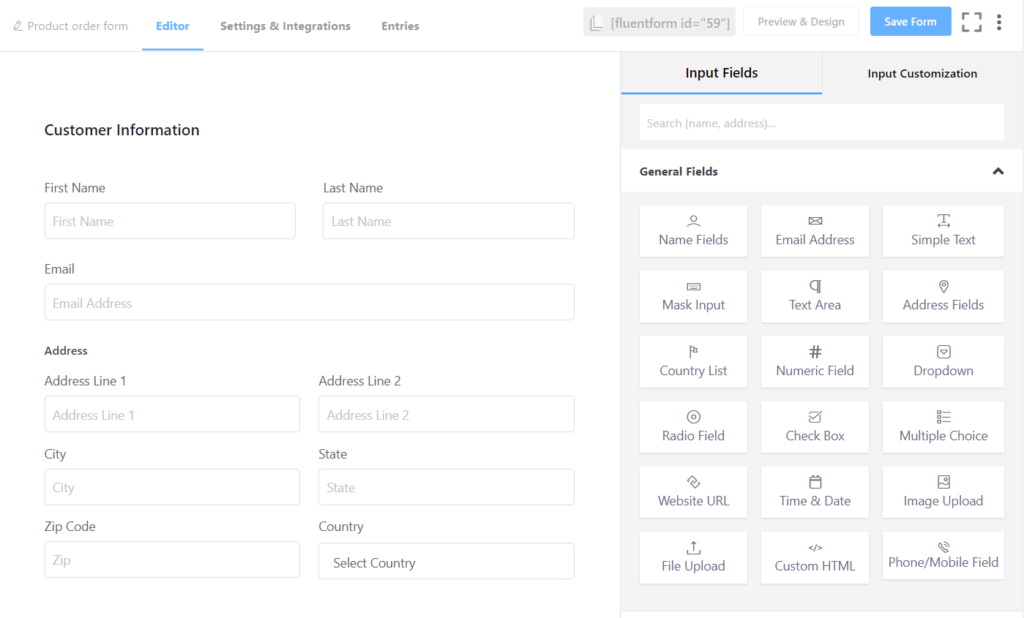
Creating forms is very easy in Fluent Forms thanks to its drag-and-drop functionality. You can create a product order form from scratch, or use a pre-built template. For our product order form, you can add the following input fields –
- Name
- Email Address
- Address
- Product selection and quantity
- Payment summary
- Payment method
First, insert a Custom HTML field for the section heading. Then add Name Fields, Email Address, and Address Fields in your form to collect customer information. Click on the Save Form button.
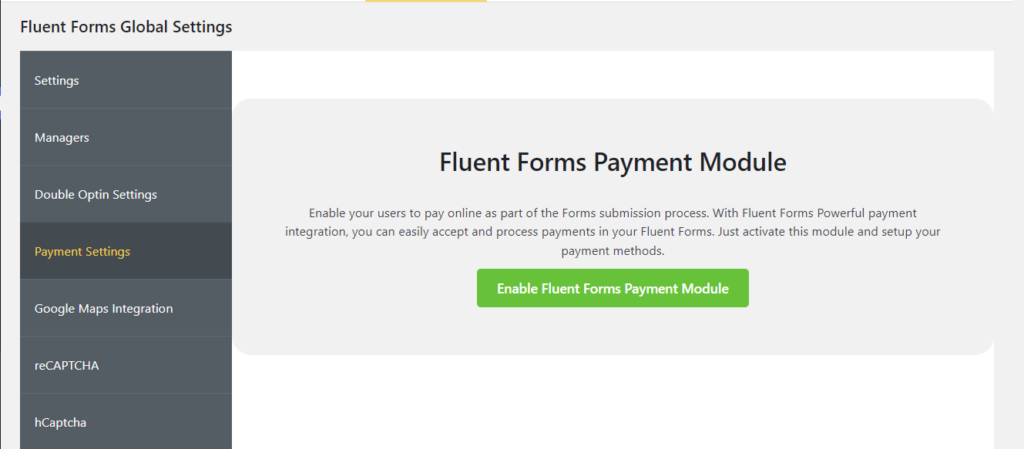
When you install Fluent Forms Pro for the first time, you have to enable Fluent Forms Payment Module to add the payment fields. Go to Fluent Forms Global Settings > Payment Settings and click on Enable Fluent Forms Payment Module.
Make sure that the box beside Enable Payment Module is checked. You can add your Business Name, Business Address, and Business Logo.
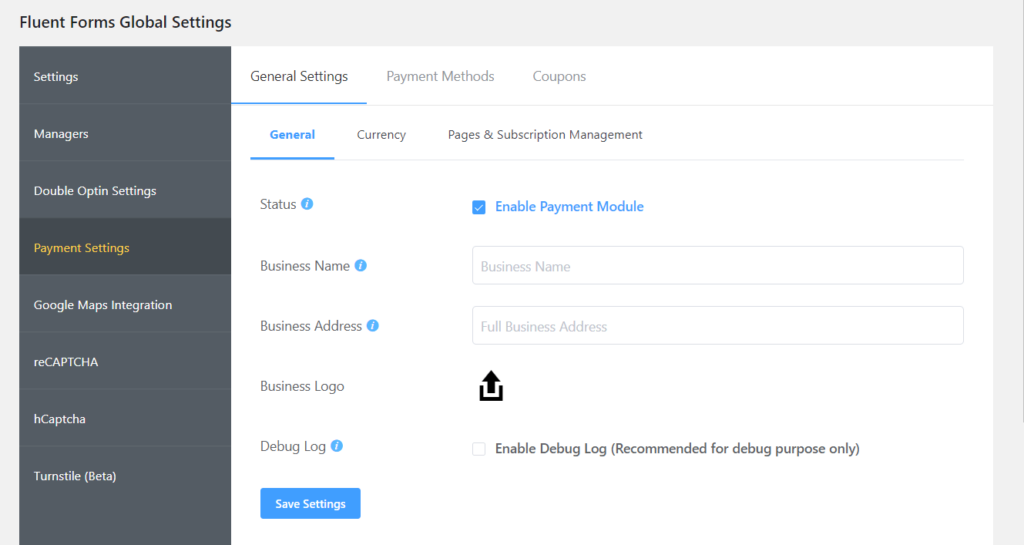
Click on Save Settings.
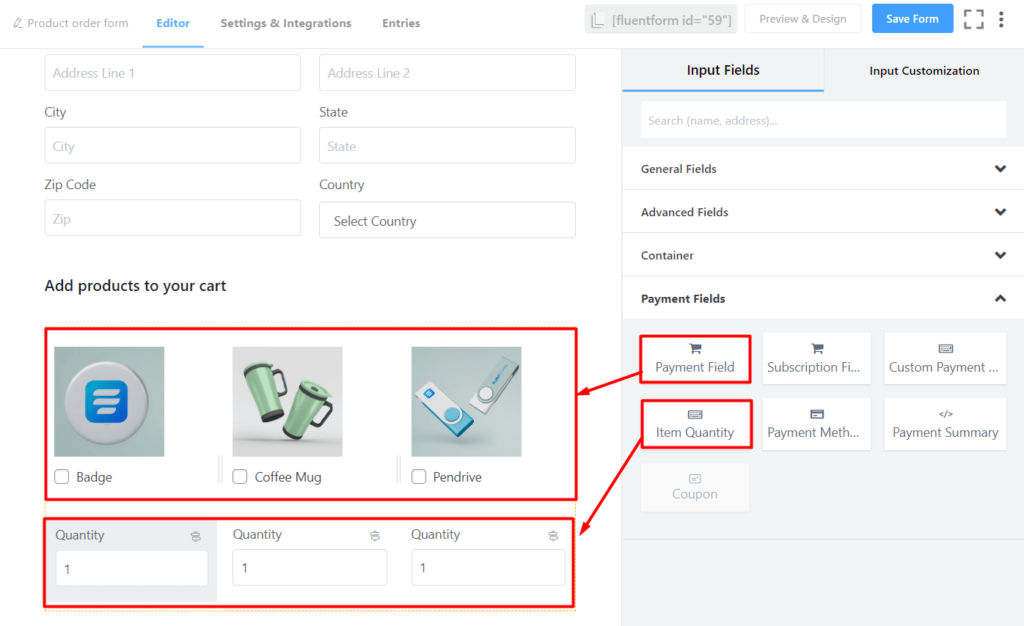
Once the Payment Module is enabled, go back to the form editor. Give a title to the next section using the Custom HTML field. Fluent Forms has a Container feature that allows users to build a multi-column form layout. We made use of a Three Column Container to display the products with their images. Then list the products using the Payment Field and customize it.
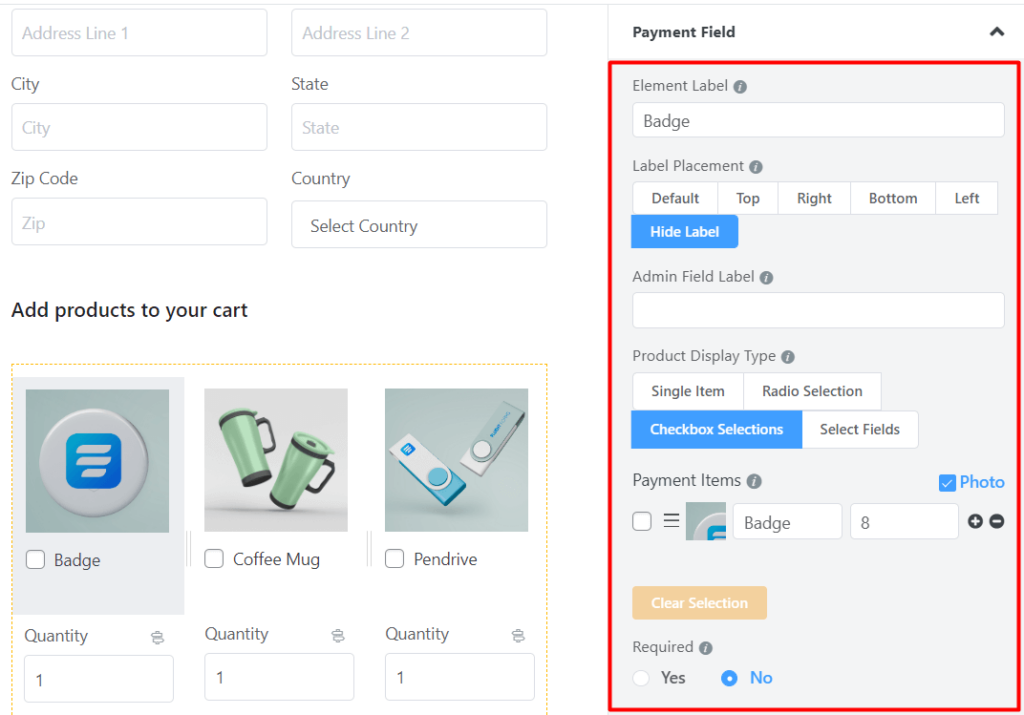
Use the Item Quantity field to let customers order each item in different quantities. We used Conditional Logic in this field so that customers can see the field only if they select the product.
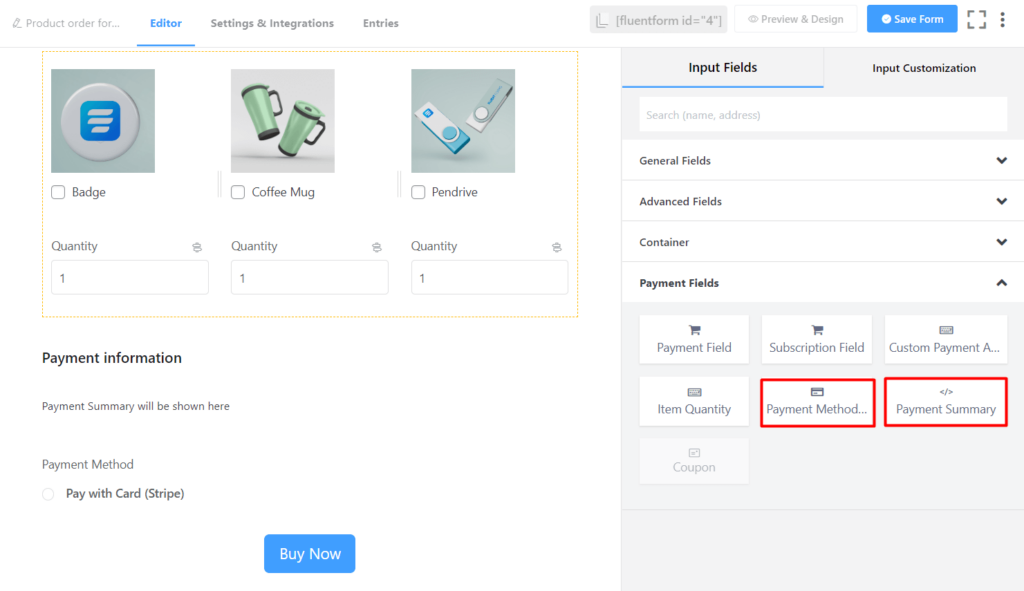
For the final section of the product order form, add the Payment Summary and Payment Method fields.
It is important to configure the payment methods before creating the form to get the Payment Method Field in the form editor.
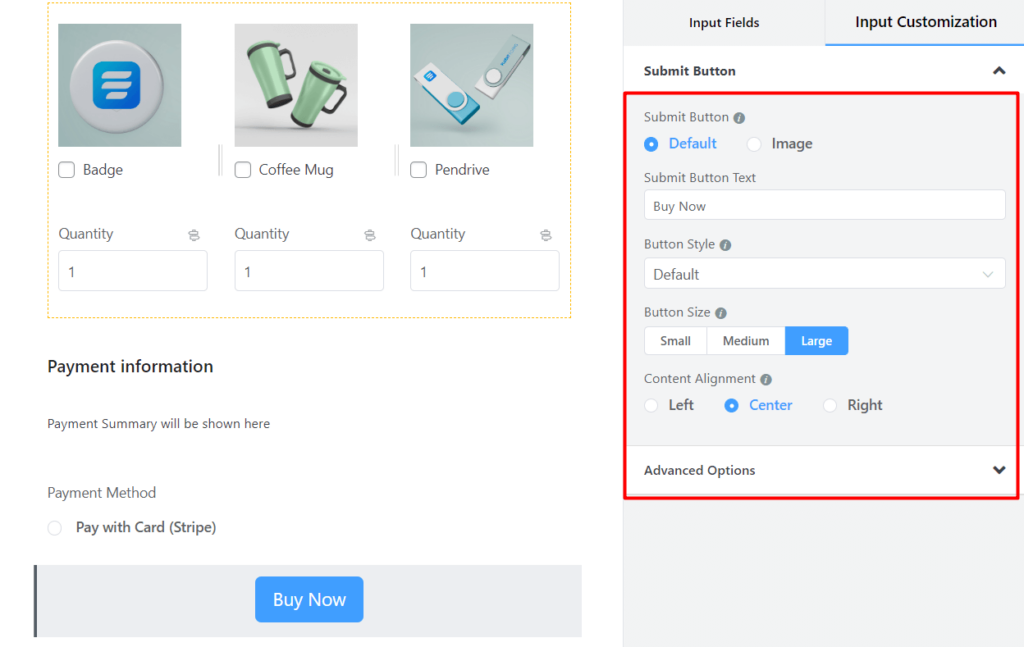
As the last step of designing the form, you can customize the Submit Button.
Step 4: Configure PDF feed
Fluent Forms PDF Generator Module has automated pdf creation capability based on submitted form entries. First, you have to configure the PDF feed of the specific form for which you want to generate a PDF invoice.
Go to the Settings & Integrations tab of the form and click on PDF Feeds > Add PDF Feed and select a template. We have selected the Invoice template. Here you can edit the PDF Contents and Appearance. We customized the PDF Contents as shown in the image below.
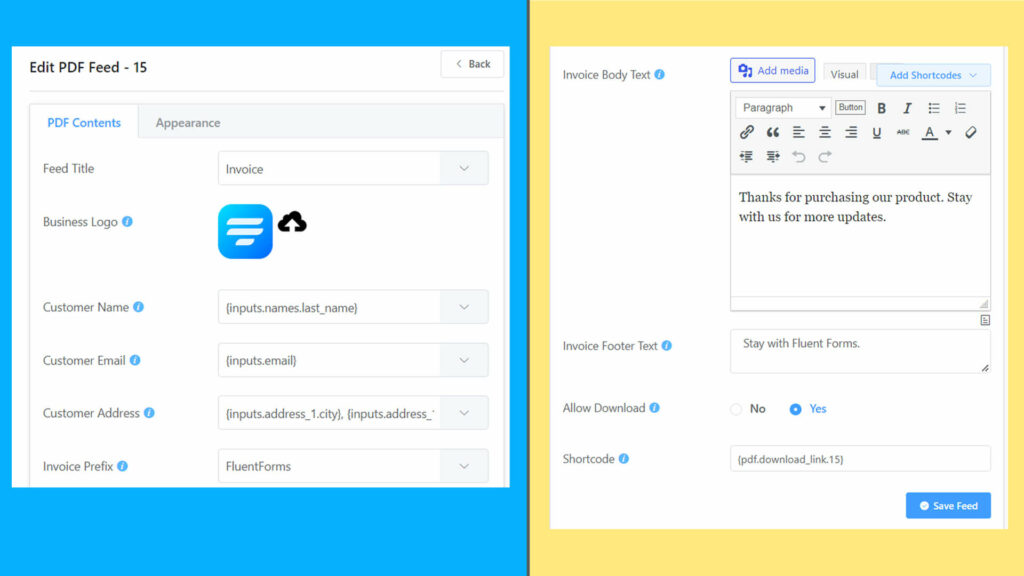
Notice that the input fields are mapped with Customer Name, Customer Email, and Customer Address. Once you are happy with the contents, hit the Save Feed button.
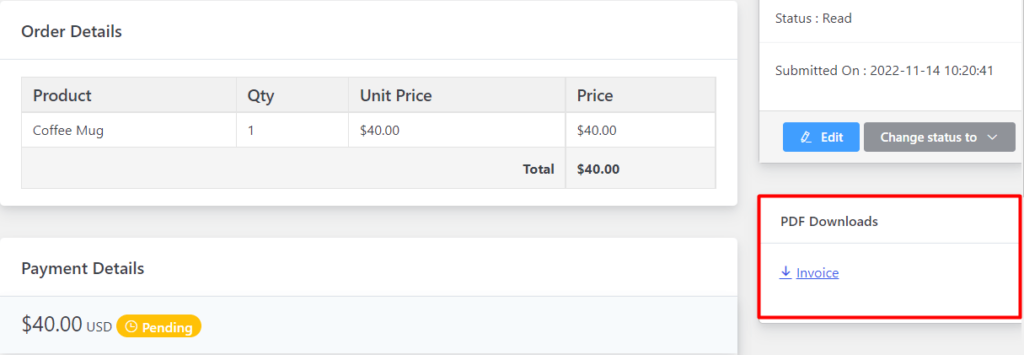
You are all set to automatically generate PDF invoices for each form submission. Now a PDF invoice will be generated as soon as a customer submits the form. You can find the PDF invoice by going to the specific form entry.
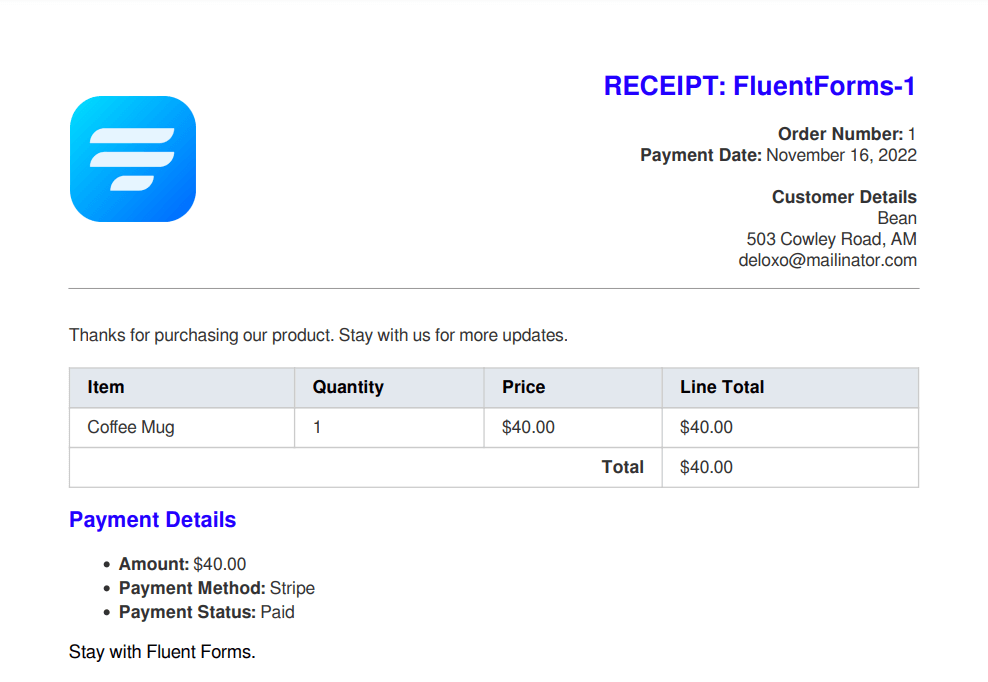
Now take a look at an automatically generated invoice below.
Step 5: Send PDF invoices to customers
There are two methods to send invoices to your customers:
- Show a button for PDF Invoice as a confirmation message
- Send invoice email
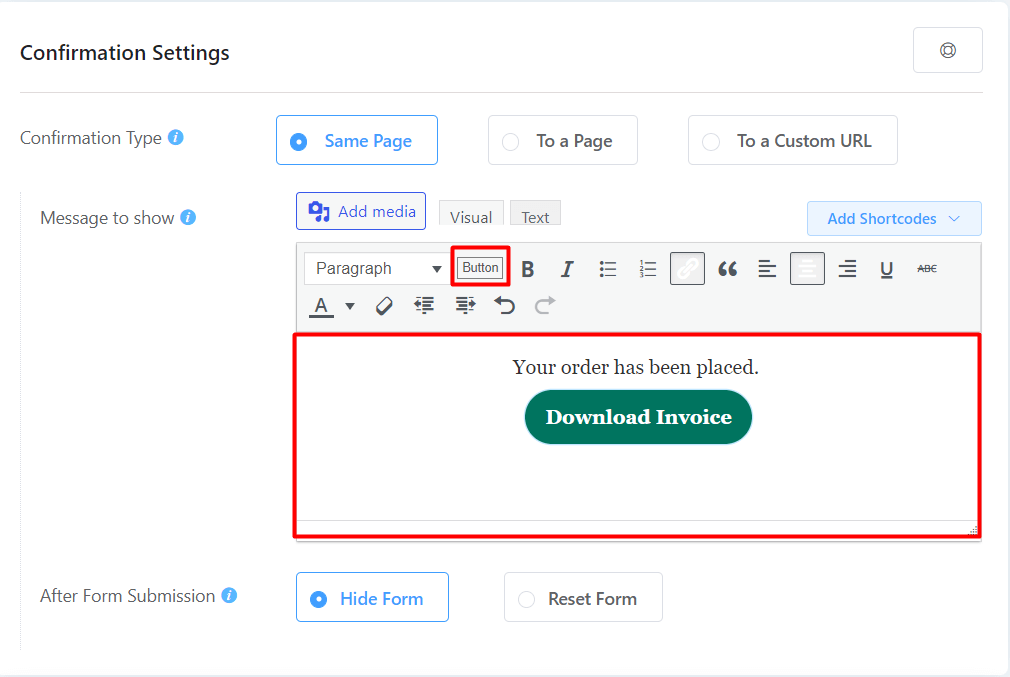
To show a button for PDF invoice upon form submission, go to Setting & Integrations > Form Settings. Customize the confirmation message as shown in the image below. We have added a Download Invoice button with a customized confirmation message that says, “Your order has been placed.”
Don’t forget to click on Save Settings.
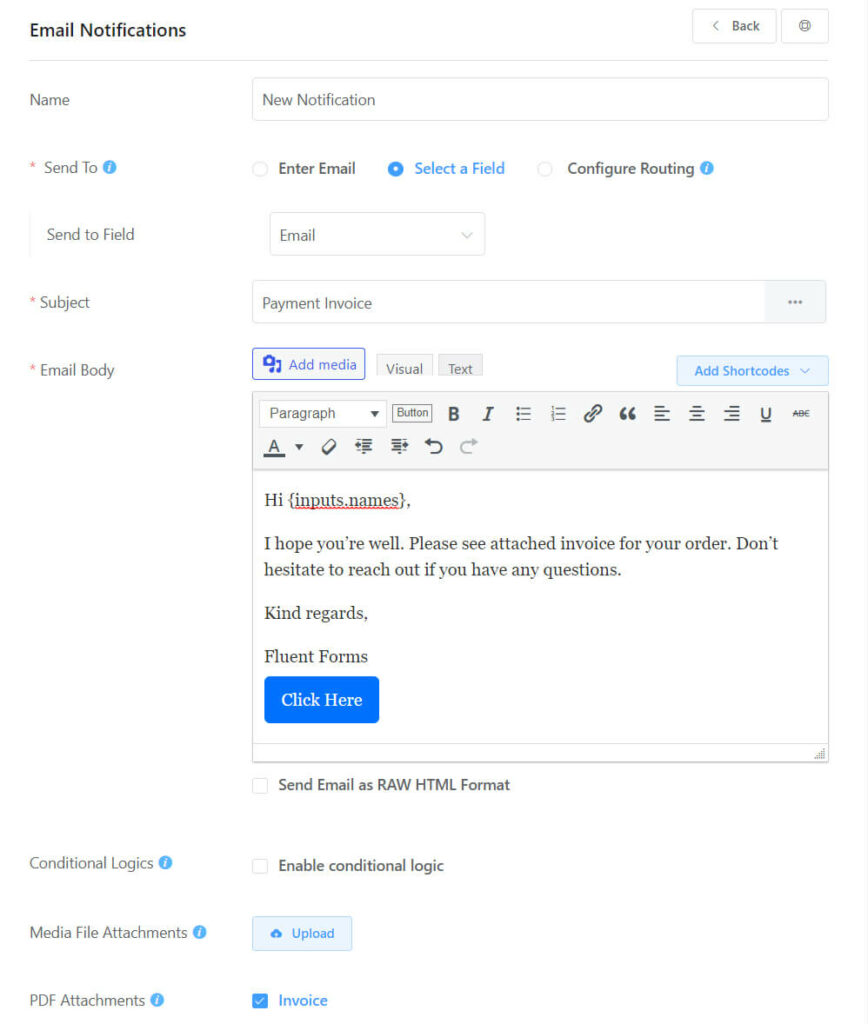
If you want to send the invoice via email to your customers, simply add an Email Notification.
If you face trouble with email deliverability, you can use Fluent SMTP.
Wrap up
Invoicing is a crucial part of any transaction for both parties to be fully aware of it. If you are running an e-commerce website, it is important that your customers get an invoice upon each payment made. In this article, we have shown how to generate and send invoices in WordPress with Fluent Forms.
For more useful articles like this, stay tuned to our social media channels. If you have any queries, comment down below.

An Econ major turned into a Digital Marketer by choice. Hello! This is Ashraf and I am here to enlighten you on various WordPress topics and help you make informed decisions.


4 responses to “Generate PDF Invoice and Seamlessly Send Them to Customers”
-
Where are Settings & Integrations & PDF Feeds? I can’t see them! I can see “Global Settings” & “Integrations” but nothing is there you mentioned in the article. I don’t see your screenshot match my dashboard! your tutorial and my real-time experience are totally different! Please send me a video tutorial. Thanks
-
You will find Settings & Integrations tab on the form editor interface. Screenshot: https://ibb.co/KxZ0mNj
For the PDF Feeds option, see the image: https://ibb.co/6DgyNBXHope it solves your confusion. Is there anything I can help you with?
-
-
What is the URL for button?
-
The URL for the download button to download PDF invoice is the shortcode. To get the shortcode, go to the Settings & Integrations > PDF Feeds of a specific form. Scroll down and you will find the shortcode. Make sure that you have allowed downloading the pdf invoice.
-


Leave a Reply