
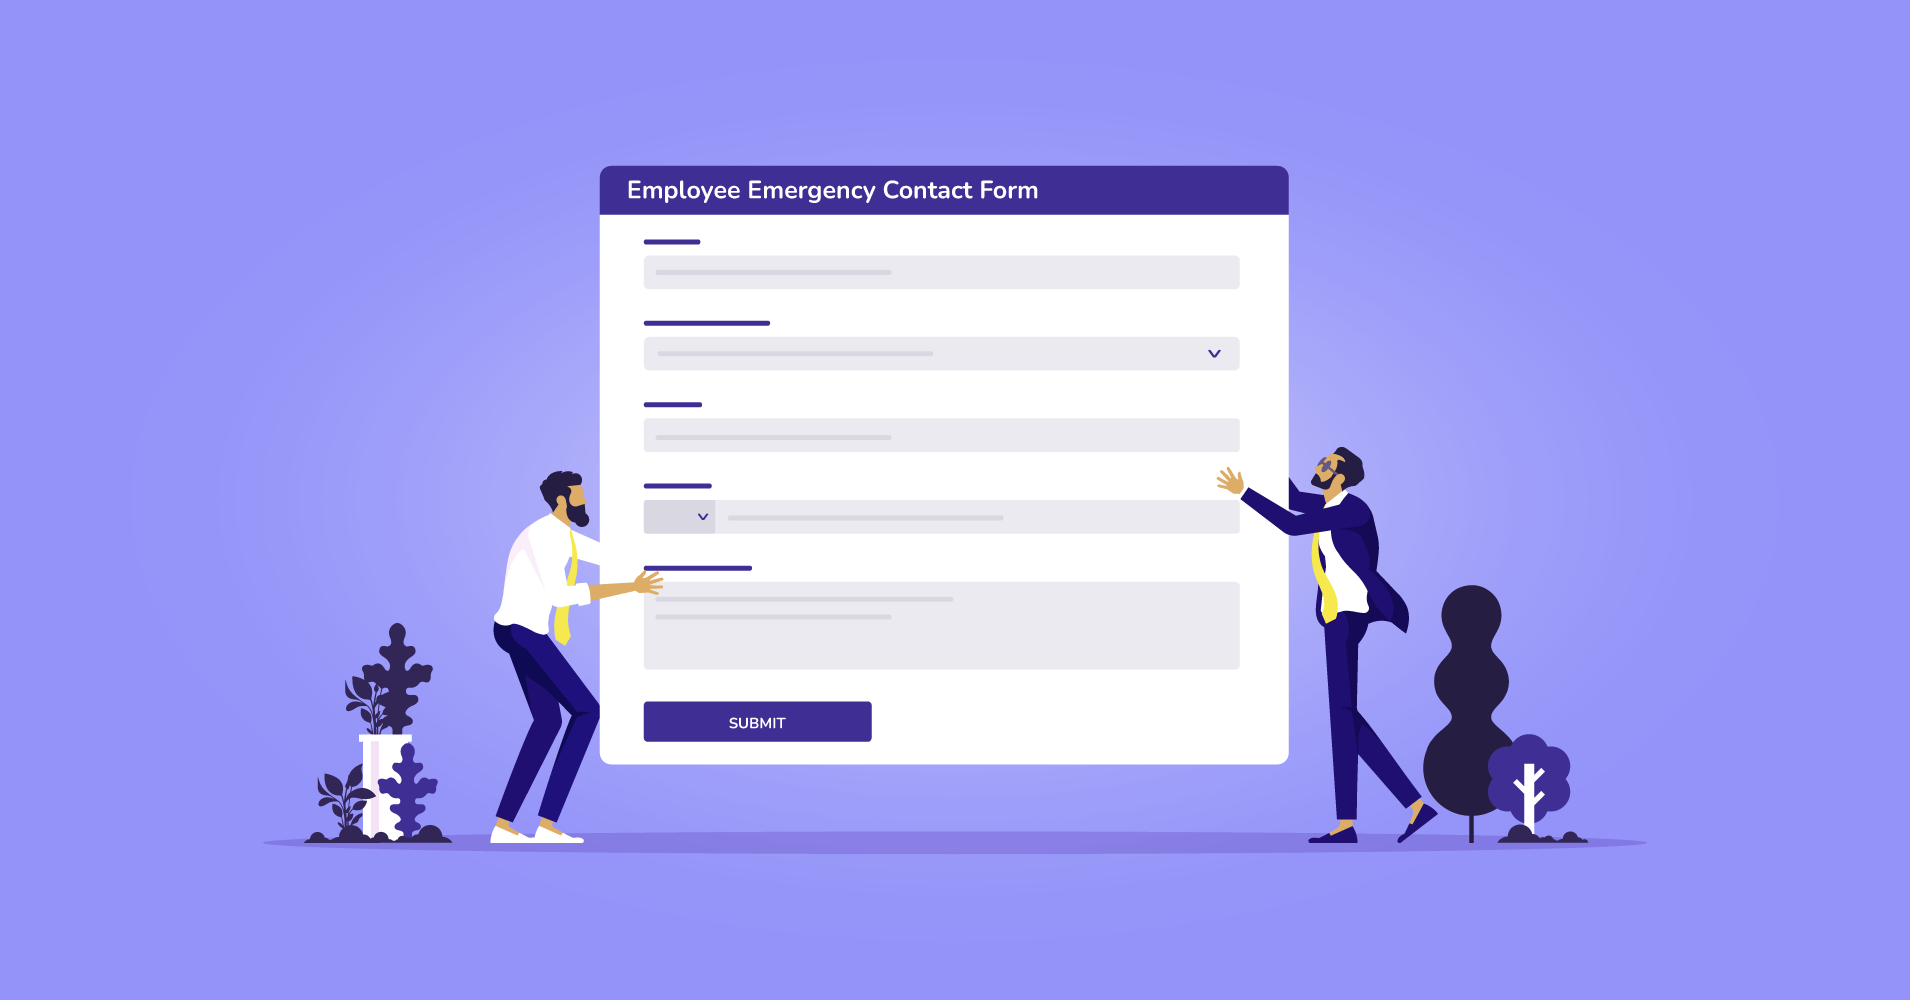
Create an Employee Emergency Contact Form in WordPress (4 Simple Steps)
Let’s say you are an employer and noticed an employee abruptly stopped showing up to work. Or maybe someone got injured at the workplace. What should you do in such emergencies? You should reach out to a person who knows that missing or injured individual quite well. They can help you deal with these critical events by providing information.
So if you are looking for a way to collect emergency information about your employees through an online form, look no further. This article will describe why you need to create an emergency contact form for your employees. Also, we will show the step-by-step process of how to create an employee emergency contact form in WordPress.
Employee emergency contact form – Why do you need one?
In case you are unfamiliar with the emergency contact form, it’s a form used to collect information about individuals’ emergency contact information. This is an important part of any onboarding process as it provides crucial information on health and safety and a contact point to reach out to in case of an emergency.
Emergency contact information for employees is important for:
- Informing family or relatives about a medical emergency
- Providing appropriate health care
- Checking up on an employee’s wellbeing
Now you know why it is so important to have information about employees’ emergency contact. If you want to collect them in a paperless manner, you can opt for online forms. Let’s see how you can do that.
How to create an employee emergency contact form
To make a simple emergency contact form for employees, all you need is a WordPress plugin that can create forms and collect responses. There are so many form builder plugins out in the market. But you should consider their features, user experience, and speed when choosing one. We recommend Fluent Forms in this regard.
Why Fluent Forms?
Fluent Forms is the most lightweight, drag-and-drop form builder plugin packed with all the features and functionalities you would expect from a plugin of this kind. And on top of all, you get an amazing form-building experience.

While choosing Fluent Forms, we considered the following factors –
- Fluent Forms is a drag-and-drop form builder plugin that gives a smooth user experience
- It has dozens of useful pre-built form templates for quick form building
- Conversational forms make Fluent Forms stand out
- With Fluent Forms, you can use 45+ native integrations for additional functionality
- You can use conditional logic for more control over your forms
- It gives you the ultimate freedom of using a multi-column form layout
- The payment feature lets you accept payments from your clients in a seamless way
- Fluent Forms has calculated fields for measuring numbers based on inputs
Got the perfect tool? Let’s jump right into the form-building process. Follow the steps below to design an emergency contact form for employees.
Step 1: Install Fluent Forms
The process of installing Fluent Form is the same as installing any other WordPress plugin. Go to the Plugins from your WordPress dashboard and click on the Add New button. Search for Fluent Forms, install it, and activate it.
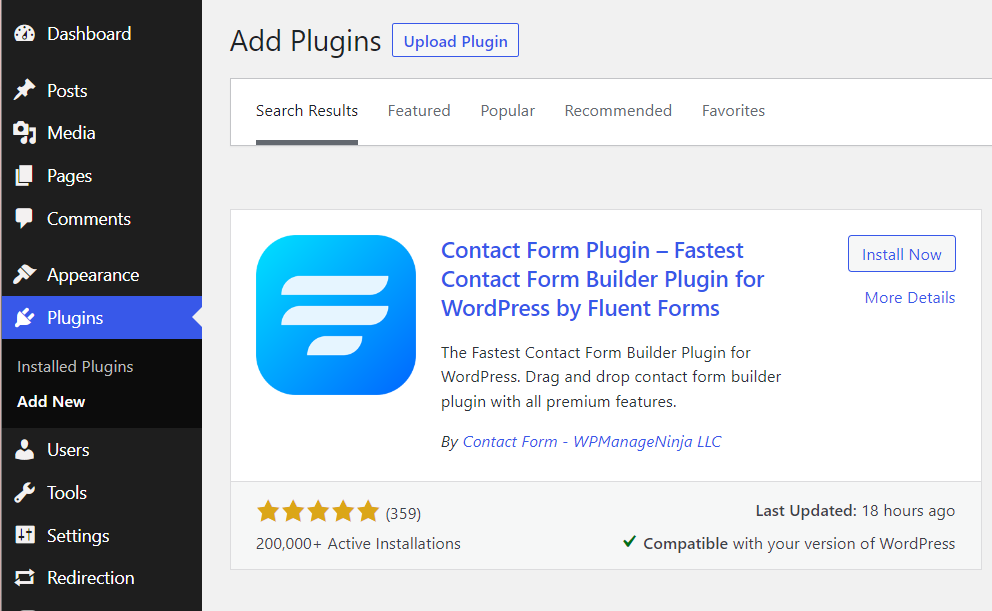
You need to upgrade to the Pro edition of Fluent Forms to use the Phone Field we need in our contact form. You can access a whole bunch of extra features and functionalities in Fluent Forms Pro.
Step 2: Add necessary input fields
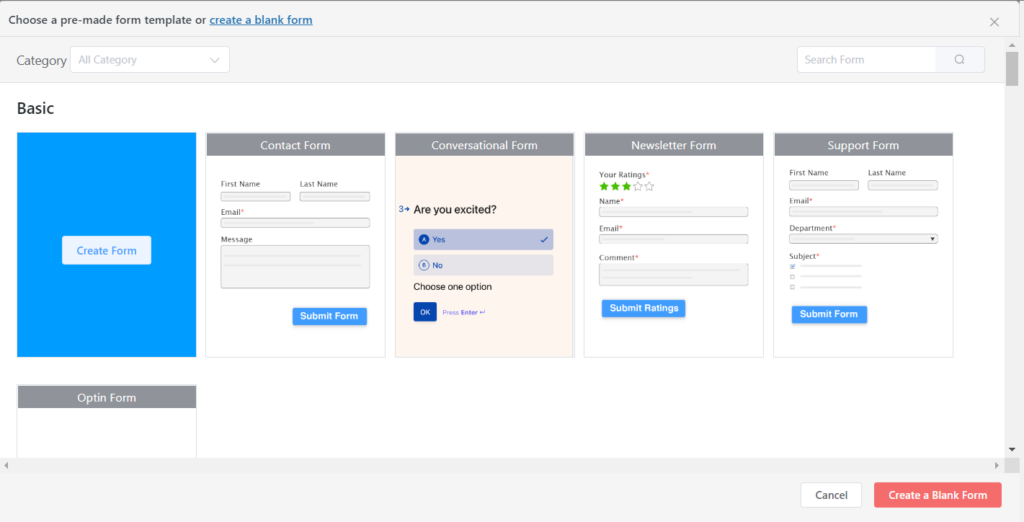
Next, hover over Fluent Forms Pro on your WordPress dashboard and click on New Form > Create Form to start creating the emergency contact form.
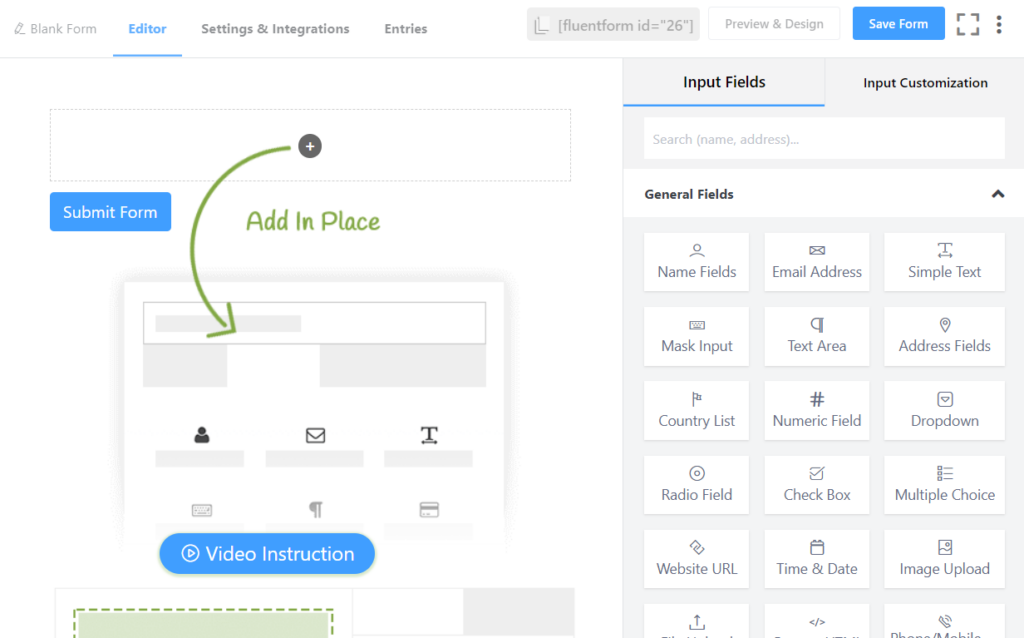
You will see a form editor interface, as shown below.
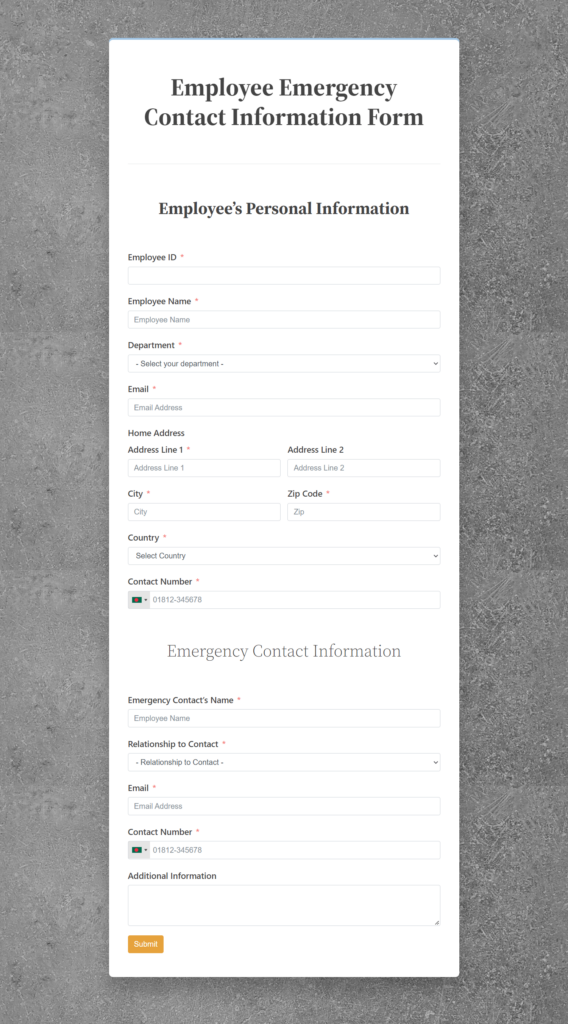
In our employee emergency contact form, we will have two sections. One for the employee’s personal information and the other for their emergency contact information. For the Employee’s Personal Information section, we will add the following fields:
- Employee ID
- Employee Name
- Department
- Home Address
- Contact Number
For the Emergency Contact Information section, we will insert the following input fields:
- Emergency Contact’s Name
- Relationship to Contact
- Contact Number
- Additional information
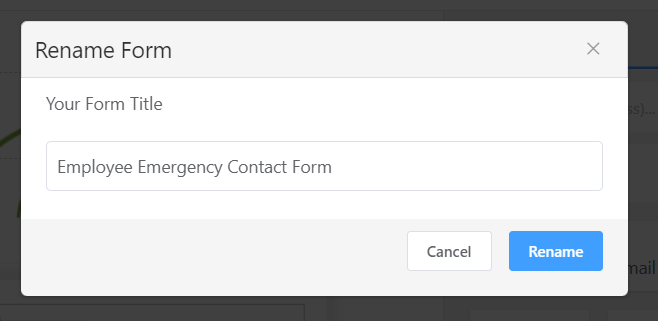
Before adding the input fields, let’s first rename the form to “Employee Emergency Contact Form.” Click on Blank Form in the upper left corner of the window to rename the form.
Now is the time to add input fields to your form. Adding fields in Fluent Forms and customizing them is a very simple and easy process. Just click on the desired field or drag and drop it on the form editor.
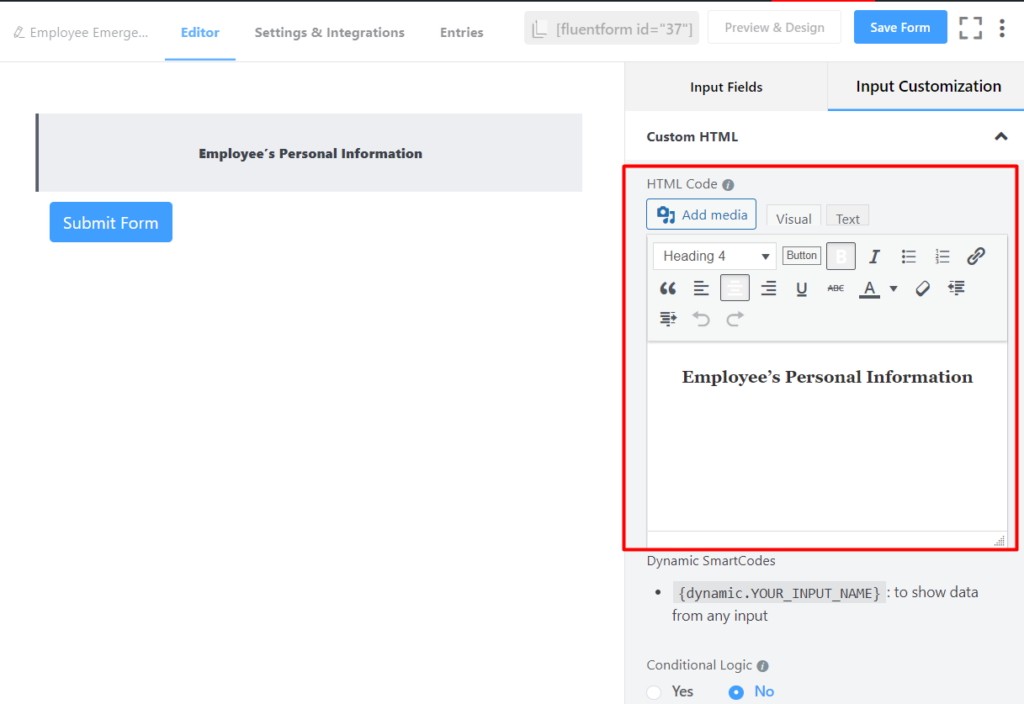
First, we will add a heading for the first section. To do that, let’s add a Custom HTML field. Click on the added field to customize it. We named the section “Employee’s Personal Information,” selected Heading 4 as the heading type, and center-aligned the text.
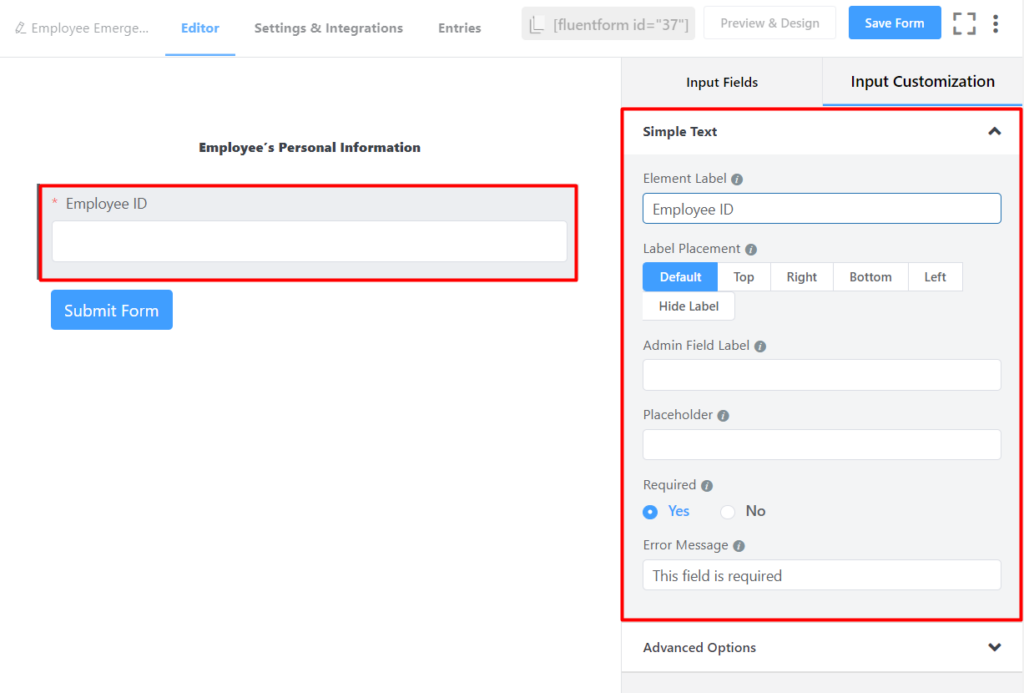
Next, we will add a Simple Text to our contact form for the Employee ID field. We changed the Element Label to Employee ID and made it a mandatory field.
Fluent Forms offers some ready-to-use input fields that users frequently need. For the Employee Name, simply click on the Name Fields. We hid the Last Name, changed the Label of the First Name to Employee Name, and made it a Required input field.
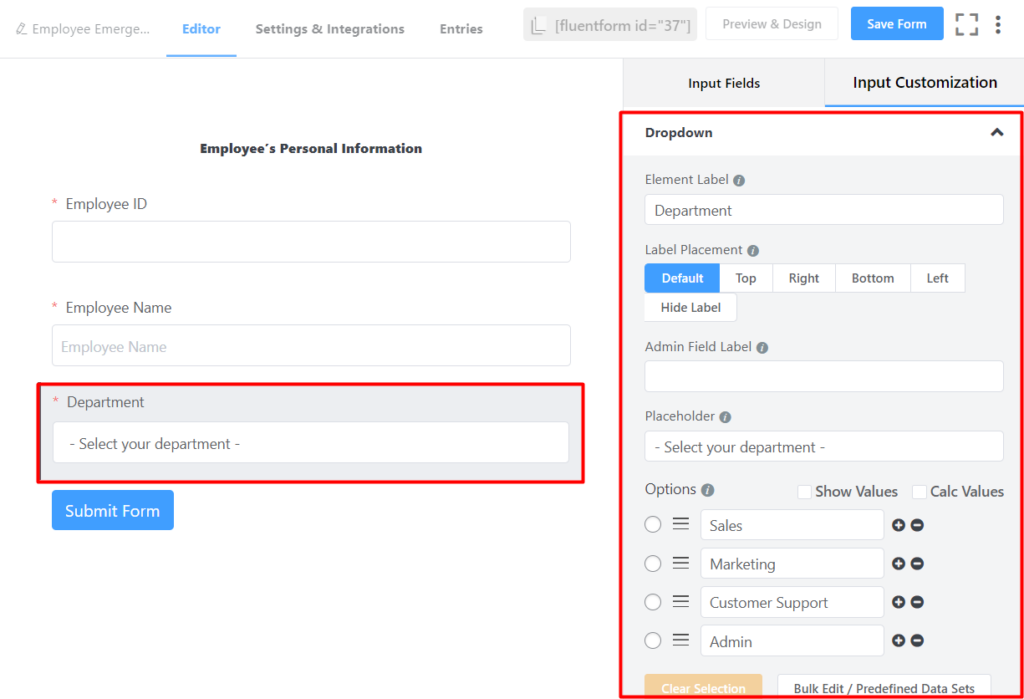
For the Department field, let’s add a dropdown menu to let your employees select their respective departments from a list. Click on the Dropdown input field. You can customize it by changing the Element Label, Placeholder and adding Options. You can include additional options by clicking on the plus sign (+) beside any option.
After that, click on the Email Address, Address Fields, and Phone/Mobile Field input field to add them to your form.
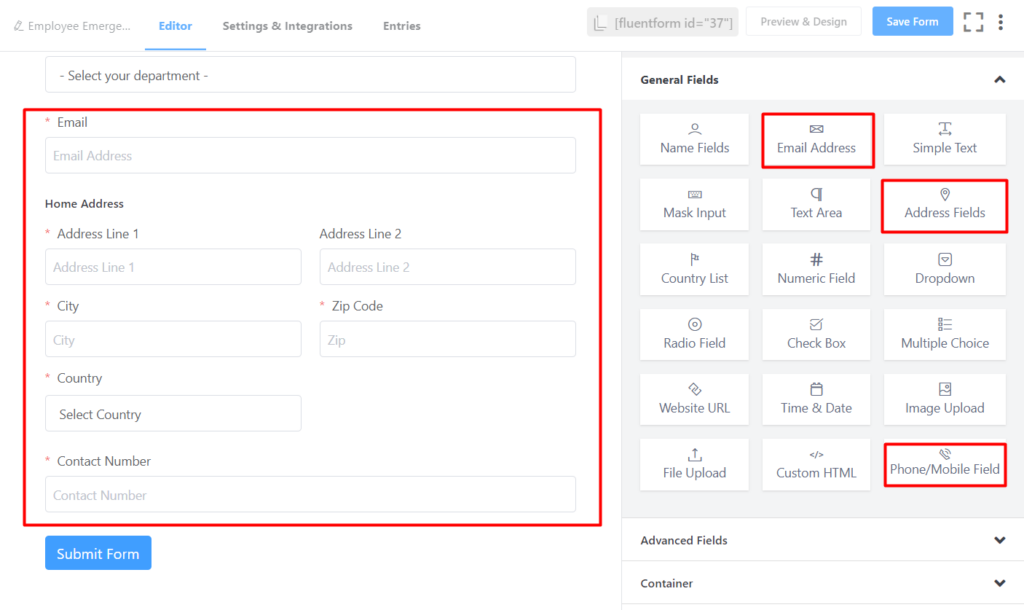
You can customize each of these input fields according to your needs. For example, you can turn on validation for both the email address and phone number, making sure that employees do not enter the wrong information.
We are halfway through building the employee emergency contact form. The next section can be designed in the same manner. If you have carefully read till now, you should master the form-building process already.
For the second section, add a Custom HTML for the section heading. We will call it the “Emergency Contact Information” section. Follow the process described above to add Emergency Contact’s Name, Email, and Contact Number to your form. You can use a Dropdown input field for Relationship to Contact.

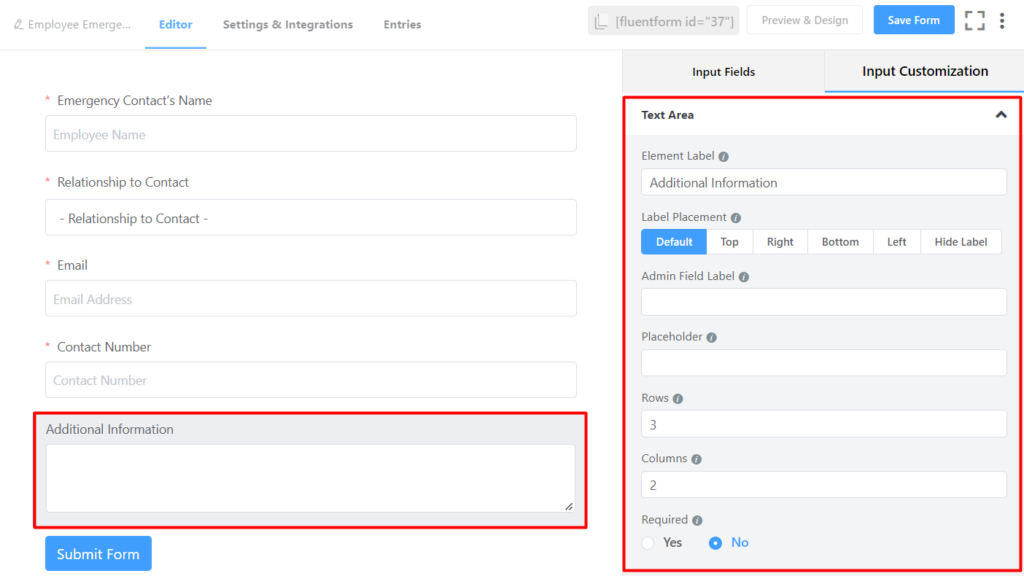
Text Area can be used for letting your employees provide Additional Information about themselves, e.g., their health issues, personal preference, etc. You can set the size of the Text Area by changing the number of Rows and Columns.
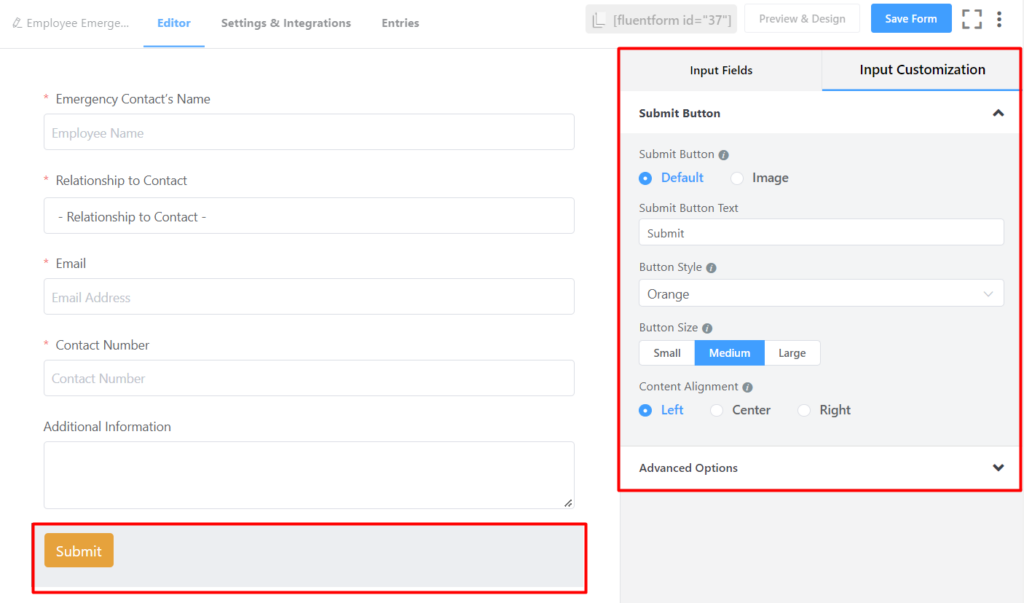
Once you have added all the input fields to the emergency contact form, you can customize the Submit button. You can change the text, style, size, and alignment of the submit button. Click on the Save Form button.
That is it! Your employee emergency contact form is almost ready. Before publishing it, let’s quickly check out some form settings that you can play with.
Step 3: Configure form settings
When you click on the Settings & Integrations tab, you will be presented with some settings to configure your contact form. Here you can change the confirmation message that will be shown to the respondents when they submit the form.
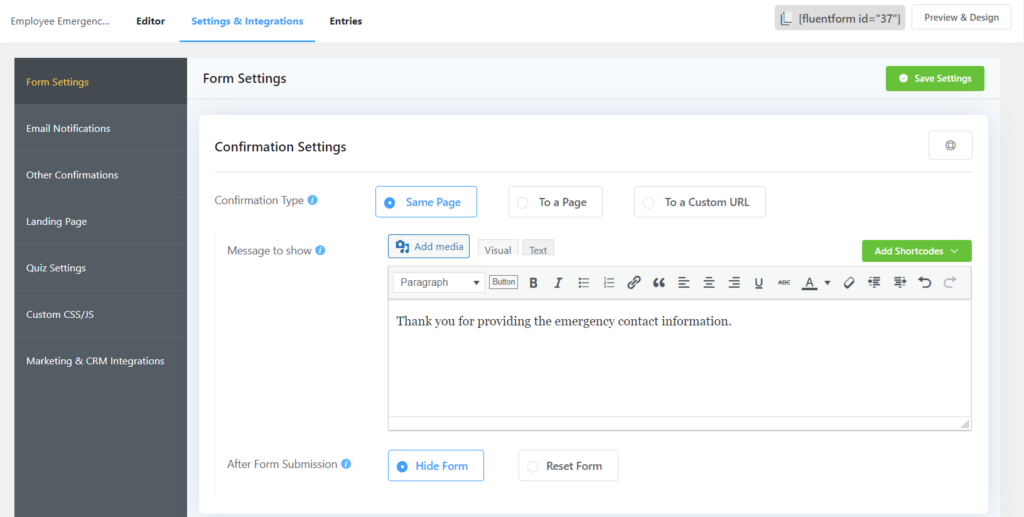
Alternatively, you can show an image or a video as the form confirmation message. Some other things that you can do here are:
- Try different form layout options
- Schedule and restrict form entries
- Enable advanced form validation
Step 4: Publish the form
Publishing the form can be done in three ways.
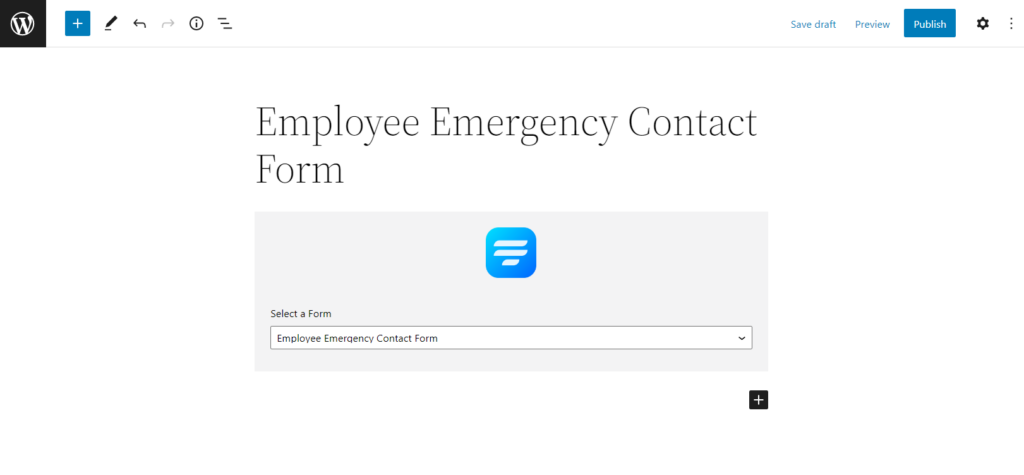
You can use the Gutenberg block editor to select the form. Click on Add New under Pages in the WordPress dashboard. Give the page a title. In the blank area of the block editor, click on the plus sign (+) or type a forward slash (/). Then type Fluent Forms and choose the Employee Emergency Contact Form you have just created.
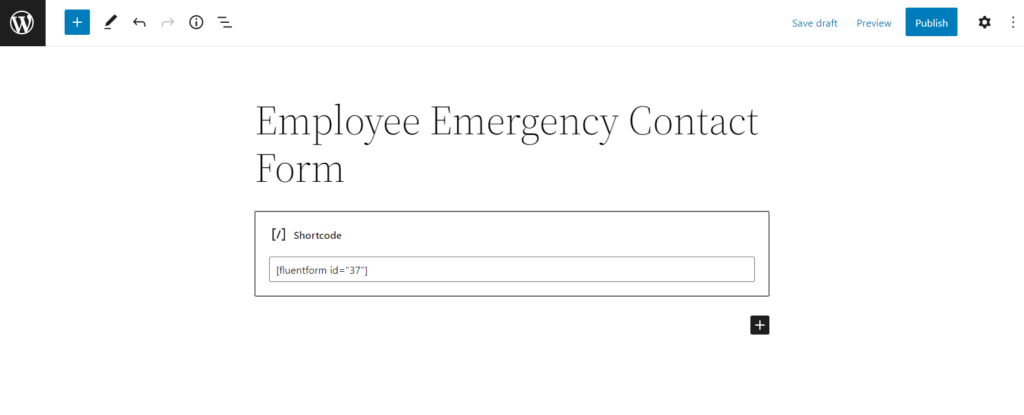
A second way to do that is to use Fluent Forms’ Shortcode feature. You can find the Shortcode of the form on top of the form editor window.

Simply click on the Shortcode to copy it. Paste this Shortcode using a shortcode block anywhere you want to display your form on your website.
The best way is to publish the form on a dedicated landing page. Go to Settings & Integrations > Landing Page. Check the box beside Enable Form Landing Page Mode. Here you can fully customize the landing page according to your brand identity.
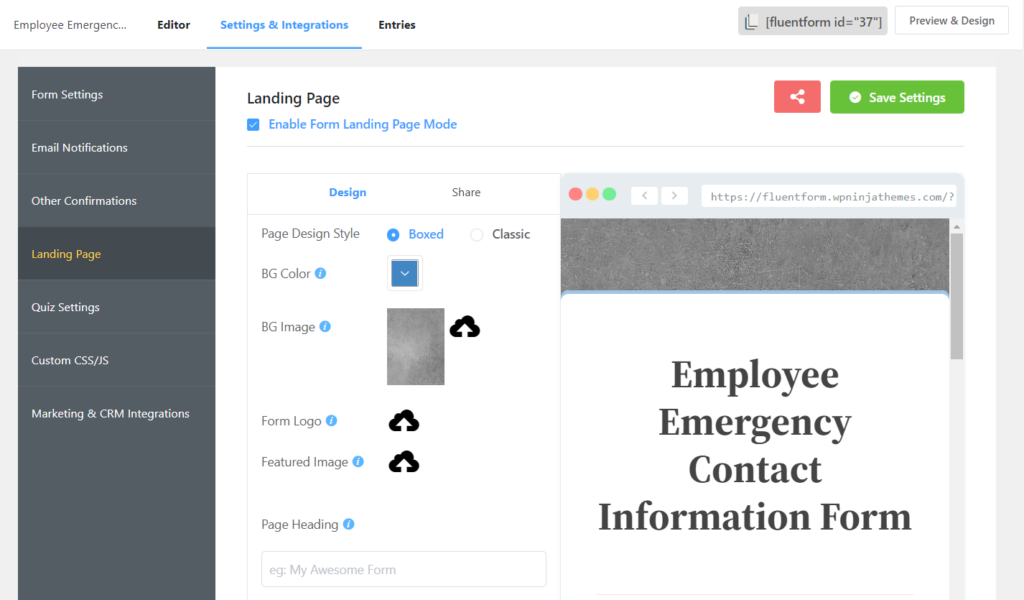
Click on Save Settings after the necessary customization.
As you can see, we have designed quite a long form that might result in higher form abandonment. To overcome this, you can opt for a multi-step or a conversational form.
Final thought
Emergencies do occur. According to the U.S. Bureau of Labor Statistics, there were 4,764 fatal work injuries recorded in the United States in 2020.
So if you have emergency contact information of your employees, you will thank yourself for collecting them. In this article, we explained all the nitty-gritty details of how to create an employee emergency contact form. Try it out in your organization, and tell us how it helped you in critical events.
If you have any queries, comment down below. Also, follow our social media channels for more tutorials like this.

An Econ major turned into a Digital Marketer by choice. Hello! This is Ashraf and I am here to enlighten you on various WordPress topics and help you make informed decisions.


Leave a Reply