3 Steps to Create a Check Request Form on Your WordPress Site

A request for a check is not only a professional reminder for transactions, but also an official approach to proceed with further procedures. A check request form allows you to prioritize and filter the upcoming payments you are going to make.
A check request form attached to the relevant page of your WordPress website can introduce a continuous process to get payment requests from the internal departments, as well as the service/product providers.
TL’DR:
- A check request form helps businesses officially manage, categorize, and prioritize payments by gathering detailed information from requestors.
- You can create a check request form on WordPress using a plugin like Fluent Forms.
- Step 1: Install the plugin and create a new form (from blank, a template, or using AI).
- Step 2: Drag and drop necessary fields like Name, Email, Reason for Check, Date Needed, and File Upload.
- Step 3: Customize fields, such as adding department options to a dropdown menu.
- Fluent Forms also offers features like multi-step forms, spam protection, and an AI form builder.
How a check request form helps your business
You may need to make payments frequently for various purposes. Check request forms help you obtain the necessary information to pay for business expenses and bills.
Check request forms, if maintained in an organized way, help you categorize and prioritize upcoming payments. A check request, as submitted by the requestor who needs to be paid, serves as a two-sided scope to verify informational details.
Whereas a voucher only focuses on the basic data, a check request form is scalable to comments, additional information, priority, and other relevant information provided by the payee.
Steps to build a check request on WordPress
When creating forms on WordPress without coding knowledge, a contact form plugin like Fluent Forms is necessary. Fluent Forms is the fastest WordPress form builder plugin trusted by 600,000+ businesses worldwide.
Step 1: Create a new form
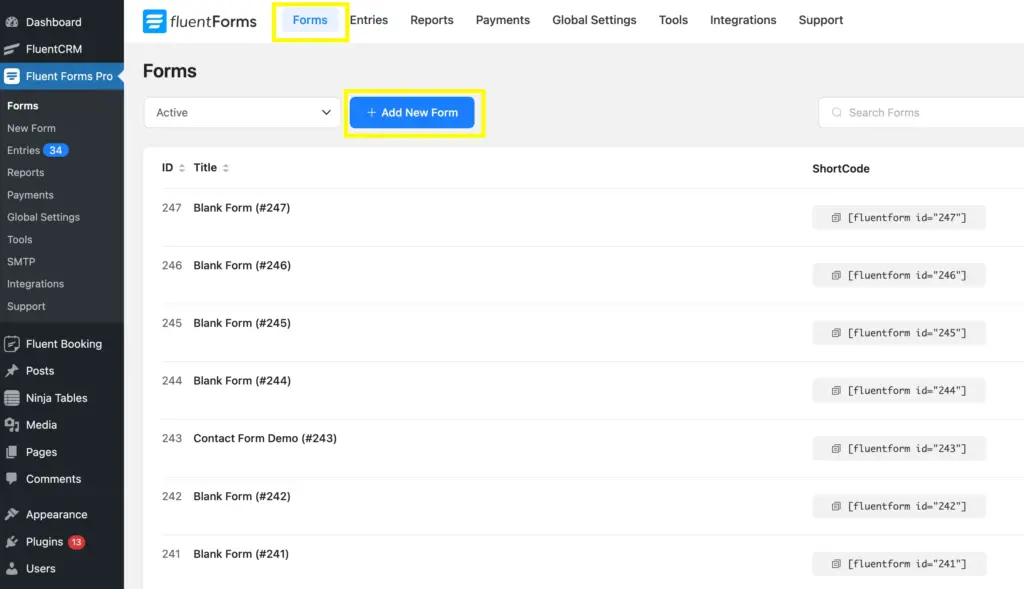
After downloading and installing Fluent Forms, navigate to the Fluent Forms Dashboard and click on the Forms.
Click on the Add New Form button on the Forms page to get the new form creation options.
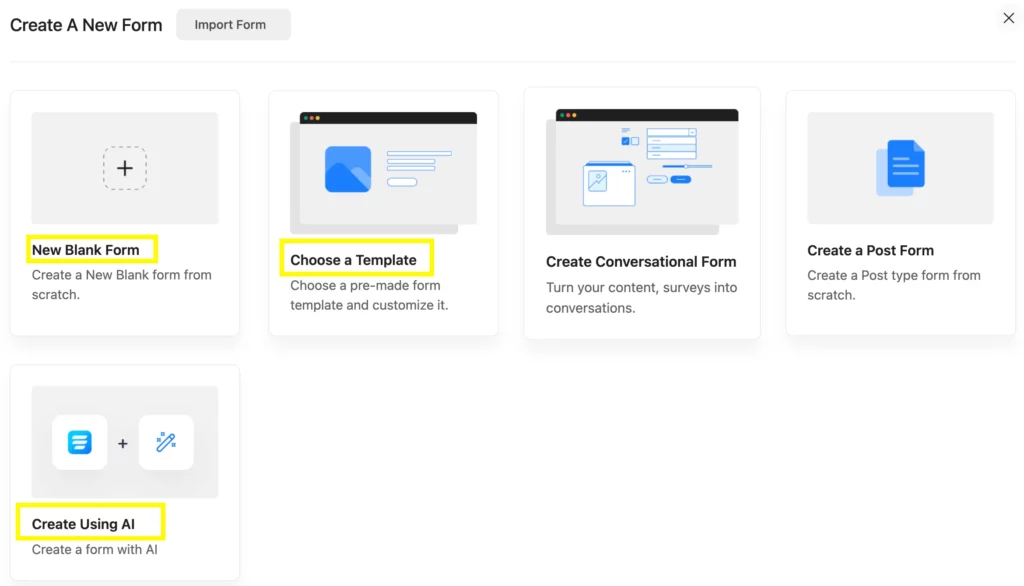
After clicking on Add New Form, you will get options for building a new form. Using Fluent Forms, you can choose New Blank Form, Choose a Template, or Create Using AI, and build a perfect check request form for your website.
Step 2: Add relevant input fields
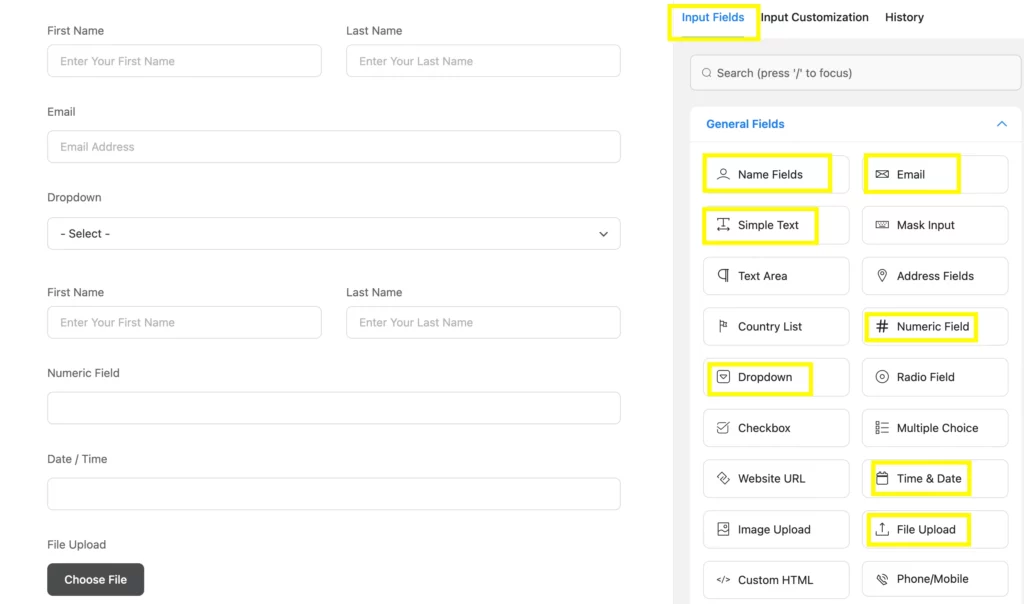
Adding relevant input fields is simple using Fluent Forms, as it offers a drag-and-drop form-building experience.
What are the relevant input fields to create a check request form?
- Name fields (for Requestor’s and Payee’s names)
- Email fields (for Requestor’s and Payee’s emails)
- Dropdown (for selecting Department)
- Simple Text field (Reason for check)
- Time & Date (Date needed)
- Radio field (Payment method)
- File Upload field (for supporting documents), etc
Using Fluent Forms, you can simply choose the fields by clicking on the Input Fields. We have organized the fields based on priority.
Step 3: Customize the input fields
To bring clarity to your check request form, you need to customize the fields. Like, use the dropdown field to provide options for choosing the department.
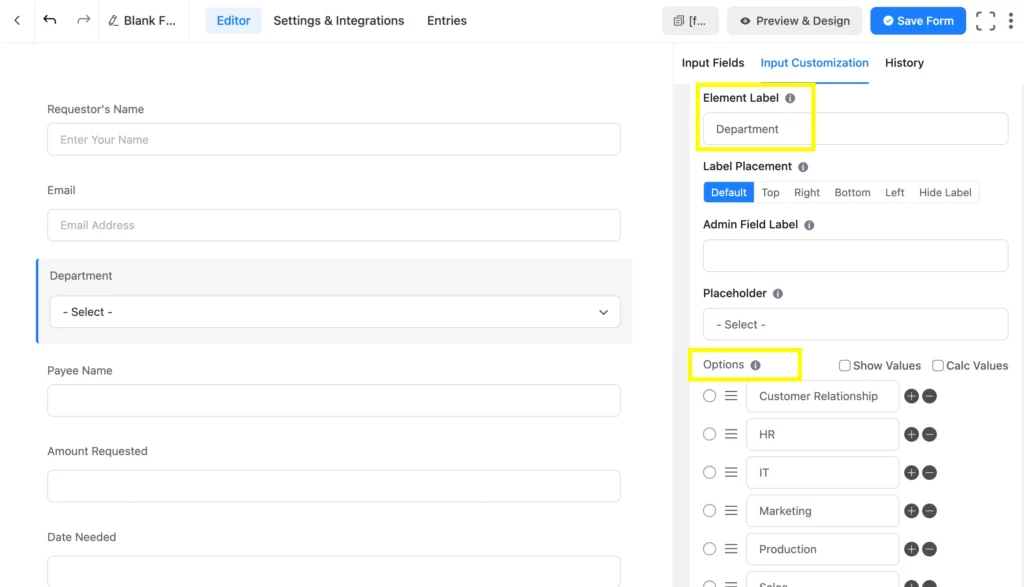
Once you’ve completed creating the check request form, it’s more likely to appear as this Check Request Form Template.
Related Features
Multi-step form
Fluent Forms comes with its multi-step form feature to make the forms more readable and engaging. You can break a long form into several pages and make it more functional. This feature contains progress indicators, partial entries, customizable step titles, previous and next buttons, etc, which help you build an optimized and purposeful form.
Spam protection
Spam in form submissions happens especially when it’s related to a transaction. So, you need to establish form security so that spammers can’t even think of spamming. Fluent Forms ensures integrations with protective tools such as Akismet, Turnstile, reCAPTCHA, and hCaptcha that develop the form’s and the site’s security.
AI form builder
A command of a few words about how you want a form to appear, and Fluent Forms AI Form Builder will create a new form based on your prompt. The more specific your command is, the better output you will get.






Leave a Reply