
How to Create a Valentine’s Day Party Invitation Form

As February approaches, love is in the air, and what better way to celebrate the love-filled vibes than by throwing a memorable Valentine’s Day party?
As everyone gears up for the season of affection, why not make this Valentine’s a truly exceptional day by hosting an unforgettable party? The arrangement begins with creating an invitation form that not only speaks but sings love.
In this blog, we will show you how to create a Valentine’s Day party invitation form. Let’s jump in!
Fluent Forms – the best WordPress form builder
To create a party invitation form in WordPress, you need a plugin that lets users provide their names, contact details, RSVP preferences, and any other essential information.
With Fluent Forms, you can effortlessly create such party invitation forms. It is currently the most lightweight form-builder plugin in WordPress. This WordPress form plugin has a user-friendly, drag-and-drop interface and comes with exciting features and functionalities.
Some of the features of Fluent Forms are –
- Drag-and-drop form builder plugin for smooth user experience
- 50+ ready-to-use input fields
- Conversational forms for giving the best form-filling experience
- Multi-step forms for breaking down long forms into short ones
- Spam protection to save your forms from being spammed
- Conditional logic for more control over your forms
- 45+ native integrations for additional functionality
- PDF add-on for generating PDFs after form submissions
- Payment feature for accepting payments from your clients in a seamless way
- Numeric calculation for measuring numbers based on inputs
- Advanced form styler to customize the look and feel of your forms
Now that you have the right tool in your hand, let’s get into the process of creating a Valentine’s Day party invitation form.
How to build a Valentine’s Day party invitation form?
Follow the steps below to create a lovely Valentine’s Day party invitation form –
Step 1: Install Fluent Forms
To install Fluent Forms, go to the Plugins section from your WordPress dashboard, click on Add New, search for ‘Fluent Forms’, install the plugin and activate it.
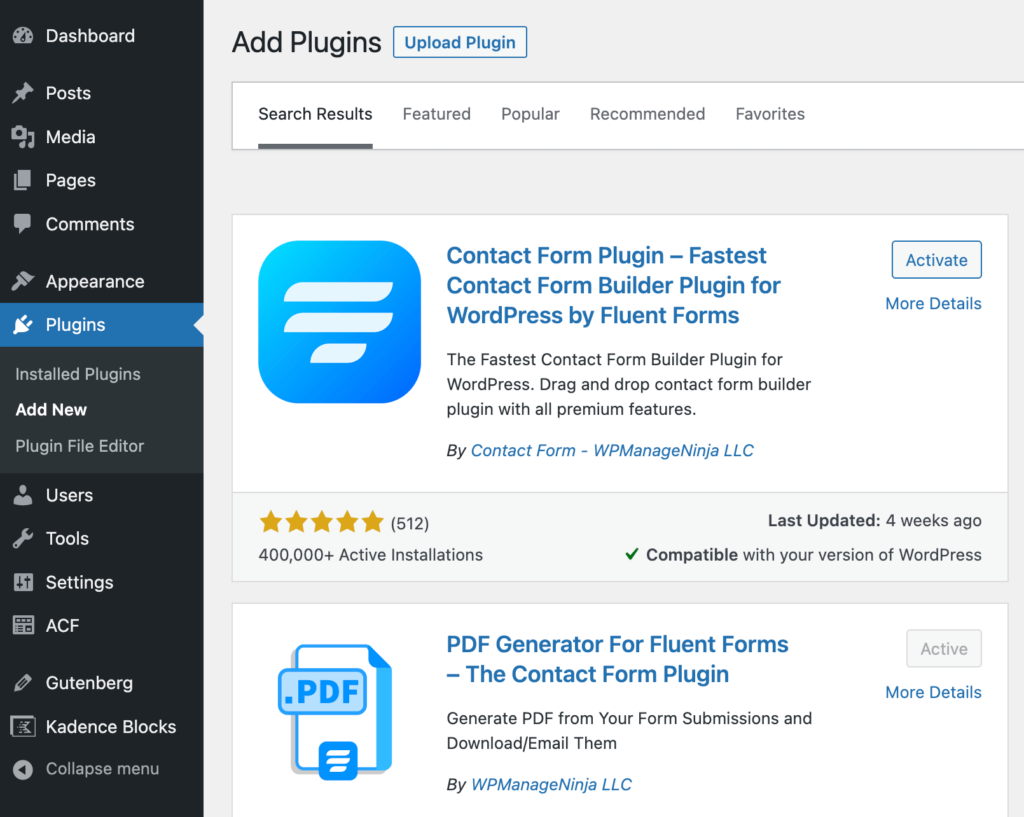
You can easily create a party invitation form using the free version of Fluent Forms. However, we want to have some advanced features in our party invitation form. So upgrade the free version of Fluent Forms to Fluent Forms Pro.
Step 2: Create a party invitation form from scratch
Now, hover over Fluent Forms on your WordPress dashboard and click New Form.
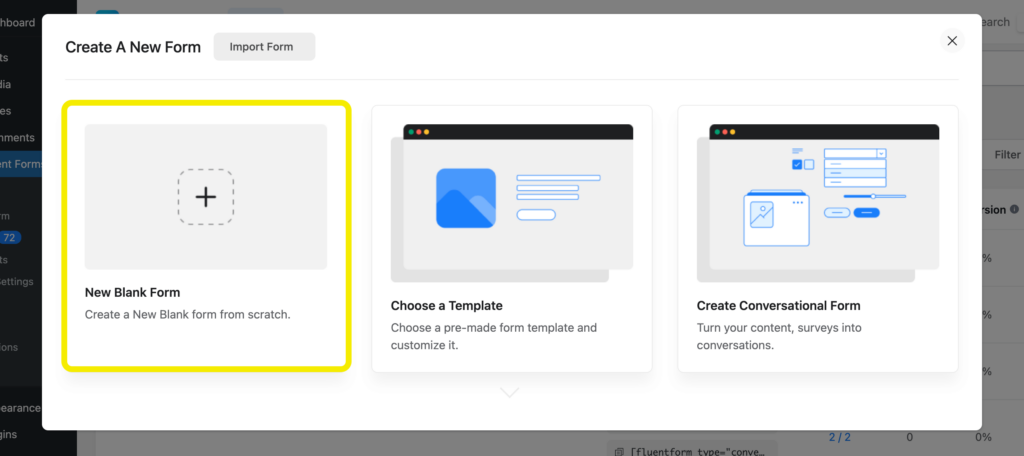
Choose New Blank Form from the popup window. You will see the form editor interface of Fluent Forms.
Before adding the input fields, rename the form by clicking on the form name on the left side of the window.
Step 3: Add input fields
Now it’s time to add necessary form fields. A party invitation form generally contains the following input fields –
- Reservation Holder’s Name
- Email Address
- Phone Number
- Ticket Information
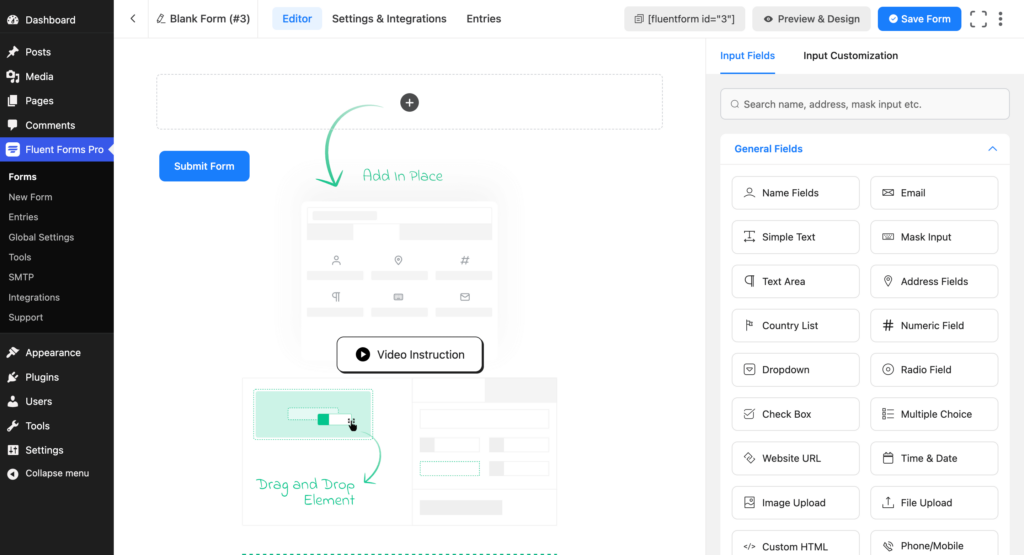
Now start creating the Valentine’s Day party invitation form by adding a Custom HTML field to include a form header. Customize it easily using the rich content editor or text editor that allows you to input HTML code.
Now add the following input fields for collecting necessary information –
- Name Fields
- Phone/Mobile
- Payment Item
- Payment Method
You need to enable the payment module and activate different payment methods to be able to use the payment feature of Fluent Forms.
Clicking on any added input fields will give you some Input Customization options.
We have customized the Name Fields as shown below –
You can also customize other input fields according to your requirements.
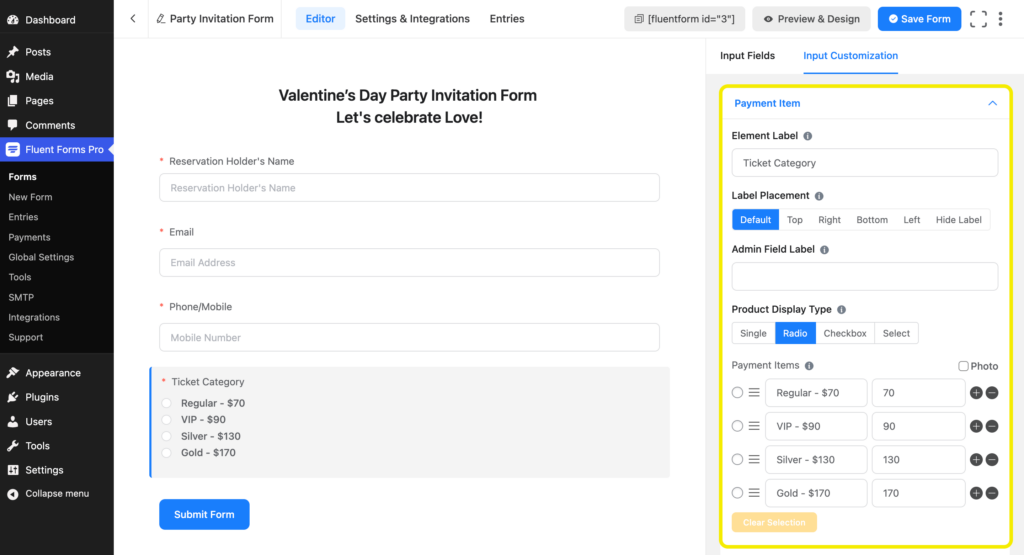
For the Payment Item field, change the Element Label to Ticket Category and the Product Display Type to Radio.
Now add the available ticket categories in Payment Items.
We also want to allow people to complete the payment right from our party invitation form. So we have added a Payment Method field.
To get the available payment methods in Input Customization, you have to first enable them from Global Settings > Payment > Payment Methods. You can customize the Payment Method as shown below.
To protect the invitation form from spammers, you can add reCAPTCHA to your form.
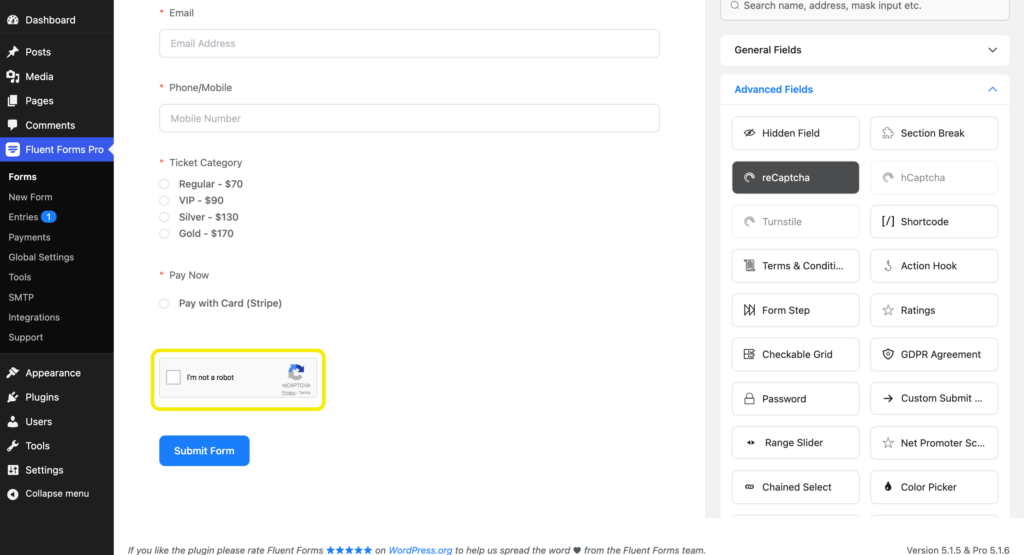
Finally, to make your form more user-focused, you can customize the Submit Button.
Step 4: Configure your form’s settings
You will find a tab called Settings & Integrations on top of the form editor interface. Click on this tab to access various settings.

From the Settings & Integrations tab, you can do the following –
- Change the confirmation message that is shown when a user submits a form
- Enable double opt-in confirmation
- Configure form layout
- Apply different scheduling and restriction rules
- Configure email notifications
- Create PDF feeds for generating PDFs from each form submission
- Design a dedicated landing page for your form
- Use custom CSS and JS in your form
- Configure various payment options
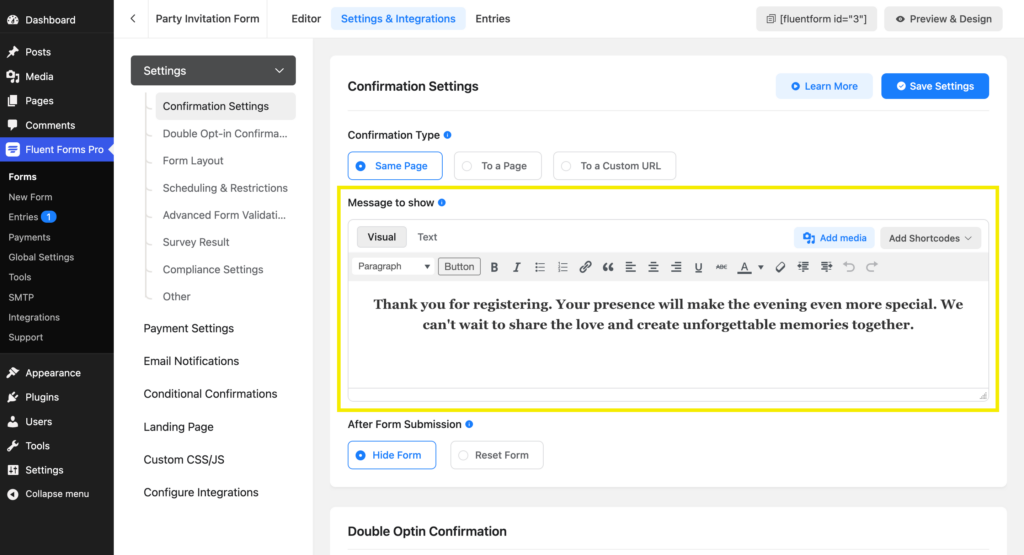
We would like to show a message after someone fills out the party invitation form. From the Confirmation Settings, customize the Message to show.
Step 5: Send PDF invitation card
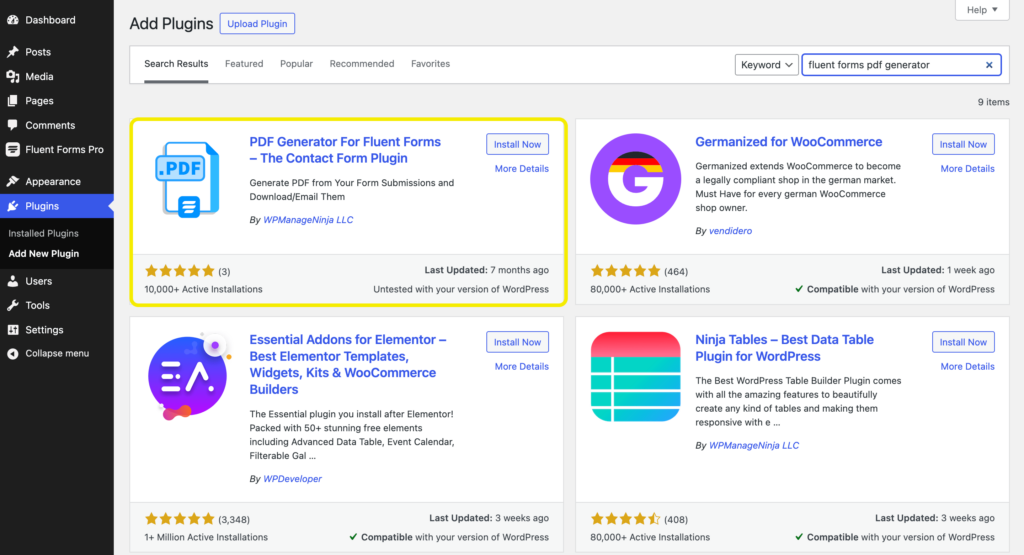
Fluent Forms offers users a PDF Generator that can automatically turn form submissions into PDFs. Using this feature, you can send invitation cards to your users in a PDF. To do so, you have to first install and activate PDF Generator For Fluent Forms on your website.
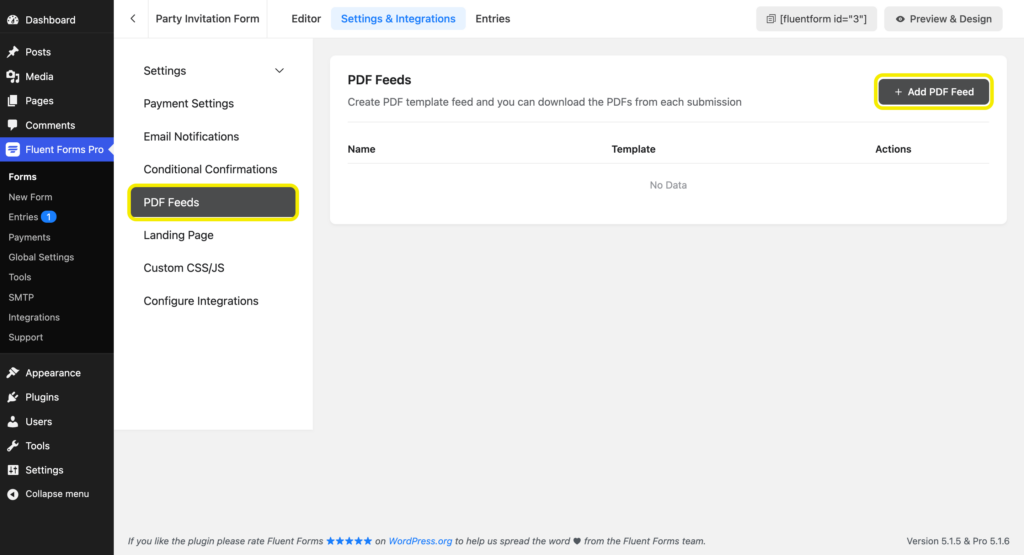
Then you have to configure the PDF feed of the party invitation form. Go to the Settings & Integrations tab of the form and click on PDF Feeds > Add PDF Feed.
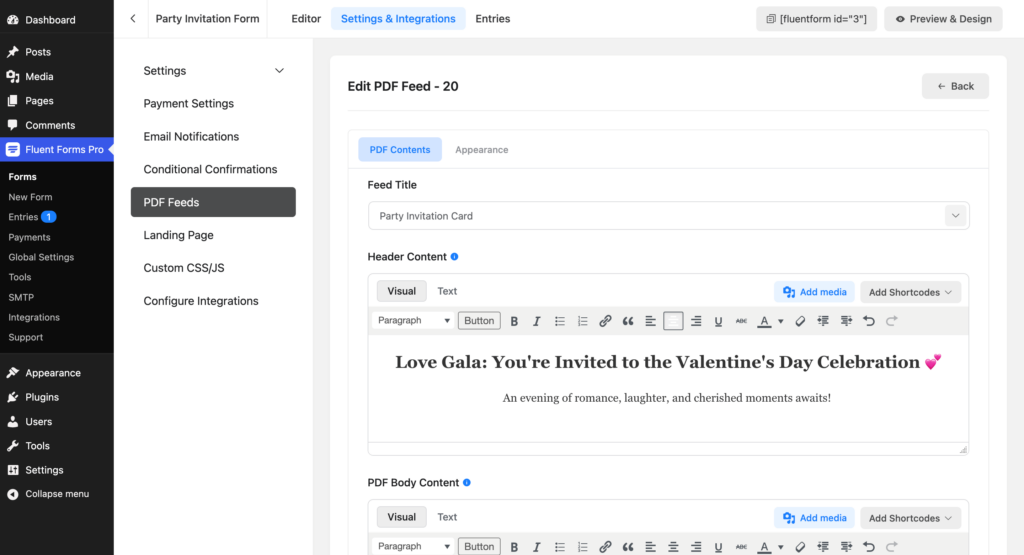
Select the General template. Here you can edit the PDF Contents and Appearance. We customized the Feed Title and Header Content as shown in the image below.
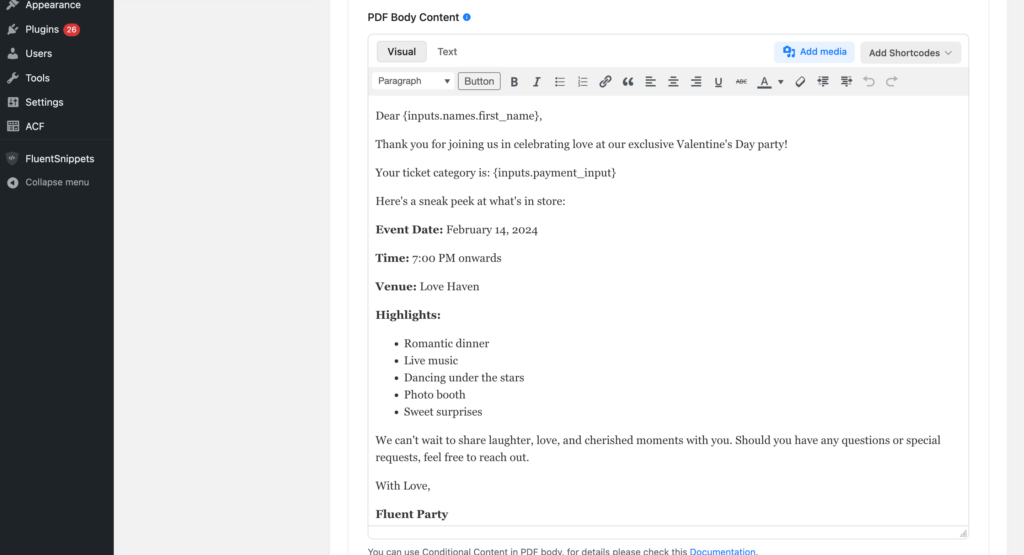
We also customized the PDF Body Content. You can take advantage of shortcodes to make your invitation card more dynamic.
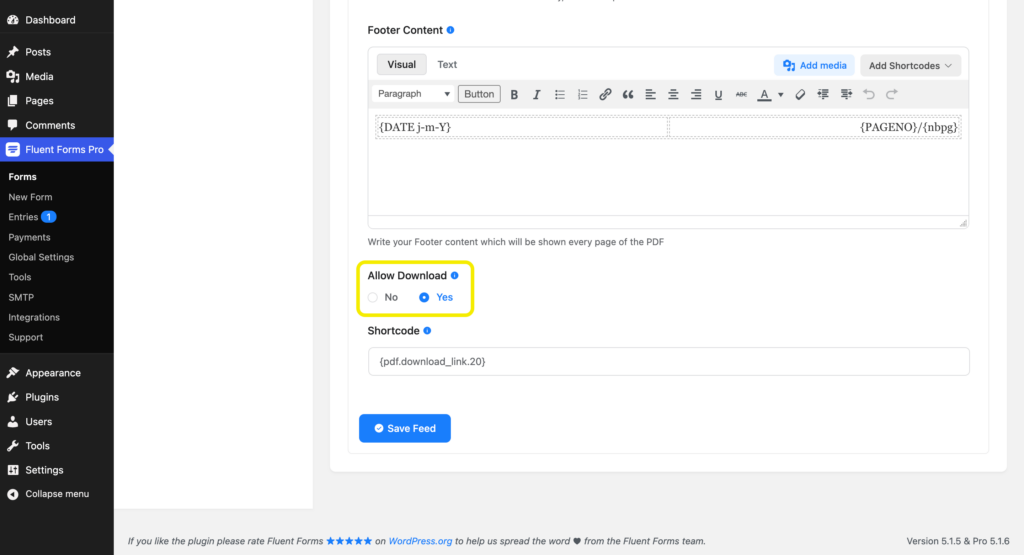
There’s an option that allows individuals to download the PDF file. We have enabled that.
You have configured the PDF feed.
Now there are two methods to send invitation cards:
- Show a download button in the confirmation message
- Send an email notification with the invitation card
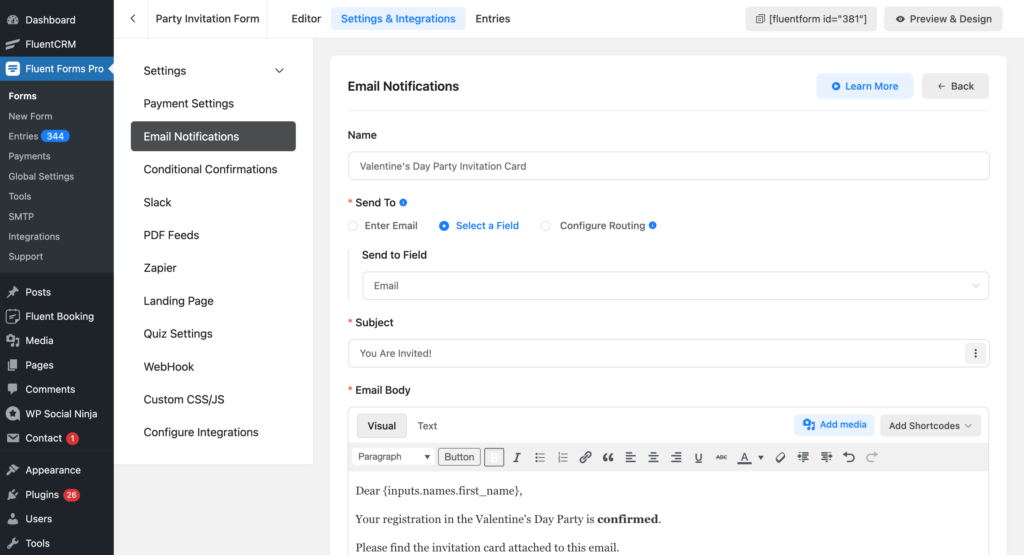
If you want to send the invitation via email, simply create an Email Notification.
You can use Fluent SMTP to avoid email deliverability issues.
Step 6: Publish your form
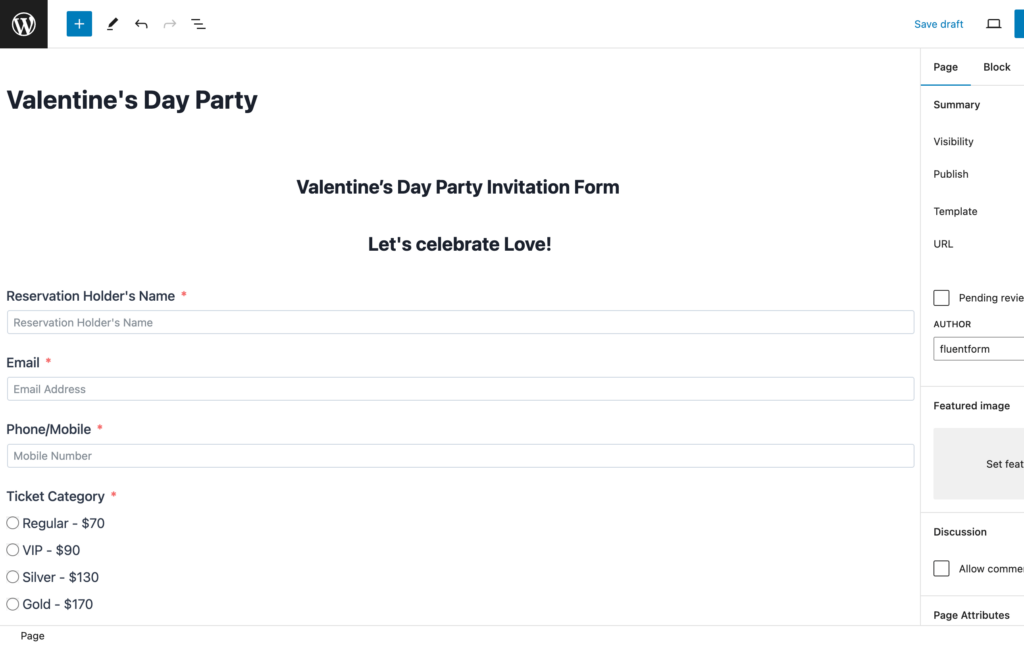
You can publish your Valentine’s Day party invitation form in three ways. First, you can use the Gutenberg block editor to choose the form you have just created.
Click Add New under Pages in the WordPress dashboard’s left sidebar. Give the page a title. In the block editor’s blank area, click the plus (+) sign or insert a forward slash (/). Then, in the search box, write Fluent Forms and select the form from the dropdown menu.
You will see a preview of the form as shown below.
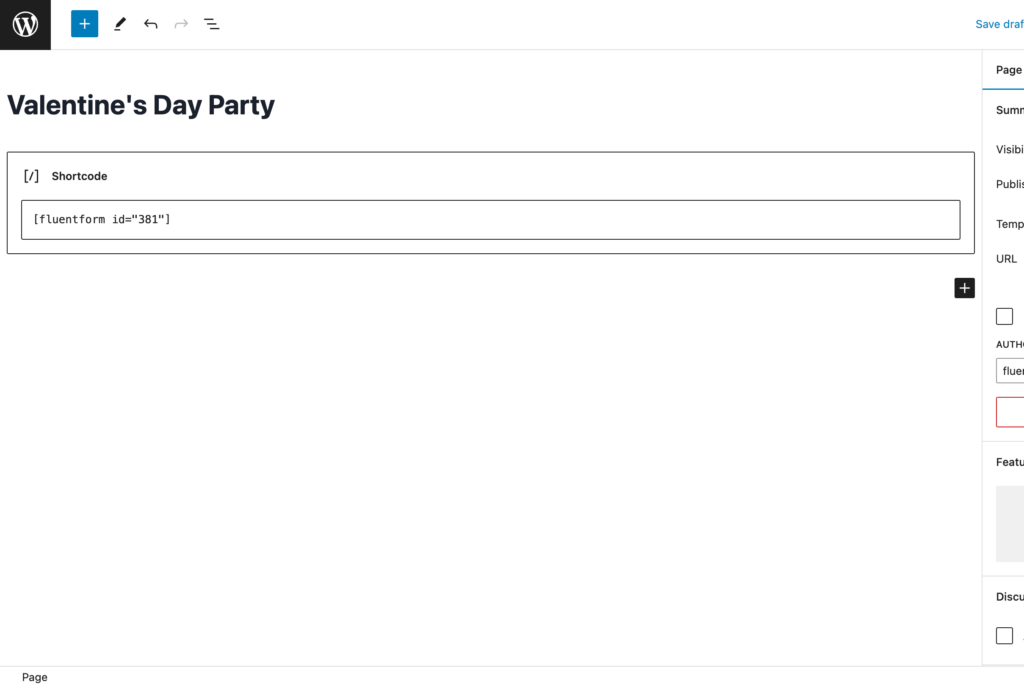
Fluent Forms’ Shortcode feature is a second option that you can use to show your form. The shortcode is found at the top of the window that displays the form editor.
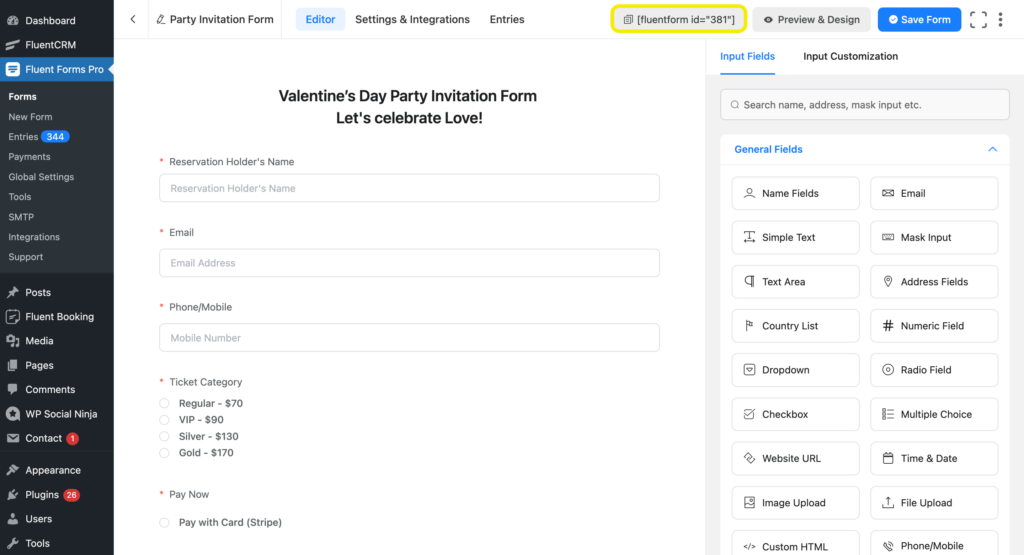
Click on the shortcode to copy it and then paste it using a shortcode block anywhere you want to display the form on your website.
The third approach is to publish your form on a dedicated landing page. To do this, go to Settings & Integrations > Landing Page. Check the box to Enable Form Landing Page Mode. The landing page is fully customizable.
Try out the Valentine’s Day party invitation form below:
For testing purposes, you can use test cards from Stripe documentation.
Your data will be automatically deleted after form submission. We don’t store them.
Wrapping up
Perfecting your Valentine’s Day party invitation form is crucial for setting the right tone and ensuring a delightful celebration.
Using Fluent Forms, you can effortlessly create an invitation that captures the spirit of love by following the steps outlined in this blog.
Stay connected with us on social media for more tutorials and insights. Any questions or thoughts? Feel free to leave a comment below.

An Econ major turned into a Digital Marketer by choice. Hello! This is Ashraf and I am here to enlighten you on various WordPress topics and help you make informed decisions.


Leave a Reply