
How to Create Any Payment Form with Calculation in WordPress
You run an online business. You have social media pages and a website for marketing purposes. People look for different solutions in your niche and land on your amazing products.
However, you don’t have a streamlined product order system. Your audience has to contact you and transfer the balance to your account manually to purchase something. It takes extra time, not to mention the trust issues, which can frustrate many of your users.
A simple solution to this is automating payment processing with a payment form. It’ll streamline transactions, boost user trust, and make your business look more professional.
Let’s see how you can sell anything directly from your WordPress website using a payment form with calculations.
Creating payment forms with a WordPress form builder
First things first. We’ll be using Fluent Forms to create a payment form in this tutorial. Because, well, this form plugin offers essential payment features in the free version. It also helps you create advanced payment forms easily (which are also mobile-responsive). I know, right? It’s great!
So let’s install Fluent Forms if you haven’t already. You can test the process from a WordPress playground as well. Next, we have to configure the payment settings and connect to payment gateways from Fluent Form’s Global Settings.
Now that our payment feature is all set up, let’s move on to understanding the payment fields so we can easily create any payment form.
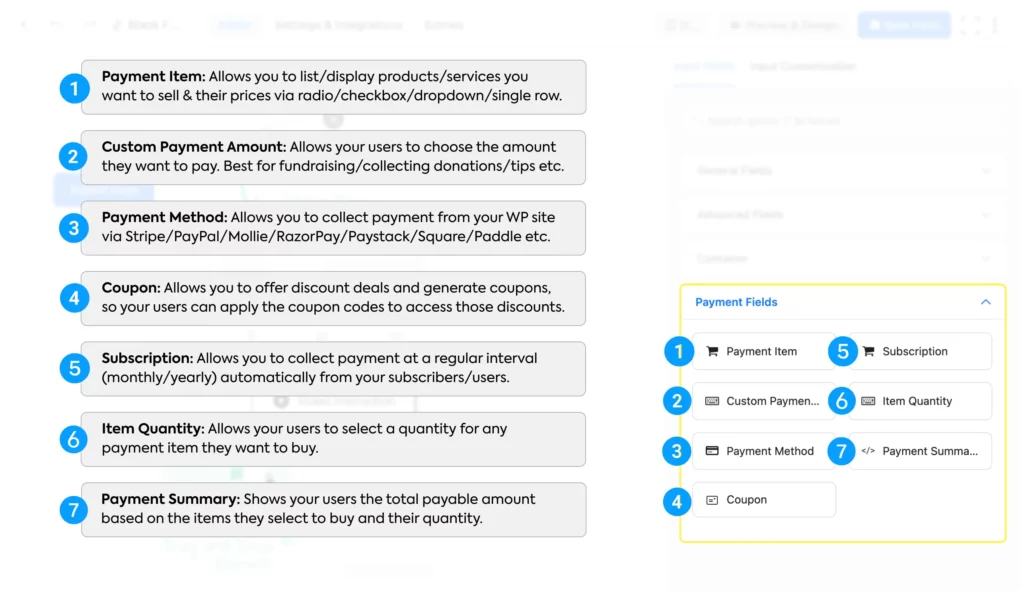
Payment Item: Allows you to list/display products/services you want to sell and their prices via radio/checkbox/dropdown/single row. The radio and dropdown (select) options let users pick only one option, while the checkbox allows multiple selections.
The single-row display doesn’t allow selection, but the payment amount automatically adds to the total payment amount (suitable for mandatory charges like delivery fees/registration fees, etc.). If some of your users want takeaway and others delivery, you can apply conditional logic so that this charge only adds if applicable.
Custom Payment Amount: Allows your users to choose the amount they want to pay. Best for fundraising/collecting donations/tips, etc. You can also set a range by determining the minimum and maximum value.
Payment Method: Allows you to collect payment from your forms via Stripe/PayPal/Mollie/RazorPay/Paystack/Square/Paddle/Authorize.net. It also includes an offline payment option, suitable for cash on delivery, bank-to-bank transfer, etc.
Coupon: Allows you to offer discount deals and generate coupons, so your users can apply the coupon codes to access those discounts.
Subscription: This allows you to automatically collect payment from your subscribers/users at a regular interval (monthly/yearly). Subscription payment includes diverse features like a trial period, subscription duration, different billing intervals, sign-up fees, multiple pricing plans, and more.
Item Quantity: Allows your users to select a quantity for any payment item they want to buy.
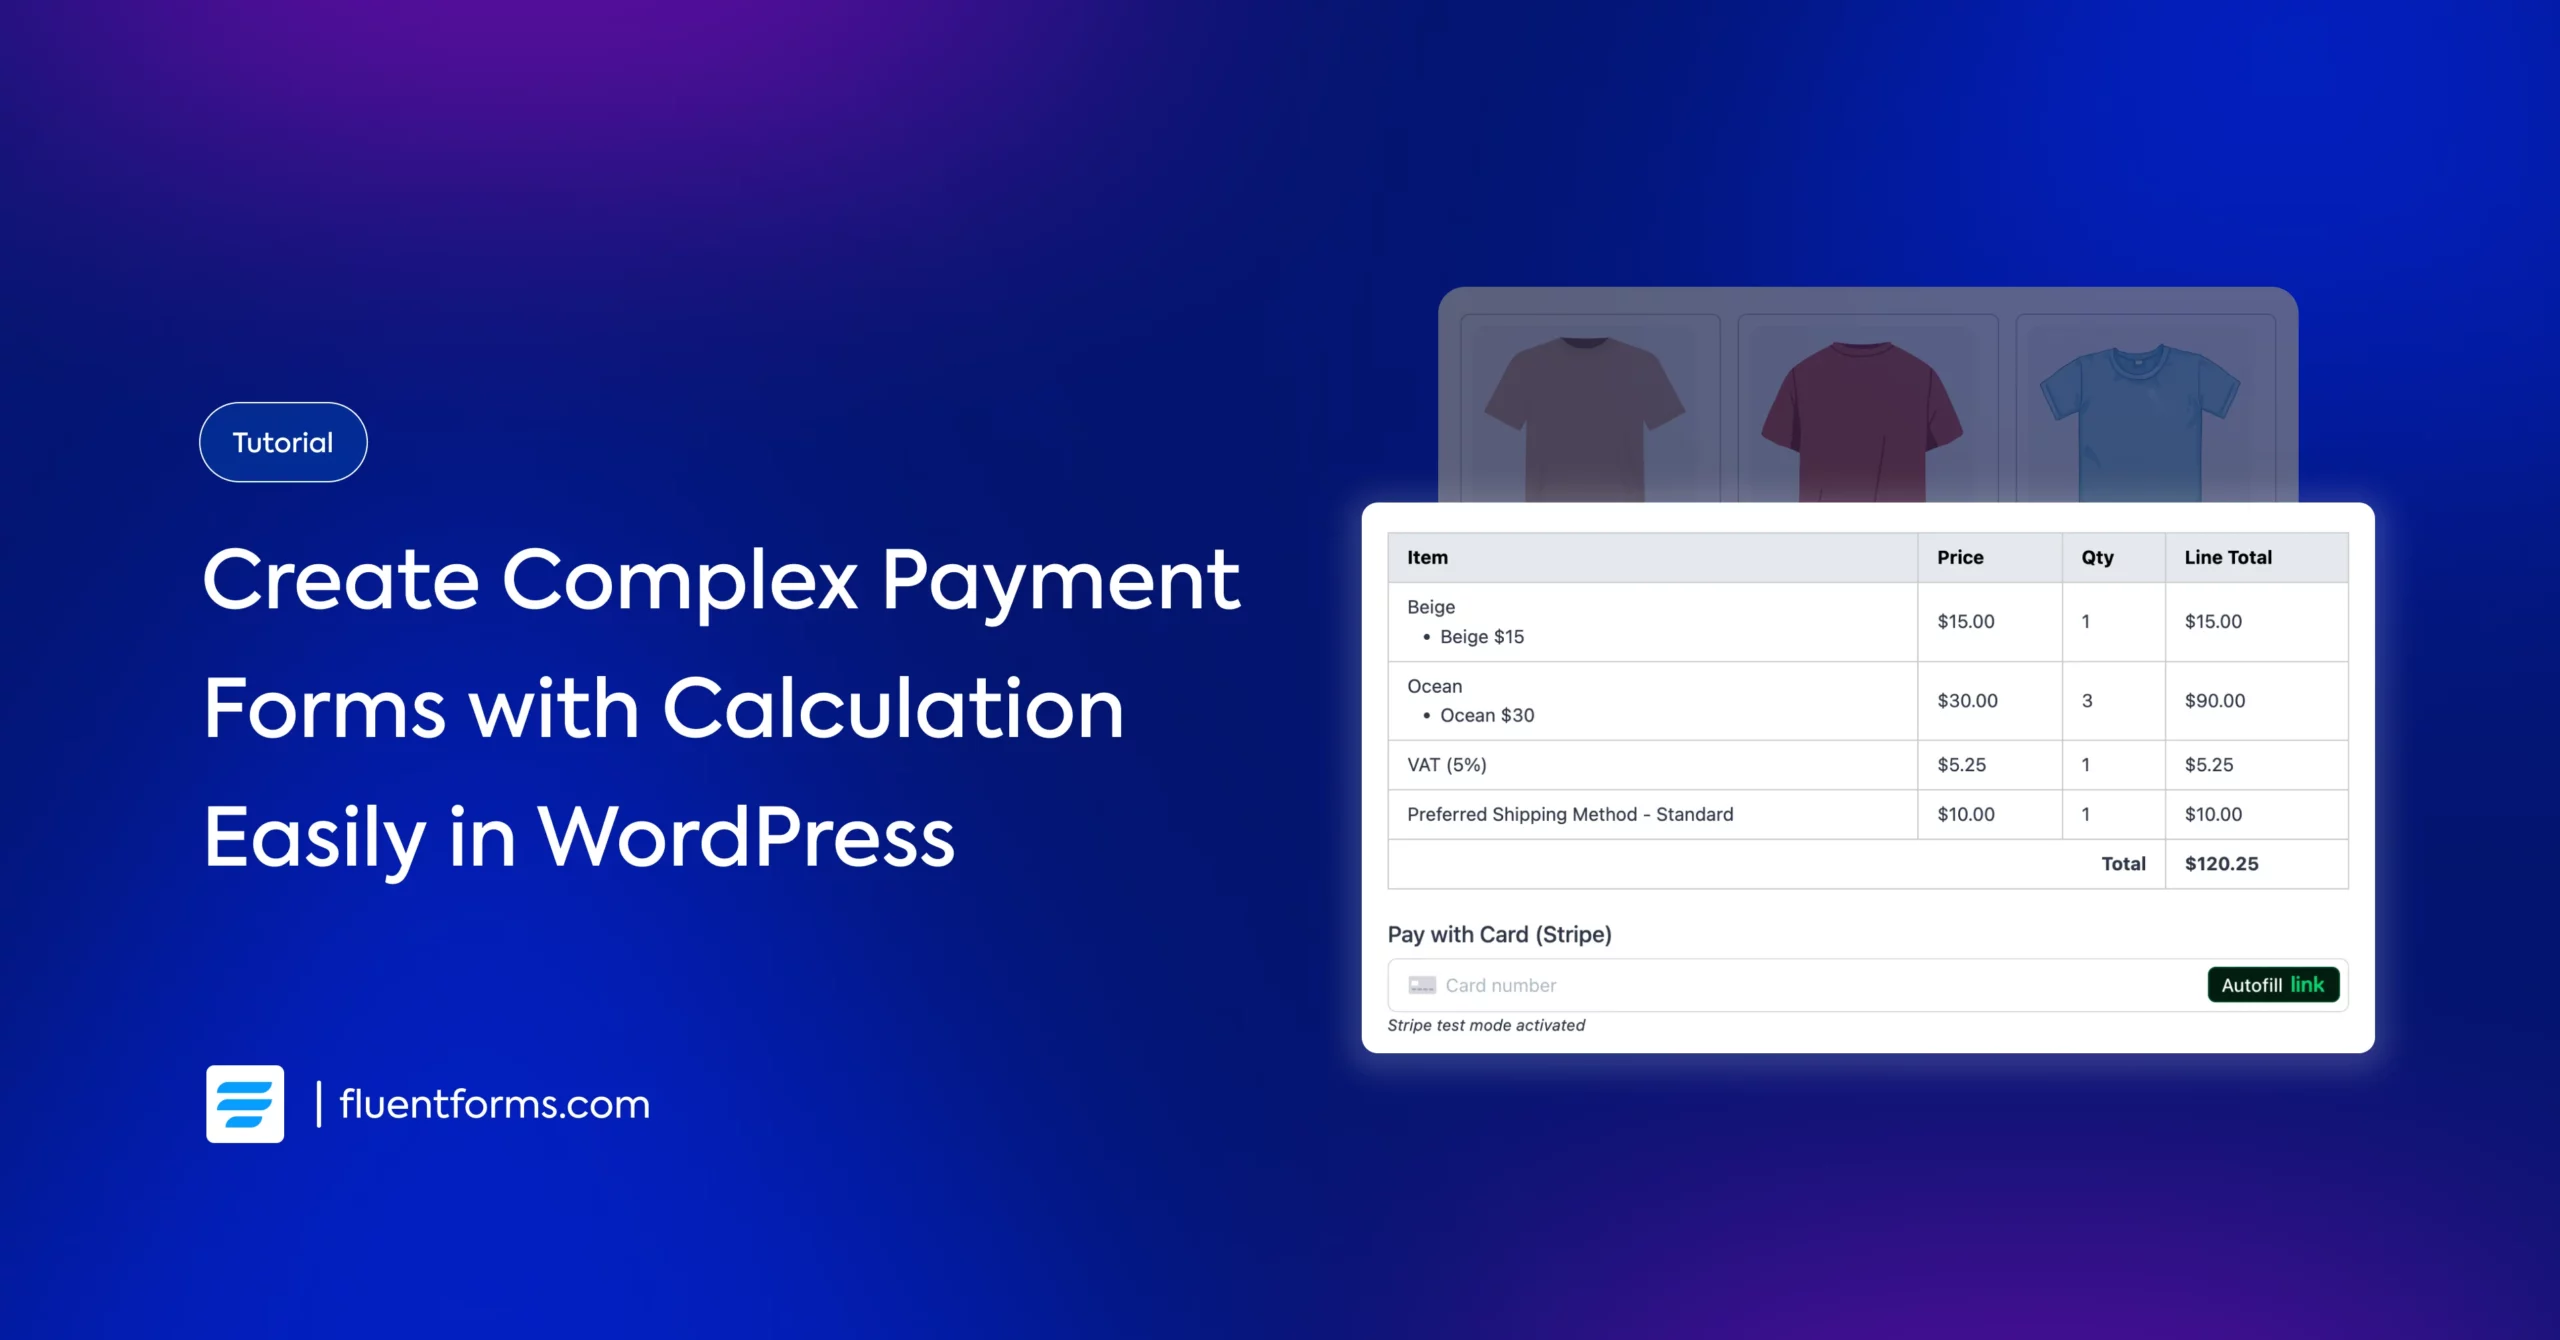
Payment Summary: Shows your users the total payable amount visually (in a table with information broken down into rows & columns) based on the items they select to buy and their quantity.
Aside from these input fields, Fluent Forms also allows you to manage inventory from your dashboard (global settings), so your users can see whether a product is available before ordering.
Now that we’ve gotten acquainted with the payment fields, let’s see how we can create a payment form effortlessly.
How to create a WordPress payment form
Let’s create a t-shirt order form for this tutorial. If you want to display the t-shirts side by side, we have to select a container. Let’s take a three-column container from the container input fields.
Next, we’re going to add a Payment Item input field in each of these 3 columns. You can simply drag the fields and drop them on the plus icon inside the containers.
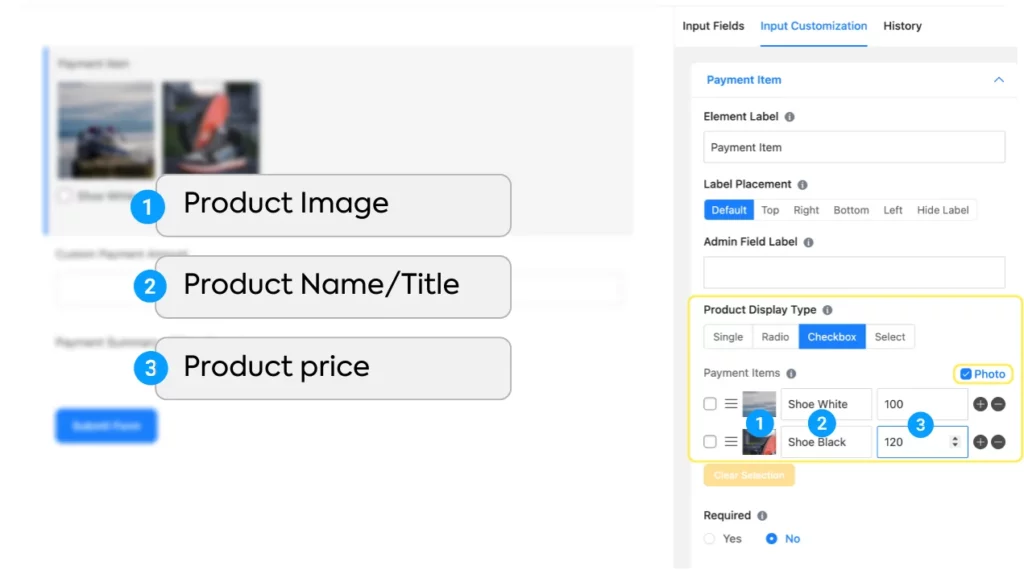
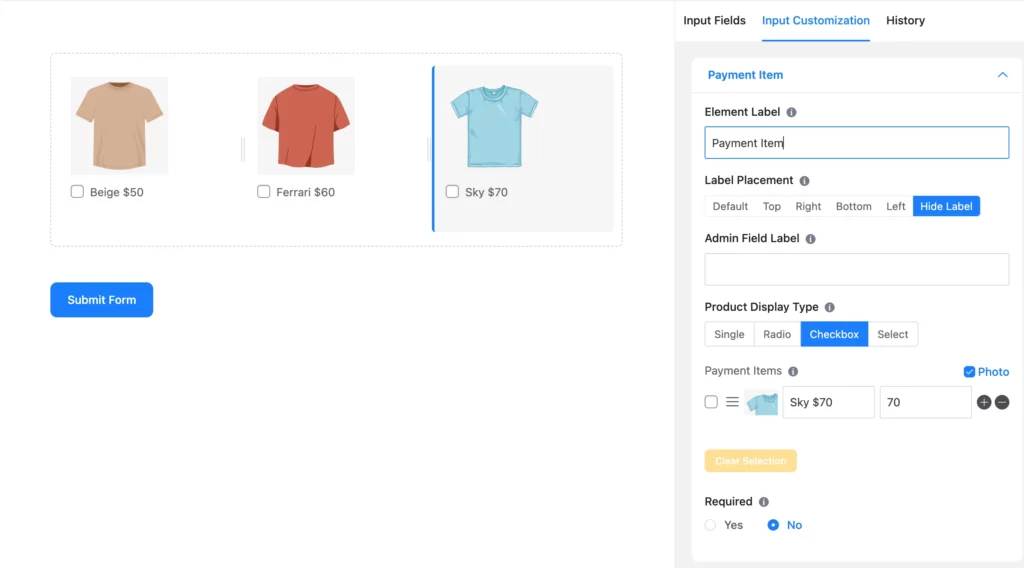
Then, we’ll customize the payment item input fields one by one. We’ll add images, select the display type “checkbox,” fix the price for each t-shirt, and assign a name to each t-shirt. We’ll also add the product prices with their names, as the price column is for calculation and not visible on the form. Finally, we’ll hide the labels, but you can keep them.
You might ask why we took three payment item fields instead of one, since you can take a single payment field and click the plus icon to add more products.
Well, one Item Quantity field applies to a single Payment Item field. So if a user selects multiple products (say 3) from a single product item field and then chooses a quantity (say 5), that quantity (5) applies to all 3 of the selected products.
However, we want our users to be able to select the quantity of each t-shirt separately. That’s why we took a separate payment item field for each t-shirt.
Let’s see how it’s done.
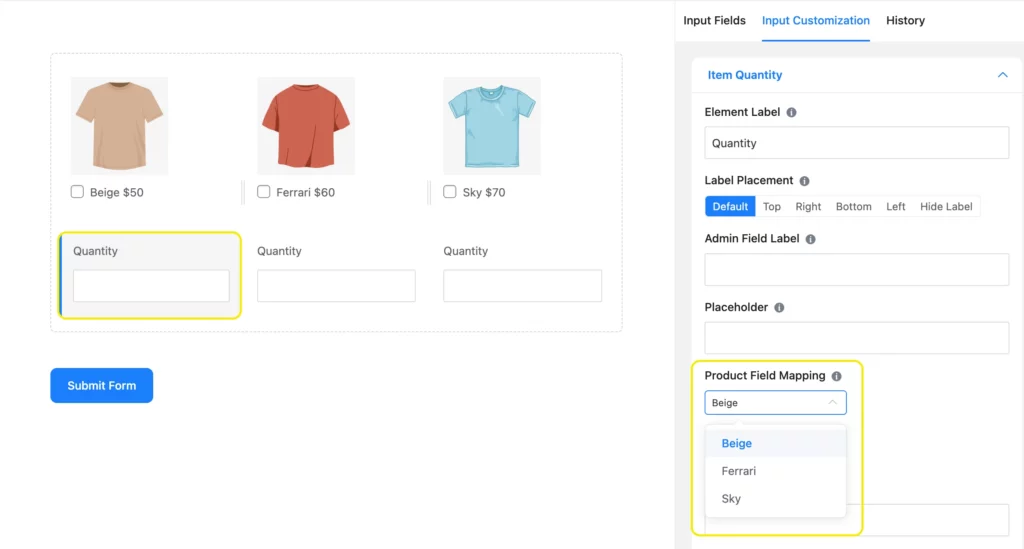
Drag & drop an Item Quantity field beneath each t-shirt. Now, let’s make sure the quantity fields link to the respective t-shirts. Click on an Item Quantity field to customize it. Then navigate to Product Field Mapping and click on the dropdown. Select the product’s label that’s in the same column as the quantity.
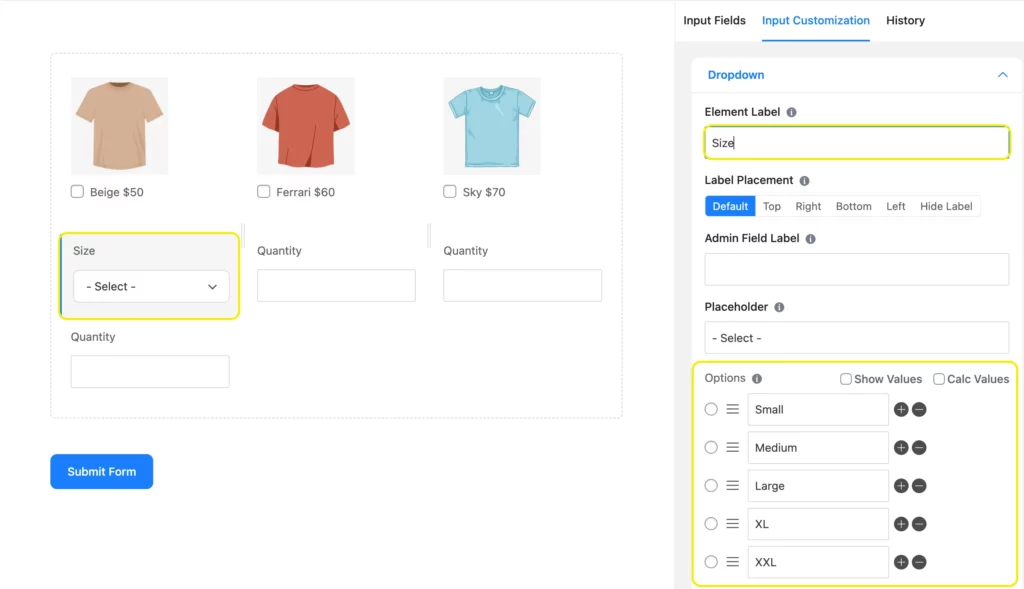
If you want to assign sizes to your t-shirts, drag a Dropdown field from the General Fields beneath each t-shirt. Click the dropdown fields to customize them. Add size options, edit the label, etc. You can also customize one dropdown field, duplicate it, and drag it to another column.
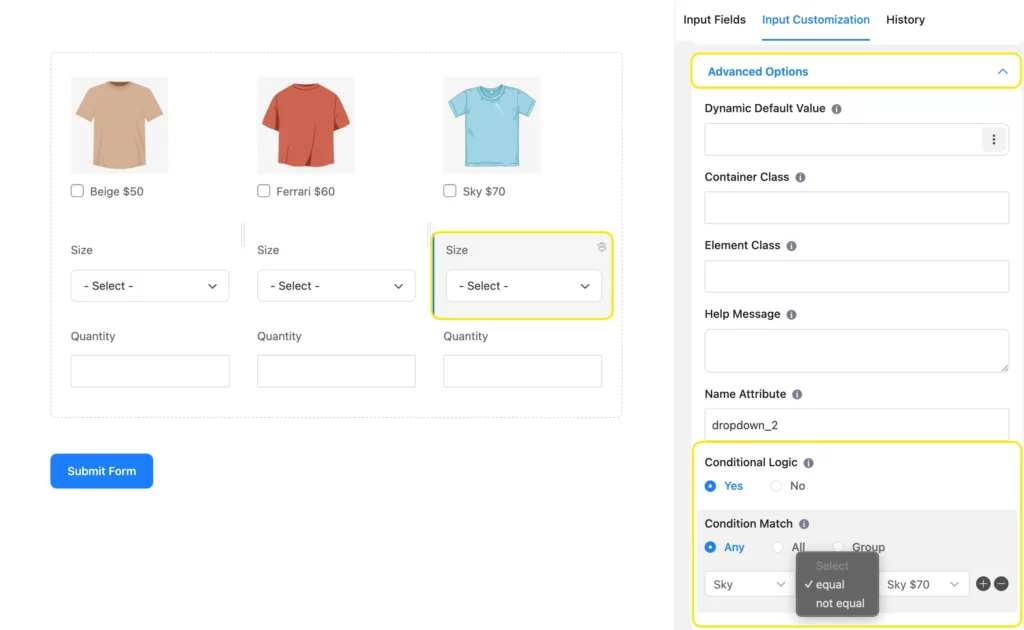
Now, we’ll apply conditions to the dropdown fields, so a particular size field appears for a particular t-shirt. Scroll down to Advanced Options from Input Customization and click Yes under Conditional Logic.
For condition matches, choose the label of the respective item in the first column, equal in the second column, and the field’s option in the last column. Repeat this process for all three dropdown fields.
If you want the item quantity field to appear after a user chooses a t-shirt, apply conditional logic to the Item Quantity field in a similar manner.
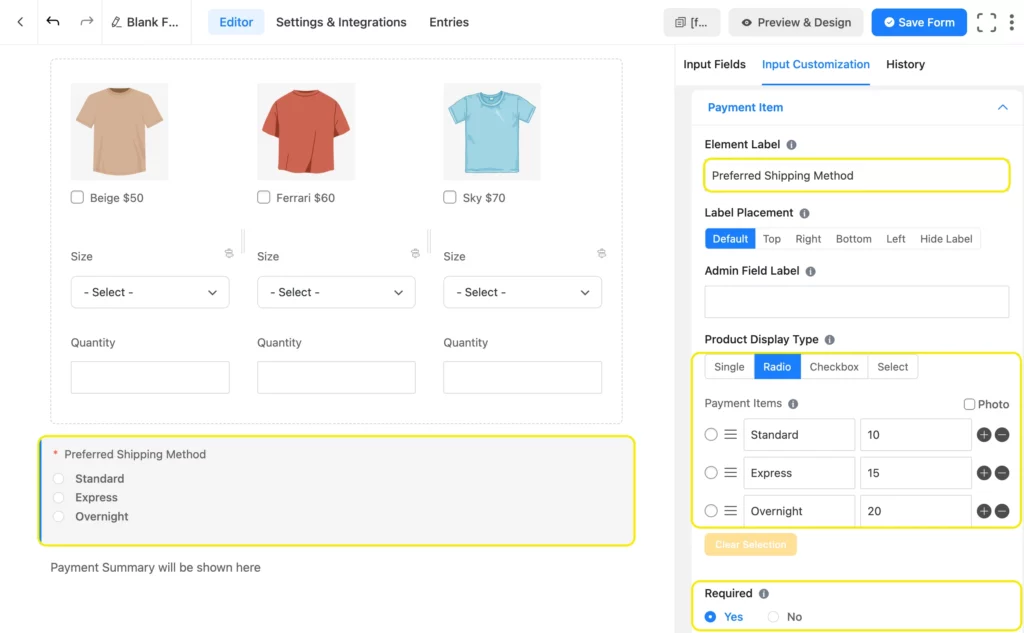
Next, we’ll take another Payment Item field for the shipping charge. Let’s select Radio for Product Display Type, as we don’t want users to select multiple shipping methods. Customize the shipping options and their price. Then click Yes under required, as we don’t want anyone to submit their order without choosing a shipping method.
Finally, add the Payment Summary and Payment Method fields. Add other required fields to capture necessary customer information, like names, email, phone number, address, etc. You’ll find these fields in the general fields section. If any information is a must, like address/contact number/size, simply click yes under required from input customization, like we did in the previous step.
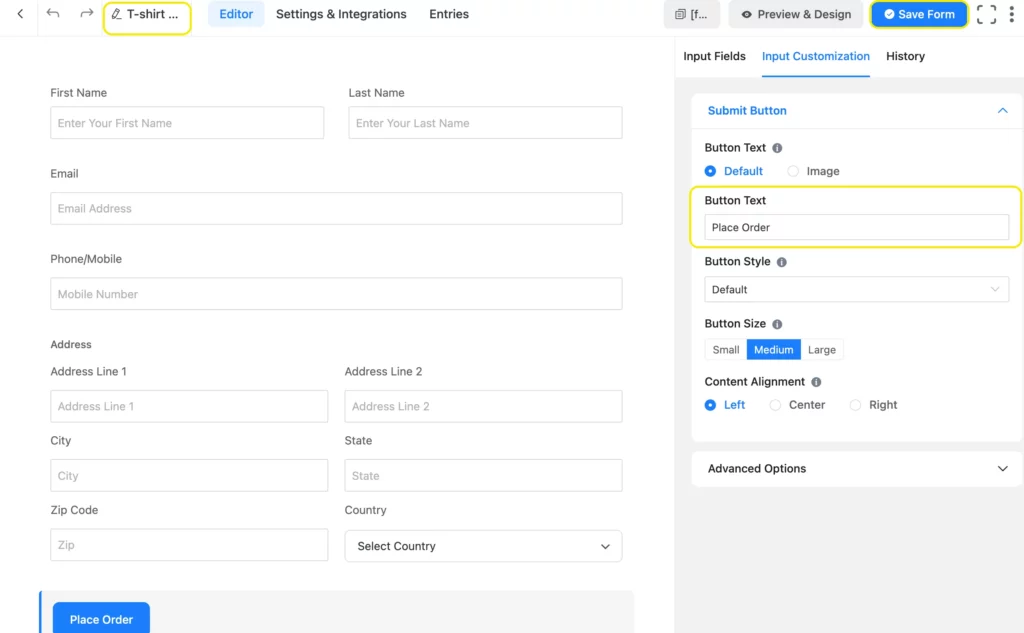
Lastly, you can customize the submit button text & style and name your form. When you’re done, click Save Form in the upper right corner. Your form is now ready. You can click Preview & Design to view your form and further style it.
Do you know? Fluent Forms Free now offers Stripe Payment integration with just a 1.9% transaction fee. Try Fluent Forms Free below!
Build Smarter Forms for Free

How to create a payment form with calculation
Let’s say we need to bring some additional calculations to the payment. So, how do we do that? Easy, we can calculate anything by applying formulas in the Numeric Field.
In this tutorial, we’ll learn how to calculate a percentage (say 5%) of VAT on the t-shirts and add it to the total payment amount.
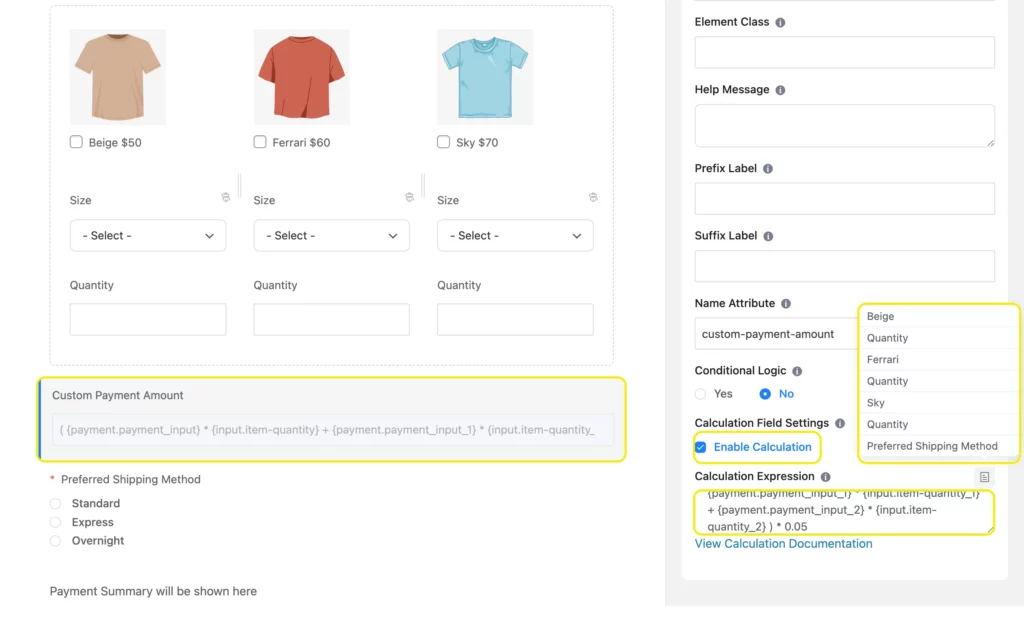
First, take a Custom Payment Amount field. You can change the field label to VAT. Navigate to Calculation Field Settings from Advanced Options and click Enable Calculation.
Create the calculation expression by connecting the right payment item and respective item quantity fields with mathematical operations. If you click the clipboard icon on top of the calculation expression box, you’ll find the fields’ shortcodes.
The equation used to calculate a 5% VAT on the t-shirts is ( {payment.payment_input} * {input.item-quantity} + {payment.payment_input_1} * {input.item-quantity_1} + {payment.payment_input_2} * {input.item-quantity_2} ) * 0.05. Be careful of the parentheses and spacing for the formula to work properly.
You can add the VAT to the payment summary without showing users this custom payment field. For that, write ff-hidden in the field’s Container Class from advanced options. This will give your form a more clutter-free look.
Here’s a little styled version of the form that we just created.
Create one form, accept endless payments
Payment forms created with Fluent Forms are intuitive, visually appealing, and fun to fill out. All of these encourage user engagement, meaning more sales for your business.
What’s more, the whole process is automated. Once you create a payment form/order form, you won’t have to lift a finger to sell anything. From your users choosing/selecting products to you accepting payments, everything is streamlined on your end and feels effortless to your users.
And the best part is, you can create any type of payment form with Fluent Forms, from simple order forms to advanced e-commerce-style forms with complex calculations. Not to mention the pre-built templates we offer to make the process even simpler for you.
If you’re still facing any issues, we’re always waiting eagerly to listen and support you. So, how about you take care of production and let us help you sell them via amazing order forms?

Sarika writes for Fluent Forms and loves to offer insights into small businesses. She’s curious and enjoys discussing ideas, interests, and perspectives. In her free time, she’s either marvelling at architectural beauties or trying different cuisines.


Leave a Reply