
How to Connect ClickSend in WordPress

For any business, communication is a must thing. And for online businesses, literally, everything depends on it. So, if you’re an eCommerce shop owner, you’ll need a perfect tool to manage all the imparting activities of the company.
If you’re looking for the best platform to control all the communicative actions of your business, then you’ve scrolled to the right place. In this article, we’ll show you how to connect ClickSend in WordPress to manage multiple communicative activities. So, let’s know about ClickSend first.
ClickSend: a multi-functional communication system
ClickSend is an online business communication software that lets companies send and receive emails, SMS, voice messages, and even posts via API or web app. It’s trusted by thousands of businesses worldwide, and powers millions of messages every day. It has,
- SMS Gateway
- MMS Gateway
- Rich Messaging
- Email Gateway
- Voice Gateway
- Fax Gateway
- Online Post
With the plugin, you can send order confirmations, cart abandonment updates, shipping information, sale announcements, and text messages to your clients straight from your WppCommerce store. So, without any further ado, let’s see how to connect the tool with the best form builder plugin in WordPress.
Use ClickSend with Fluent Forms
For this process, we took Fluent Forms as a form builder. Why? We’ll answer this question in the later part of this section. Now, here’re the steps we’ll follow to make the tutorial.
Step-1: Install Fluent Forms
If you didn’t install Fluent Forms on your WordPress website yet, then go to the dashboard of your website. Move on to the Plugins section from there, and click on the Add New button at the top of the respective page.

Then, search for Fluent Forms, install and activate it.
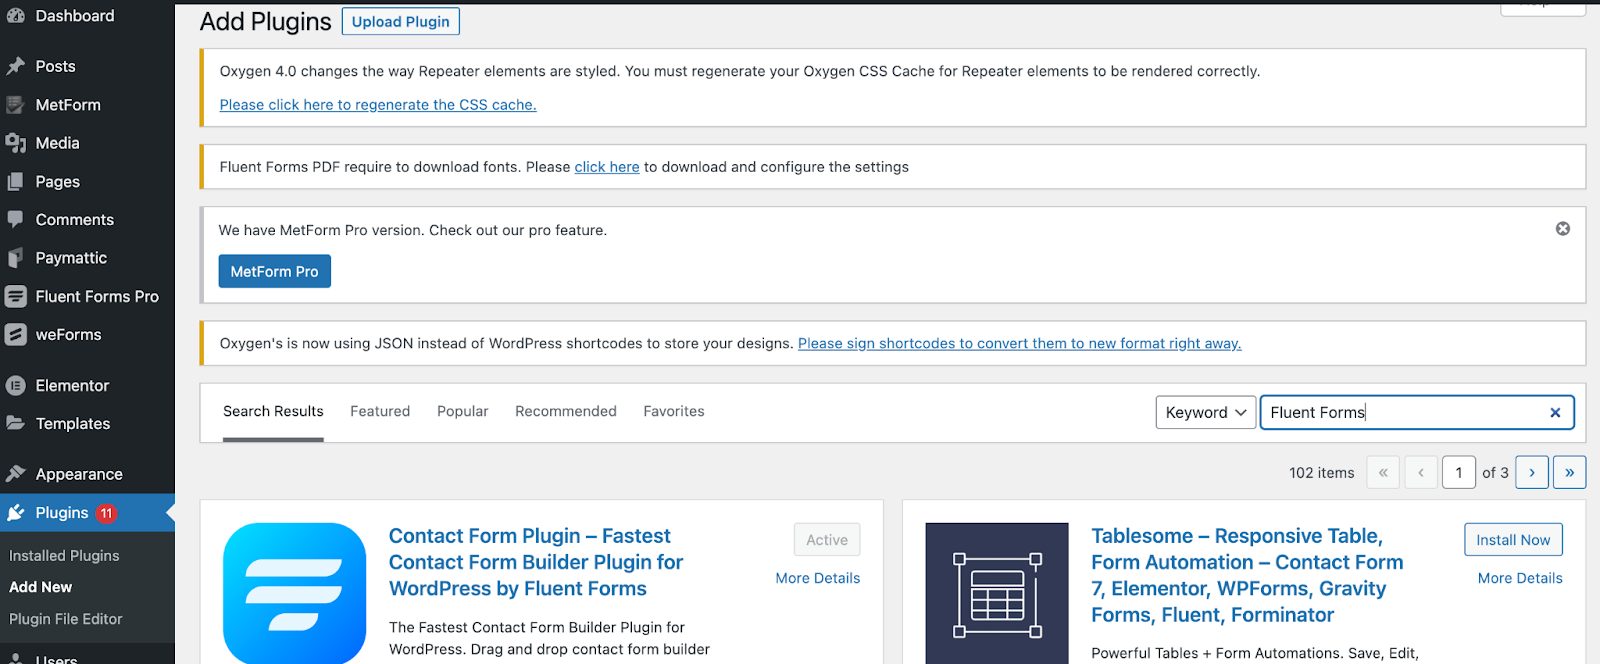
More so, if you want, you can buy the pro version of the tool from Fluent Forms’ website. We’re taking the pro version because ClickSend integration is available in our pro package.
Step-2: Create a form
Now, go to the Fluent Forms pro dashboard, and tap on the Add a New Form button.

Then, taking the Blank Form option as we want to design our form from scratch.
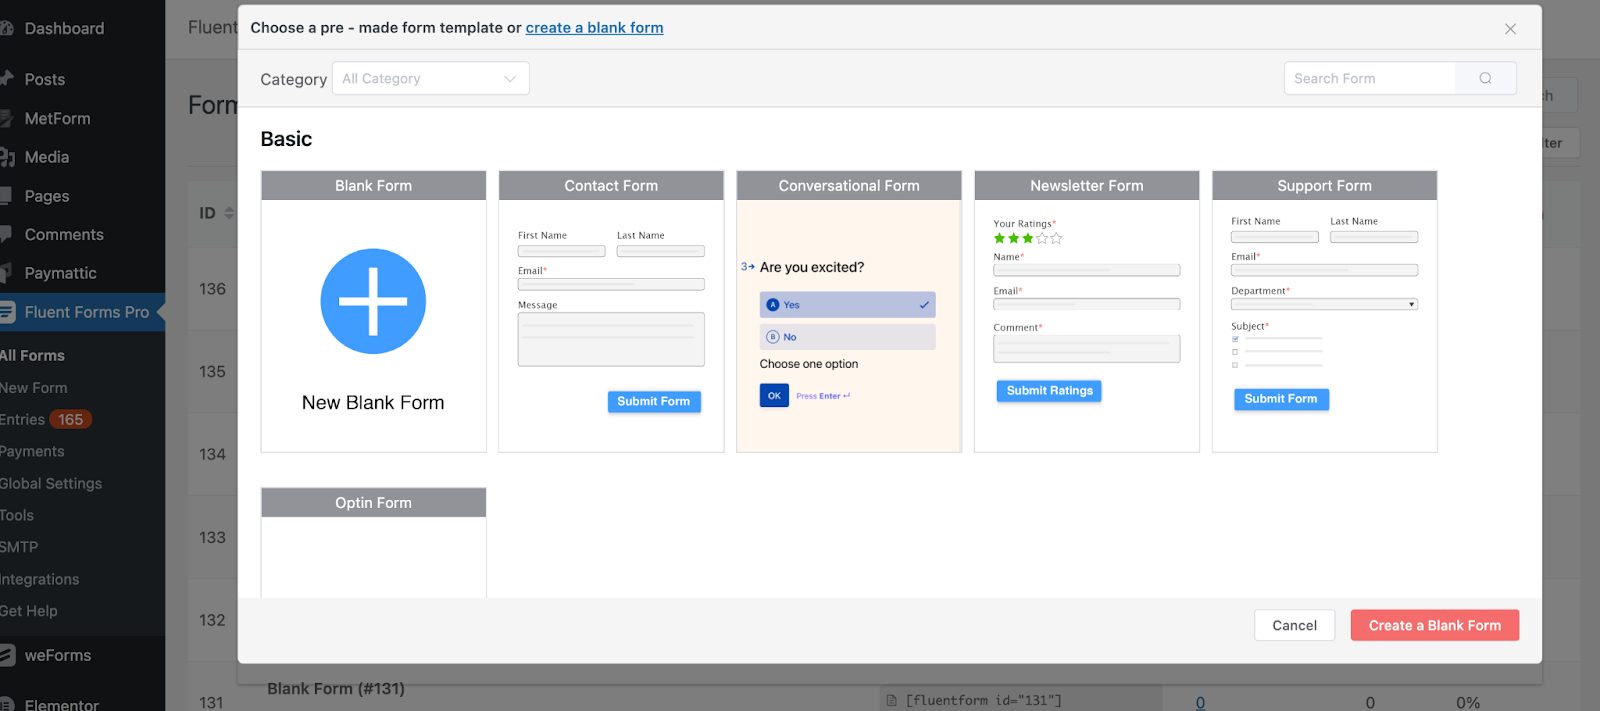
After that, the form editor will come. At first, we’re naming the form by clicking on the Blank Form button in the top left corner. Here, we’re making a Product Order Form. Through this form, we’ll collect the client’s detail, and will communicate with them based on the order update.

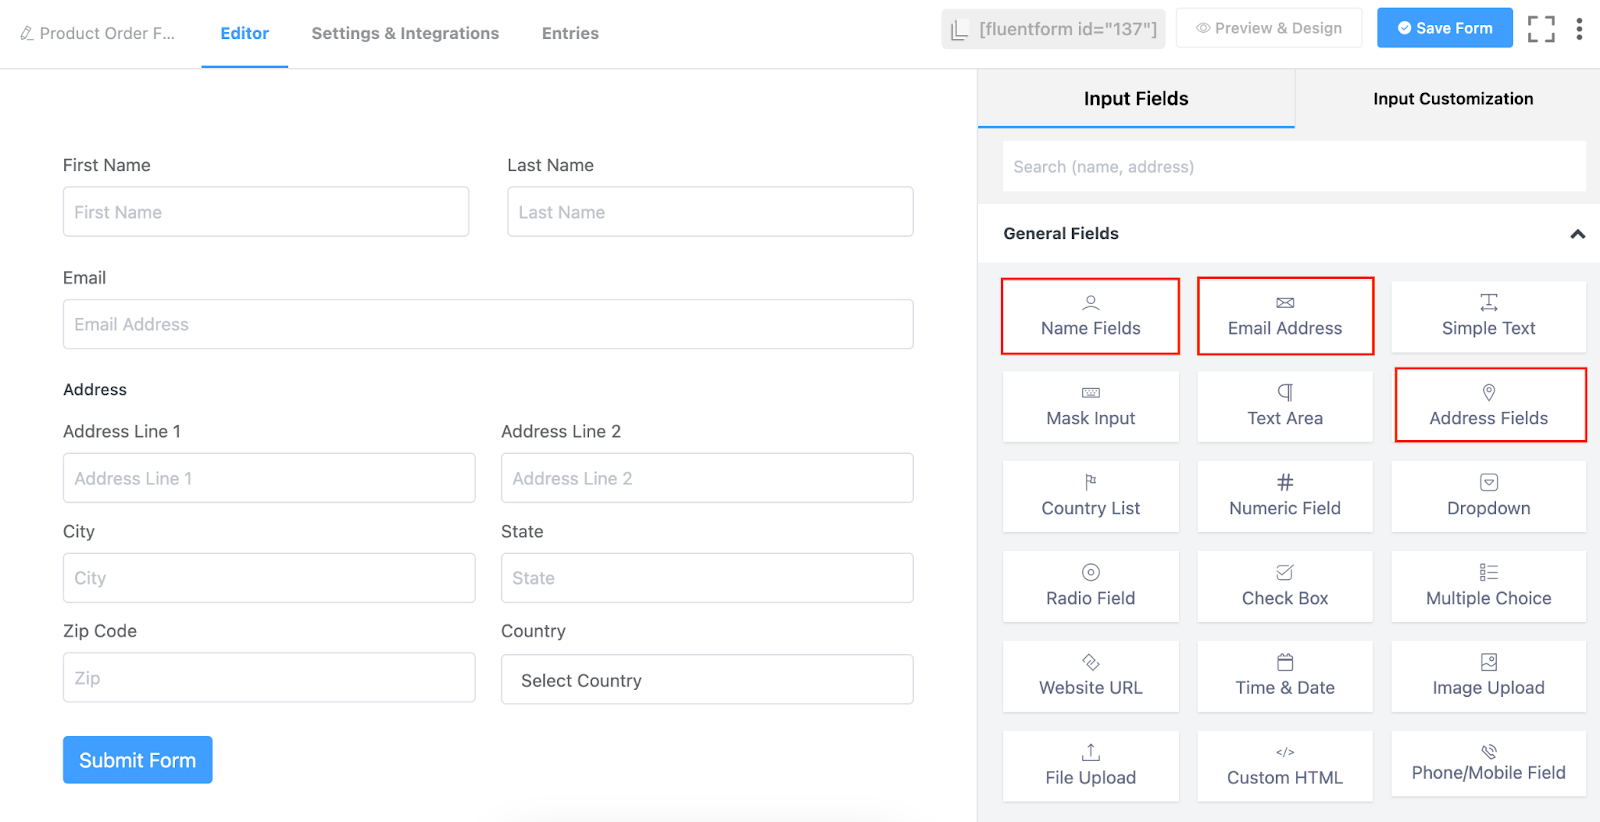
So, first of all, we’re adding the name, email, and address fields from the General Fields section.
Then, move on to the Input Customization section for each field by clicking on the pencil icon by hovering over fields, or tapping on the input customization option for individual fields.
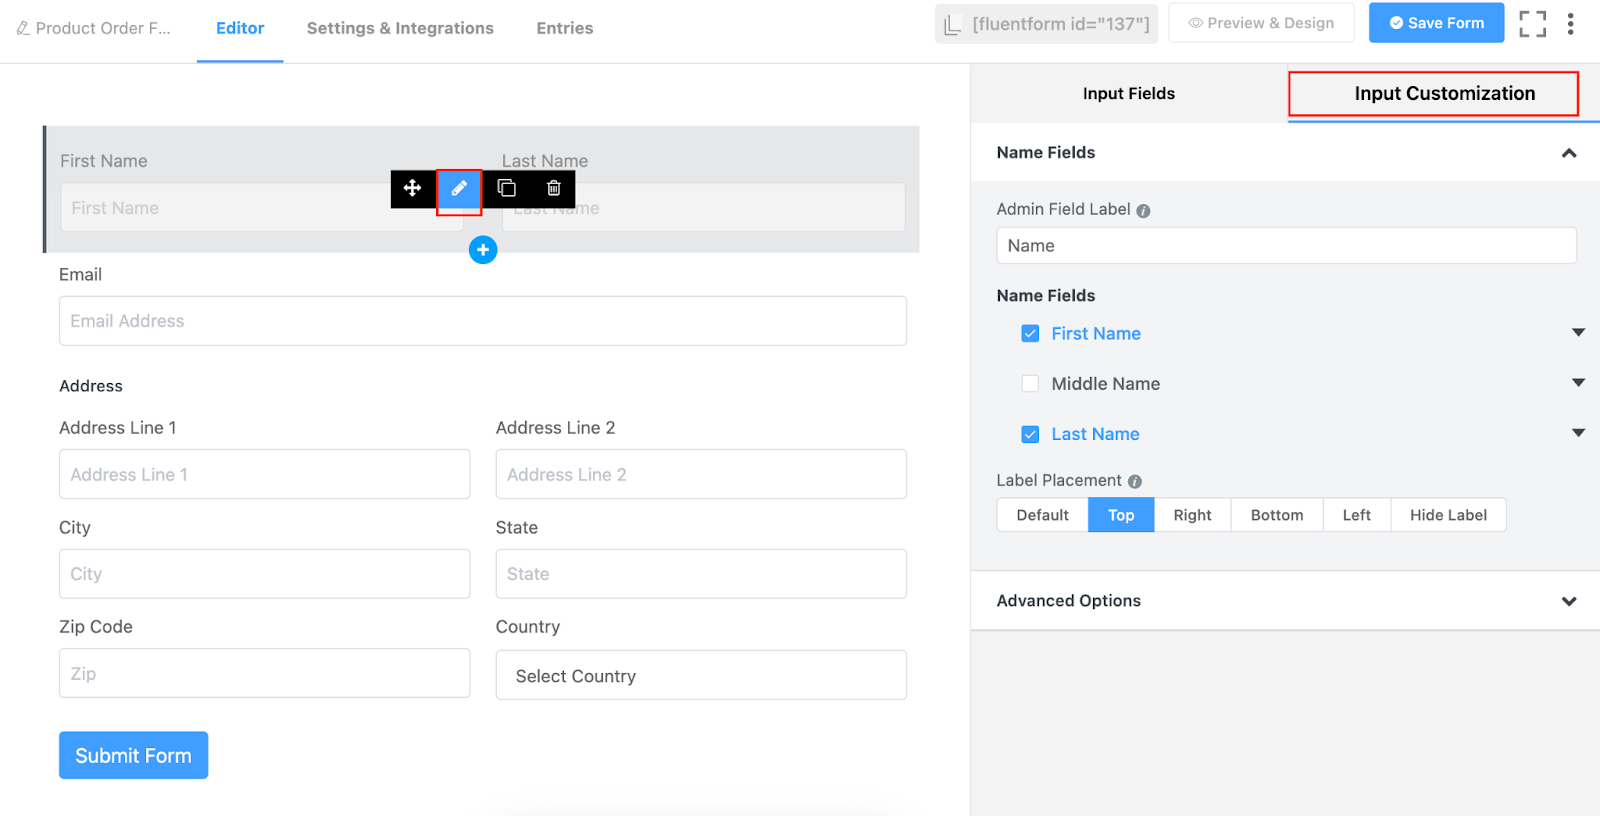
Here, we’re marking the name, email, and address fields as required fields, and unticking the address line 2, and state options from the address field.

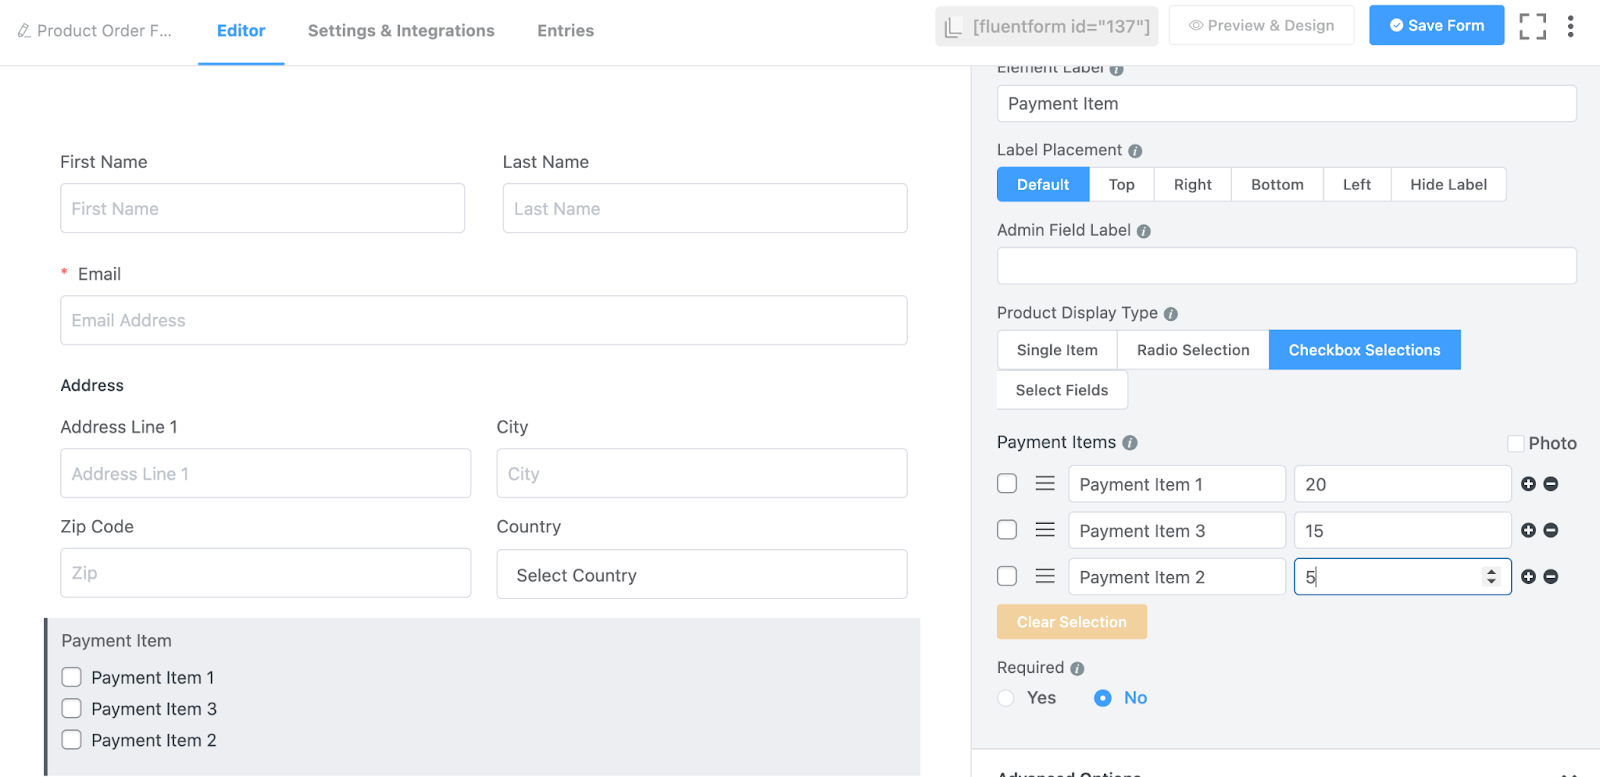
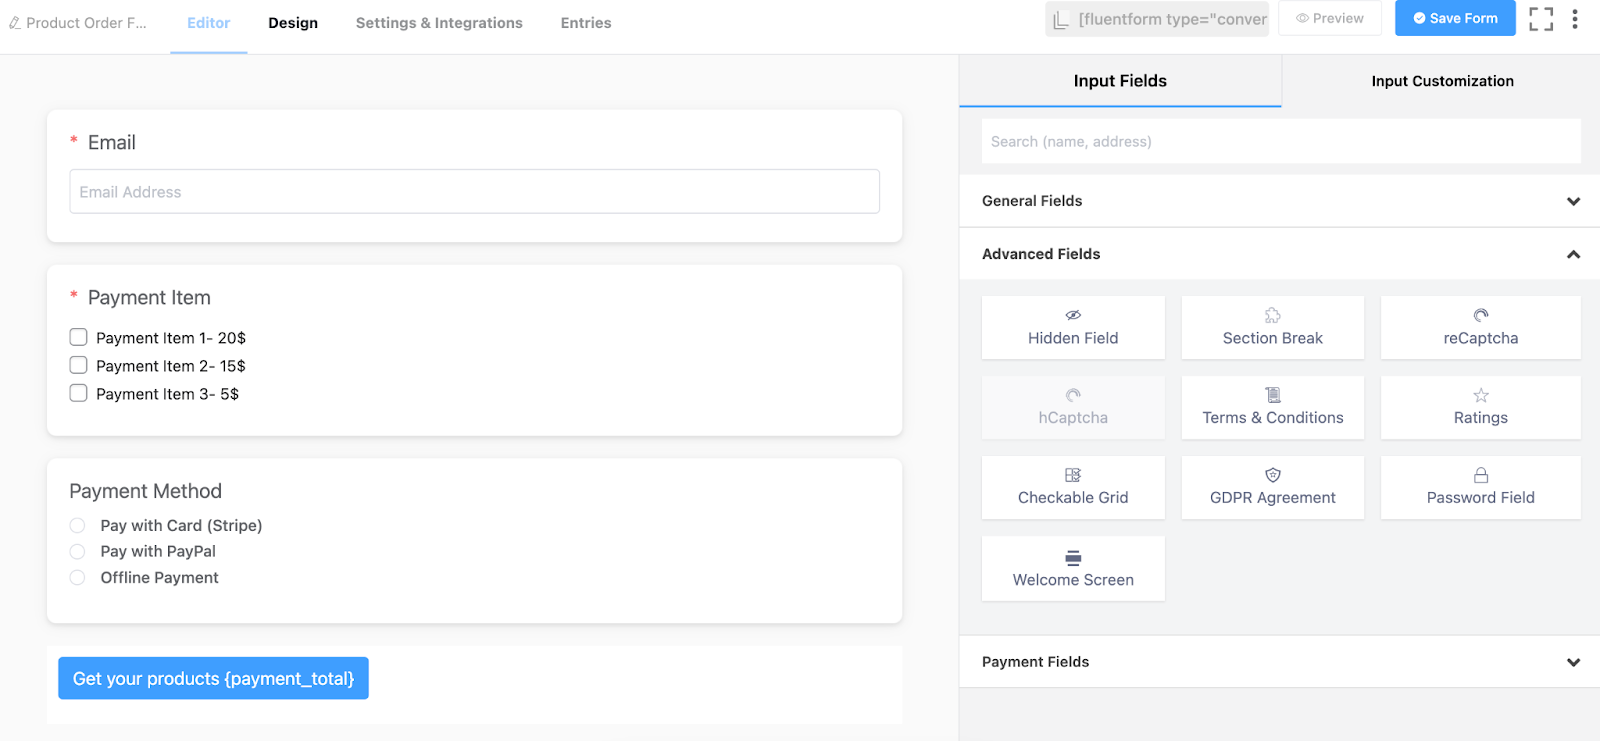
Now, let’s move on to the Payment Fields option. From there, we’re taking the Payment Field to add the payment items and price.
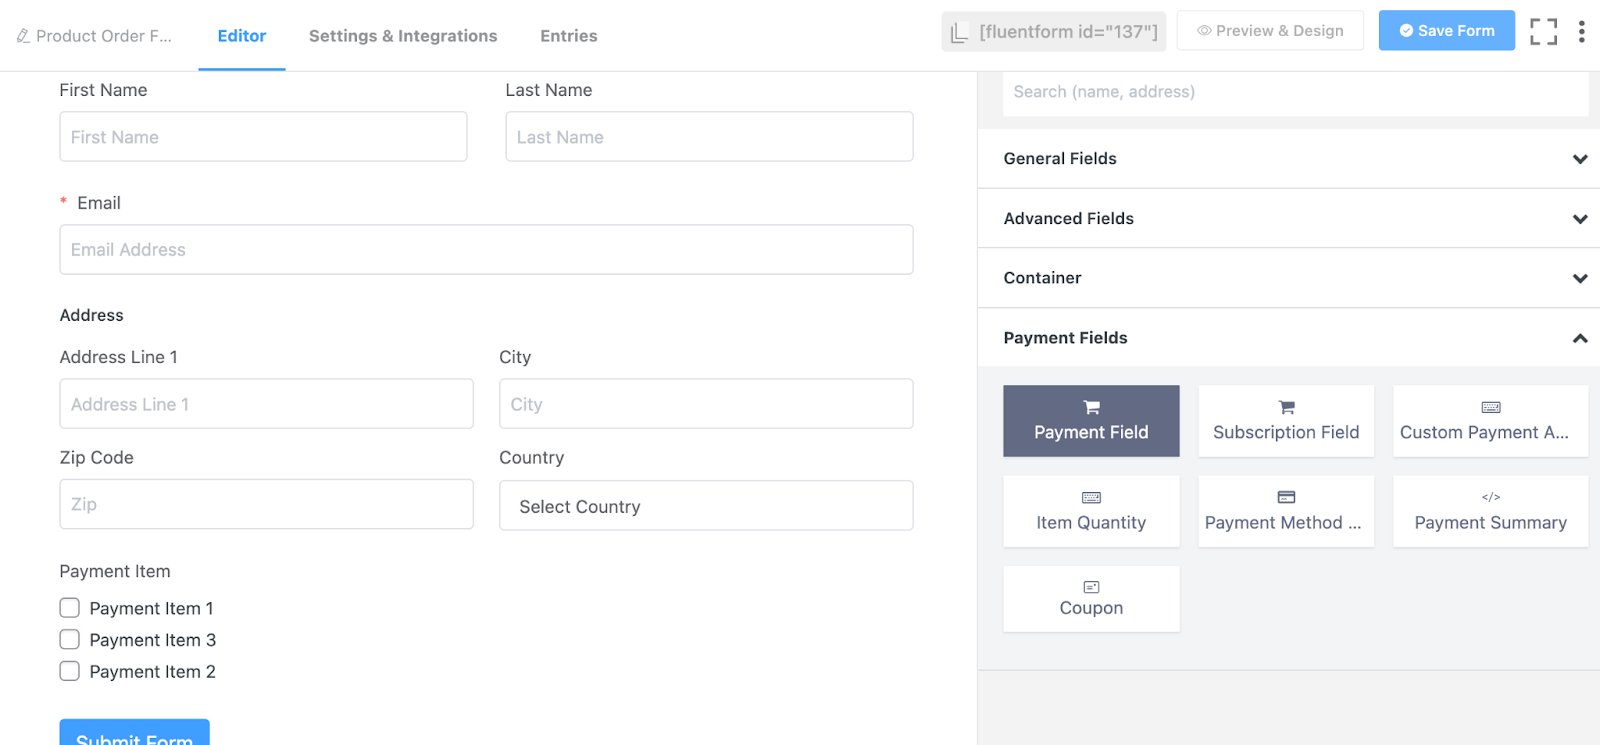
Here, we’re taking the Checkbox Selections on the Product Display Type options, as this form will collect payments for multiple items. Adding choices by clicking on the (+) icon on the right side corner of the respective option. If you want, you can add photos for each selection.
After that, we’re adding the Payment Method field to give multiple payment options to our customers. With Fluent Forms, you’ll get five different options to collect payments, such as Stripe, PayPal, RazorPay, Mollie, Paystack, etc.

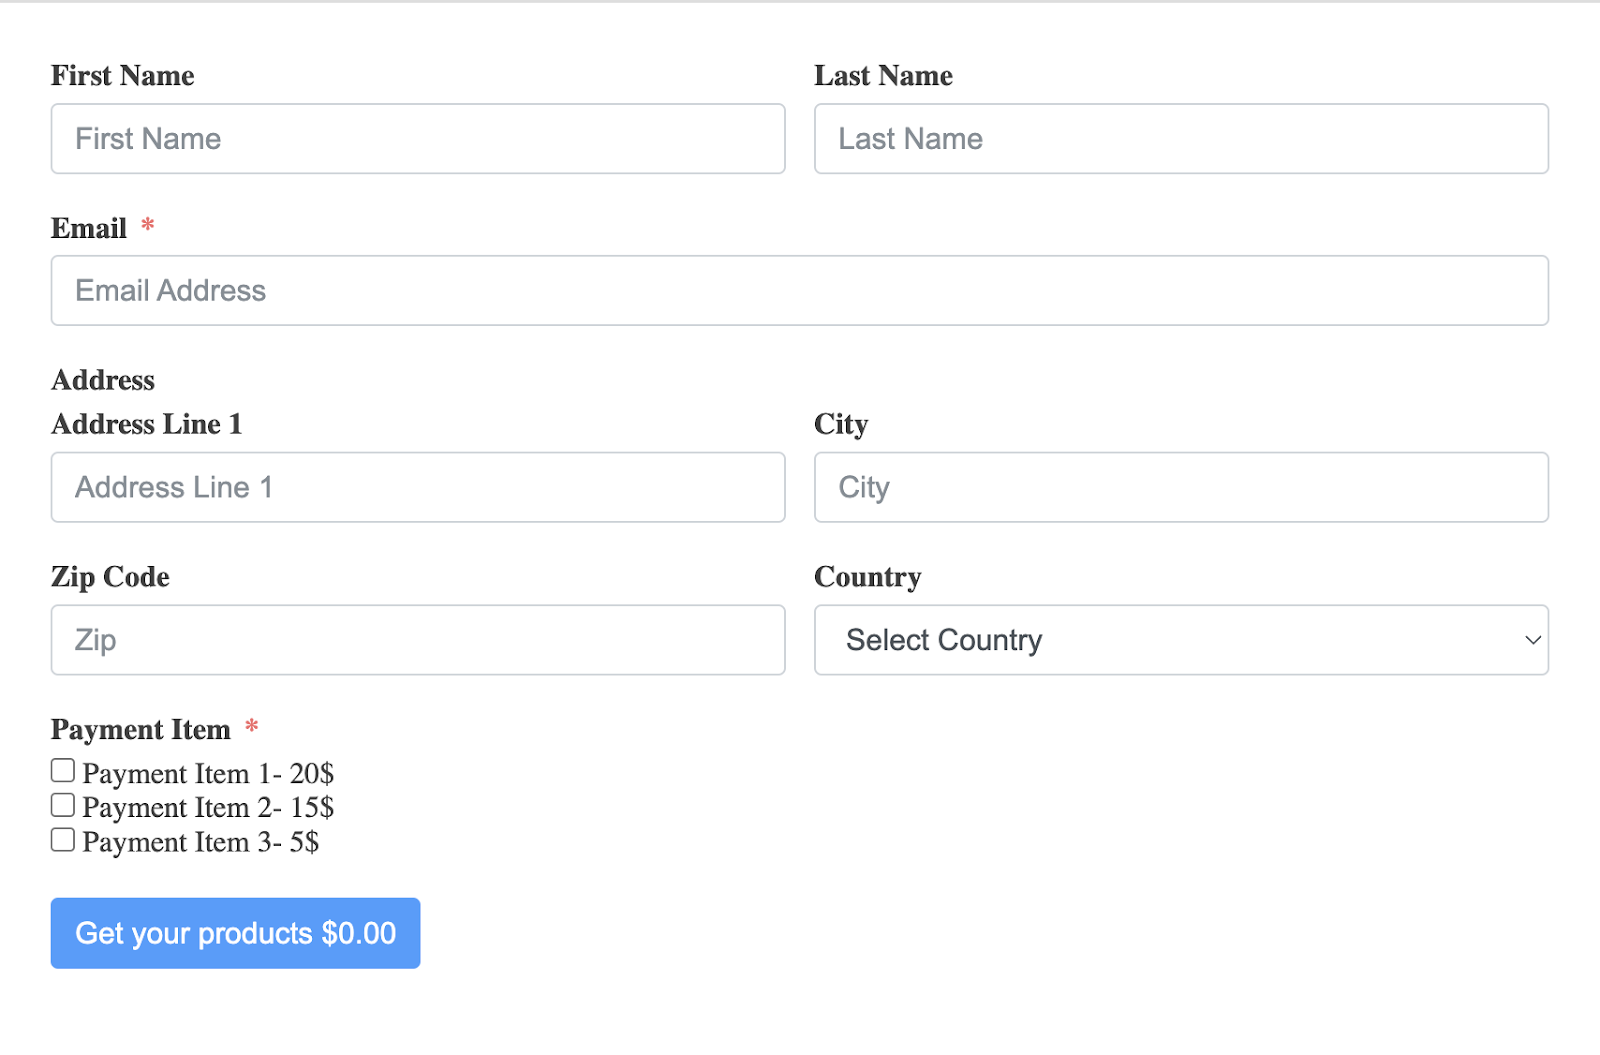
Finally, let’s customize the submit button. At first, we’re renaming the submit button as “Get your products”, and adding the custom code {payment_total} to show the total payment when people finally made a purchase.

Saving the form by clicking on the Save Form button at the top right corner. And here’s the preview of the form.
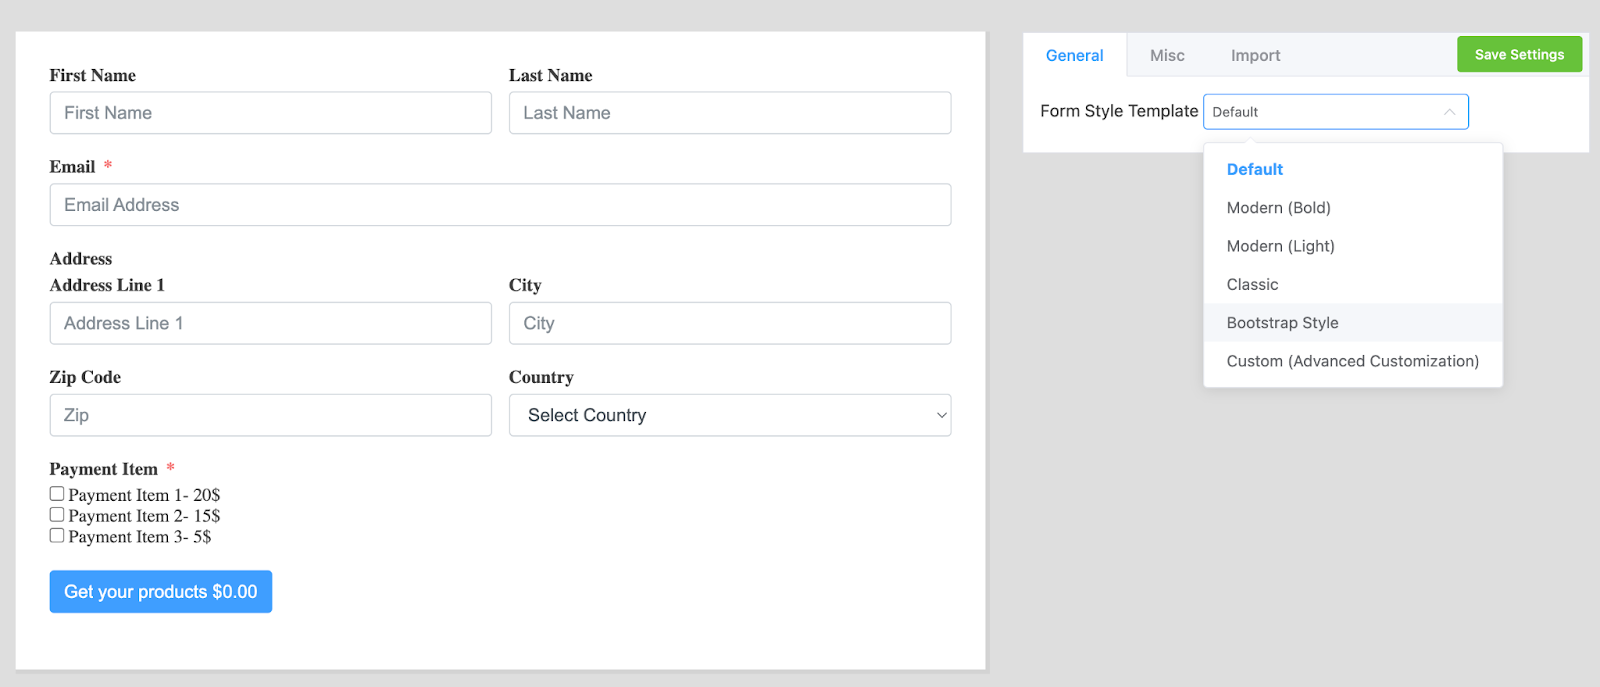
Now, if you want to add some colors to your form, you can do that with Fluent Forms’ global styler option. From the Preview & Design section, you’ll get the styler option on the right side. Choose any template from there. We’re taking the Bootsrap Style.
Then going to the Misc section. Here, you can set the Container Styles, Asterisk Styles, Inline Error Message Styles, After Submit Success Message Styles, After Submit Error Message Styles, etc. We’re changing the border color from the container styles section first.
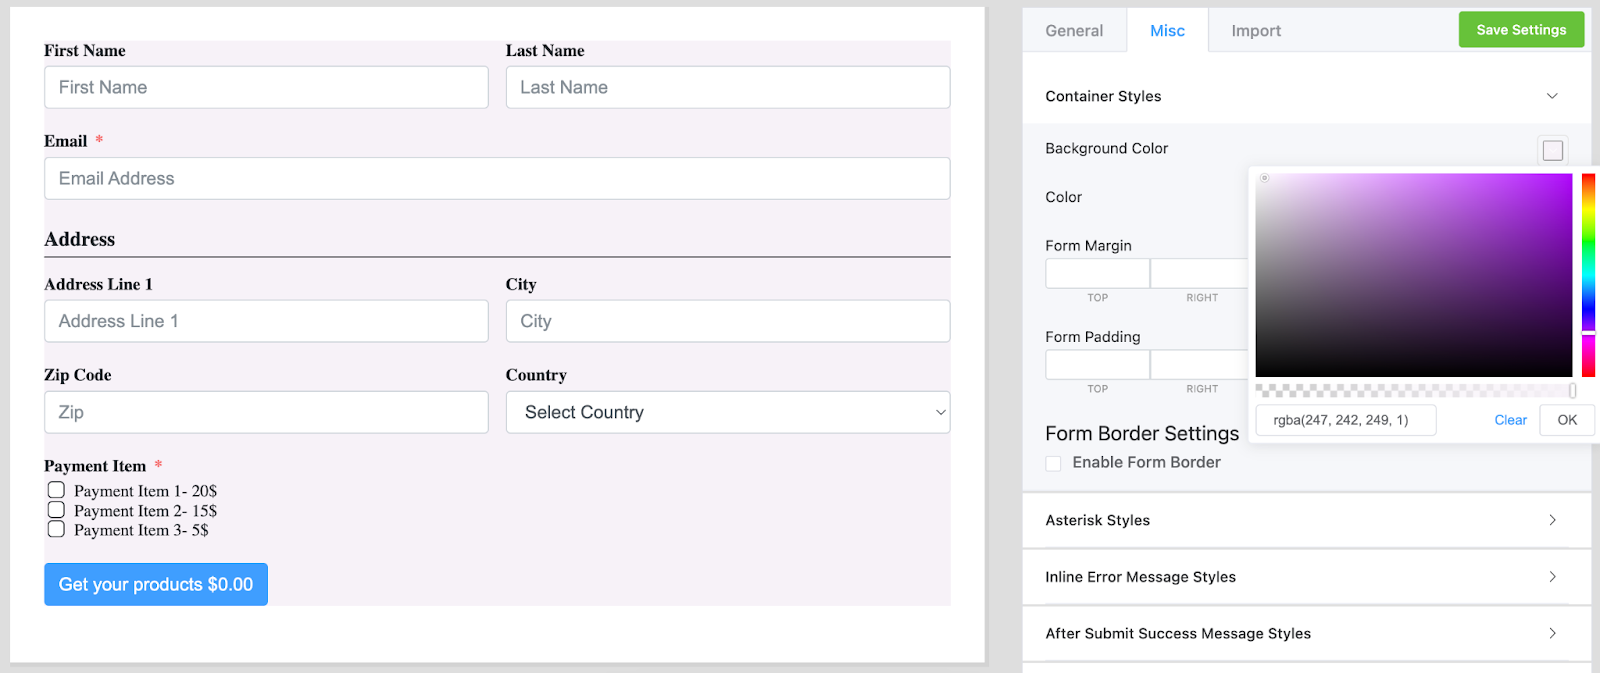
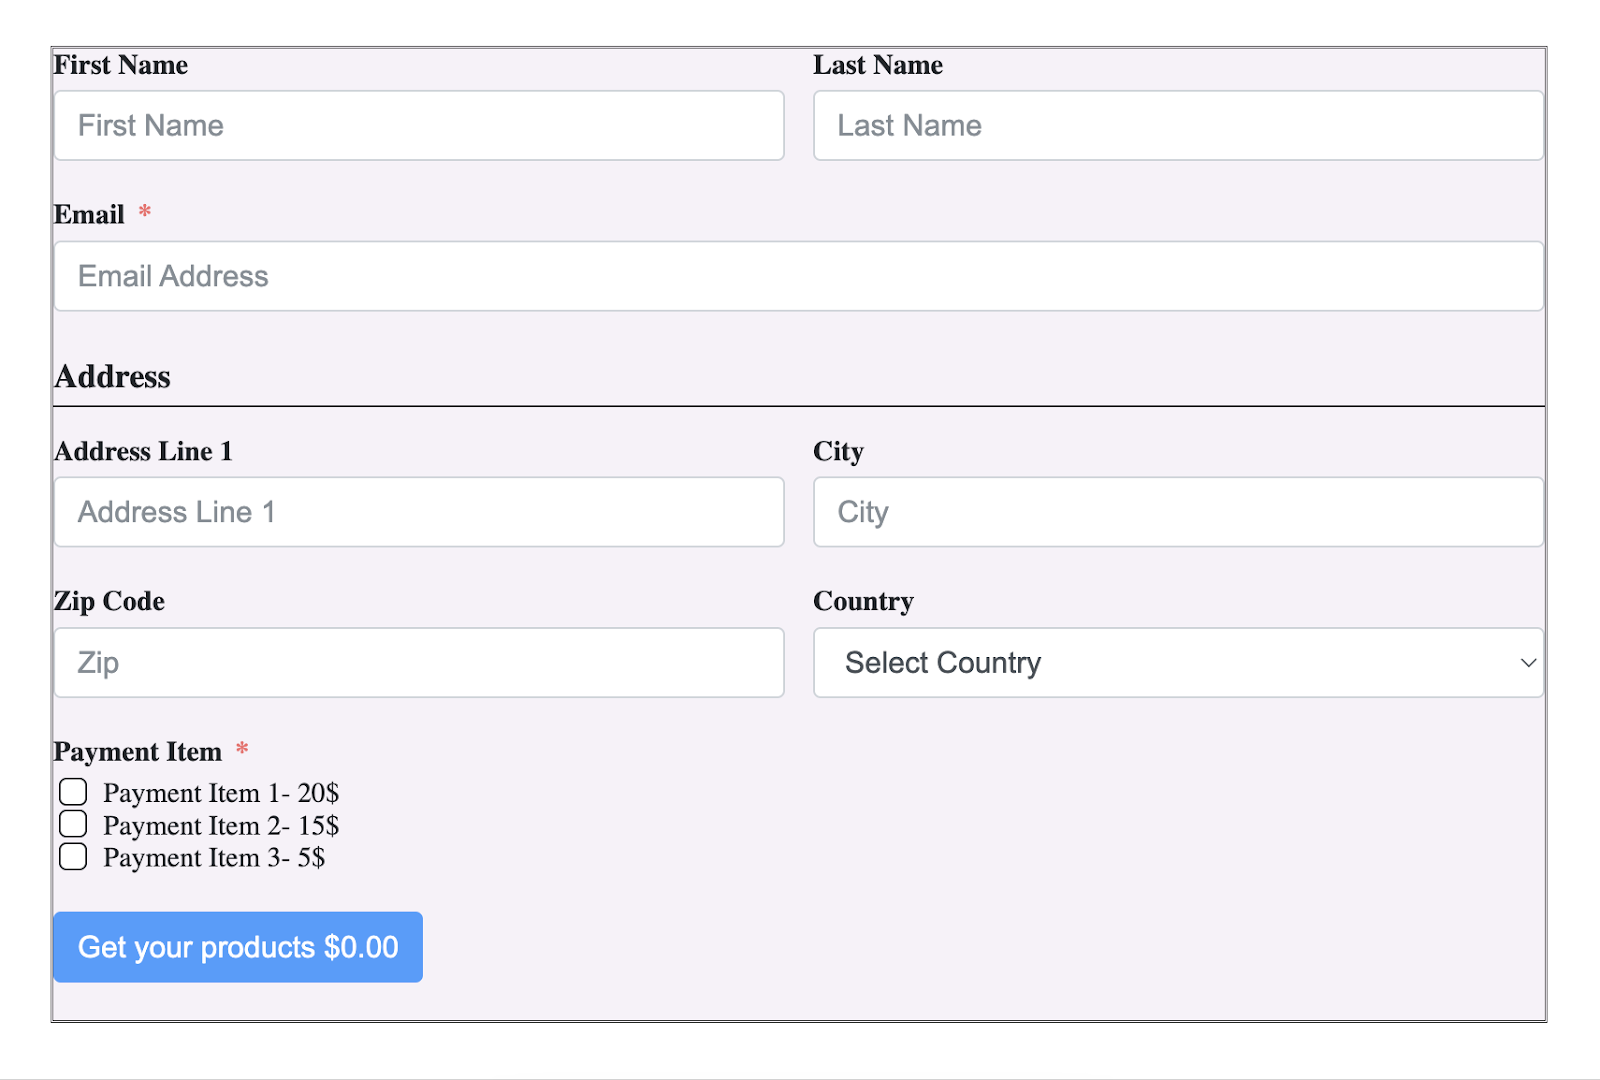
Then, enable the form border from the Form Border Settings section, and settle the Border Types as Double.

Don’t forget to save the settings from the top right corner Save Settings button. Now that’s the outlook of the form.
More so, if you want to give your form a feeling of conversation, turn the form into conversational forms with Fluent Forms. To do that, go back to the editor again, hover on the three-dotted icon in the top right corner, tap on the Create to Conversational Form button, and confirm the conversation.

At first, you’ll get the form editor of conversational forms. We don’t want to add anything new, as we’ve already added the necessary fields. So, we’re moving on to the Design section from on the top bar of the editor.
On the design section of the Fluent conversational forms, you can change the color of questions, answers, buttons, button text, and background, add a background image, disable layout on mobile devices, disable the scroll to next, disable branding, and more. We’re just adding a background image, and adjusting the contrast for this form.

Save the settings when done. Here’s the final look at the form.

This is our form for now.
Step-3: Activate ClickSend integration
Go to the Integrations part on the Fluent Forms dashboard. From there, look for the ClickSend module, and activate it.

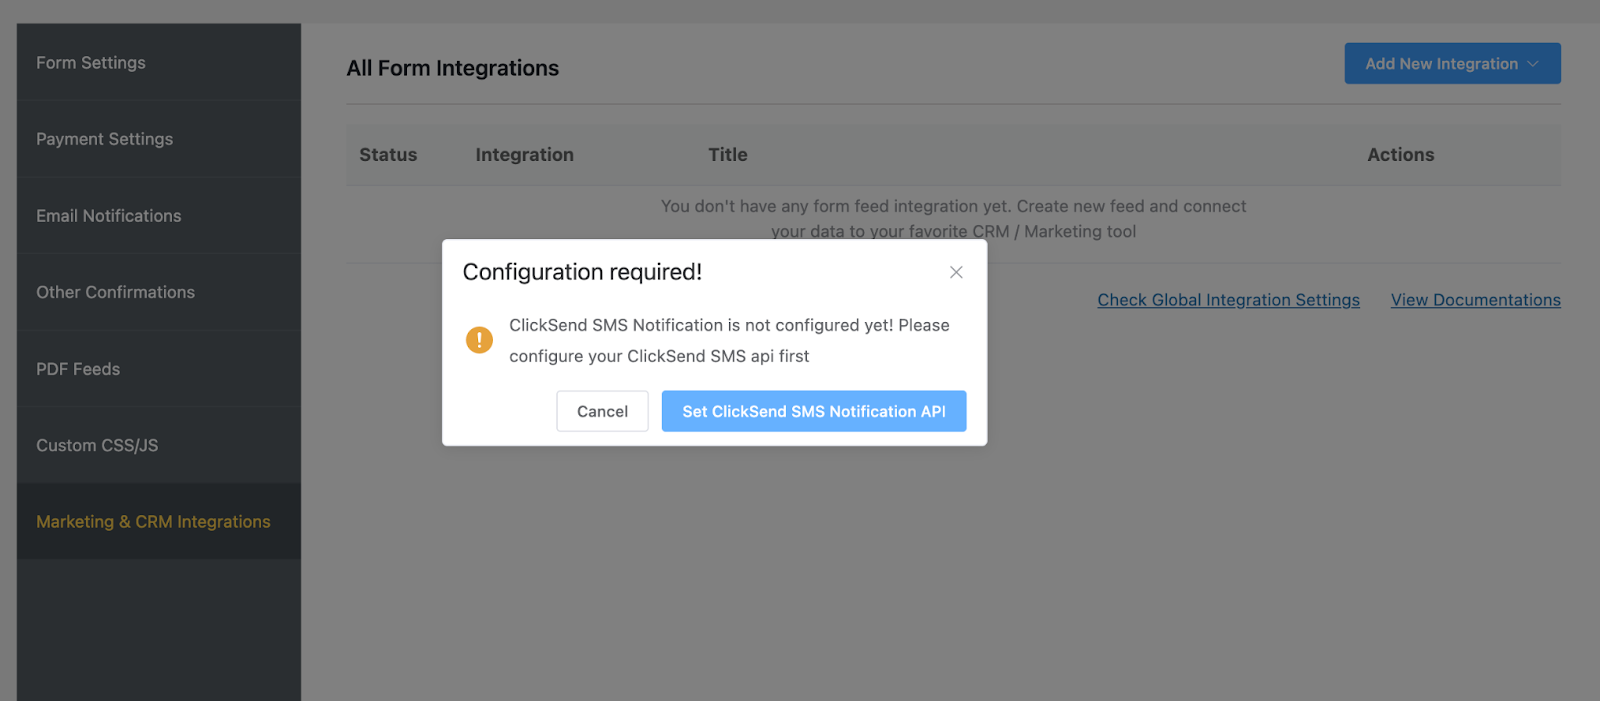
After that, move on to the Settings & Integrations section of the respective form, and take the Marketing & CRM Integrations part. There, click on the Add New Integration button, and search for the ClickSend SMS Notification.

After tapping on the button you’ll get a notification for settling the ClickSend API. Click on that.
Now, you need to get the Sender Number, and API from ClickSend’s dashboard.
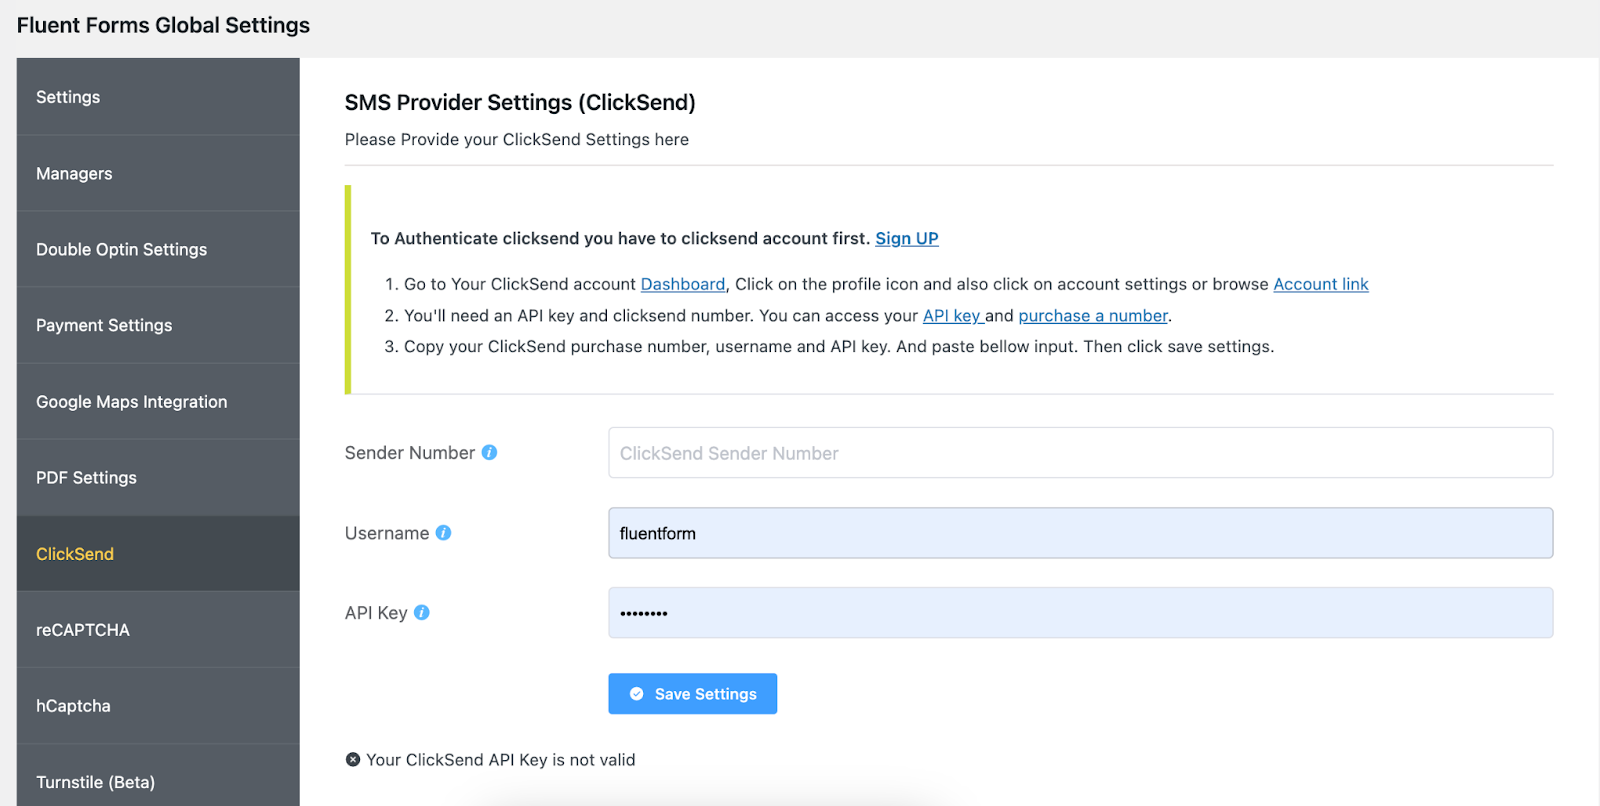
Step-4: Get the API of ClickSend
Proceed to ClickSend’s dashboard. If you don’t have an account yet, create one. It’s easy to make an account with ClickSend. Just scroll to their website, click on the signup button, and give your details, you’ll get access to a free trial for a few days.

From the dashboard, tap on your profile, there you’ll get the User Id at first. Then you can also see the option for Account Settings on the list.

On the account settings, you’ll get the user id and API key. Copy them from there.

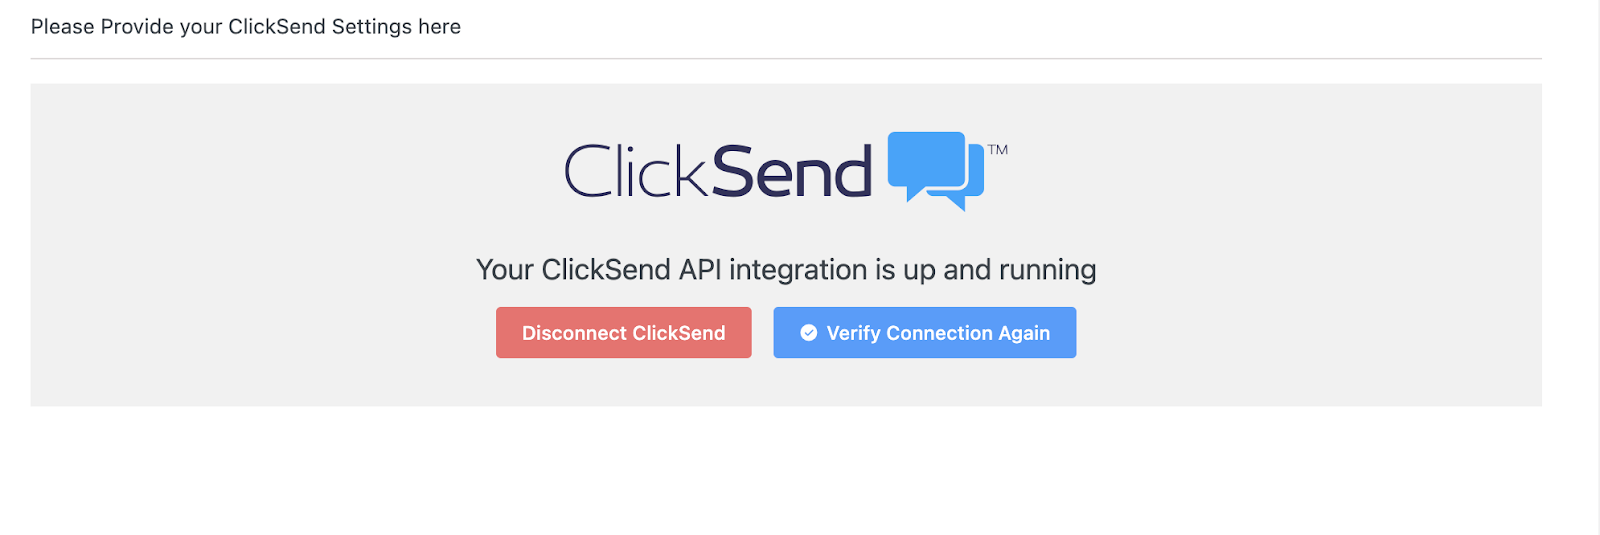
Paste them on your Fluent Forms dashboard, and save the settings.

Now, your form is connected with ClickSend integration.
Step-5: Setup the integration
Now from the Marketing & CRM Integrations section, set your feed, map the fields, and save the feed.

Step-6: Publish the form
It’s time to publish the form. The process is super easy with Fluent Forms. If you want to show your form on a page, go to the Pages section from the WordPress dashboard, and click on the Add New button.

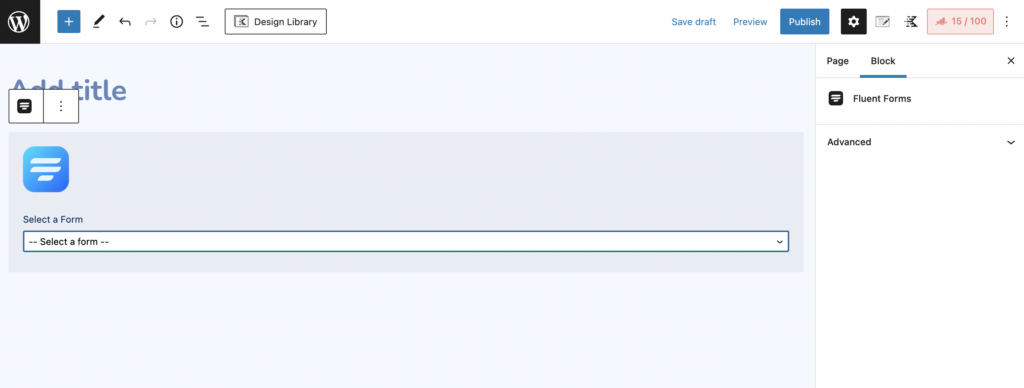
Then add Fluent Forms’ Gutenberg block by clicking on the plus (+) icon.
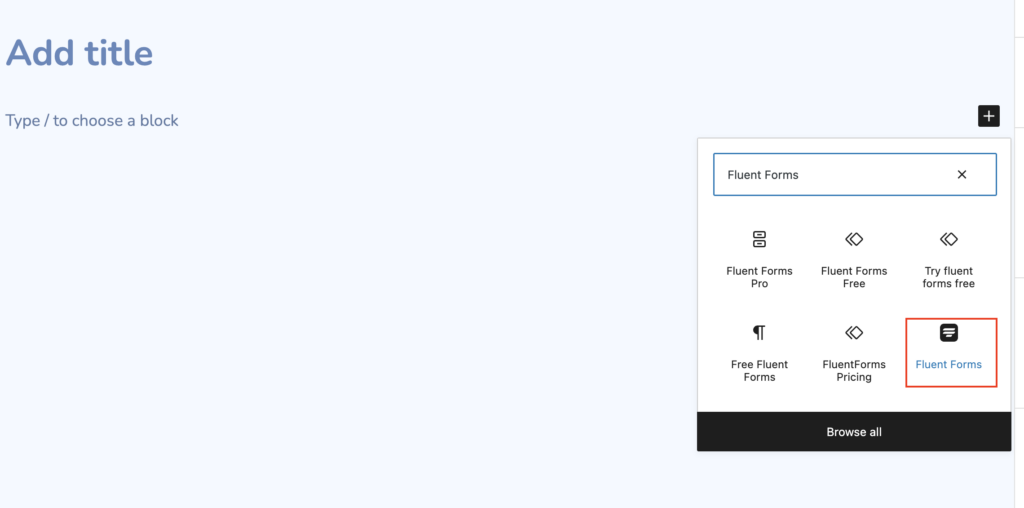
Now choose the form and publish it on your website.
You can follow the same process for publishing the form on blog posts as well.
There’s another way to publish the form. Copy the form’s shortcode and paste it anywhere on your website, either to a page or blog post. Besides, you’ll get both the shortcodes of the default form type and the conversational form. Copy anyone, and paste them to the respective place.

How easy was that?!
Fluent Forms: a robust form builder of WordPress

Fluent Forms is one of the most powerful yet lightweight form builders in the WordPress community. From making sign-up forms to payment forms, quiz forms to conversational forms are just a matter of a few minutes with Fluent Forms. It gives some fantastic features and functionalities to make helpful contact forms for your website. Its notable features are:
- Drag and drops
- 60+ input fields
- Conditional logic
- GDPR field
- 40+ third-party integrations
- Conversational forms
- 70+ pre-built templates
- Spam protection
- Signature add-on
Besides, you can use the plugin to collect payments on your eCommerce WooCommerce and store. In addition, Fluent Forms’ global styler option helps you to make amazing forms for your website. On top of that, when it’s about pricing, Fluent Forms asks very small money to pay compared to other plugins in the market.
So, grab Fluent Forms without any second thought. Check out our blog posts for more tutorials like this, and follow us on YouTube, Facebook, Twitter, and Instagram, for more information about Fluent Forms.

Hello, This is Prema. I work as a marketing strategist for Fluent Forms at WPManageNinja. When I am not playing with words, I go to explore nature.


Leave a Reply