
How to Connect Meta Box WordPress with Fluent Forms
Custom fields are one of the key segments within the WordPress base. They are necessary because they provide varied applications and places for customization. With the other things in WordPress, many developers use custom fields through different strategies.
Meta Box is a well-known plugin for helping users to use custom fields easily. In this article, we will discuss how to connect Meta Box WordPress with Fluent Forms. But before we do, let’s see what Meta Box generally mean.
What is Meta Box in WordPress
In WordPress, a meta box refers to a user interface element in the post editor screen that allows you to add additional information, known as metadata, to your content. This can include anything from custom product details and author notes to event dates or technical specifications. Meta boxes are especially useful when you need to collect and display extra data in a structured, flexible way.
To simplify and extend the use of meta boxes, many users turn to the Meta Box plugin.
Meta Box is a free, Gutenberg and GDPR-compatible WordPress plugin that helps you customize your website with custom fields and meta boxes quickly and efficiently. It’s especially helpful for eCommerce websites where you may want to include detailed product information, such as technical specifications or variations.
Beyond that, Meta Box makes it easy to build customizable product pages, landing pages, and even confidential advertising pages.
You can also use it across a wide range of websites, including:
- FAQ sections
- Booking sites for tourism and hospitality businesses
- User registration and profile pages with flexible frontend options
With over 140 five-star ratings and 600,000+ active installations, Meta Box is a reliable choice for adding powerful, customized features to your WordPress site.
Next, let’s look at how to set up Meta Box with Fluent Forms.
Connect Meta Box WordPress with Fluent Forms
Why are we using Fluent Forms to add Meta Box to our WordPress website?
Fluent Forms is an excellent form builder plugin for WordPress. It is a lightweight and comfortable tool. Anyone can create any kind of form with its smooth interface. Its drag-and-drop feature makes it easier for users to make any form within a few minutes. Furthermore, Fluent Forms comes with 60+ input fields and 70+ pre-built templates to make the form-making process sleeker. You can also get 60+ third-party integrations with the plugin.
Moreover, advanced post creation, Stripe and PayPal integration, PDF entry generation, file upload, conditional logic, etc., functions are also available in Fluent Forms. You don’t need to worry about the security with this tool, as it is secured with reCAPTCHA, Honeypot, and Akismet.
So, without any doubt, Fluent Forms is full of unique features. The developers of the tool add more functionalities every two or three months. Moreover, the plugin is super cost-effective.
Now go through this article on how to integrate Meta Box with Fluent Forms.
First, make sure that you have installed the Meta Box pro plugin on your WordPress dashboard. If you are facing any problem, to get the plugin, go through this site, and install it.
Go to the Meta Box section from your WordPress dashboard, and click on the Custom Fields option. Then click on the Add New button from the top left corner and create a new Field Group.
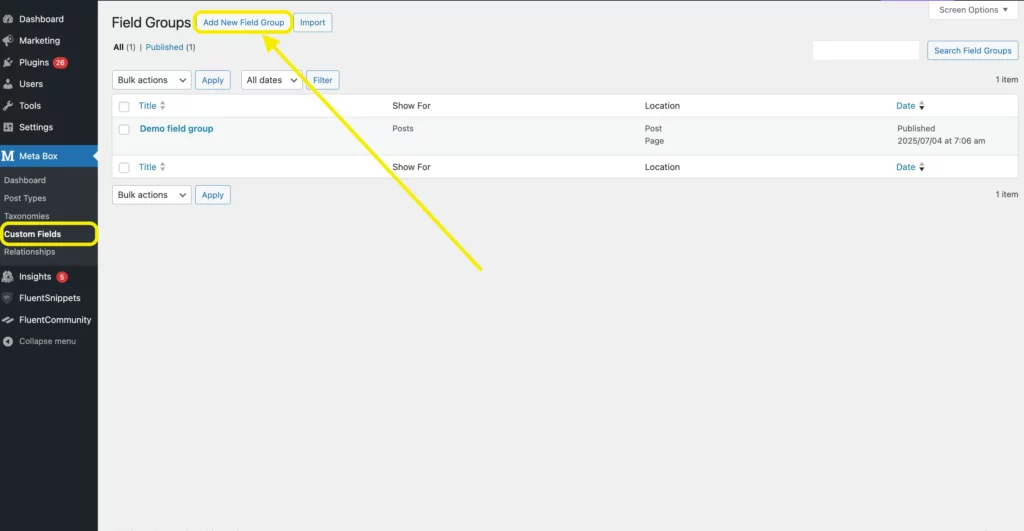
Name your field group; for example, let’s call it “Demo Field Group”. Then tap on the Add Field button to add the custom fields sections.
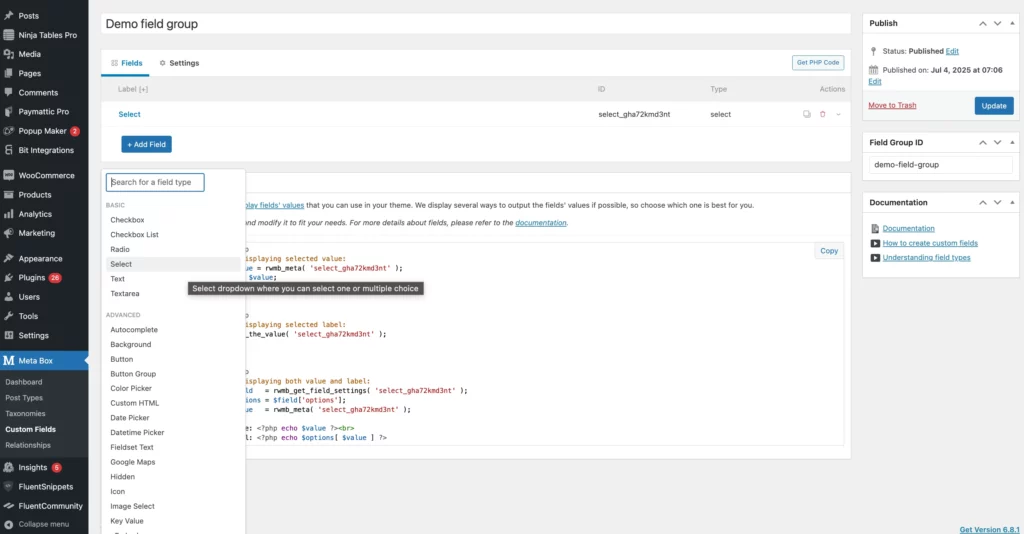
When you toggle on this button, you will see different types of fields to choose from. For the demo, we have used the “Select” field option. Now you have to configure a specific field from the opened multiple options.
For example, we have chosen the field label and choice in the General tab.
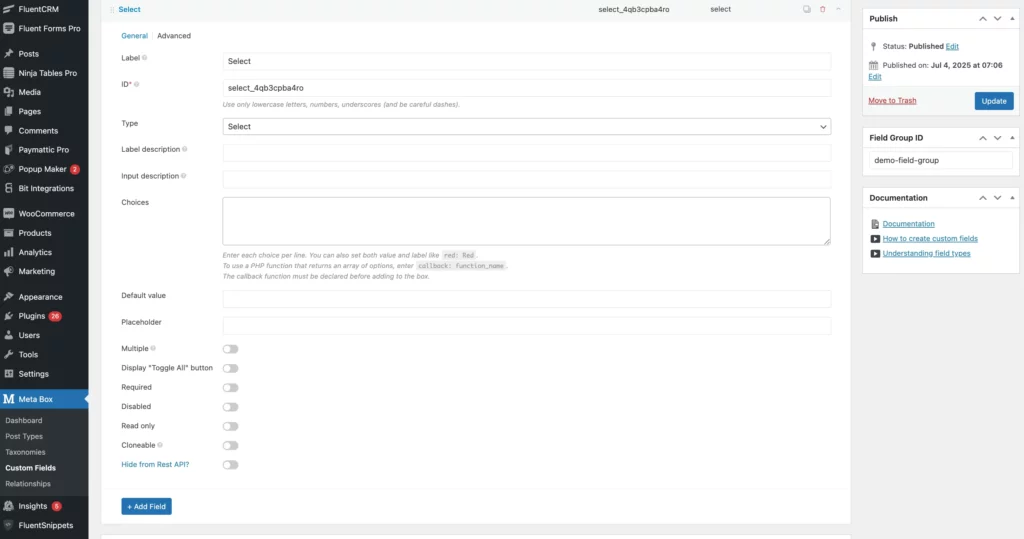
The location has been set to Post Type in the settings tab. Set your preferred location in the same way. Finally, click on the save settings button to publish the page.

When the field group is built, navigate to the Fluent Forms dashboard, pick an existing Post Form, or design a new one. Then from the Settings & Integrations tab, select Post Feed option.
Map the Post fields first.
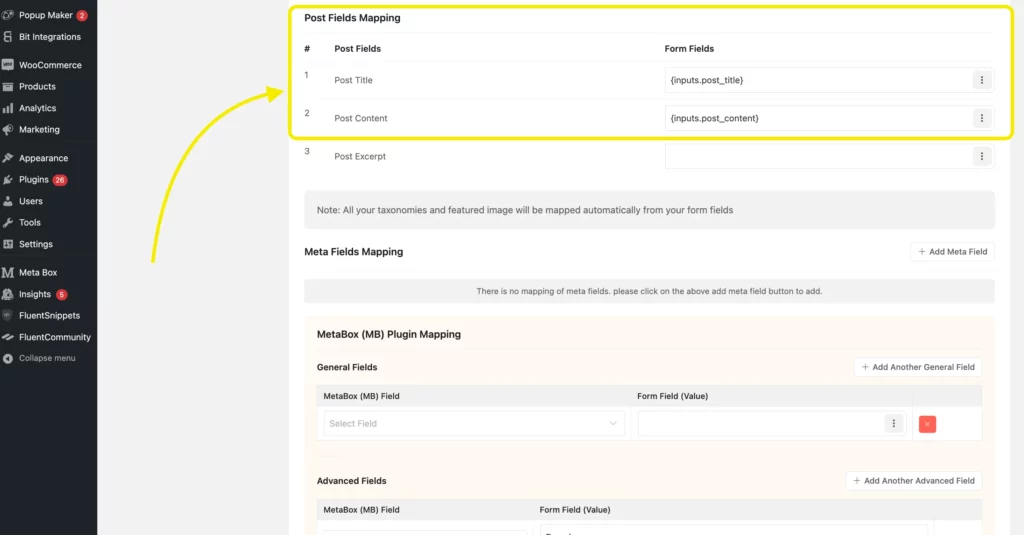
Now to map the custom fields, scroll down to the Meta Box Plugin Mapping section. Go to the Advanced Fields section, and select the Meta Box field that you made from the dropdown on the left side.
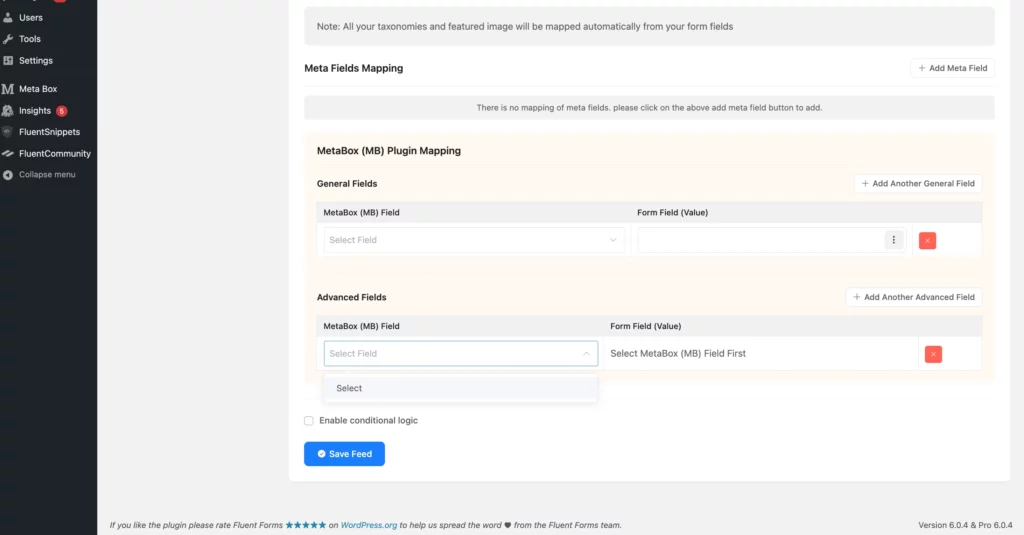
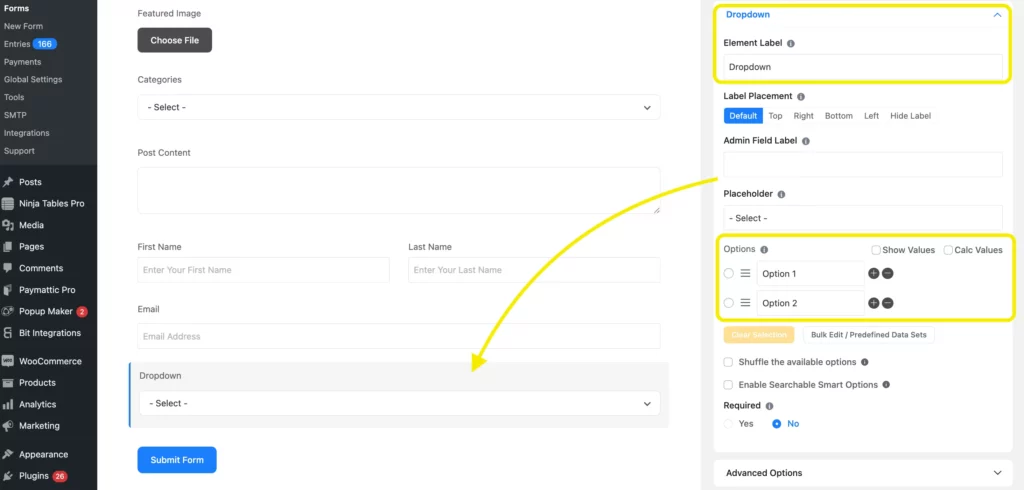
You have to create the exact form field for the custom field to get the form value.

You have to copy the Choices values from the custom fields and paste them in the Options segment in the input customization section. Lastly, click on the Save Form button.
Now, go to the preview page, add some data to the form, and submit it for testing purposes.
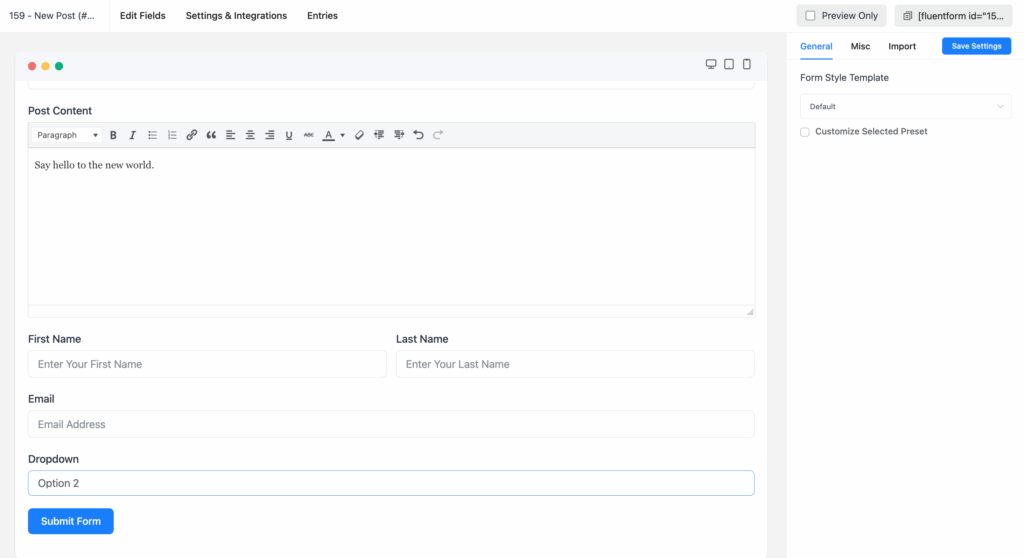
After that, go to the posts page to check out the submitted post. Click on the edit option from there. You will get the Meta Box custom field with the value at the bottom of the page on the posting page.

Done!
This is how you can connect Meta Box WordPress with Fluent Forms for using custom fields to your website.
Wrap up
Working with custom fields is no more a difficult task if you use the right tool. With these types of powerful and flexible tools, you can work better and gain success in your WordPress websites easily and smoothly.
One thing to note, this Meta Box custom field is only seen in the backend if you’re using free version. You have to use Meta View to show the custom fields in the frontend.
Further questions? Drop your comments below!

Hello, This is Prema. I work as a marketing strategist for Fluent Forms at WPManageNinja. When I am not playing with words, I go to explore nature.


Leave a Reply