
How to Add an Address Autocomplete Field in Your WordPress Forms

Are you looking for ways to simplify the process of filling out online forms for your website visitors? Consider adding an address autocomplete feature. Because users often find it challenging to enter their detailed address information and address autocompleted feature saves your visitors time and hassle.
With the address autocomplete feature, users can simply start typing their address, and the form will automatically populate the remaining fields. Alternatively, users can simply click on an icon to autofill the address of their current location.
In this article, we’ll show you how to add address autocomplete to your WordPress forms. Let’s begin!
What is the address autocomplete feature?
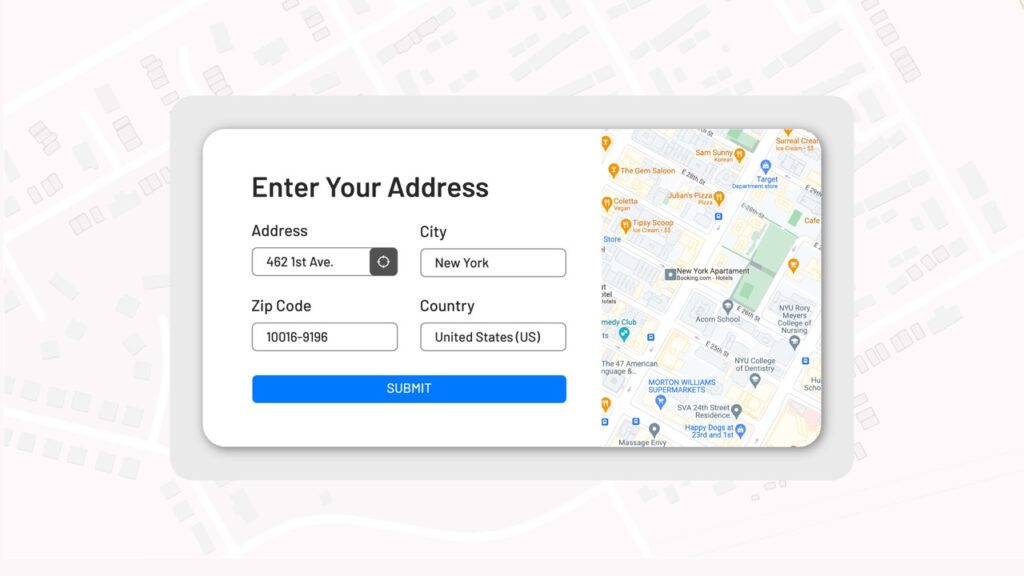
When a user starts typing their address, the address autocomplete feature displays a dropdown list of suggestions that match the input. Once the user selects a suggestion, the remaining address fields (such as city, state, zip code, and country) are automatically populated.
In some cases, an icon may appear next to the address input fields. When a user clicks on this icon, the address fields are automatically populated with the user’s current location.
Why address autocomplete is so useful?
Address autocomplete is commonly used in different types of online forms, such as registration, checkout, contact forms, etc. It can save time and reduce errors by eliminating the need for users to manually enter their full addresses.
Additionally, it can improve the user experience by making forms faster and easier to fill out.
Address autocomplete provides more accurate and up-to-date information. This means that the address entered through address autocomplete is more likely to be correct. But how do you implement the address autocomplete feature in your form?
Choosing an address autocomplete solution – Fluent Forms
To add the address autocomplete feature to a WordPress form, you need a form builder plugin that can integrate Google Maps with the form. We recommend Fluent Forms in this regard.
Fluent Forms is the most lightweight form-builder plugin in the market right now. It is a drag-and-drop WordPress plugin with tons of great features and functionalities.
Some other features of Fluent Forms that make it stand out are —
- Drag-and-drop form builder plugin for smooth user experience
- Dozens of useful pre-built form templates for quick form building
- Conversational forms for giving the best form-filling experience
- Conditional logic for more control over your forms
- 45+ native integrations for additional functionality
- PDF add-on for generating PDFs from form submissions
- Multi-column form layout for ultimate freedom
- Calculated fields for measuring numbers based on inputs
- Payment feature for accepting payments from your clients in a seamless way
- Quiz and survey module for creating quizzes and running surveys
Now that we have the right tool in hand, let’s jump into adding address autocomplete to our form.
How to add address autocomplete to WordPress forms
Follow the steps below to know how to add an address autocomplete feature to WordPress forms –
Step 1: Install Fluent Forms
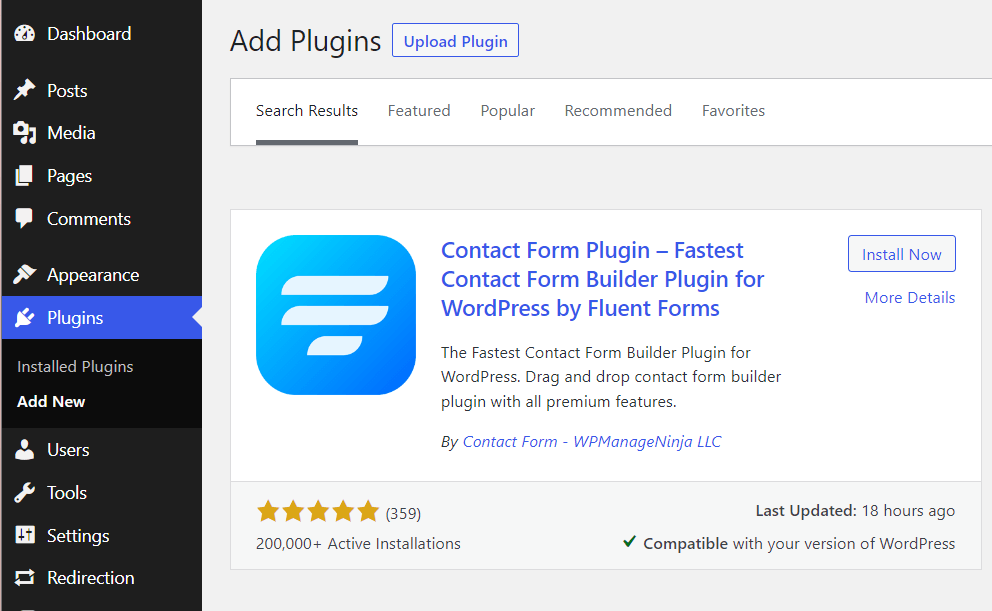
Installing Fluent Forms is easy and similar to installing any other WordPress plugin. Simply go to the Plugins section in your WordPress dashboard, click on Add New, search for ‘Fluent Forms‘, and then install and activate it.
You need to upgrade to the Pro version of Fluent Forms to be able to use the address autocomplete feature.
Step 2: Get the API key
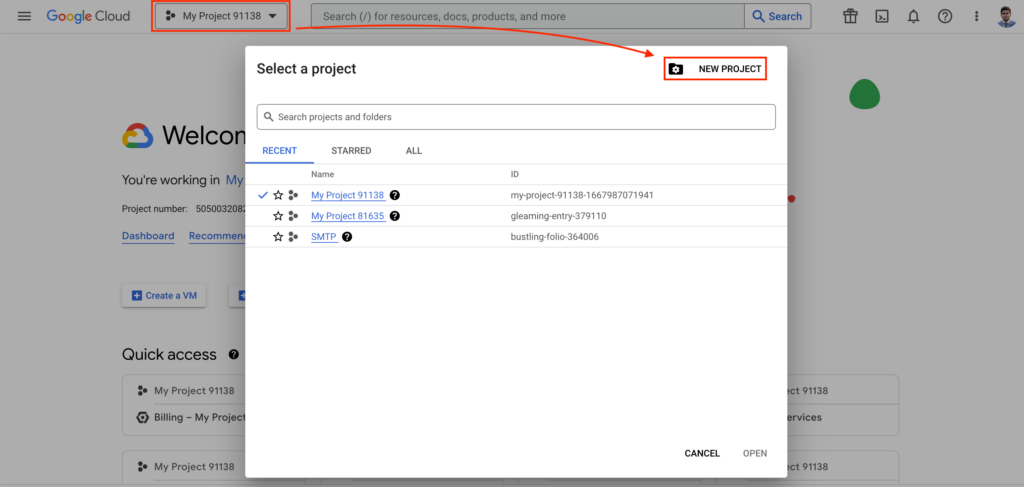
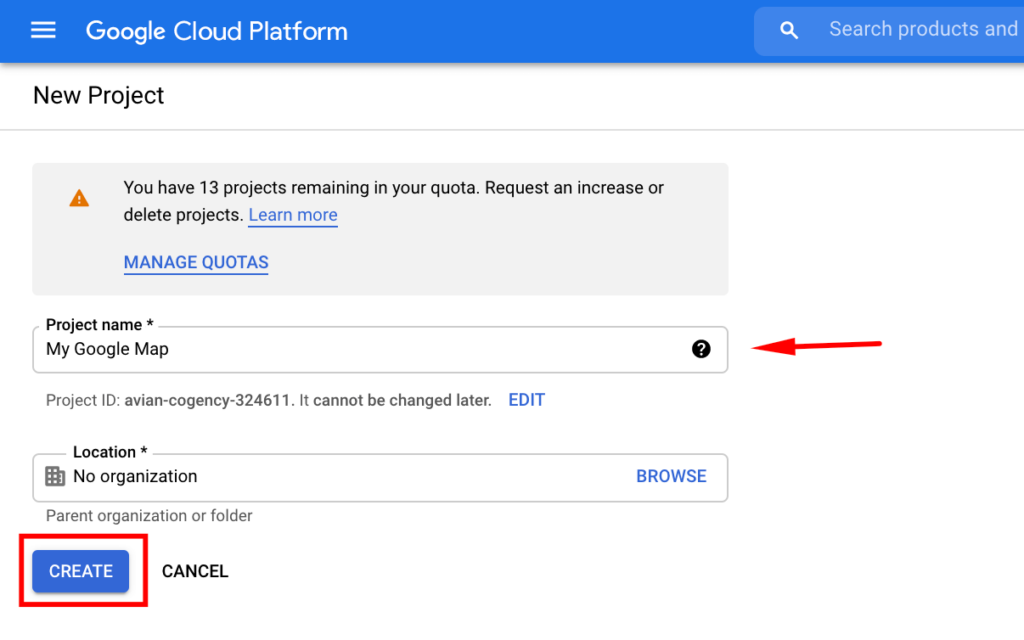
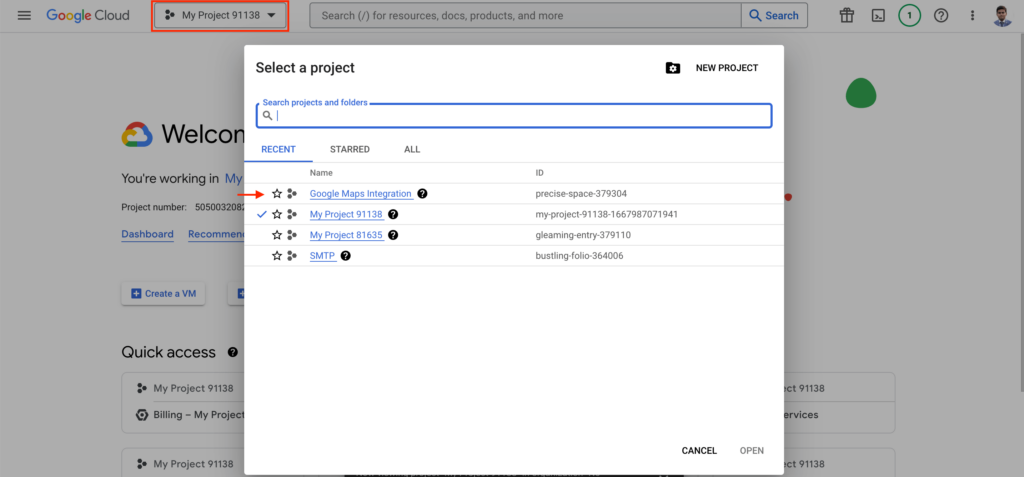
Now you need the Google Maps API Key to integrate Google Maps with Fluent Forms. You will get your API key in Google Cloud Console. Now create a new project as shown in the image below –
Provide a suitable Project name and click on the Create button.
Then you will see the dashboard window where you can click on your Project option to open the list of projects.
Here click on the project that you just created. Now enable Places API and Maps Javascript API, respectively.
Once both the Places API and Maps Javascript API are enabled, go to the Credentials page.
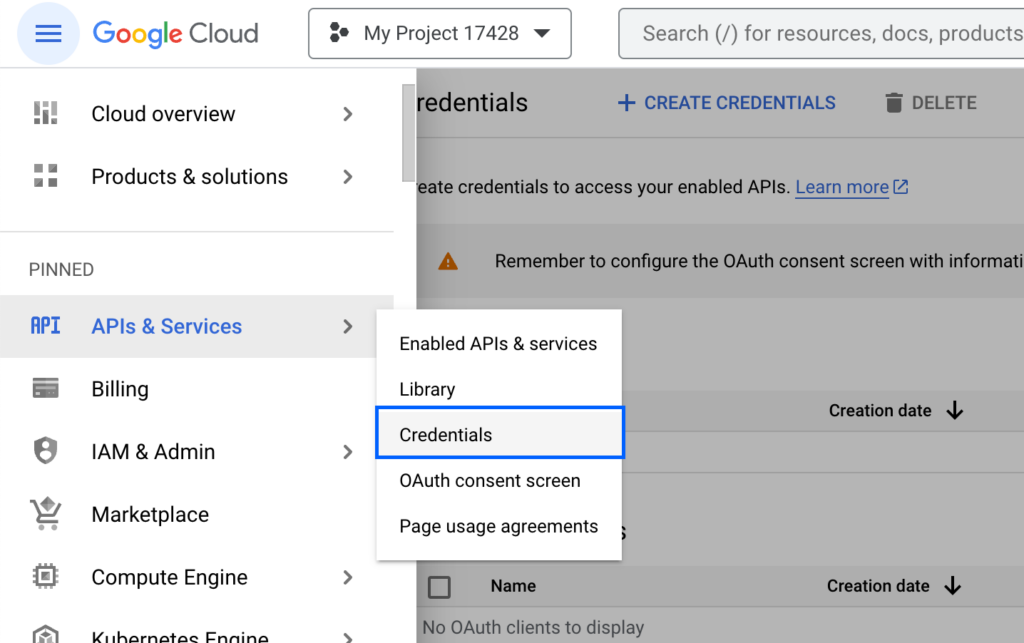
Create your API key and copy the key for the next step.
Step 3: Enable Google Maps integration
Once you have the API key, you can enable Google Maps integrations. Hover over Fluent Forms Pro and click on Global Settings.

Click on the Google Maps Integration and paste the API key here. Hit the Save Settings button.
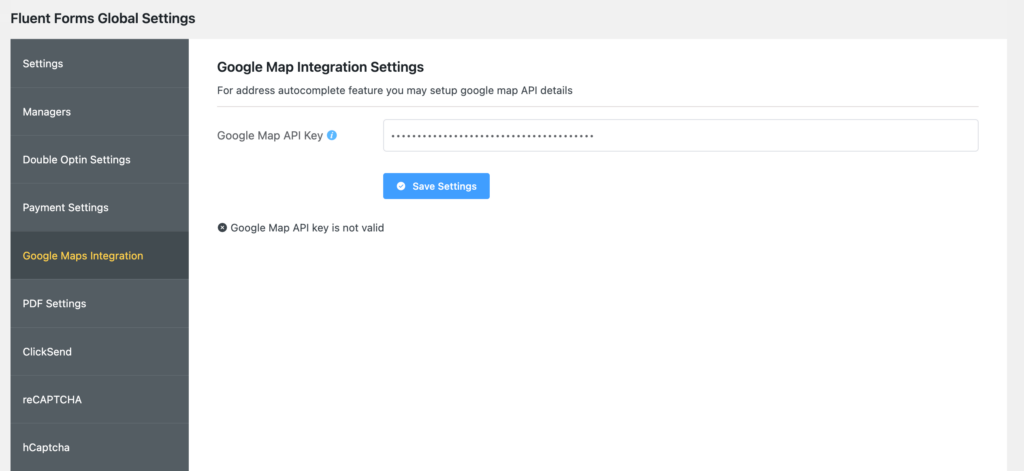
You have just integrated Google Maps with Fluent Forms.
Step 4: Add address autocomplete feature in your form
Now let’s create a new form with the address autocomplete field. To create a new form, click on Fluent Forms Pro from the left sidebar of the WordPress dashboard. Now click on the Add a New Form button.
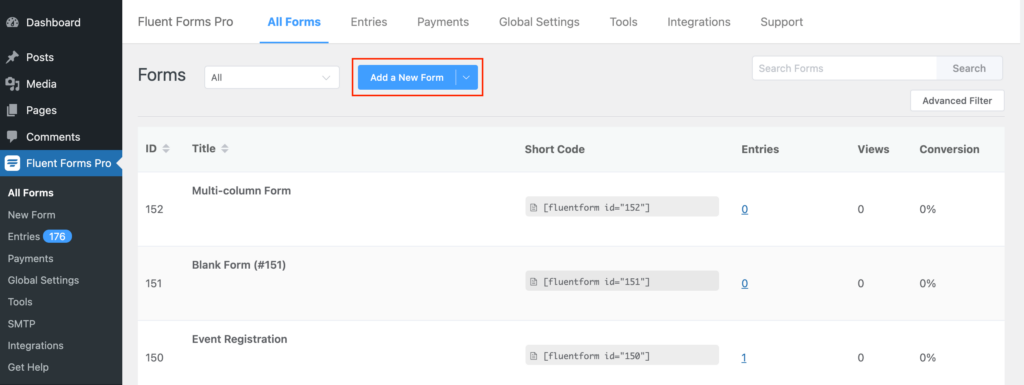
You will see a window with the pre-built templates. But let’s start with a New Blank Form.
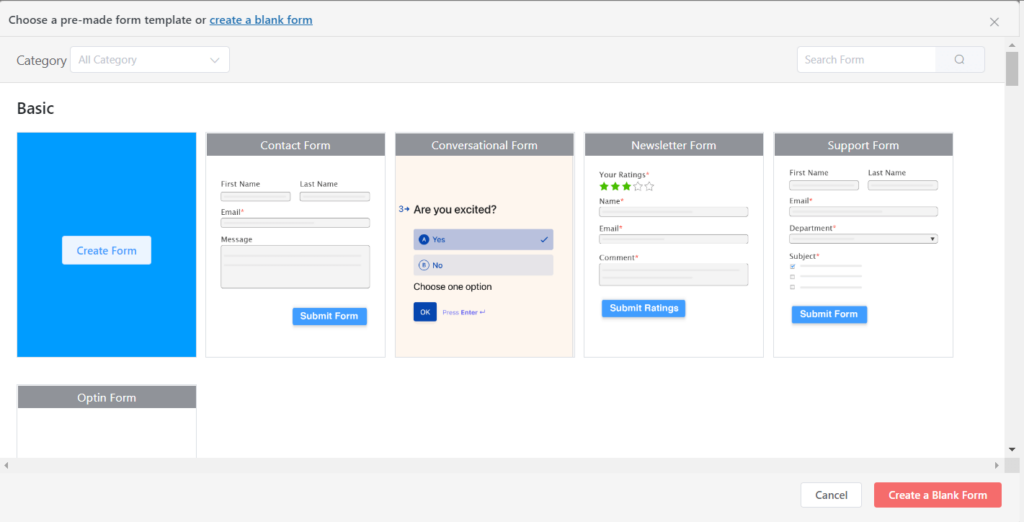
Hover over New Blank Form and click on Create Form. You will see the form editor interface of Fluent Forms.
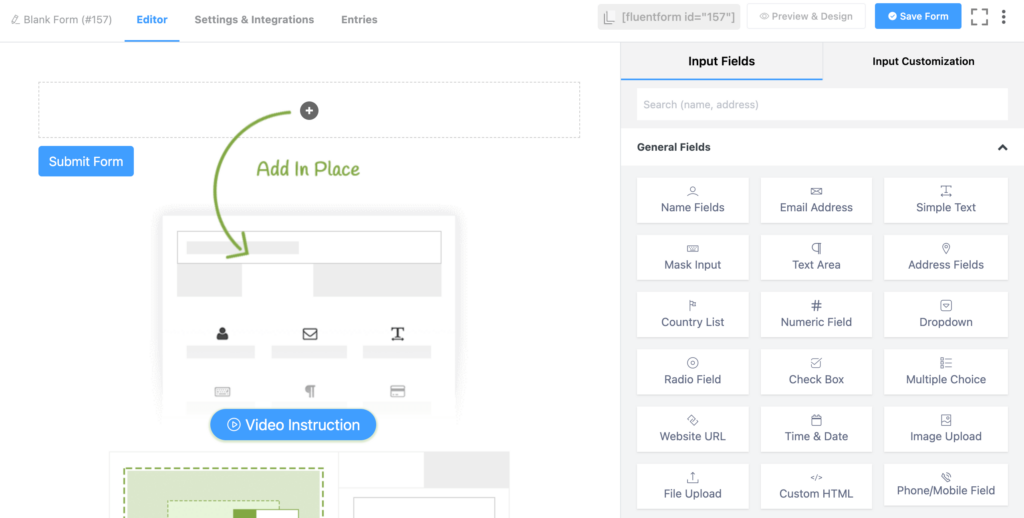
On the right-hand side, you will find various types of input fields that you can add to your form. Simply click on or drag and drop any field wherever you want it to appear. To customize any added input fields, just click on them.
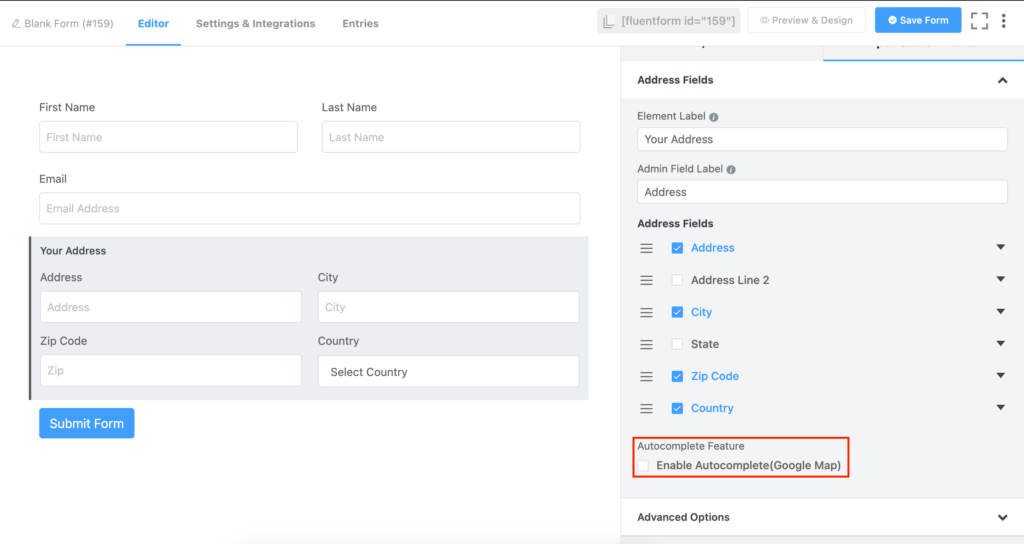
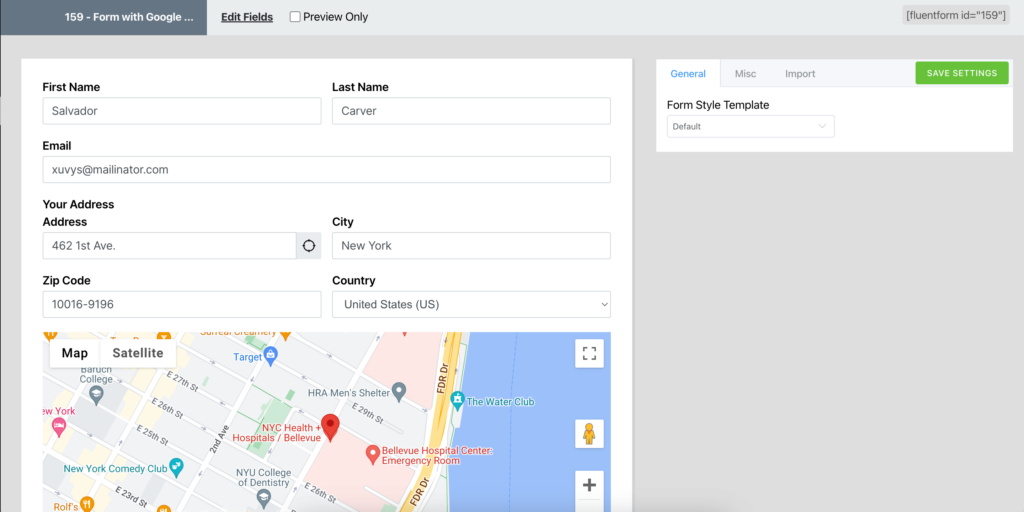
Click on the Address Fields to add them to your form. Customize the address fields according to your needs. Beside each address field, there is a down arrow icon, clicking on which will open field-specific customization options.
As you have integrated Google Maps with Fluent Forms, you will see an option to enable the Autocomplete Feature.
After enabling the Autocomplete Feature, you will see options to Show Map and Auto Locate. Enabling the Show Map allows you to show Google Maps on your Form.
Regarding the Auto Location feature, there are three options for you to choose from – Page Load, On Click and Disable.
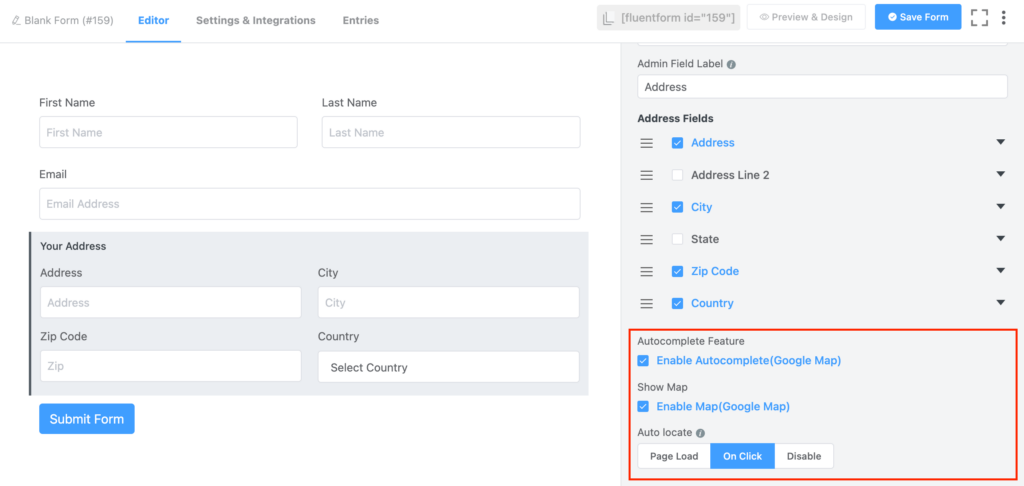
With the Page Load enabled, the users’ location is immediately detected as soon as the page loads.
And if you choose the On Click option, a location icon will appear next to the address field. A user can locate herself by clicking on that icon.
You can select the Disable option if you want to disable the Auto locate option. Don’t forget to click on the Save Form button once you are happy with the form. You can have a look at your form by clicking on Preview & Design.
You can take advantage of the Global Styler on the right side of the Preview & Design window to customize the design of your form.
Step 5: Configure form settings
Before publishing the form on your website, let’s check out some form settings of Fluent Forms that you can configure. You will find a tab called Settings & Integrations on top of the form editor interface. Click on this tab to access various settings.
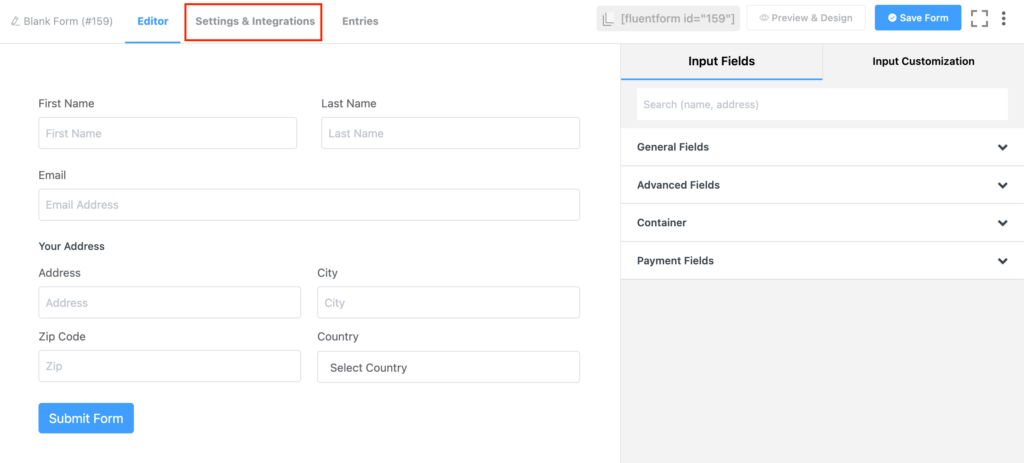
From the Settings & Integrations tab, you can do the following –
- Change the confirmation message that is shown when a user submits a form
- Enable double opt-in confirmation
- Configure form layout
- Apply different scheduling and restriction rules
- Append survey result
- Configure email notifications
- Create PDF feeds for generating PDFs from each form submission
- Design a dedicated landing page for your form
- Use custom CSS and JS in your form
- Integrating various services with Fluent Forms
Step 6: Publish your form
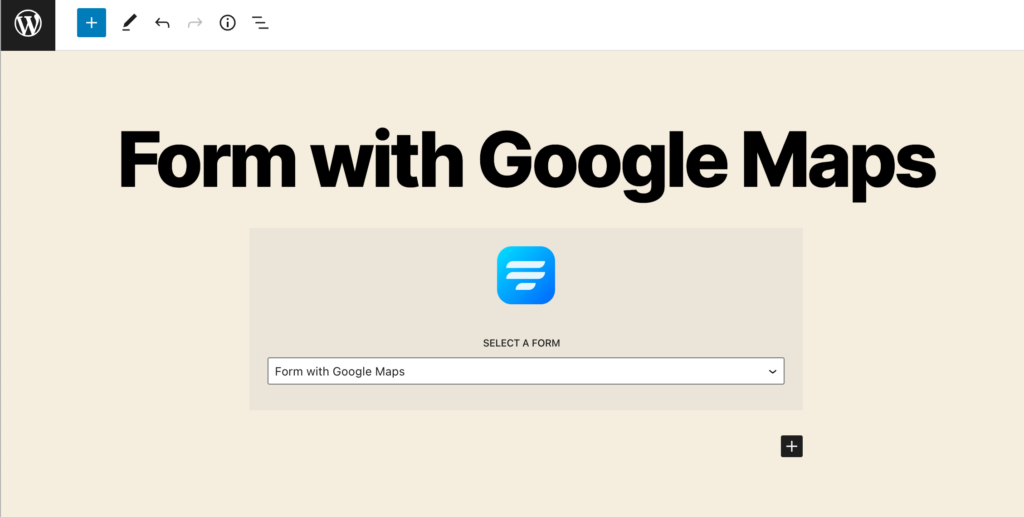
You can publish your form in three ways. First, you can use the Gutenberg block editor to choose the multi-column form you have just created. Click Add New under Pages in the WordPress dashboard’s left sidebar.
Give the page a title. In the block editor’s blank area, click the plus (+) sign or insert a forward slash (/). Then, in the search box, write Fluent Forms and select the form from the dropdown menu.
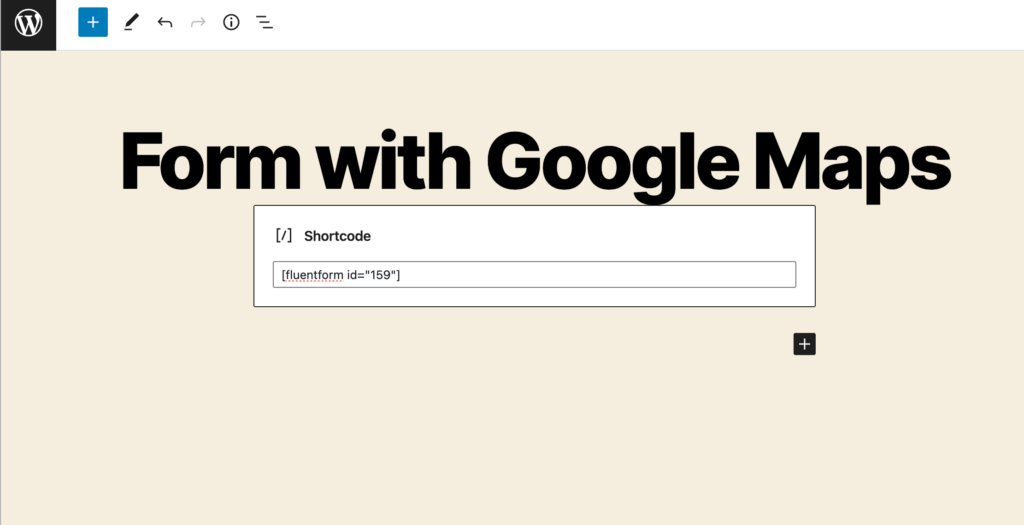
Fluent Forms’ Shortcode feature is a second option that you can use to show your form. The shortcode is found at the top of the window that displays the form editor.
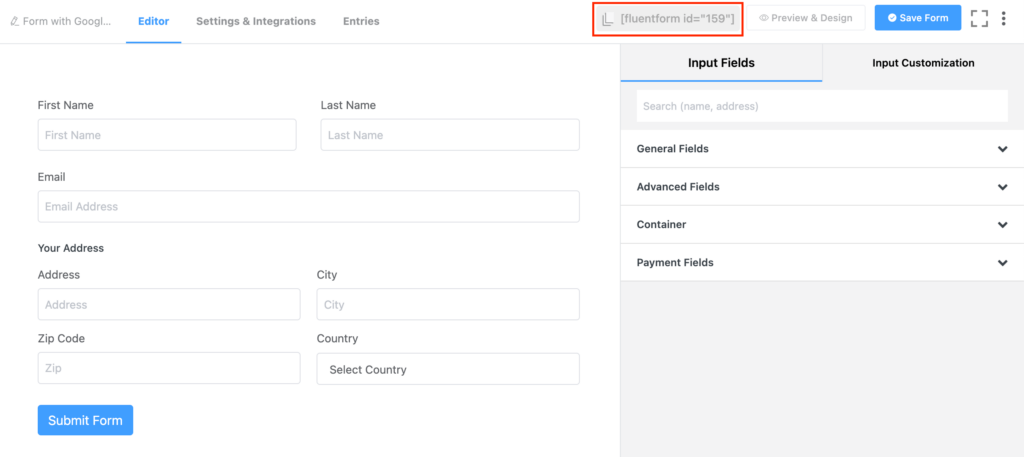
Click on the shortcode to copy it and then paste it using a shortcode block anywhere you want to display the form on your website.
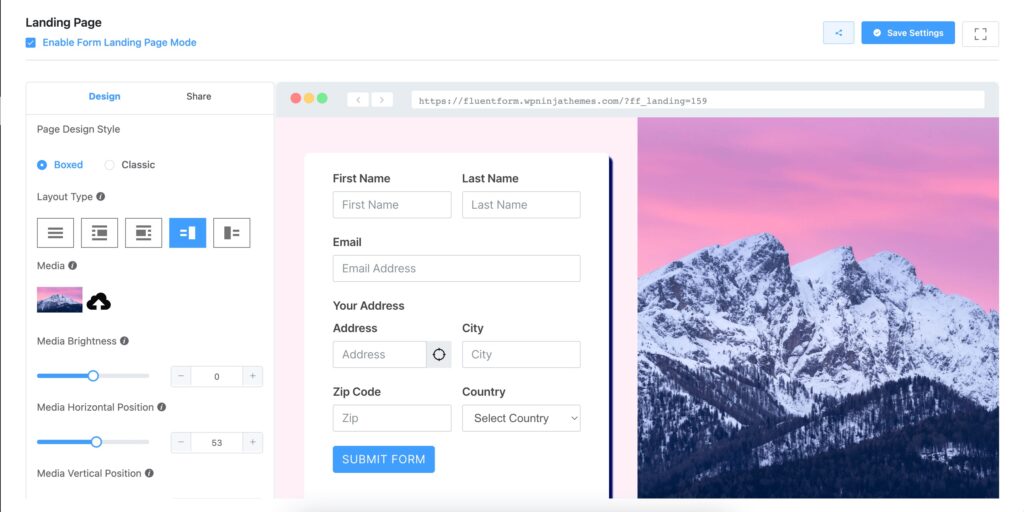
The third approach, which is probably the most impressive one, is to publish your form on a dedicated landing page. To do this, go to Settings & Integrations > Landing Page.
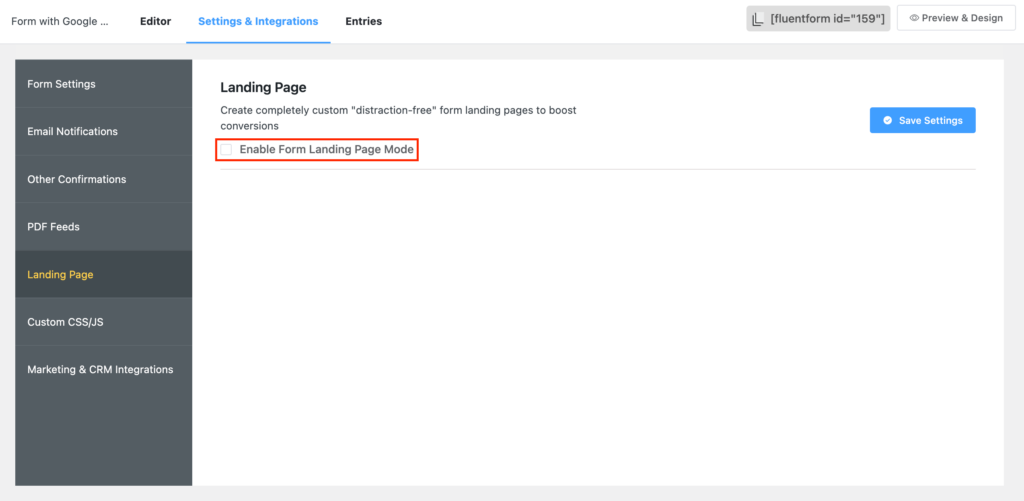
Check the box to Enable Form Landing Page Mode. The landing page is fully customizable to match your brand identity.
Wrapping up
By implementing address autocomplete on your WordPress forms, you can save time, reduce errors and improve user experience.
In this article, we’ve discussed what address autocomplete is, why it’s such a useful feature, and how to add it to your WordPress forms. By following the steps outlined in this article, you can easily add address autocomplete to your WordPress forms and start enjoying the benefits.
Hope you found this article helpful and informative. If you have any questions or comments, feel free to leave them below! Follow our social media channels for more content.

An Econ major turned into a Digital Marketer by choice. Hello! This is Ashraf and I am here to enlighten you on various WordPress topics and help you make informed decisions.


Leave a Reply