Connect Salesflare to Your WordPress Site Using Fluent Forms

Manual lead management slows you down.
If you’re still copying contact details or sending follow-ups by hand, you’re wasting time.
Salesflare is a smart CRM built for small teams. Fluent Forms helps you collect leads on your WordPress site.
When you connect them, leads flow into your CRM instantly — no spreadsheets, no delays.
This guide shows you how to integrate Salesflare with Fluent Forms in minutes.
TL;DR
- Get the Salesflare API Key.
- Activate the Salesflare Module.
- Create/Use a form with Fluent Forms.
- Set up the integration feed and map the input fields.
- Test and go live.
Why use Salesflare
Salesflare is a simple yet powerful CRM designed for small to medium-sized B2B businesses. It helps automate your sales tracking without the spreadsheet overload.
With Salesflare, you can:
- Automatically track emails, meetings, and calls
- Manage leads and opportunities visually
- Get real-time pipeline insights
- Trigger tasks and reminders
- Integrate with tools like Gmail, Outlook, Slack, and more
It’s built for speed, automation, and user-friendliness – especially for teams who want less admin and more selling.
Why Fluent Forms
Before you can nurture leads inside Salesflare, you need a reliable way to capture them – and that’s where Fluent Forms comes in.
Fluent Forms is a fast, lightweight form builder for WordPress. With its built-in Salesflare integration, you can:
- Instantly send form entries to your Salesflare account
- Automatically create new contacts or update existing ones
- Tag leads and assign them to pipelines based on form responses
- Eliminate manual data entry from your workflow
It’s the easiest way to connect your website forms with your CRM. You can build any kind of form; from basic contact and demo request forms to advanced multi-step lead capture forms.
Fluent Forms doesn’t just collect data. It helps you capture high-quality leads, segment them smartly, and hand them straight to Salesflare so your team can follow up at the right moment.
Furthermore, Fluent Forms comes with 60+ input fields and pre-built templates to make the form-making process sleeker. You can also get 60+ third-party integrations with the plugin.
Moreover, advanced post creation, Stripe and PayPal integration, PDF entry generation, file upload, conditional logic, etc., and more WordPress form-building features are also available in Fluent Forms. You don’t need to worry about the security with this tool, as it is secured with reCAPTCHA, Honeypot, and Akismet.
Whether you need a lead capture form, support form, or signup form, Fluent Forms has you covered.
Now, let’s see how to connect Fluent Forms with Salesflare.
Connect Salesflare to WordPress with Fluent Forms
You can set up the Salesflare integration in five easy steps.
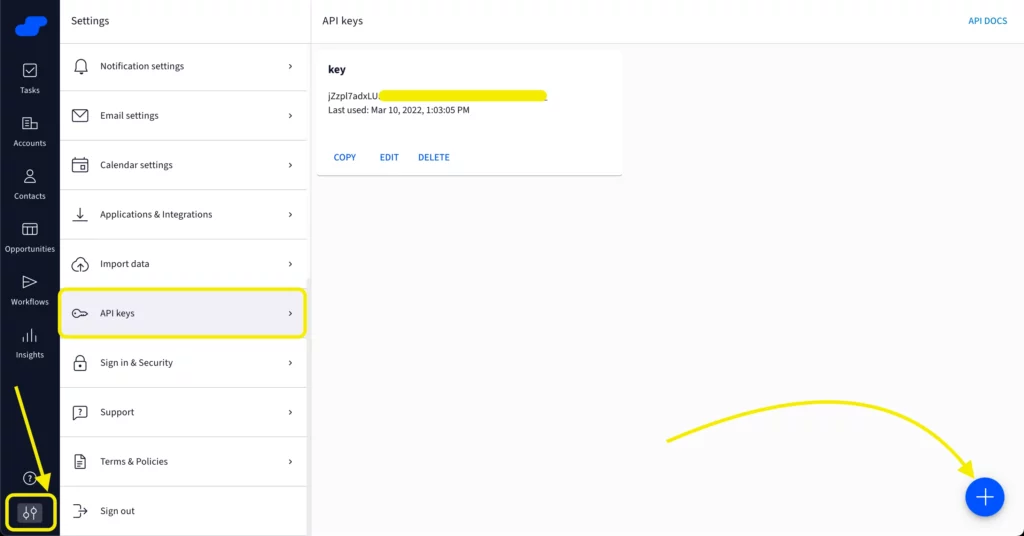
Step 1: Get Salesflare API key
First, log in to your Salesflare account.Navigate to Settings → API Keys. If you don’t have one already, generate a new API key by clicking on the ‘+’ sign.
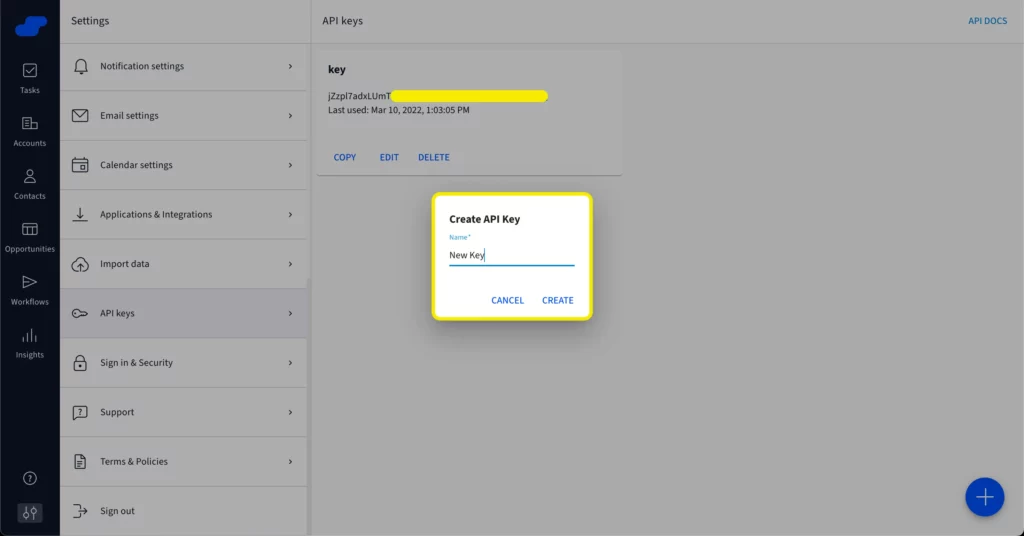
Name the new API Key and click on Create.
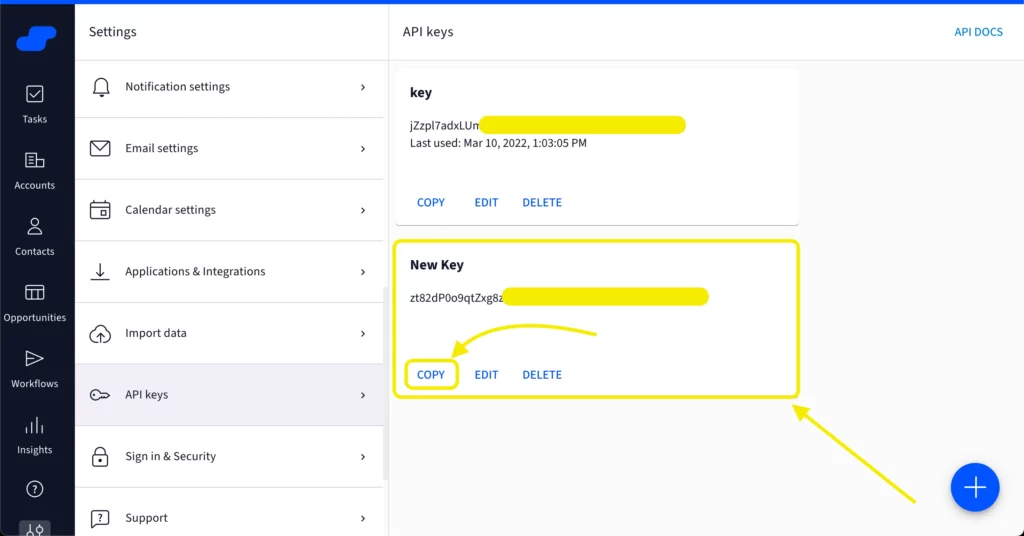
Copy the API key and keep it handy- we’ll need it in a moment.
Step 2: Activate the Salesflare module in Fluent Forms
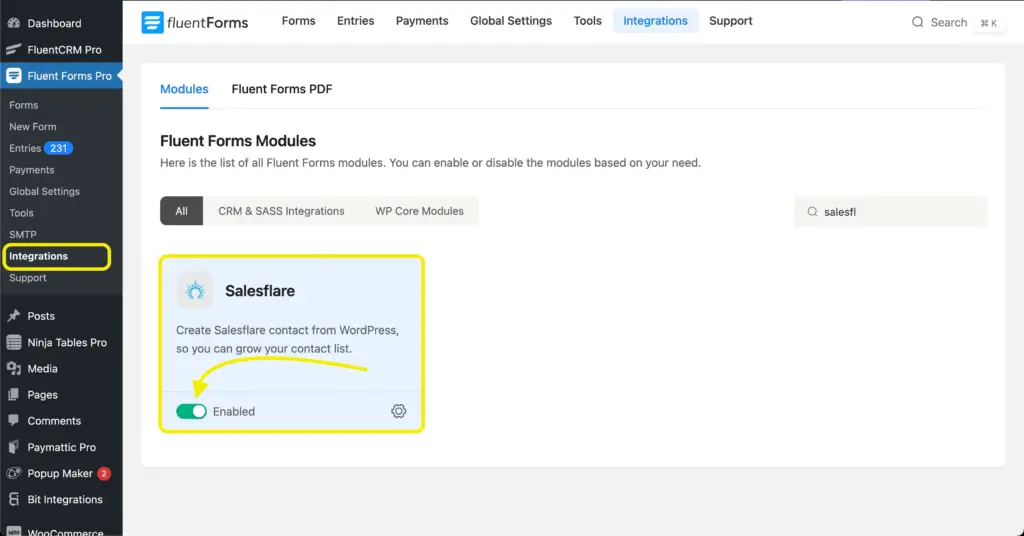
Head to your WordPress dashboard.
Go to Fluent Forms Pro → Integrations.
Scroll down to find Salesflare or use the search bar and toggle it on. This activates the module.
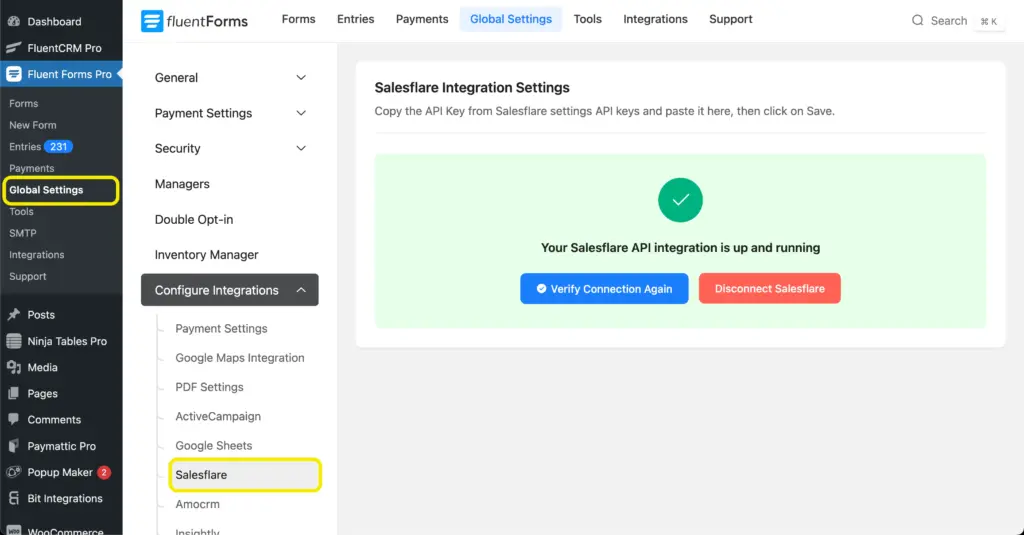
Once done, go to Global Settings → Salesflare → Configure Integrations and paste your API key in the configuration area.
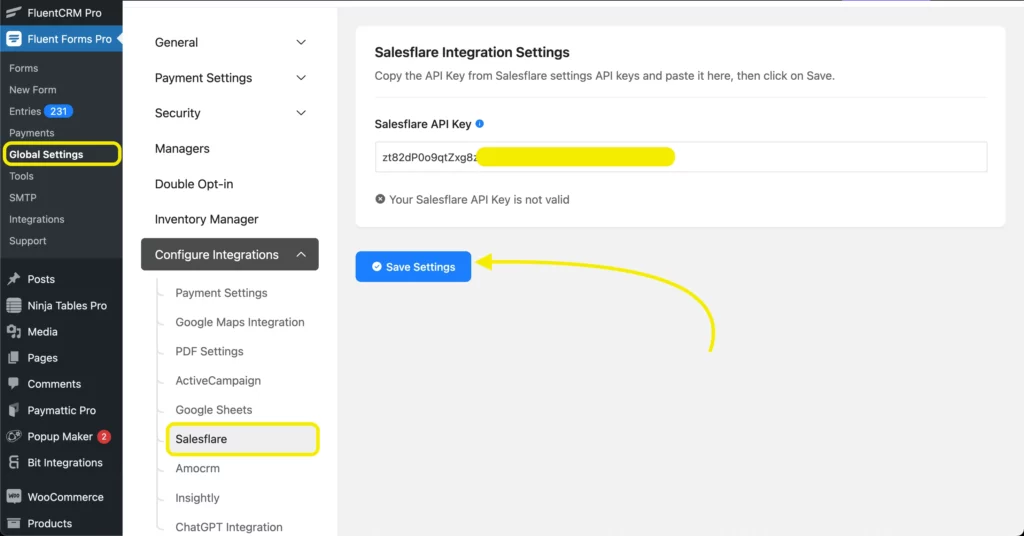
Click Save Settings, and you’ll see a confirmation of the successful connection.
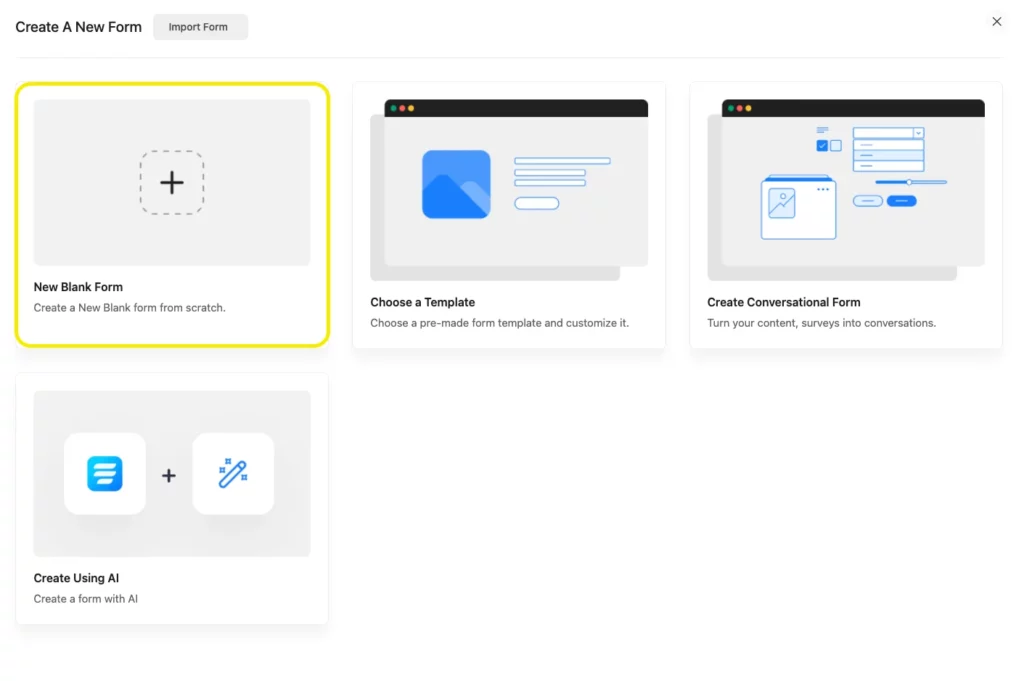
Step 3: Create a lead capture form with Fluent Forms
Next, create a form to capture leads. You can start from scratch or choose from the amazing form templates.
Edit your form as you like and Save Form when you’re done.
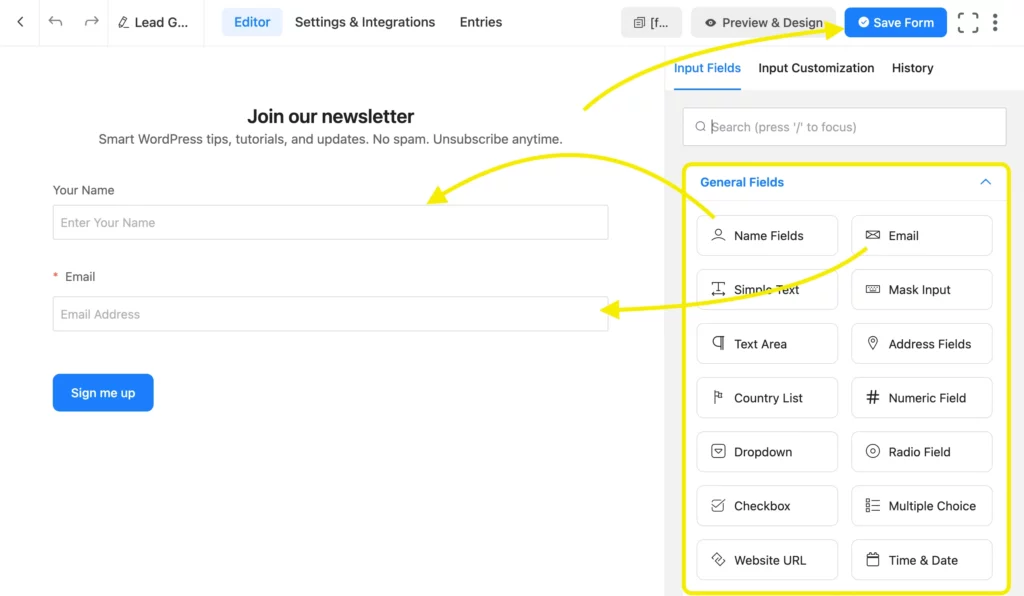
You can use a template or build one from scratch. Add fields like:
- Name
- Company
- Phone
- Custom notes or tags
We created a simple Newsletter Form for demonstration.
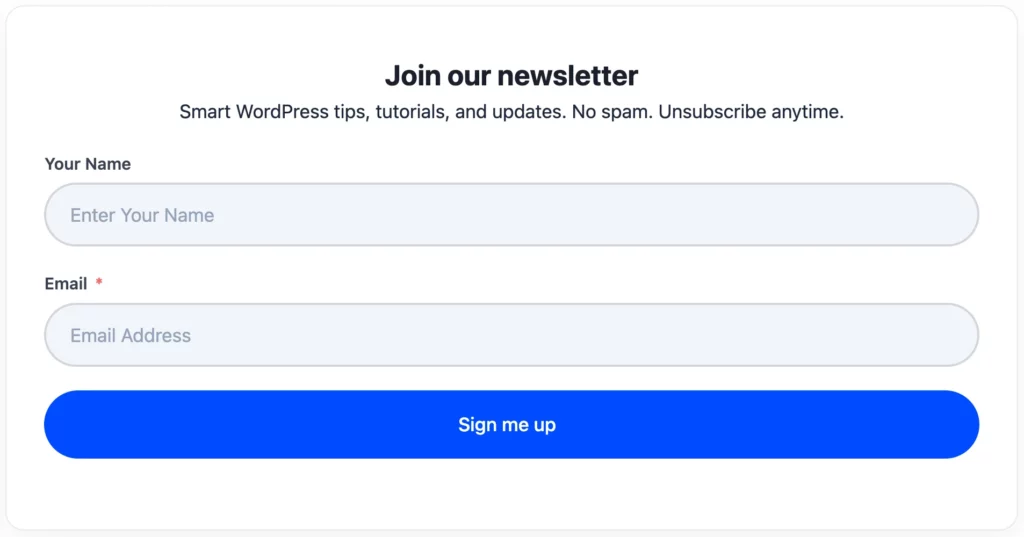
Style your form using the advanced form styler or with custom CSS if needed.
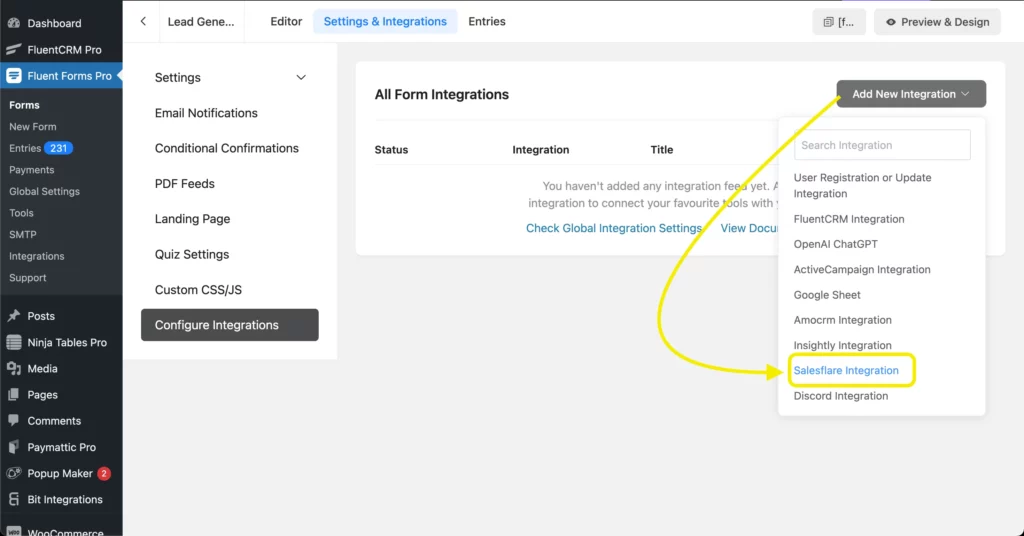
Step 4: Set up the Salesflare feed
Now let’s connect your form to Salesflare.
Go to the form’s Settings & Integrations.
Click Configure Integrations → Add New Integration.
Choose Salesflare from the list.
Map the form fields (e.g., Name → Full Name, Email → Email).
Optional: Add tags, assign team members, or set custom properties.
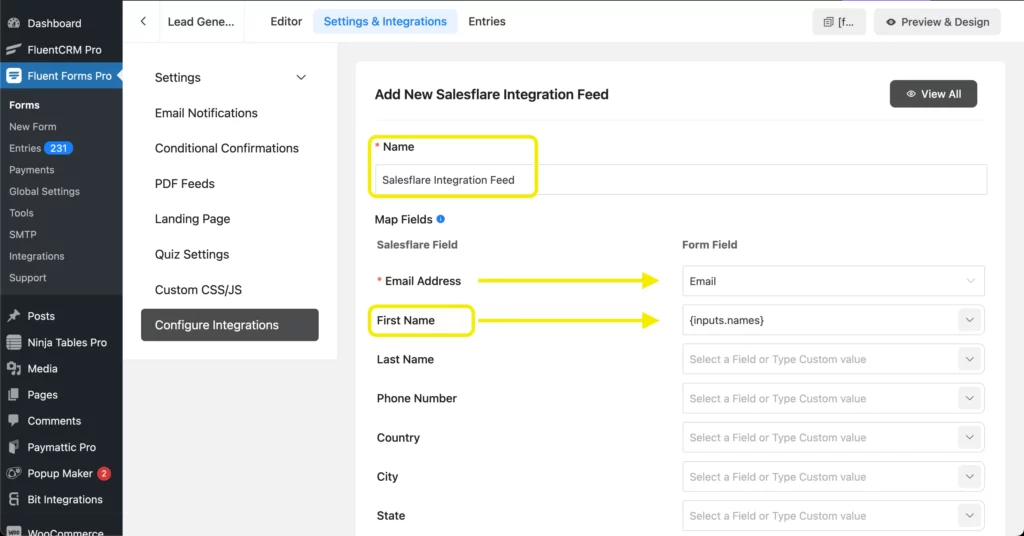
Use conditional logic to send leads based on user choices.
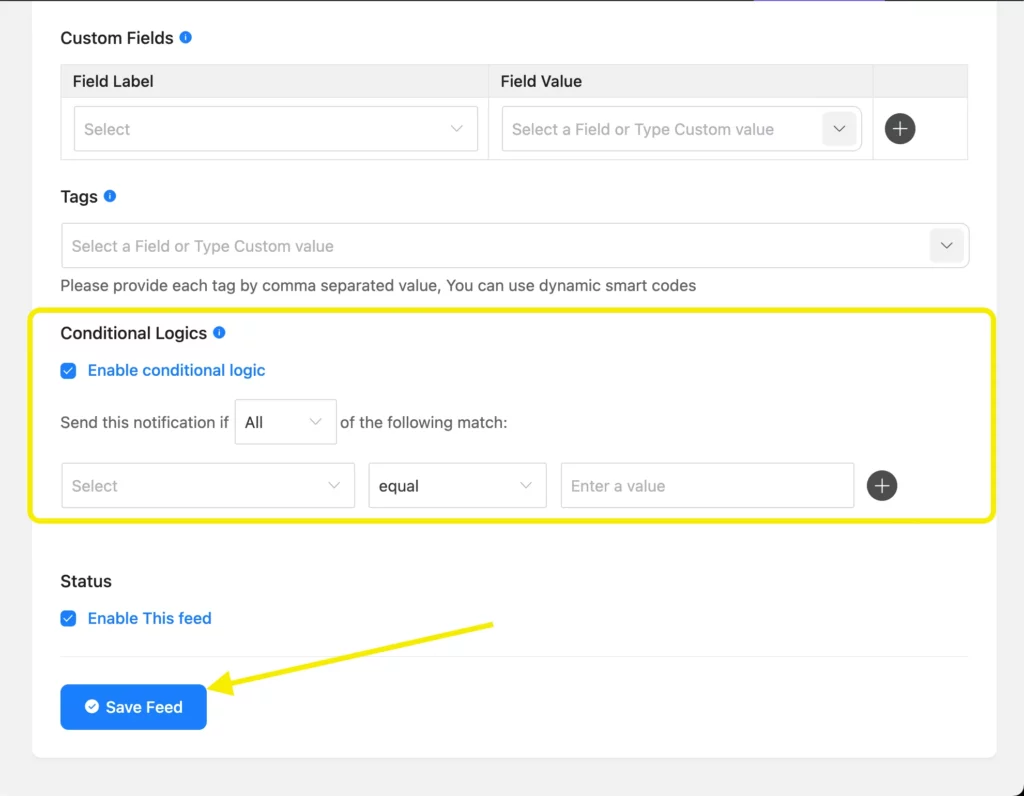
Once done, click Save Feed.
Step 5: Test and go live
Submit a test entry from the frontend or preview screen.
Head to your Salesflare dashboard and check if the new contact appears with all mapped fields.
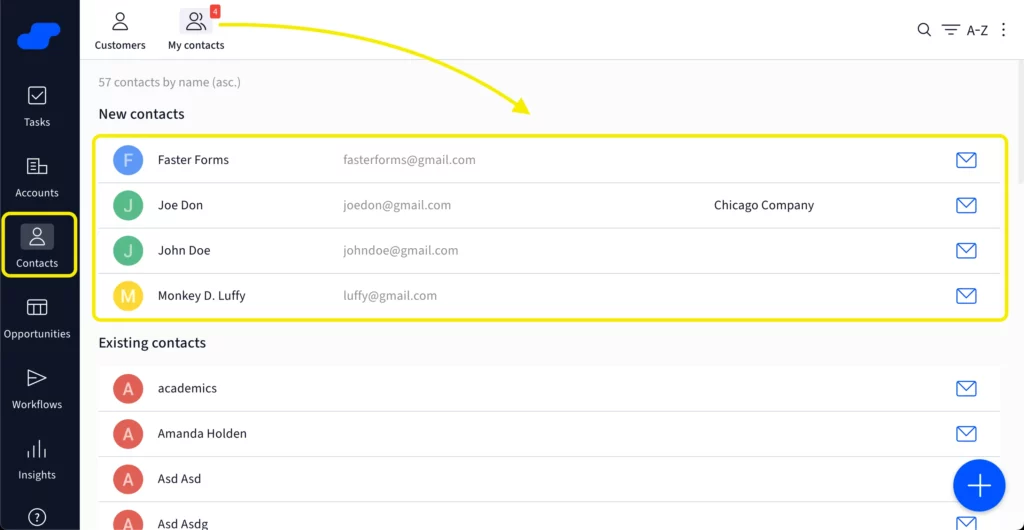
Once you confirm it’s working, you’re ready to launch your form.
Make the most of your Salesflare integration
Here are a few pro tips to get more value from your setup:
- Use conditional logic to segment leads by interest, region, or budget.
- Apply tags for better filtering inside Salesflare.
- Add UTM parameters to your forms to track marketing performance.
- Set up automated email flows from Salesflare once a lead is added.
- Keep notifications on for high-value submissions.
Start closing faster
Connecting Salesflare to Fluent Forms helps you capture leads and sync them with your CRM instantly – no more missed follow-ups or manual entries.
This integration not only saves time but gives your sales team the visibility and tools they need to act quickly. Need more automation tips? Learn how to build email sequences with Fluent Forms and Sendfox. Got questions? Drop a comment below or reach out – we’re always here to help.

This is Sumit. He’s a physics major who’s trying to understand both the physical as well as the WordPress worlds. Whenever he’s not busy, plays fifa or spends time with his family.


Leave a Reply