How to Show Real-time Poll/Survey Results
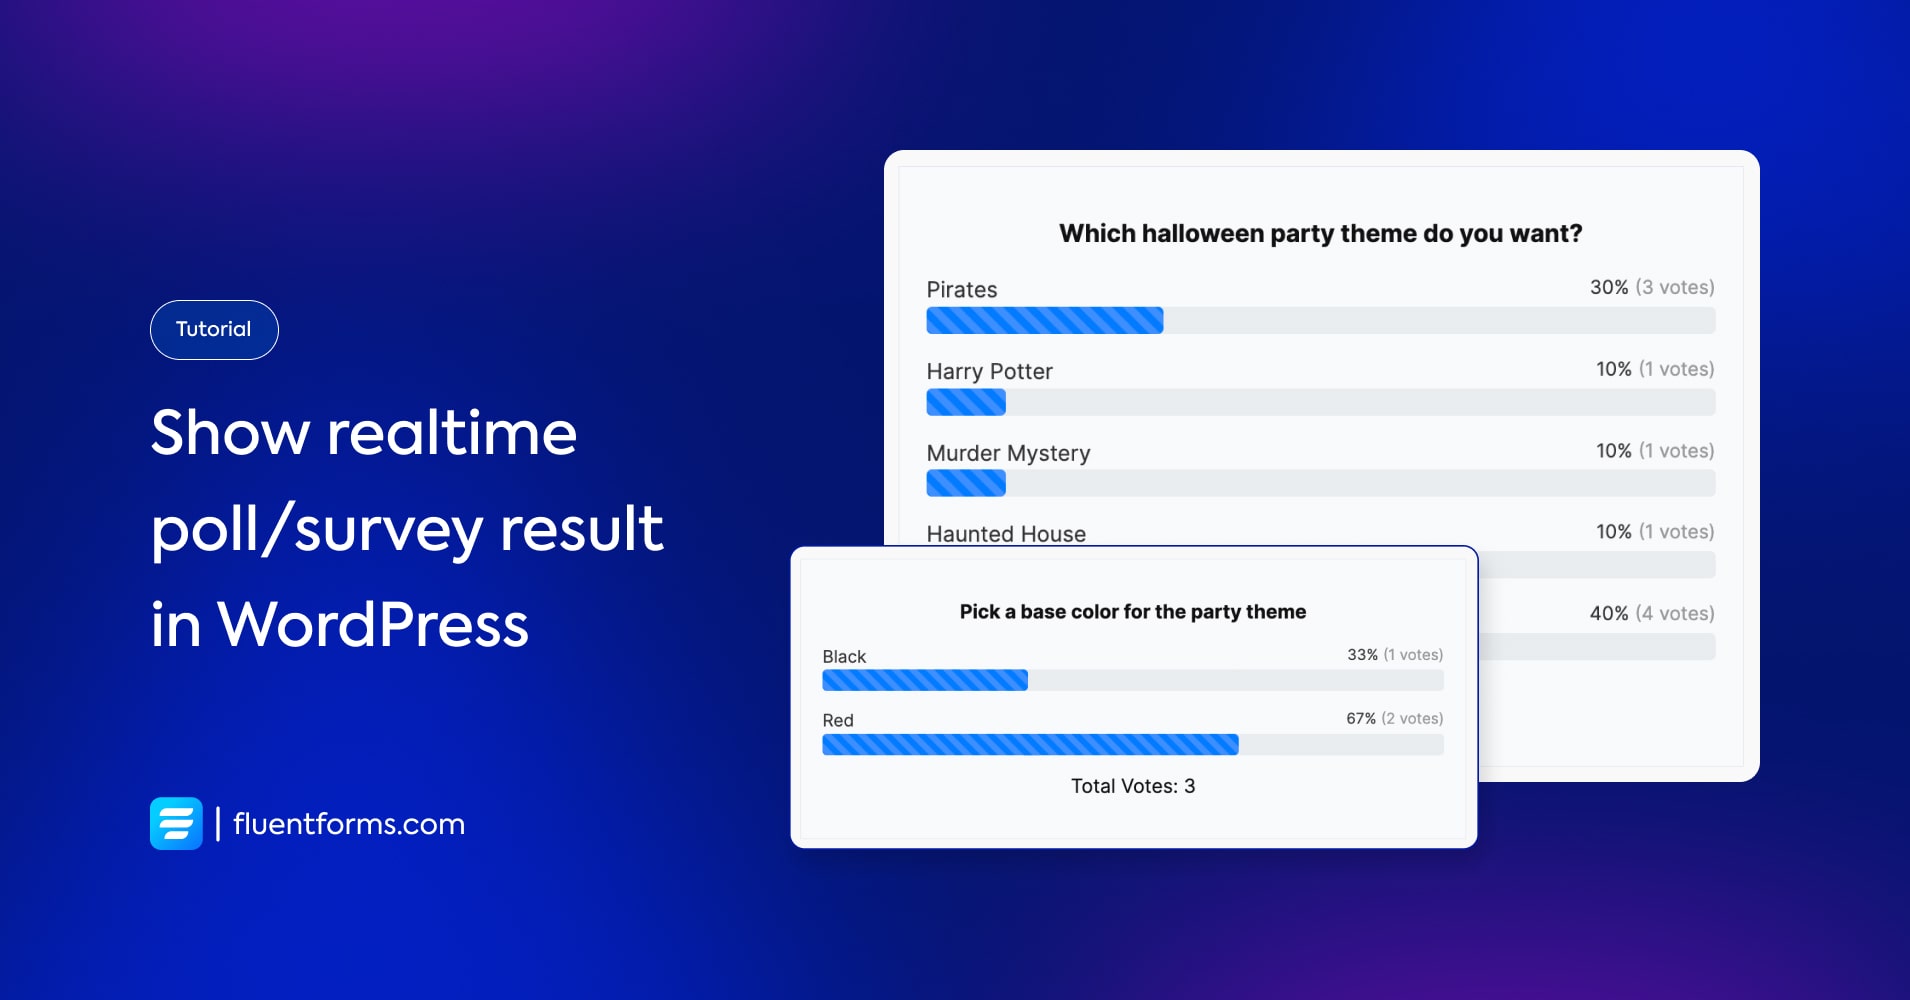
Want some exciting activities on your website? We have the perfect solution for you. Create relevant surveys and polls and display the results live in your WordPress website.
Use case
You can show the survey results both on the same page as the form submission or on a different landing page on your site.
How to show real-time poll/survey results
Let’s find out how to show real-time poll/survey results using Fluent Forms, the best contact form plugin for WordPress.
Step 1:
Create a form with the necessary fields. Add one or more fields from Radio Fields, Checkboxes, Multiple Choice, Dropdown Fields, and Range Slider Fields to collect the votes.
For example, in this Halloween Survey Form, we’ve added radio and checkbox fields along with other input fields.

Step 2:
After creating the form, save it. Then go to the Settings & Integrations of the form. From there select Survey Result.
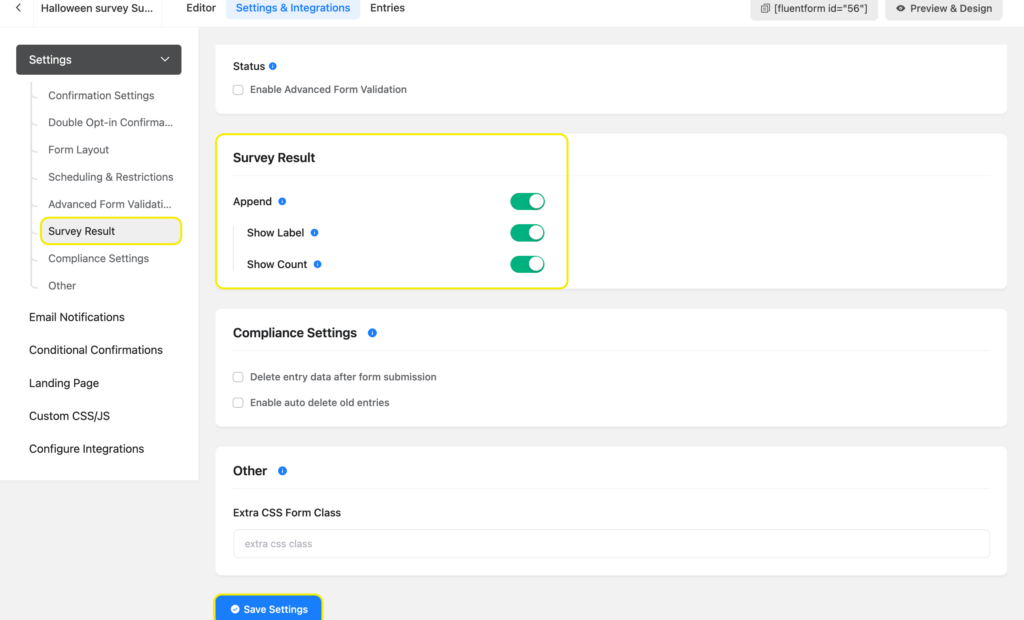
If you want to display the survey results, turn on Append from the survey result settings. Turn on Show Label and Show Count if you want to show both. Now Save Settings and you’re done.
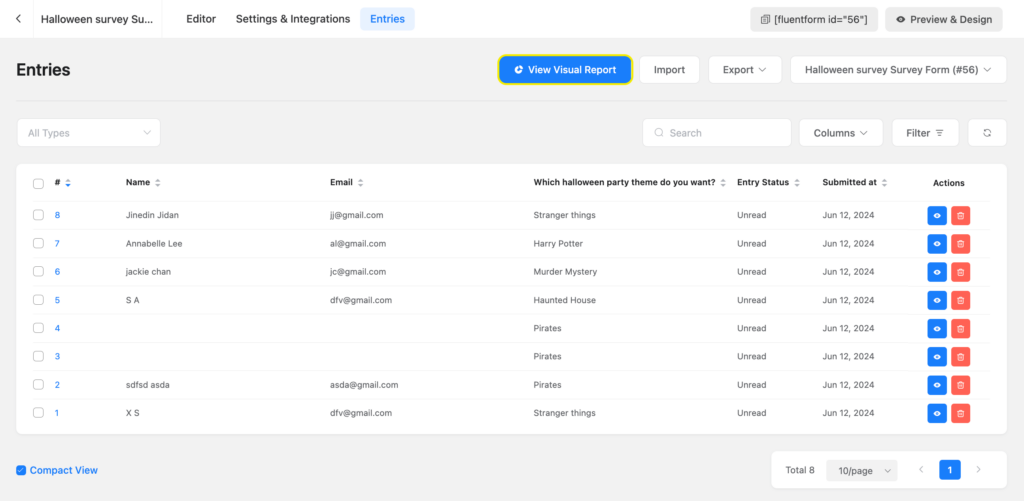
If you want to see the entries, go to Entries. If you want to see the visual reports, click on View Visual Report.
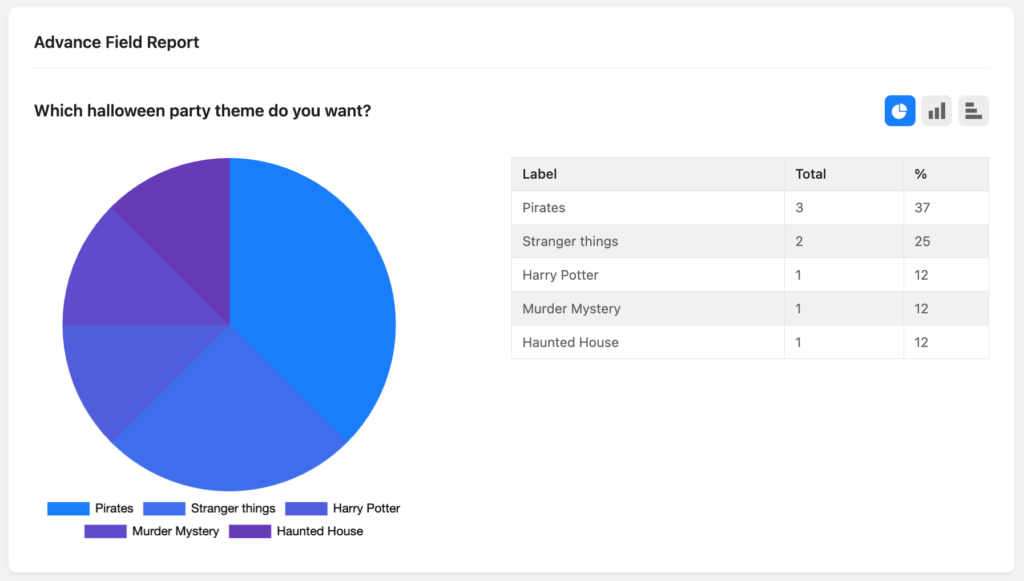
Below is how the visual report is in the pie chart. If you want to view the report in a graph chart, click on the horizontal/vertical graph icons in the upper right corner of the tab.
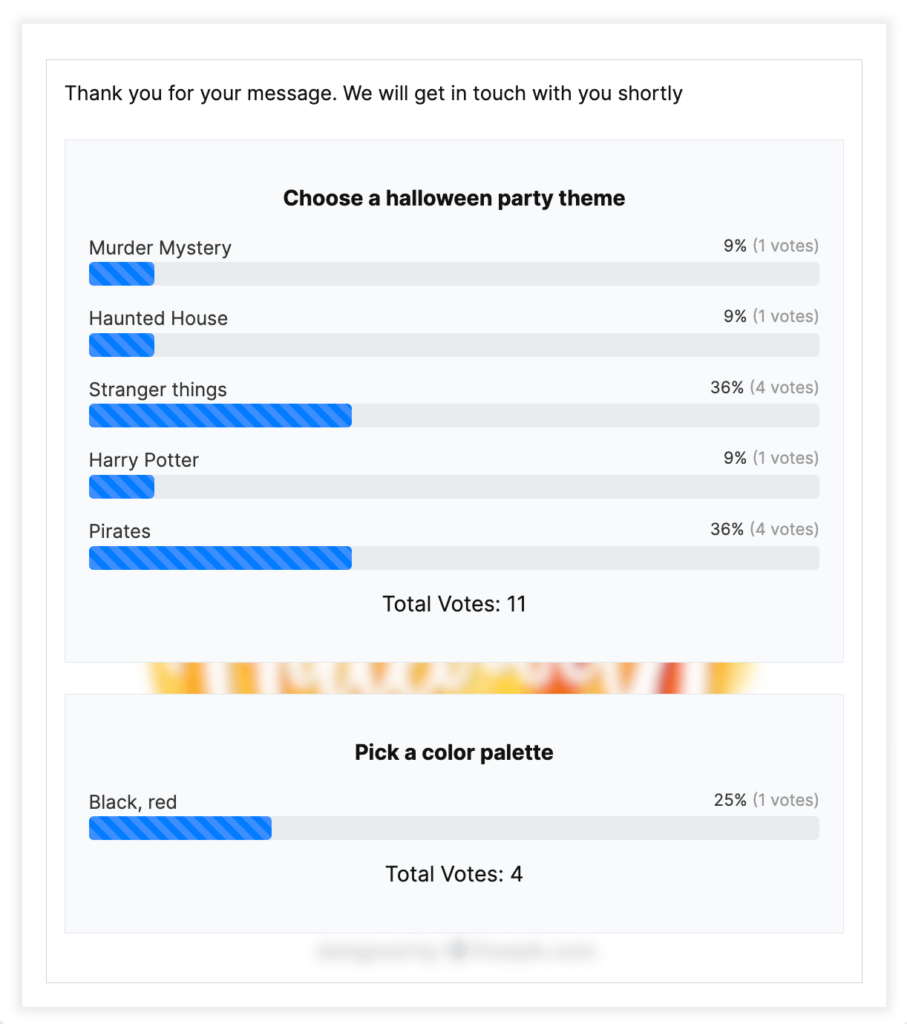
Since you’re displaying the survey results, this is what the confirmation message with the survey results looks like when someone submits the form.
Fill out the following form to see the amazing result for yourself.
Displaying survey results on a page
Step 1:
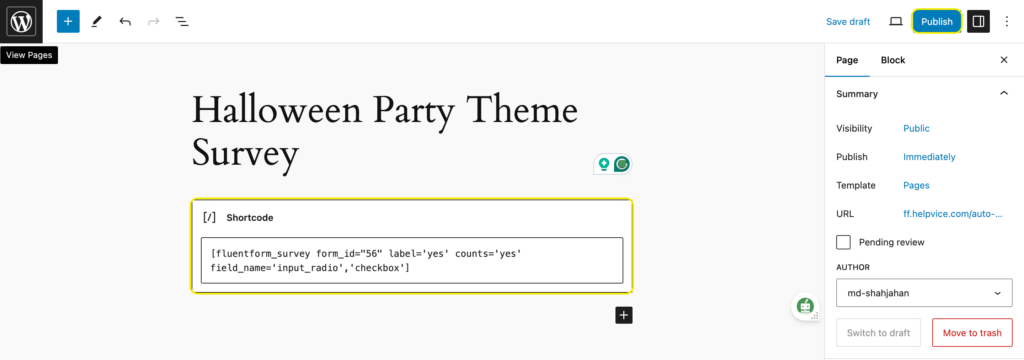
Add a new page from the left-hand panel of your WordPress dashboard. Name the page. Inside the page, add a Shortcode block.
Step 2:
Type the following shortcode in the shortcode block, replace [form_id] with the appropriate form ID, and the status of the ‘label’ and ‘counts’ as yes/no. Put the field names one after another using a comma.
” label=’yes’ counts=’yes’ field_name=’input_radio’,’checkbox’]
Step 3:
Publish the page.
This is how the survey results appear on your webpage.

Related feature
Creating a poll form in WordPress
Having a poll form on your website helps you create polls and collect votes through it without ever having to leave your website.

Sarika writes for Fluent Forms and loves to offer insights into small businesses. She’s curious and enjoys discussing ideas, interests, and perspectives. In her free time, she’s either marvelling at architectural beauties or trying different cuisines.


Leave a Reply