How to Create a Sponsorship Form in WordPress: A Step-by-Step Guide

If you’re still managing sponsorship requests through emails, or worse, a basic “contact us” form, you’re not just creating extra work for yourself but also making a poor first impression.
Sponsors are busy professionals. They want a clear, streamlined, and formal process. Without it, your event, team, or nonprofit might seem disorganized and make them question whether it’s worth investing.
That’s why you need to replace those back-and-forth sponsorship emails with a single, elegant solution: a dedicated sponsorship form. It’s professional, and it automates the entire sponsorship application process.
In this guide, I’ll walk you through the steps to create a professional and engaging sponsorship form in WordPress. Whether you’re hosting a local charity dinner or a global tech conference, this tutorial will help you secure sponsors with ease.
Let’s dive right in.
TL;DR
- Install the Fluent Forms plugin in WordPress and enable its payment module.
- Connect a payment gateway like Stripe or PayPal.
- Create a new form & add fields to collect contact info, company name, a File Upload for the sponsor’s logo, and additional messages.
- Use the Payment Item field to create selectable sponsorship tiers with defined prices & benefits. For example, Gold – $5,000 (Includes a booth, logo on banner, stage mention).
- Add a payment method field to streamline payment acceptance, save the form, and embed it on your sponsorship page using its shortcode.
- Integrate the form with project management tools to automatically send form data to task list for efficient sponsorship tracking and follow‑up.
Why a dedicated sponsorship form is non-negotiable
Before we learn how to create a sponsorship form, let’s see why it’s a powerful business tool.
Well, besides collecting valuable sponsorship information, a well-designed sponsorship form builds trust, streamlines communication, and makes sponsors feel valued. Here’s how:
It establishes credibility: A well-designed sponsorship form on a dedicated page shows you are serious and organized. It tells potential sponsors that you value their time and partnership.
It boosts engagement: An intuitive and engaging sponsorship form enhances user experience with its interactive elements, like dropdowns, checkboxes, etc.
It drives conversions: For a potential sponsor, filling out a clear, guided form is infinitely easier than drafting an email from scratch, leading to a high conversion rate.
It Streamlines Your Workflow: You can easily integrate your sponsorship form with project/data management platforms like Notion, Trello, Google Sheets, etc. This way, each submission automatically goes to its designated space on your sponsorship management board, making management easy for you. You can also manage them directly from your WordPress dashboard with a FluentBoards integration.
Take the WordCamp US sponsorship page, for example. Their form uses clear tier names like “Admin” and “Editor,” which resonate with the WordPress-enthusiast audience, and a scarcity model (only 2 spots left) to create urgency.
This approach not only attracts sponsors but also drives quick action. Let’s create a form that does the same for you.
How to create a high-converting sponsorship form in WordPress
Now the fun part starts. In this step, we get to create our comprehensive sponsorship form. However, to create the best sponsorship form, you’ll need the best form plugin, Fluent Forms, one of the most intuitive and powerful form builders.
If you don’t have the plugin, you can download it from the plugin repository, install it on your dashboard, and activate it.
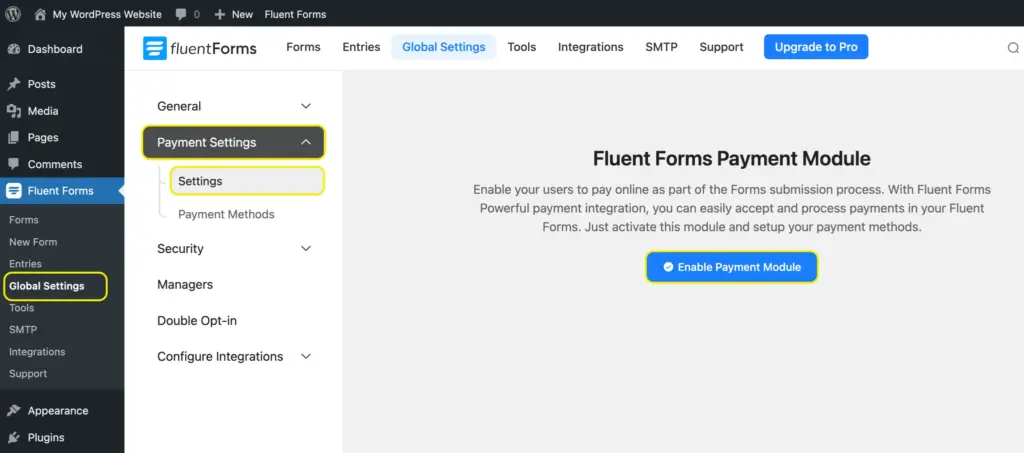
After that, we’ll need to Enable Payment Module from Global Settings, since we’ll accept the sponsored amount through our form.
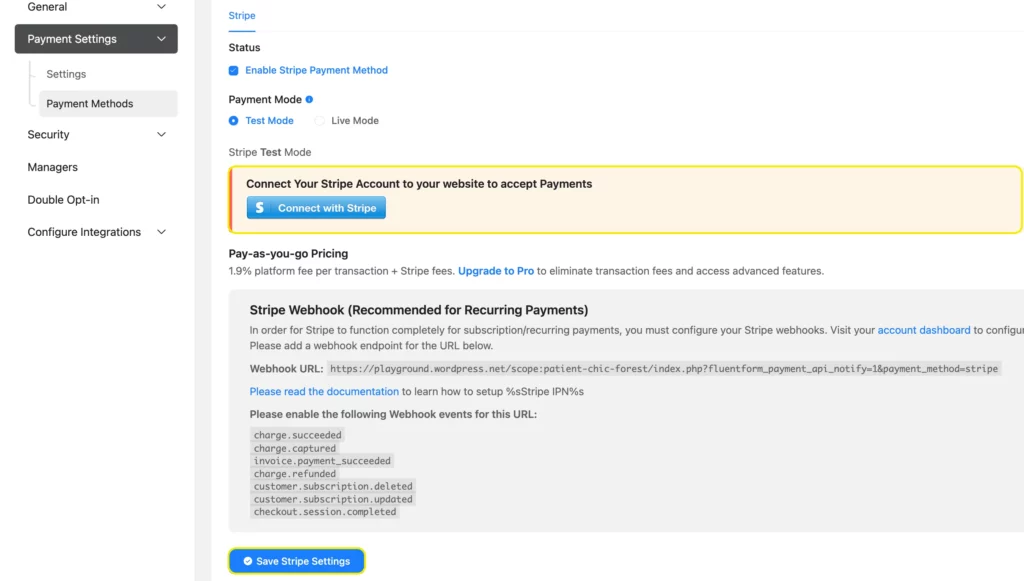
Next, you’ll need to configure the payment methods. Fluent Forms Pro allows you to accept payment via multiple secure payment gateways, including Stripe, Mollie, PayPal, Razorpay, Paddle, Paystack, and Square, free of charge. However, the plugin’s free version only allows integration with Stripe for a 1.9% charge per transaction.
Once you’re done, navigate to New Form from Fluent Forms and click “New Blank Form” from the pop-up, since we’ll learn how to create a sponsorship form from scratch.

Add the basic contact fields
Drag and drop the necessary fields from the right-hand panel. You’ll need:
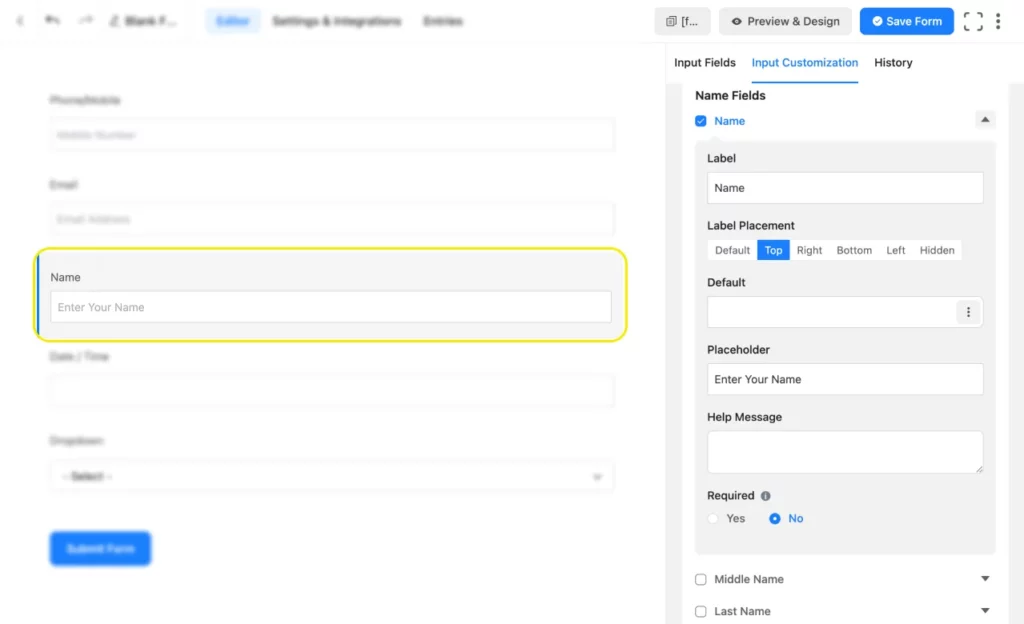
The name fields: Name fields are already configured for first, middle, and last names. If you want the full name in a single field, click the name fields to customize them. Change the label and placeholder text of the first name to optimize it for the full name. Uncheck the box beside last name. This way, there will be only one name field.
Email: Next, add the email field. You can validate the email field and mark it as required from the input customization.
A Phone/Mobile field: Next, take a Phone/Mobile field to collect sponsors’ phone numbers as backup contact information.
A Simple Text field: Take a simple text field and click on it to edit. Change the Element Label to “Company/Organization Name” and make it a required field.
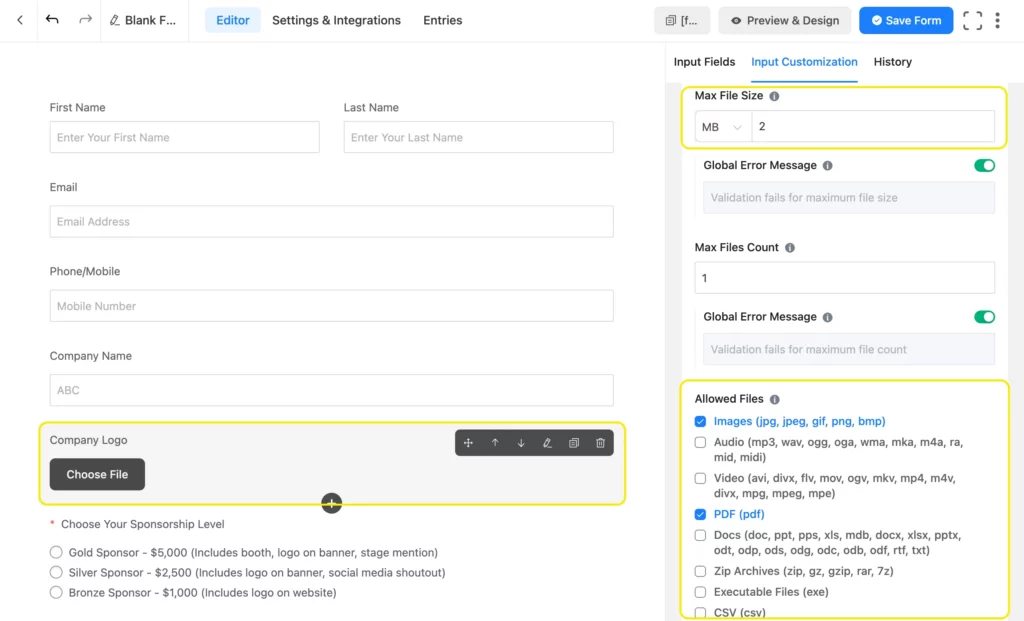
File Upload: Next, add a File Upload/Image Upload field so the sponsor can upload their company logo. Edit the Element Label text to “Company Logo.” In the field settings, you can restrict the Allowed File Types (e.g., png, jpg, svg) and set a Maximum File Size to keep things manageable.
After that, let’s move on to the sponsorship form-specific fields of our form.
Add sponsorship details to your form
This is where we build the core of the form with sponsorship levels and corresponding benefits. Let’s see how.
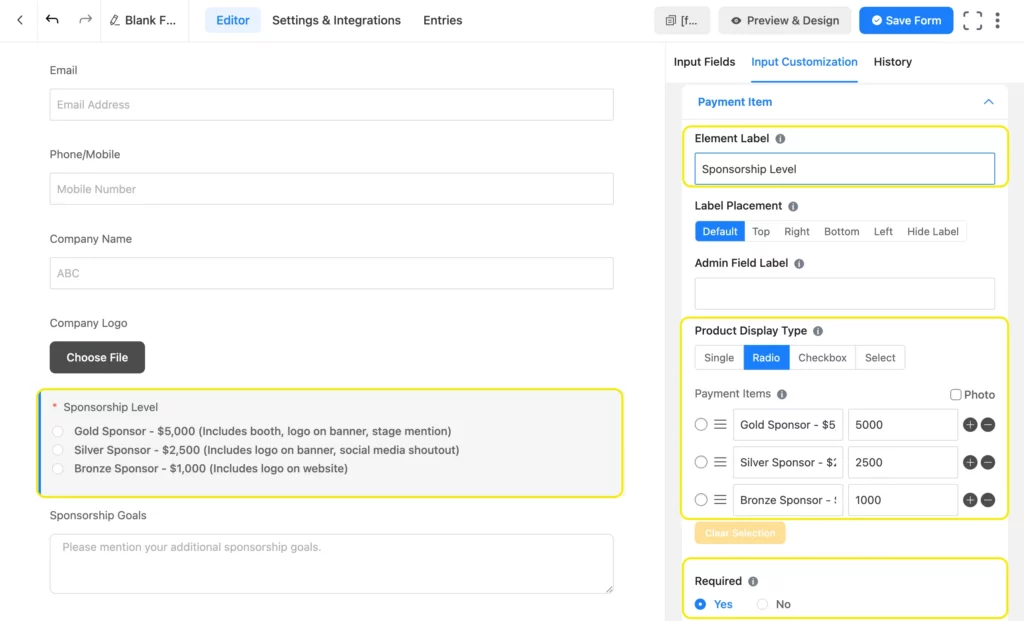
Payment Item: Drag a Payment Item field to your form. Click to edit it. Change the Element Label to “Choose Your Sponsorship Level/Sponsorship Level.” Change the Product Display Type to Radio. In the Options area, define your tiers. Add the price and key benefits to help sponsors decide. For example:
- Gold Sponsor – $5,000 (Includes booth, logo on banner, stage mention)
- Silver Sponsor – $2,500 (Includes logo on banner and social media shoutout)
- Bronze Sponsor – $1,000 (Includes logo on website)
Make this field Required, since we don’t want sponsors submitting their form without selecting a sponsorship level.
Payment Summary: You can include a Payment Summary field. It’ll show the sponsors the total payment amount once they select a sponsorship level. However, you can skip this field for a simple sponsorship form to keep it clutter-free.
Payment Method: Next, add one or more payment methods to your sponsorship form. However, adding more payment methods makes your chances of receiving a sponsorship higher since that makes paying convenient for a wider range of sponsors.
Text Area: Lastly, add a Text Area field so sponsors can add any additional marketing goals they might want to achieve through the partnership.
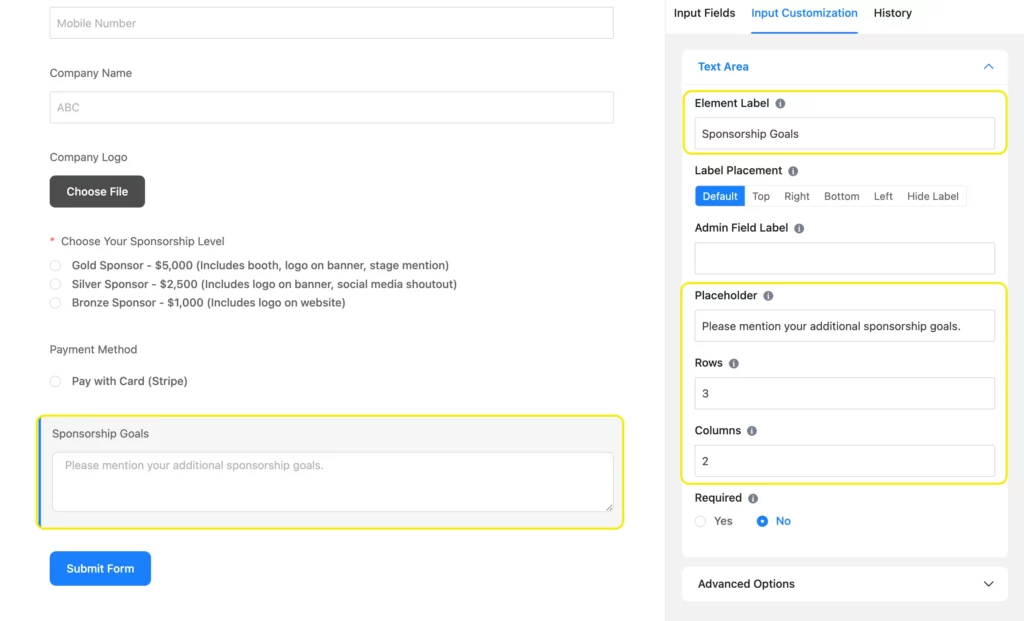
Your sponsorship form is now complete. Click Save Form in the upper right corner to save your form. Here’s the preview.

You can customize the thank you message, set up email notifications, etc., from the Settings & Integrations tab. Finally, copy the form’s shortcode, paste it in its designated space on your sponsorship page, and wait for sponsors to come to you.
Build Smarter Forms for Free

Elevate your brand and your revenue
A sponsorship form is a straightforward way to attract sponsors and fund your next big project. Whether you’re a nonprofit, small business, or event organizer, this guide equips you to build a form that resonates with your audience.
By focusing on user-centric design and clear CTAs, you can create a sponsorship form that not only converts but also strengthens your brand’s identity. It transforms a scattered, unprofessional process into a streamlined system that impresses potential partners and saves you countless hours.
So, are you ready to start building partnerships the right way? Create a great sponsorship form for your site now, and let us know how it goes!

Sarika writes for Fluent Forms and loves to offer insights into small businesses. She’s curious and enjoys discussing ideas, interests, and perspectives. In her free time, she’s either marvelling at architectural beauties or trying different cuisines.


Leave a Reply