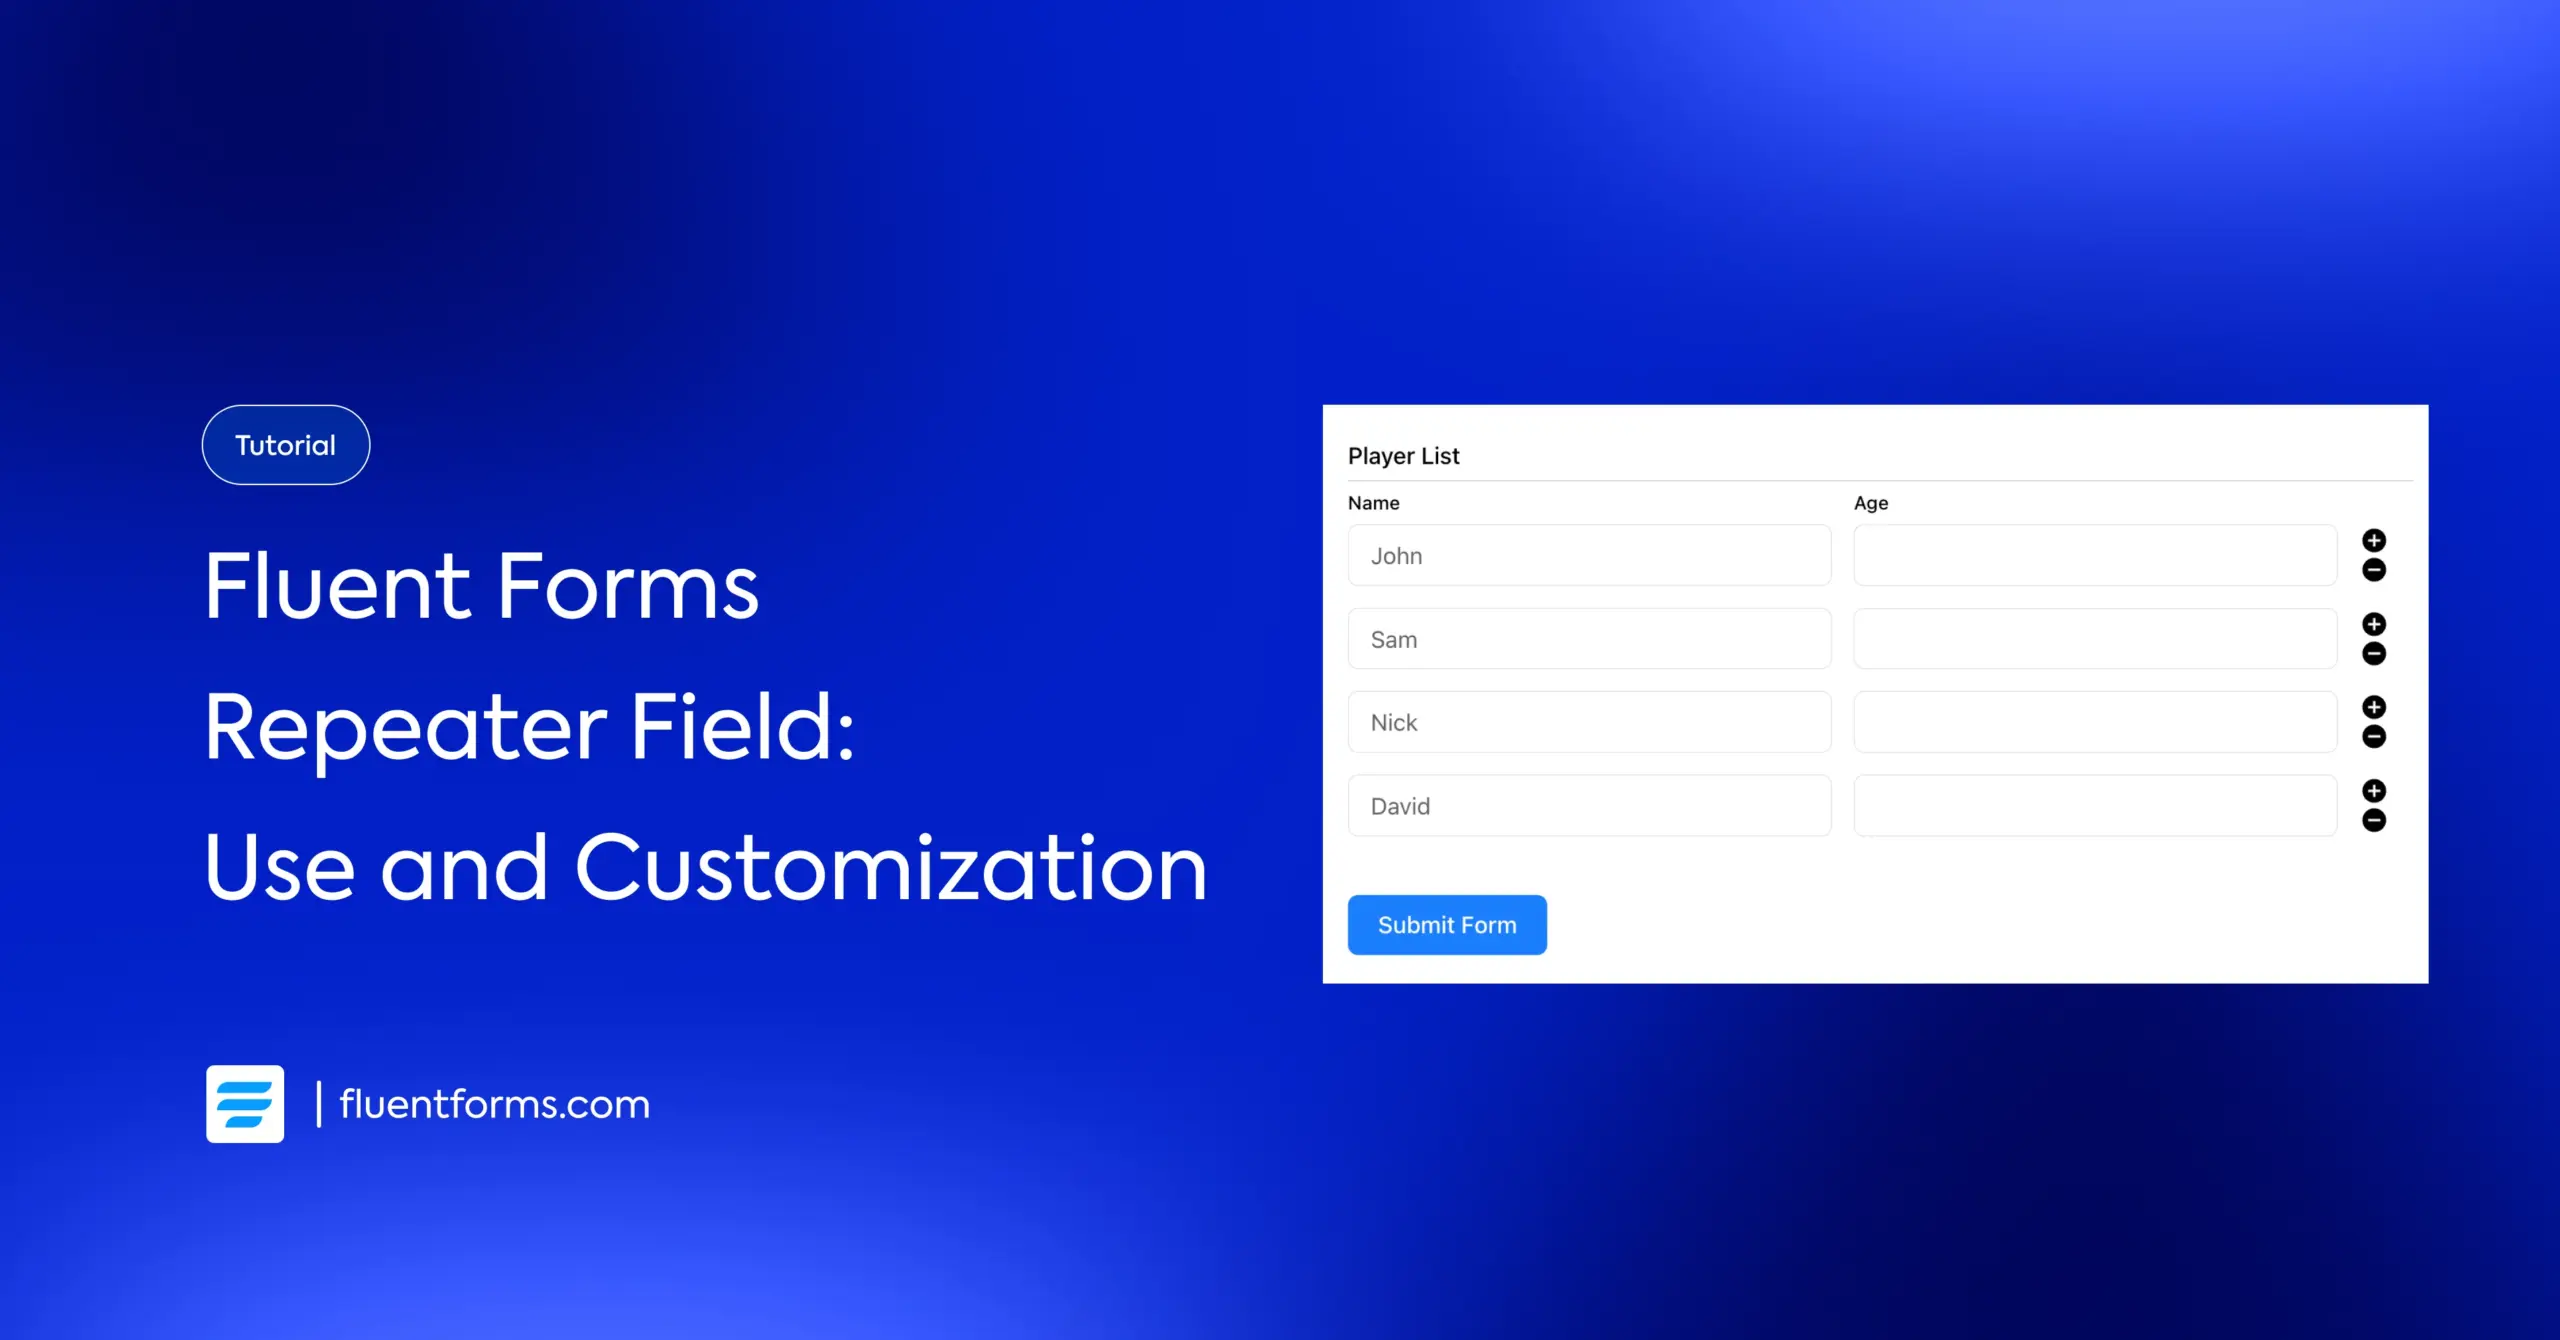
Fluent Forms Repeater Field: Output Data in Emails, PDFs, and Calculations
You’ve added a Repeater field to your form, maybe to collect multiple product line items, a list of team members, or a set of travel details. The form looks great. Users can add rows on the fly. It feels smooth.
Then a submission comes in. You open the email notification, and the repeater data is either missing, garbled, or shows up as a raw string that makes no sense outside a database.
Here’s the thing: this is not a bug. It’s a configuration step that most users skip. Once configured properly, the purpose will be served completely.
In this guide, I’ll walk you through exactly how to make the Fluent Forms Repeater field output data cleanly in email notifications, PDF exports, and calculations.
TL;DR
- The Repeat Input field lets users add multiple rows of structured data inside a single field: applicable for order forms, registrations, itineraries, and more.
- Repeater data is stored as structured rows, so a plain {field_name} shortcode won’t render it properly in emails or PDFs.
- In email notifications: use the repeater field’s smart code shortcode inside the email body, Fluent Forms renders it as a formatted table automatically.
- In PDFs: insert the same shortcode into your PDF Module template body.
- For calculations: use {repeat.repeater_field.N} to reference specific columns inside the repeater, and {repeat.repeater_field} in an external numeric field to sum everything into a total.
- When in doubt, add {all_data} to your email body first, it confirms every field (including repeater) is actually being captured.
Fluent Forms Repeater Field: How It Works and When to Use It
The Repeat Input field lets your users dynamically add as many rows as they need, all within a single field on your form. You define the column structure (text, number, dropdown, etc.), and users fill it in row by row.
Quick note before we start: The Repeat Input field is a Fluent Forms Pro feature. If you’re on the free plan and wondering why you can’t find it, upgrading to Pro is the first step.
It’s the perfect field when the label is the same but the inputs from the user’s end are different. Some practical examples:
- Order forms: users list multiple items with quantity and type
- Event registrations: collecting details for each attendee separately
- Travel booking forms: one row per destination
- Expense reports: every cost entered as a separate line
- Team registration: each team member’s name, role, and contact info
Setting it up takes three steps:
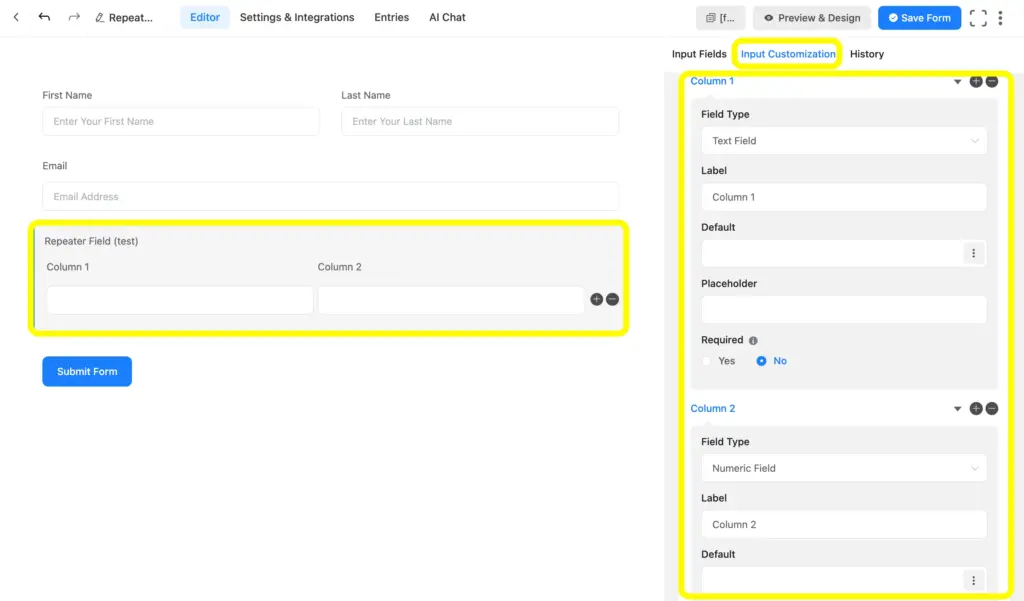
- In the form editor, go to Advanced Fields and drag the Repeat field into your form.
- Click the pencil icon on the field to open settings. Under Repeat Field Columns, add each column, pick the field type, write a label, add a placeholder if needed, and mark it required if applicable.
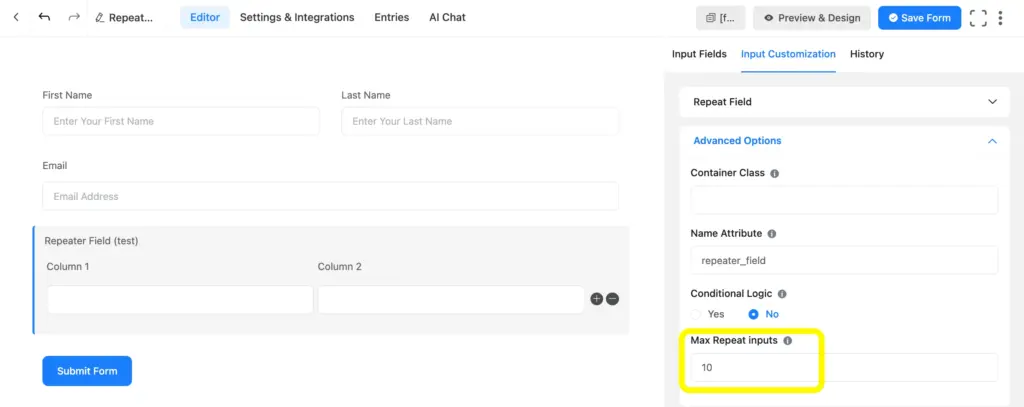
- Under Advanced Options, set a Max Repeat Inputs value to cap how many rows a user can add. Leave it blank to allow unlimited rows.
Heads up: Each column inside the repeater can be configured independently, its own field type, label, default value, and calculation settings.
Repeater Field Output Data in Emails
Getting your repeater data into email notifications requires only a few steps of config change once you know where to look.
Step 1: Go to your form’s email notification settings
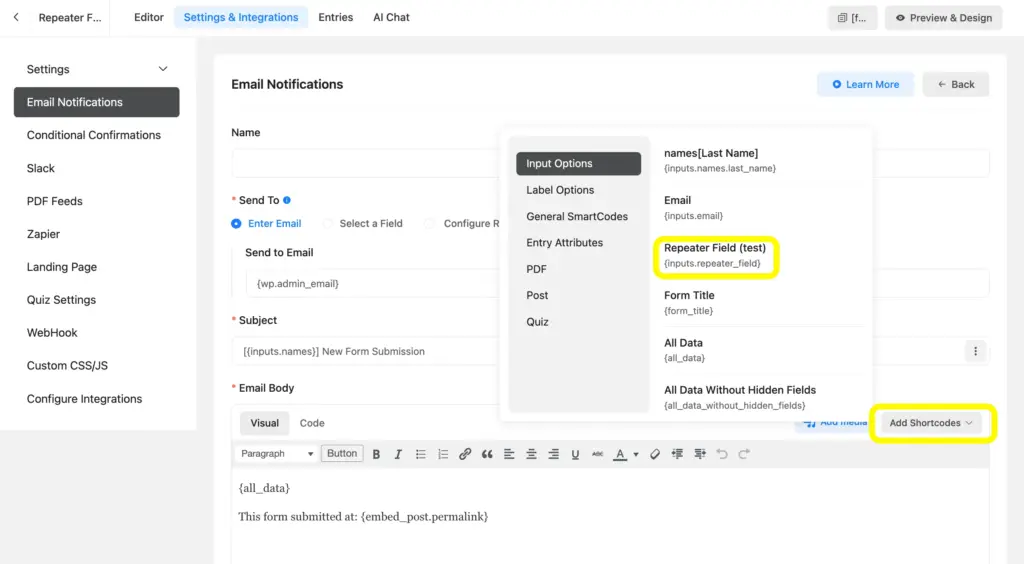
In the form editor, click Settings in the top navigation, then select Email Notifications. Open the notification you want to update: admin notification, user confirmation, or both.
Step 2: Insert the repeater field’s smart code
Inside the email body editor, click the Add Shortcodes dropdown. Find your repeater field by its label — it’ll appear in the list just like any other field. Click it to insert the shortcode, which will look something like {your_repeater_field_name}.
Alternatively, type the shortcode directly if you already know the field’s name attribute.
Step 3: Save and test
Save the notification, submit the form with two or three rows of test data, and check the email. Fluent Forms will render each row as a table row, with your column labels as headers. It takes care of the formatting automatically.
Calculation in Fluent Forms Repeater Field
This is where the Repeater field earns its place in complex forms. You can calculate a total for each row, assign numeric weights to dropdown selections, and sum everything up into a total, all without custom code.
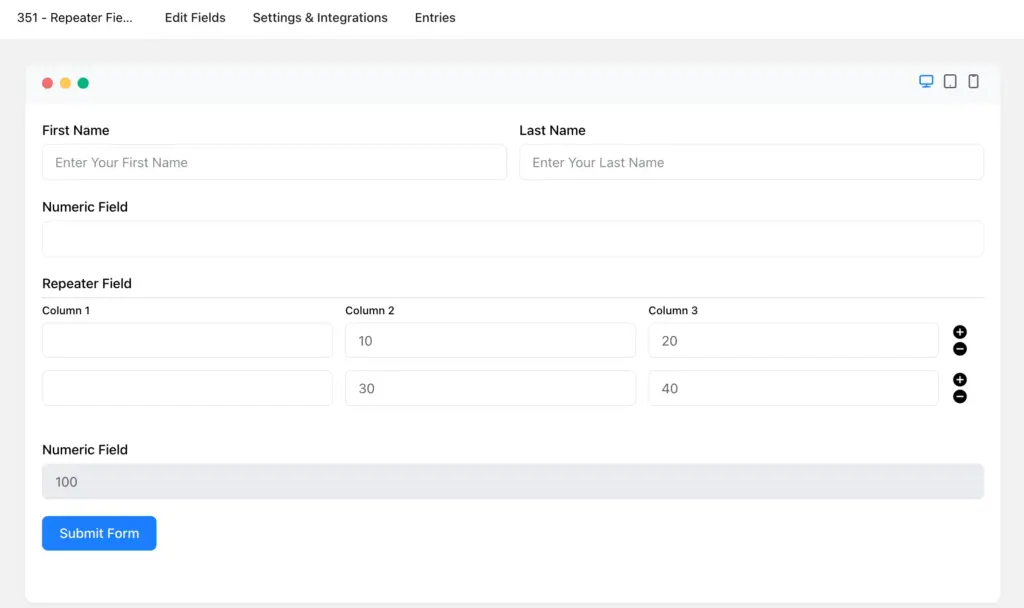
Step 1: Add the Repeat Field and your columns
Drag the Repeat Input field into your form. Add the column types your use case needs. A typical calculation setup for a line-item order form:
- Column 1: Text (item name)
- Column 2: Numeric Field
- Column 3: Numeric Field
And, another separate numeric field below the repeater field to make the calculation work.
Step 2: Enable Calculation on the separate numeric field
It’s so simple only triggering another numeric field’s calculation using the attributes of the repeater fields, like:
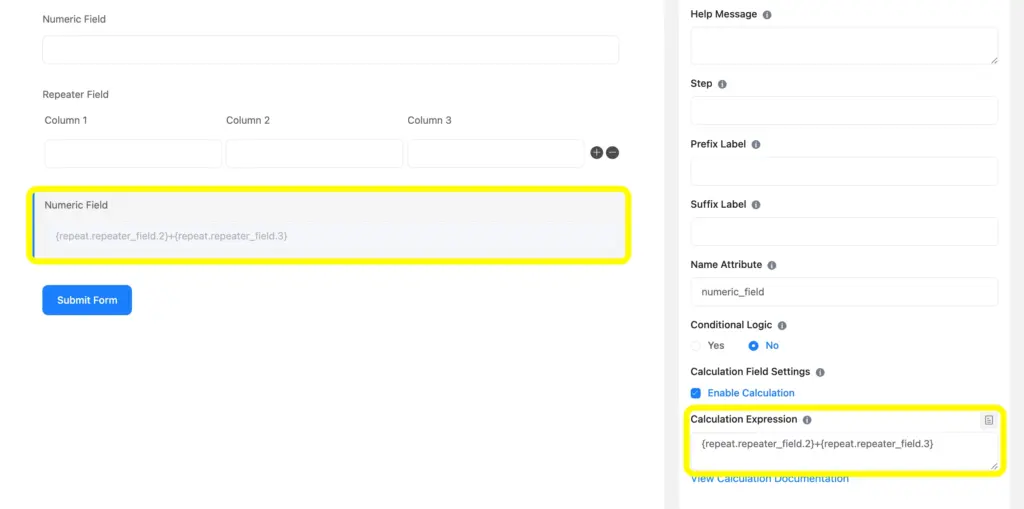
Step 3: Save, preview, and test
Once you put the calculation commands, now save it and check the preview inputting values in the column.
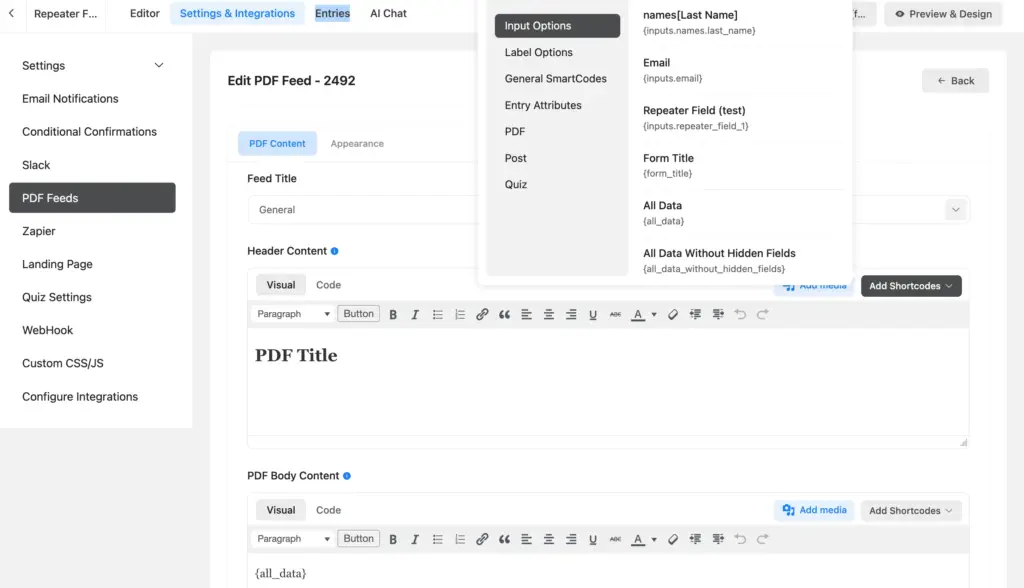
How the Repeater Field Appears in PDFs
The Fluent Forms PDF Module lets you export form submissions as downloadable PDFs. The repeater field works in PDFs the same way it does in emails: place the shortcode in the template, and Fluent Forms handles the formatting.
Steps to configure
- In the form editor, click Settings > PDF Feed
- Create a new PDF template or open an existing one.
- In the template body, insert your repeater field’s shortcode: the same one used in your email notification.
- Save the template.
- Submit the form with test data, open the entry from the form’s Entries view, and download the PDF to verify the repeater rows appear as a table.
For a walkthrough of the PDF generator, watch this tutorial:
Note: Adding a new repeater field to your form, or renaming an existing one, does not automatically update any PDF template that’s already set up. If you rename a field, go back into the PDF template and update the shortcode manually. Otherwise, the repeater data will be missing from future exports.
Related Features
Numeric Calculation
Fluent Forms Numeric Calculation lets you build formulas that pull from fields outside the repeater, apply rounding, and run conditional math, all without code. The Numeric Calculation feature ensures a better user experience in your form.
Conditional Email Notification
The Conditional Email Notification feature helps you send tailored responses to admins or users via email. This makes the email set it up to send the repeater data only to the team member responsible for that submission type.
Make the Most of the Repeater Field
The Fluent Forms Repeater field enhances the ease of filling out replicated fields, but it needs to be connected properly to deliver its full value. Set it up right, and you can transform how users interact with your forms. Visit to Fluent Forms Pro plans and ensure the latest, fastest, and smartest features for the ultimate form creation solution.
Enjoying this article?
We regularly publish actionable content on our blog. Subscribe to get them delivered straight to your inbox.
We won’t spam you. You can unsubscribe whenever you want.

Hi, this is Aparup. I am a Literature postgraduate, mixing my creative thoughts with my experience in the tech industry to surpass AI. Professionally, I am a content marketer seeking solutions to users’ problems regarding WordPress.


Leave a Reply