
How to Add Images to a WordPress Form

Your client submits a booking request. No photo attached. You follow up. They sent the wrong file. You follow up again.
That back-and-forth disappears the moment your form handles images properly. With Fluent Forms, you have two distinct ways to work with images: displaying them inside the form as selectable choices, and collecting them from users as uploads. This guide walks through both, from the free File Upload field to cloud storage routing for high-volume sites.
TL;DR
- Fluent Forms lets you display images as selectable choices inside radio button, checkbox, and dropdown fields using HTML image tags in field labels
- The File Upload field (Pro) accepts image files alongside any other file type; you control allowed formats and size limits
- The Image Upload field (Pro) is built specifically for photo submissions, with a thumbnail preview after upload
- Conditional logic can show or hide image upload fields based on earlier answers, so users never see fields that don’t apply to them
- The Cloud Storage Manager add-on by FluentWiz automatically routes uploaded files to Google Drive, Dropbox, Amazon S3, or Cloudflare R2 on form submission
Why You Might Need Images in Your WordPress Forms
Images in forms serve two completely different purposes, and mixing them up leads to the wrong solution.
The first is display: showing images inside the form to help users pick the right option. Think product photos next to purchase choices, or style examples next to a service selection.
The second is collection: receiving image files from users as part of their submission. A portfolio upload, a reference photo for a custom order, a headshot for a member profile.
Fluent Forms handles both natively. The display approach works through HTML in field labels, with no add-on required. The collection approach uses the dedicated File Upload and Image Upload fields. Both are covered below.
How to Display Images as Selectable Form Field Choices
To show images as choices inside a Fluent Forms field, you add a Radio Button, Checkbox, or Dropdown field, edit each option’s label to include an HTML image tag, and the image renders inline next to that option. No plugin needed beyond Fluent Forms itself.
Here’s the process, step-by-step:
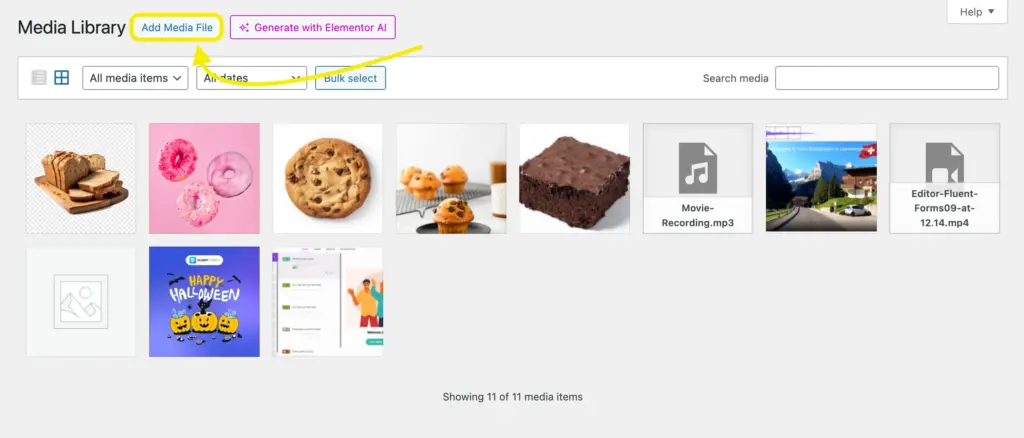
Step 1: Upload your images to WordPress
First you need to upload the images on WordPress. You can skip this step if you want, but this is the standard procedure we follow. Go to your WordPress dashboard and click on Add Media File.
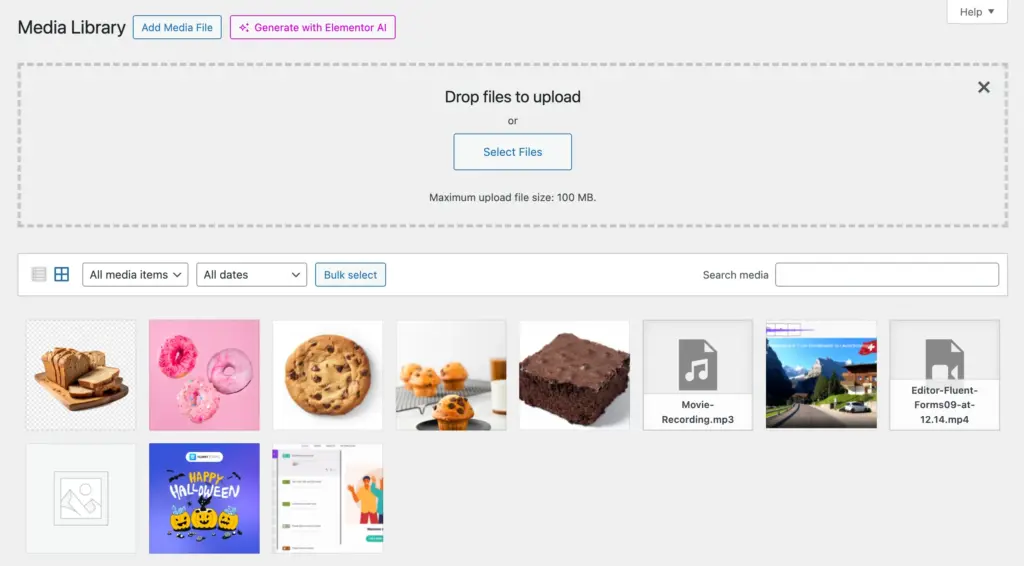
Drop the image files you want to upload here.
Step 2: Use/Create a form and select the images
Create a new form or use existing ones, in the Fluent Forms form builder. You can use Radio Field in this case.
In the Radio Field, there’s a checkbox named Photo, selecting which you can show images as options.
Click on the Upload icons and choose the images you want to show.

Use relevant images that correctly represent the options.

Save and preview the form.

Formatting tip: Pre-size your images to the same dimensions before uploading. Consistent image sizes keep choices aligned without any CSS work. If you need choices displayed side by side, the multi-column layout setting (free) handles that without custom code.
When this approach makes sense: product selection forms, style preference surveys, booking type choices, personality quiz visuals, any situation where the user needs to see options to choose between them.
How to Add Decorative or Instructional Images to a Form
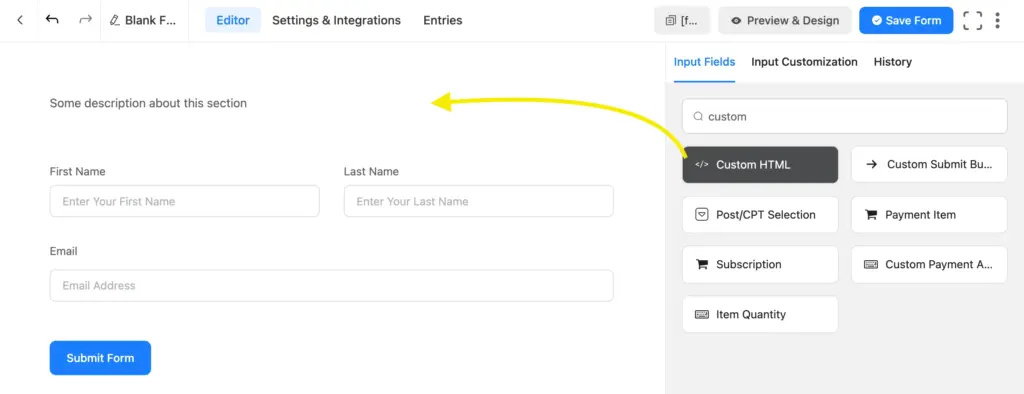
To place a standalone image inside a form (one that isn’t a selectable option), use the Custom HTML field.
This is useful for showing a product photo above a payment field, displaying an instruction diagram above a complex question, or including your logo inside the form itself.
Step 1: In the Fluent Forms builder, drag a Custom HTML field to the position where you want the image.
Step 2: Click the field to customize it and add media here:
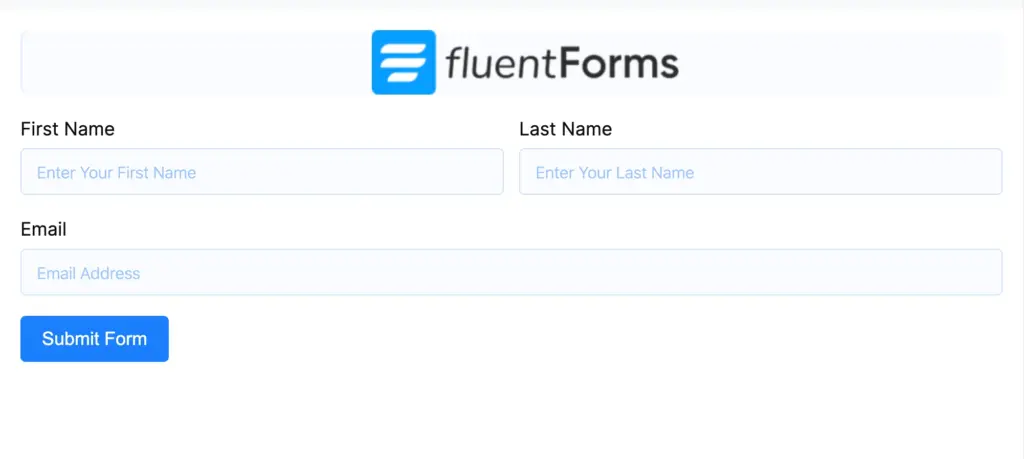
Step 3: Save the form and preview it on the frontend.
The Custom HTML field also accepts iframes, videos, and other embeds if you need more than static images.
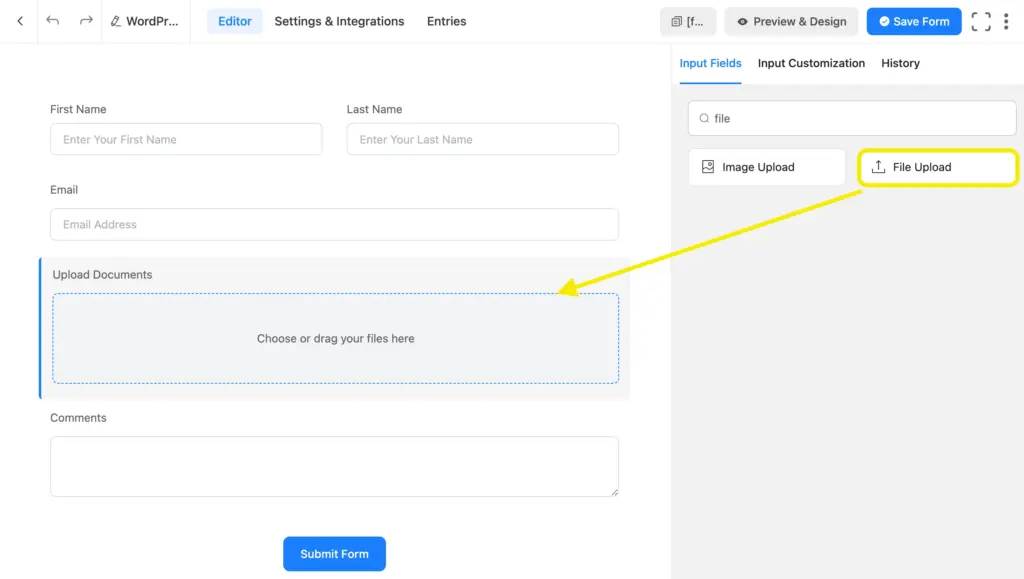
How to Collect Image Uploads from Form Users (File Upload Field, Pro)
The File Upload field lets users attach files to a form submission. It accepts images, documents, PDFs, and any other file type you allow. It’s included in the free version of Fluent Forms.
Adding the field:
In the form builder, find File Upload under Standard Fields and drag it onto your form.
Key settings to configure:
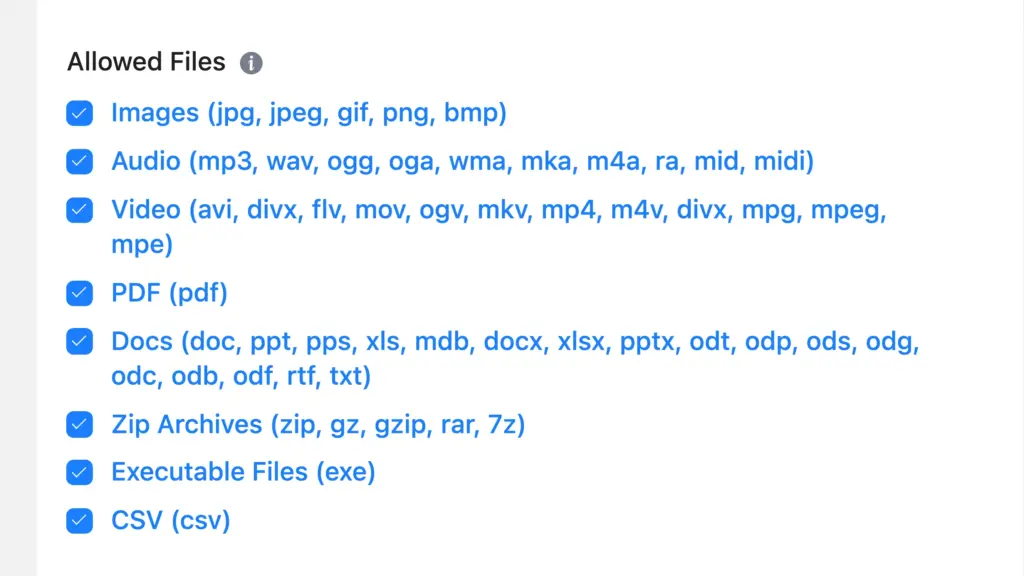
- Allowed file types: Enter the extensions you’ll accept (jpg, jpeg, png, gif, webp, etc.). Leave others out to block them automatically.
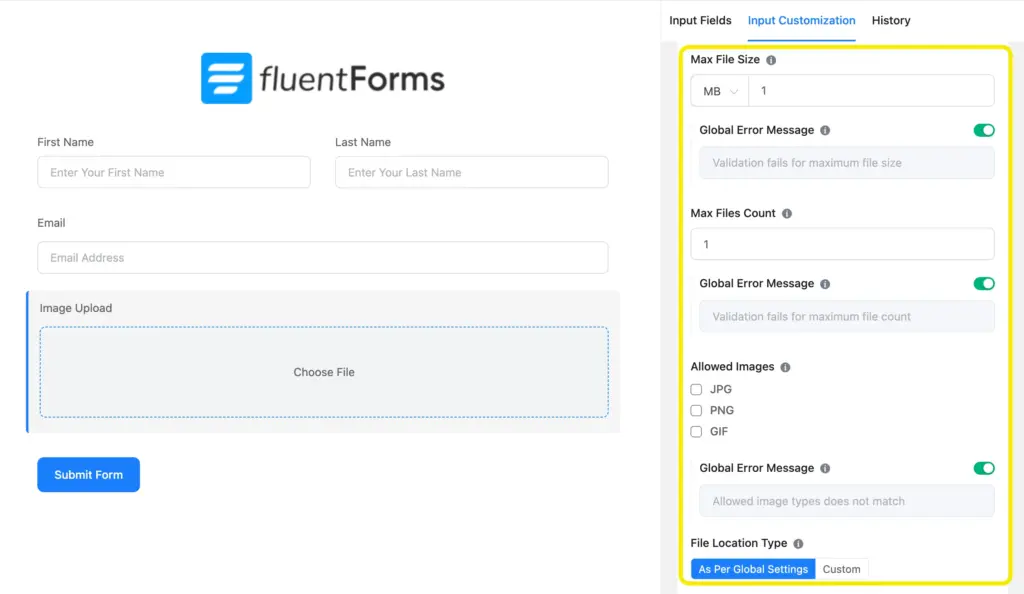
- Max file size: Set a limit in MB. This prevents users from submitting files that would slow your server.
- Max number of files: Decide whether users can submit one image or several.
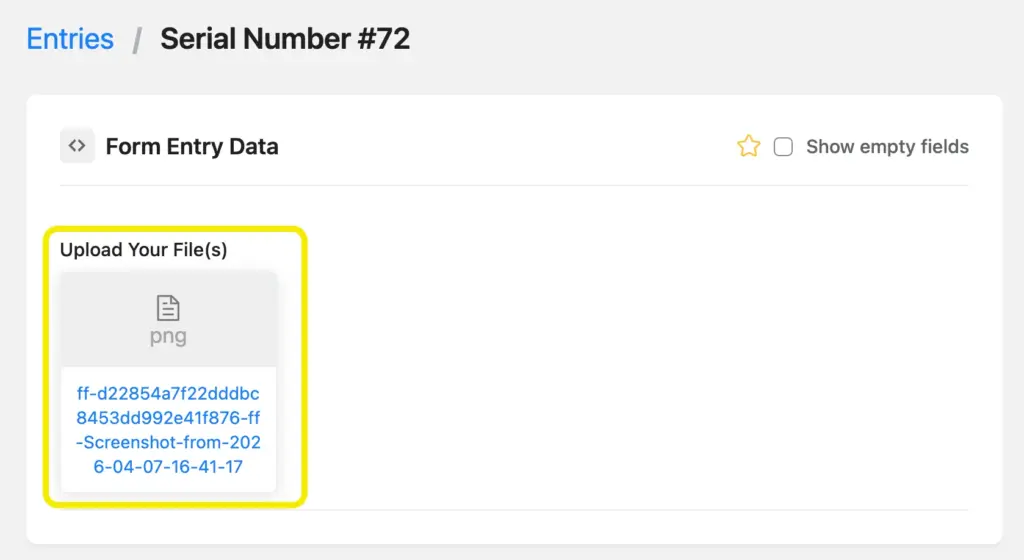
Where the files go:
Uploaded files land on your WordPress server inside /wp-content/uploads/fluentform/. They’re tied to the form entry and appear in the Entries dashboard when you view a submission. You can preview or download them directly from there.
Best for: Contact forms requesting screenshots, service inquiry forms asking for reference photos, job application forms collecting CVs and headshots, and any general-purpose file collection.
How to Collect Image Uploads from Form Users (Image Upload Field, Pro)
The Image Upload field (Pro) is built specifically for photo submissions. It only accepts image file types, and after a user selects a photo, it shows a thumbnail preview directly inside the form before submission.
That preview matters. Users can confirm they’ve attached the right file without reopening their file manager, which cuts down on wrong-file submissions on forms like profile photo uploads or product photo requests.
Adding the field:
In the Pro form builder, find Image Upload under the Pro Fields section and drag it into position.

Settings:
The Image Upload field has the same core controls as File Upload: accepted image types, max file size, and max count. It strips out non-image file types by default, so users can’t accidentally attach a PDF or spreadsheet.
Frontend experience:
After a user selects a photo, a thumbnail appears inline in the form. They can remove and re-upload before submitting.

Best for: Profile picture uploads, before/after photo submissions, portfolio pieces, product photo requests for custom orders, event photo collection.
Using Conditional Logic to Show Image Upload Fields
Not every user needs to upload an image. Showing an upload field to everyone, even when it doesn’t apply to them, adds friction and drags down completion rates.
Conditional logic in Fluent Forms fixes this. You set a rule on the upload field: show it only when a previous answer meets a condition.
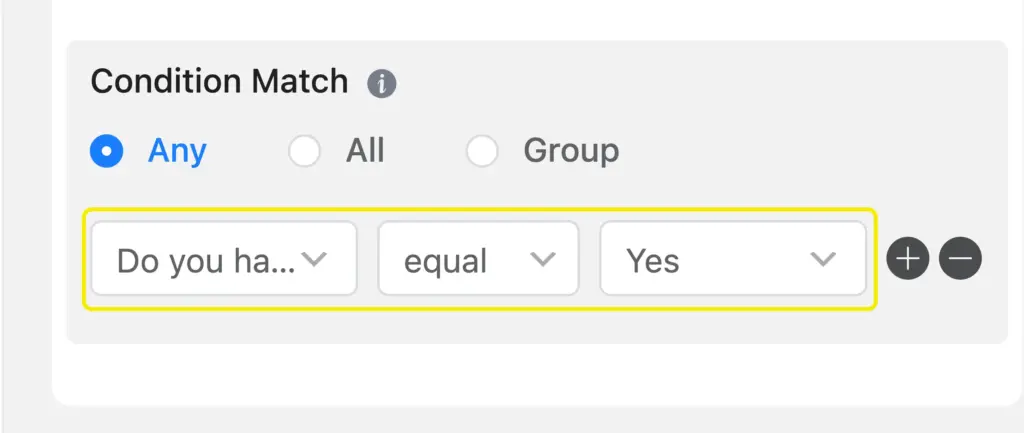
Example setup:
A service inquiry form asks: “Do you have reference photos to share?” with Yes/No radio buttons. The Image Upload field is hidden by default. Set a conditional rule: show the Image Upload field when “reference photos” equals “Yes.”
Users who answer No never see the upload field. Users who answer Yes get exactly the right prompt.
Other practical setups:
- Show a headshot upload field only when someone selects “Speaker” as their registration type
- Show a property photo field only when a form respondent chooses “I want a valuation”
- Show a logo upload field only when a client selects a branding package
Conditional logic works on both the free File Upload field and the Pro Image Upload field. The setup is identical: pick the field, add a rule, choose the condition.
Where Uploaded Images Go by Default
Every file submitted through Fluent Forms lands in your WordPress server’s /wp-content/uploads/fluentform/ directory. For a low-volume contact form, this is fine. Files are stored securely, they’re linked to individual entries in the dashboard, and you can download them whenever you need.
The problem shows up at scale.
A hiring portal collecting 200 applications a week, each with a resume and a headshot, fills server storage fast. A membership site where users upload profile photos on registration accumulates gigabytes over months. A school collecting student assignment files each term hits hosting limits.
Large files also affect site speed. Images sitting in your wp-content folder are served from your web server. Enough of them and your hosting plan’s storage and bandwidth caps become a real constraint.
For sites in that situation, the answer is routing uploads to cloud storage at the moment of form submission, so they never pile up on the server.
Routing Image Uploads to Cloud Storage
Cloud Storage Manager is a third-party add-on built by FluentWiz, an official third-party developer with long-term experience building add-ons for the Fluent plugin suite. The add-on automatically sends files uploaded through Fluent Forms to your connected cloud storage the moment a form is submitted.
Your server never accumulates those files long-term. They arrive, get transferred to the cloud in the background, and you manage them from there.
Supported cloud destinations:
Google Drive and Dropbox are available in the plugin’s free version. Amazon S3 and Cloudflare R2 require the Pro version. Both S3 and Cloudflare R2 also require paid accounts based on usage. Google Drive and Dropbox work with free accounts within their standard storage limits.

How it works in practice
The plugin works with your existing file and image upload fields. No changes to your forms are required. You install the add-on, connect your cloud service, configure your folder structure, and it handles the rest.
Files upload to the cloud in the background, so form submission speed isn’t affected. Users experience a normal, fast form submission while the file transfer happens after the fact.
Folder organization
You can set up dynamic folder naming to organize uploads by form name, submission date, or values from specific form fields. A hiring form could automatically create a folder per applicant. A client intake form could sort uploads into a folder per company name.
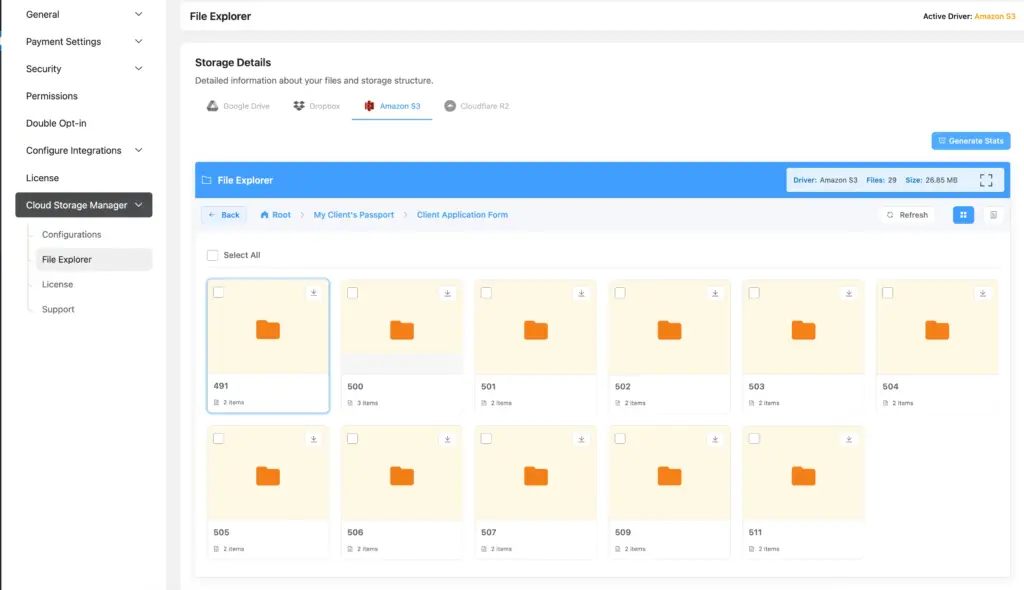
File management from WordPress
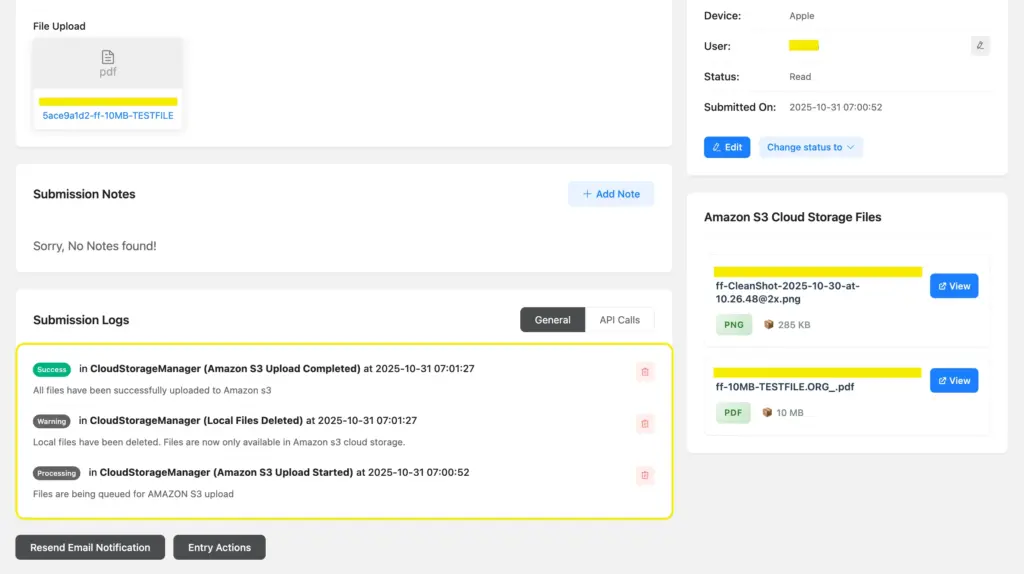
Cloud Storage Manager includes a built-in file explorer inside the Fluent Forms dashboard. You can view, organize, and access cloud-stored files without leaving WordPress.
Auto-delete local copies
After a file successfully transfers to the cloud, the add-on can automatically delete the local copy from your server. This keeps your hosting clean without any manual cleanup.
Email notifications still fire normally. FluentCRM and FluentBoards integrations continue to work as expected. The cloud routing doesn’t interrupt any downstream workflow.
Who this is for: Agencies handling multiple client sites, HR teams collecting application documents, schools gathering student submissions, membership sites where users upload profile photos, and any site collecting image files at volume.
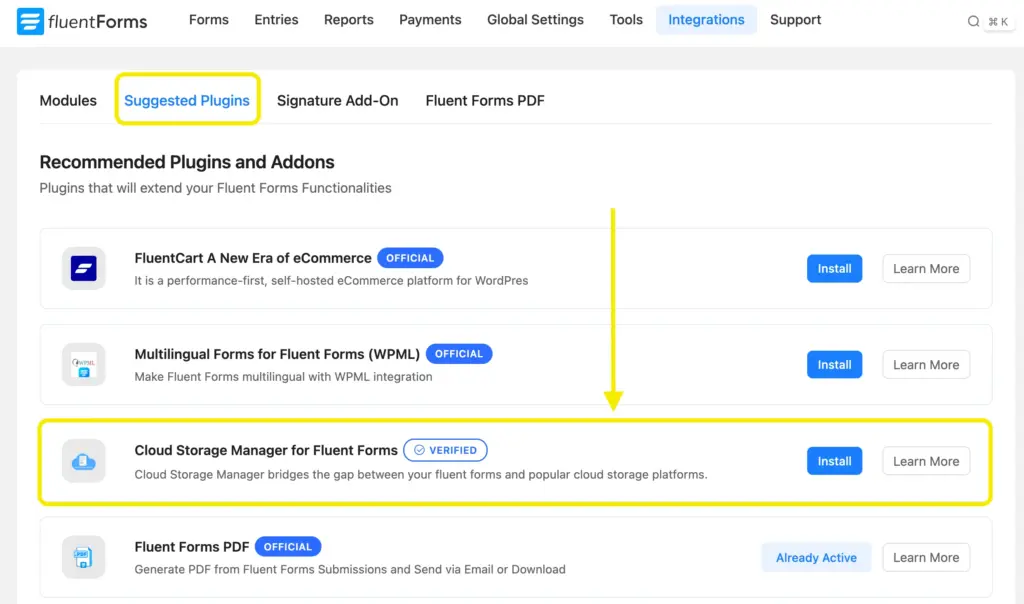
Where to find it: Install “Cloud Storage Manager for Fluent Forms” From WordPress plugin directory for the free version, or visit fluentwiz.com for the Pro version. The plugin also appears in the Fluent Forms Suggested Plugins panel.
Other Fluent Forms Features Worth Knowing
A few related features that often come up once image handling is in place:
Multi-Step Forms: If image upload is part of a longer process, such as a booking flow, a job application, or a portfolio submission, breaking the form into steps keeps the upload from feeling like a barrier. Each step is shorter, and completion rates go up.
PDF Generator: Once a user submits a form with images, Fluent Forms can automatically generate a PDF from the submission. Useful for intake forms, applications, or any situation where the submission becomes a formal document.
Advanced Form Styler: Controls the visual presentation of upload fields, including button style, label placement, and field borders, across all contexts and not just the block editor. Pro feature.
Advanced Post Creation: Let form submissions create or update WordPress posts directly. If you’re building a directory, portfolio site, or community platform where users submit images alongside content, this removes the need for any custom development.
Enjoying this article?
We regularly publish actionable content on our blog. Subscribe to get them delivered straight to your inbox.
We won’t spam you. You can unsubscribe whenever you want.
What to Do Next
You now have the full picture: how to display images inside forms as choices, how to collect uploads from users, and how to handle where those files land after submission.
For most sites, the File Upload field and a Custom HTML field cover everything. When photo submissions become a specific requirement, the Image Upload field adds the right UX. When the upload volume grows and server storage becomes a real issue, the cloud storage routing solves it cleanly.
You already know the File Upload and Image Upload fields are in the pro version. If you are deciding whether the upgrade to pro is worth it, just for these two fields, check out the free vs pro page.
You’ll get to know the full potential of Fluent Forms and decide if it’s for you or not.
Have questions about image upload settings or cloud storage routing? The Fluent Forms documentation and community are the fastest places to get answers.

This is Sumit. He’s a physics major who’s trying to understand both the physical as well as the WordPress worlds. Whenever he’s not busy, plays fifa or spends time with his family.


Leave a Reply