
How to Add a Progress Bar to Your WordPress Form
A progress bar can be a useful addition to your WordPress forms, providing visual feedback to your users as they complete the form. Not only does a progress bar help to improve the user experience, but it can also help to increase the chances of a user completing the form in full.
In this article, we will guide you through the steps of how to add a progress bar to your WordPress form. Before jumping into the process, let us first know in some more detail why you need a progress bar in your form.
Purpose of the progress bar on forms
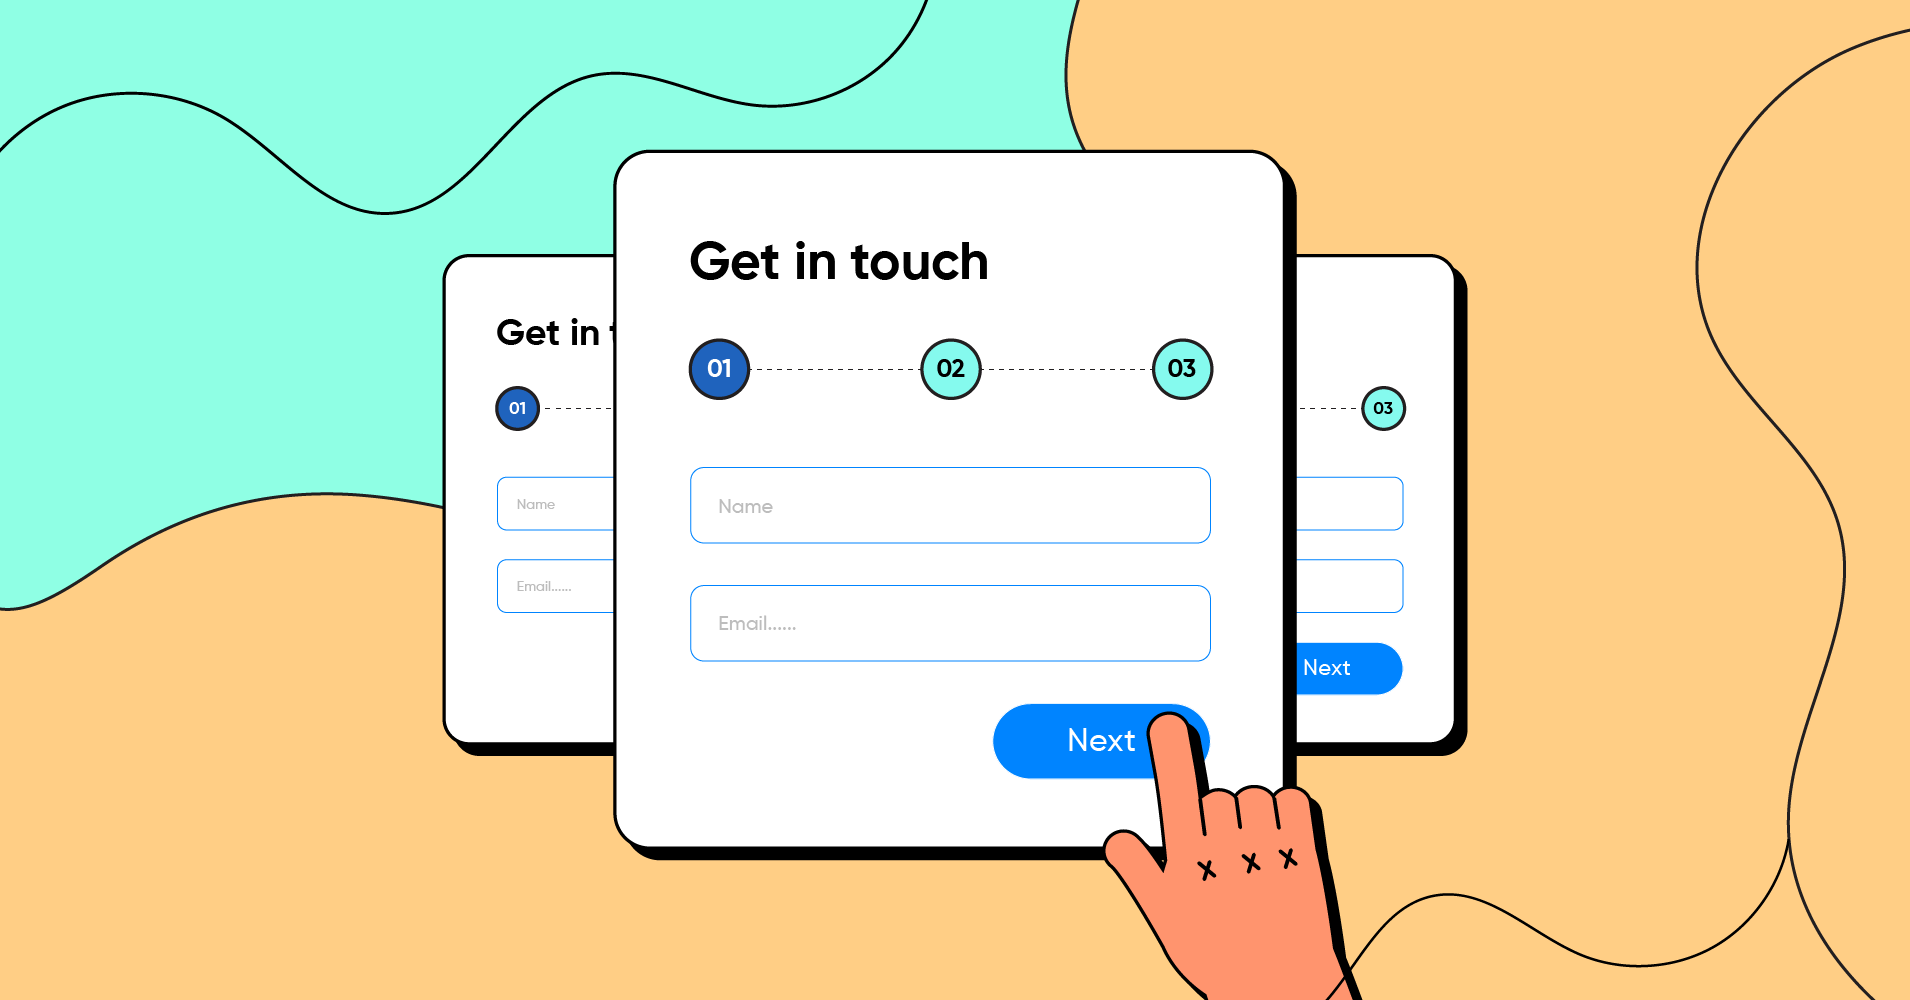
The purpose of a progress bar on forms is to provide a visual representation of how far along a user is in the form-filling process. This can be particularly useful for long or complex forms that may take a significant amount of time for a user to complete.
A progress bar can help to keep users engaged and motivated to finish the form, as it gives them a sense of progress and accomplishment.
In addition to improving the user experience, progress bars can also serve a practical purpose. For example, a progress bar can help users to identify which sections of the form they have already completed and which ones they still need to work on.
Overall, the purpose of a progress bar on a form is to provide a useful and engaging tool for users as they complete the form.
Fluent Forms – the tool you need
To make a form with a progress bar, all you need is a great form builder plugin that gives you the feature of splitting a long form into multiple steps and showing a progress bar as a user fills out the steps of the form.
We recommend Fluent Forms for creating a form that displays a progress bar. Fluent Forms is a fantastic form plugin with bundles of features and customization options. Greater ease of use makes it stand out of other similar plugins.
Some of the most notable features of Fluent Forms are –
- Multi-steps forms
- Conversational forms
- File and image upload
- Form scheduling and restriction
- Advanced post creation
- Dozens of pre-built templates
- Multiple payment solutions
- User registration
How to make a form with a progress bar in WordPress
Follow the steps below to make a form with a progress bar –
Install Fluent Forms
To add a progress bar to a WordPress form, you will need to install the Fluent Forms plugin. This is similar to installing any other WordPress plugin.
First, go to the Plugins of the WordPress admin dashboard and click on Add New. Then, use the search function to find Fluent Forms. Once you have located it, click on the Install button and then activate the plugin.
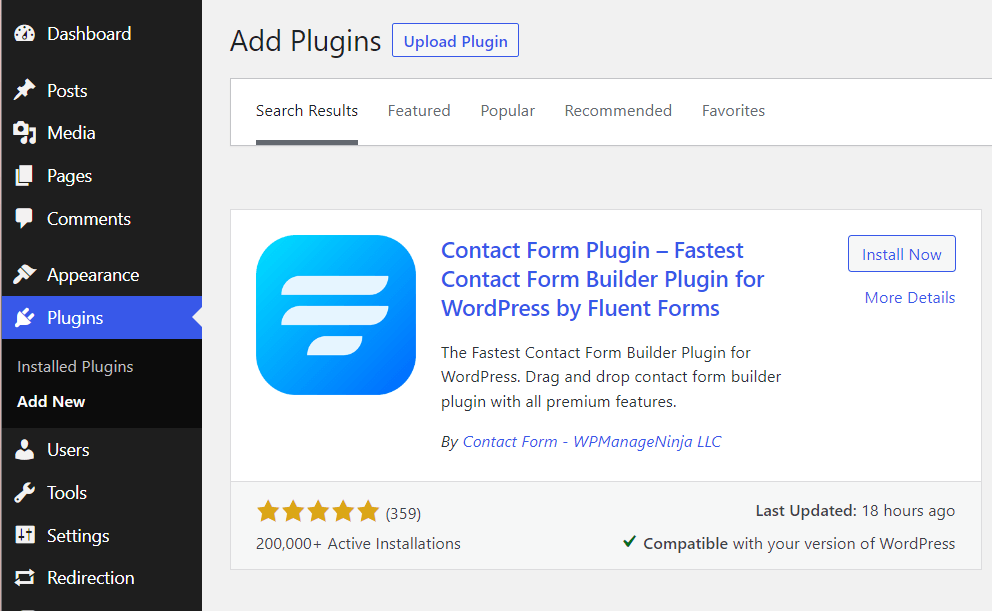
To create a form with a progress bar, we will need the pro version of Fluent Forms. So after installing the free version, upgrade to the Pro version by using a license key.
Create a new form
Next, go to Fluent Forms Pro on your WordPress dashboard and click on New Form > Create Form to start creating a form.
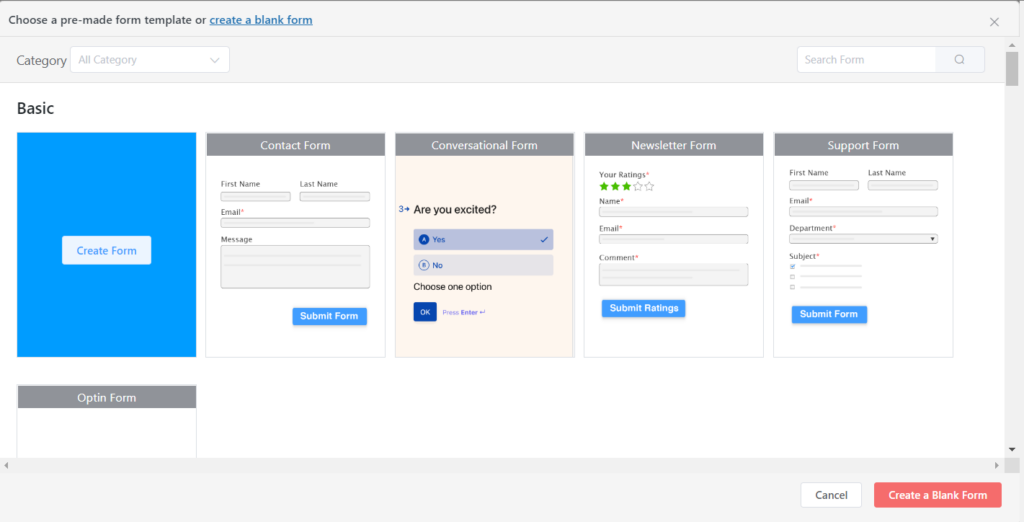
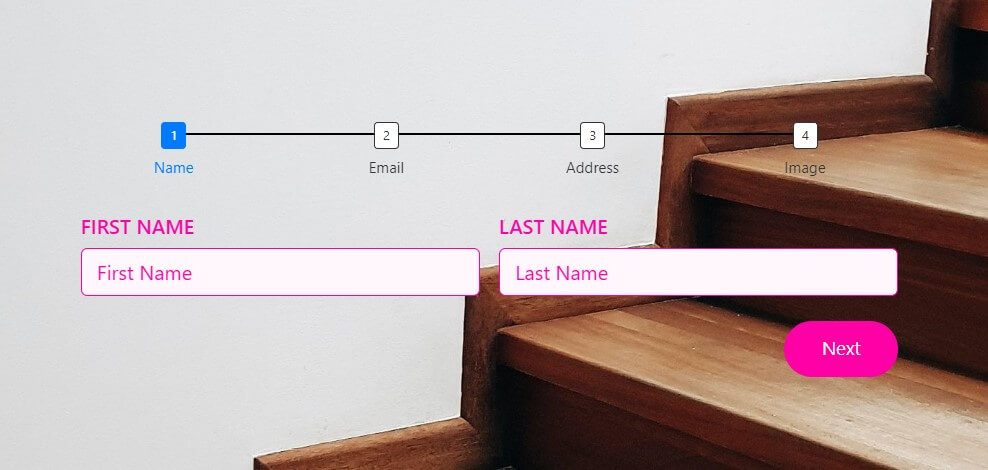
You will be landed on the form editor window. Now add the necessary input fields to your form and customize them. We have added the Name Fields, Email Address, Address Fields, and Image Upload field.

If you want to customize the input fields, it’s so simple in Fluent Forms. Just click on the added input fields and you will see different customization options on the right hand side.
Add a progress bar to your form
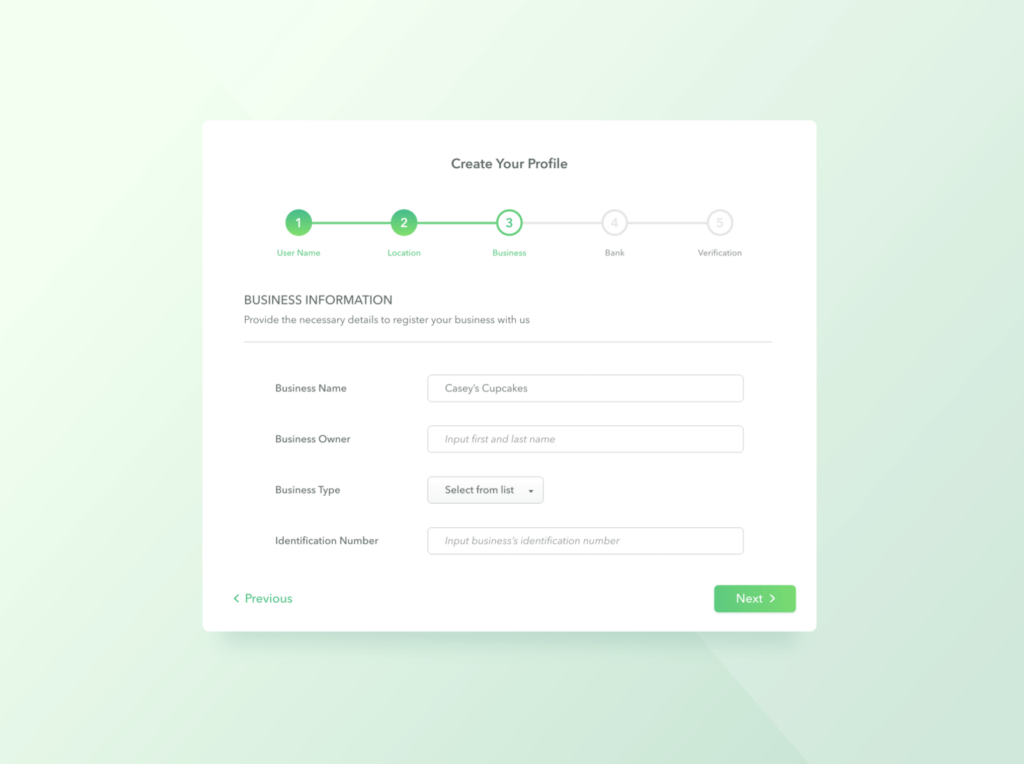
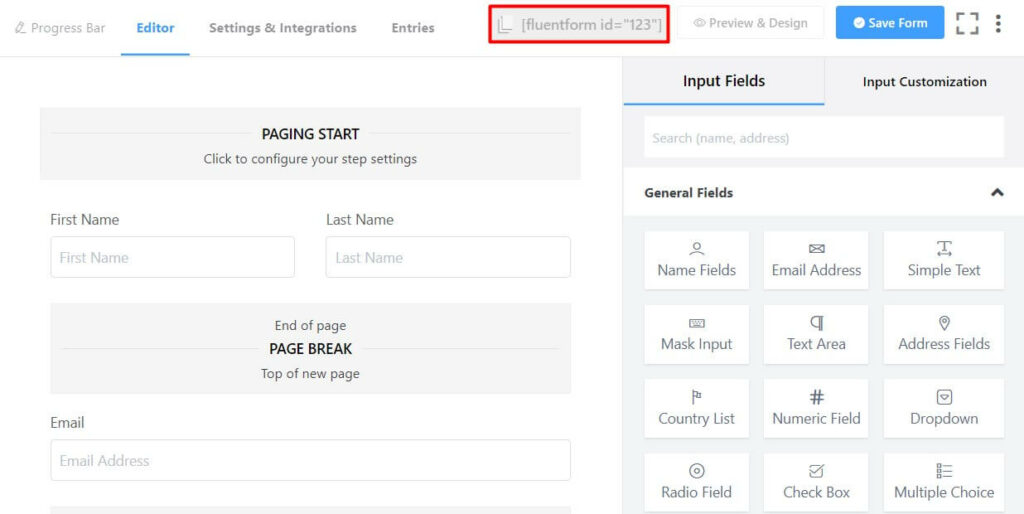
Once you have added the required fields, drag and drop Form Step from the Advanced Fields tab onto the form where you want the breaks.
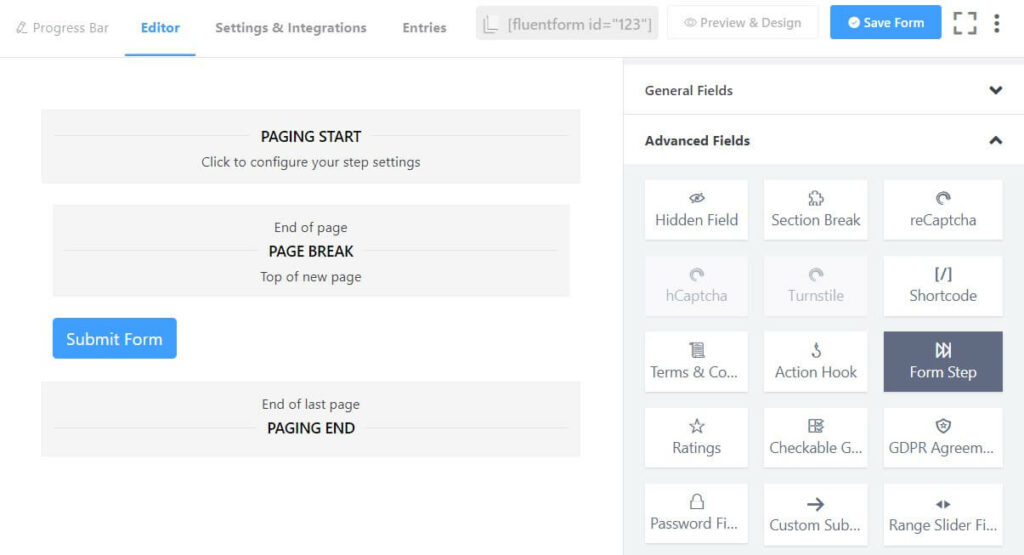
The Form Step field lets you split your forms into multiple steps. You can add multiple steps to your form. Adding each step requires you to drag and drop Form Step onto your form.
Customize progress bar
If you click on the Paging Start field in your form editor, you can customize the progress bar.
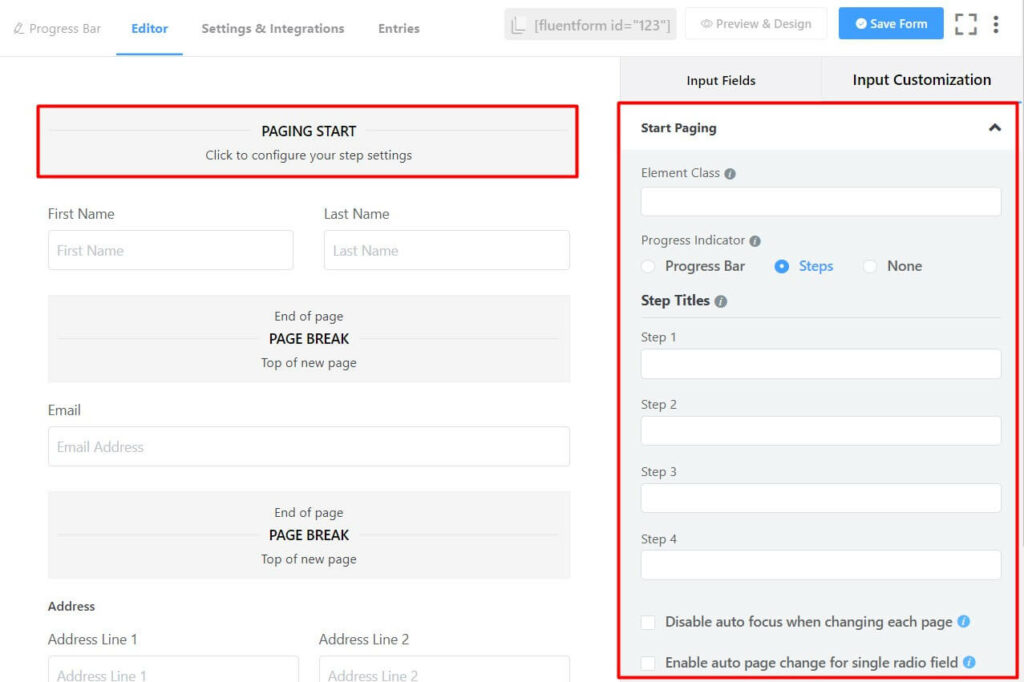
Here you can change the style of the Progress Indicator and add titles to each step.
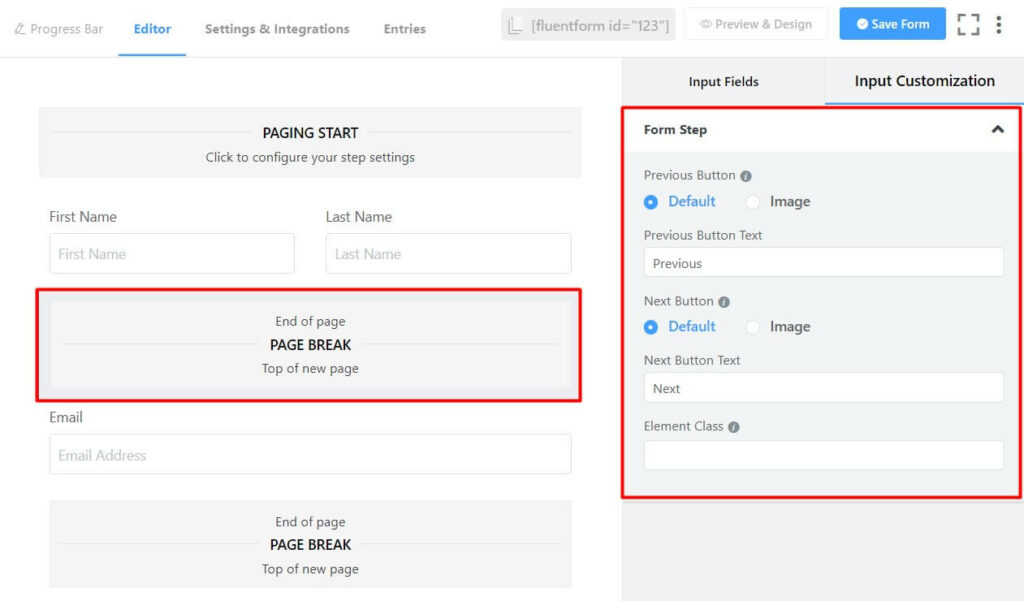
Clicking on the Page Break fields allows you to change the appearance of the Previous and Next buttons. You can use text or images in these buttons.
Don’t forget to click on the Save Form button to save the changes.
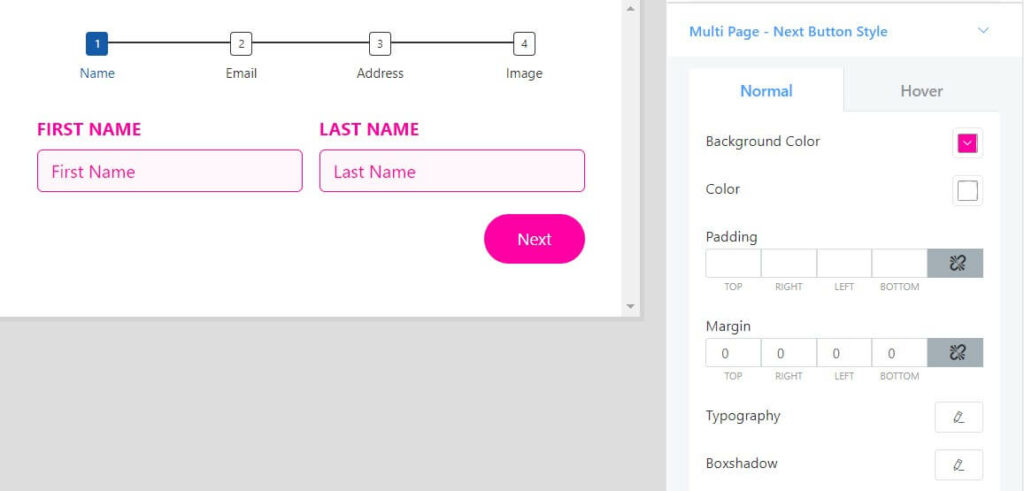
Now click on the Preview & Design button to go to the preview page. You can play with a bunch of customization options for your form and the progress bar using the default form styler that Fluent Forms offers on the right-hand side of the preview page.
Click on Save Settings once you are happy with the customization option.
Fluent Forms’ step form feature also lets you save partial entries so that you can follow up with the people later.
Customize form settings
With Fluent Forms, you can customize various form settings. To do this, go to the Settings & Integrations tab.
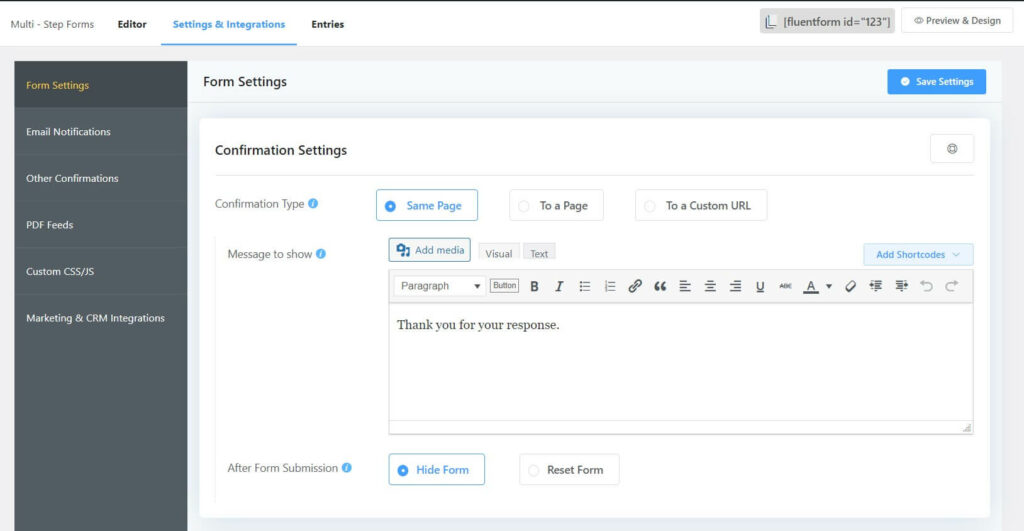
Here you can change Confirmation Settings and Form Layout, apply restrictions on the form, schedule the form, and do much more.
Publish your form
Now that you have created a WordPress form with a progress bar, you are ready to make it available for your users. You can publish your form in three ways.
First, you can use the Gutenberg block editor to choose the survey form you have just created. Click Add New under Pages in the WordPress dashboard’s left sidebar. Give the page a title. In the block editor’s blank area, click the plus (+) sign or insert a forward slash (/). Then, in the search box, enter Fluent Forms and choose the form you have just created.
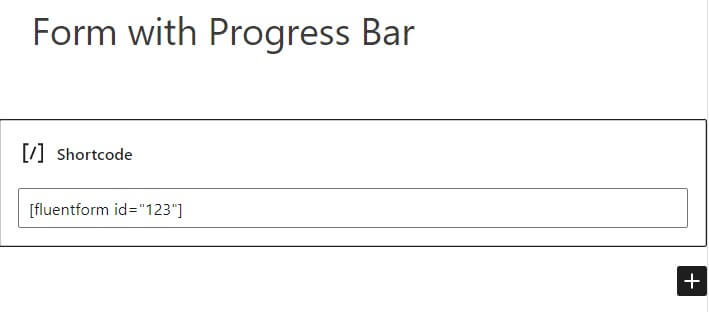
Fluent Forms’ Shortcode feature is a second option that you can use to show your form. The shortcode is found at the top of the window that displays the form editor.
Click on the shortcode to copy it and then paste it using a shortcode block anywhere you want to display the form on your website.
The third approach, which is the most impressive one, is to publish your form on a dedicated landing page. To do this, go to Settings & Integrations > Landing Page. Check the box to Enable Form Landing Page Mode. The landing page is fully customizable to match your business.
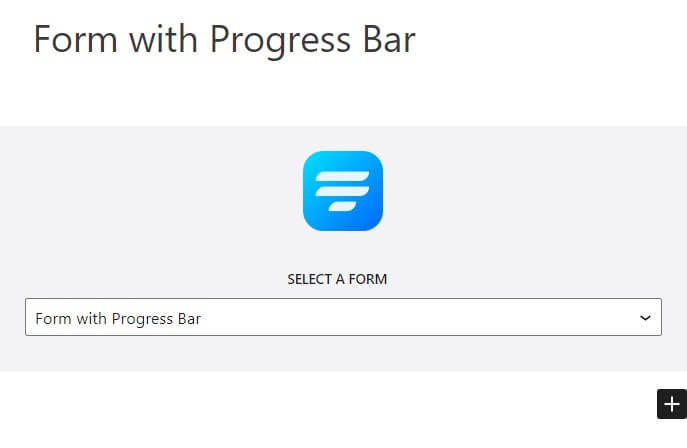
Try out this demo form with a progress bar:
Your data will be automatically deleted after form submission. We don’t store them.
Wrapping up
Knowing how to add a progress bar is particularly important when you have a lengthy form that asks for different types of information. The form Step feature of Fluent Forms allows you to break your long form into multiple steps and put specific types of information together. This results in a better customer experience.
In this article, we showed you how you can add a progress bar to your WordPress form and customize it. Follow our social media channels and website for more tutorials like this.

An Econ major turned into a Digital Marketer by choice. Hello! This is Ashraf and I am here to enlighten you on various WordPress topics and help you make informed decisions.


Leave a Reply