Allow File Upload Option To a WordPress Form Easily

One of the most widely used digital necessities is a webform. Webforms are used to collect data from users for different reasons. The nature of these data varies depending on your purpose.
You can use an online form to collect payments, run a survey, as a means to collect questions/complaints, etc. However, webforms have become more innovative, and with file upload features, now you can even use the forms to collect files.
What is file upload?
File upload is an intelligent feature that allows a user to submit files through a simple form. All they have to do is select the file they wish to submit and hit the submit button.
The file upload feature lessens extra hassles on both sides. Nobody has to assign designated cloud storage to collect files or resort to unnecessary emails. Through a form, users can collect as many files as needed, and all of them will be collected in a single database.
Fluent Forms

Fluent Forms is one of the forerunners among WordPress form builders. It is undoubtedly the most lightweight and thus super fast too. The plugin is packed with ultra-smart functionalities like file upload, repeat field, survey, form restrictions, etc.
And creating forms is super easy too. Fluent Forms is beginner-friendly. There are over 70+ prebuilt form templates, 45+ input fields, and 30+ integrations. All these help create a webform in minutes, and then you can integrate them with services to make sure you get the best out of your form.
How do I collect files through a form?
If you are wondering how you can collect files through a form, don’t worry. It’s effortless. And it will only take a couple of minutes. So just sit back and relax.
Here, we will show you how to use the file upload feature. For its uncomplicated nature, we will be using Fluent Forms Pro today. You can use other form builders. But make sure to check first whether they provide this feature.
So let’s get started.
Step 1: Create a form
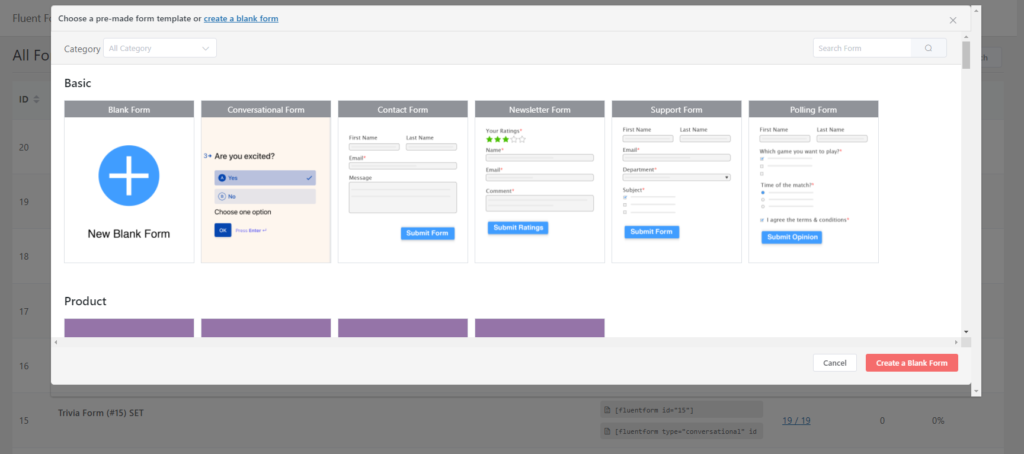
The very first step is creating a form. You can do it in two different ways. First, you can choose from the massive heap of prebuilt form templates and select the one you need.
Or, you can just take a blank form and start creating it from scratch. We’ll use a blank form for this purpose. So click on the blank form template, and your form is created.
Step 2: Add ‘file upload’
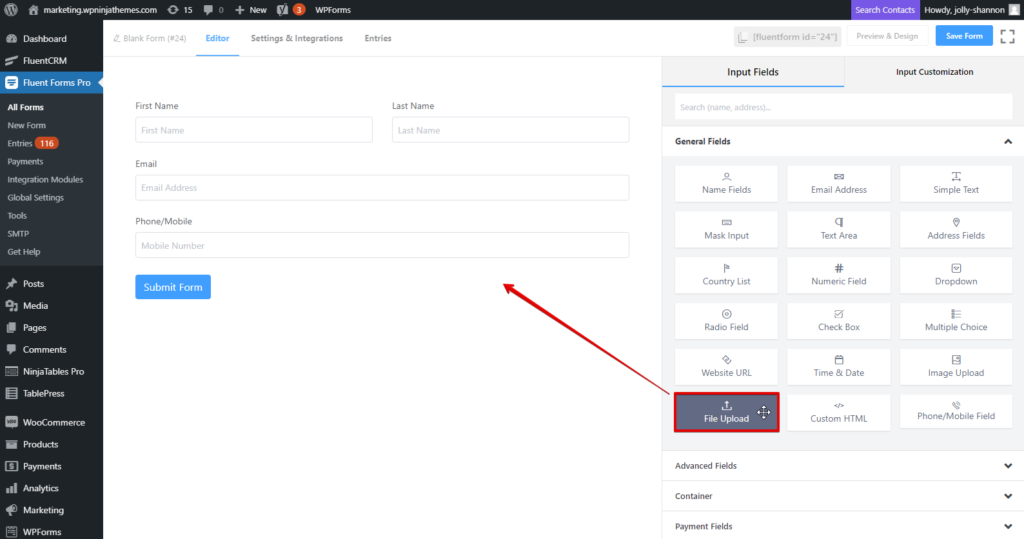
The form created is an empty one. So we need to beat it into shape. Let’s drag and drop the fields we need. For demonstration, we will use a name field, email field, phone/mobile field. This makes for a basic contact form.
But let’s say you will use it to collect bug reports from your users. So you will need a screenshot, a CSV, or even a zip file. A file upload field will let you collect these files easily. Just go to the General Fields section, locate File Upload, drag it and drop it to a suitable position.
Step 3: Customize the ‘file upload’ field
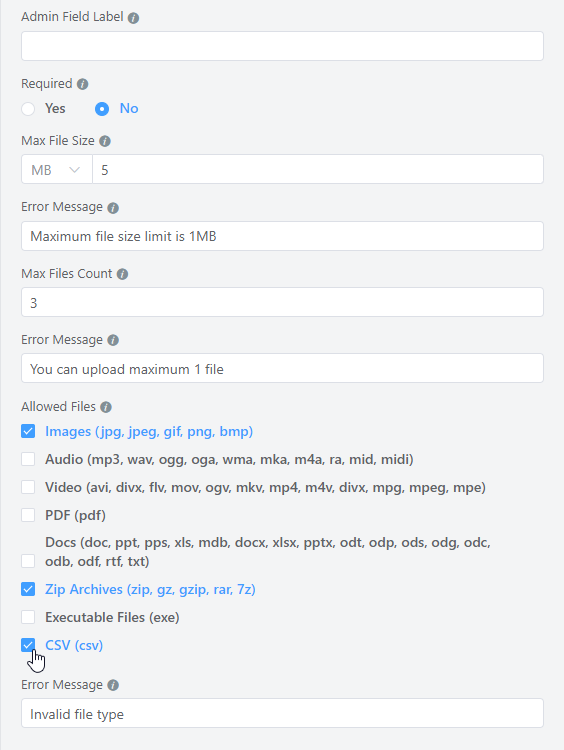
Now hover over the field and click on the edit icon. You will notice a bunch of options in the input customization panel. You can set the element label, button text, admin field label as you want. You can also place the label in a number of ways.
If the file you require is crucial, make sure you tick the required option. And then set the file restrictions. You can choose up to how many files you want to receive in a single form and the size of each one of them.
Moreover, there’s also an option to select the formats that are allowed. This helps you narrow down your submissions and only accept your designated formats. So, in our case, we will select the Images, Zip Archives, and CSV options. Very clean, right?
Step 4: Extra flair
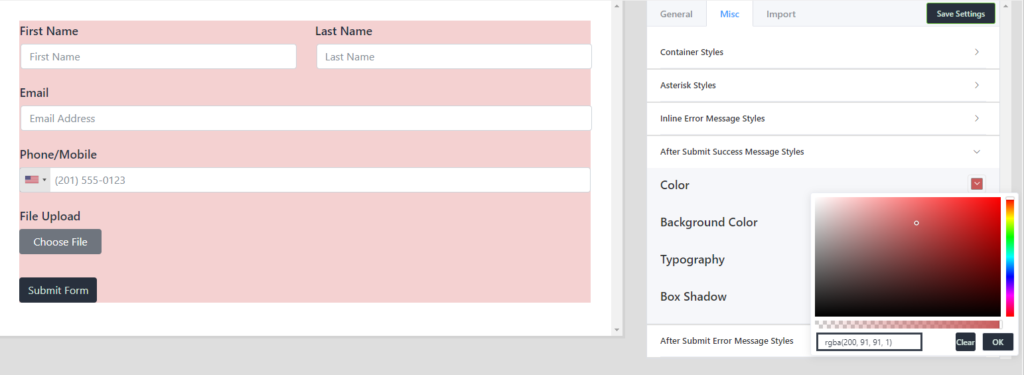
Your form is basically ready and up for use. But you can do more if you want. For instance, you can employ conditional logic to the file upload field, so it will only appear when a particular condition is fulfilled.
You can also use the global styler to design the form. Click on the Preview & Design button, and the styler will appear. There are plenty of options in terms of styling. You can choose a template or even import an existing style.
Where will I need file upload?
There are various use cases for such an intelligent feature. And not to mention, they are versatile too. You can use the file upload feature to collect CVs/resumes for a job application form or let athletes showcase their skills. Honestly, the possibilities are endless.
Check out Fluent Forms Pro for more such unique features. And if you don’t like what you see, then money back guaranteed, no questions asked.


Leave a Reply